
Updates:
- 2024/11/04: update with long-term usage of flex-plate
- 2023/07/25: published
- 2023/06/13: adding my print settings to increase reliability
- 2023/03/31: first prints performed
- 2023/03/29: adding Formlabs 3/3L and Prusa SL1S as comparison
- 2023/03/23: starting write-up
Introduction
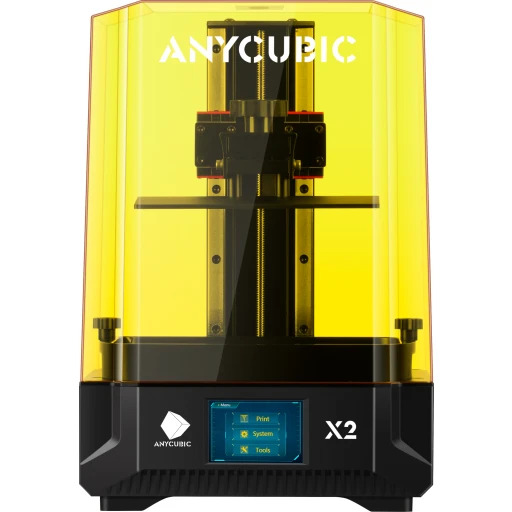
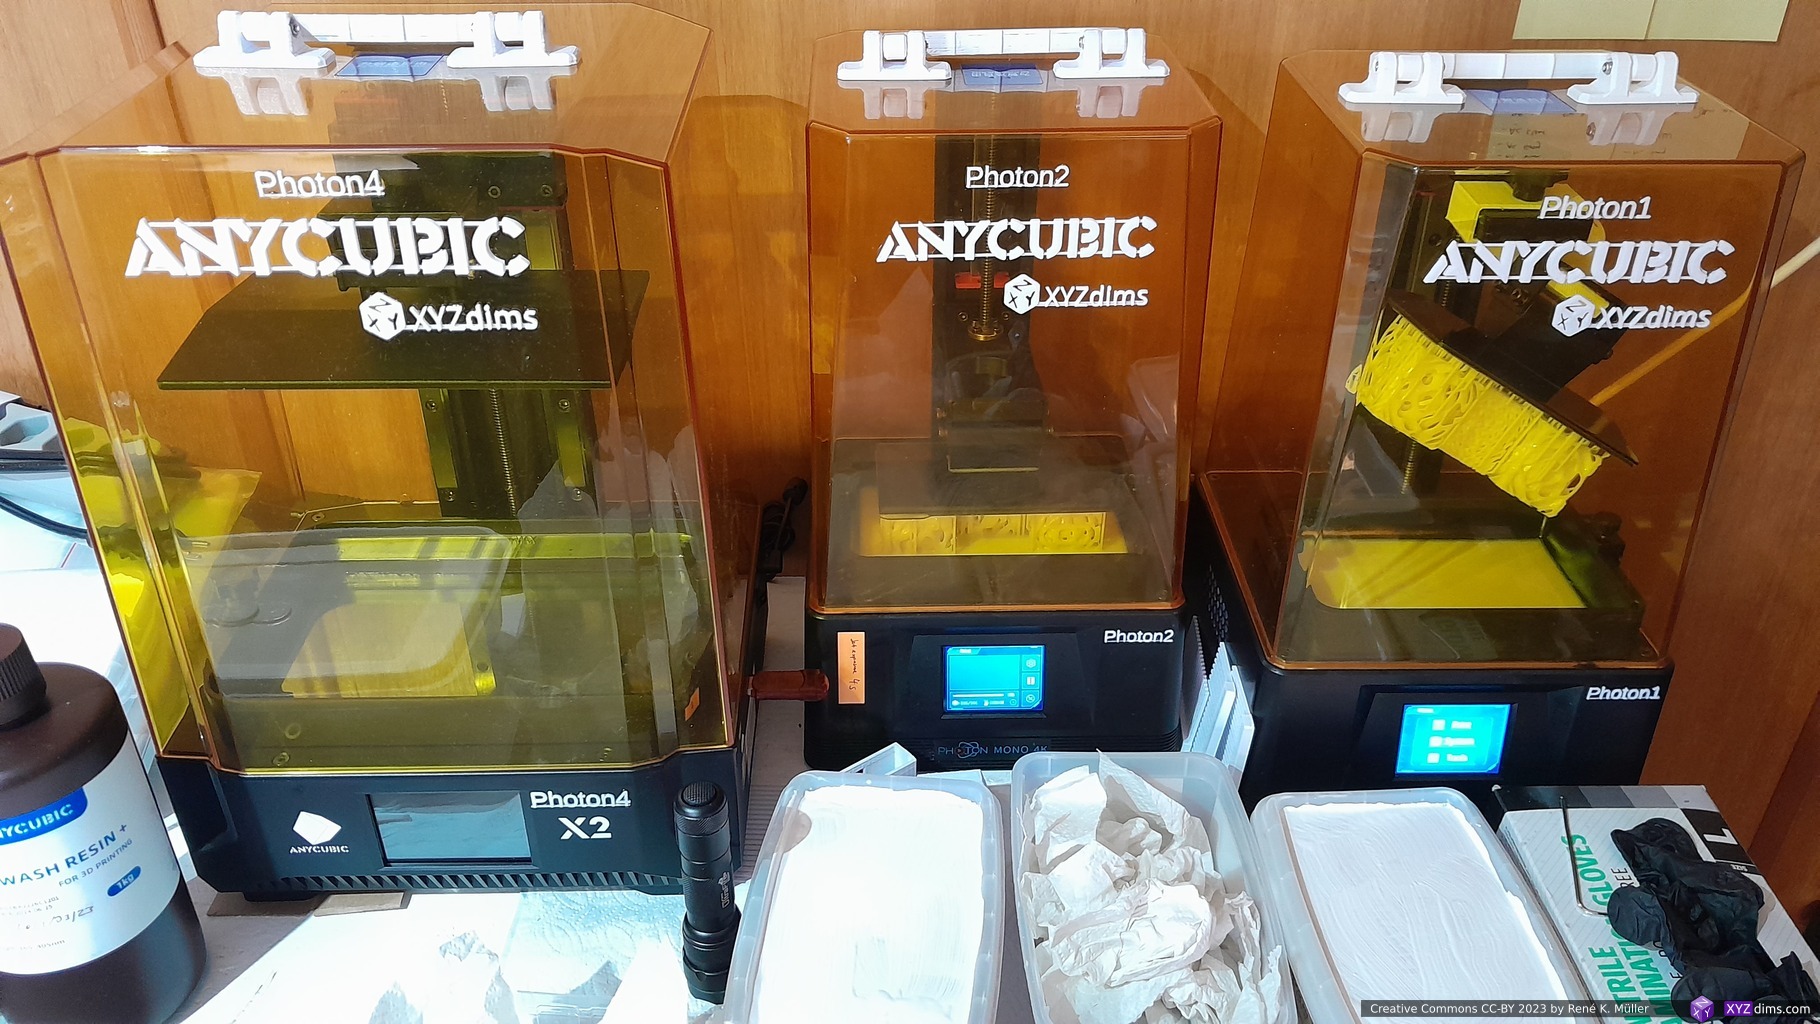
After my first steps with Anycubic Photon Mono 4K, an entry-level MSLA I also got a slightly larger Anycubic Photon Mono X2:
- build volume: 196 x 122 x 200 mm (WxDxH)
- resolution: XY 48μm, Z 50μm
- 9.1″ display with 4K+ resolution (4096×2560) display
- monochromatic LCD (hence “Mono”), faster printer due shorter exposure
- affordable with EUR 300-350 (2023/03)
- no network, only USB drive printing
I ordered at Anycubic.com directly (EUR 350) 2023/03/24, and got it a week later.
Default Settings
| Defaults Firmware V0.2.3 | My Settings 2023/07 | My Settings 2023/11 | |
|---|---|---|---|
| Bottom Layers | 6 | 5 | 1 .. 6 2) |
| Exposure Off [s] | 1.0 | ||
| Bottom Exposure [s] | 30.0 | 25.0 | 25.0 |
| Normal Exposure [s] | 2.0 | 2.5 | 2.5 |
| Transition Layers | 4 | 10 | 10 |
| Bottom Region | |||
| Bottom Layer [0] Rising Height [mm] | 3.0 | 4.0 | |
| Bottom Layer [0] Rising Speed [mm/s] | 1.0 | ||
| Bottom Layer [0] Retract Speed [mm/s] | 1.0 | ||
| Bottom Layer [1] Rising Height [mm] | 4.0 | 4.0 1) | |
| Bottom Layer [1] Rising Speed [mm/s] | 3.0 | 1.5 | 1.5 |
| Bottom Layer [1] Retract Speed [mm/s] | 3.0 | ||
| Normal Region | |||
| Normal Layer [0] Rising Height [mm] | 3.0 | 4.0 | |
| Normal Layer [0] Rising Speed [mm/s] | 1.0 | ||
| Normal Layer [0] Retract Speed [mm/s] | 1.0 | ||
| Normal Layer [1] Rising Height [mm] | 4.0 | 4.0 1) | |
| Normal Layer [1] Rising Speed [mm/s] | 3.0 | 1.5 | 1.5 |
| Normal Layer [1] Retract Speed [mm/s] | 3.0 | ||
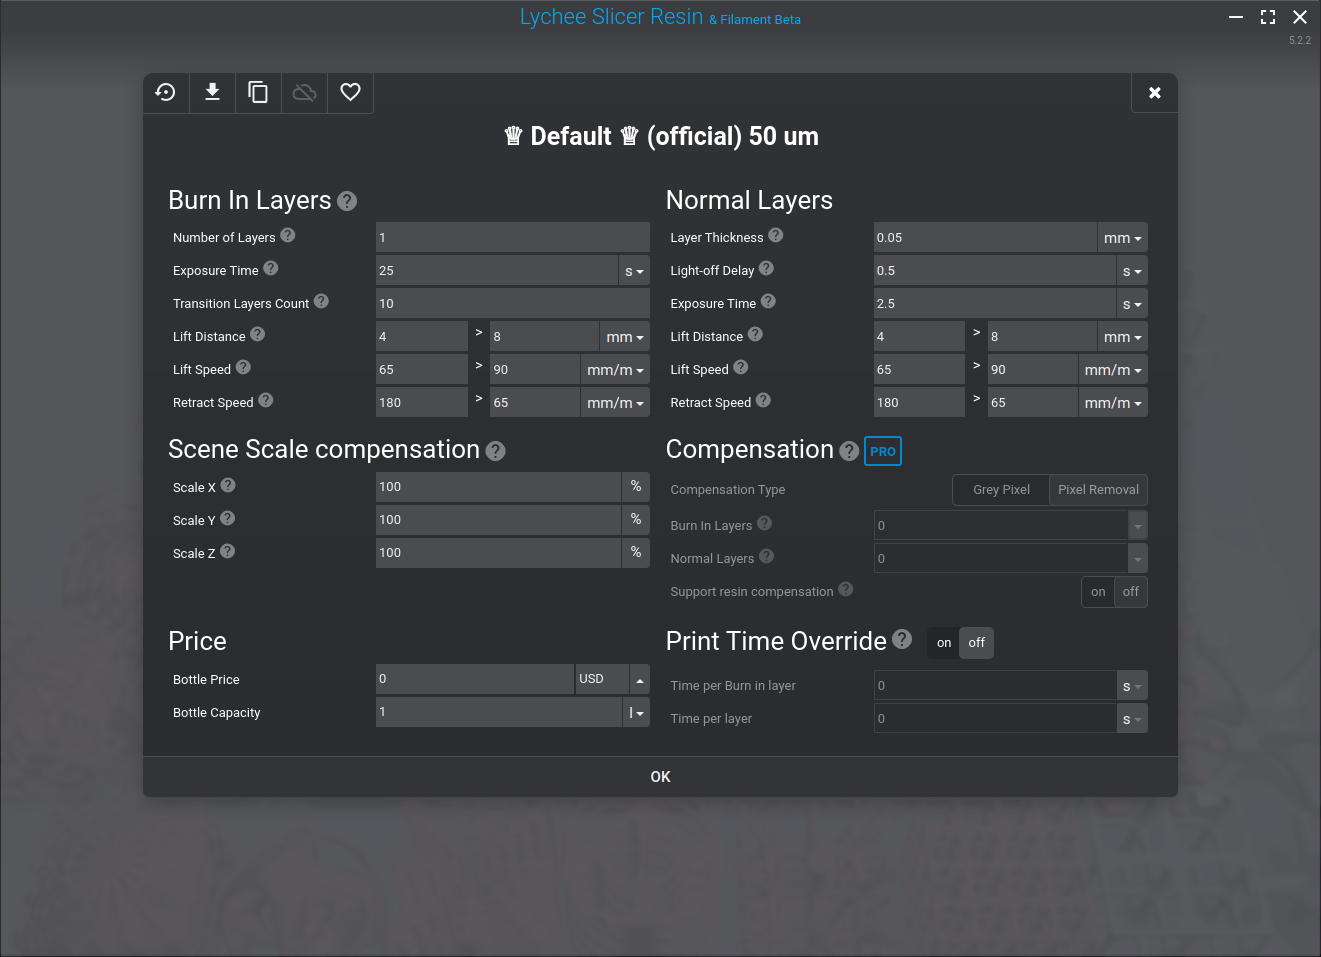
- in Lychee Slicer the 2nd lift distance is the sum of [0] Rising Height 4.0mm + [1] Rising Height 4mm = “4.0mm > 8.0mm”:
- depending on the size of the pieces, if they are small (e.g. 20x20mm foot print) then I use 1 bottom layer, for larger pieces I increase up to 6 bottom layers
After some prints I realized the 3mm/s or 180mm/min 2nd rising speed really decreased the reliability of prints I did, usually after bottom layers some models, especially fine structures, deliminated and I realized the transitioning needed to be longer and also reduce the 2nd rising speed, the retraction speed could stay as is. The slowed down the overall print time, but reliability is getting near to Mono 4K.
Various Resins
Mono 4K vs Mono X2 vs Mono M3 Max
The print area Mono 4K doubles nearly with Mono X2, and the Mono M3 Max (EUR 1000) additionally doubles the print area:
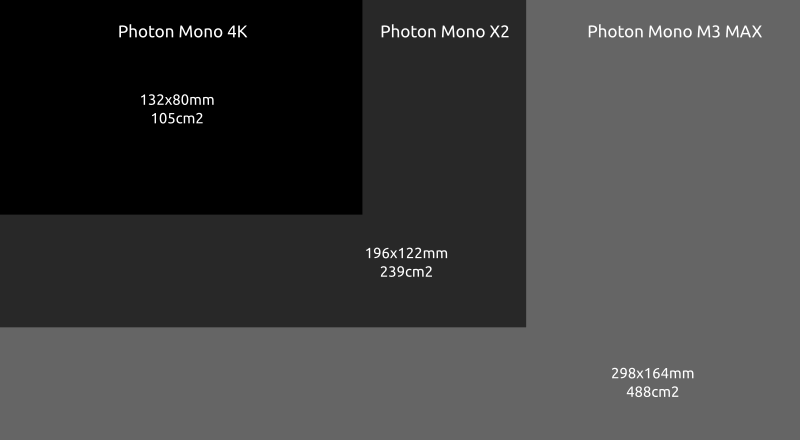
As pointed out previously, the print area with MSLA directly affects the print speed, the larger the build plate, the faster the print: more parts can be printed at the same time.
The Mono X2 is relatively new as of writing this blog-post, just released in late 2022, so the third party market has not yet taken off regarding spare vats, spring steel magnetic build plate, protective films and alike.
Update 2023/07: The Mono X2 already discontinued as M5 and M5S has been released.
Photon Mono X2 vs Creality LD-006: Details Matter
The main reason I prefered the Photon Mono X2 (EUR 350) over the Creality LD-006 (EUR 250) with the nearly same build-volume is that the LD-006 has a bad build-plate mount where resin is trapped near the screws – which makes cleaning and switching resins much harder:
Eventually either cured, dried or semi liquid resin trapped in there will contaminate your next prints – so a bad build plate design can ruin your prints eventually.
Slicer Support
Lychee Slicer 5.x and upward also supports the Mono X2 out of the box, whereas Prusa Slicer SLA slicer, as of 2.x series, does not slice to any but .sl1, and so requires a custom setting to add support for it indirectly then requires a tool like UVtools to convert to .pmx2 (Note: as of 2023/03 the output format is not working properly).
The native Photon Workshop slicer coming with the printer has no Linux support and only works via Wine “Windows” emulator, and is barely usable.
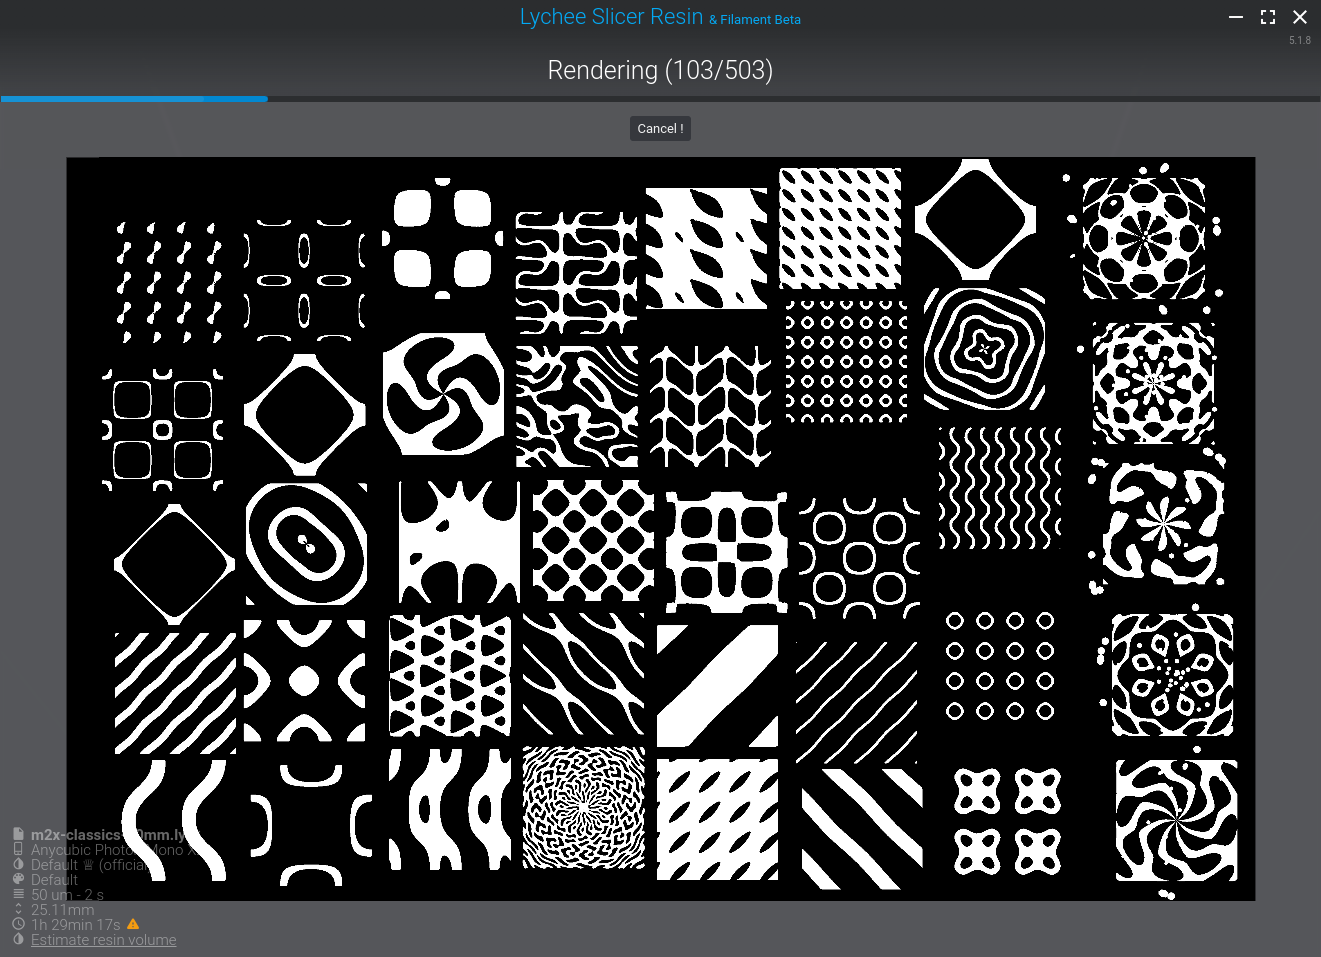
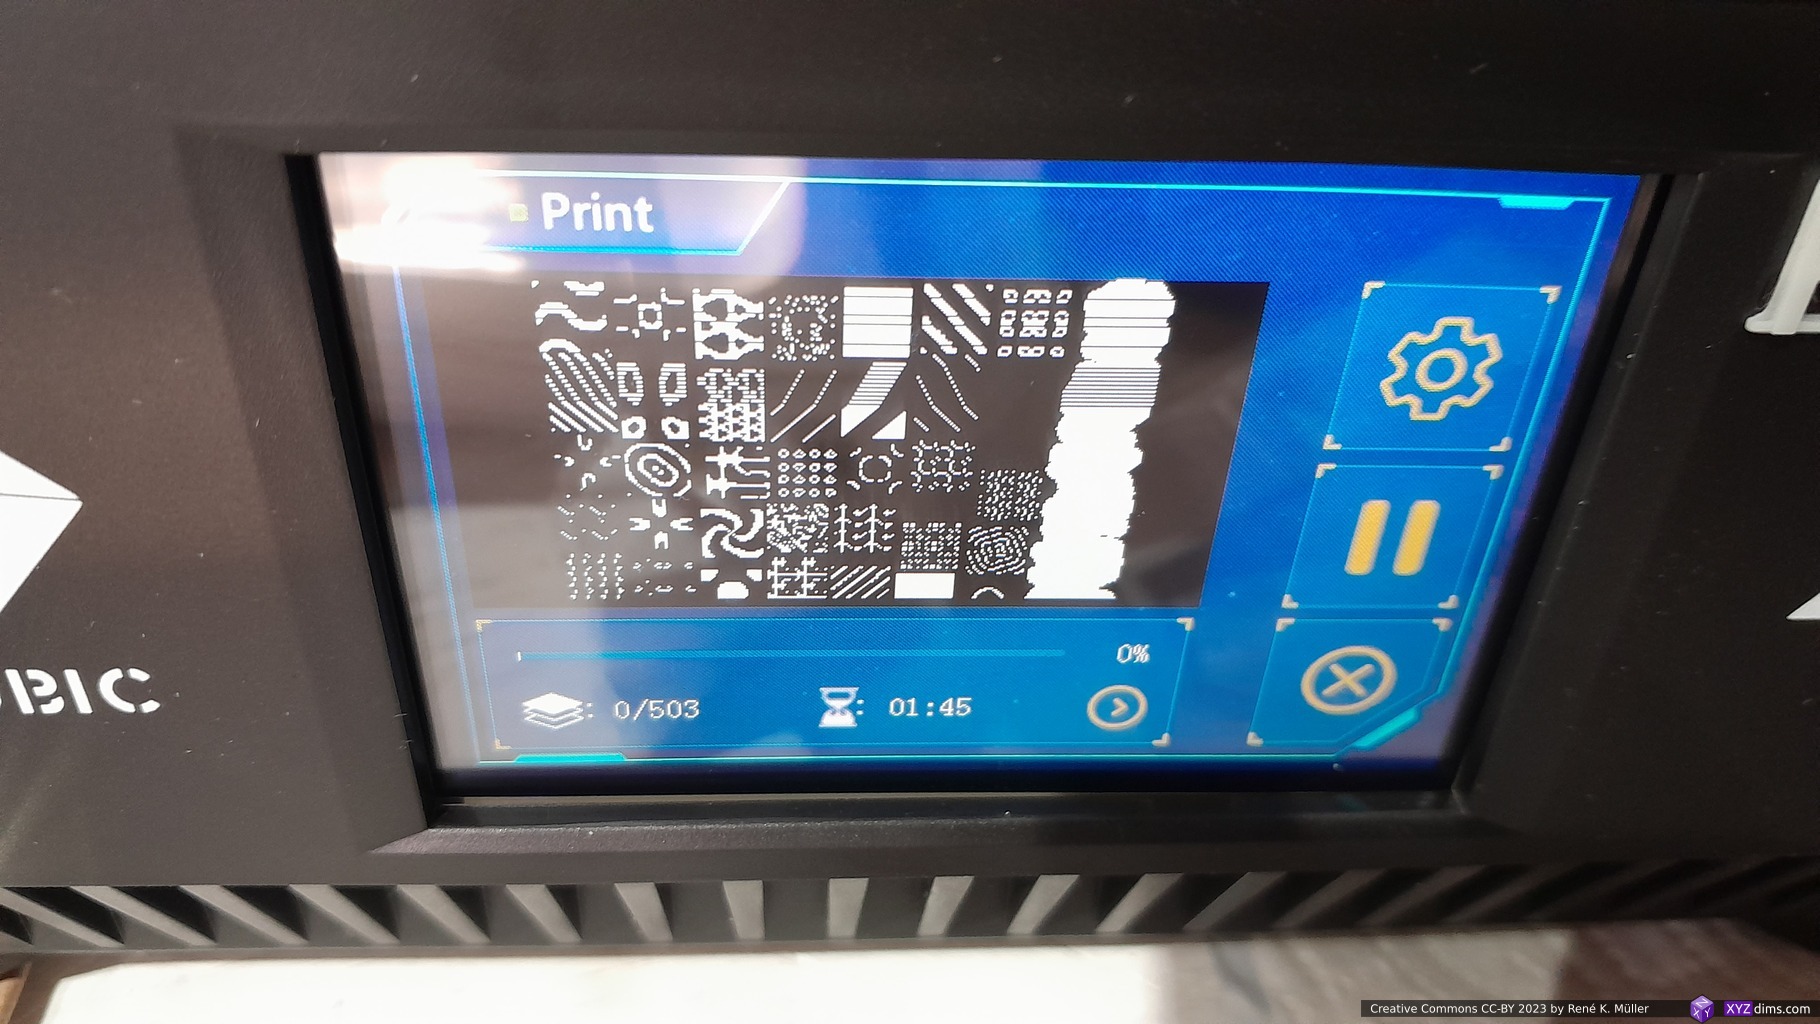
Printing 40x Triply Periodic Minimal Surfaces 20mm cubes samples at once, and it took 1h45m (with default settings) with apprx. 30mm height, as some required support.
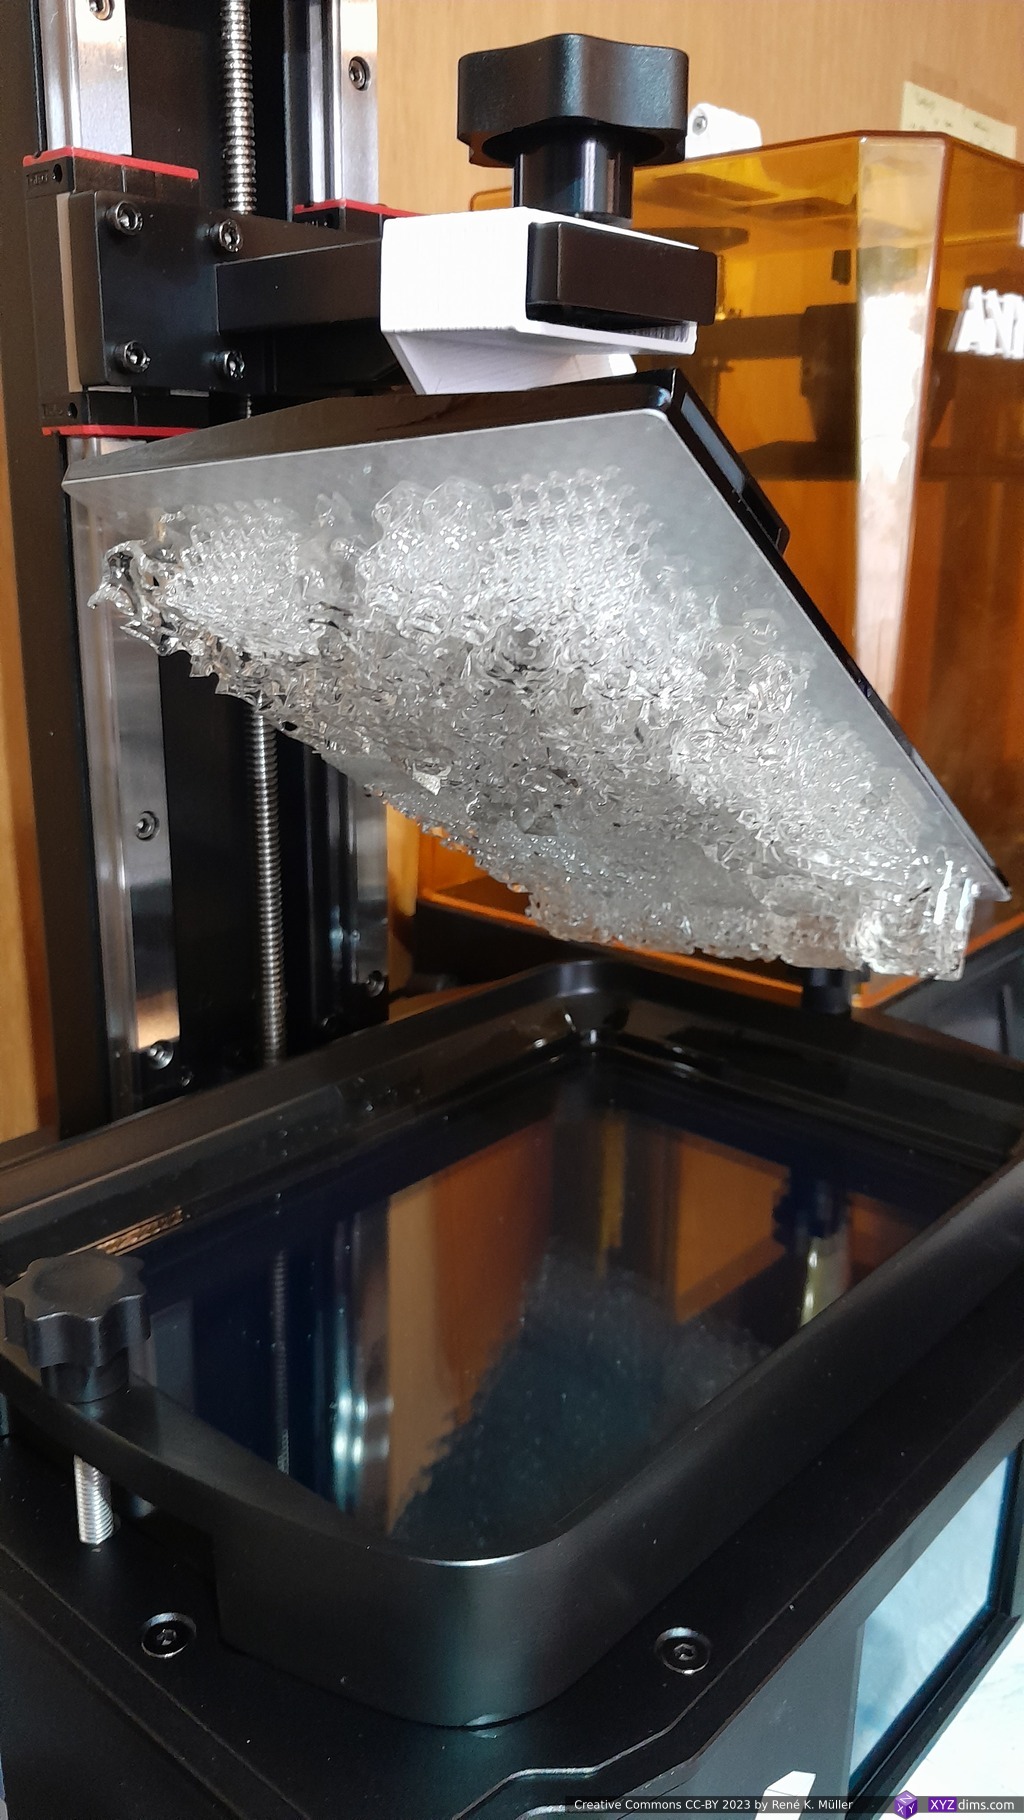
The pieces were overexposed, the bottom layers were significantly overexposed, the clear resin as well the white resin which came as 2nd batch – the defaults as recommended by Anycubic and consequently by Lychee Slicer 5.1.8 were not as good as Photon Mono 4K.
The default settings with 3mm/s or 180mm/min for 2nd lift speed caused multiple failed prints for me such as delimination, and I reduced it to 1.5mm/s or 90mm/min and increased transitioning layers from 4 to 10 – after that fine structures like those 40mm cube lattice prints came out quite well.
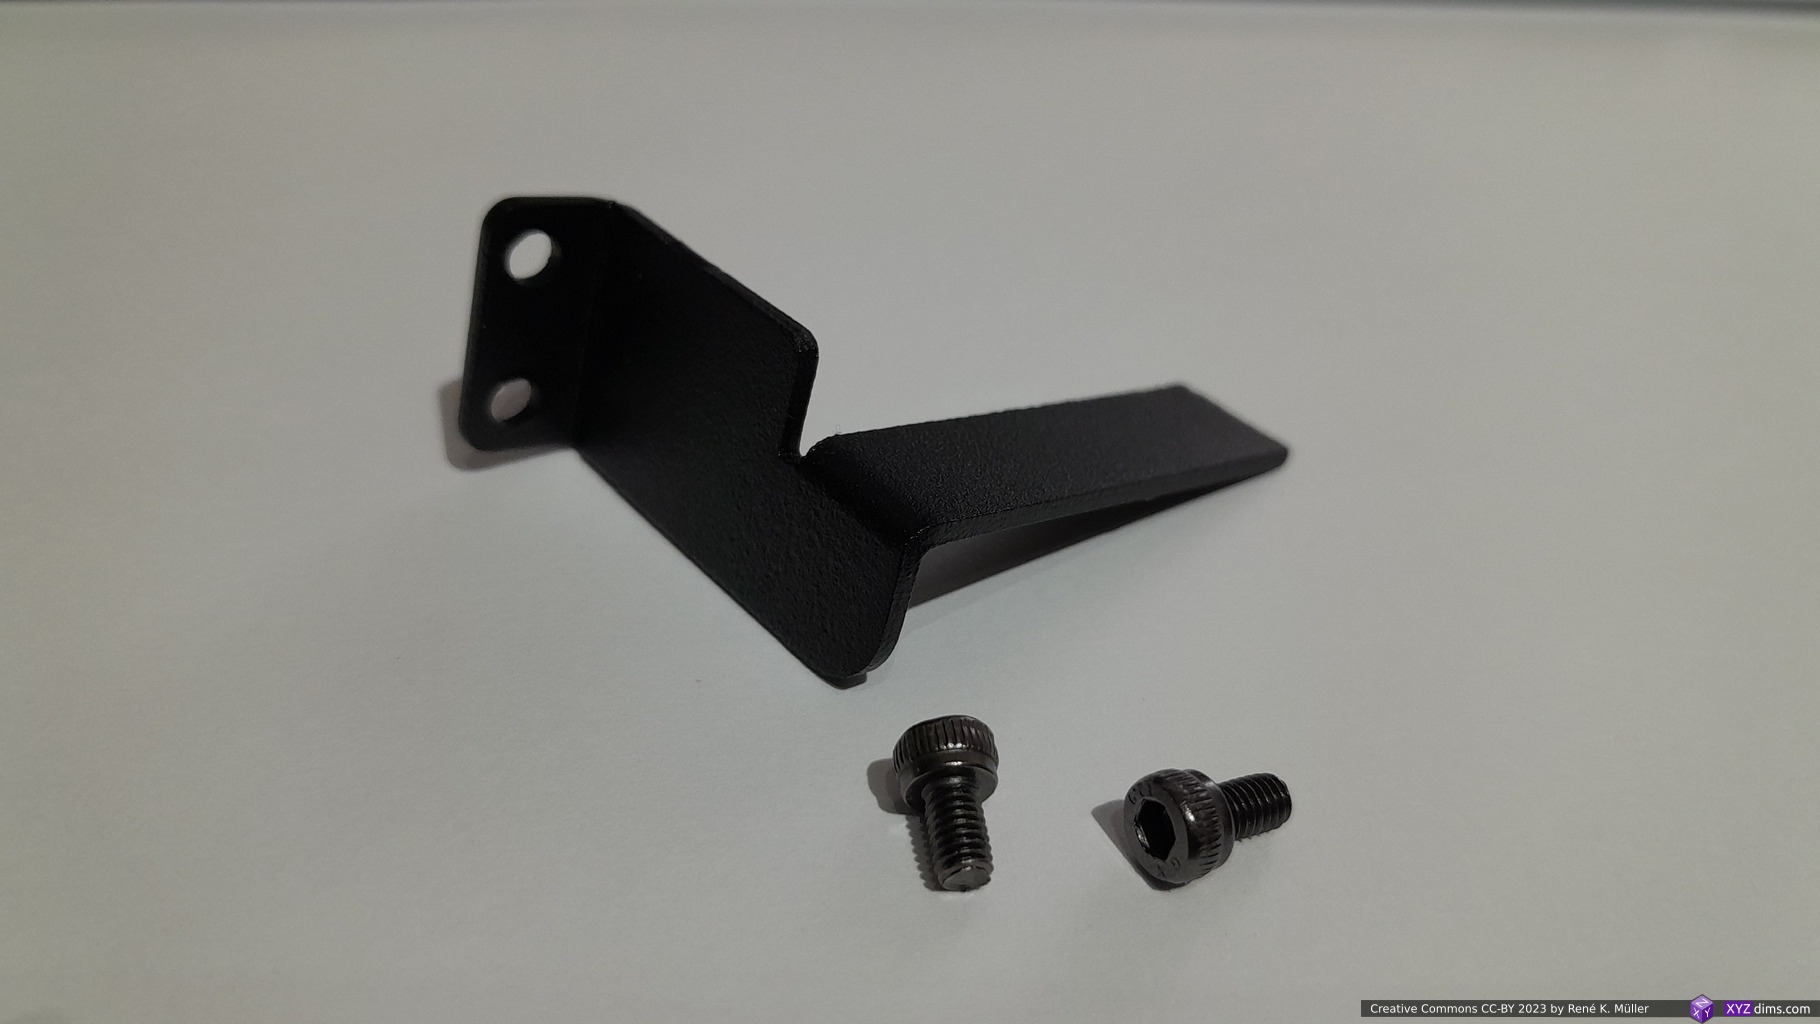
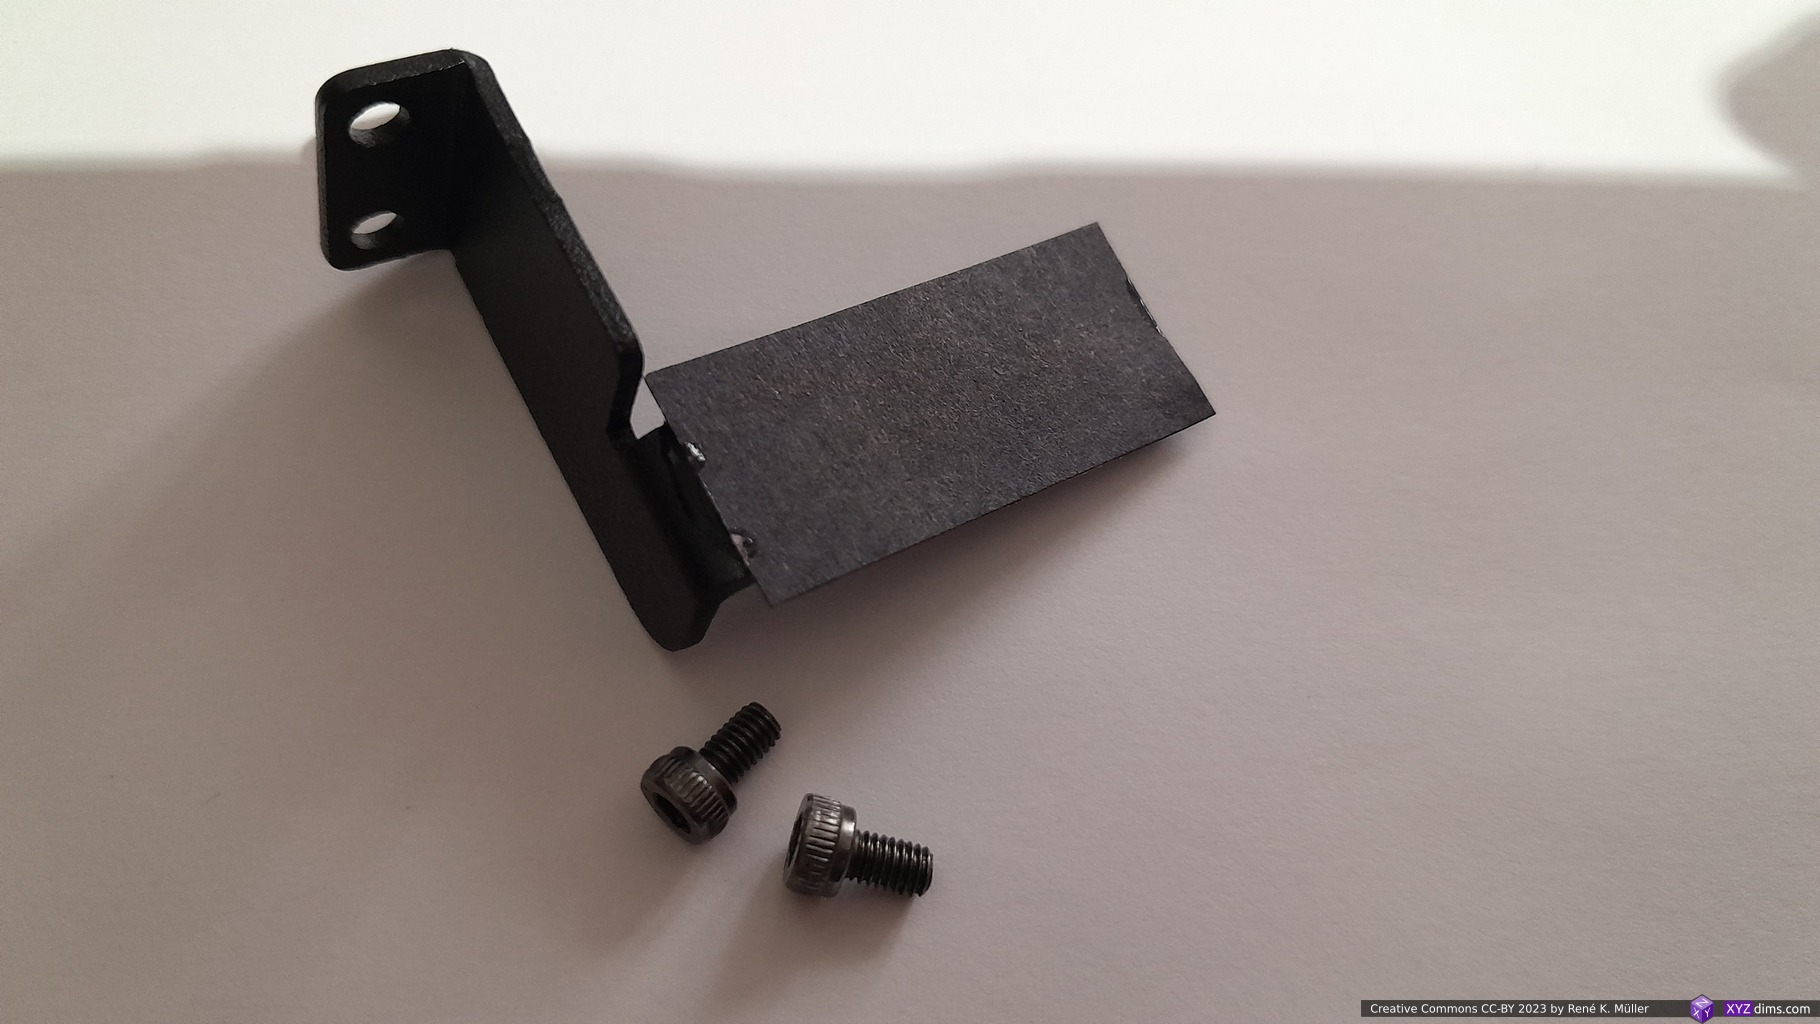
Photon Mono X2 Drip Hook
I highly recommend a drip hook, you want uncured resin easily drip over a period of 5-10min back into the vat, before you wash it off in water (when using water wash resin) or isopropyl alcohol (IPA).
- Printables: Photon Mono X2 Drip Hook (STL)
Third Party Market
| Photon Mono X2 compatibility | Specifications | |
|---|---|---|
| vat | Photon Mono X, Mono X 6K, Mono M3 Plus | 263 x 169 x 30 mm (outside max) 238 x 162 mm (inside) |
| steel build plate | Elegoo Saturn S (same LCD size) | 202 x 129 mm (min. 196 x 122mm) |
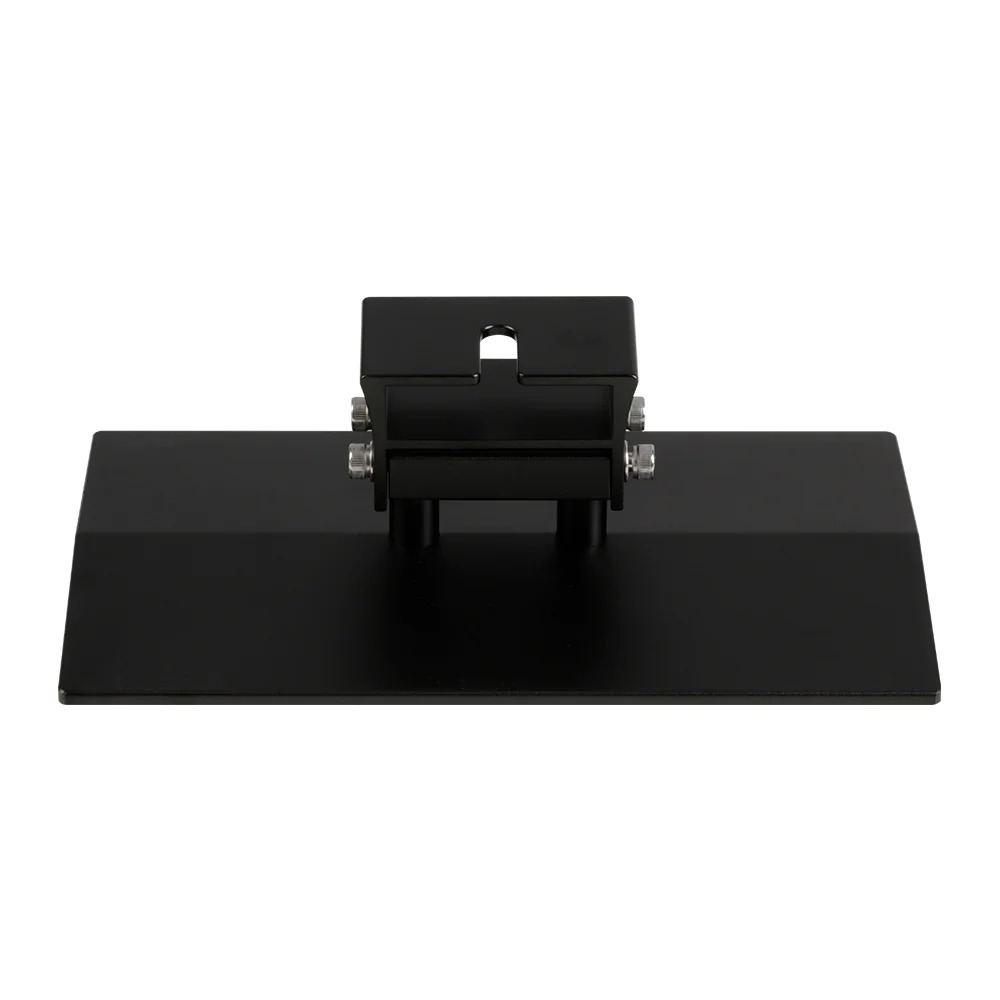
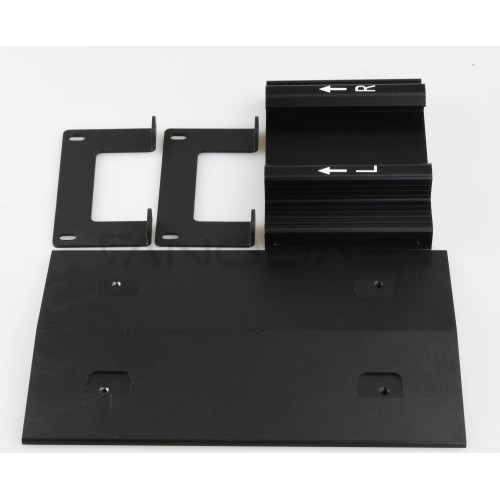
Spring Steel Plate
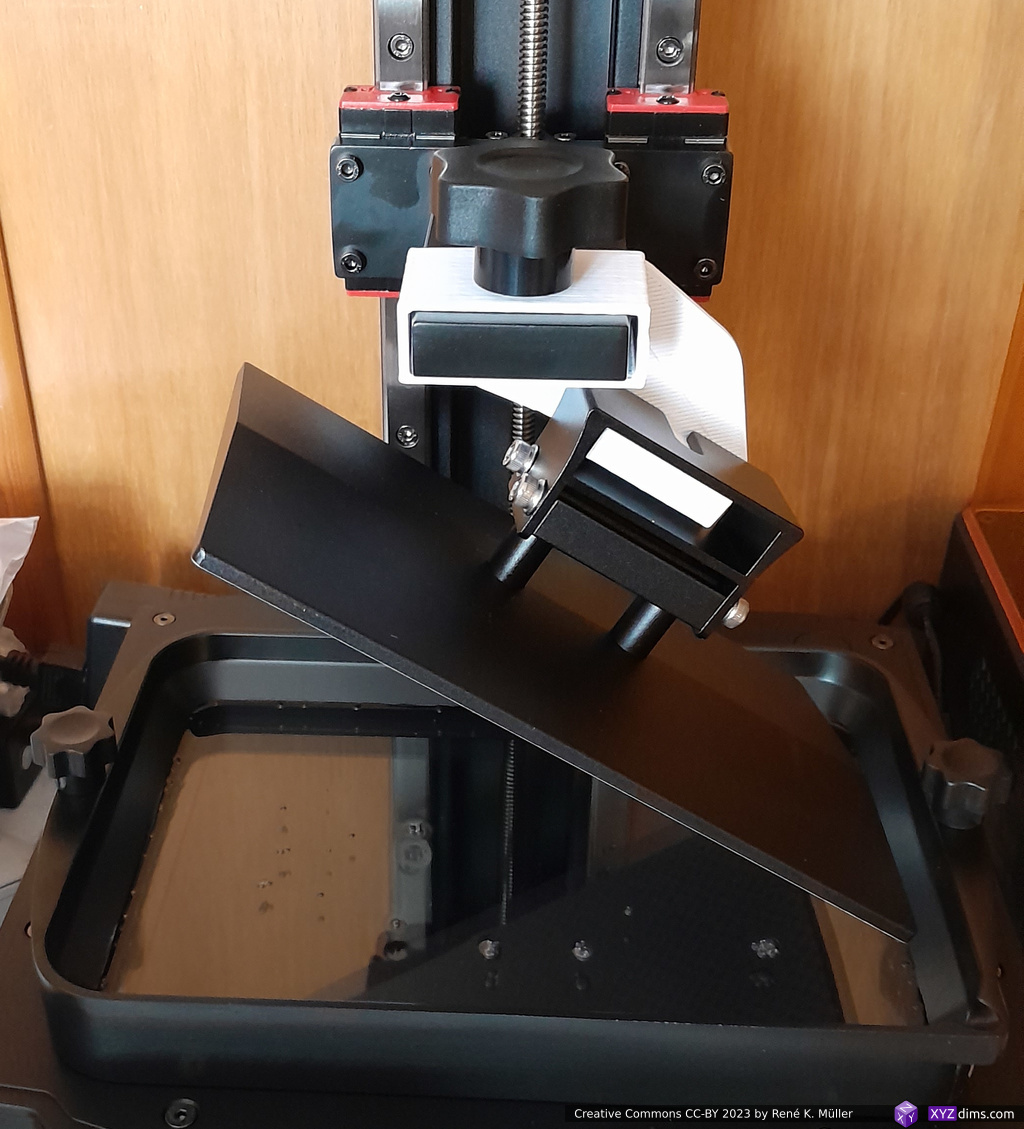
I made two prints with the original build plate, and it was difficult to remove the prints without flexing and scratched the plate right away – the adhesion is good, too good actually. So it became clear, I also want a spring steel plate for it.
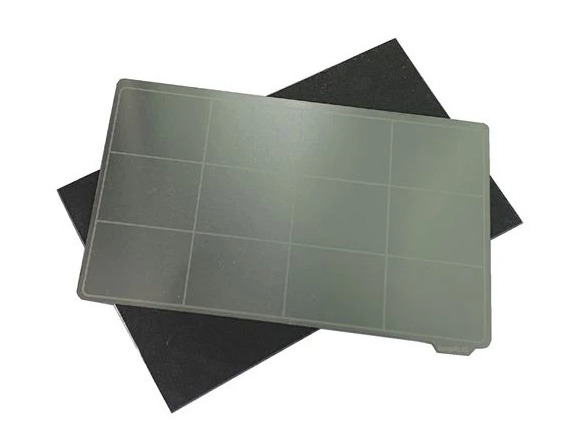
I’ve got a spring steel plate 202×128 mm from Aliexpress.
- magnetic base: 2.2mm thick, slightly extends, 203x129mm
- steel plate: 0.5mm thick, exact 202x128mm
so one has to compensate 2.5 – 3mm in Z height and adjust, speak extend, the Z-level probe. I just glued a black strip of paper, and then of course re-level the bed again afterwards.
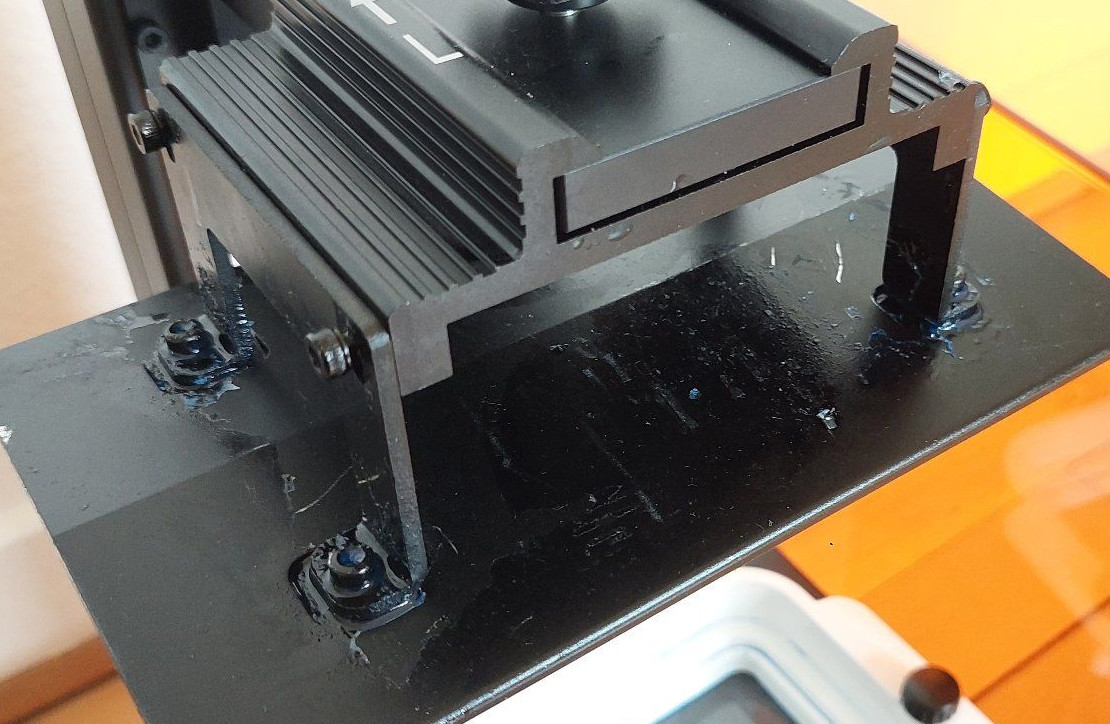
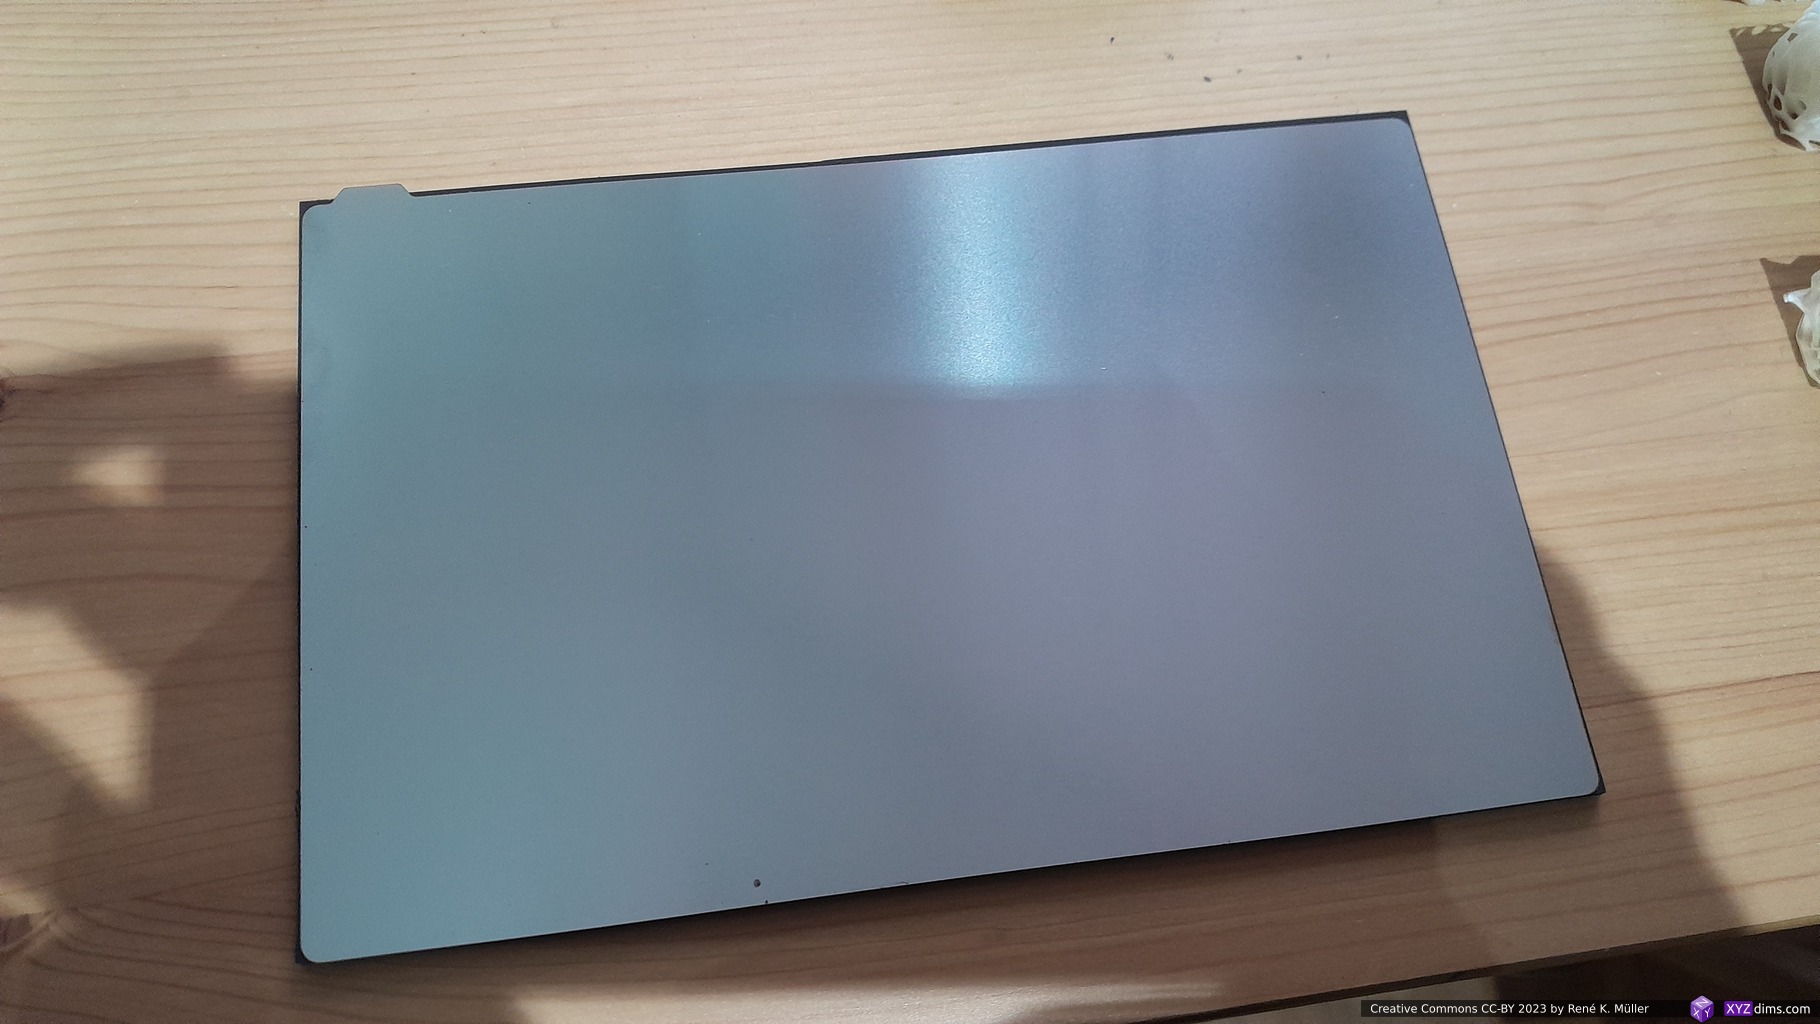
Update 2024/11: well, let me add here after 20 months usage, where the built-plate rested for apprx. 5 months without use, the steel plate fused with the magnetic rubber counter part, and while trying to separate, the rubber base tore a hole, but as it turned out, also the adhesive of the rubber base detaching from the actual build-plate:


This is bad . . . I’m not sure if it came to be of the long stand-still / resting without detaching the steel plate, or a rather short lifetime of the flex-plate, I suspect a combination of both. I clean(ed) the steel plate and rubber counter part after every print session (one or multiple consecutive prints), but still some resin residue could have remained, sufficient to fuse the flex steel plate with the rubber counter part.
Either way, I gonna replace it and keep using the flex steel plate as it makes it easier to detach smaller or delicate pieces. I can conclude this flex steel plate likely will last 15-20 months only, and if I won’t use the printer for longer then I detach the flex steel plate from the rubber magnetic base.
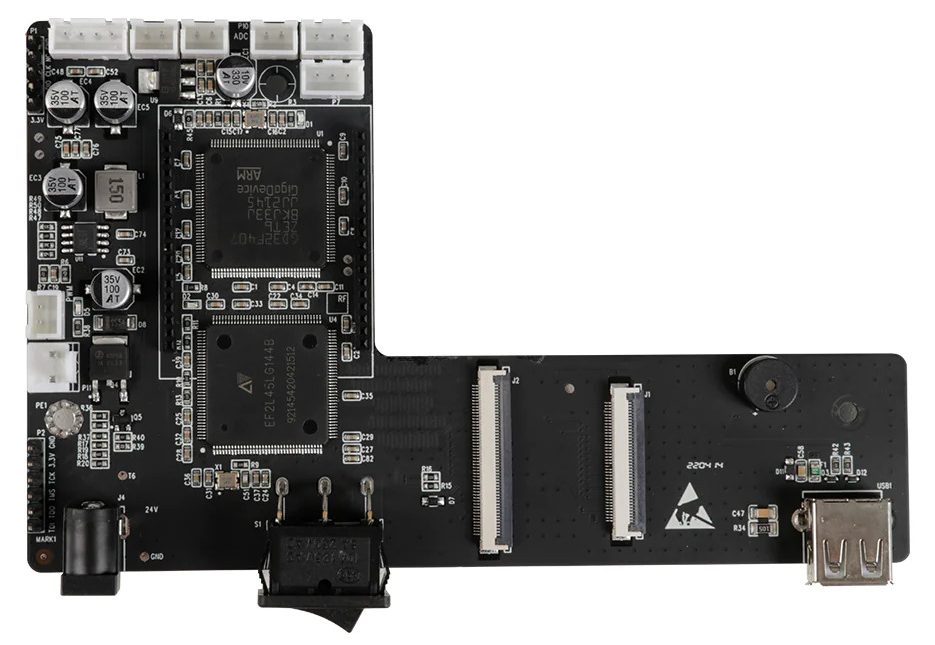
Motherboard
The motherboard has two main chips:
- ARM GD32F407
- driving Z stepper motor with endstop (Z=0)
- driving USB port
- driving both LCDs via ASIC
- EF2L 45L G1444B (ASIC)
- driving monochrome LCD via MIPI DSI (not sure where the image buffer resides)
- driving UI color LCD with touchscreen
Preliminary Review Mono X2
Pros:
- good value for build size, but not features
- mid-size build volume with 196 x 122 x 200 mm (WxDxH)
- no cover sensor (can be on or off and still prints)
- available replacement of parts (LCD, vat, build-plate)
Cons:
- no Wi-Fi (only USB Stick)
- surprisingly noisy with fans while printing
- firmware doesn’t allow to change UV light intensity
- default settings are not giving reliable prints1)
- very simple firmware & UI
- no flex build plate
- no upper endstop (you can ramm the build-plate into the plate on top)
- no sensor for running plate against cured remains in vat2), that would require more advanced firmware
- cheap USB memory stick (breaks after a few days, data corruption)
- using original Anycubic Water Washable Resin +
- newer printers (2023) have load cell to measure counter force, and prevent build-plate to run with force against vat and LCD underneath. Update 2023/05: Anycubic released Mono M5S (2023/05) which has a load-cell sensor, but reviews are mixed.
Addendum
Printing Procedure
Let me take the chance to describe my MSLA resin printing procedure – if you are newcomer you might like to read it in a concise way.
- resin printing (as in 2023) is still a messy procedure at the consumer and prosumer level as well
- the moment the print is finished, you need to remove the build-plate or flex steel plate, no matter which, the piece(s) still have resin on it, which likely will drip on the printer and especially around the vat is the most critical area:
- by any means prevent any resin to come under the vat
- don’t touch the underside of the vat with hands or gloves, unless you have a fresh piece of sheet of paper towel or equivalent
- if you must clean the underside of the vat – and if you do you already screwed up when this happens – clean it first thoroughly, and after that the side of the vat and other part of the printer
- prevent any resin to get on the LCD or protective layers on the LCD, wipe it away right away
- cured resin is difficult to remove, especially from softer surfaces like plastic – so I have the habit to remove all resin outside of the vat right away
- clean your gloves with pieces of paper towel, to prevent to further spoil your equipment you grab as next:
- clean gloves when handling the build plate
- I keep the same gloves for multiply prints or a 1-2 weeks as I clean them with paper towels right away (2-3 times per print: whenever I touch the 3d printer, the gloves are clean)
- when removing the pieces from the build plate, things will become messy, no matter what
- washing the piece(s) off in a water container as I use only water wash resin
- 1st wash container: I dip the pieces with the build plate into the container, my gloves don’t get wet or touch resin
- 2nd wash container: I remove the flex build plate, and dip it with the pieces still on the plate into the 2nd container – dipping in and out several times
- then I remove the pieces from the flex build plate, by flexing the build plate or use a metal scrapper, and they drop into a small container with layers of paper towels where they dry a bit (10-30min) – I don’t touch the pieces with my gloves, I only touch the build plate
- cleaning the build plate with paper towels dry, mount it back on the printer
- cleaning the flex build plate with paper towels and attach it to the build plate
- no cured remains in vat: using the plastic scrapper to push on the vat’s bottom softly, and move through the vat slowly to see if there are remains attached to the vat bottom, those needs to be removed otherwise at next print the build plate will push it unto the LCD and potentially damage it – high risk to damage the MSLA printer severely, such as puncture FEP of the vat and leak resin all over
- if there are cured remains on the bottom FEP which I can’t remove with the plastic scrapper (large enough to pick out), then
- either I expose the entire plate for 10-20s, and remove then a full cured layer of the entire area, this removes all small remains
- if there are small floating pieces, then I empty the vat off the resin by pouring through a metal or paper filter (keeps back remove all cured remains) back into the bottle – this is time consuming and messy as you need to clean funnel and metal filter again
- if there are cured remains on the bottom FEP which I can’t remove with the plastic scrapper (large enough to pick out), then
- if I have printed pieces with small holes where water might still be captured, I take a piece of paper towel and wrap it and shake it fast in my hands – I have seen people blowing compressed air on the cured pieces, this makes sense if you produce many pieces in series frequently
- 2nd stage curing of the pieces in UV chamber:
- white/black/grey resin 1-3 mins
- clear resin 2 mins max
- further resting the piece(s) for 1-2 hours to dry further
And I leave the resin in the vat, and let the vat stay on the printer for weeks and even months – no refilling back and forth to and from bottles, unless I know I have cured fragments in the vat, then I empty the vat with metal or paper filter back into the bottle and clean it with paper towels thoroughly as mentioned above already.
Keep everything around resin printer as clean as possible.
Consumer MSLA vs Professional SLA/MSLA
When trying to compare consumer MSLA and professional SLA & MSLA like from Formlabs, notable they switched from SLA 2024/04 to MSLA with their Form 4 series as well, one might just look at the print size or build volume (state 2024/11):

but also look at other aspects:
| Anycubic Photon | ELEGOO Mars/Saturn ULTRA | Prusa SL1S | FOrmlabs Form 3, 3L | FORM 4, 4L | |
|---|---|---|---|---|---|
| Pricing | EUR 200-1,000 | EUR 300-400 | EUR 1,600 | EUR 5,000-10,000 | EUR 5,000-11,000 |
| Technology | MSLA | MSLA | MSLA | Low Force SLA | MSLA |
| Exposure Technology | UV light & LCD | UV light & LCD | UV light & LCD | UV laser | UV Light & LCD |
| Automatics | force sensor (resin level, collision) | resin level | resin level resin dispenser resin heating level indication | resin level resin dispenser resin heating level indication | |
| Next Layer Method | peeling by raising | peeling by tilting | peeling by tilting | peeling by raising & resin wiping | peeling by raising & resin wiping |
| Removal of Part | messy | messy | messy without CW1 OK with CW1 | messy without Form Wash OK with Form Wash3) | messy without Form Wash OK with Form Wash3) |
| Cleaning Part | messy | messy | messy without CW1 OK with CW1 | messy without Form Wash OK with Form Wash3) | messy without Form Wash OK with Form Wash3) |
| Post Curing Part | required | required | required | optional | required |
| Material (Resin) Selection | ★★☆☆☆ | ★★☆☆☆ | ★★☆☆☆ | ★★★★☆ (closed)5) | ★★★★☆ (closed & open)5) |
| Firmware | ★☆☆☆☆ | ★☆☆☆☆ | ★★★★☆ | ★★★★☆ | ★★★★☆ |
| Slicing Software | ★★☆☆☆ Photon Workshop ★★★★☆ Lychee Slicer | ★★★★☆ Lychee Slicer | ★★★★☆ Prusa Slicer | ★★★★★ PreForm | ★★★★★ PreForm |
| Print Speed | ★★★★☆ depends only on print height | ★★★★★4) depends only on print height | ★★★★★4) depends only on print height | ★★☆☆☆ depends on layer cross section & print height | ★★★★☆ depends only on print height |
| Hardware Maintainability | ★★★☆☆ | ★★★☆☆ | ★★★★☆ | ★★★☆☆ | ★★★☆☆ |
| Original Online Resources | ★☆☆☆☆ | ★☆☆☆☆ | ★★★★★ | ★★★★★ | ★★★★☆ |
| Community Resources | ★★★★☆ | ★★★☆☆ | ★★★★☆ | ★★★☆☆ | ★★★☆☆ |
| After Sales Support | ★★☆☆☆ | ★★☆☆☆ | ★★★★☆ | ★★★★☆ | ★★★★☆ |
| Third Party Market | ★★★☆☆ | ★★☆☆☆ | ★★☆☆☆ | ★☆☆☆☆ | ★☆☆☆☆ |
| Reliability | ★★☆☆☆1) | ★★★★☆ | ★★★☆☆ | ||
| Value | ★★★☆☆2) | ★★★★☆2) | ★★★☆☆2) | ★★★☆☆2) | ★★★☆☆2) |
- based on overall build and firmware, which can’t even properly calculate remaining print time while printing, I have a low expectation
- value for most are nearly the same, because the low price for Anycubic Photon Mono series also give you moderately good solution, whereas Formlabs printers are very pricey but also giving you good value, and Prusa SL1S rather high priced for the gaining reliability and print speed, Elegoo Mars & Saturn Ultra value is higher due lower price
- Form Wash station for Form 3, Form Wash L for Form 3L, you move the build plate direct into the washing station, and before curing remove them from the build plate
- Prusa SL1S & Elegoo Mars/Saturn Ultra prints a layer in 2 seconds in total, whereas traditional MSLA takes 7-10s (exposure time + lifting/retraction)
- Impressive selection of resins, incl. bio compatible, strong and durable options
As a follow-up, while reviewing another resin printer, I realized the “value” for me I could actually determined by the XY area which translate into parallel printing capability, which is more relevant than the height (Z), combined with the precision or voxel size – as of 2023 Anycubic doesn’t even mention the XY resolution anymore – a bad marketing move.
Resin Printer Value Comparison
A numeric value summarization for features I care about, the rough & simple formula:
XY Area [mm2] / Price [EUR] / XY Resolution [μm]
The bigger the XY area, the smaller the price and the smaller the resolution, the higher the value:
State 2026/04
| PRINTER | year | XY RESOLUTION | Type | BUILD VOLUME XYZ | PRICE | Value |
|---|---|---|---|---|---|---|
| Elegoo Saturn 4 | 2024- | 19μm x 24μm2) | MSLA | 218x122x220 | 300 EUR | 3.74 |
| Elegoo Saturn 4 Ultra | 2024- | 19μm x 24μm2) | MSLA | 218x122x220 | 400 EUR | 2.81 |
| Anycubic Photon Mono M5 | 2023- | 19μm x 24μm2) | MSLA | 218x123x200 | 410 EUR | 2.72 |
| Elegoo Mars 5 Ultra | 2024- | 18μm | MSLA | 153x78x165 | 270 EUR | 2.54 |
| Anycubic Photon P1 MAX | 2026- | 25μm | MSLA | 285x214x300 | 960 EUR | 2.54 |
| Anycubic Photon Mono X 6Ks | 2023- | 34μm | MSLA | 196x122x200 | 280 EUR | 2.51 |
| Anycubic Photon Mono M7 | 2024- | 17μm x 25μm2) | MSLA | 223x126x230 | 450 EUR | 2.49 |
| Elegoo Jupiter 2 | 2026- | 20μm x 26μm | MSLA | 302x162x275 3) | 800 EUR | 2.36 |
| Elegoo Saturn 3 Ultra | 2023- | 19μm x 24μm2) | MSLA | 218x123x260 | 480 EUR | 2.32 |
| Anycubic Photon Mono 4K | 2021-2022 | 35μm | MSLA | 132x80x165 | 150 EUR | 2.01 |
| Anycubic Photon Mono X2 | 2023- | 48μm | MSLA | 196x122x200 | 260 EUR | 1.91 |
| Anycubic Photon P1 | 2025- | 17μm x 25μm | MSLA | 223x126x230 | 600 EUR | 1.88 |
| Anycubic Photon Mono 2 | 2023- | 35μm | MSLA | 143x89x165 | 210 EUR | 1.73 |
| Elegoo Jupiter SE | 2023- | 51μm | MSLA | 277x156x300 | 700 EUR | 1.21 |
| Anycubic Photon M7 Max | 2025- | 46μm | MSLA | 298x164x300 | 900 EUR | 1.18 |
| EMake Galaxy 1 | 2023 | 25μm / 100μm1) | SLA | 400x200x400 | 2,700 EUR | 1.18 |
| Anycubic Photon M3 Max | 2022-2024 | 45μm | MSLA | 298x164x300 | 980 EUR | 1.10 |
| HeyGears UltraCraft Reflex RS | 2024- | 30μm | MSLA | 222x122x200 | 1,200 EUR | 0.75 |
| EMake LCD 16″ 8K | 2024- | 46μm | MSLA | 353x198x400 | 2,700 EUR | 0.56 |
| Formlabs 3L | 2020-2024 | 25μm / 100μm1) | SLA | 335x200x300 | 9,000 EUR | 0.29 |
| Formlabs 3+ | 2020-2024 | 25μm / 100μm1) | SLA | 146x145x185 | 3,500 EUR | 0.24 |
| Formlabs 4L | 2024- | 46μm | MSLA | 353x196x350 | 11,000 EUR | 0.14 |
| Prusa SL1S | 2021- | 49μm | MSLA | 127x80x180 | 1,700 EUR | 0.12 |
| Formlabs 4 | 2024- | 50μm | MSLA | 200x125x210 | 5,175 EUR | 0.09 |
- Formlabs 3’s & EMake SLA printers use a laser beam which has 100μm in diameter, but it can be positioned 25μm exact, the latter was used to calculate the value
- The UV pixels are non-square, the longer side was used to calculate the value
- Elegoo Jupiter 2 advertised the Z build volume as 300mm, it can print but you can’t remove it afterward, so it’s rather 275mm.
The XY area in SLA scales not as good as with MSLA, as the laser beam takes longer the more XY area (e.g. more pieces) need to be rendered per layer – so, MSLA is recommended for aiming fast parallel printing. Interestingly Formlabs 4 is now a MSLA as well (2024/04), they seem to have abandoned the SLA laser-based approach.
That’s it.
