Note: The information is outdated as print3r natively supports networked printing, see 3D Printing: Print3r 2.x: Networked Printing (2019/02/27), but this information is still useful bridging USB to TCP in general.
Introduction
The moment you deal with more than one single 3d printer, but multiples – you want to access those with a single host: creating a cloud 3d printing facility.
After a few minutes researching the net for USB to network bridge, I realized the overhead to print via network is possible without Octoprint or some other solution, but simple ser2net and socat alone, thanks to this Github Issue by Marco E explaining his steps, so I reiterate his solution with some changes:
- create USB to network bridge with
ser2netper printer - create network to virtual serial per printer with
socaton the host
Printers
Each printer you like to network has to have:
- Linux OS (like Debian, Ubuntu or alike), e.g. Raspberry Pi or OrangePi or any kind of lowcost ARM-based board
- USB connectivity where the 3d printer is wired
- Wi-Fi (wireless) or Ethernet (wired) connectivity
Install
As next install ser2net serial to tcp bridge per printer:
% sudo apt install ser2net
Create a file named client.cfg, you may have to change the baudrate and/or the USB device:
3380:raw:600:/dev/ttyUSB0:115200 8DATABITS NONE 1STOPBIT -XONXOFF LOCAL -RTSCTS
Start ser2net on each printer:
% ser2net -c client.cfg
Host
As next prepare the host, where all the printers will be controlled from:
- UNIX OS like Linux (Debian, Ubuntu, *BSD, macOS should work too)
- Wi-Fi (wireless) or Ethernet (wired) connectivity
- Print3r
Install
First make sure you have socat installed:
% sudo apt install socat
For each printer you are creating network back to (virtual) serial port – replace 192.168.0.16 with the IP of your printer(s):
% socat -d -d pty,raw,echo=0,b115200 tcp:192.168.0.16:3380
2018/10/07 10:08:16 socat[31821] N PTY is /dev/pts/29
2018/10/07 10:08:16 socat[31821] N opening connection to AF=2 192.168.0.16:3380
...
The first line reports the new virtual serial port, e.g. /dev/pts/29 or enforce a link of the new device:
% socat pty,raw,echo=0,b115200,link=/tmp/my-printer tcp:192.168.0.16:3380
you can reference /dev/pts/... or the link you defined with Print3r then:
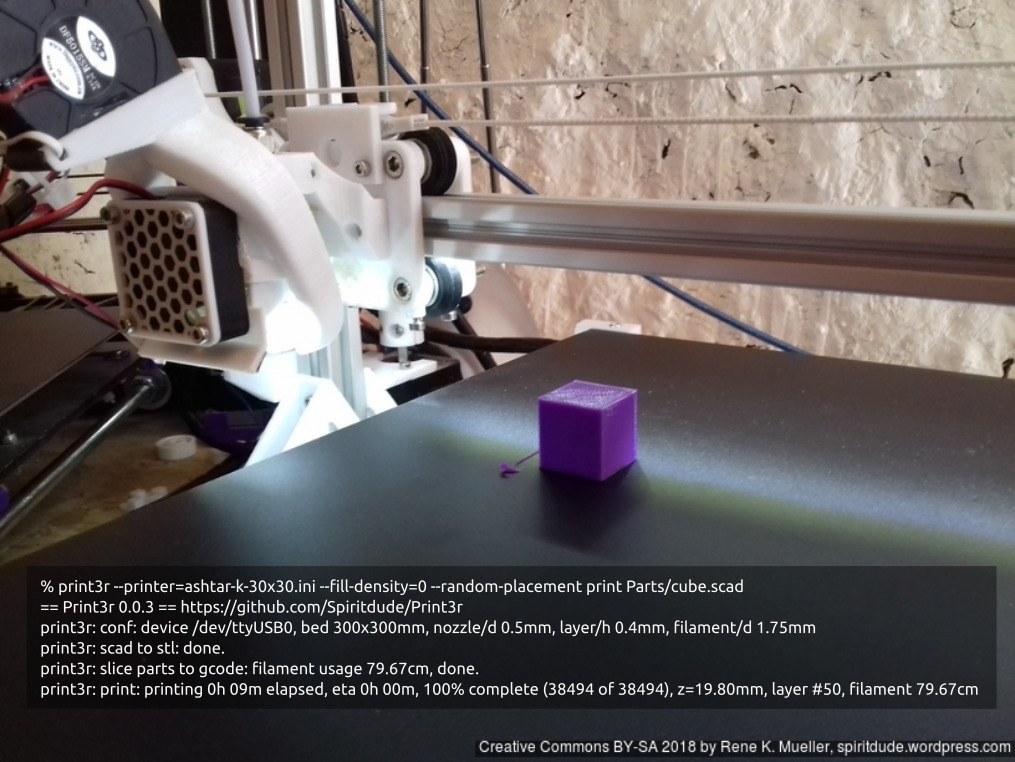
% print3r --device=/tmp/my-printer --scale=2 --random-placement --fill-density=0 --perimeters=1 print xyzHollowCalibrationCube.scad
== Print3r 0.0.8 == https://github.com/Spiritdude/Print3r
print3r: conf: device /tmp/my-printer, bed 380x300mm, nozzle/d 0.5mm, layer/h 0.4mm, filament/d 1.75mm
print3r: scad to stl: done.
print3r: slice part to gcode: position 272,118, filament usage 2.38m, done.
print3r: print: 0h 03m elapsed, eta 0h 16m, 18.9% complete, z=0.60mm, layer #2, filament 0.42m
So you end up with something like this:
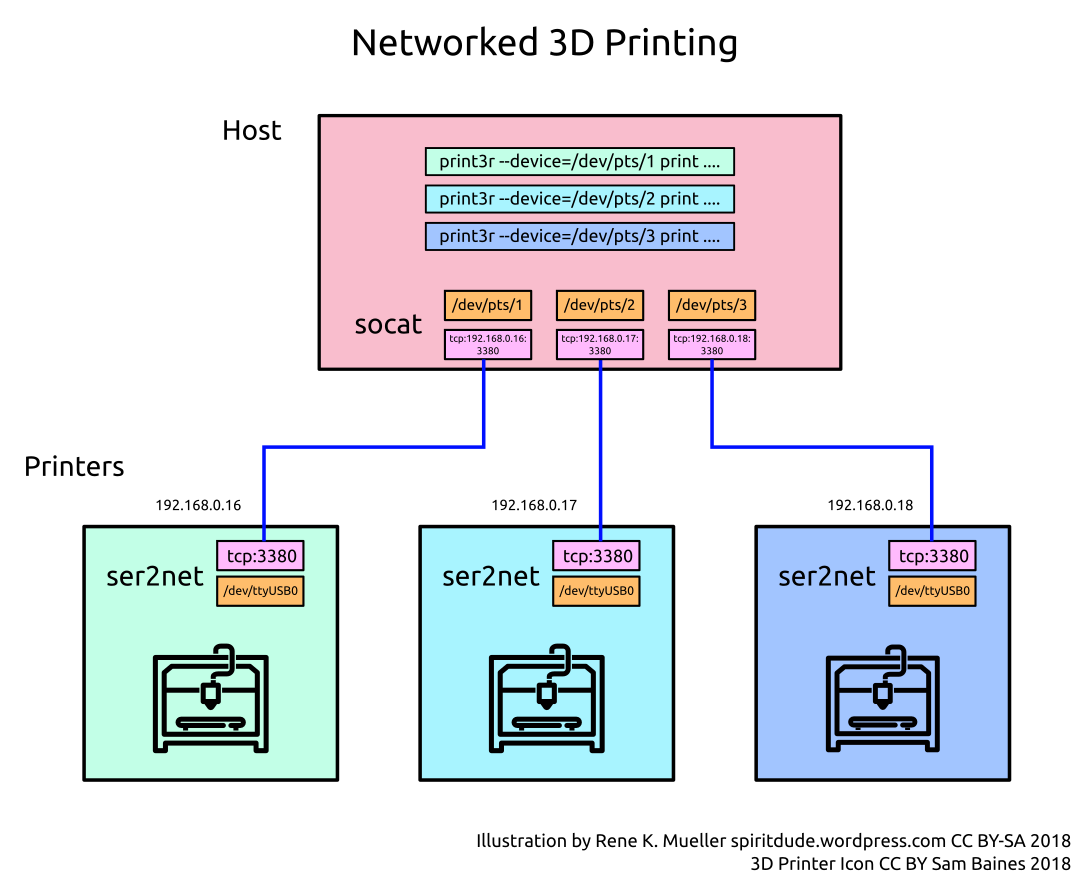
So, that’s it, with ser2net on the printers, and socat on the host you have a rather simple and straight-forward cloud 3d printing facility.
I likely will extend Print3r to support networked printing with a simple all-in-one setup. Implemented since Version 2.0.0, see 3D Printing: Print3r 2.x: Networked Printing.
Update:
- 2018/11/01: there is a slight drawback using
ser2net: only takes common baudrates, but doesn’t support 250,000 which is the default baudrate for Marlin, 115,200 does work though. So, in case you plan to useser2netreflash the firmware to use 115200 as baudrate.