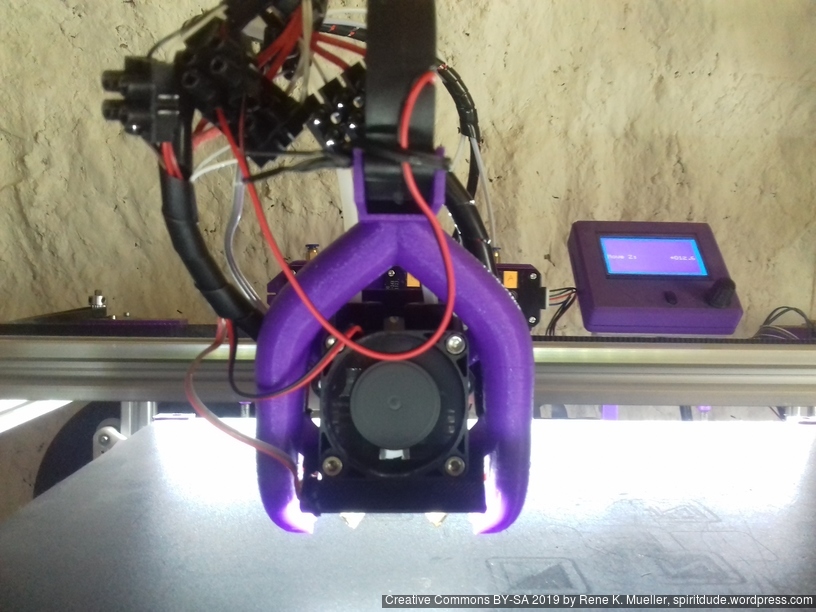
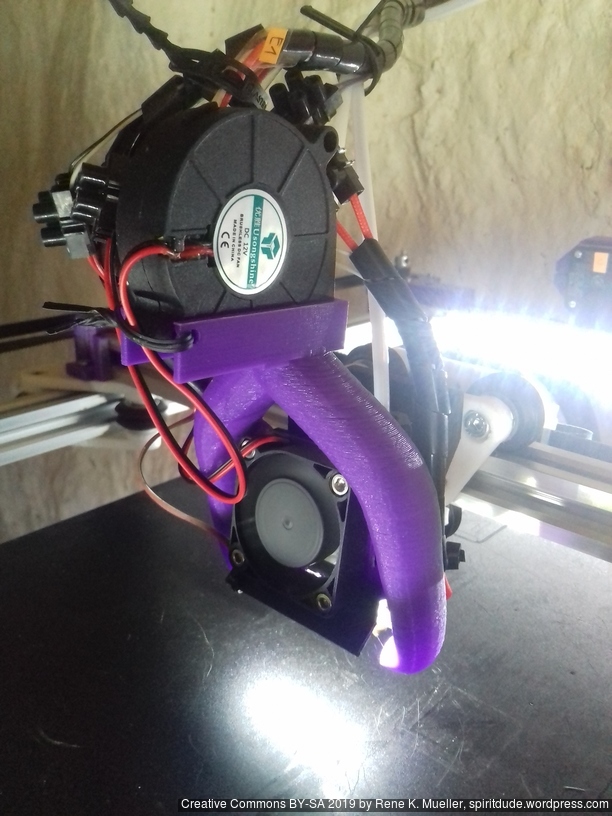
The past year (2018/2019) I printed with my own designed 3D Printers with various printheads and required for each variant a dedicated Part Cooler, and I realized it was worth the time to approach this in a parametric manner using OpenSCAD, using the “bull horn” design and so I came up with a general approach, and as a result was able to create various variants for my use-cases:
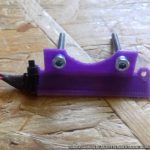
E3D Volcano (1 nozzle, 1 heatsink, large nozzle diameter)
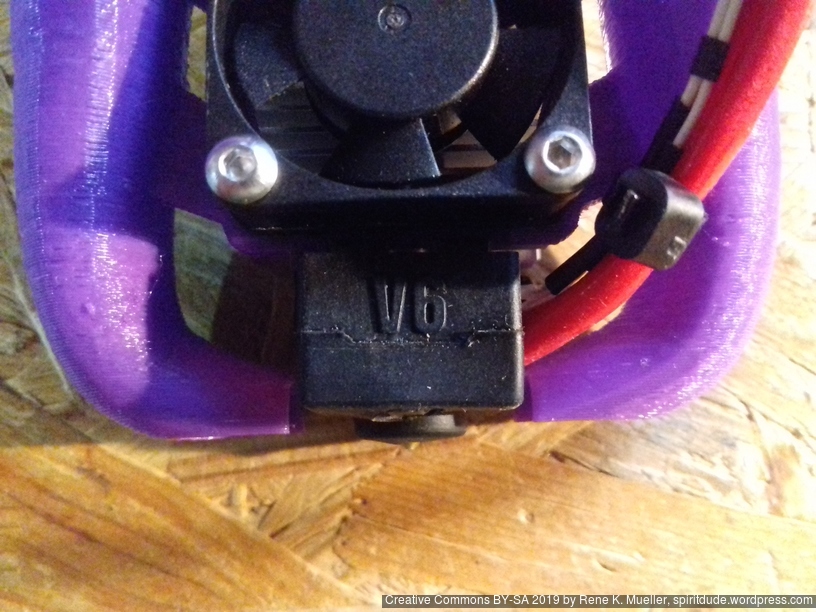
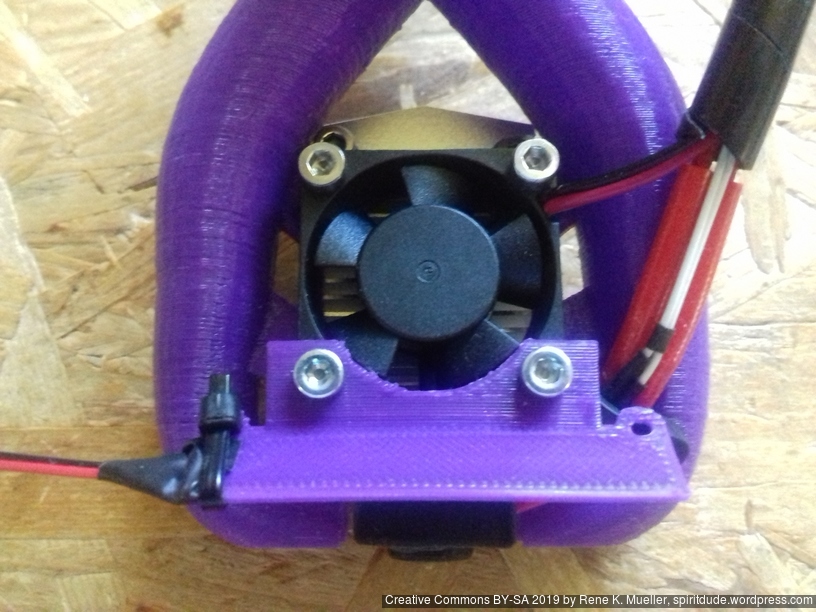
E3D V6 Lite (1 nozzle, 1 heatsink, small / medium nozzle diameter)
a few other specialized setups
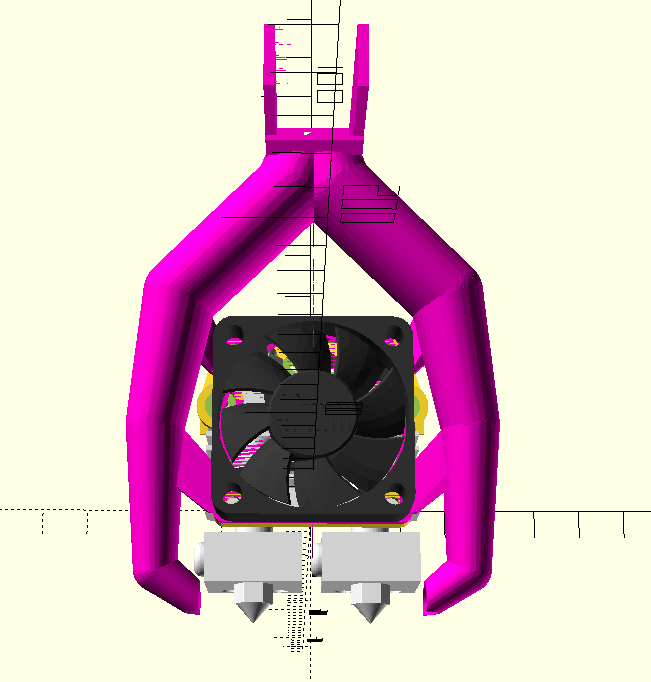
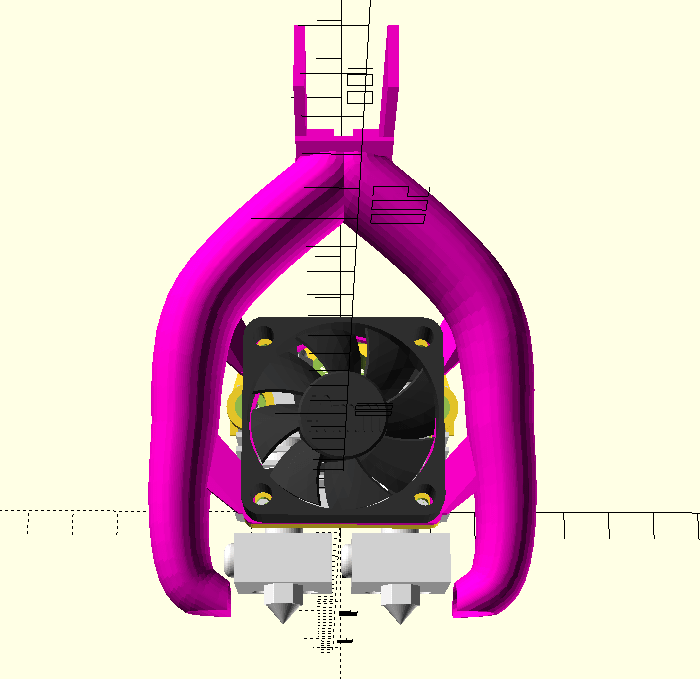
Dual Micro Swiss
Dual E3D V6 Lite
Triple Micro Swiss
Single E3D V6 Lite
Needless to say, the proven design allowed me to quickly design and print a new variant, and have expected results when using the part cooler – which is a huge time saver.
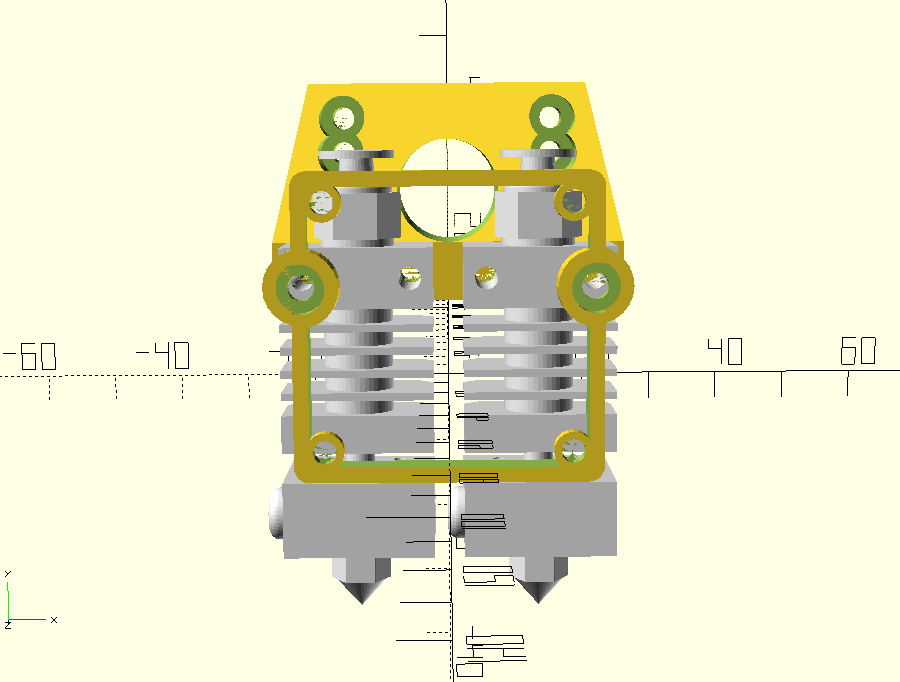
Yet, one drawback is obvious: in order to adapt a new variant, one requires the surrounding parts like heat sink and nozzle as a model or design it yourself (which can be time consuming as well) so the proper variables can be found to render the part cooler for the setup.
After I designed my 3D Printers also in parametric manner, like the Ashtar K (Prusa i3-like) 380x300x300mm build volume or Ashtar C (Core XY) 380x400x380mm build volume, using this parametric approach for a Part Cooler as well, turned out quite successful too.
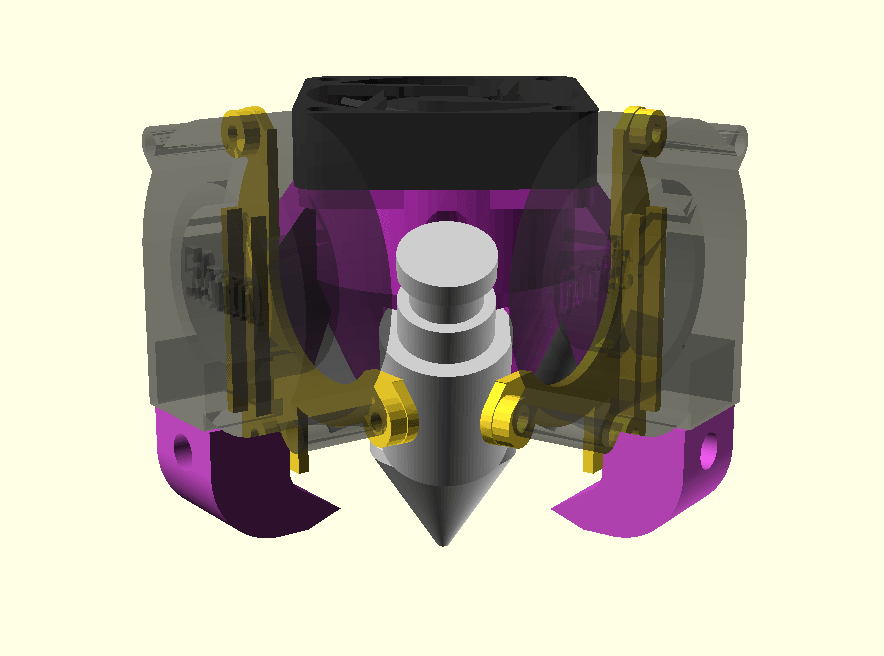
It makes sense to develop and design a parametric piece which
maintains a few constraints, a general form, a base functionality
requires a few variables to adapt certain customization, sometimes it makes sense to introduce a lot of variables, and while testing and adapting customized pieces, some variables may become constants and unforeseen variables become more important
It certainly requires expertise about the piece in order to discern the constraints from the variable aspects while still maintaining its base functionality.
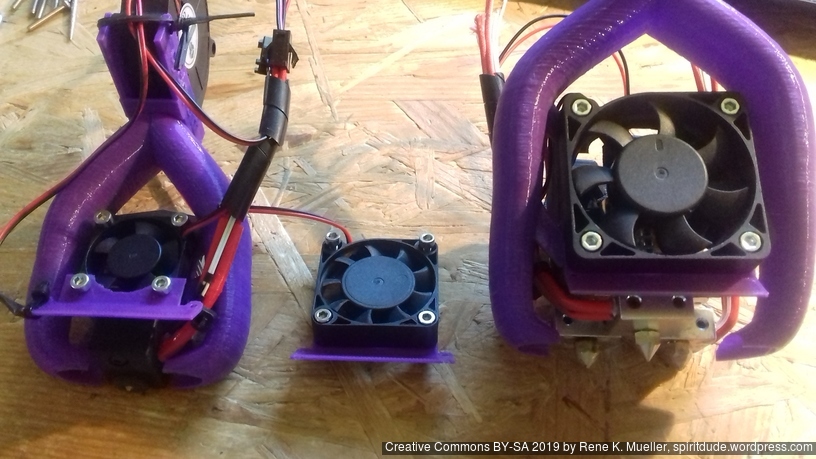
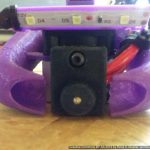
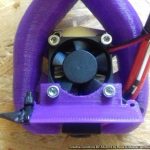
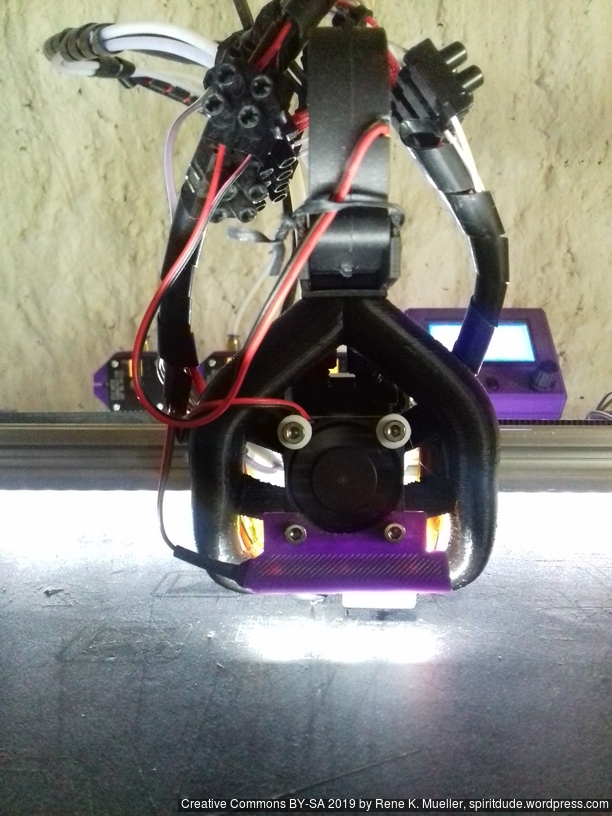
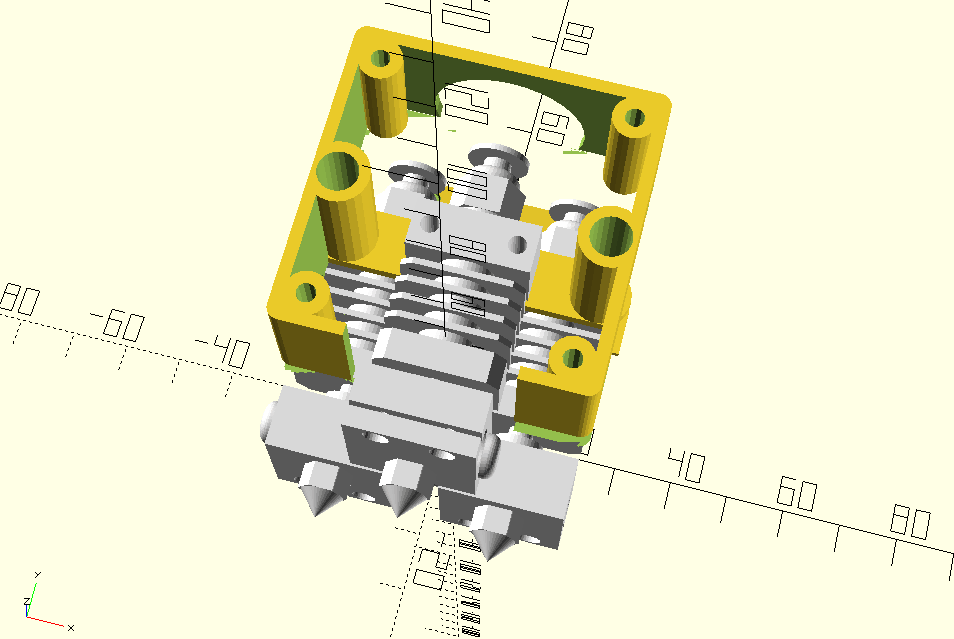
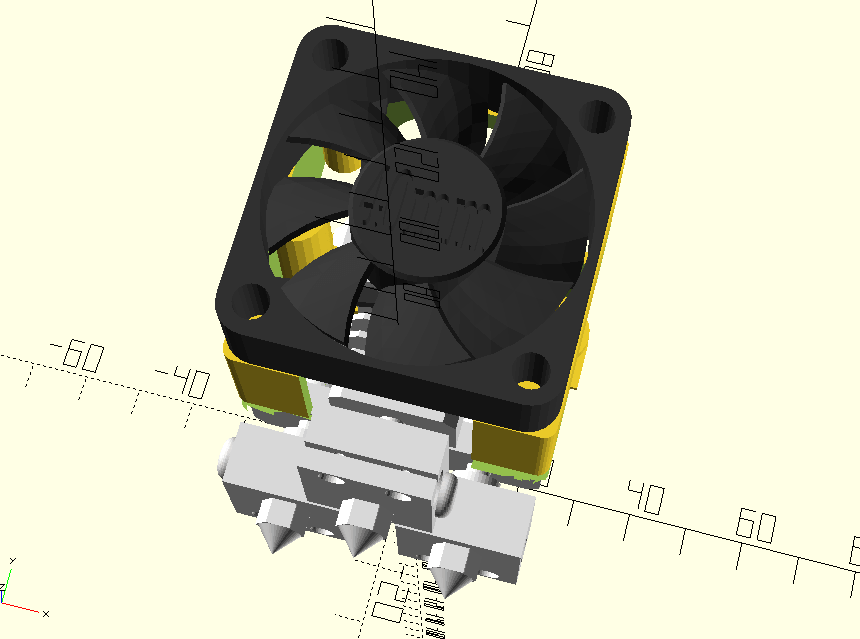
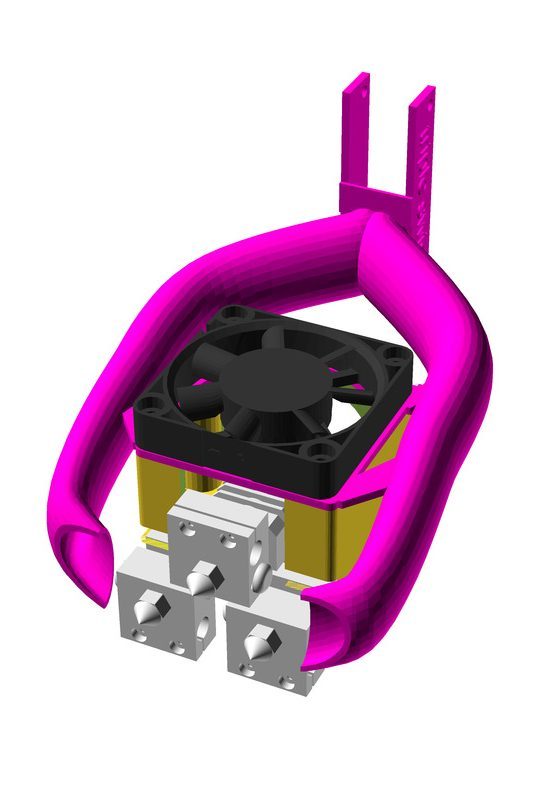
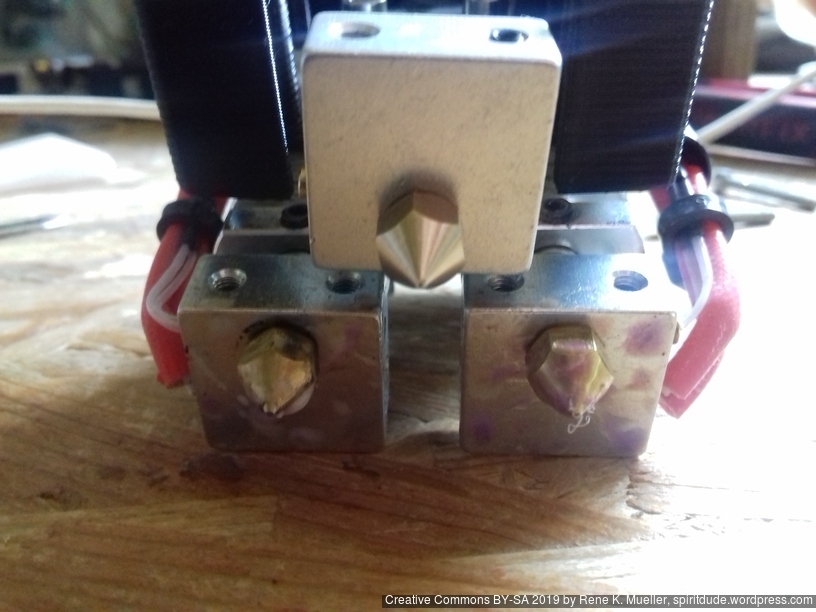
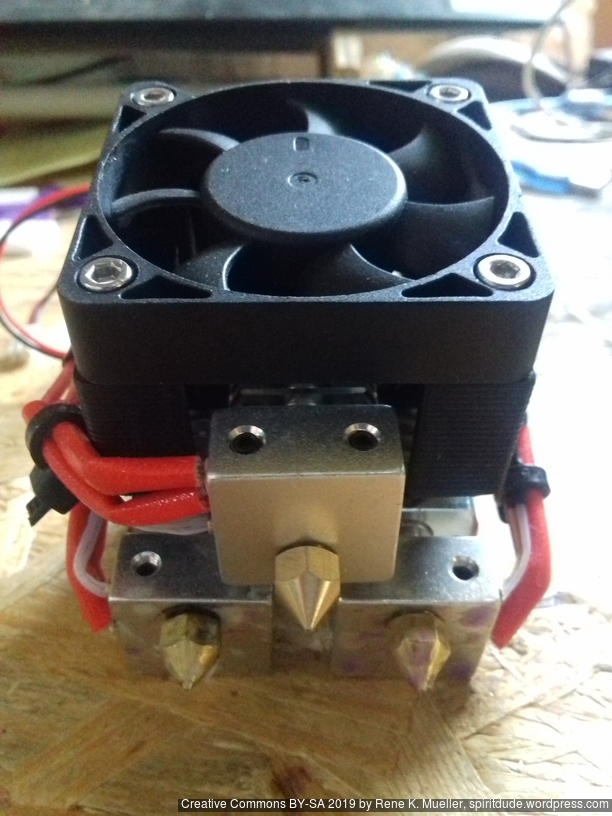
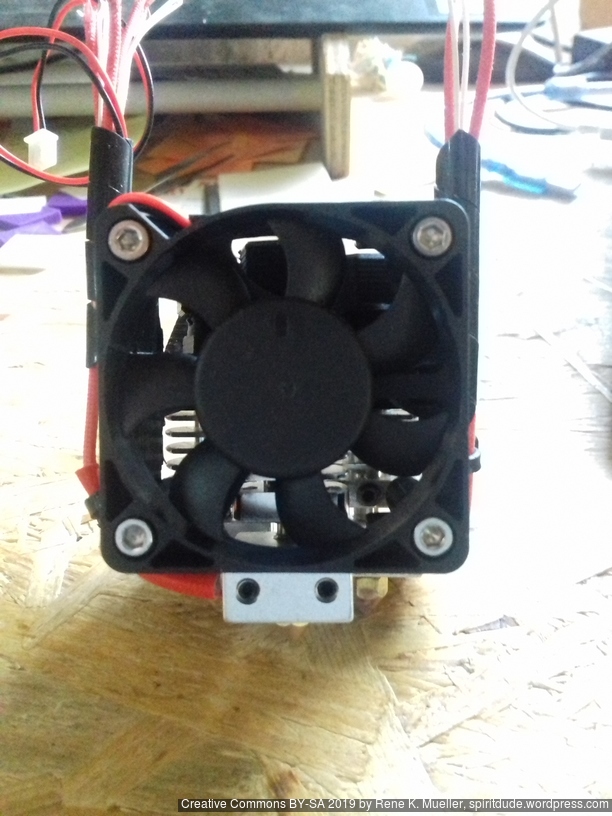
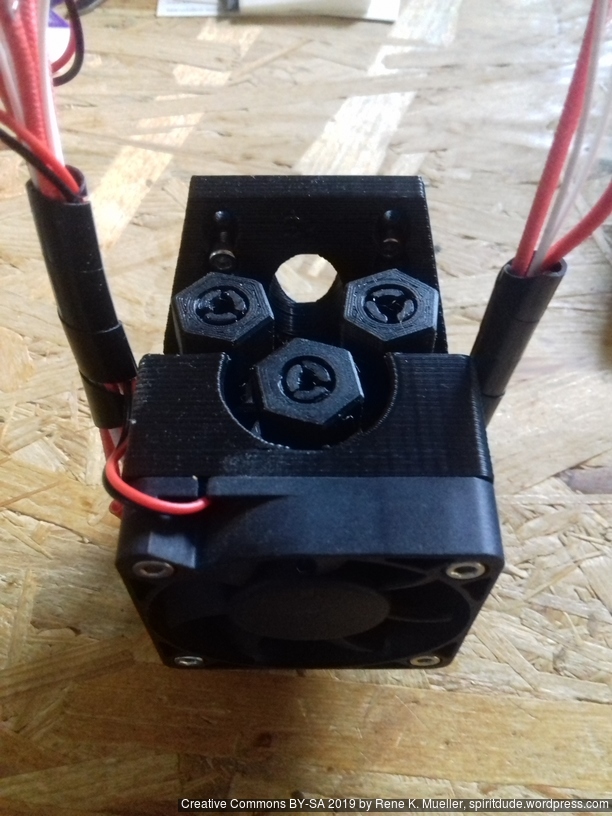
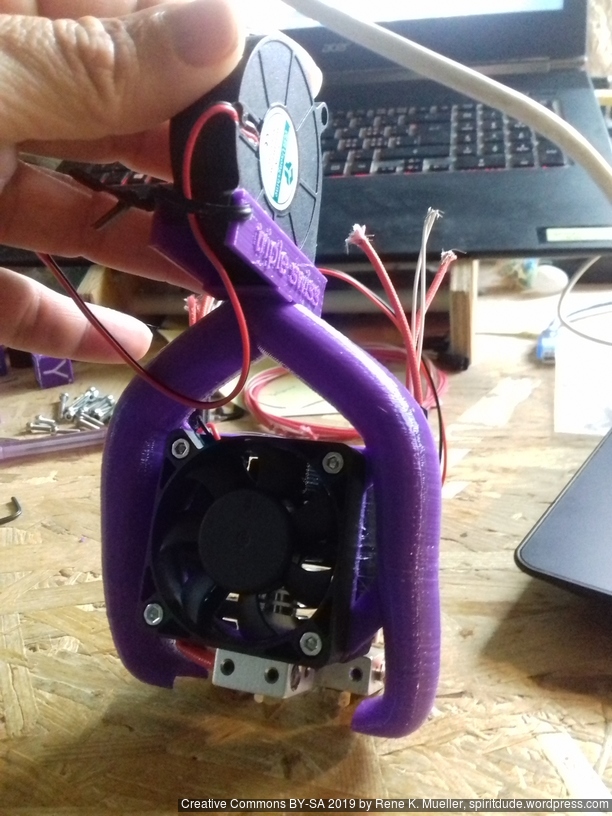
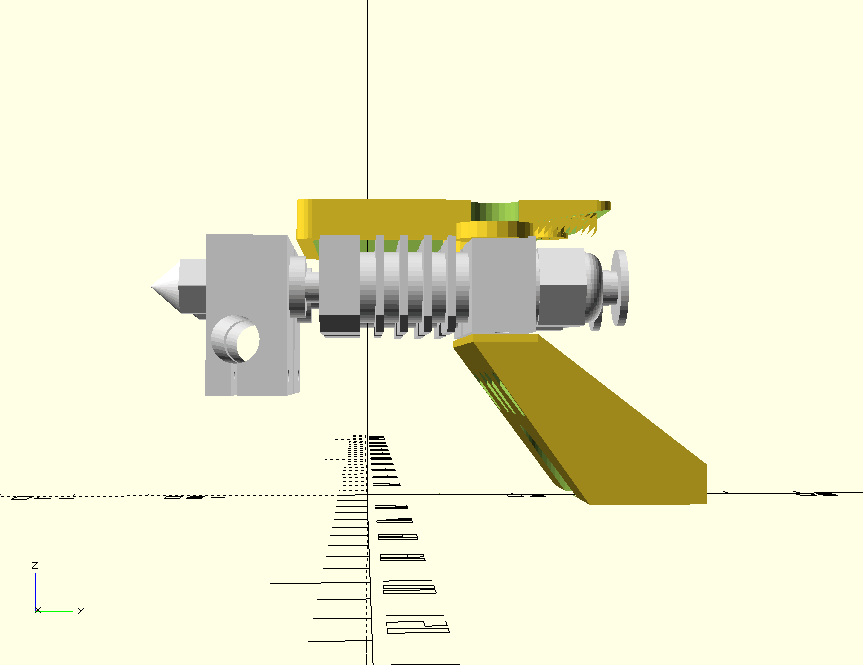
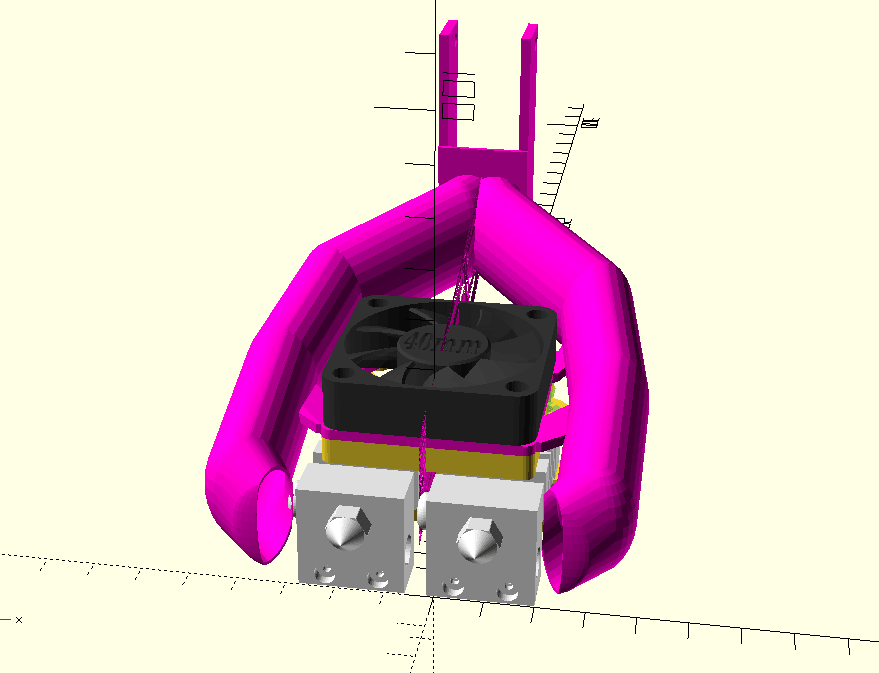
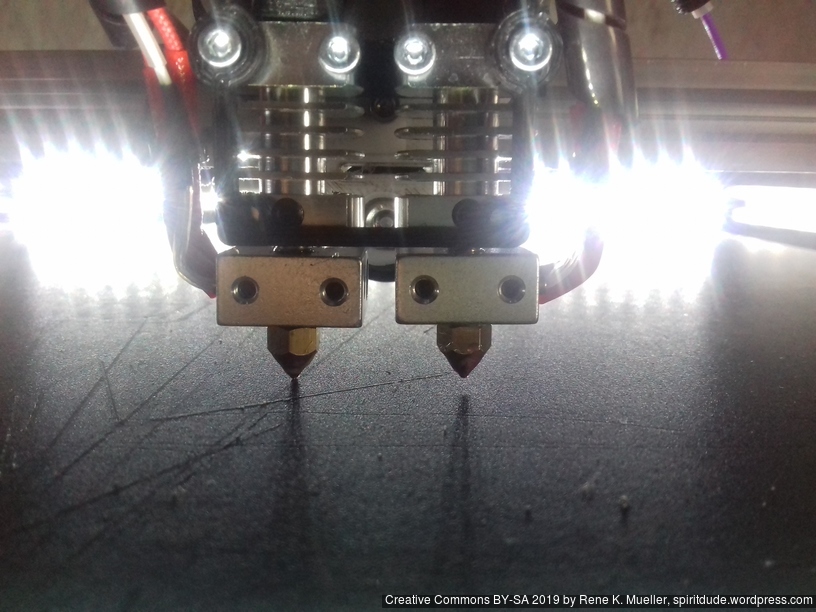
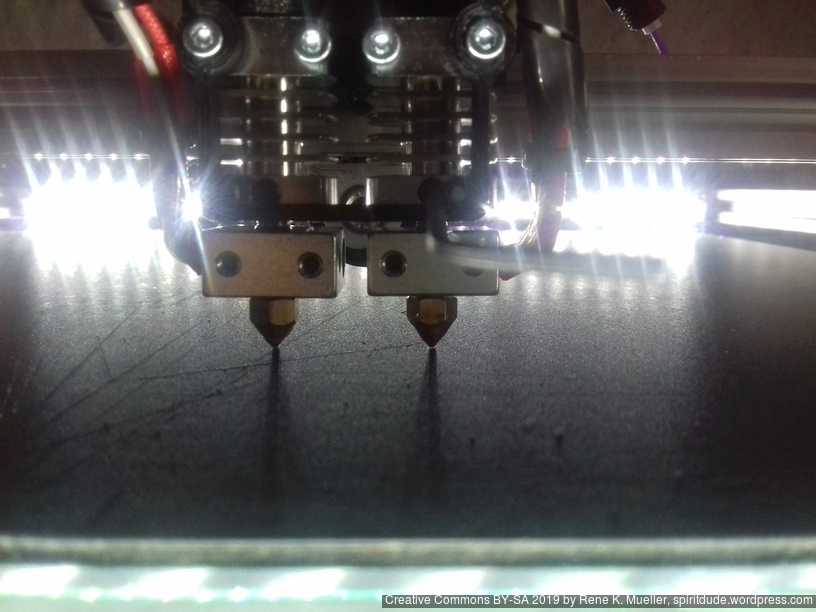
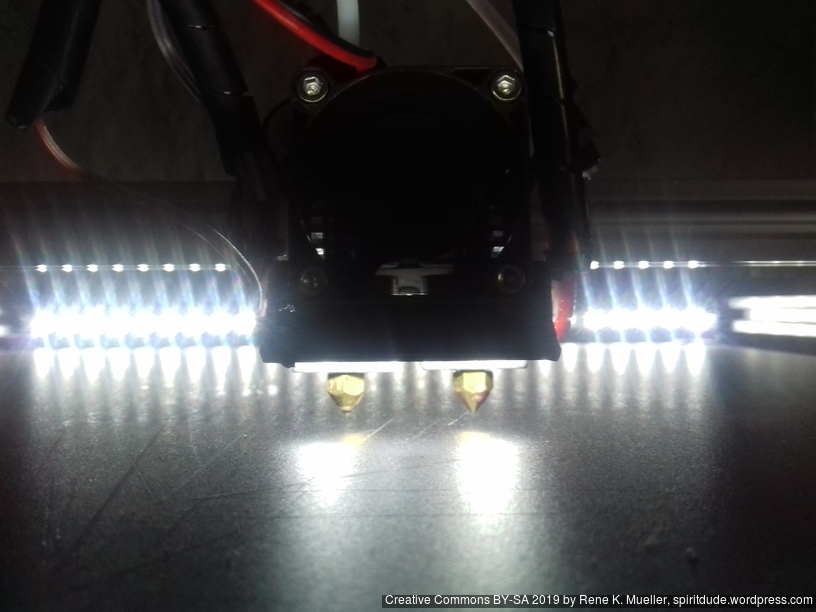
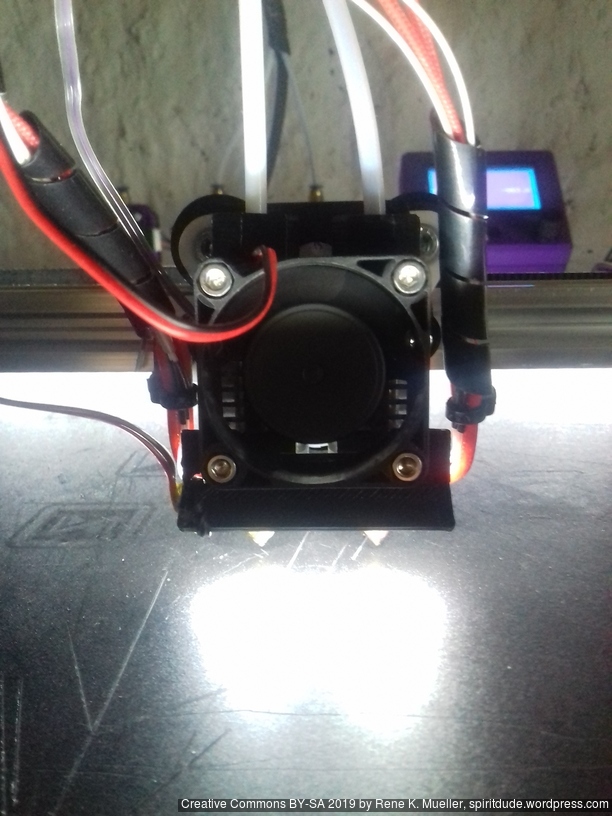
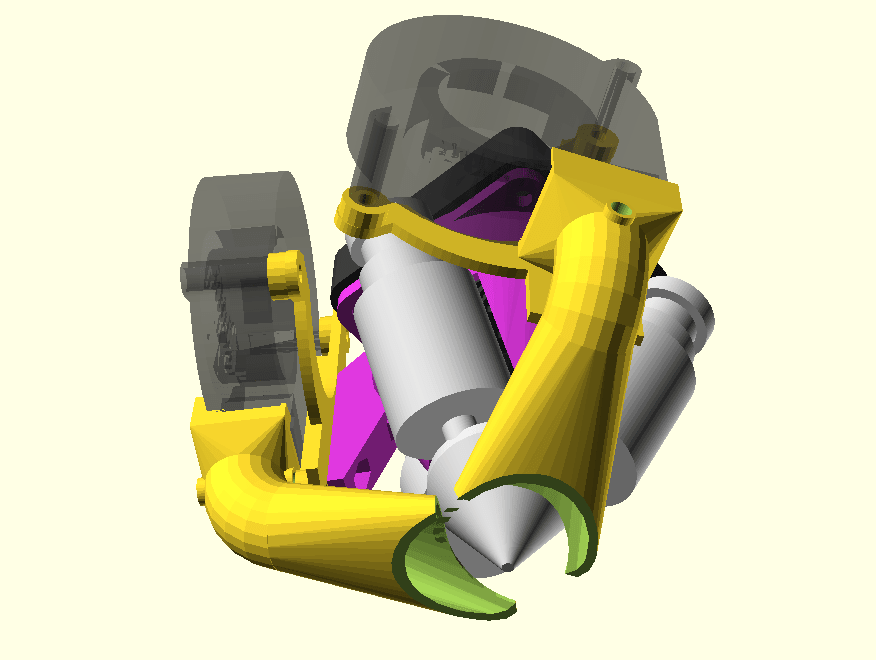
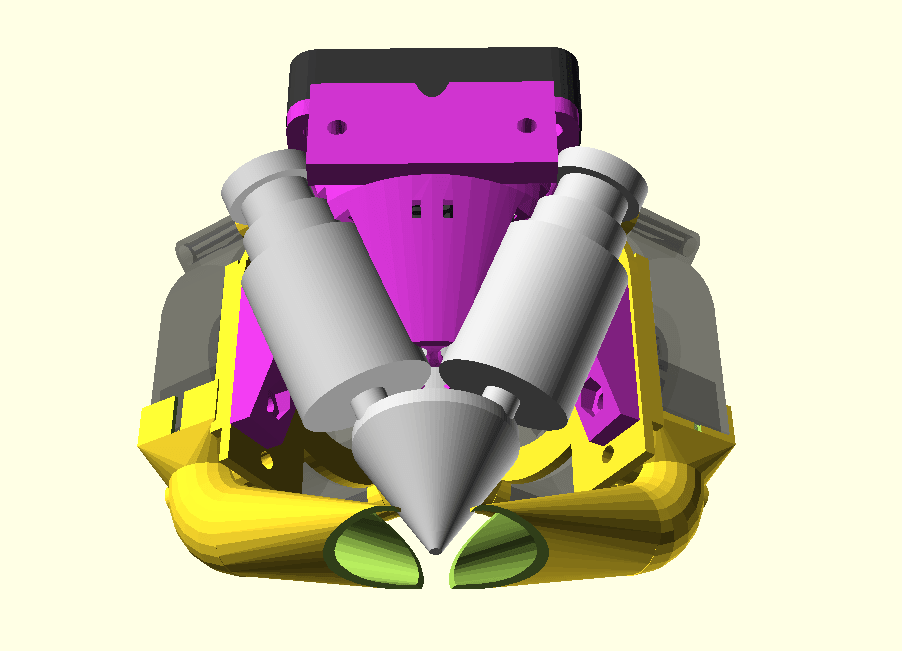
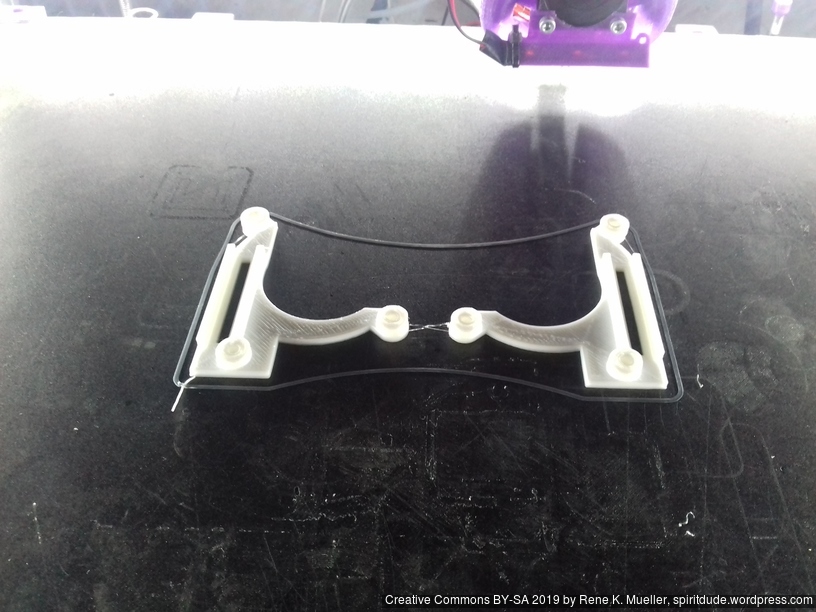
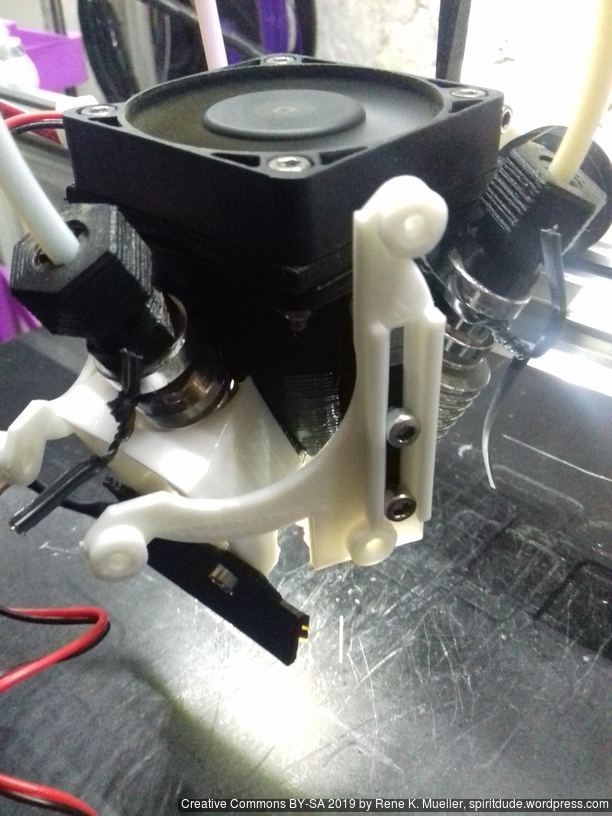
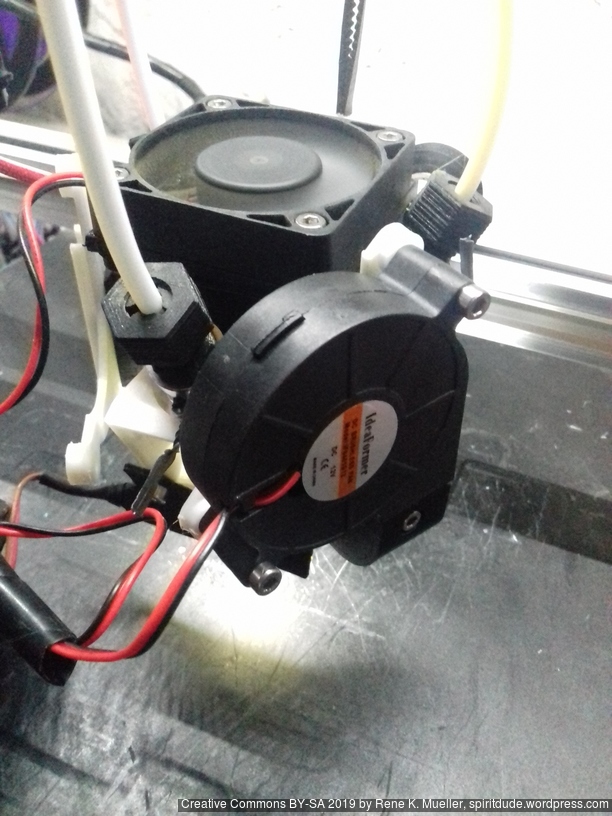
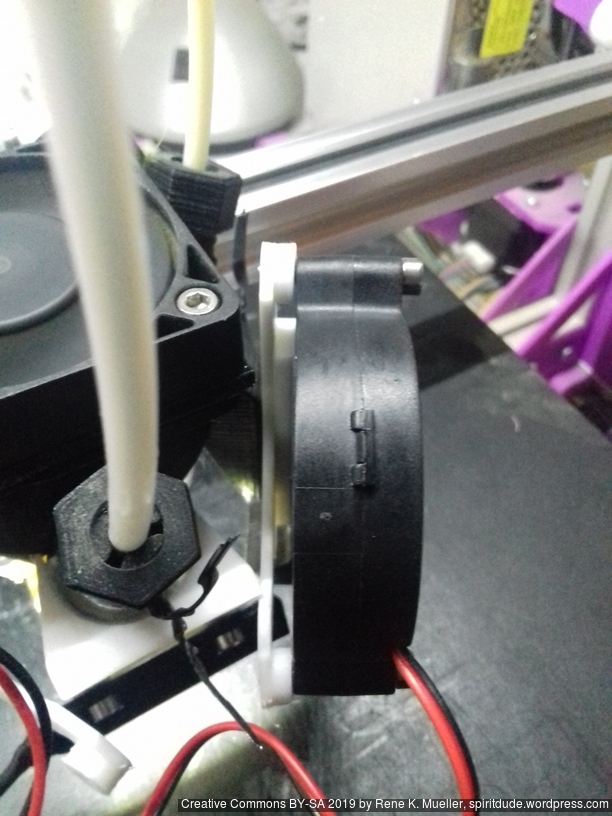
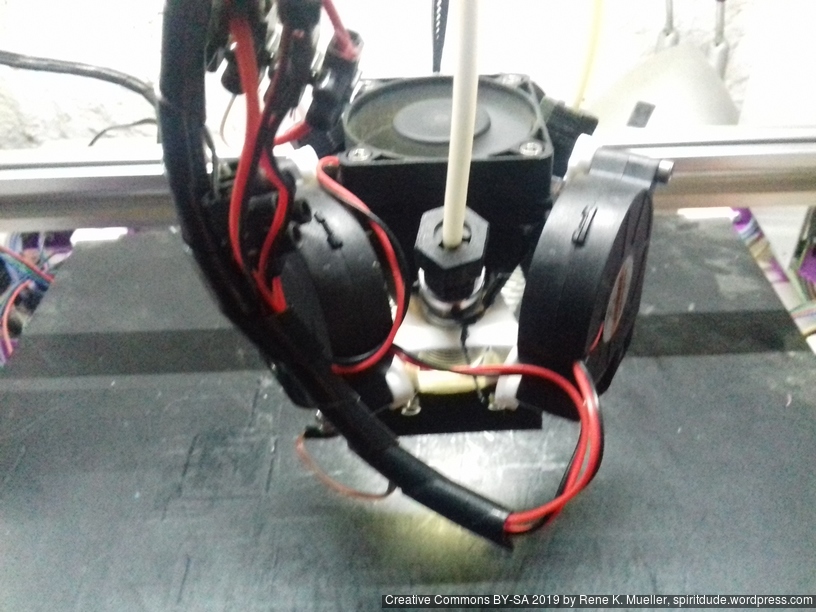
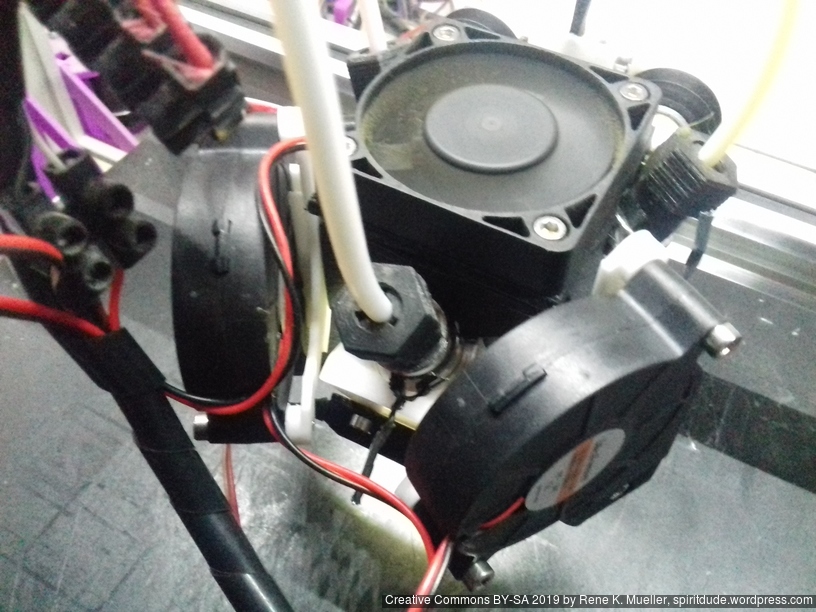
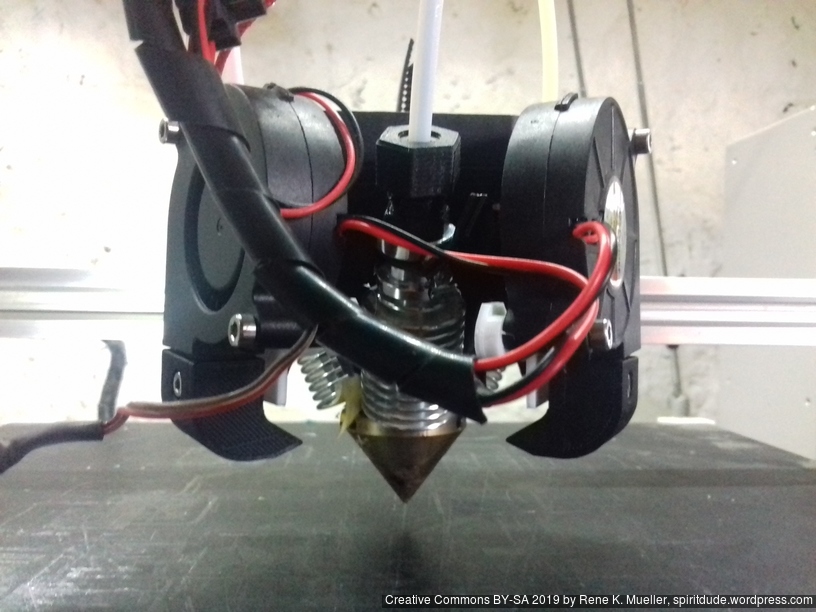
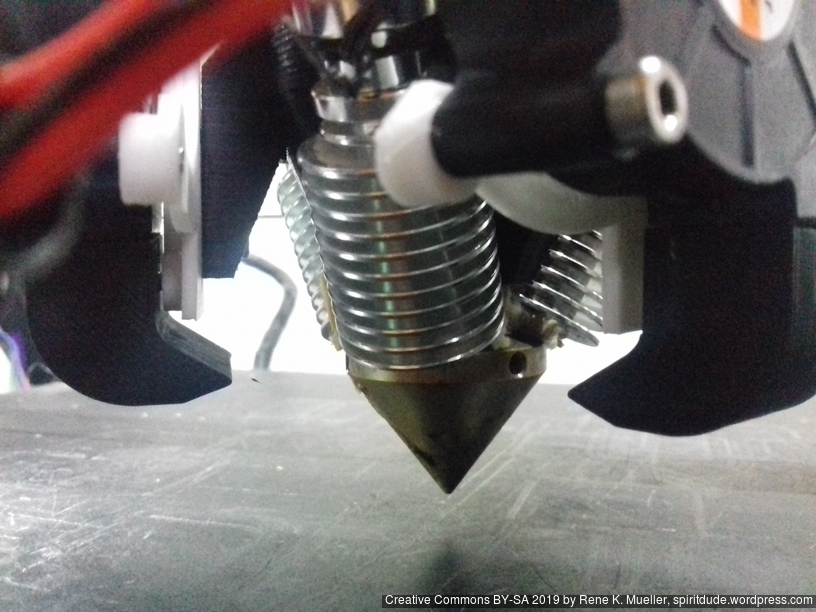
Assemble 3 nozzles in one go, and adding heatsink fan mount:
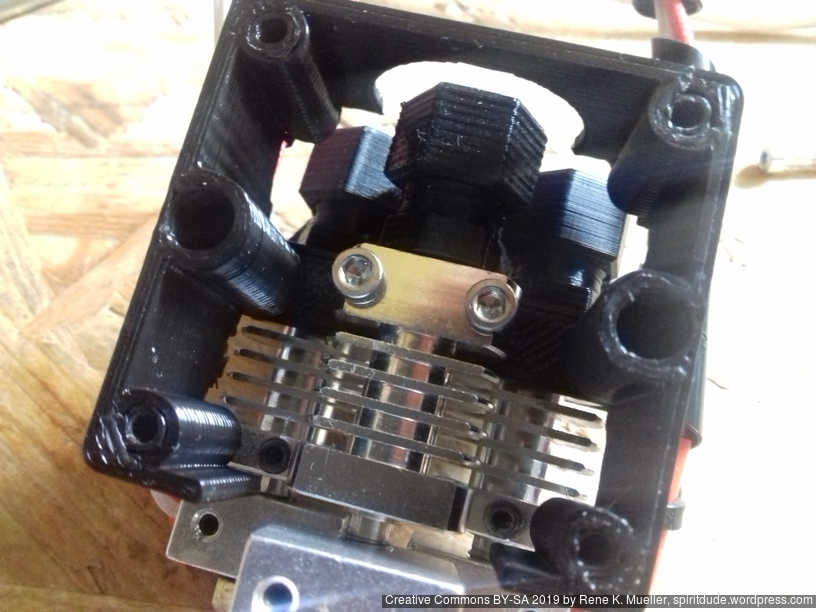
adding 50mm fan on top:
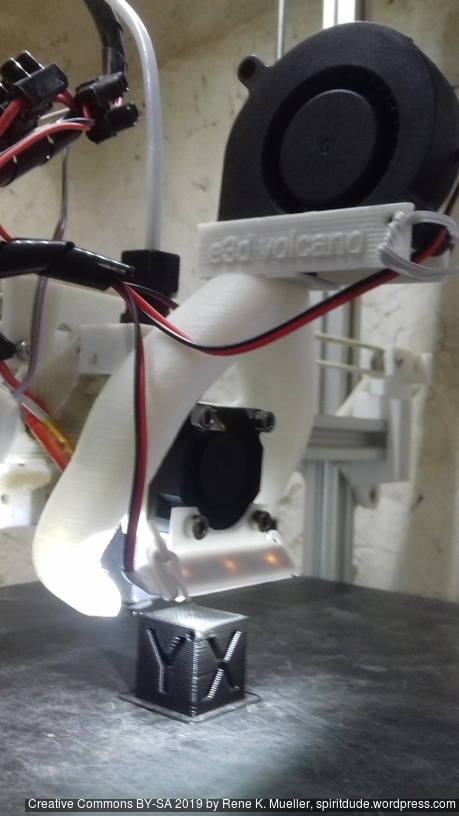
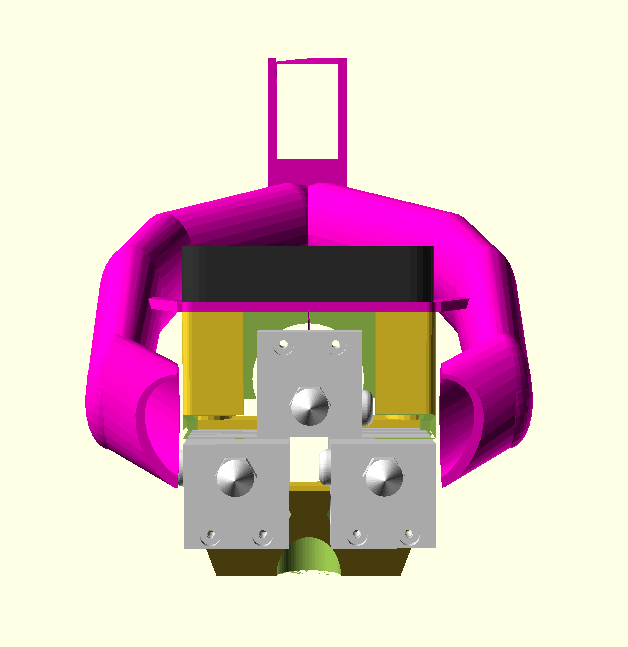
and with the dedicated Part Cooler using 5015 fan blower:
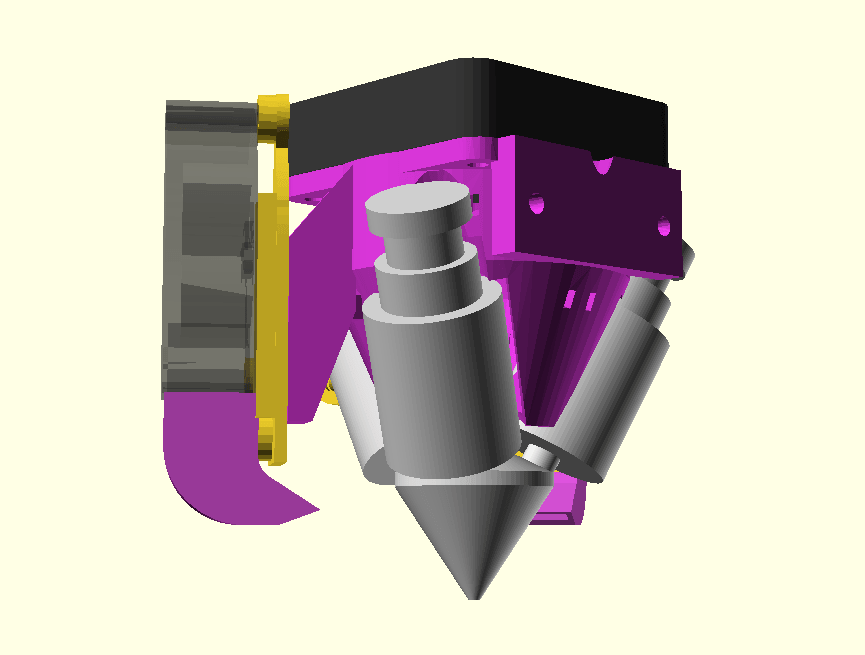
I recommend cover all nozzles with silicon socks when using the part cooler. Optionally LED strip mount in case you want some light on all three nozzles.
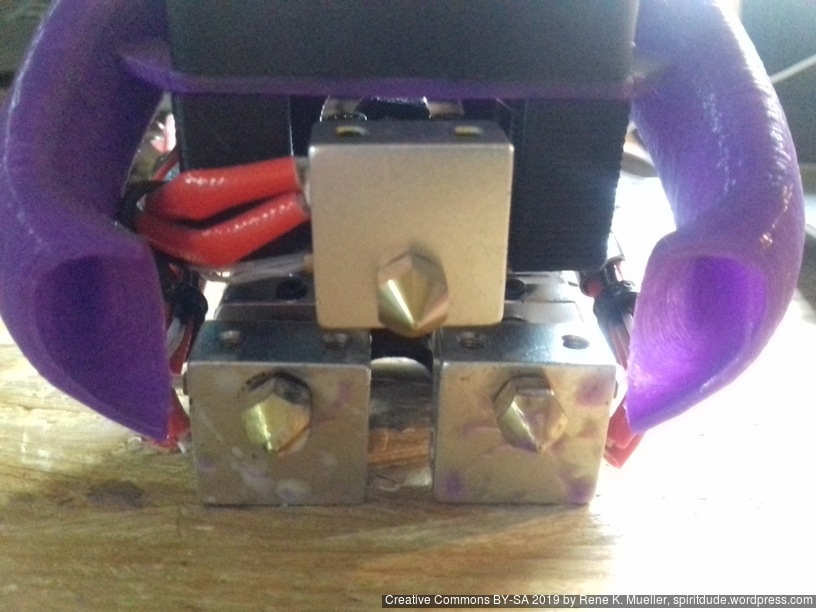
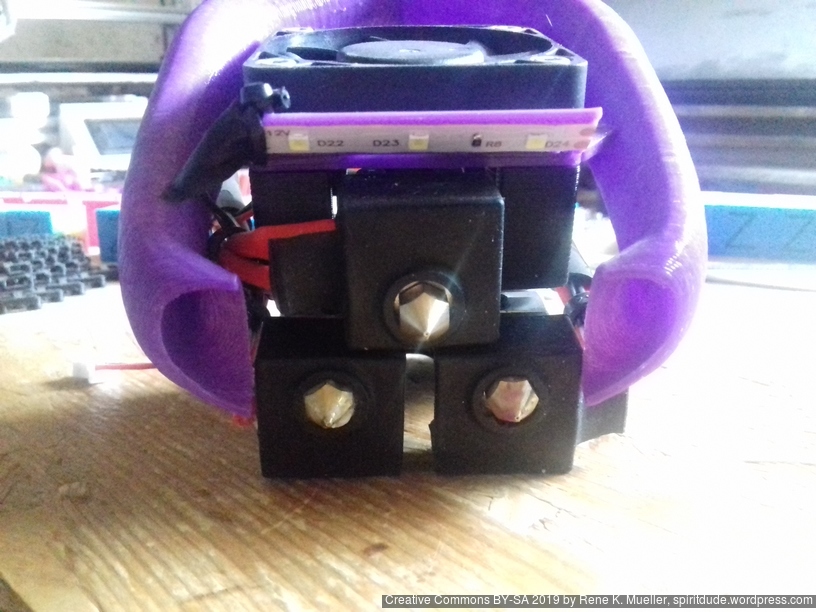
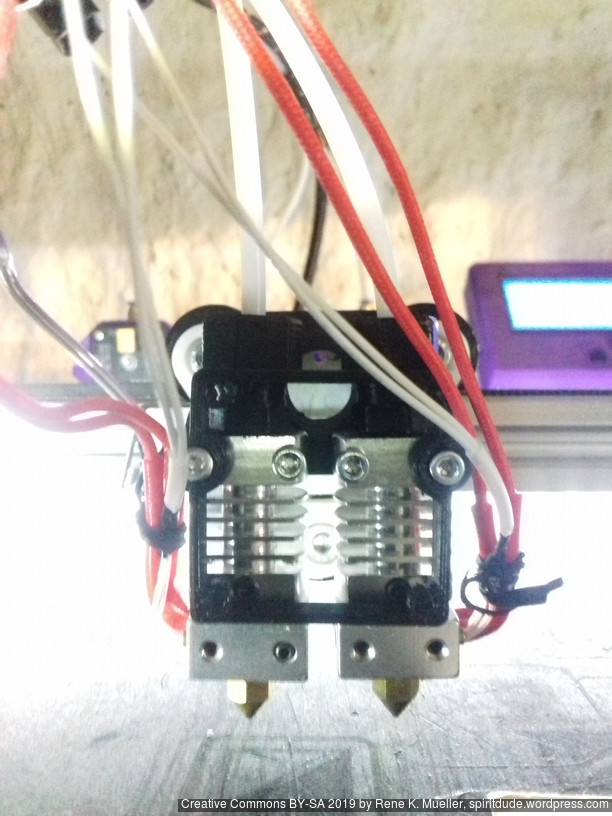
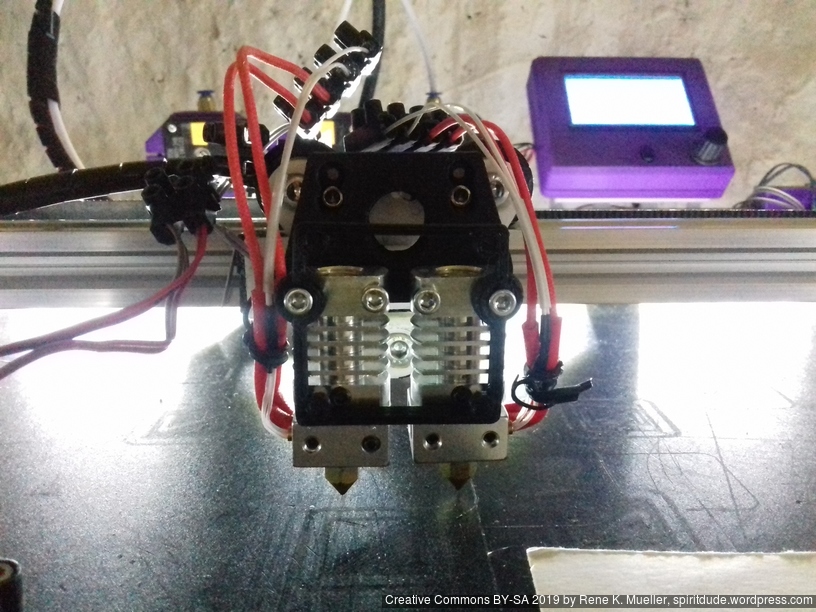
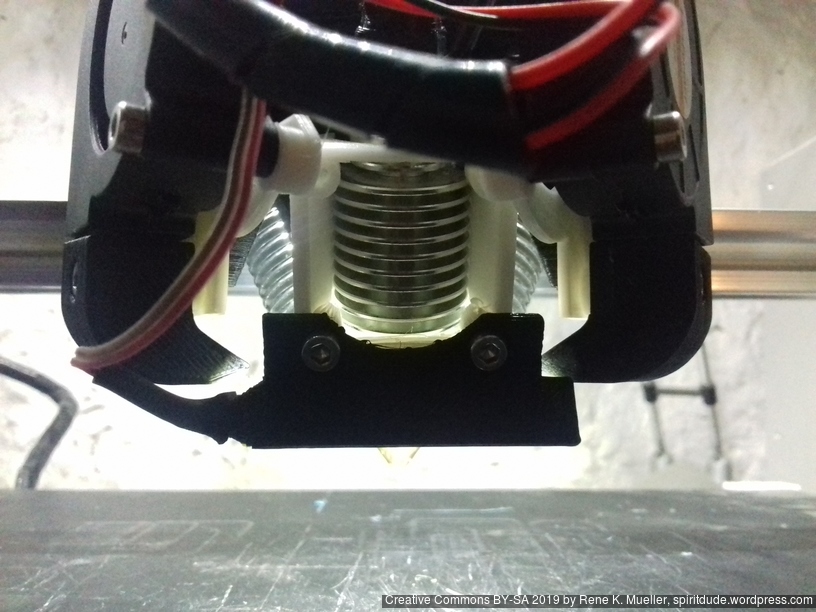
Leveling Three Nozzles
It’s essential that all three nozzles have the same distance to the bed, otherwise inactive nozzles might touch and tip-over a piece while printing. See Dual Nozzle Setup for the procedure.
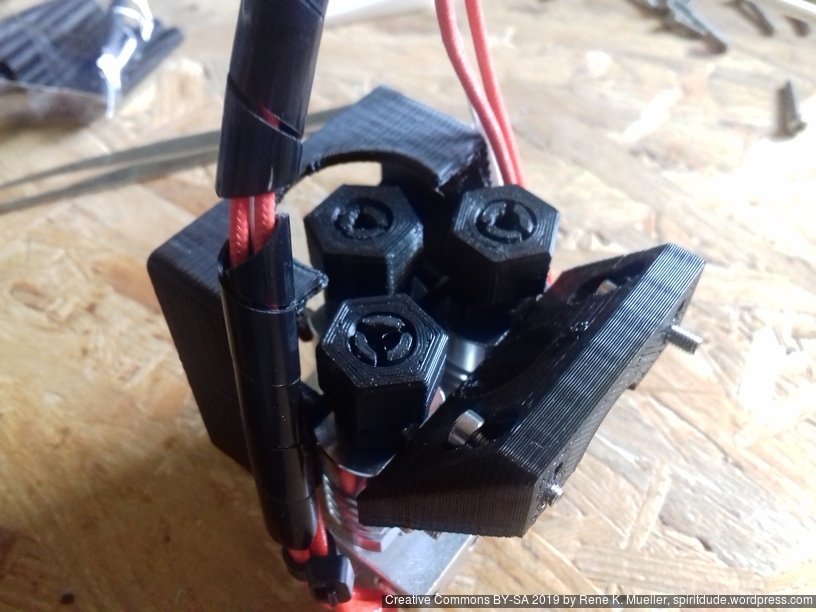
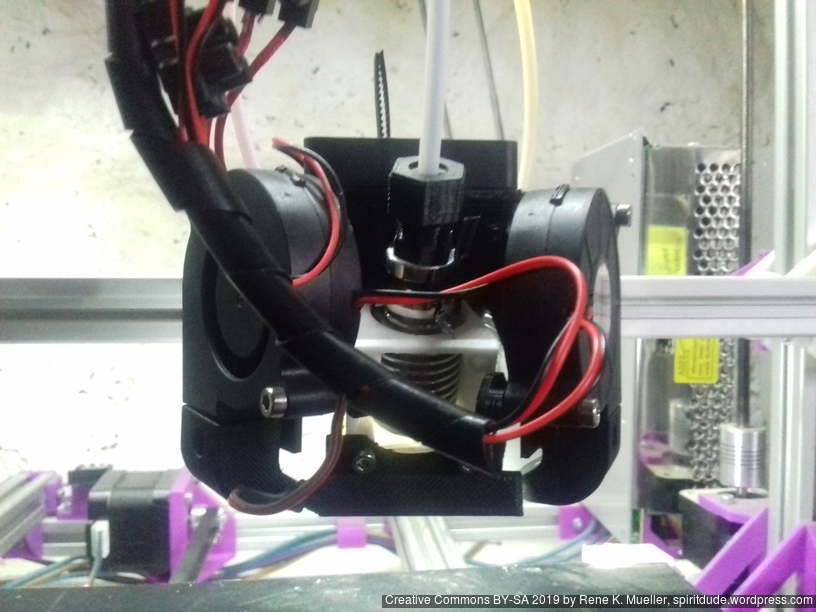
Third Hotend Wiring
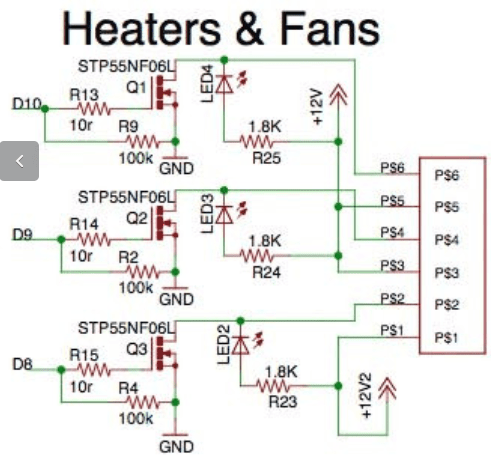
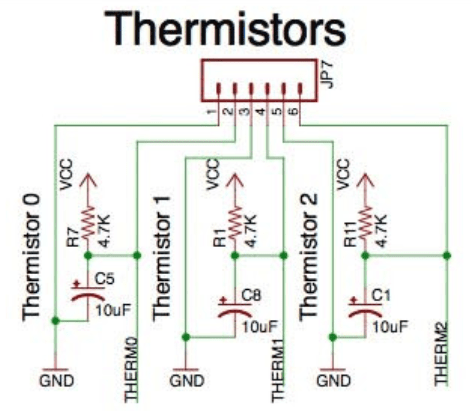
One requires a board with 3x MOSFETs to heat all three heatblocks and 3x thermistors inputs, like RUMBA or TANGO (Open Source variant of RUMBA) controller board or extend it with dedicated parts:
per heater: STP55NF06L (MOSFET) with 10R, 100K on a Dx (digital output); LED with 1.8K is optional
per thermistor: 4.7K with 10uF on a Ax (analog input)
You can define X offset via Gcode (e.g. as start gcode):
M218 T0 X0
M218 T1 X24 Y0
given T0/Extruder 1 is left, and T1/Extruder 2 is on the right.
Since “CR10 hotends” are really cheap and not precisely machined, there is too much margin in the mounting 3mm holes – hence, you likely have more or less of 24mm X offset, and possible even Y offset as well. Use a 2-color calibration model to tune the offsets.
in theory no purge block, but if ooze shields are shared among switching extrusions (more than 2 extrusions) there may be cross-contamination between colors/materials
the printheads individually are proven to be reliable
Hints:
single heatblock = same print temperature
dual heatblock = different print temperatures possible
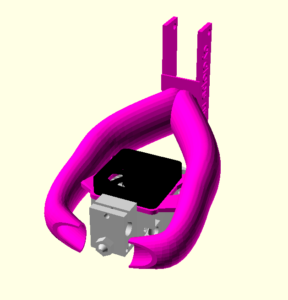
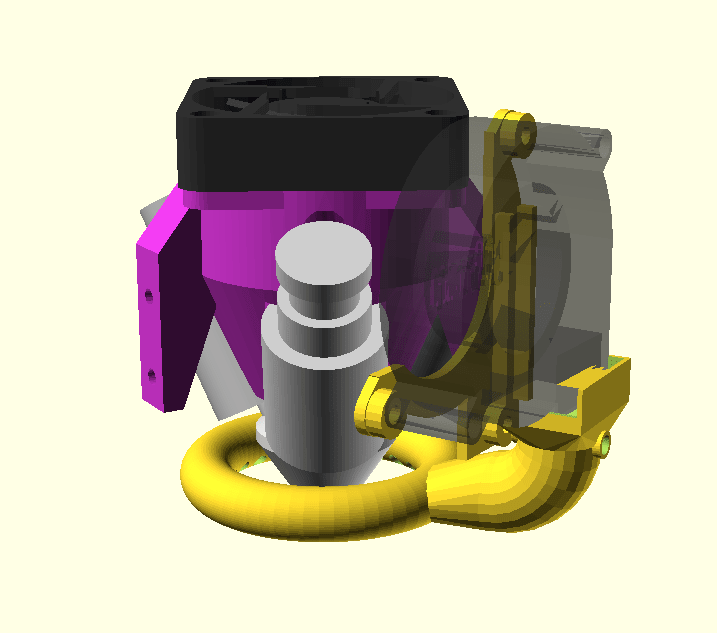
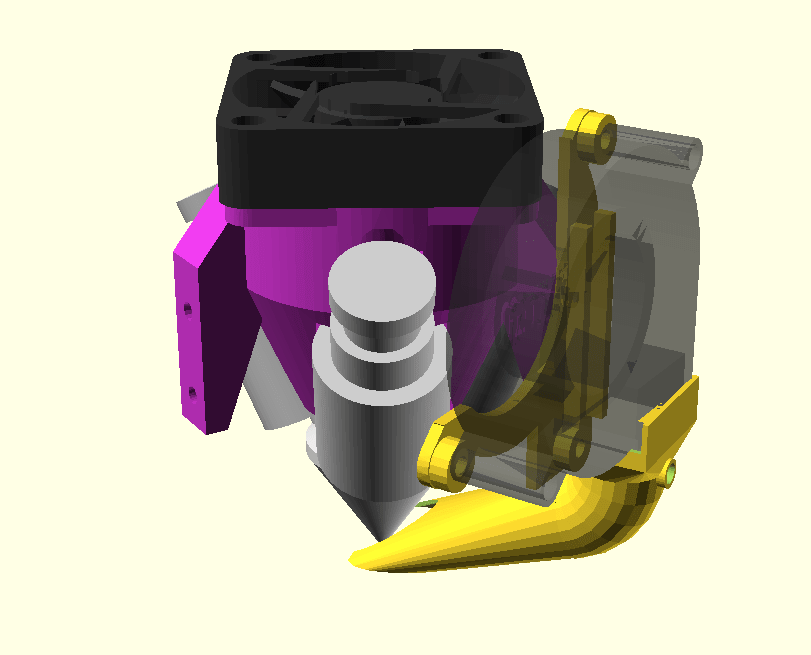
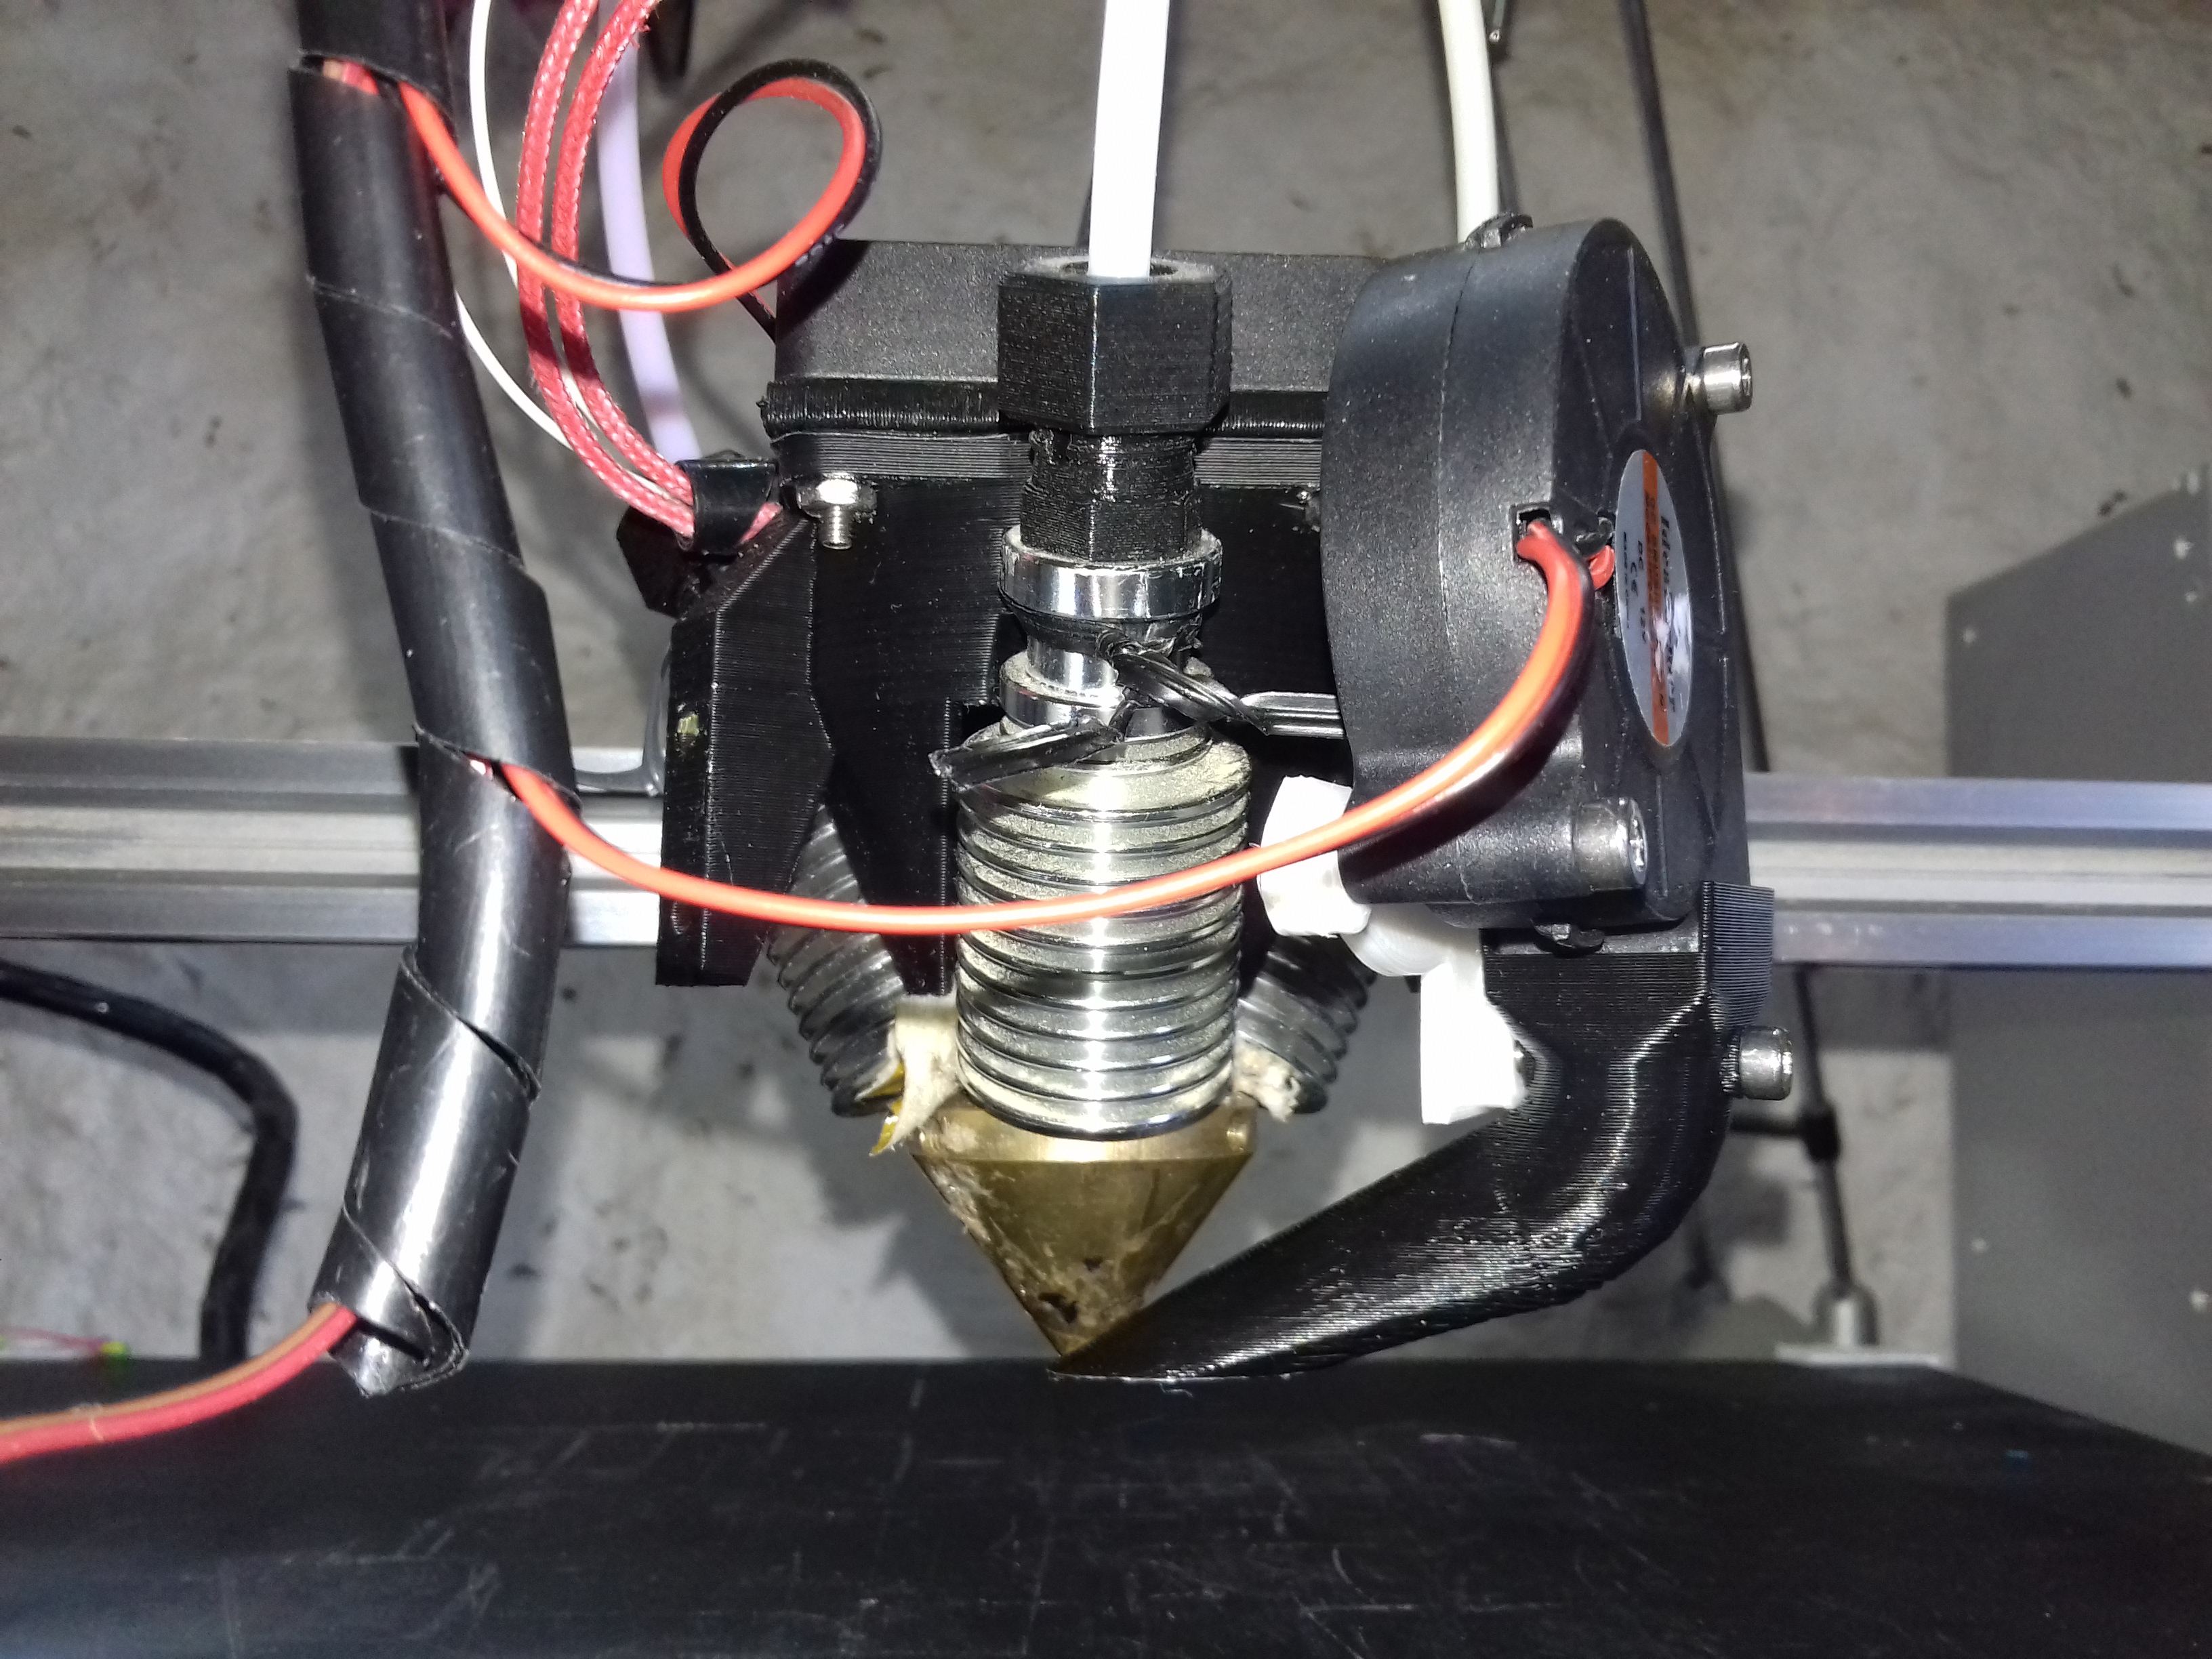
The past weeks (2019/09) I adapted existing Part Cooler designs, and redesigned them in order to work with the Diamond Hotend, as I have been searching for a good part cooler option and did not succeed with what’s out there already.
So here my 3 designs so far with a short review of their use quality:
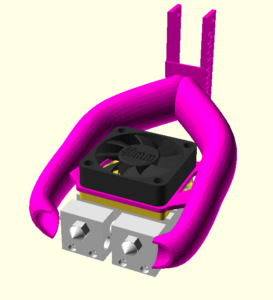
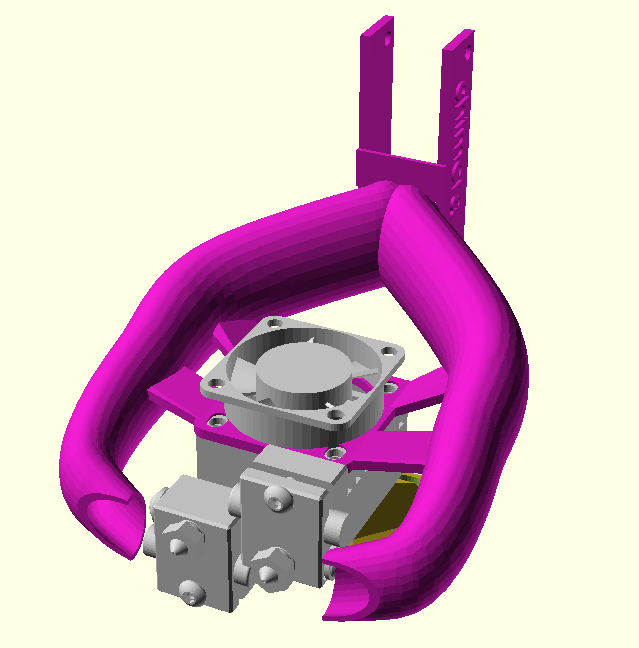
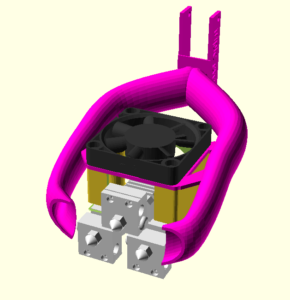
Dual (or Single) Short Fan Shrouds
At the first sight this looks a promising design, but in reality there were major drawbacks:
adjustment of height (vertical) was critical and required fine-tuning
tendency to cool down the nozzle instead of the molten filament, in particular at lower layers near the bed
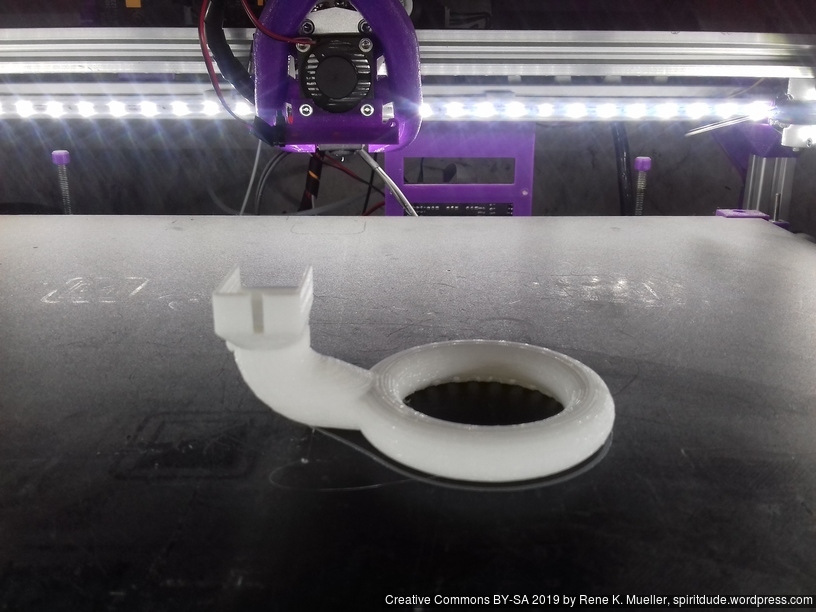
As next I designed the ring cooler, with small holes around the nozzle, also adjustable in the height (Z), but the cooling wasn’t really sufficient, as the nozzle still was cooling off a lot (no more than 45% cooling fan with 5015 blower was possible) – quite a disappointment for the rather sophisticated setup, but this general “ring cooler” design has failed for me also for other printheads like E3D V6 or so, and I switched back to “bull horn” like fan shroud.
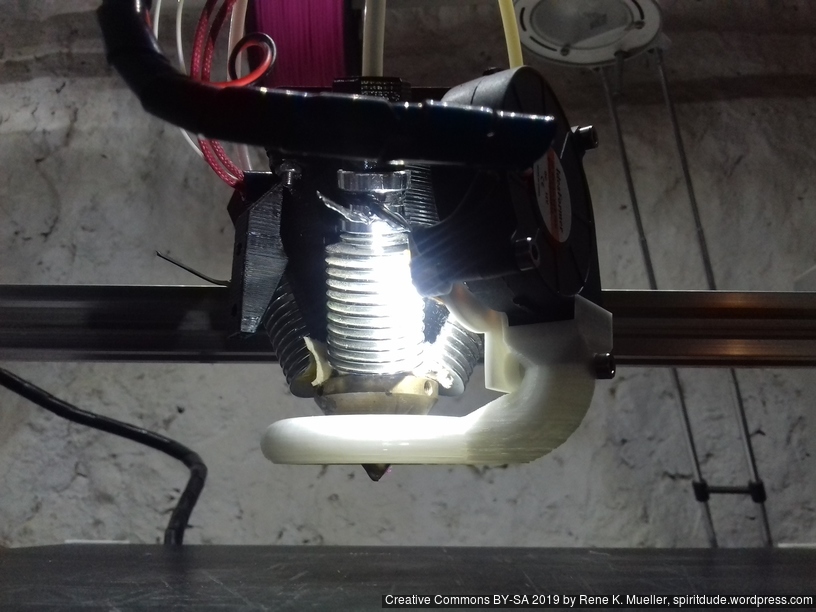
This rather simple design turned out the best option so far:
wide: 5015 blower runs at 80% without cooling the nozzle too much
narrow: 5015 blower runs at 50% without cooling the nozzle too much
creates sufficient disturbance around the nozzle to cool opposite side as well
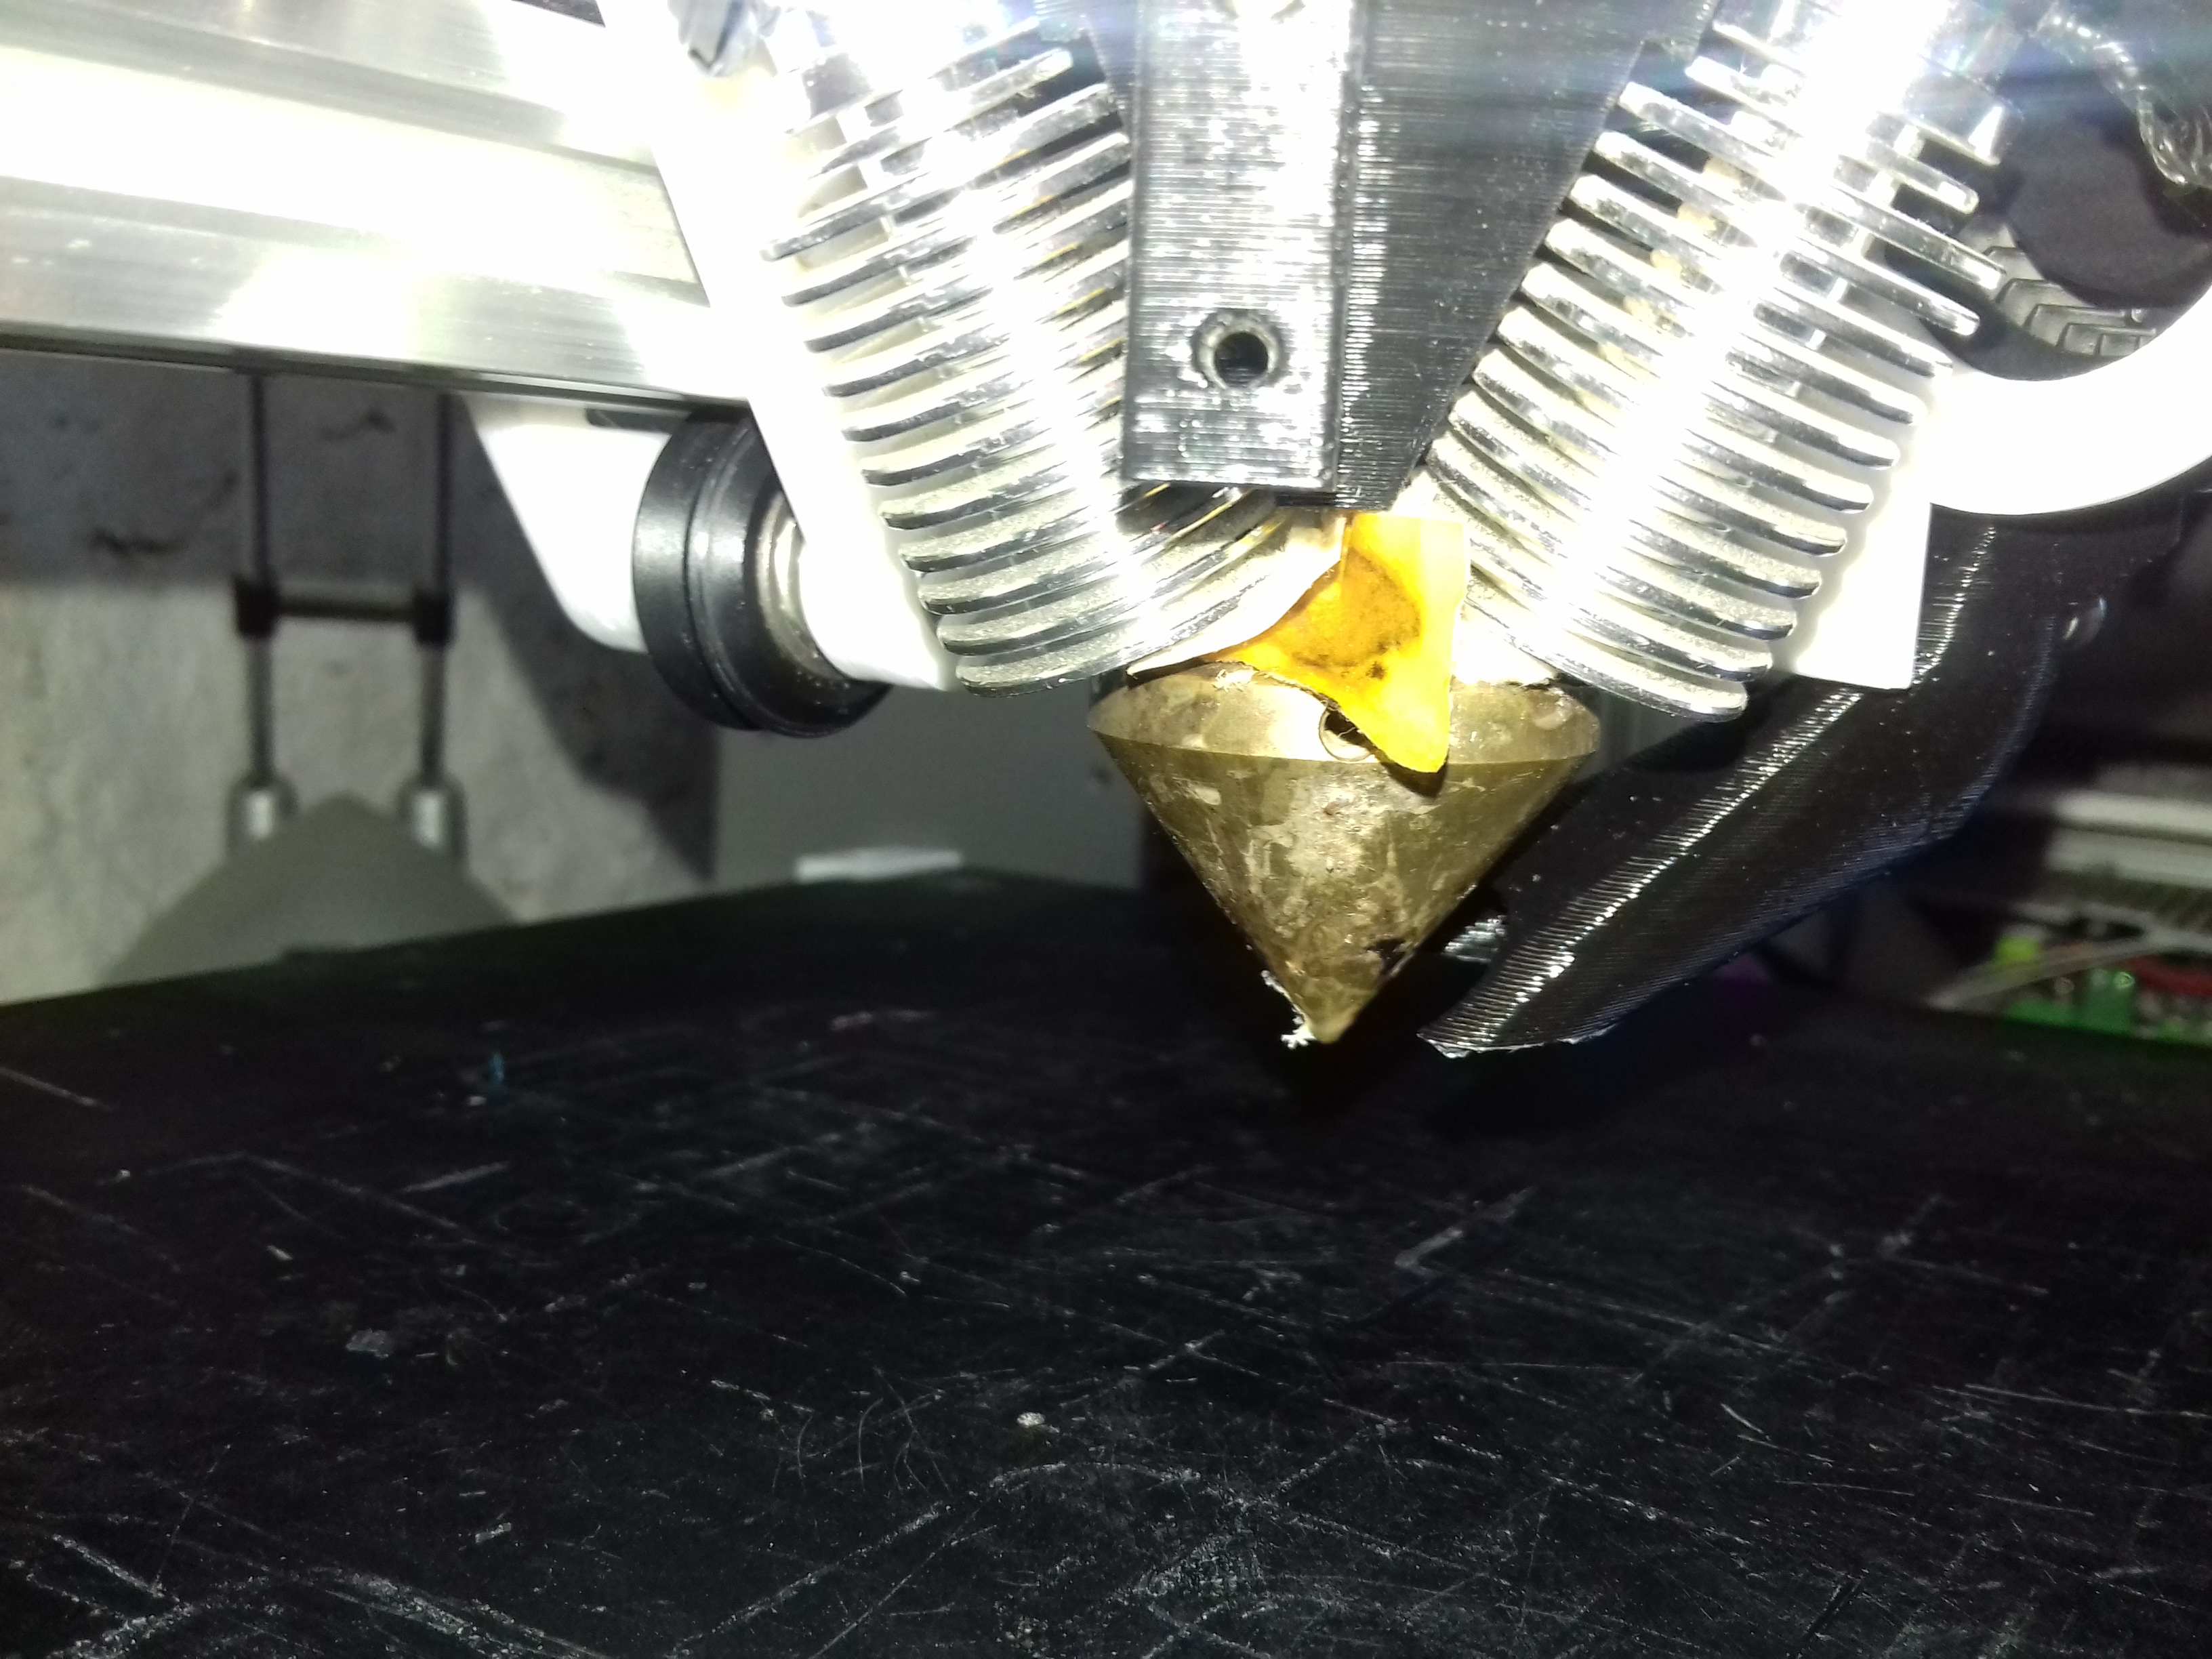
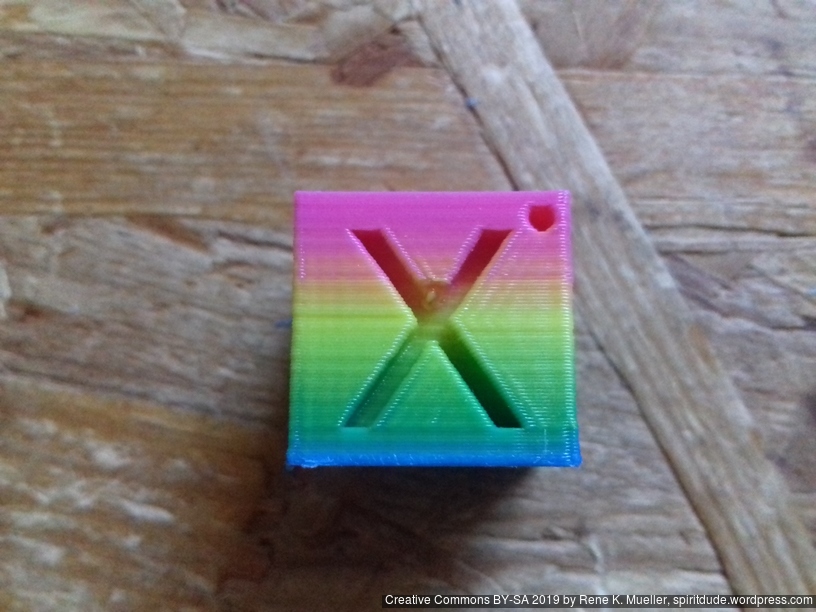
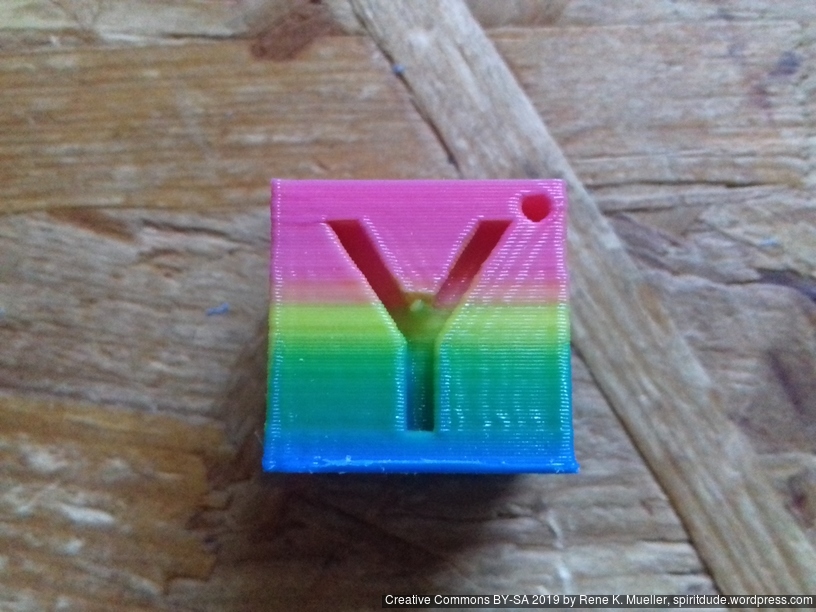
and the XYZ 20mm Hollow Calibration Cubes came out quite well, on all 4 sides the letters were printed OK – not as good as E3D V6 and other printheads.
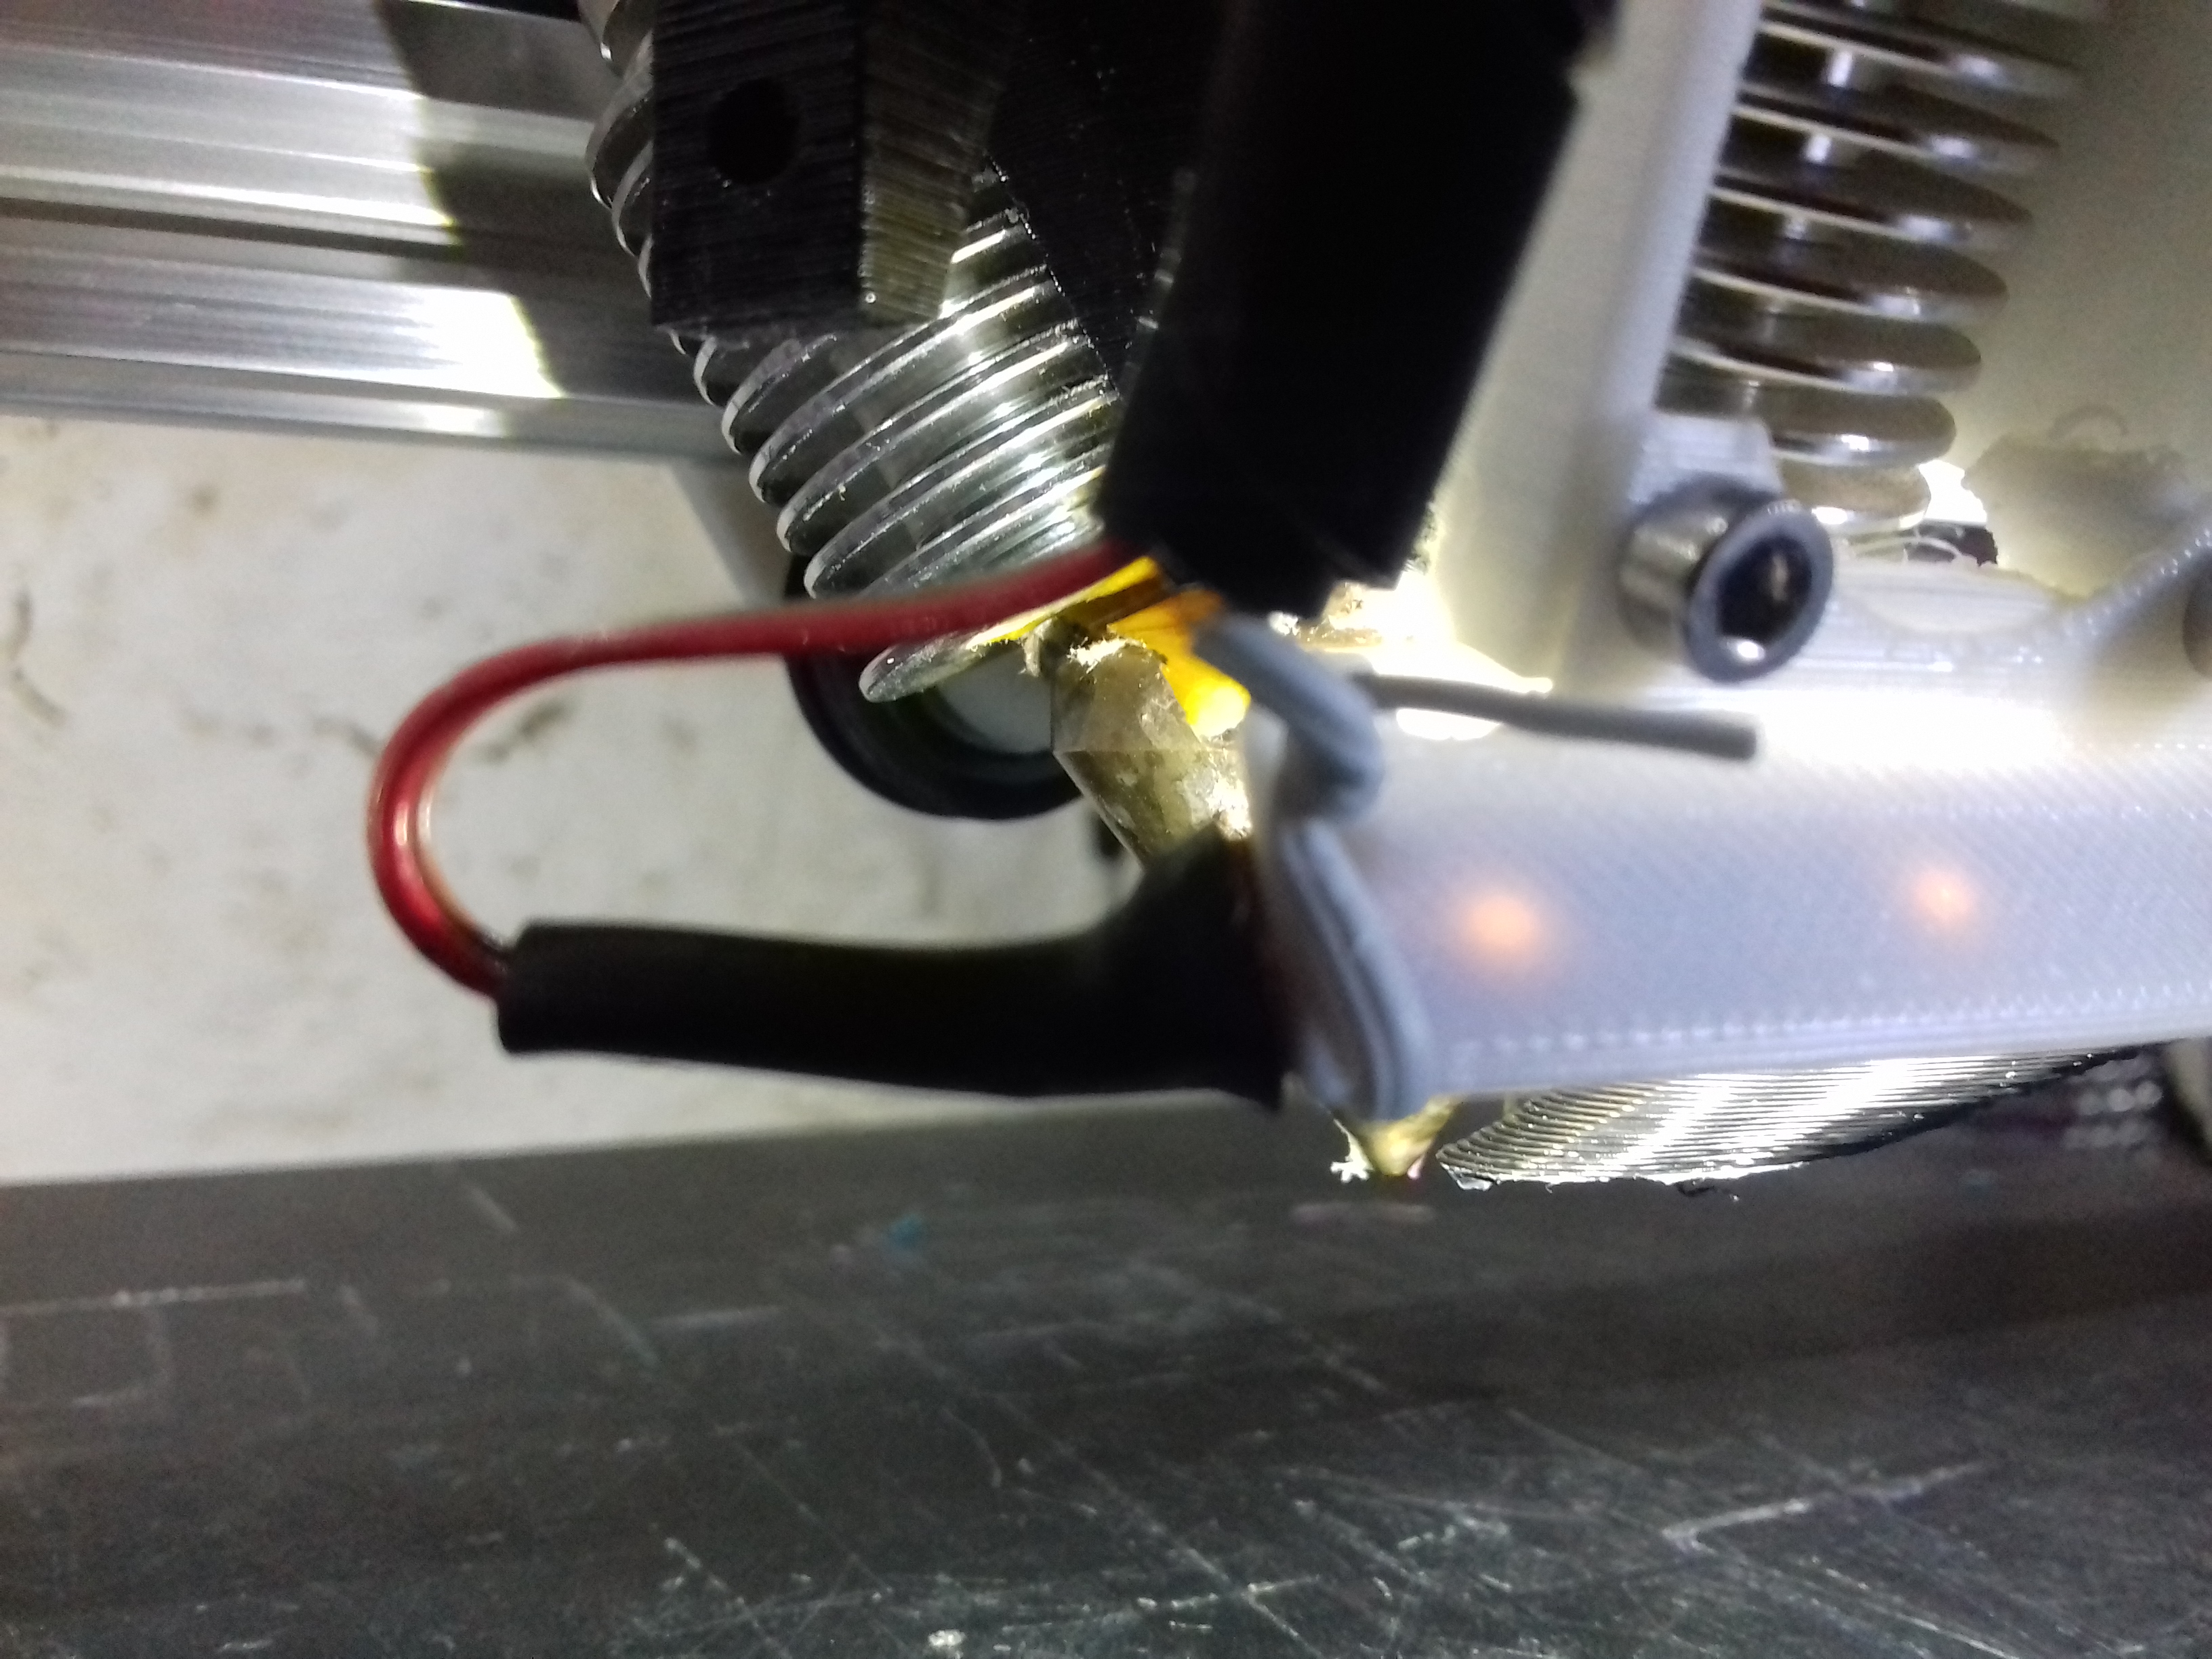
Although it seemed logical to use two direct cooler, but the amount of air around the nozzle in operation was too much, and it required 20% fan cooling so the nozzle was still properly heated, but this was too low to provide any sufficient part cooling. So this option, without silicon sock on the Diamond Hotend, is not suitable.
Rating: ★★★★★
Summary
The winner is the Directional Part Cooler as it brings the cool air close enough where the molten filament exits the nozzle, without affecting the bare nozzle too much. As mentioned, either way a silicon sock would be recommended when using a part cooler with the Diamond Hotend – so far (2019/09) there is no commercial source but DIY approach with this thing.
As you can see I used simple E3D V6 Fan mount in combination of LED Strip holder to lighten up the tip of the nozzle and the printing operation.
Even though the air output is close to the nozzle tip, you might reduce the fan
-narrow: use ~50% fan cooling, position as low to the nozzle height as possible (e.g. 2mm above, not less, not more)
-wide: use ~80% fan cooling: more tolerant on vertical position / height
to avoid cooling the nozzle and run into “THERMAL RUNAWAY” error – or you use a Diamond Hotend silicon sock, then you likely are able to use 100% cooling fan.
XYZ Hollow Calibration Cube with 3 Colors Mixed
The actual success of this setup is seen in this test cube (printable with 0% infill):
The “X” and “Y” junctions are quite well printed, not as good with a “bull horn” part cooler as with E3D V6 setup.
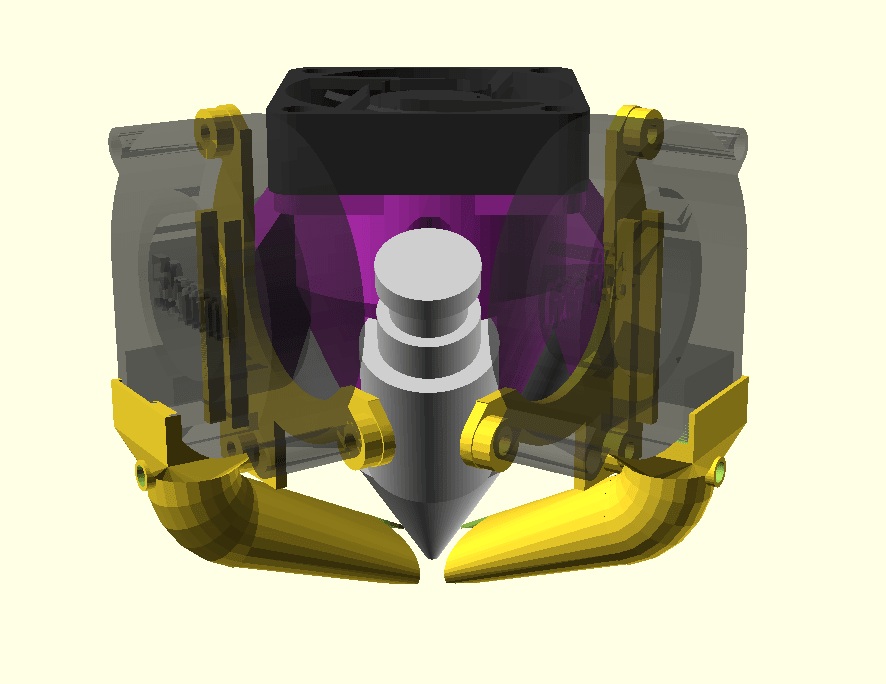
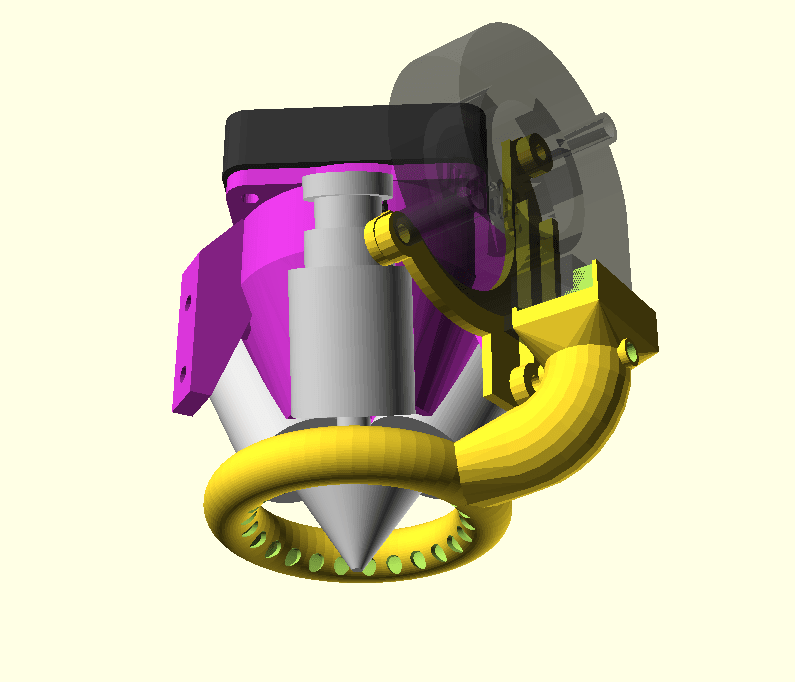
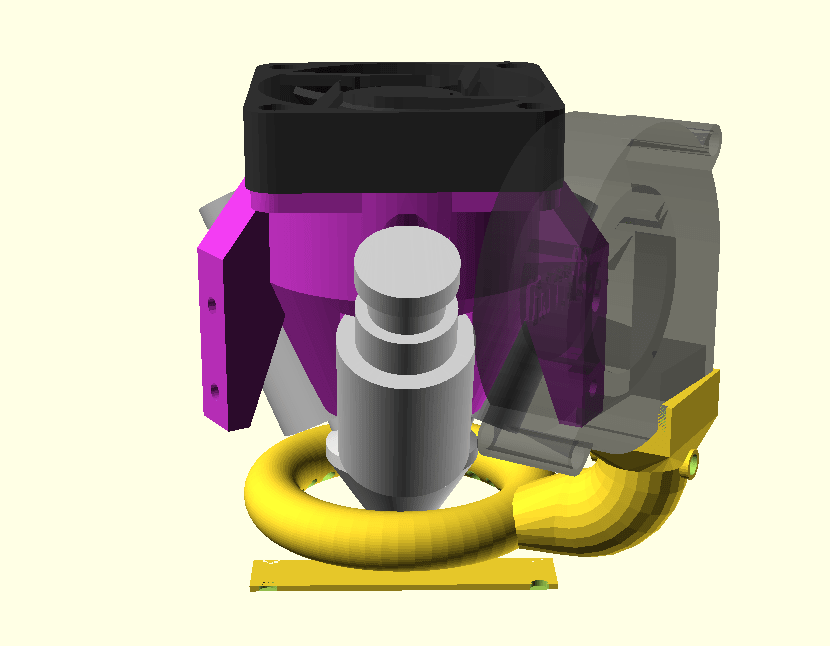
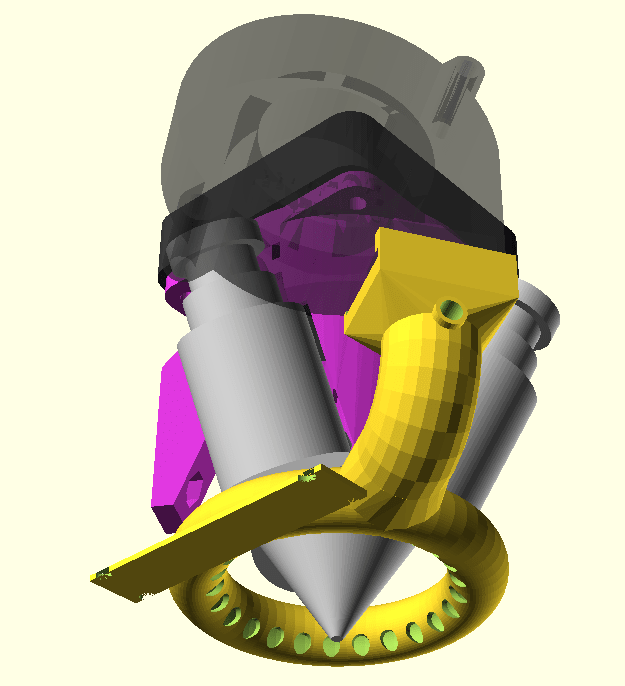
Addendum: Dual Directional Cooler
Although this looks like a nice setup, the overall output of air to the nozzle is overpowering and cools off the nozzle too much. The cooling fan, in my case, required reduction to 20% to avoid “THERMAL RUNAWAY ERROR”, but at 20% the cooling effect on the extruded filament was less optional than with a single directional cooler – therefore this option isn’t recommended, unless you have a silicon sock over the nozzle.
Best print ring_part_cooler in white PLA, as it obstructs the nozzle quite a lot and if you use LED strip to lighten up the nozzle, white PLA might help to keep the brightness.
Pros:
adjust vertical distance of ring to bed/nozzle
Cons:
vertical position only adjustable when 5015 blower is deattached
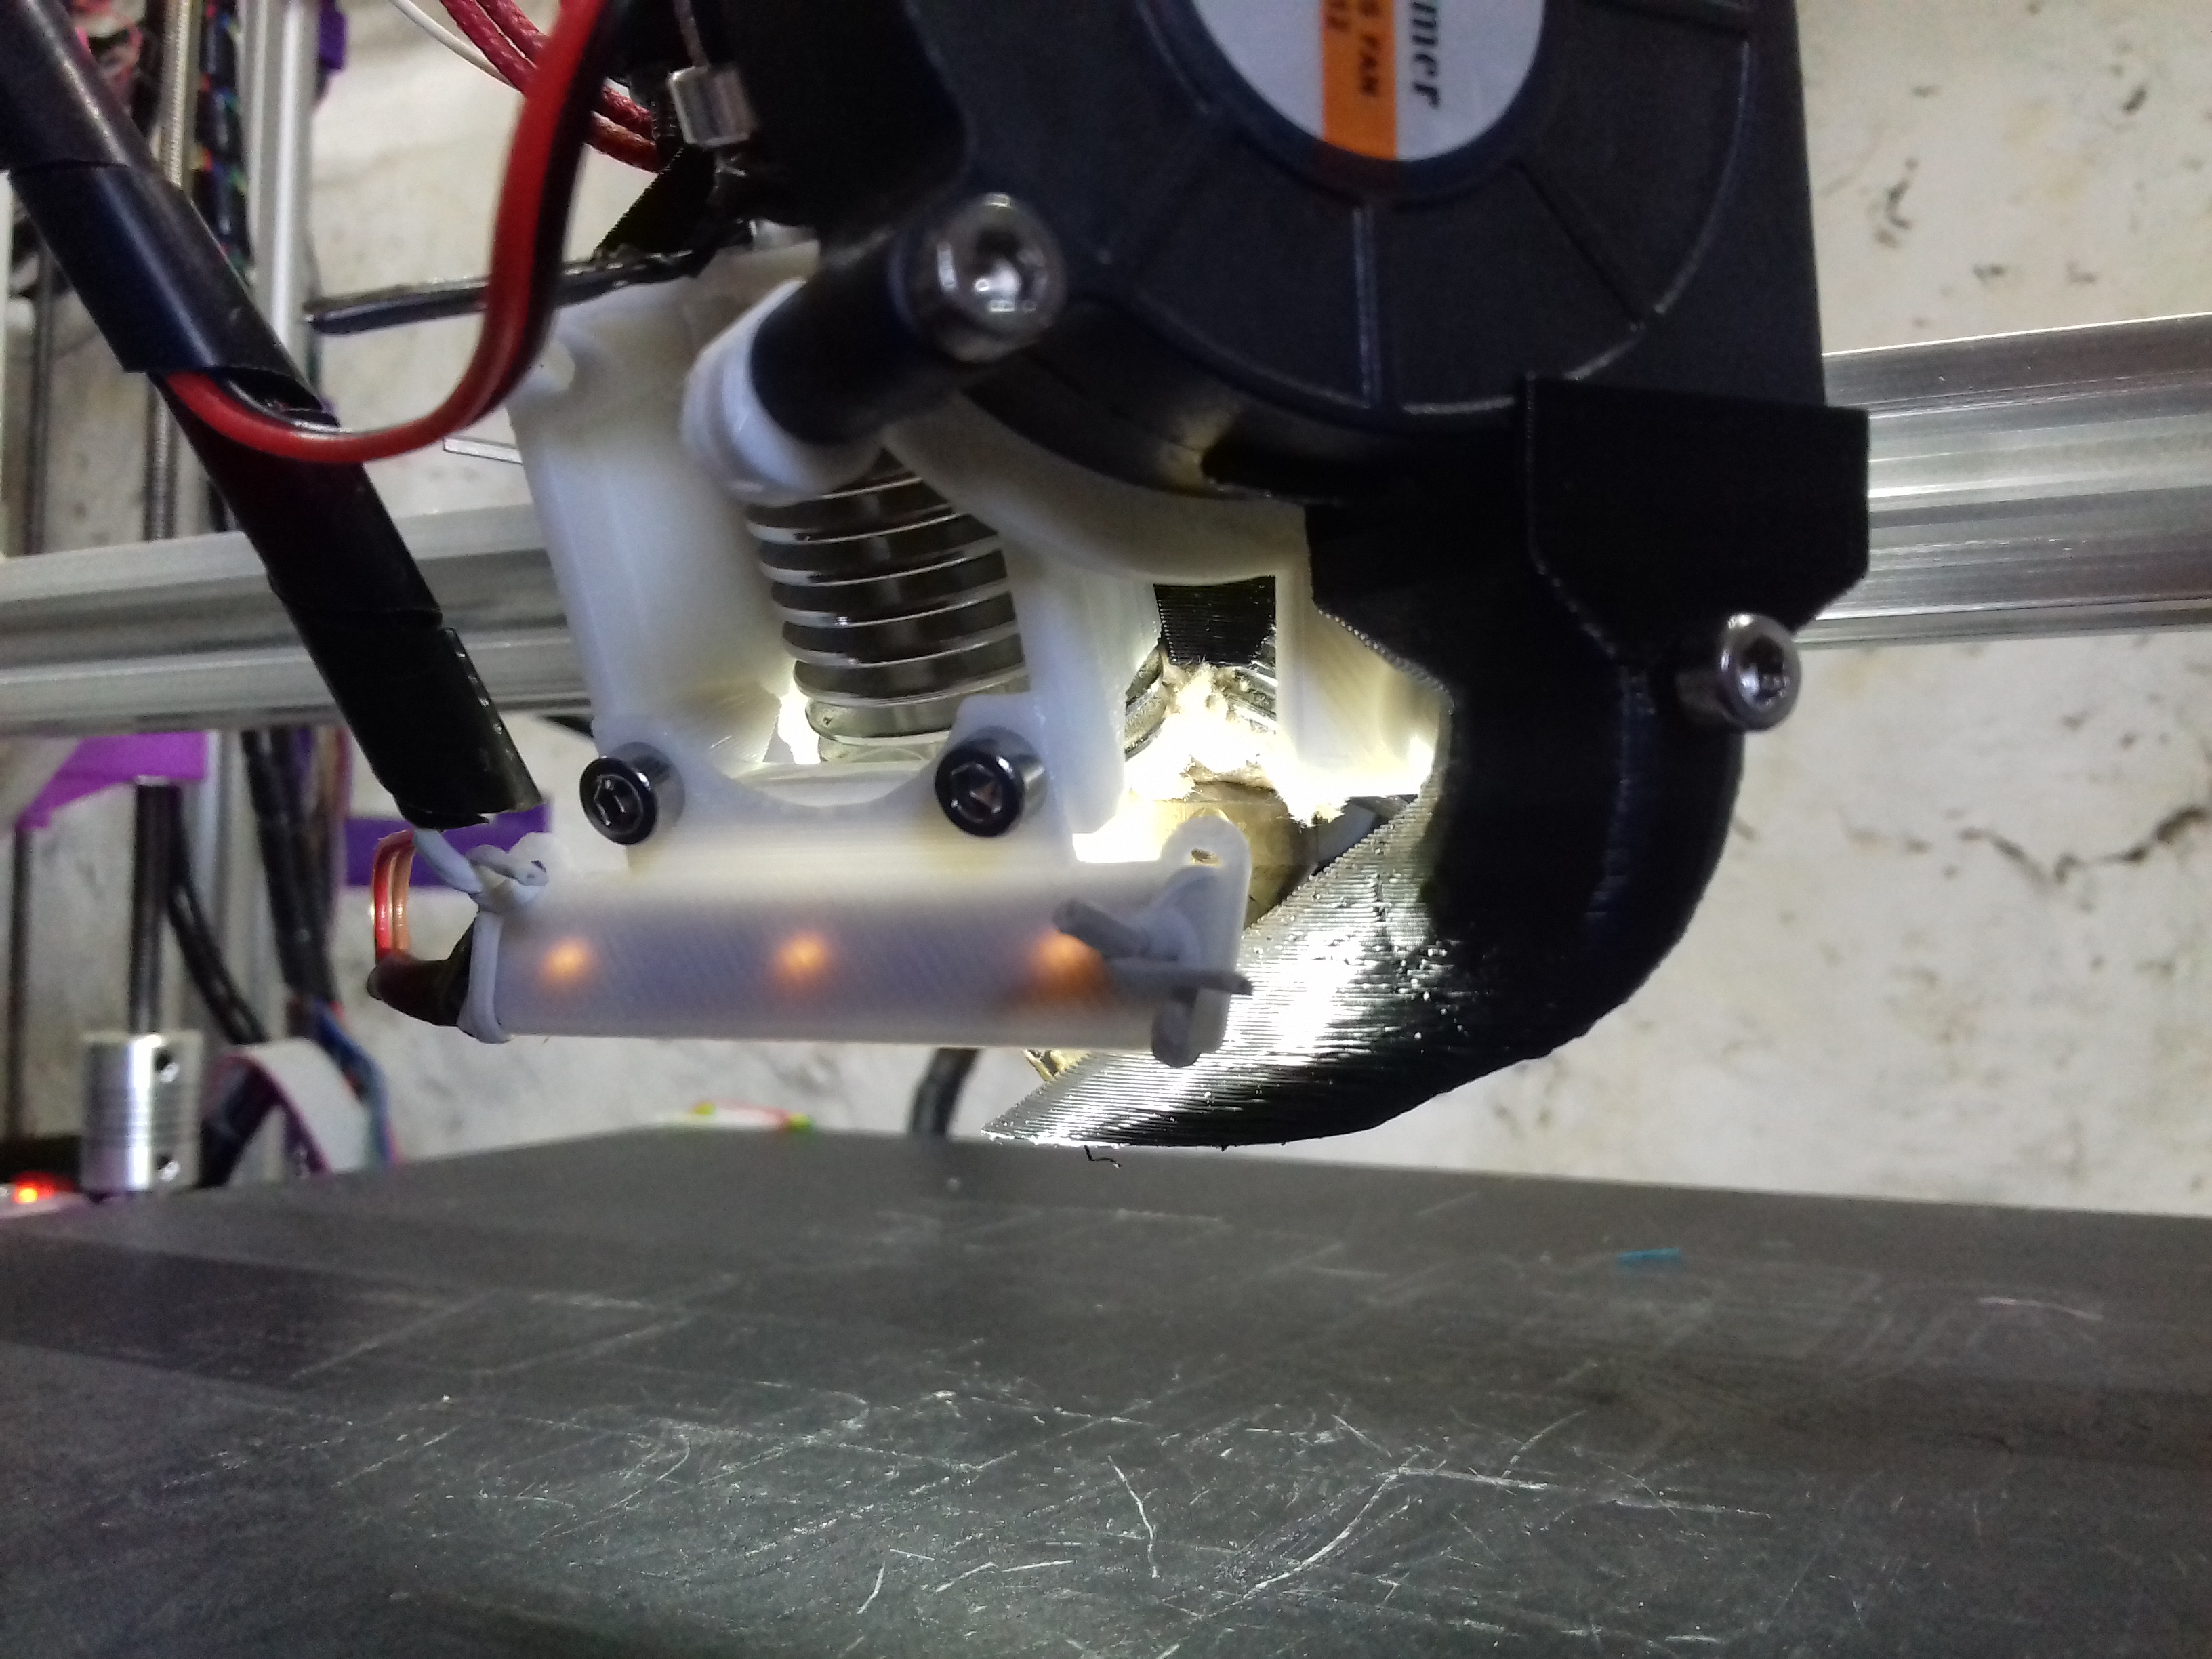
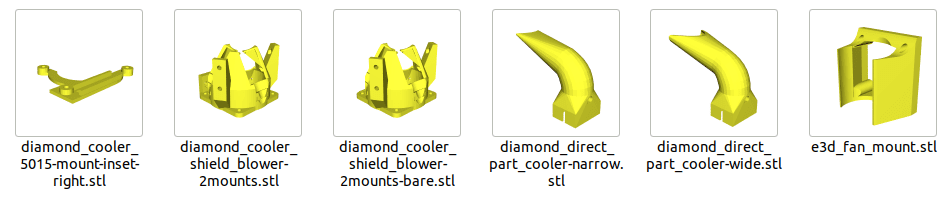
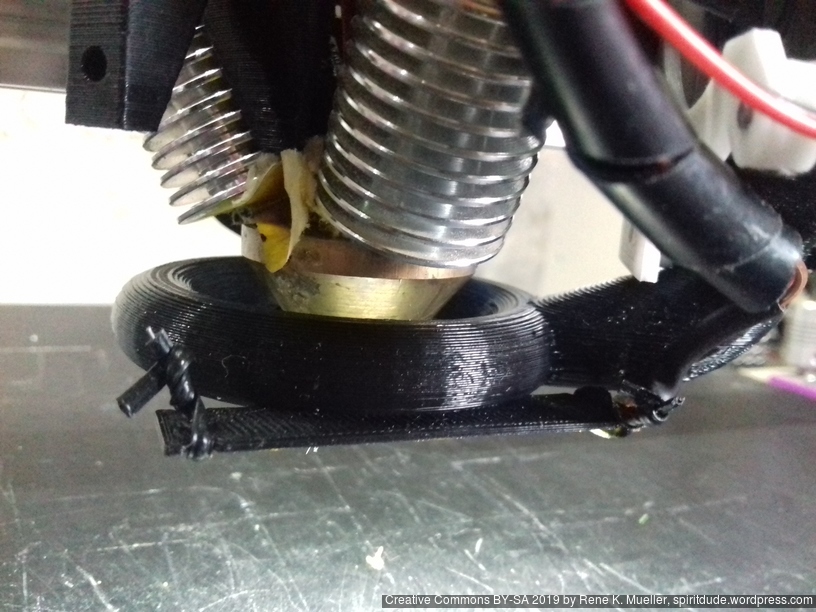
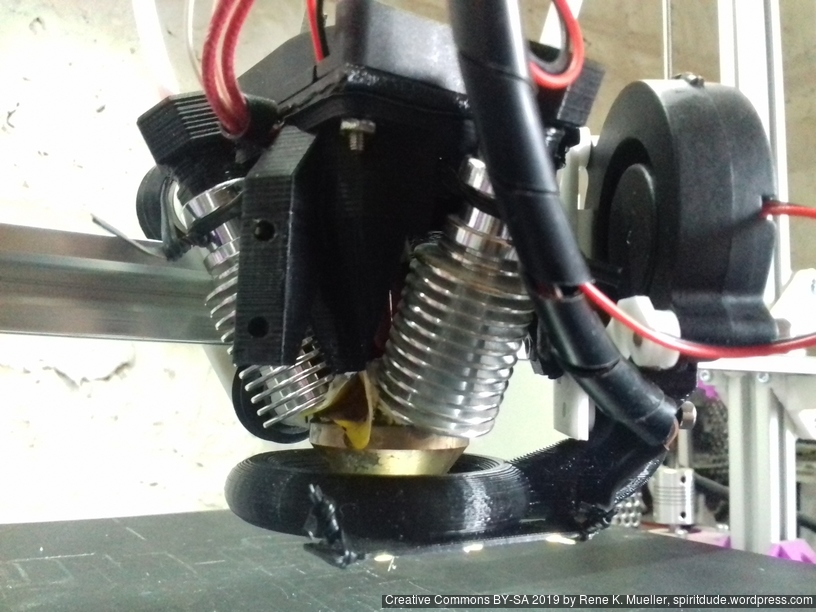
The past months (2019/09) I used a temporary setup for part cooling as most designs I explored for part cooling for Diamond Hotend did not work for me – so I finally I remixed an existing design in order to use 5015 blower fans and the “BQ fan shroud”:
Parts
Printable:
1x diamond_cooler_shield_blower-2mounts
1x diamond_cooler_5015-mount-inset-left
1x diamond_cooler_5015-mount-inset-right
2x bq_extruder_Tobera or bq_extruder_Tobera-clean(air outputs)
“-clean” version requires glueing but has no internal obstacle
height adjusting only reachable when 5015 blower is detached
without nozzle socks don’t use 100% fan, but 20-30% depending on the 5015 blowers in use – otherwise it will cool nozzle down and you get “THERMAL RUNAWAY ERROR”
Assembly
insert M3 nuts into diamond_cooler_shield_blower-2mounts
use 2x M3x12/14/16 to attach diamond_cooler_5015-mount-inset
adjust height as you like (enable part cooler and check air direction)
use 2x M3x16 to attach 5015 blower
use 1x M3x14 to attach bq_extruder_Tobera and simultanously attach 5015 blower too
Fan Positioning
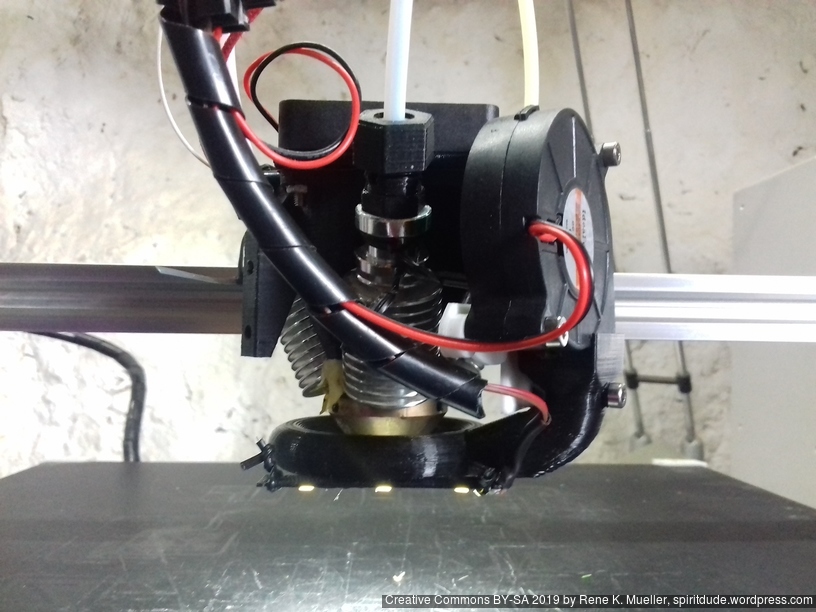
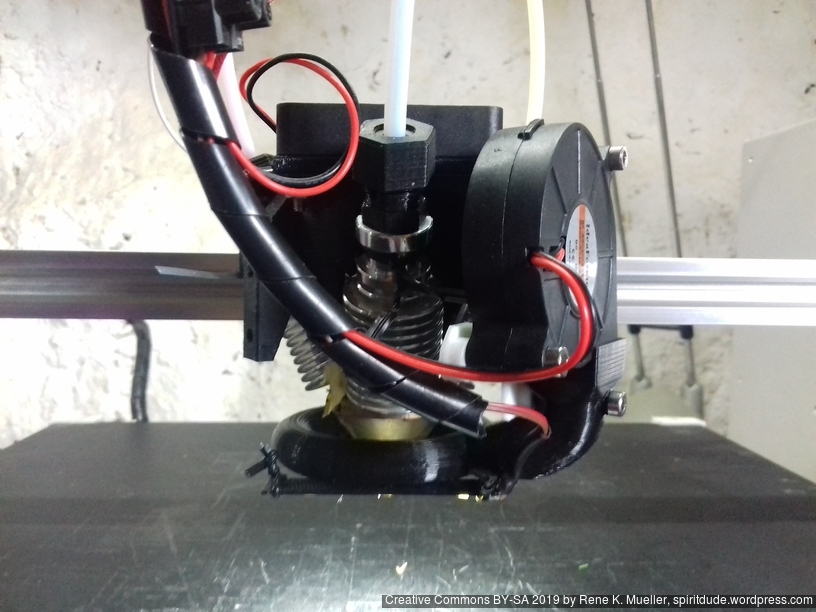
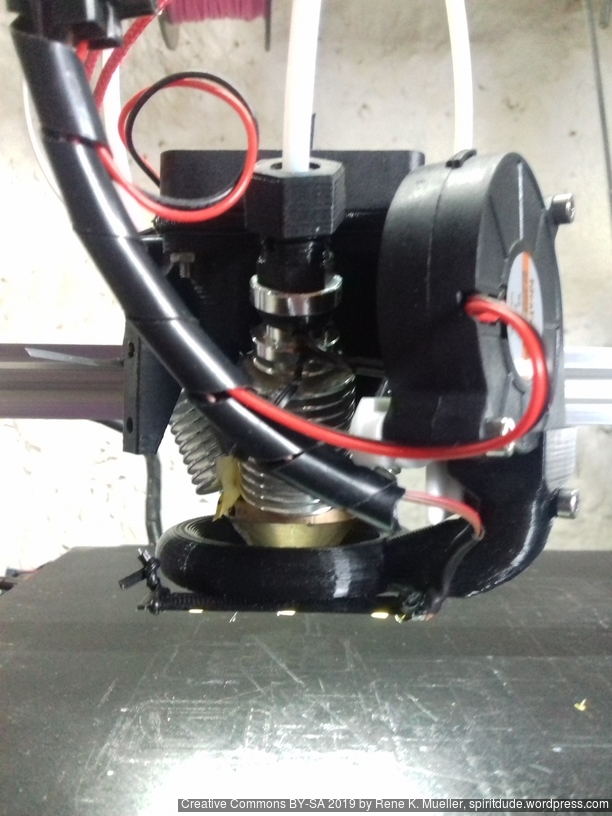
After a few tests I found the ideal vertical positioning of the fans:
most vertical top of the fans (like the above photos indicate) at 25% max cooling fan (your percentage may vary)
any other vertical position lower in theory should give more surrounding cooling, but in reality the air flow bounces back to the nozzle and cools it down (without socks) much faster
At a later time I may provide alternatives for the bq_extruder_Tobera air output.
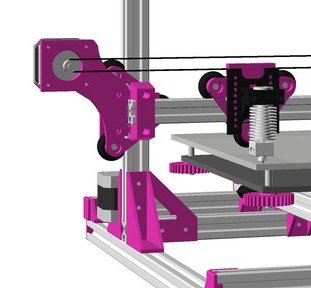
For the past 9 months (2019/08) I printed with two Ashtar K printers, where the X belt was routed above the 2020 extrusion:
Routing Above (Old)
Routing Within (New)
Pro:
easy access (X motor & X carriage belt mount)
stabilizes the X carriage vertically
Cons:
bending of the mount
And the bending of the mount became an issue more and more, as I kept tighten the belt and bend the mount more; time to redesign the part.
Update 2021/01/19: I resurrected the piece for the Ashtar K/M IDEX and improved the strength for its use-case.
Old “routed above” X motor mount
Improved “routed above” X motor mount
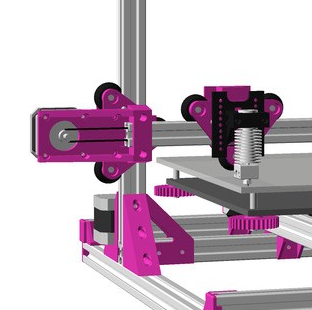
New Option: Routing Belt inside groove of 2020 Profile
First I used T shaped 2020 aluminium profiles and the nylon wheels did have little surface to ride, hence, I wanted the belt also function as vertical stabilizing. Once I replaced the X beam with V shaped 2020 profile, and V shaped wheel in the V modules riding on the profiles, I thought to reposition the belt into the groove of the V 2020 profile, and so reposition the X motor mount. So I merged the horizontal 2020 mount with the motor mount in one, plus adjustable Z stopper:
which gave the desired stiffness of the part I sought.
Pro:
remains stiff
easy to mount & accessible (belt, Z stop screw)
Cons:
larger part, 2020 mount and motor mount combined
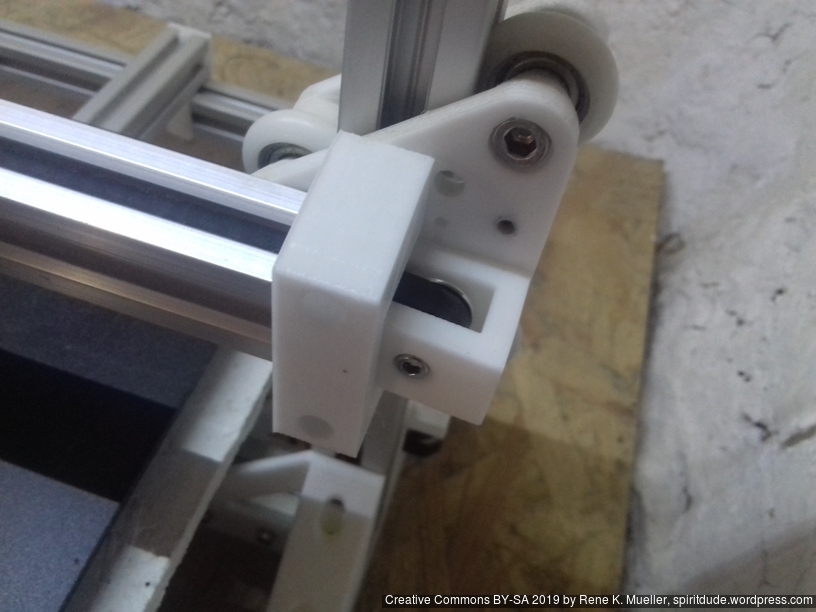
X Carriage Beltmount
In order to route the belt in the groove of the 2020 profile for the X carriage itself, a rather delicate piece was required, mounted at the backside of the X carriage V-module; I use a M3 to fasten the belts:
Assembled
Part names with variables:
xcarriage_short_hmount_motor_2020(zstop=true): main motor mount with 2020 profile mount combined
xcarriage_beltmount_2020(th=32.7): new belt mount on the X carriage, th default at 32.7mm, but one needs to measure the total thickness of the V modules acting as X carriage
pulley_holder_2020(): right side of the belt routing
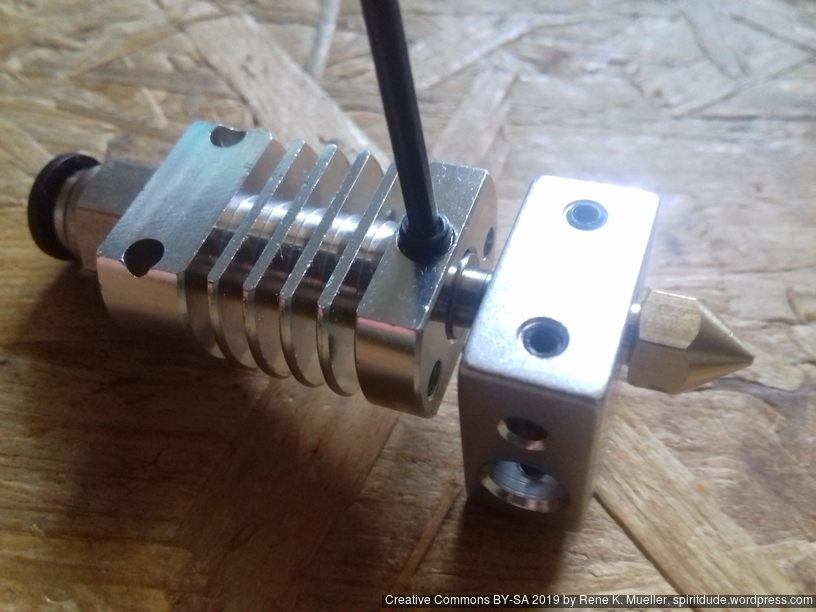
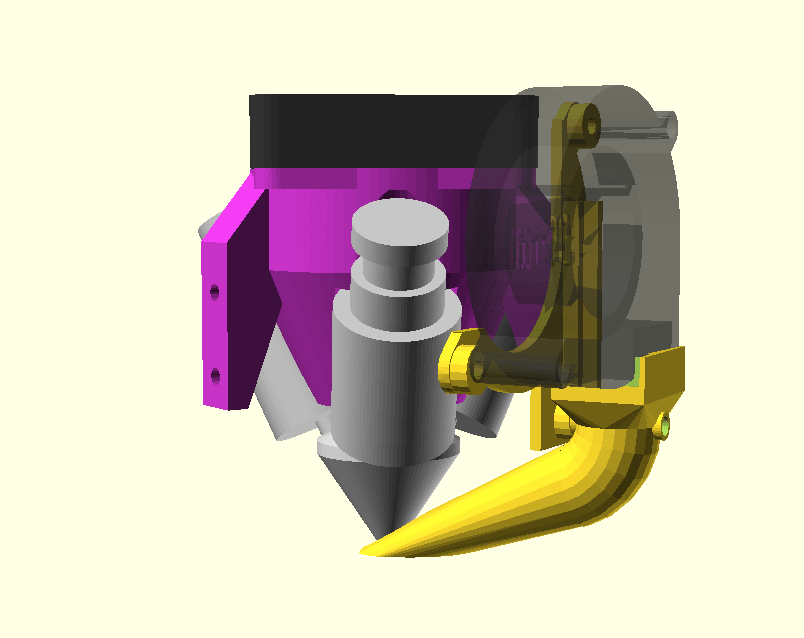
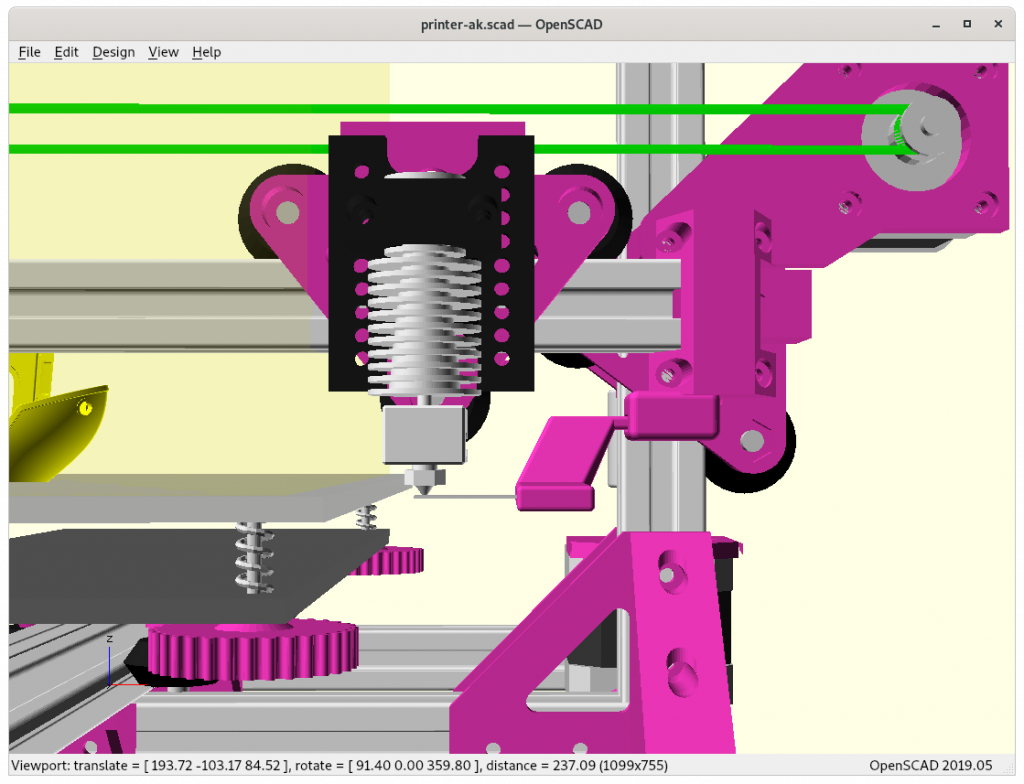
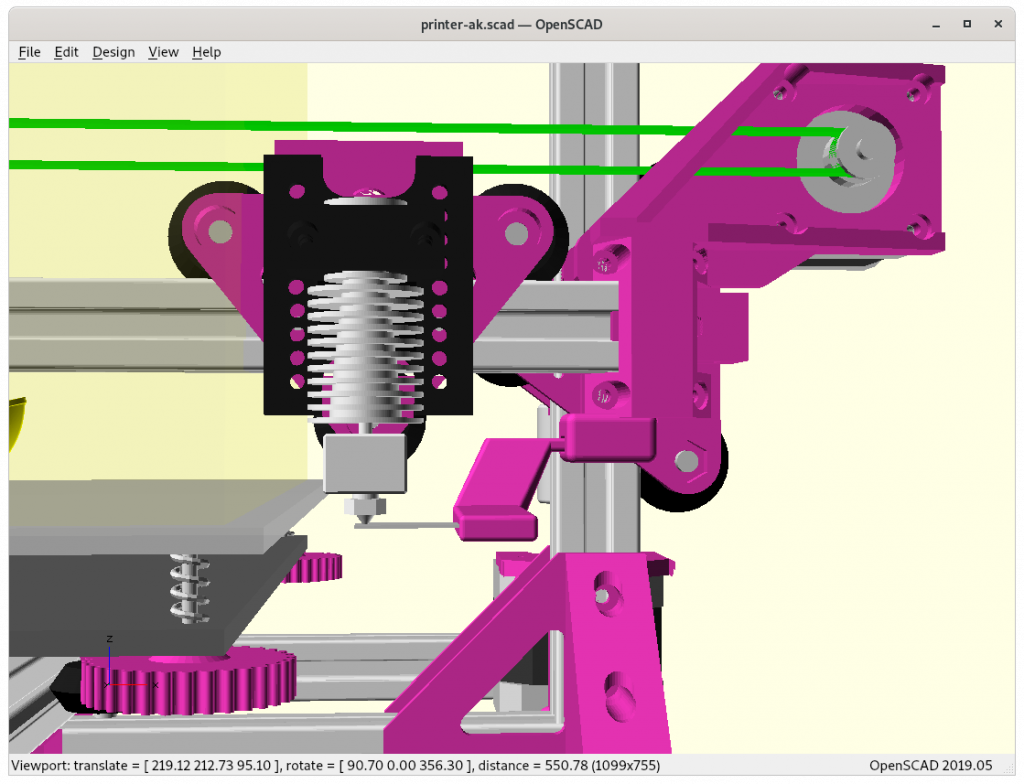
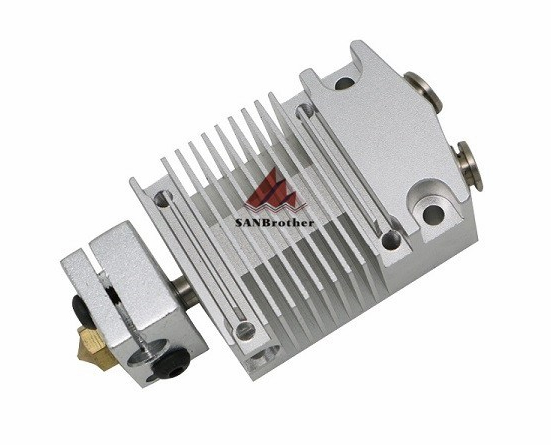
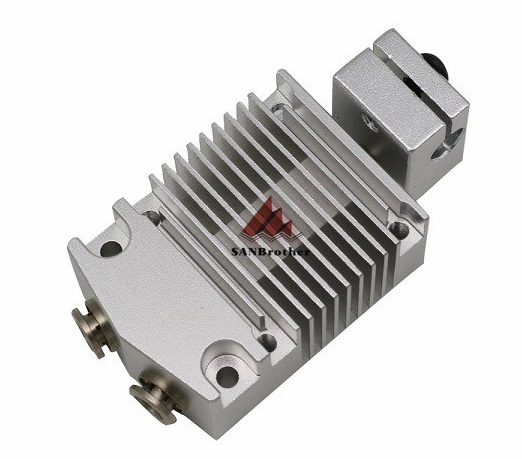
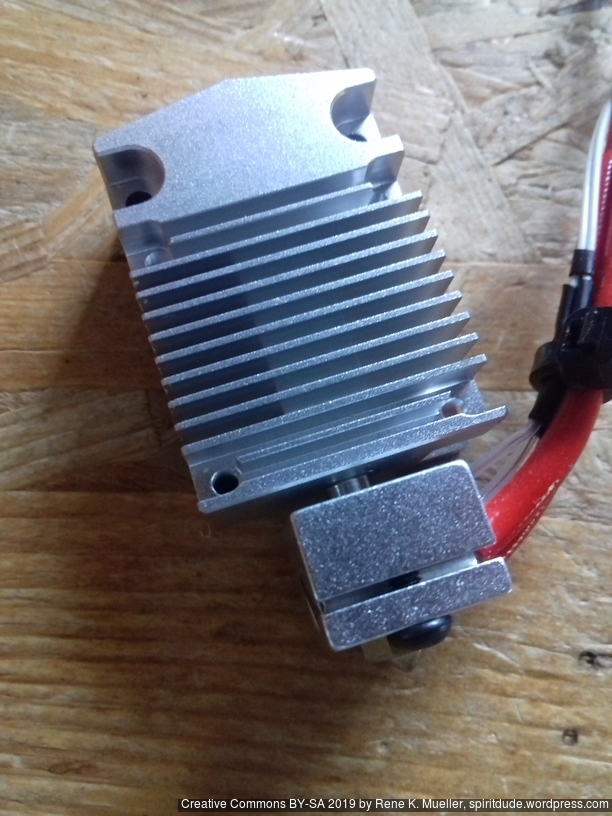
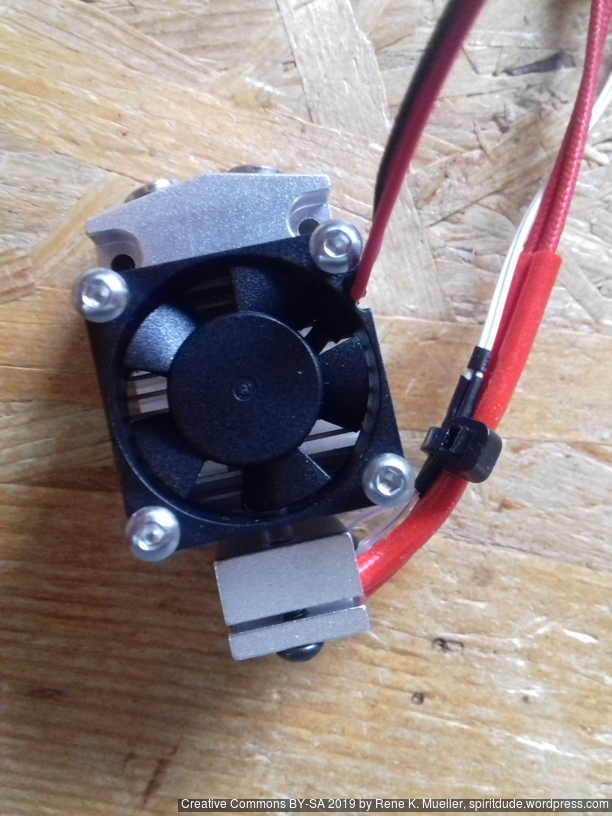
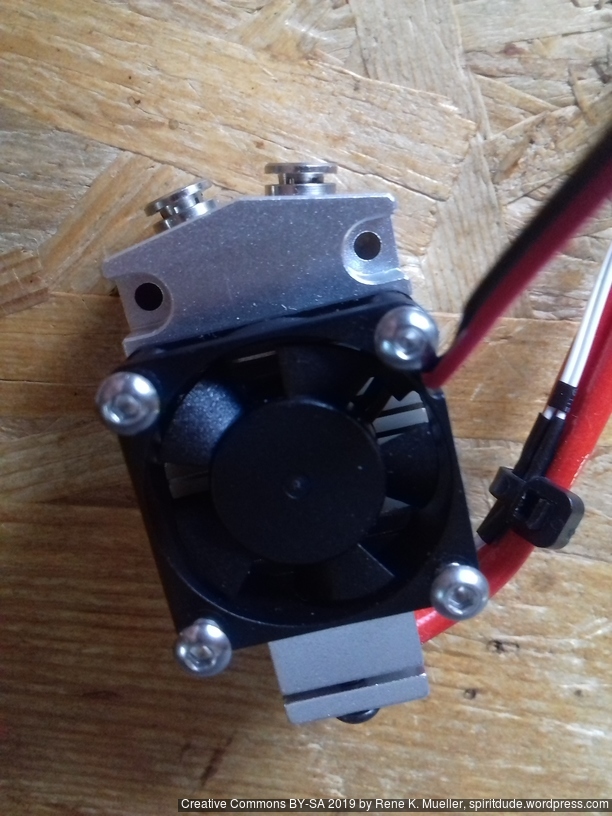
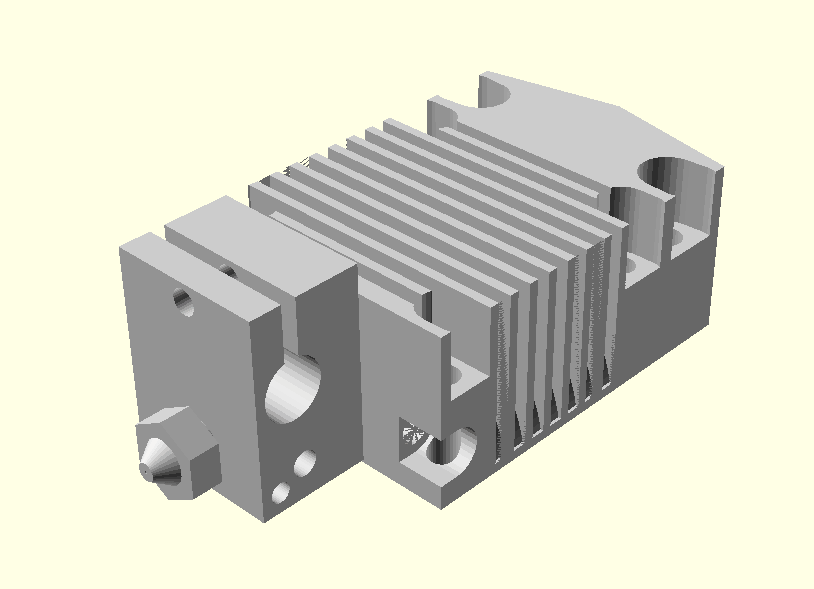
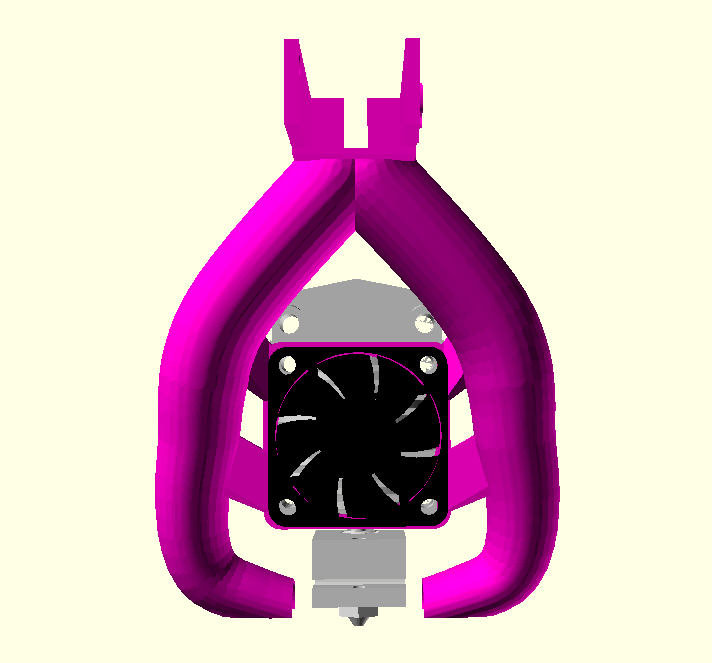
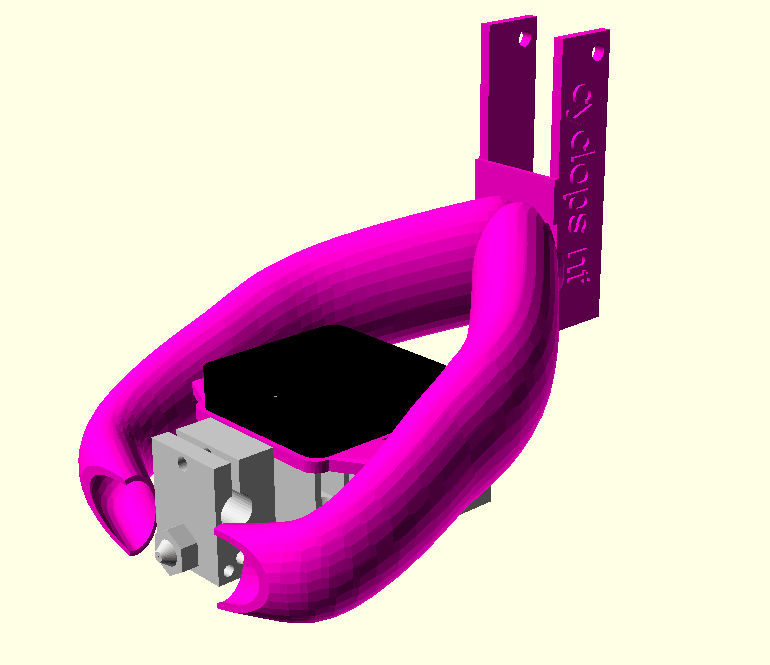
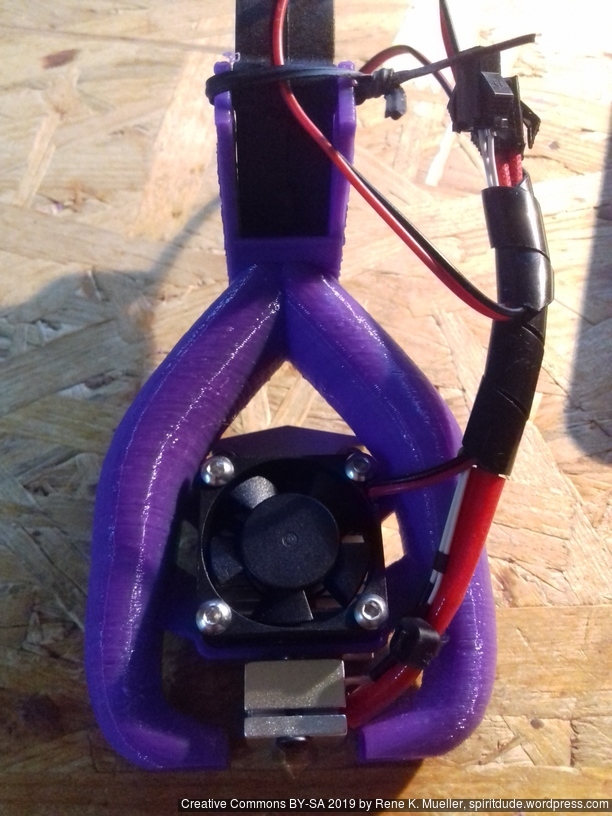
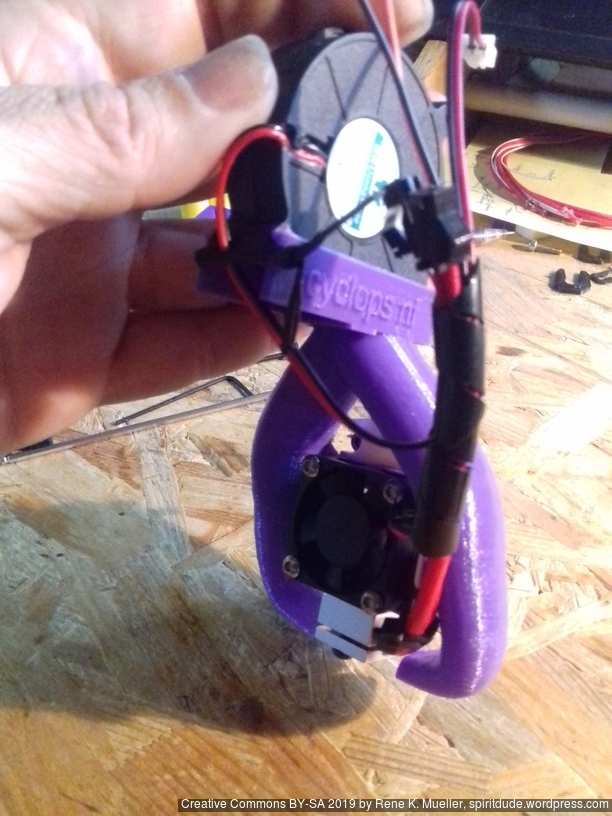
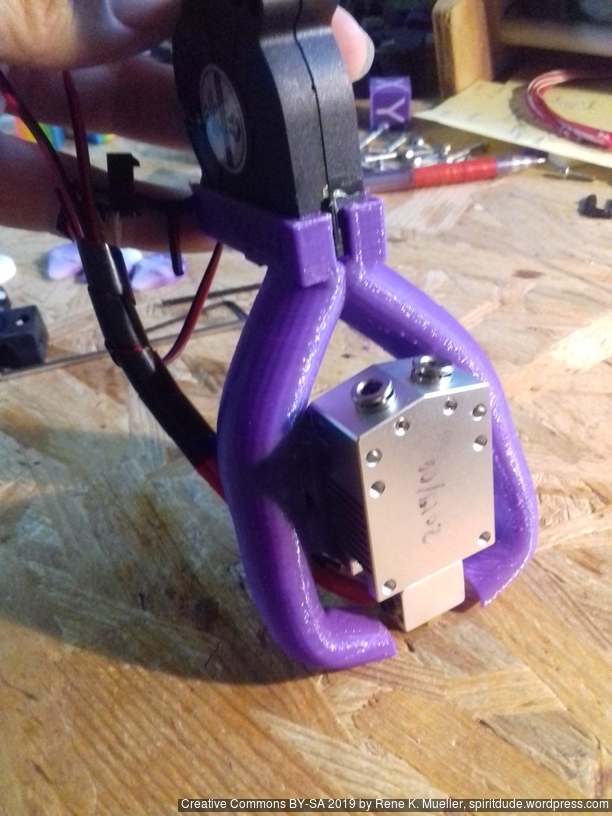
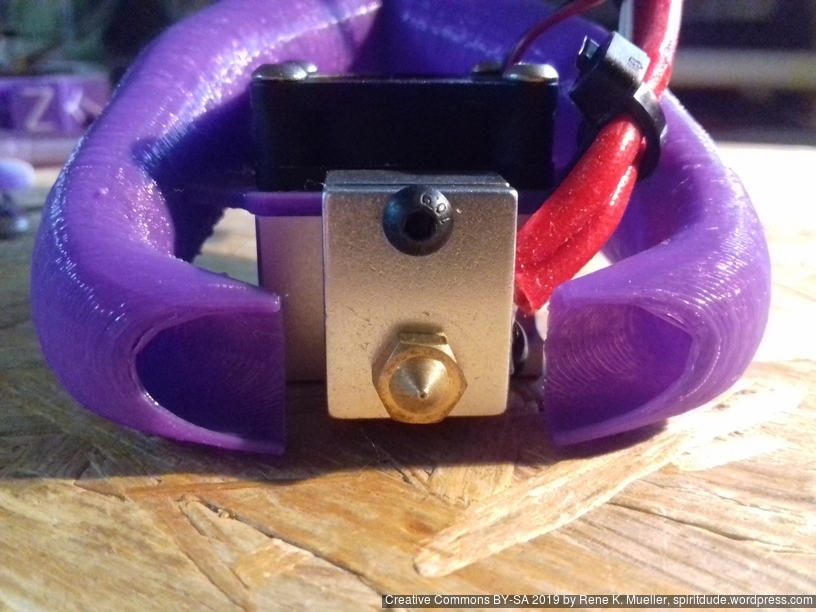
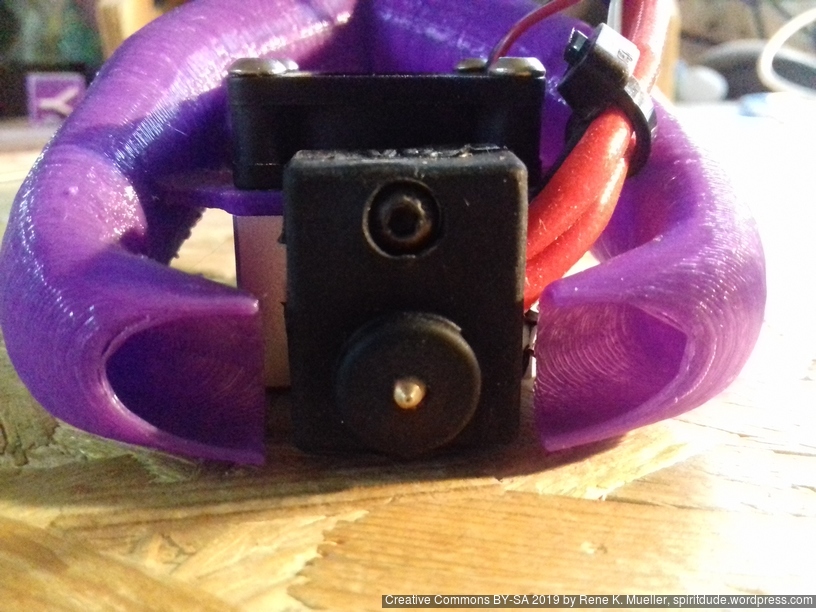
After my bad experience with the “Cyclops/Chimera” clone (2-in-1 with mixing capability), I purchased (June 2019) the improved “Cyclops” which resembles the “Cyclops NF 2-in-1” or “LERDGE 2-in-1 V2” , so I name this variant “Cyclops NF 2-in-1“:
which can be ordered at AliExpress (affiliate links):
LERDGE 2-IN-1 V2 (slightly different screws holes to fasten heatbreak),
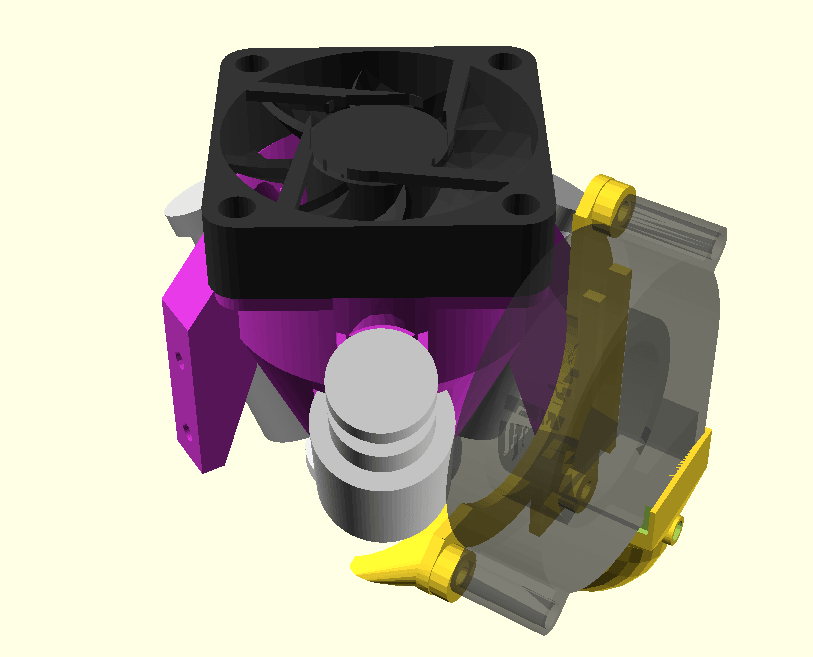
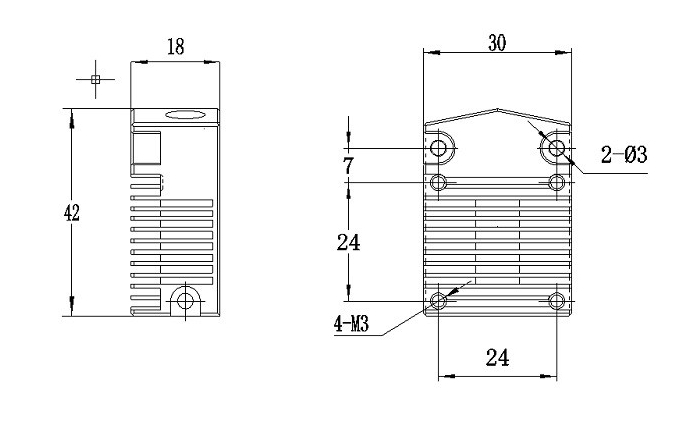
and uses E3D V6 nozzle (clone) and 30x10mm fan on top. The two mounting holes are 24mm apart and fit the Prusa i3 X-carriage.
Further, the two filaments cannot be mixed like the original Cyclops but either filament A or B can be fed into the nozzle, but not both at the same time. Also, one can print with one filament solely, a 2nd filament must not be present.
Pros:
affordable
simple setup
single filament printing possible without 2nd filament being present
Cons:
cannot mix colors
long retraction required for tool change (>34mm)
long transition purge (~55mm)
custom PTFE or nylon piece in the heatbreak (not easy to source)
uncoordinated retraction can cause one filament blocking another
Model & Part Cooler
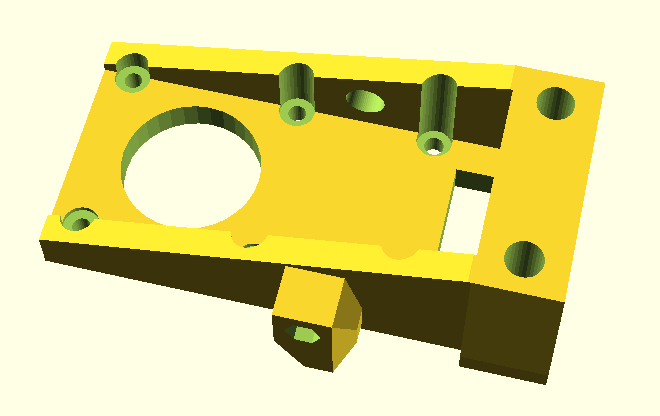
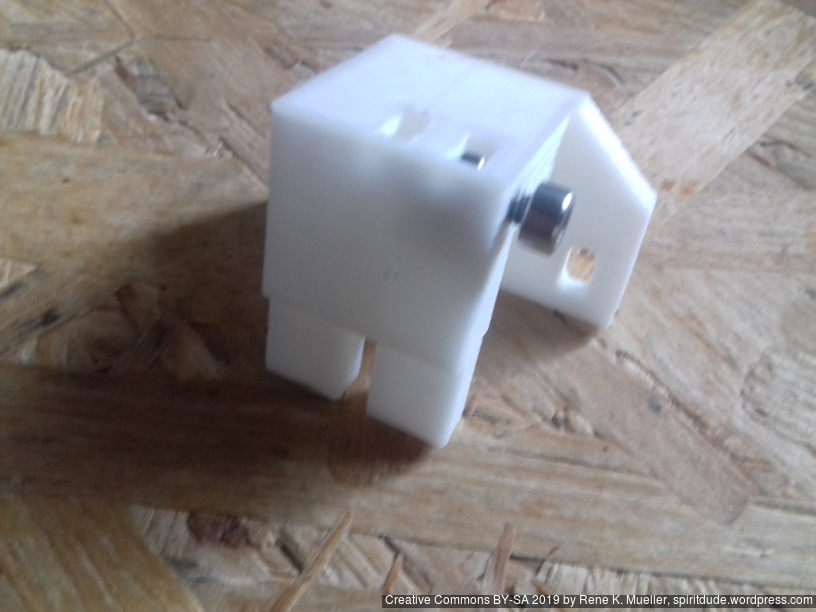
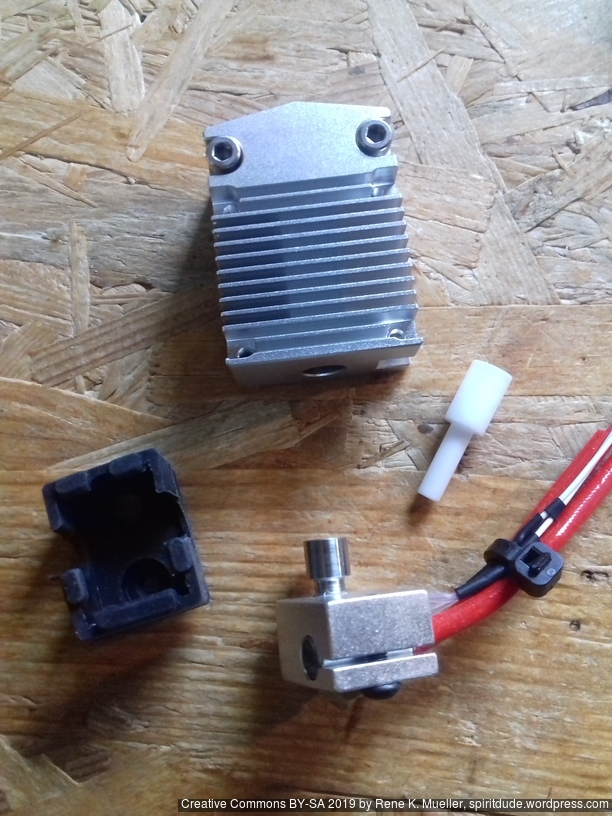
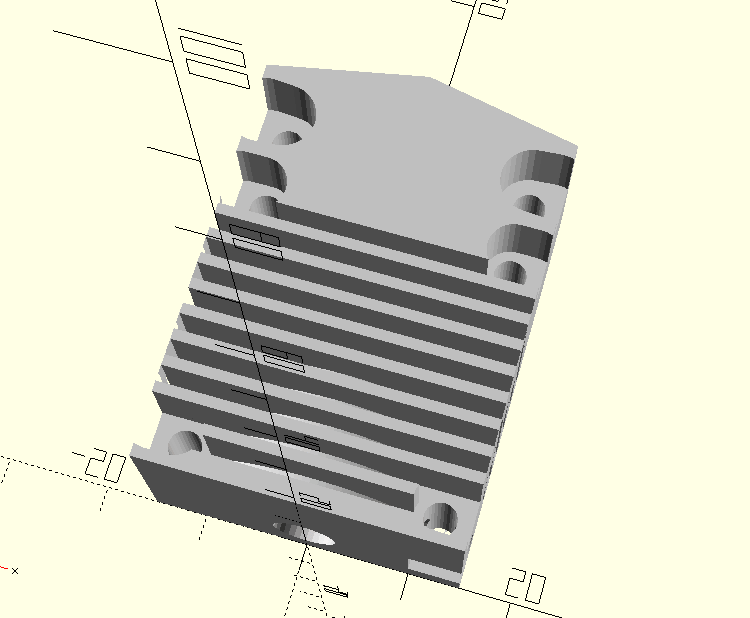
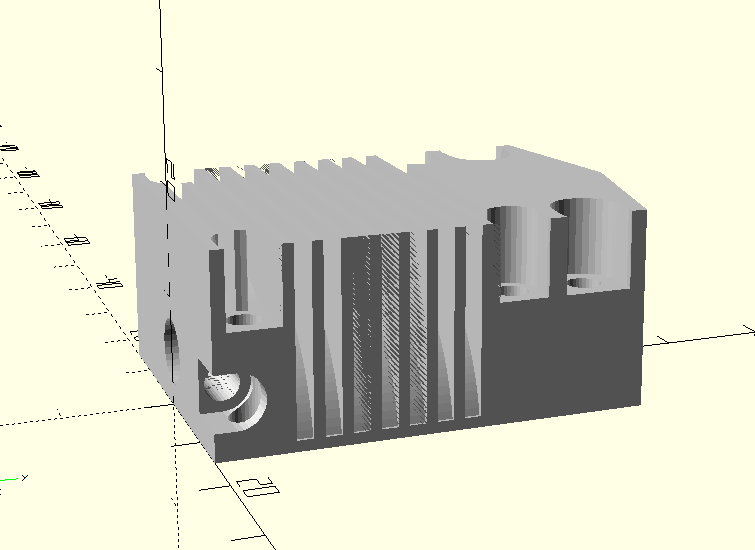
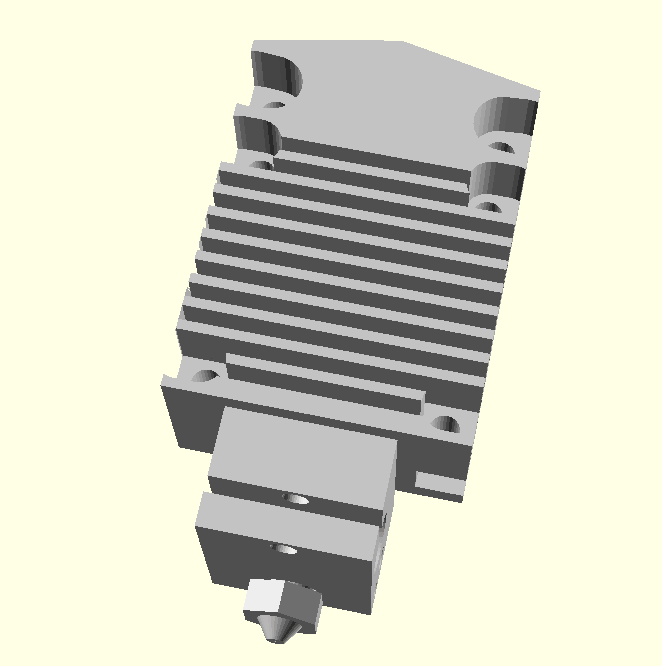
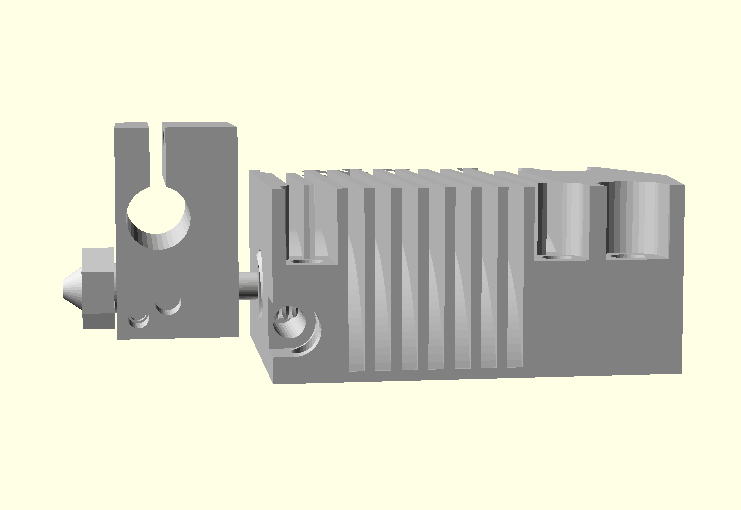
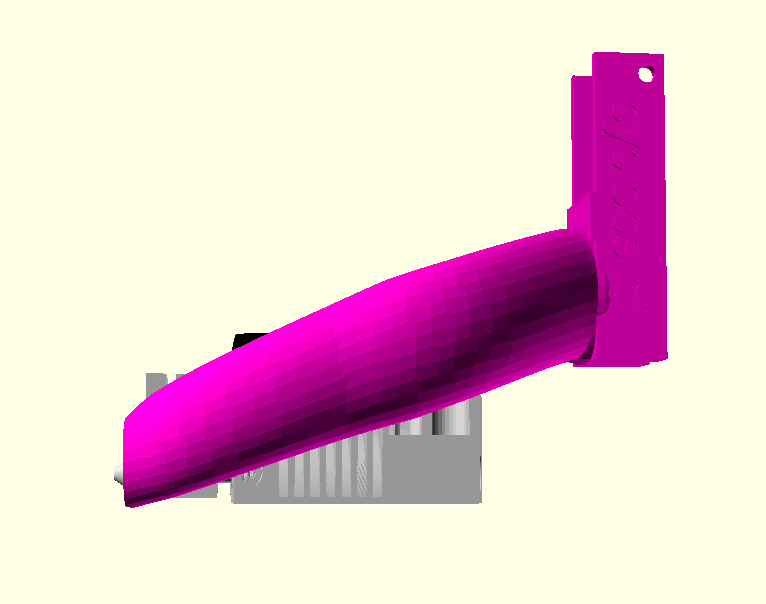
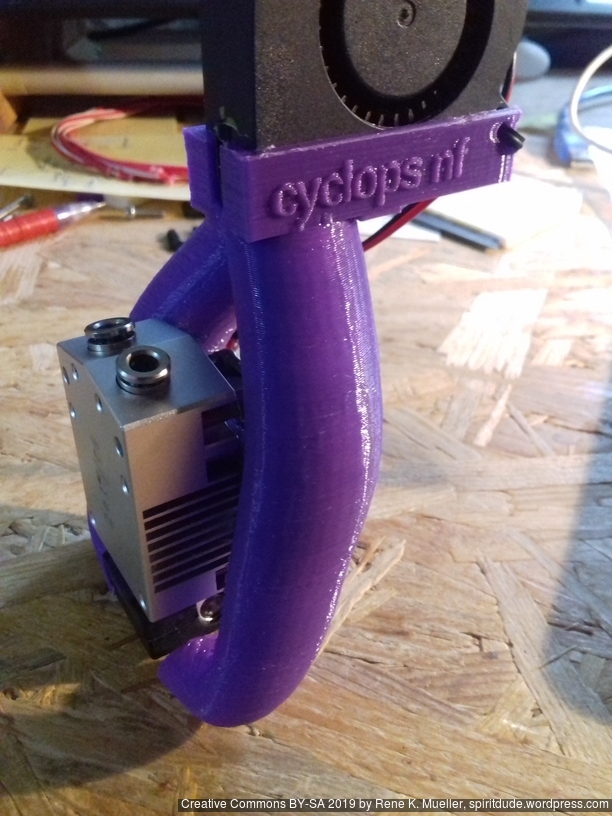
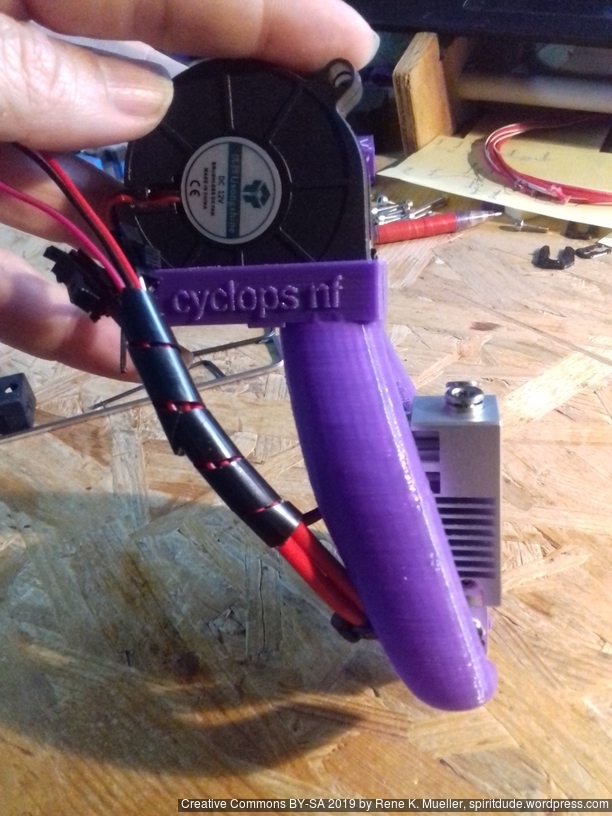
I quickly modeled the heatsink in OpenSCAD:
so I was able to adapt my Parametric Part Cooler with following settings part_cooler(name="cyclops nf",m=30,wx=25,yoff=10):
I finally turned the heatblock around (from the default orientation), so I could see the nozzle better and the LED strip shining more direct on the nozzle and bed.
Operation
The long tool switching retraction of > 34mm imposes quite additional risk of jamming combined with temperature sensitivity: depending on the temperature the pulled back of end of filament changes shape, and may not able to re-enter at next tool switch – so I’m a bit skeptical on the reliability – time will tell.
As I use print3r solely (without GUI), I set following in the printer profile:
# -- slicer=slic3r, slic3r-pe and prusa only:
retract_length_toolchange = 36
which I use as print3r @e2-nf-t1 ... in case I like to print with 2nd filament only:
start:
T0: purge 20mm
T0: retract -36mm
T1: forward 36mm
T1: purge 60mm
reset E meter and go back to absolute positioning/extruding
end:
go back to Y380 (absolute)
T1: retract extrusion -2mm
T1: retract -36mm quick
T0: forward 36mm quick
switch off heating and motors
This way I keep T0 as default, and on-demand switch to T1 only with @e2-nf-t1 macro in operations. One case is not covered: if I abort a print then T1 is still active in the printhead and manually needs to be retracted (future print3r version will resolve this).
in theory no purge block, but if ooze shields are shared among switching extrusions (more than 2 extrusions) there may be cross-contamination between colors/materials
the printheads individually are proven to be reliable
Hints:
single heatblock = same print temperature
dual heatblock = different print temperatures possible
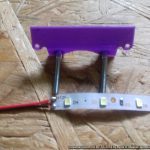
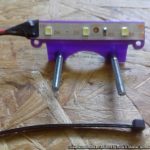
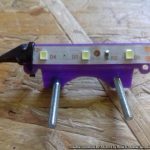
The final step you can decide to put the mount above or below the fan, which gives some flexibility. The mount is just 1mm thick so it won’t matter so much on the existing setup.


 Printable:
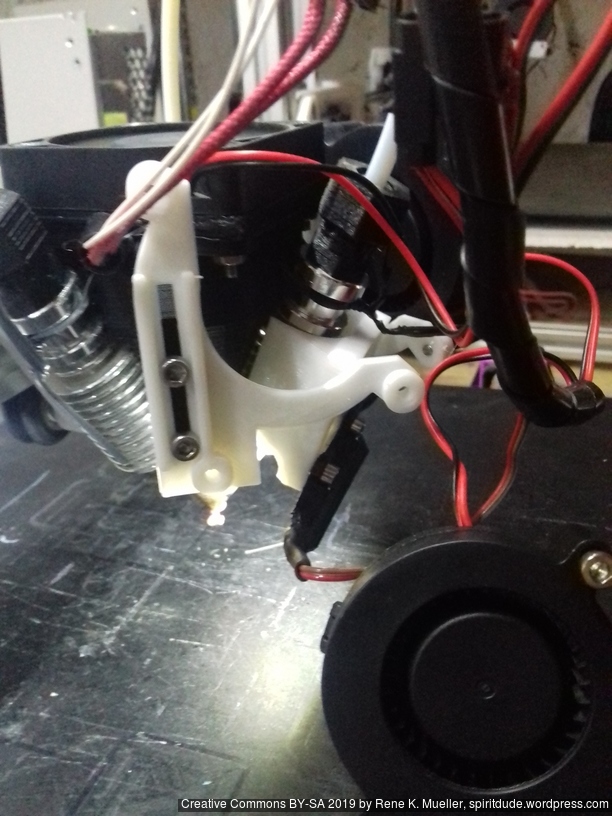


 Early on I used this setup and extended the options further – a 50mm long LED Strip Fan Mount – which mounts directly on