
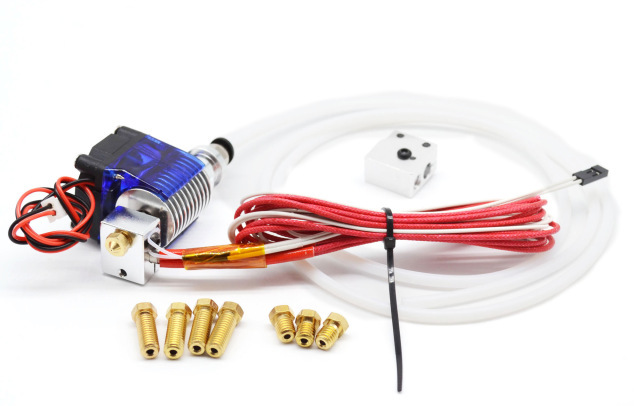
 The CTC DIY I3 Pro B, a Geeetech I3 Pro clone, is the very low-end of 3d printers – quality and pricewise, and uses a direct drive to feed the filament aka “MK8 Extruder”. I ordered an E3D V6 clone with 0.2mm-0.4mm short nozzles with optional Volcano hotend for larger diameter nozzles (0.6mm – 1.0mm) from China, at EUR 9 price, as I wanted to
- print faster, above 100mm/s if possible
- print thicker or larger layer height to reduce print time for larger volume prints, e.g. 0.6mm – 1.0mm nozzles
and E3D V6 hotend seemed to be the remedy.
First I tried the Bowden setup, then printed an adapter so E3D V6 works with original extruder as well, e.g. direct drive is recommended when printing with flexible filament.
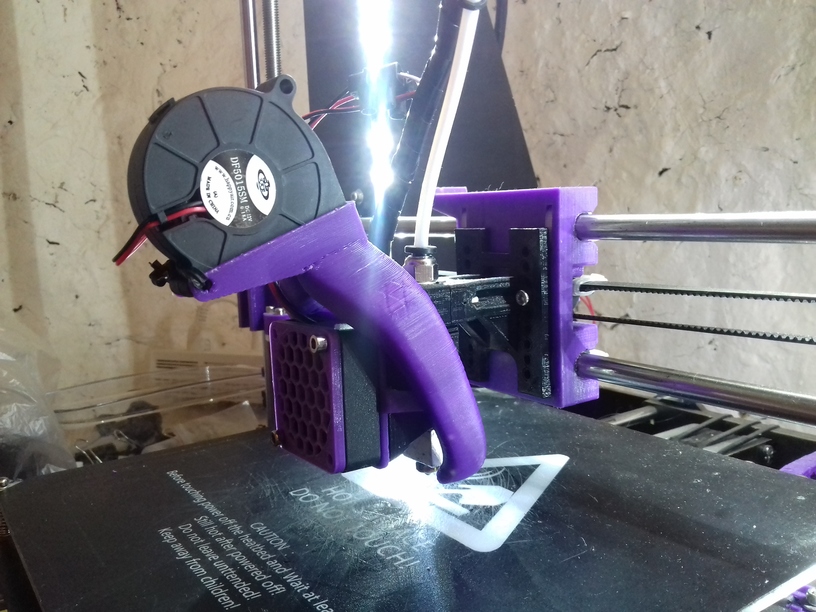
2-in-1 Fan Setup for E3D V6
I used the 2-in-1 fan duct: extruder and filament cooler for E3D V6, it’s low complexity and low mass makes it quite suitable, yet, since only one fan is used, it cools at the first layer already and likely reduce adhesion – not optimal but for now an acceptable compromise. The cooling otherwise is excellent, as good as my “duck beak” fan I had with original setup.
To secure the fan better, I used some rubbery-like glue (when dried) and put it on the end of the clamp of the fan adapter (let it dry first before using), to increase the grip on the hotend – as the fan once fell off while printing when it ran off failed printed filament which was cool and hard already – which would have caused quite a chain of dangerous events (hotend no longer cooled, melting the mounts, falling on the heatbed and heat whatever lies on the bed if the print(er) would have let be unattended).
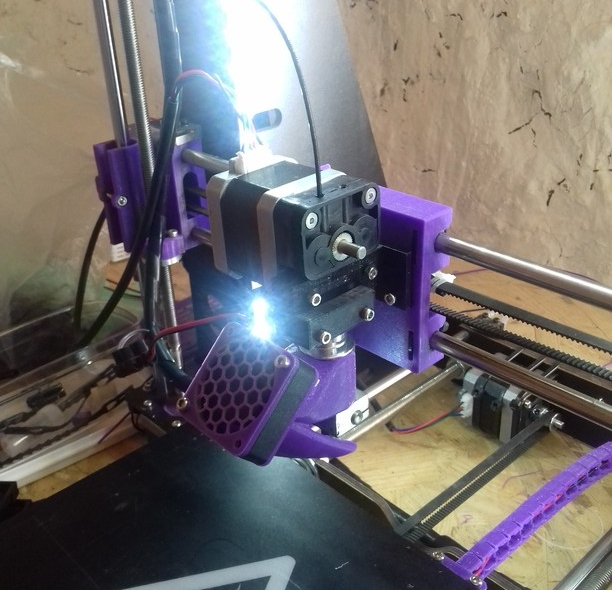
E3D V6 Radial Fan Fang
 After some time I switched to E3D V6 Radial Fan Fang, which uses 5015 radial fan, which turns on at 2nd layer – I used a remix which uses 40x40x10mm fan for the heatsink and replaces the small E3D V6 fan.
If you choose this, file the grip a bit so it attached smoother to the heatsink – my first print broke while attaching.
Quality of E3D V6 Clone
 Before I go into the details, let me comment of the overall building quality of those E3D V6 clones: you get what you pay for, a compromise. My hotend leaked like crazy, at the junction of heatblock & nozzle, and heatblock & heatbreak – which is most annoying, and that did not happen with the original MK8 Extruder.
Remedy: I used teflon thread tape used to seal threads of the heatbreak, on both nozzle and heatbreak thread – this is really suboptimal. The teflon thread melted over time (not right away but after days/weeks), so I didn’t keep it.
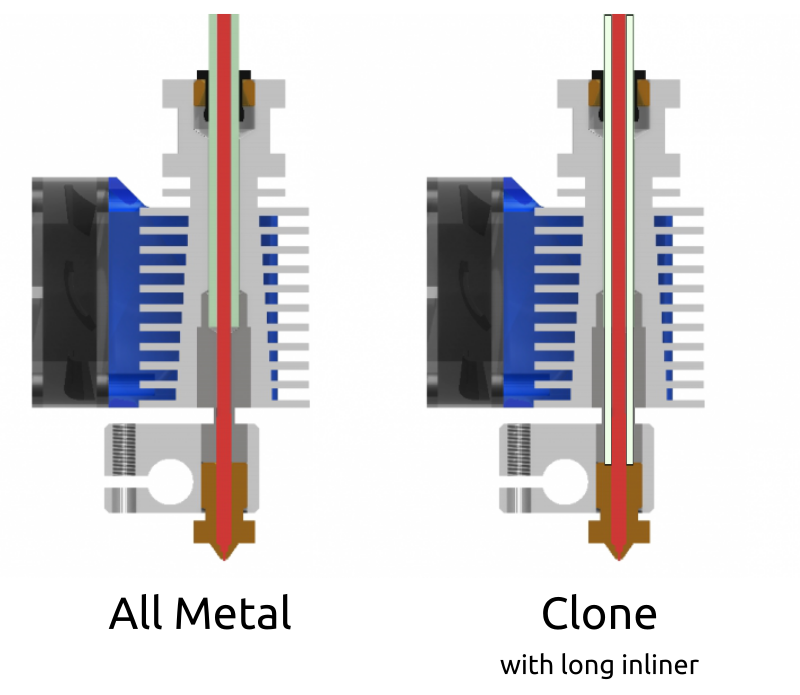
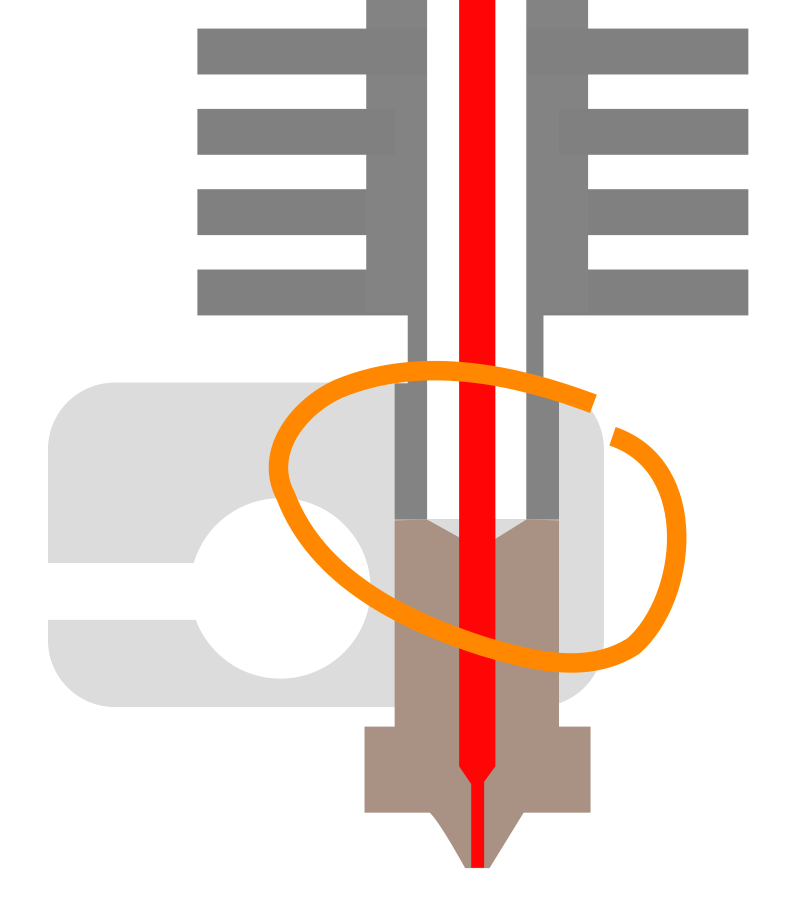 Update 2: the real problem of leaking was the PTFE/teflon inliner, the end toward the nozzle wasn’t perpendicular sufficiently and likely a bit too short (by less than 1mm) and it was too narrow tube with 3mm OD instead of 4mm and be more tight – so the PLA leaked between the inliner and the threads of the heatbreak and nozzle – so the real remedy is to pay close attention of the length of the inliner (in case the E3D V6 clone comes without it as in my case), and give it 0.5mm to 1mm extend with a clean cut and preferably a conic end which presses then toward the nozzle.
Further, I had to use again a teflon inliner/tube – this wasn’t an all metal hotend, means, I am still limited with limited material choices, staying below 240C to preserve the teflon tube.
But on the upside, the quality of the extrusion was excellent, there was an significant improvement of print quality compared to the old “MK8 Extruder” setup, and I seemed to increase printing speed as I desired:
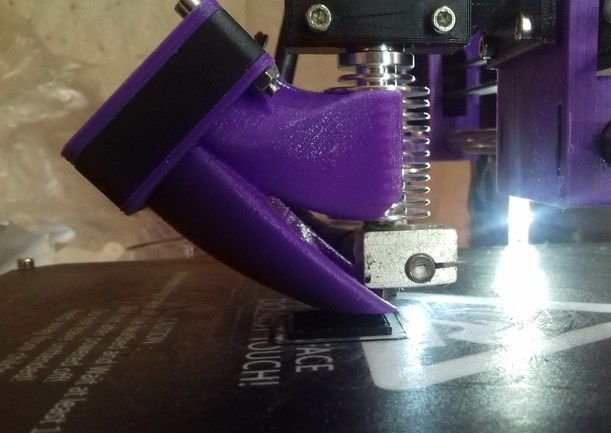
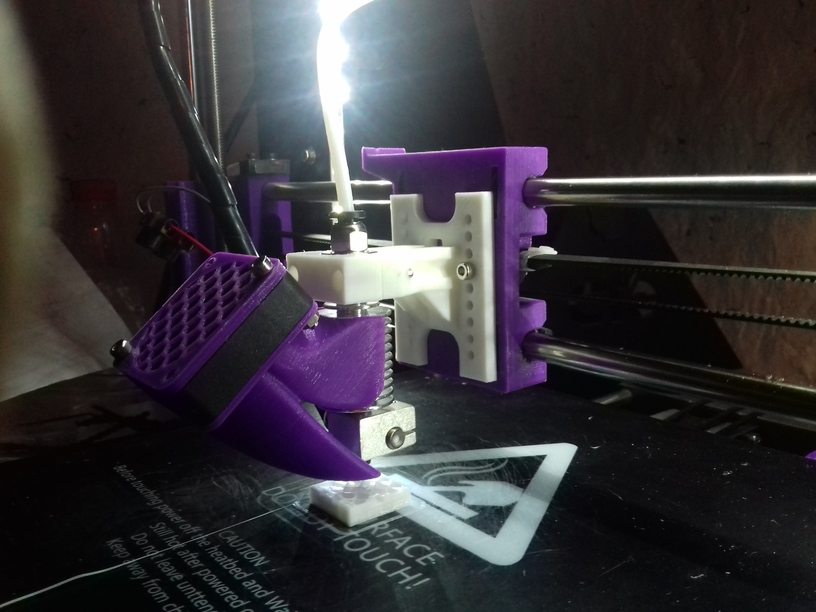
E3D V6 with Original Extruder
I used an adapter but altered it so it prints without support Simplified E3D V6 mount for CTC Prusa i3 Pro B with original extruder, fortunately it maintains the similar Z and Y distance to the bed as the original hotend, so there is little to change.
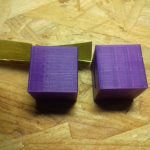
And the usual XYZ calibration cube at 60mm/s and 120mm/s:
Since I didn’t upgrade or customize my firmware yet, my thermistor likely reported wrong temperature, as the possibly new type wasn’t properly assigned in the firmware – and I had to reduce print temperature, too much stringing otherwise occured:
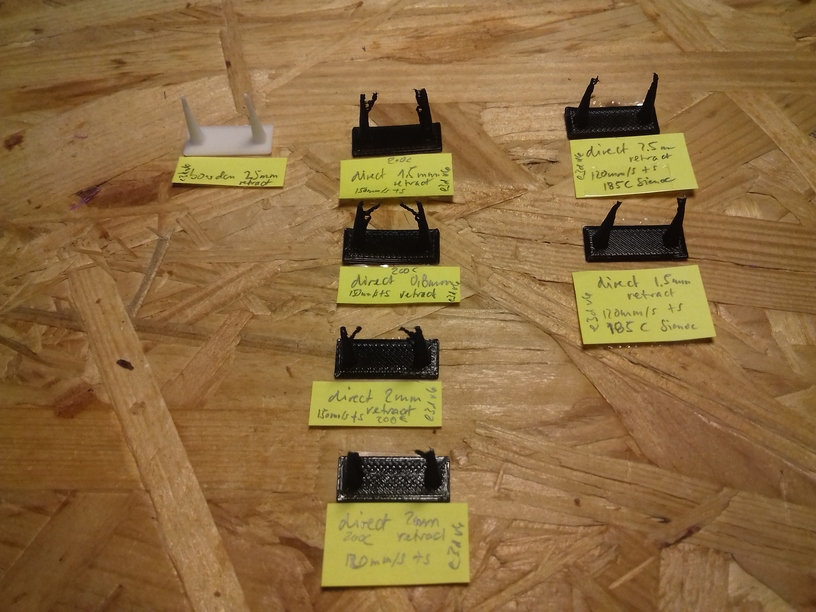
The tests reveals that stringing is mainly a problem of nozzle temperature, and much less of retraction length.
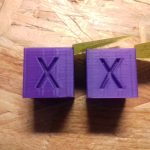
XYZ Calibration Cube
Left to right: 60mm/s, 120mm/s and 150mm/s:
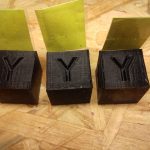
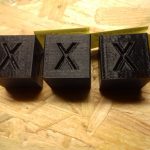
Surprisingly it still performed quite well with 120mm/s and 150mm/s, although I doubt 150mm/s were really achieved at this small print.
E3D V6 MK 7 Extruder Settings
- Printing speed: 60mm/s – 150mm/s
- Infill speed: 100mm/s – 150mm/s
- Motion speed: 120mm/s – 150mm/s
- Retraction distance: 1.5mm
E3D V6 with Bowden Setup
With the Bowden setup one uses a teflon/PTFE tube to put the extruder motor stationary aside and push from there, reducing the moving mass on the X axis and so faster printing speed is possible – but as I found out, with faster printing speed more pressure in the hotend and if the hotend isn’t properly sealed, it will leak quickly.
The first run with Bowden setup, the extruder stepper motor not yet mounted but sitting aside:
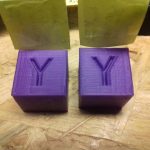
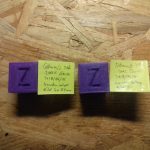
With the direct drive I printed at 60mm/s as default, now printing at 80mm/s the XYZ Calibration Cube:
and the results are impressive, left 60mm/s, right 120mm/s:
 The two E3D V6 bowden adapters I first printed and used required quite some change in Z height, bringing my Z stopper screw to its limits and also were off in the Y axis – so I designed a more suitable adapter with multiple mounting holes: CTC Prusa I3 Pro B E3D V6 Extruder Adapter V2.2 with a simple extruder motor mount at the top left-hand side of the XZ frame.
E3D V6 Bowden Settings
- Printing speed: 60mm/s – 150mm/s
- Infill speed: 100mm/s – 150mm/s
- Motion speed: 120mm/s – 150mm/s
- Retraction distance: 2.5mm – 4mm (really depends on the length of the Bowden tube)
Conclusion
Using E3D V6 with a low cost and low quality 3d printer:
Faster printing with improved overall print quality.
Aside of the leaking, which was fixed with teflon thread tape, the E3D V6 clone is a great addition to the CTC DIY I3 Pro B – true added value, but comes with more cumbersome handling with sealing threads when exchanging nozzles.
Btw, in this setup I still use M8 threaded rods in the Z axis, and you see no Z wobble artifacts, the linear threads for the Z axis are overrated – it works with simple M8 threads, if you let the couplers flexible enough, like with this “cheap” clear PVC tube, and not fasten the threads on the top, they have to stay floating.
