


That’s it.

That’s it.

It has been a few weeks with the color mixing Diamond Hotend 3-in-1 (there is also an 5-in-1 option) – a few notes:
Pros:
Cons:
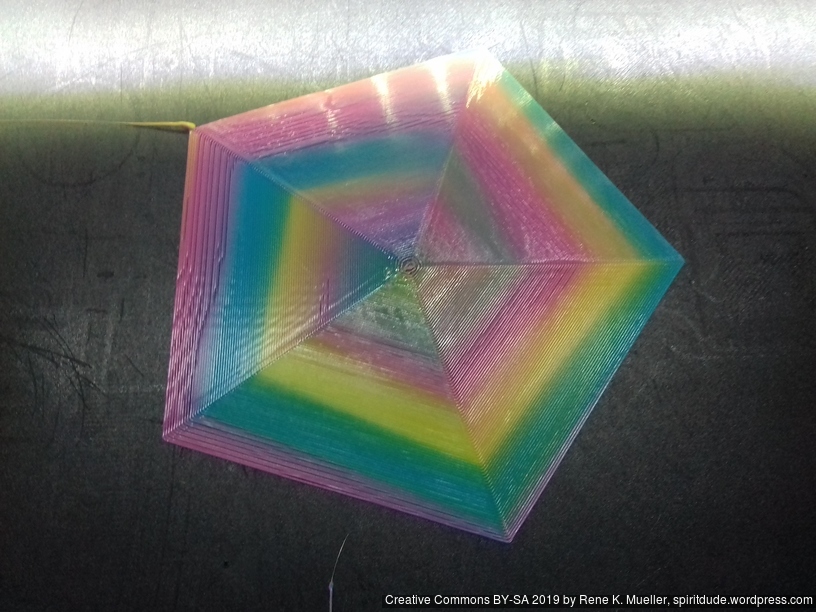
Alike with single extruder, with Diamond Hotend one must build up pressure within the hotend so the print is successful:
This procedure worked for me:
The Gcode looks like this:
G91                    ; relative positioning
M165 A1                ; color A
G1 E15 F100            ; extrude 15mm
M165 B1                ; color B
G1 E15 F100
M165 C1                ; color C
G1 E15 F100
M165 A0.33 B0.33 C0.33 ; all colors each 1/3
G1 E10 F100            ; extrude 10mm
G90                    ; absolute positioning
G92 E0                 ; reset extruding position (to be sure)
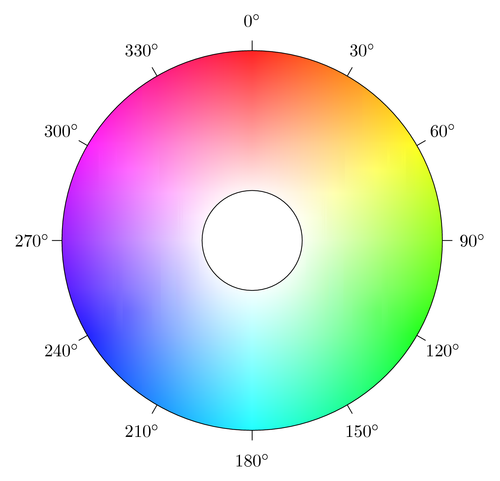
Hue wheel is a simple way to remember the colors, and is part of Hue Saturation Lightness (HSL) representation covering entire human color spectrum (more natural than remembering RGB values).
h: 0 .. 360 degrees
s: 0 .. 1 (ignored)l: 0 .. 1 (ignored)function hsl2cmy(h,s,l) {
r = ((h+180)%360)/360;
c = r < 1/3 ? 1-r*3 : r >= 2/3 ? (r-2/3)*3 : 0; // 1..0..0..1
m = r < 1/3 ? r*3 : r <= 2/3 ? 1 - (r-1/3)*3 : 0; // 0..1..0..0
y = r >= 1/3 && r < 2/3 ? (r-1/3)*3 : r >= 2/3 ? 1 - (r-2/3)*3 : 0; // 0..0..1..0
return (c,m,y);
}
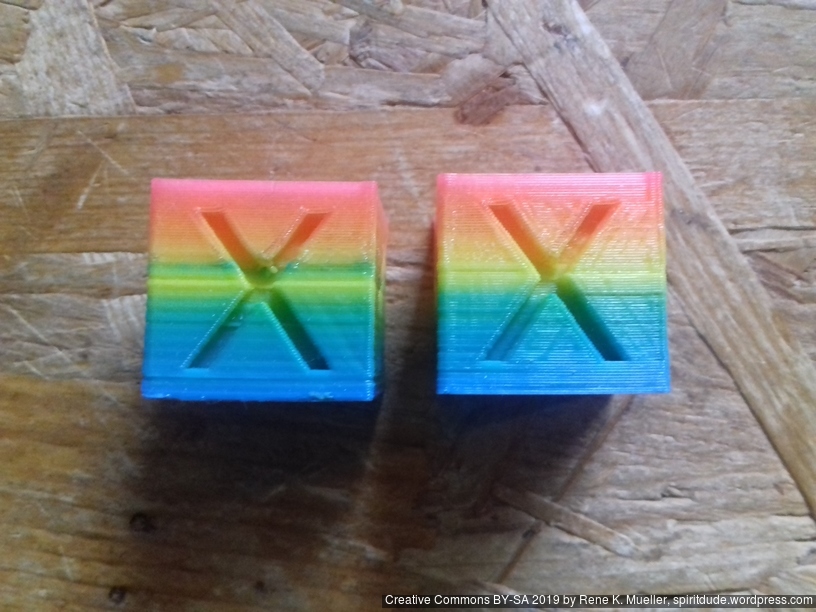
So, in case you use Cyan, Magenta and Yellow filament, you are able to cover some of the Hue wheel – I say “some” as getting Magenta filament seems not that easy – e.g. I used Glowing Magenta (less pigments) vs Rose/Magenta filament, here the two as comparison:
A proper color space mapping is required, e.g. accounting the different pigment density and thereby consider the strength how one color might dominate another in the mixing.
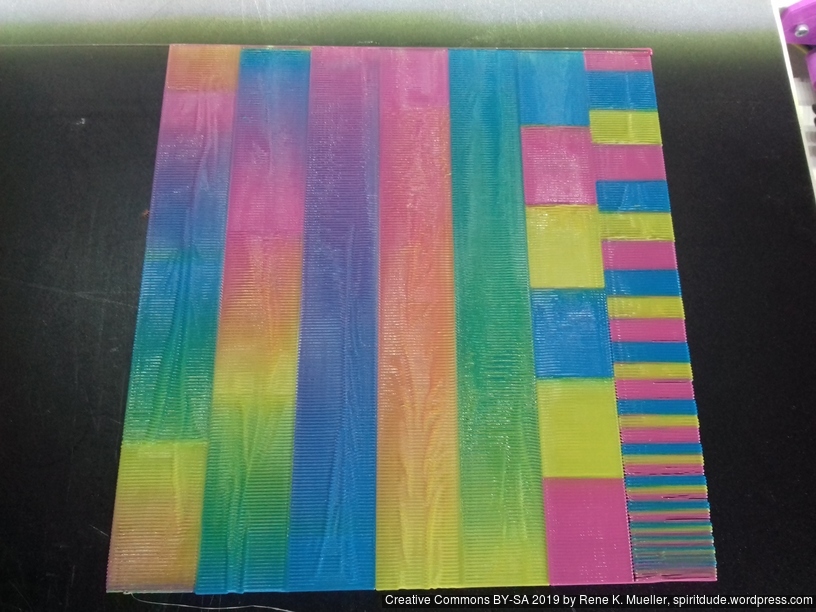
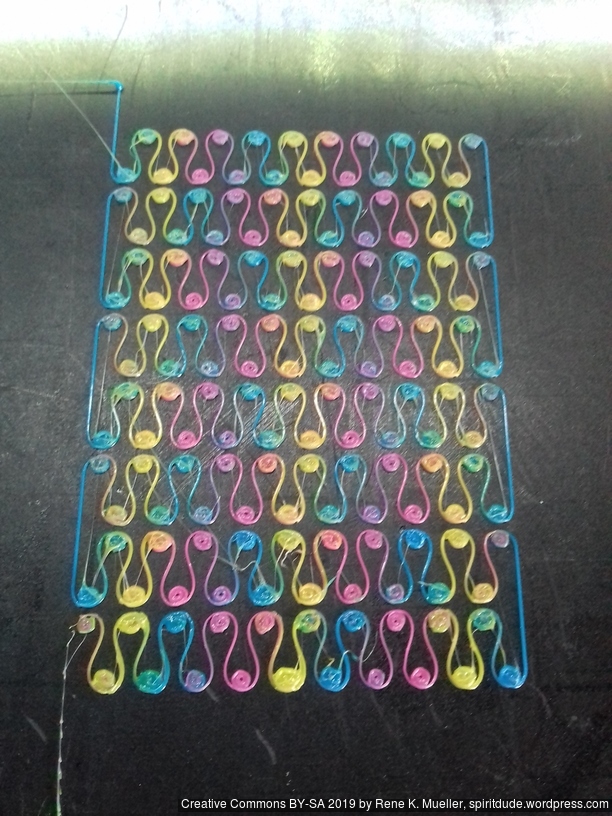
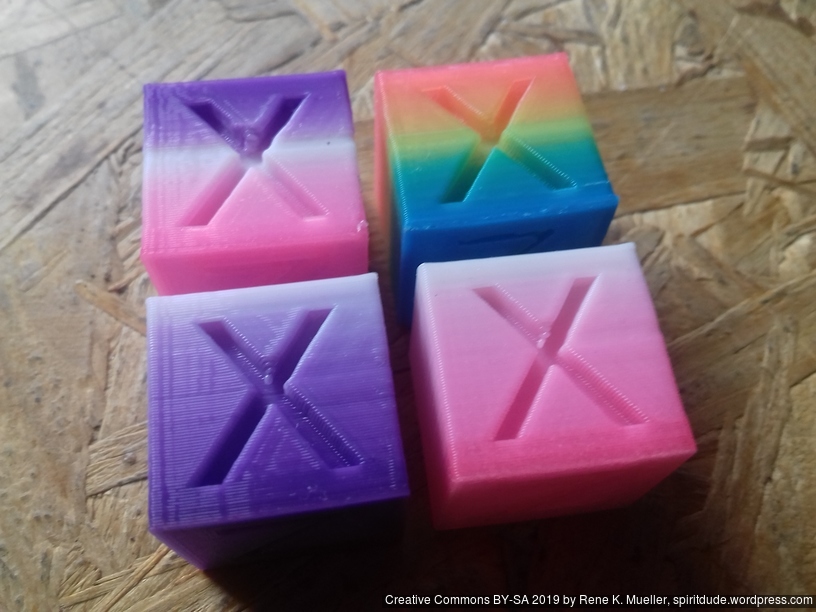
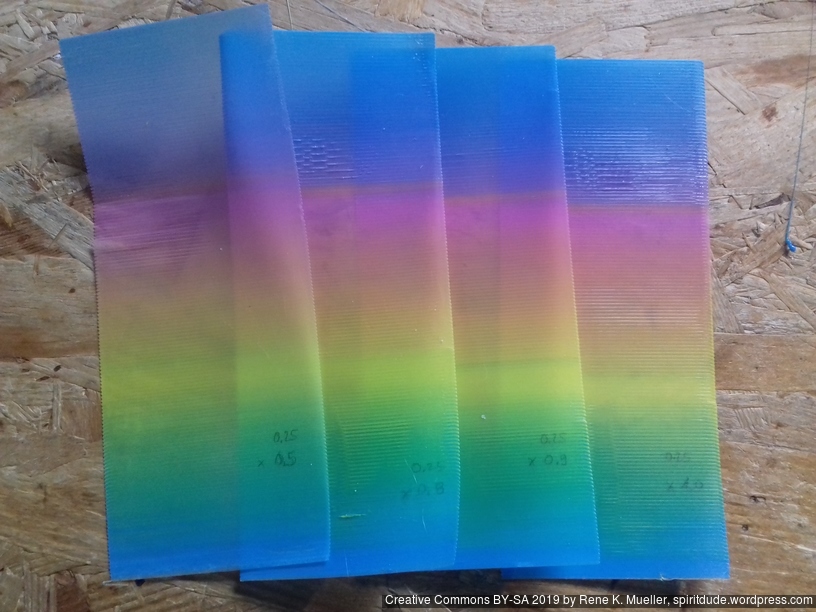
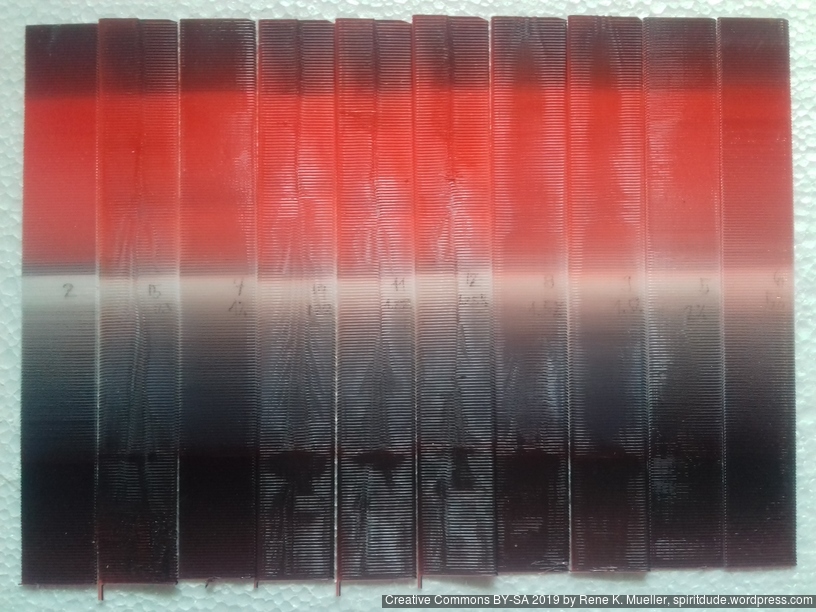
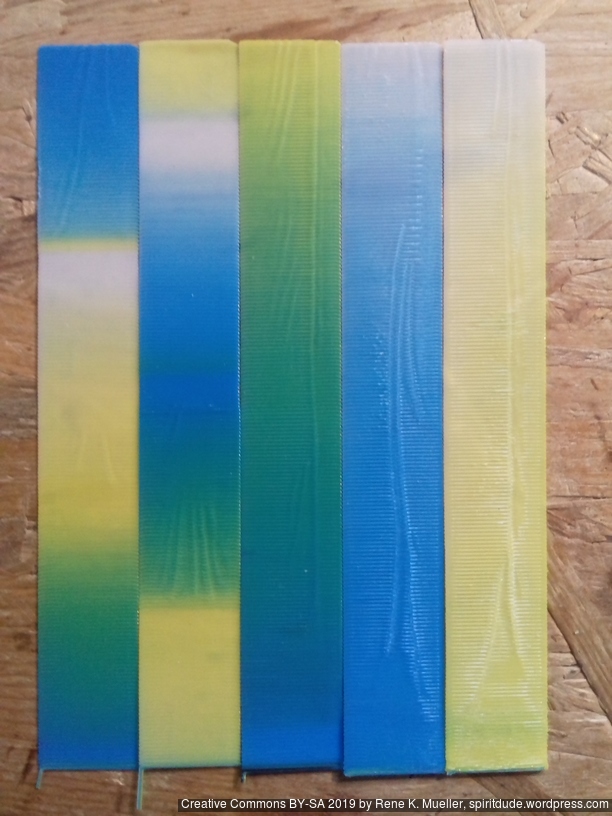
Usually the first print of the day, cooling up from 15-20C room temperature, gives me not a good print, even using my pressure building Gcode, the 2nd and 3rd print color mixing becomes more reliable. Yet, as you can see, color blending/mixing isn’t fully consistent:
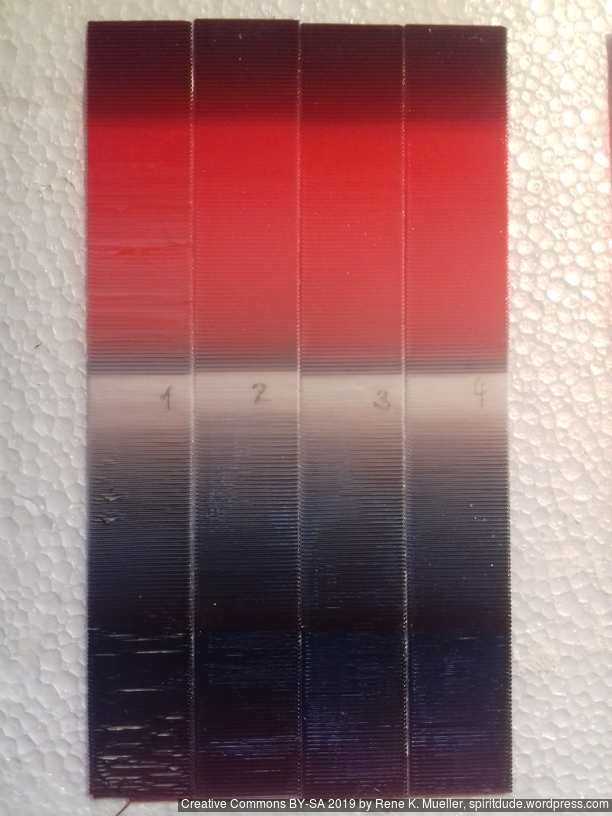
No 1 was 1st print heating up from 15C ambient to 205C – including pre-pressure preparation. No 2-4 were printed with nozzle kept at 205C and not cooling off.
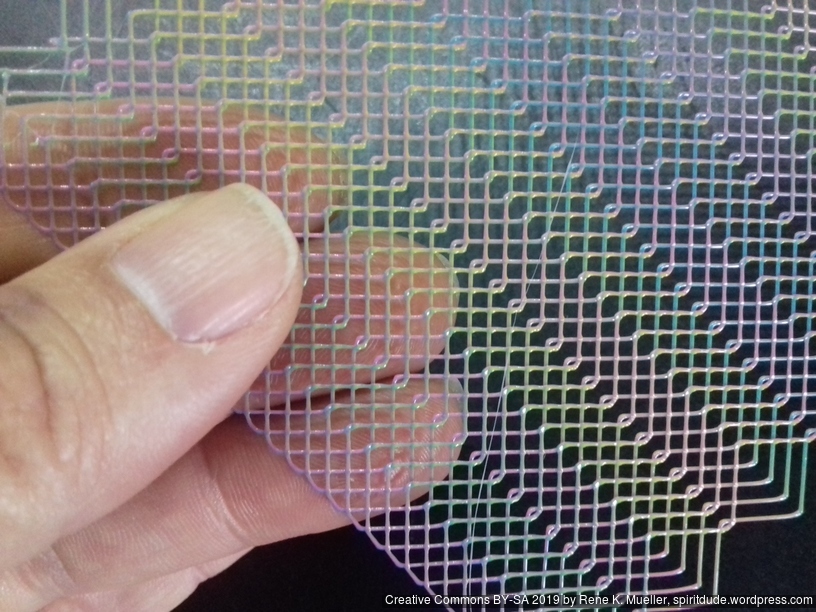
Some wider strips also single layer about 0.25mm thick with 0.4mm nozzle printed with various extrusion multipliers (0.5 – 1.0x):
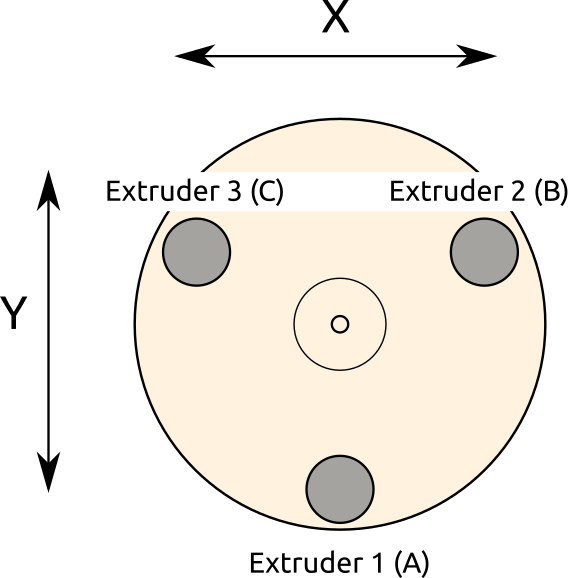
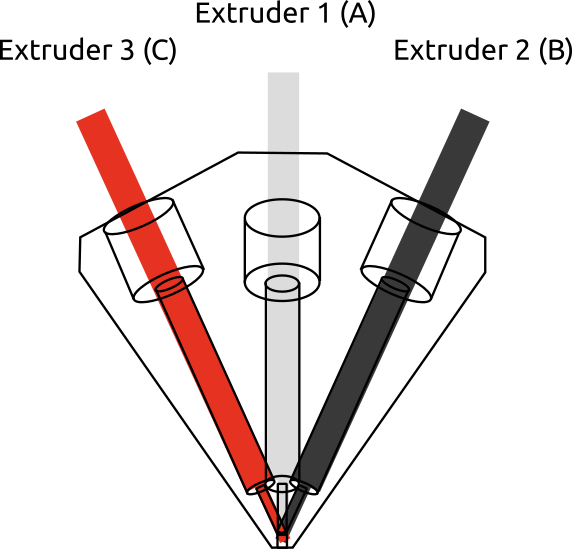
Looking from the top of the Diamond Hotend, you have 3 (or 5) filament intakes, and in case of 3-in-1:
and the following examples I use
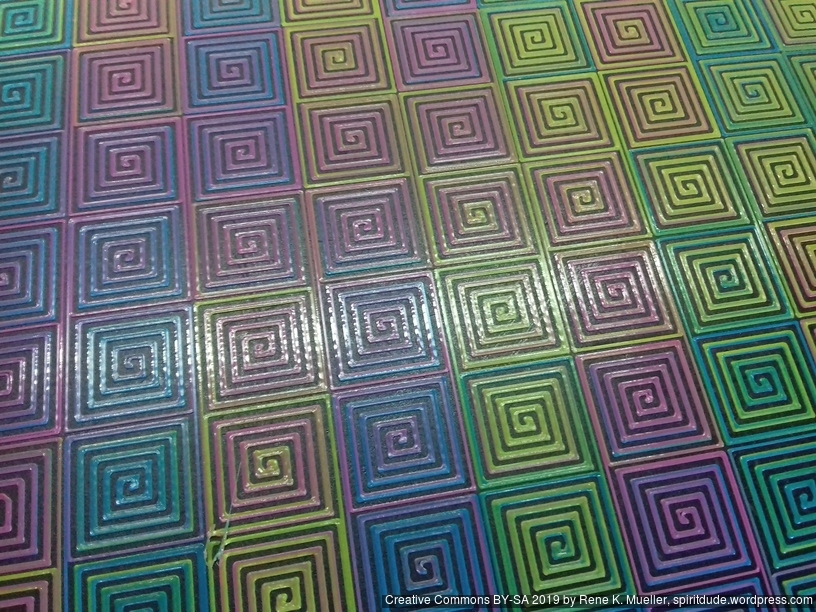
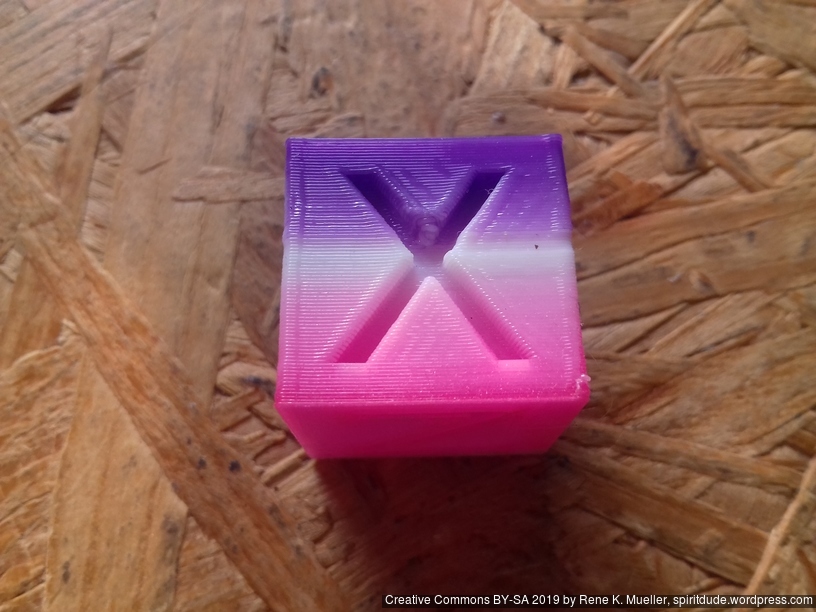
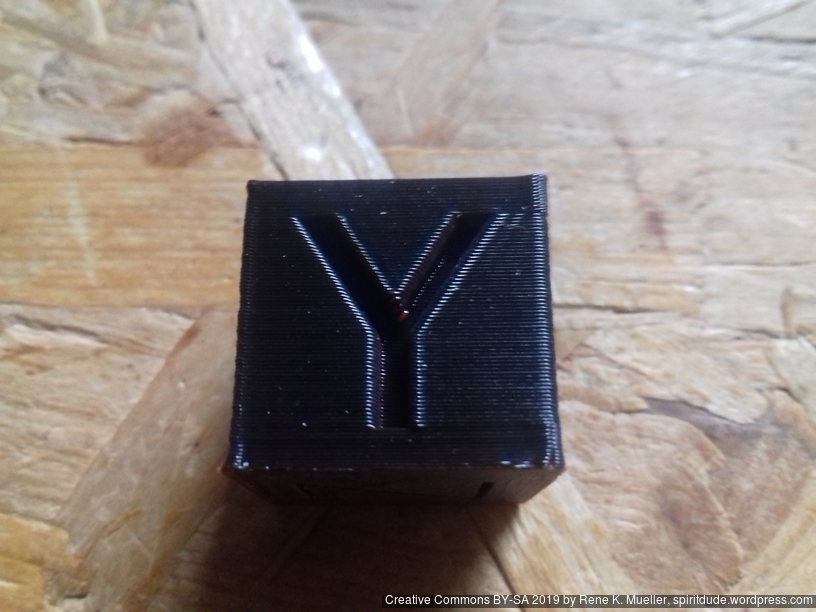
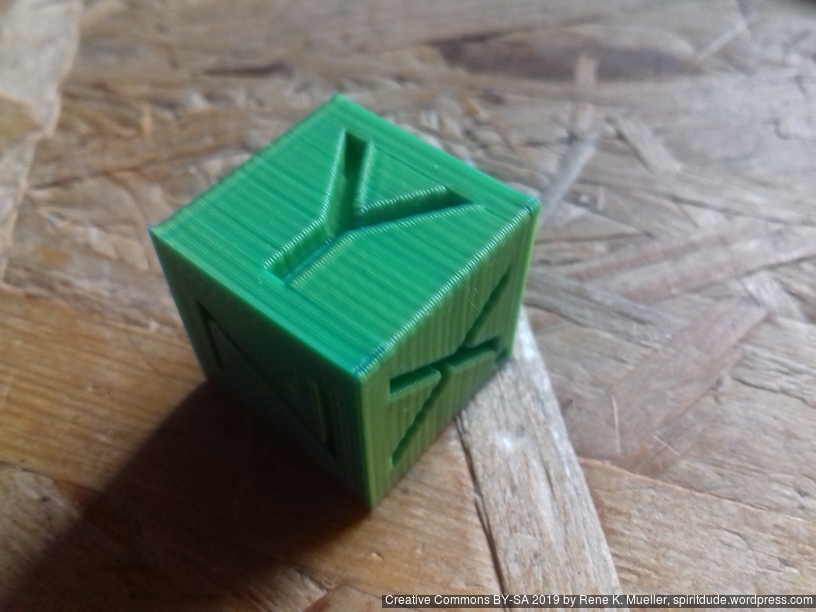
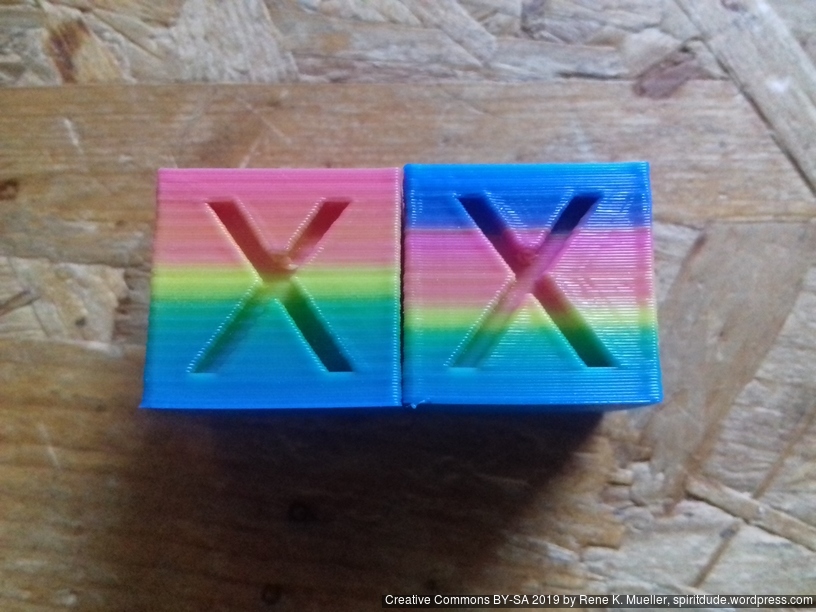
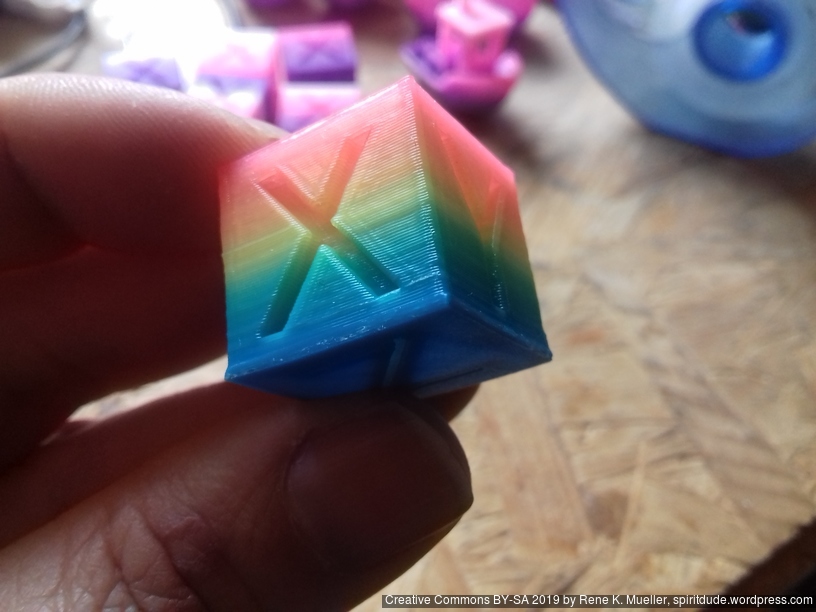
and you clearly see that color mixing is highly dependent on the orientation, using my xyz 20mm Hollow Calibration Cube printed with 0% infill, 2 perimeters, 0.4mm nozzle, 0.25mm layer height:
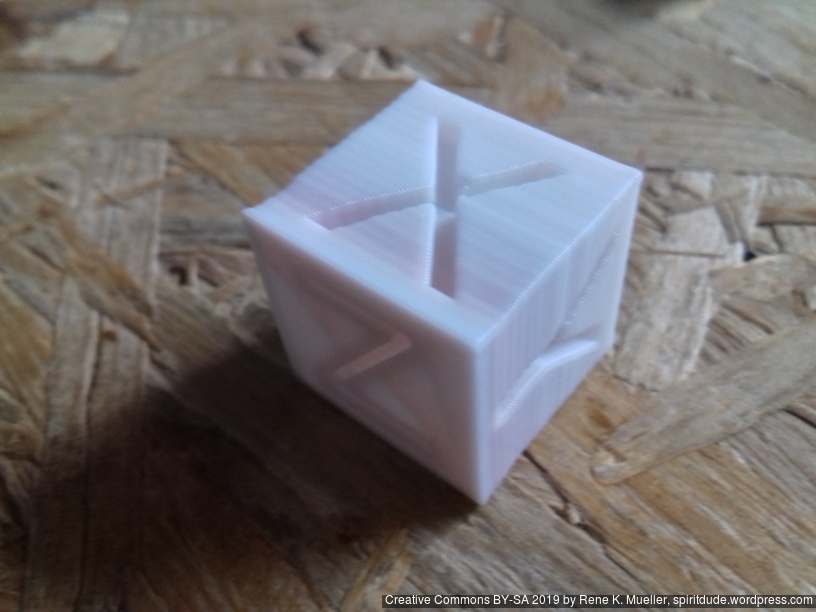
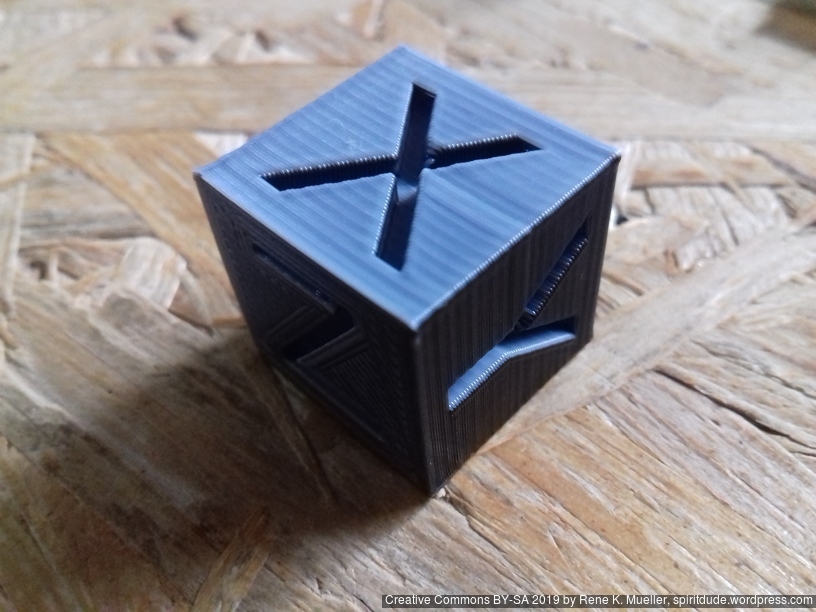

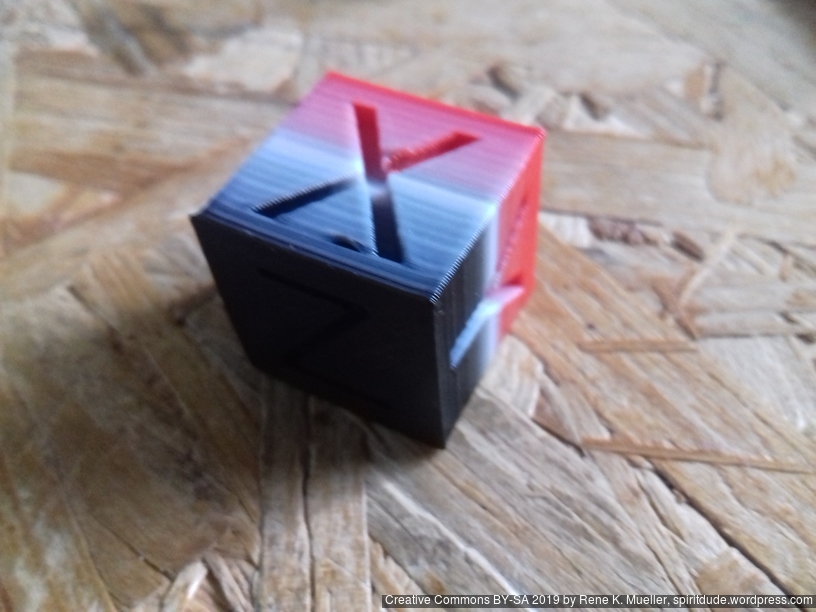


Let me focus on three cases more detailed:
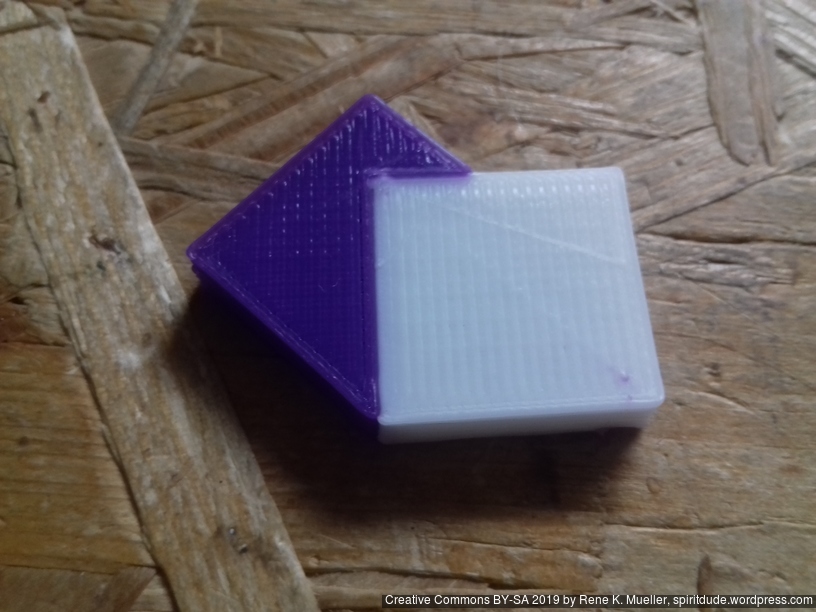
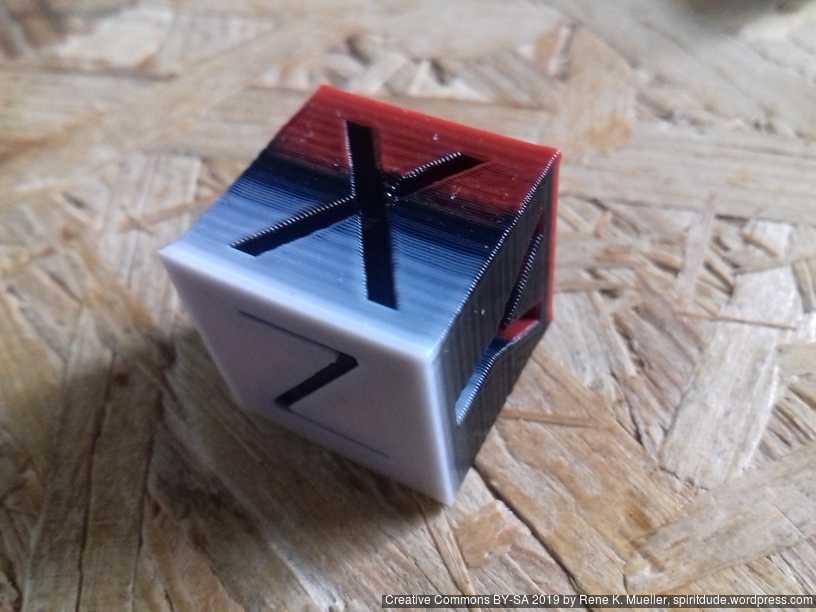
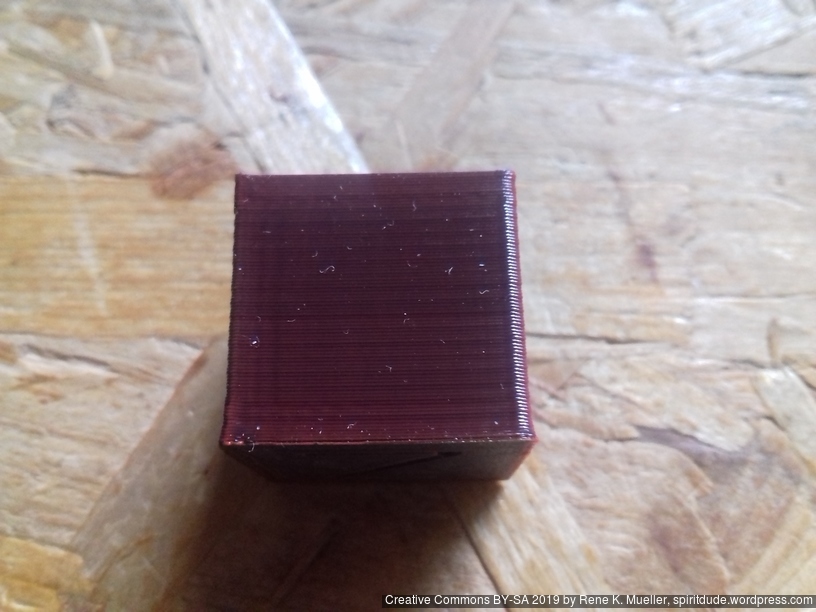
As you can see, white PLA fed 50% through A (front), gives the X face predominent white, whereas the black PLA fed 50% through B (back right) gives the “Y” face predominent black. Ideally, this cube should be mix 50/50 white/black, a shade of grey, but obviously isn’t. The same with red (C) and black (B):
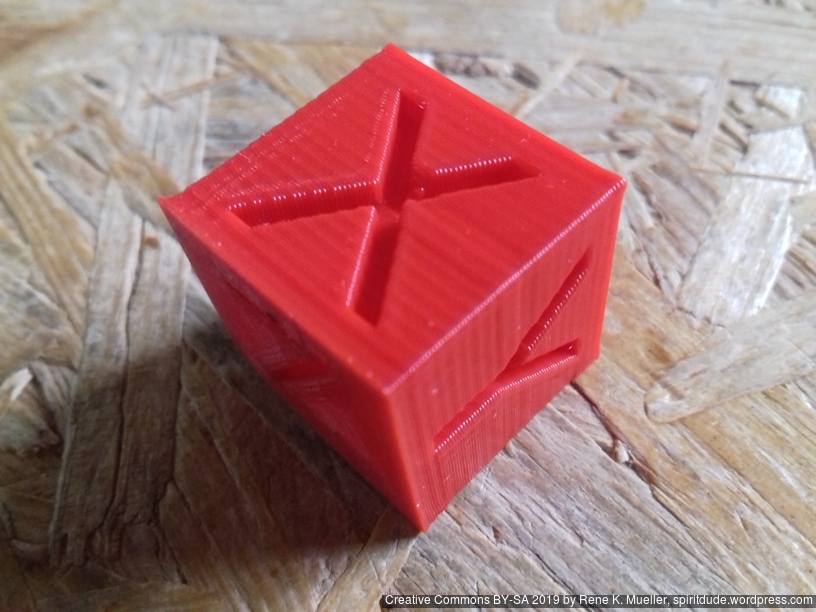
although the mix in front of “X” face is ok, And looking at A (front) 50% white and C (back left) 50% red PLA:
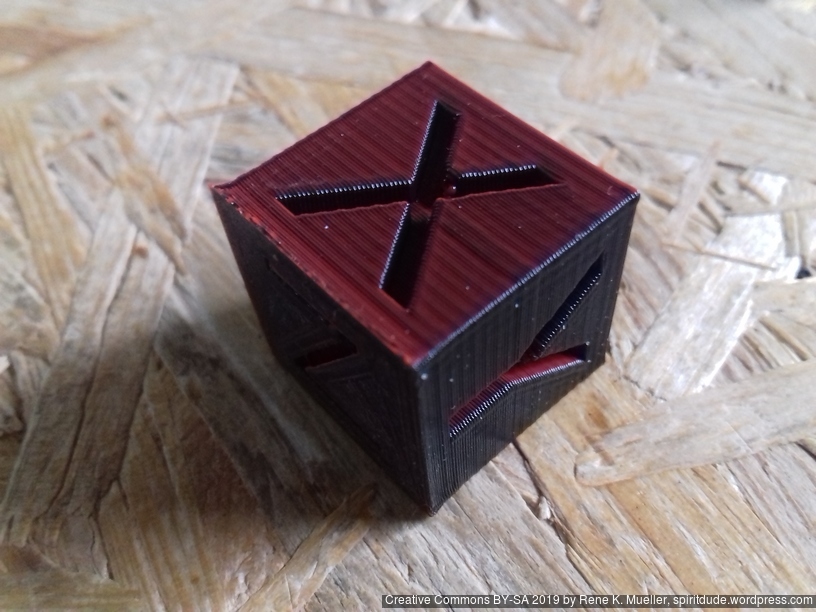
And looking at the 20mm Hollow Calibration Cube with A=0% white, B=50% black and C=50% red:
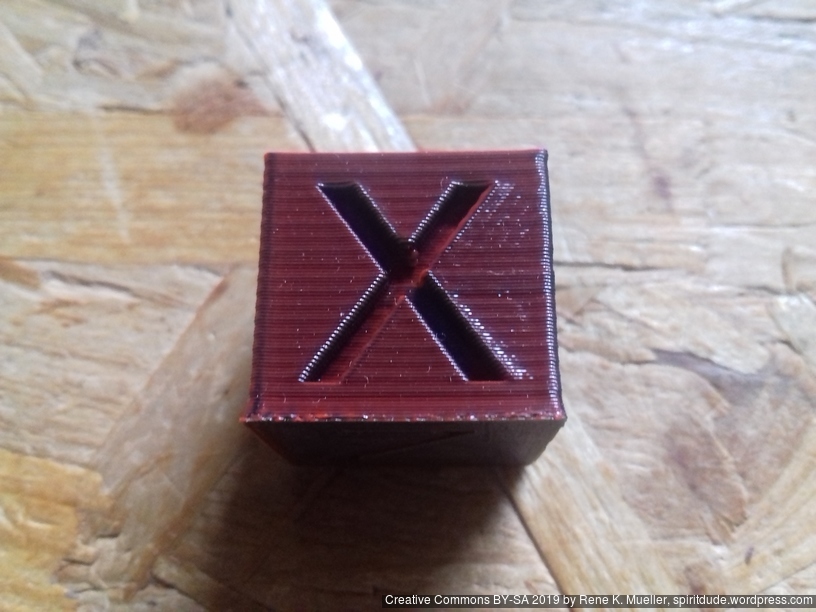
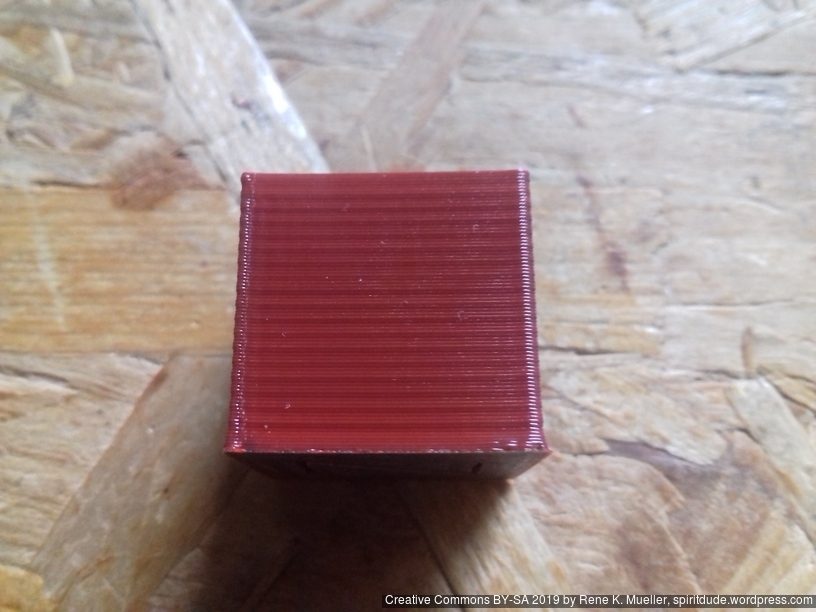
each side has another shade of red, even though 50/50 red/black is defined.
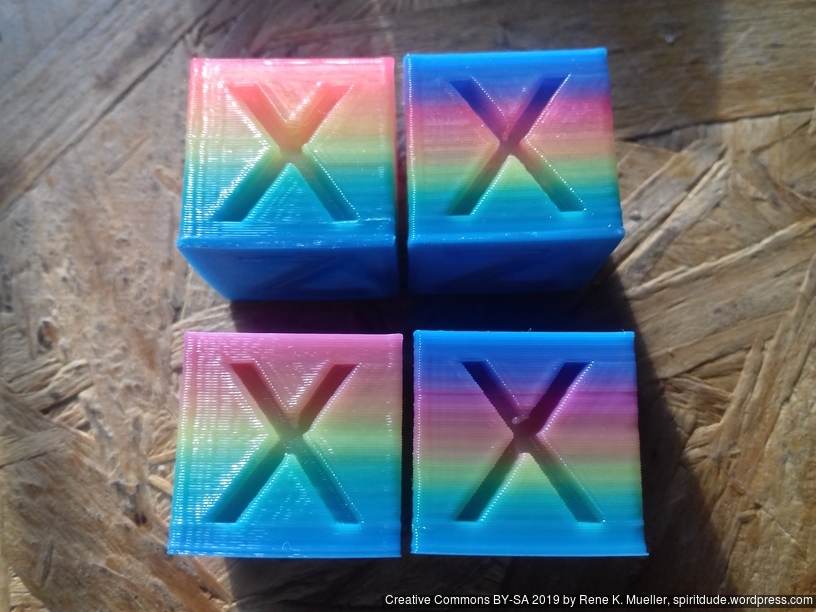
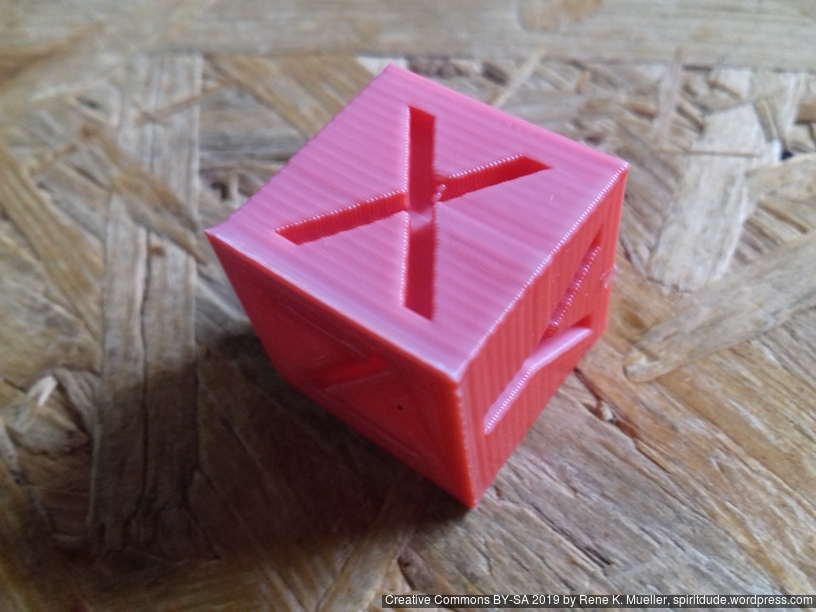
Another example with 50/50 cyan/yellow which should give green:
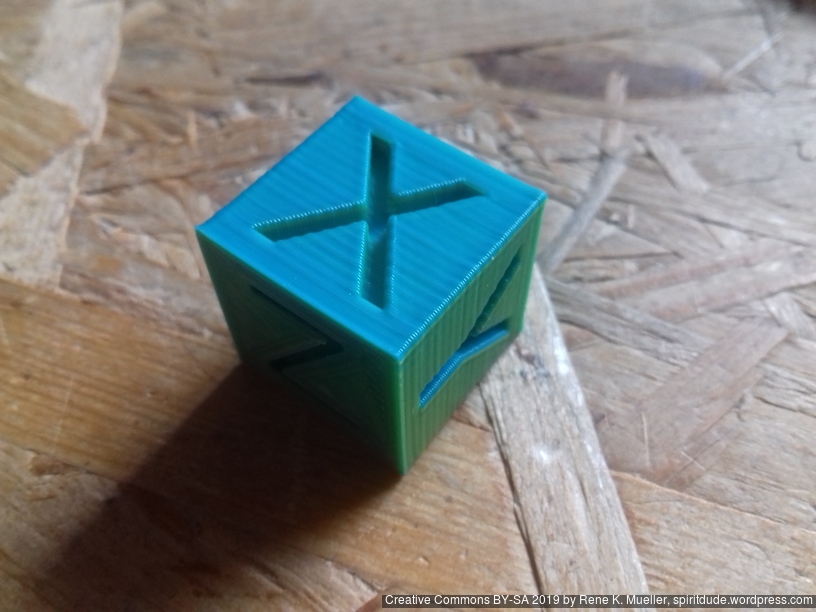
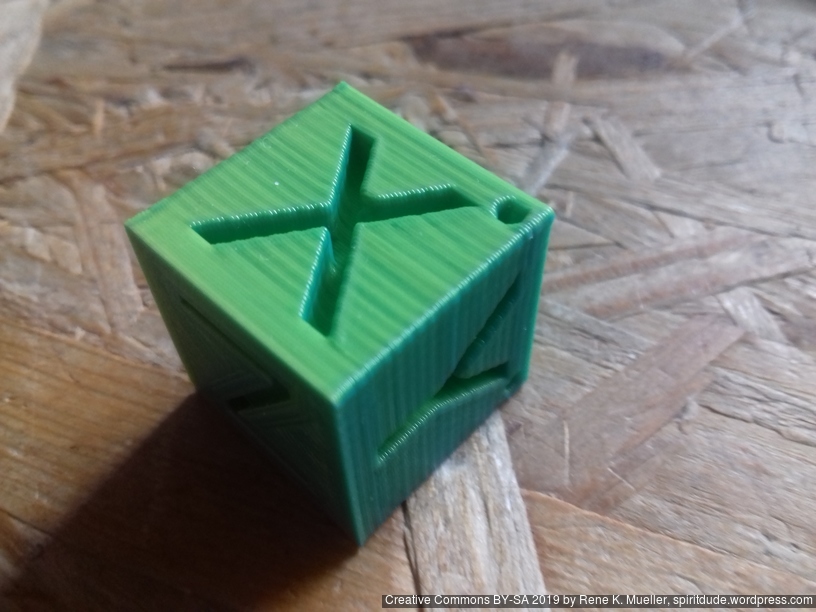

each side has another shade of green (the opposite sides of X or Y have a dot on the right upper corner for orientation).
This issue is a bit more complex so let me explain in a few steps:
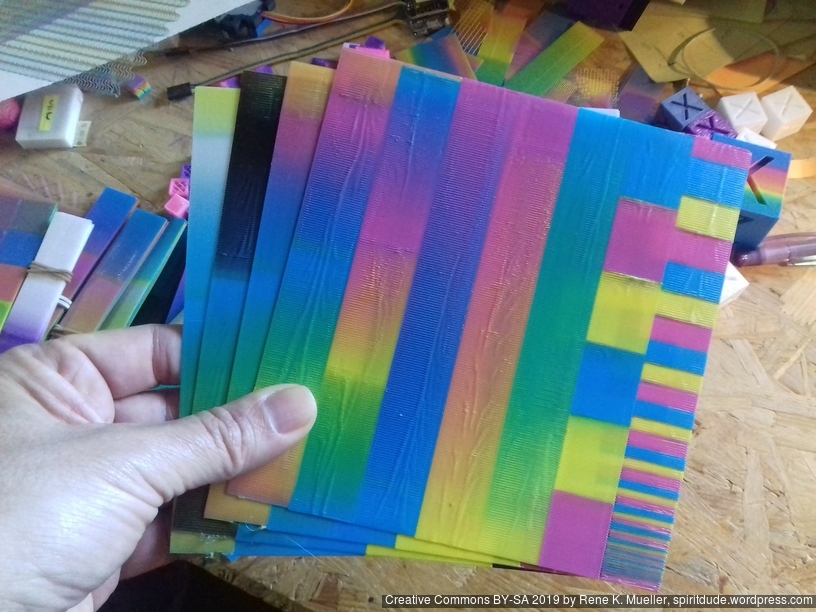
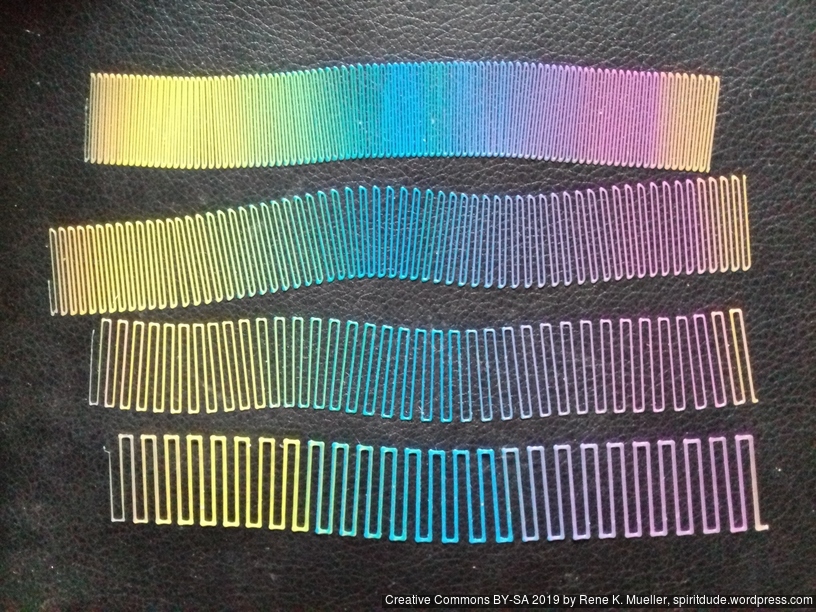
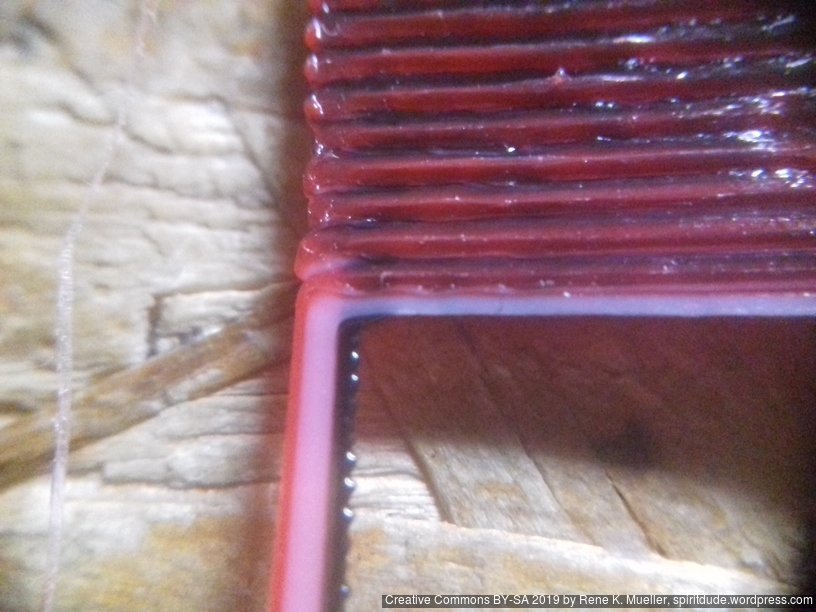
Here the single layer mixing examples, where you can see it clearly:
The width of the strip is 20mm, length is 150mm, making A/B – B – C – A/C transition (equals to Hue wheel to CMY 0..360 degrees transition) where A=white, B=black and C=red PLA, you can see how long the transition is, 2-3 lines equals to 40-60mm printed, which is about 2-3mm filament (ratio is 20x: 0.4mm nozzle vs 1.75mm filament, calculating ratio with circular areas).
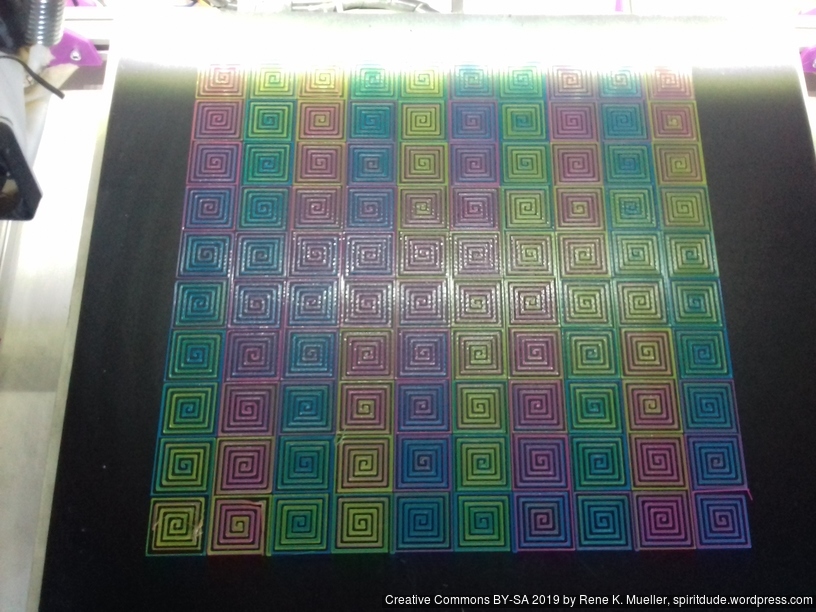
Possible remedy is to extrude all filaments with a minimum, e.g. 0.5%, 1%, 1.25%, 1.5%, 2% and 5% as examples:
In essence you compromise the purity of the colors, but you gain cleaner color change.
So, if color change (without purge tower) is important for the print, and you don’t need pure colors, you may set the minimum for each involved filament to 0.5%, for example:
M165 A0.005 B1 C0.005
Note: If Marlin sees A+B+C > 1, and rescales all parameters to normalized sum of 1.0, I don’t know how other firmware behaves.
Some more tests, using white (W) and black (K) (Netco, purchased via Ebay) on the 3-in-1 to have some idea how 5-in-1 Diamond Hotend will behave:
White blends quite well to Yellow or Cyan, given the limitations of the Diamond Hotend as illustrated earlier in this post.
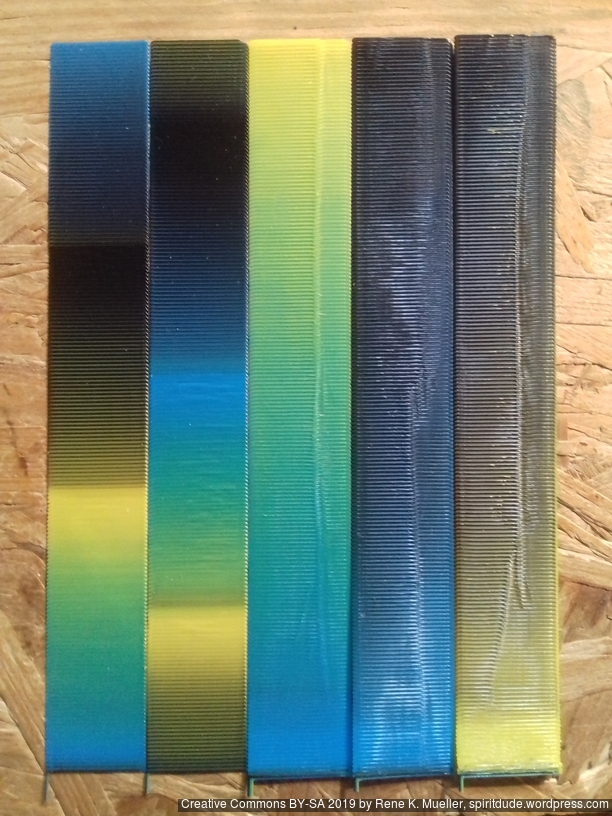
Black dominates very strongly and doesn’t seem to mix well: Dark Yellow didn’t work well as it seems the limited mixing shows Yellow and Black aside of each other; where as Dark Blue worked better.
Using Rose filament (Noveste, purchased via Ebay) as “Magenta” gives very good transitions with Cyan and Yellow, yet, no classic Red from the mix, which magenta would or should provide:
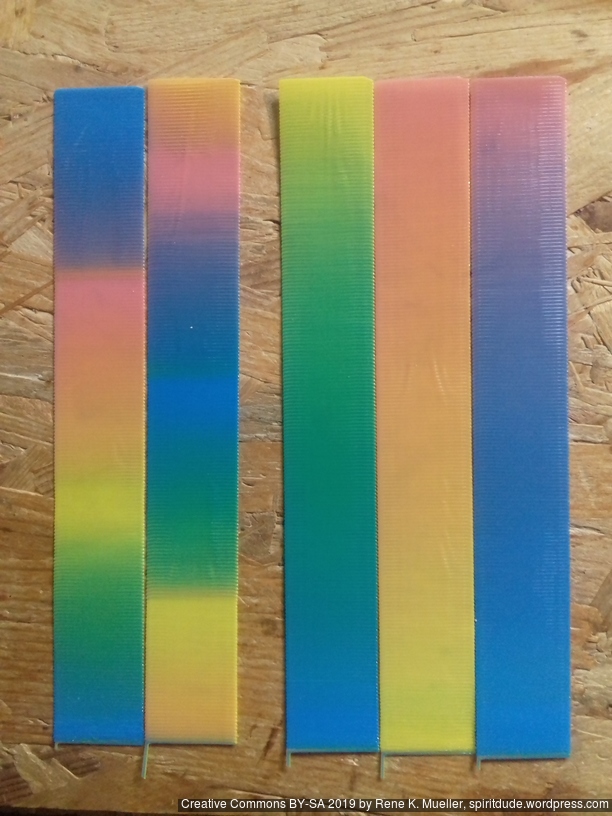
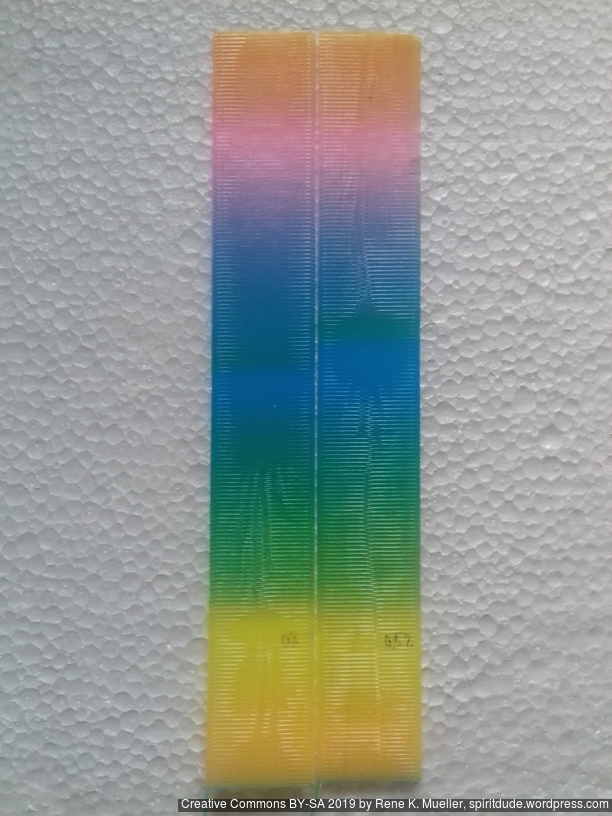
Using Raspberry Rose filament (OWL Filament, Germany, purchased via Ebay) blended or mixed with Cyan and Yellow:
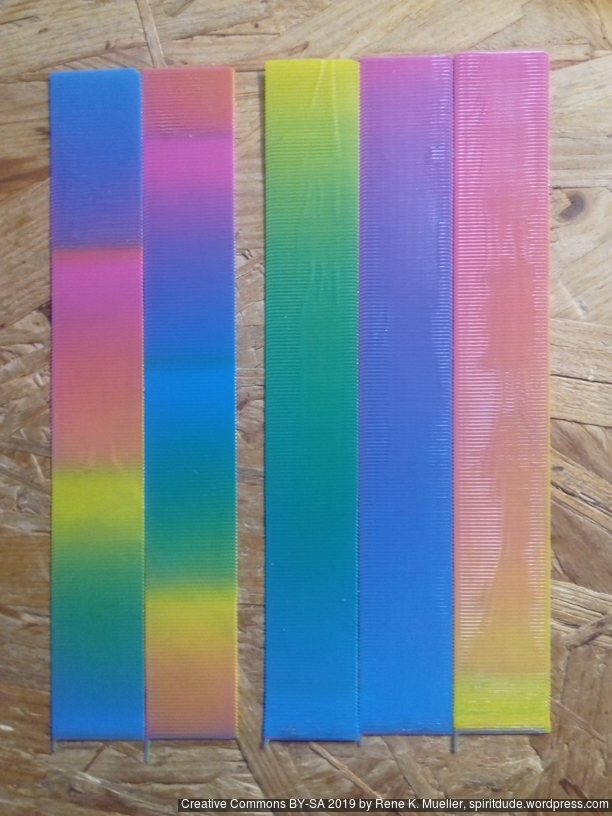
Quite good results with this single layer strip: so far much closer to red than before, rather deep saturated Orange, not quite Red, and when I printed calibration cubes, I saw the Raspberry Rose filament dominates Yellow and doesn’t properly mix: the change between Yellow and “Magenta” is rather abrupt:
I will try to acquire better “Magenta” filament, as I haven’t achieved proper Red color by mixing Magenta and Yellow. The Cyan/Yellow mixing works quite well, given both filaments come from the same supplier (Sienoc), one who doesn’t provide Magenta unfortunately, only Glowing Magenta which blends well, but lacks strong color, too translucent.
blue = relevant positive
red = relevant negative
Independent Dual Extrusions (IDEX)
★★★★★
Dual Hotends 2-in-2
★★★★★
Chimera 2-in-2
★★★★★
Cyclops 2-in-1
★★★★★ (clone)
Cyclops NF 2-in-1
★★★★★
Diamond Hotend 3-in-1
★★★★★
Multiple Switching Extrusions (MSE) 2-in-2, 3-in-3, 4-in-4
(rating comes later)
Y Splitter x-in-1
★★★★★
Tool Changer
(rating comes later)
Footnotes
Hints:
That’s it.