
After 30 days after receiving the CTC DIY Prusa i3 3d printer, here some notes of what I did:
Sample Prints
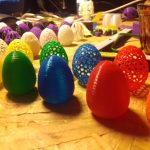
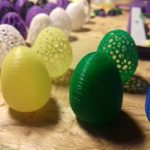
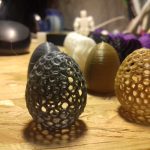
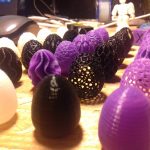
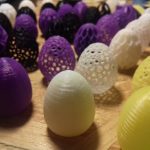
I choose the “easter eggs” series as designed by Antonin Nosek as sample print to tune and review my machine settings (extrusion flow, nozzle temperature, printing speed) and compare the quality of the results:
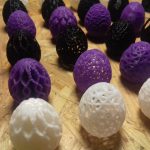
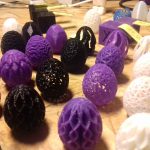
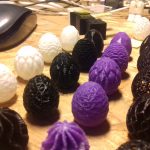
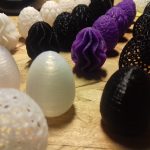
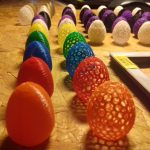
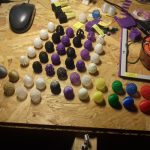
For now I used “Sienoc” branded PLA filament (purple, black) which performed well (adhesion, printability), “Kaisertech” white PLA which was OK, and a collection of 20 colors of PLA of unknown brand each 10m for smaller prints (required 215C instead of 200C).
- “Voronoi Loopy” egg stresses the 3d printer with short segments, stringing issues will show up if temperature is not well tuned (much stringing, likely too high temperature, increase travel speed)
- “Plain” egg I used for general temperature setting
Here are few brief video samples of printing pieces at difference challenges:
Easter Eggs
The easter egg “minecraft” version on the lefthand side usually requires support to print the overhangs, but at 40% size (~25mm height) with sufficient cooling at the nozzle/part extrusion it prints properly without support, printed at 60mm/s (black PLA by Sienoc @ 200C).
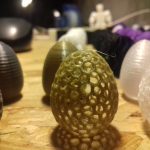
Easter Egg “Voronoi Loopy”
The easter egg “Voronoi Loopy” is a bit of torture for the 3d printer, as the layers are chopped into many very small segments which in 3d form many loops covering the surface. It’s printed at 0.2mm layer height and 60mm/s printing speed, but since it’s printed at 0% infill that speed is not reached – black PLA by Sienoc @ 200C.
Bathtub Plug
A friend required a fitting plug for a bathtub and I quickly made a small cylinder or rather cone with two different radius. Since it was used in outdoor and forcefully inserted, I printed it with 30% infill and 0.3mm layer height (with 0.4mm nozzle) and 80mm/s printing speed to save time, printed with black PLA by Sienoc @ 200C.
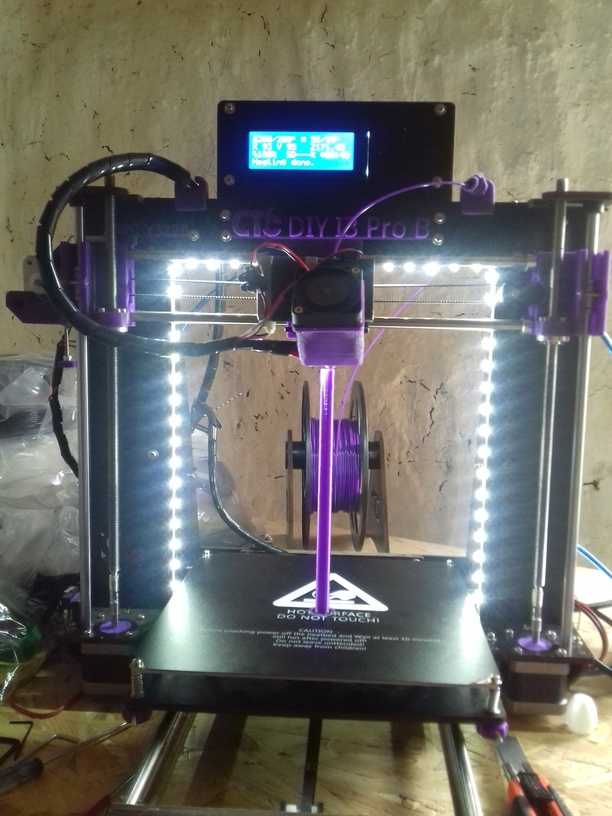
LED Strip
I already added a white LED nearly the nozzle, which highlights the immediate printing areas but I wanted to have good light for the overall printing – so I added a LED strip along the inner XZ frame.
Bed Surface
-
- Blue tape sheets
-

- Stickable bed surface
Using original blue tape strips eventually gets ripped and damaged with a lot of printing and I ended up replacing it. At first I tried to put entire blue tape sheets on the bed, but those worked terribly: the tape was so adhesive to the printed parts, that the tape ripped easy from the bed, and some tape remained on the parts bottom even.
As next I’ve got a stickable printing surface, which worked very well at first but after a few prints had hard time to get a good first layer regardless at which bed temperature, the filament didn’t stick well on the surface but curled among the nozzle.
Currently I used the black stickable surface and blue tape sheets on top, until I found a better solution.
- Black Stickable Surface: at first worked good, but then had unreliable 1st layers often – it seemed to me it’s more critical to the bed leveling, too small or too big distance and the 1st layer will fail, and filament curl on the nozzle.
- Blue Tape Sheet: PLA sticks (too) well, but rips from the bed when removing the part; unless you wait the bed cools off down to 20C, but for larger parts with a lot of area at the first layer, I ripped off the sheet from the bed.
- Blue Tape: the original tape worked very well, the PLA sticked well and very tolerant to bed leveling, and printed parts were able to remove easily – large 1st layer area one has to use a tool to left the parts; with frequent use the tape loses some of the adhesive quality of the prints.
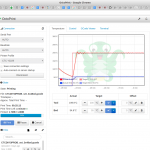
Networked 3D Printer with OctoPrint
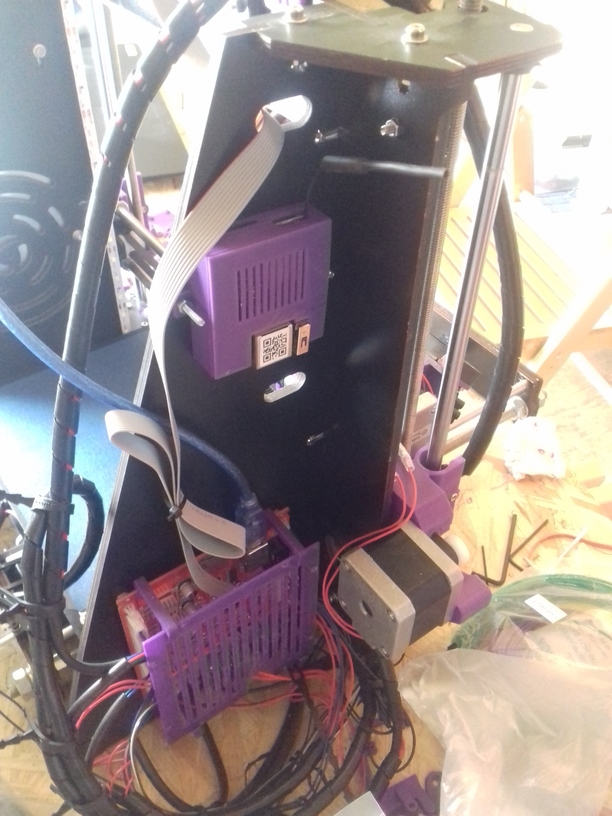 I used this guide to add OctoPrint to Orange Pi Zero, and used the 3d printable case I developed for OP Zero to mount the device to the frame.
To use OctoPrint with Cura:
- enable the OctoPrint Plugin within Cura (“Plugins” -> “Browse Plugins” -> “Octoprint” -> “Download” and restart Cura then)
- “Printer” -> “Manage Printer” -> click on “Connect OctoPrint”
- enter IP, API Key (visit OctoPrint direct in your browser, and “Server” -> “API Key” and copy) and paste API Key in Cura:Octoprint
- it will look up API Key and give “OK”
As next instead of “Print to USB” it will show option “Print with OctoPrint” in Cura.
Fastening Y Motor
I noticed that the Y motor mount wasn’t really well fastened and those two tiny M3 nuts worked themselves into the wood – a disaster waiting to happend – and I replaced the mount and used two zip ties to firmly mount the motor to the back plane – just in case.
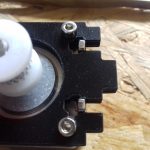
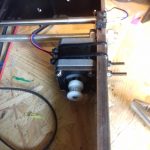
Additionally I printed an Y Motor mount (read the comments there) or alternatively this version might work as well – as another spare one.
That’s it . . .
