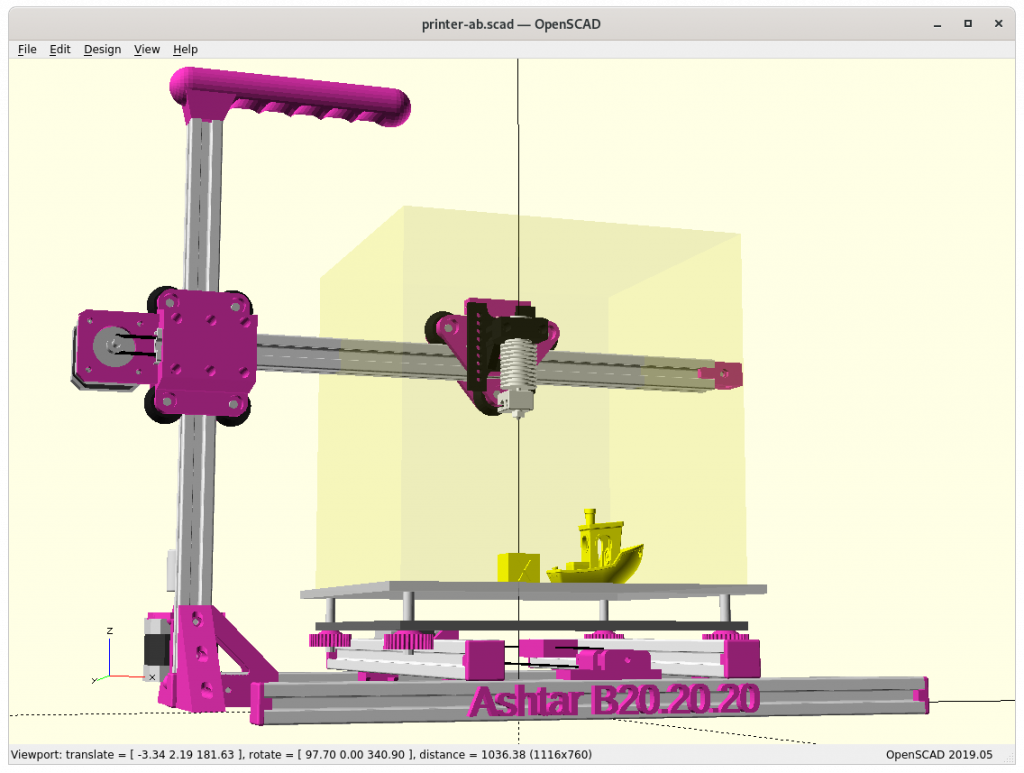
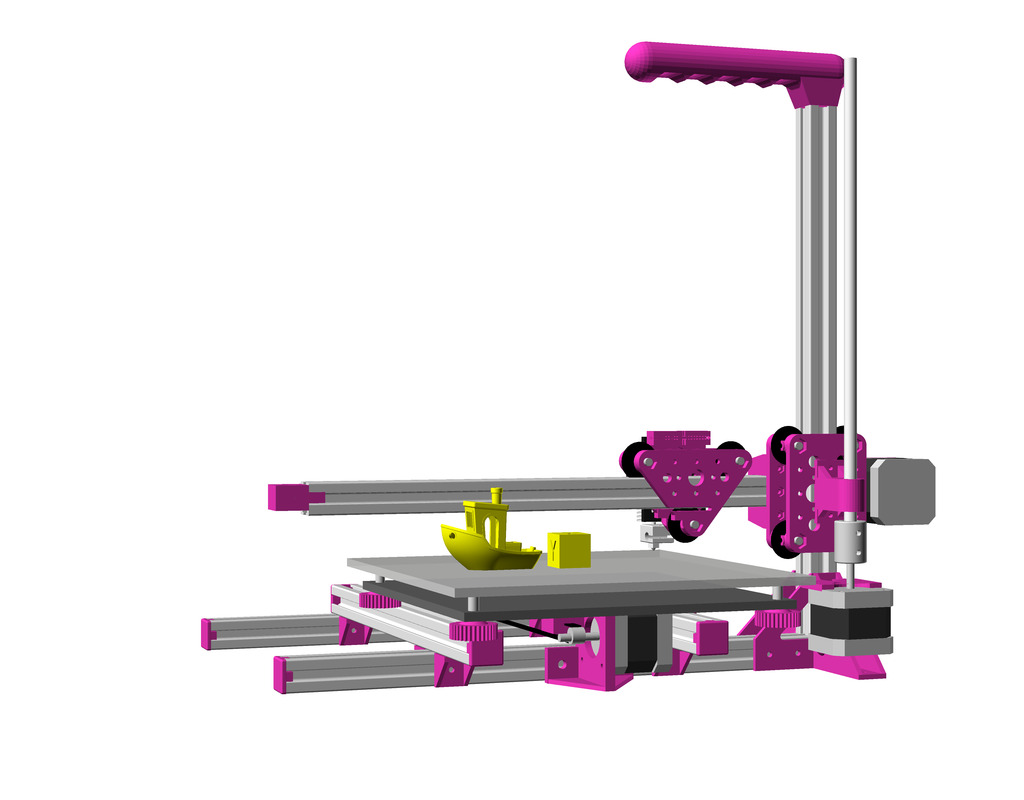
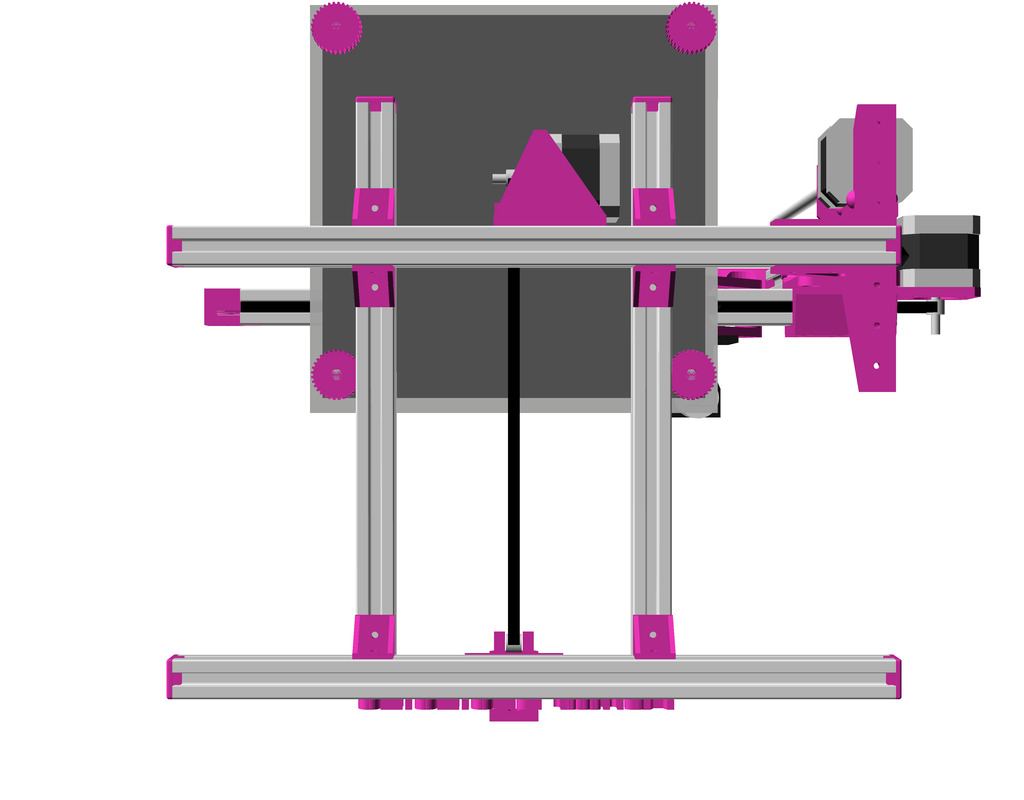
It has been on my mind for quite a while to do a 2020 alu extrusion based Cantilever 3D printer, and so I started in December 2020 with a rough design, starting from the existing Ashtar K design and cut away parts:
using Head XZ and Bed Y
aiming common build volume (e.g. easy to source print bed)
140mm to 190mm each axis
tried 6, 7 and 9 beams options, settling with 6 beams for now
aiming for uni-length 2020 alu extrusions, T-slot and V-slot where a carriage rides (X & Z axis) with V wheels.
trying to keep as simple as possible
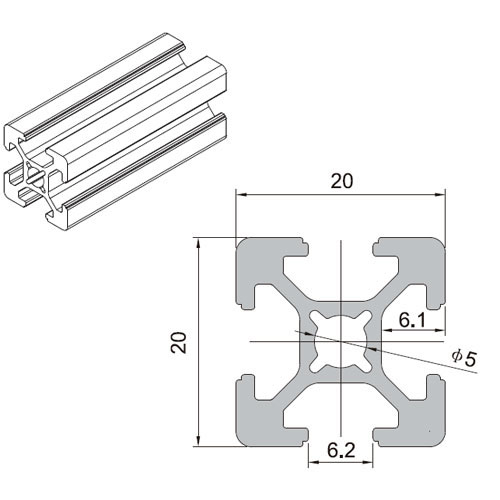
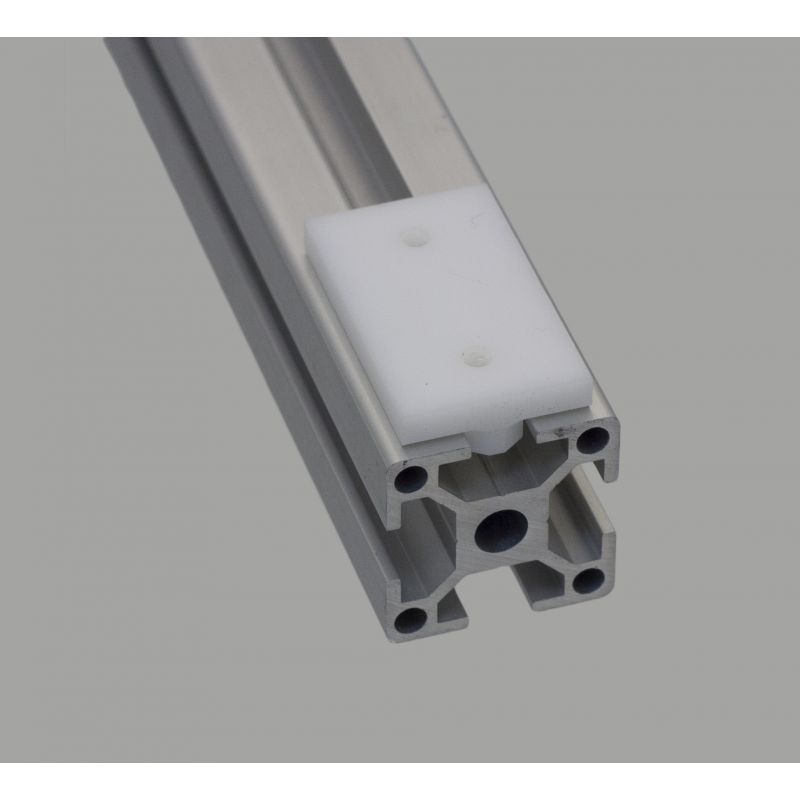
20×20 aka 2020 Alu Extrusion T-Slot Profile
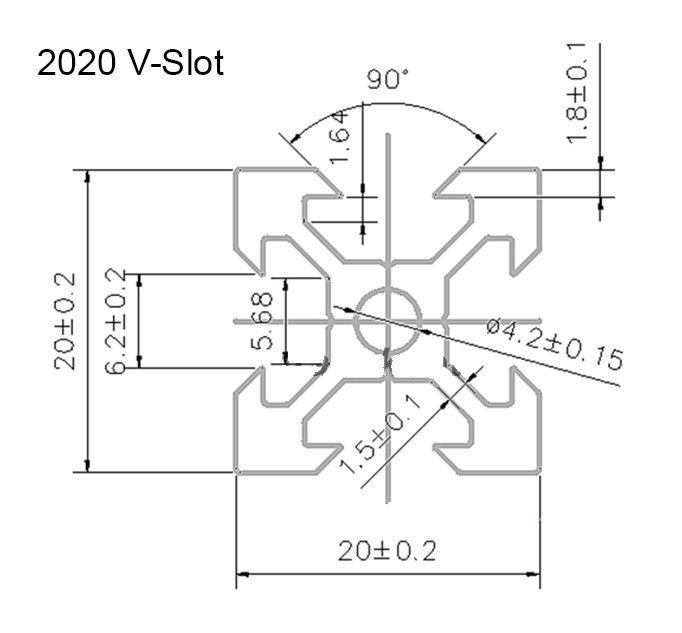
2020 V-Slot Profile
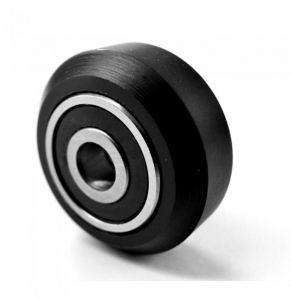
V wheel
Frame: 6 vs 7 vs 9 beams
6 beams
7 beams (+1 back)
9 beams (+2 left + right)
The 9 beams give an overall better sturdiness, but not sure how essential at small building volume (less than 220mm each axis). I might be able to remove beam, the last beam at the back at the bottom reducing to only 6 beams, in that case the Y motor is mounted on the remaining beam in the back.
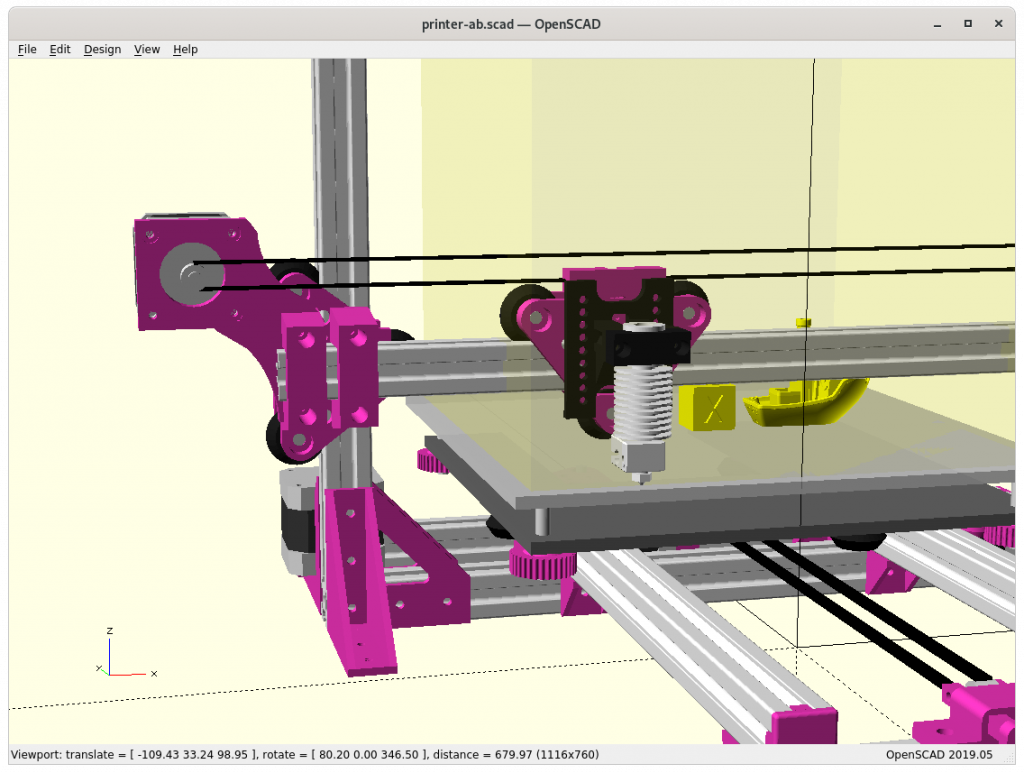
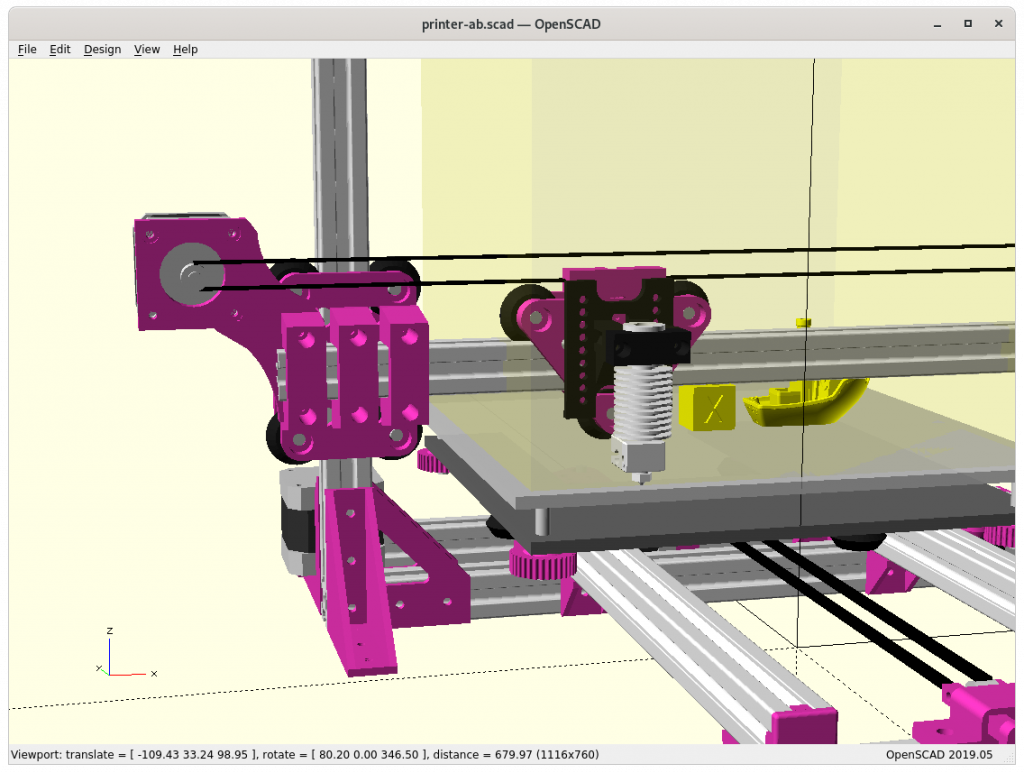
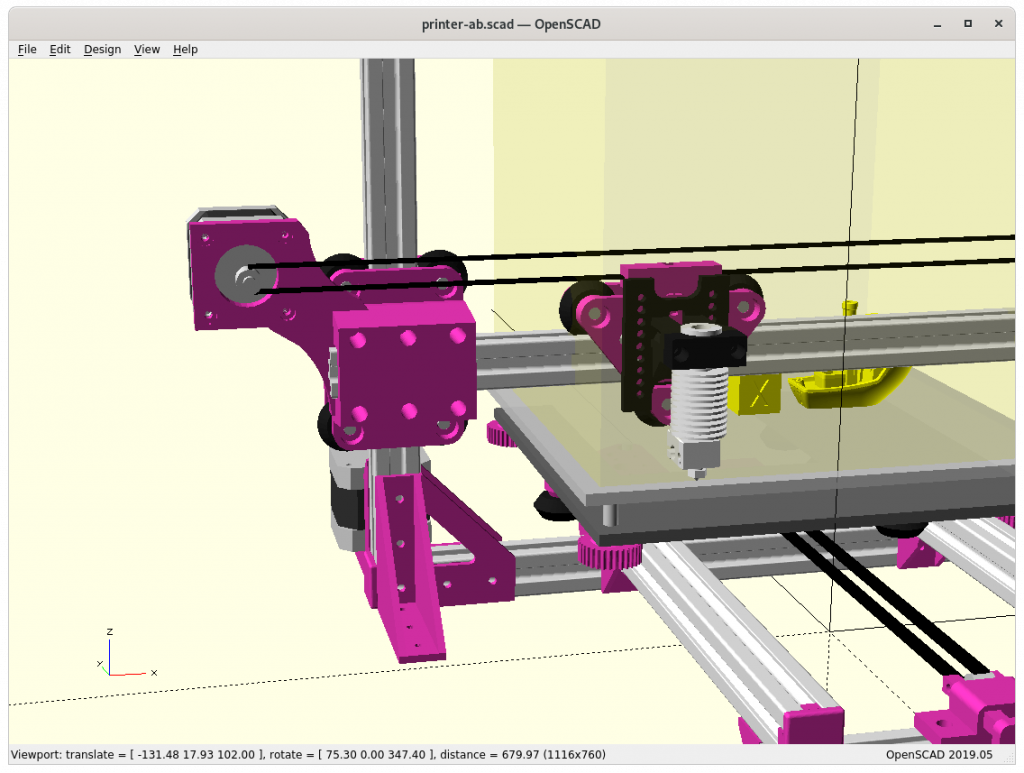
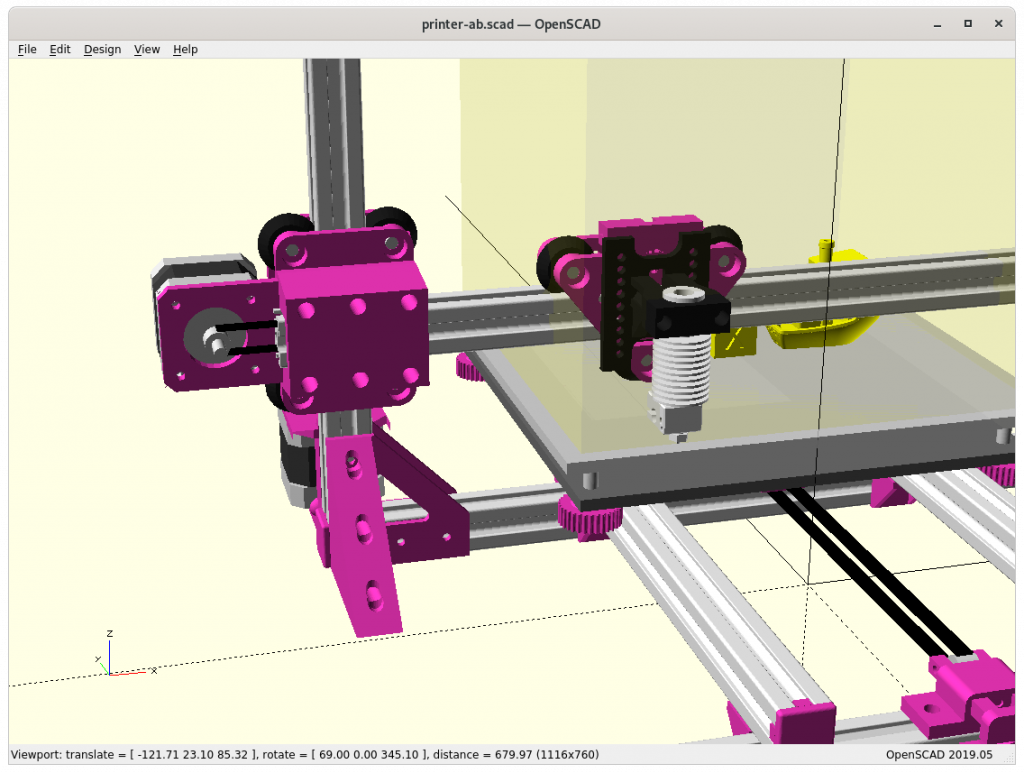
Z Carriage: 3 vs 4 wheels module
3 Wheels / 2 Mounts
4 Wheels / 3 Mounts
4 Wheels / 3-wide Mount
4 Wheels / 3-wide Mount, Routing Inside
The 4 wheels looks best but it also sacrifices some of the X range by apprx. 10mm, the obvious choice is 3-wide mount – actual tests will tell if the X & Z axis are solid enough.
Different Sizes
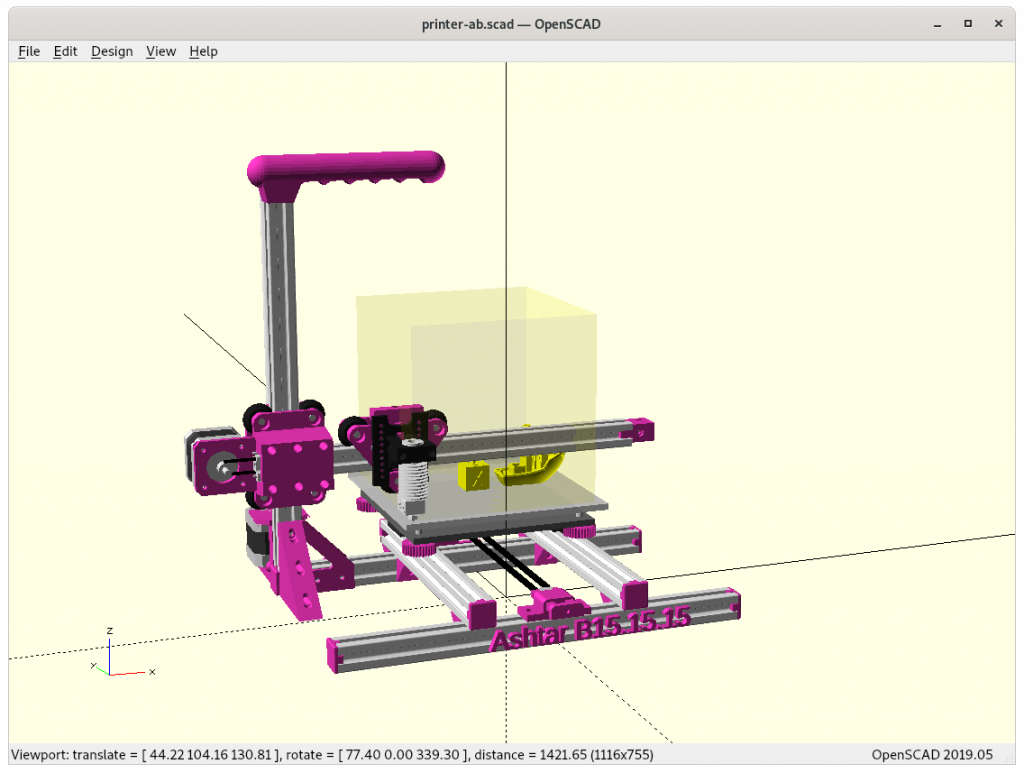
Ashtar B 150x150x150
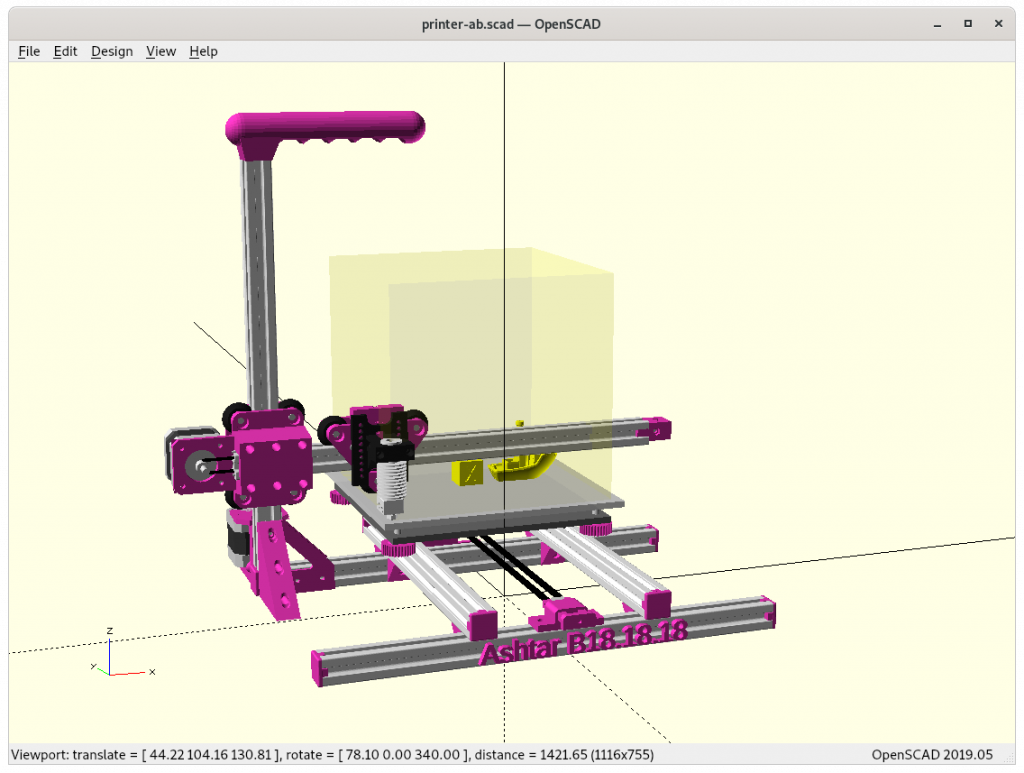
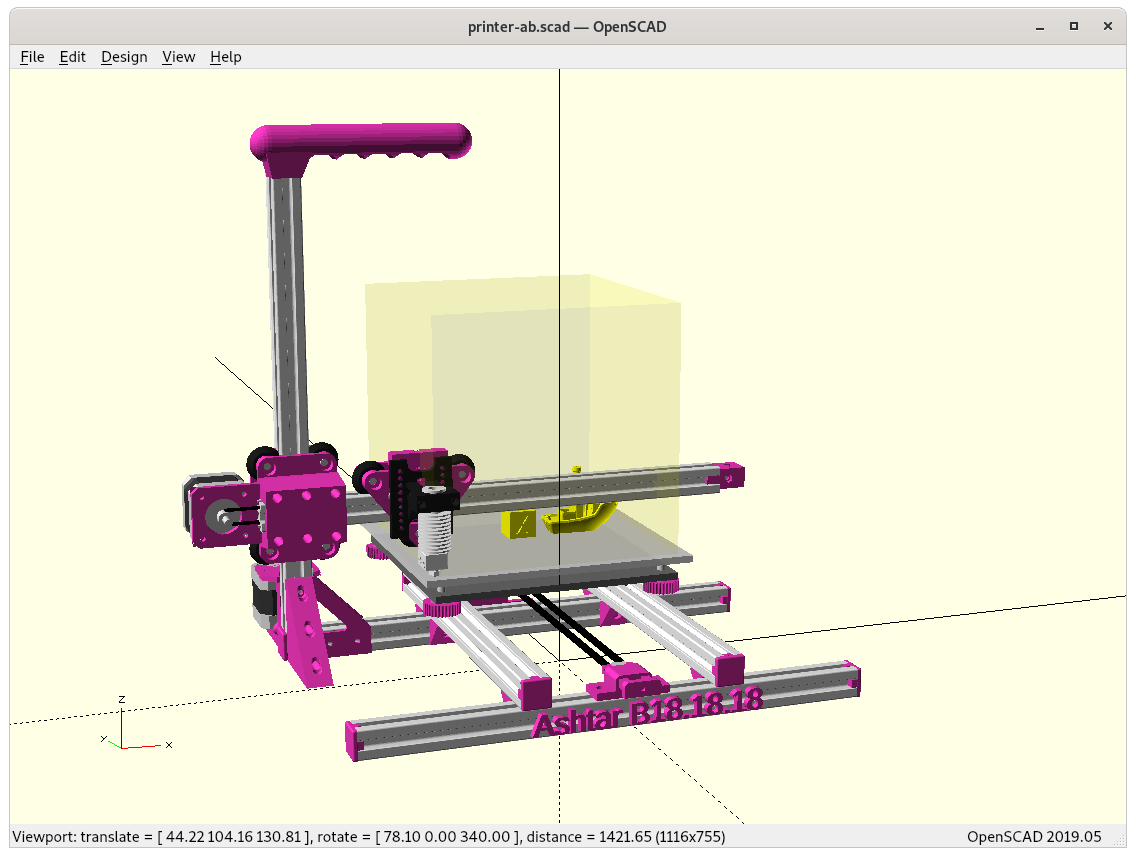
Ashtar B 180x180x180
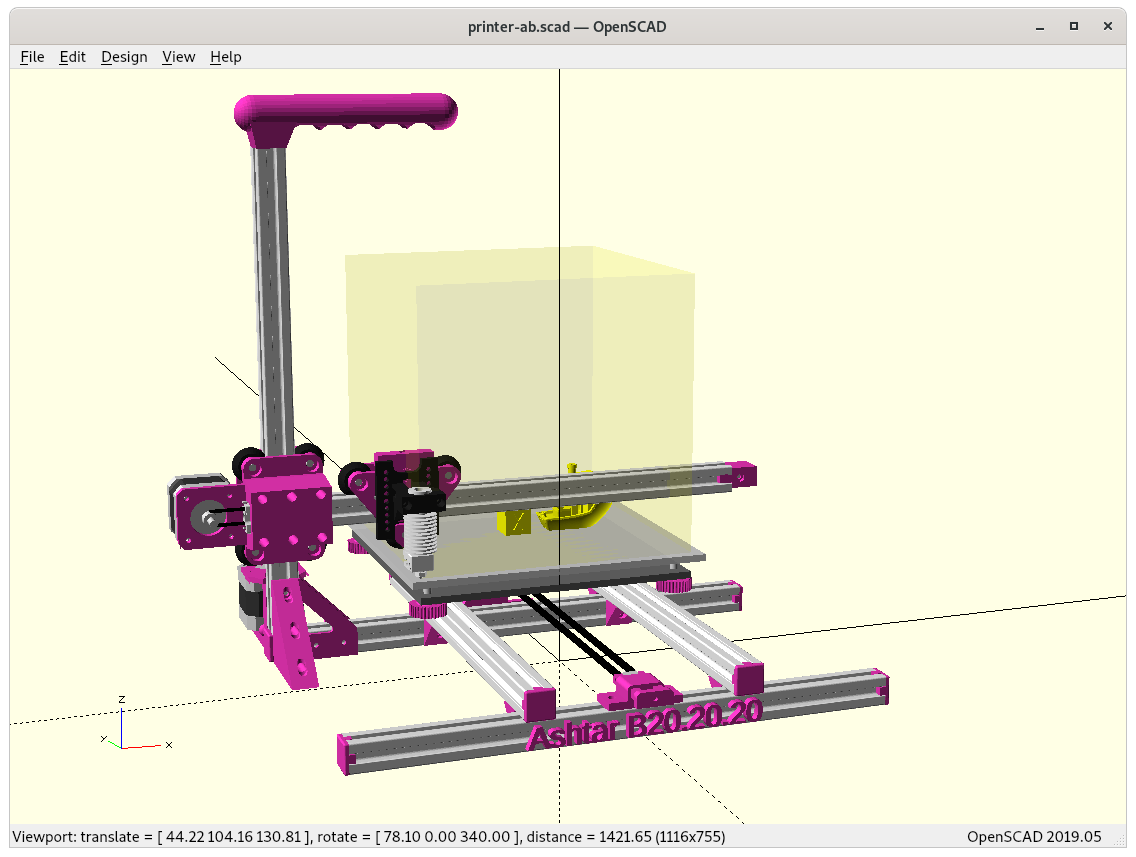
Ashtar B 200x200x200
The 200mm build axis length would be good, but I’m not sure if the XZ carriage will allow it as the max margin or tolerance would be half of a layer-height, e.g. 1mm layer height ⇒ 0.05mm tolerance, at X = 0 .. max the head should not flex more than 0.05mm. At this this early draft stage I don’t know which size is most suitable, I focus on 180mm build axis.
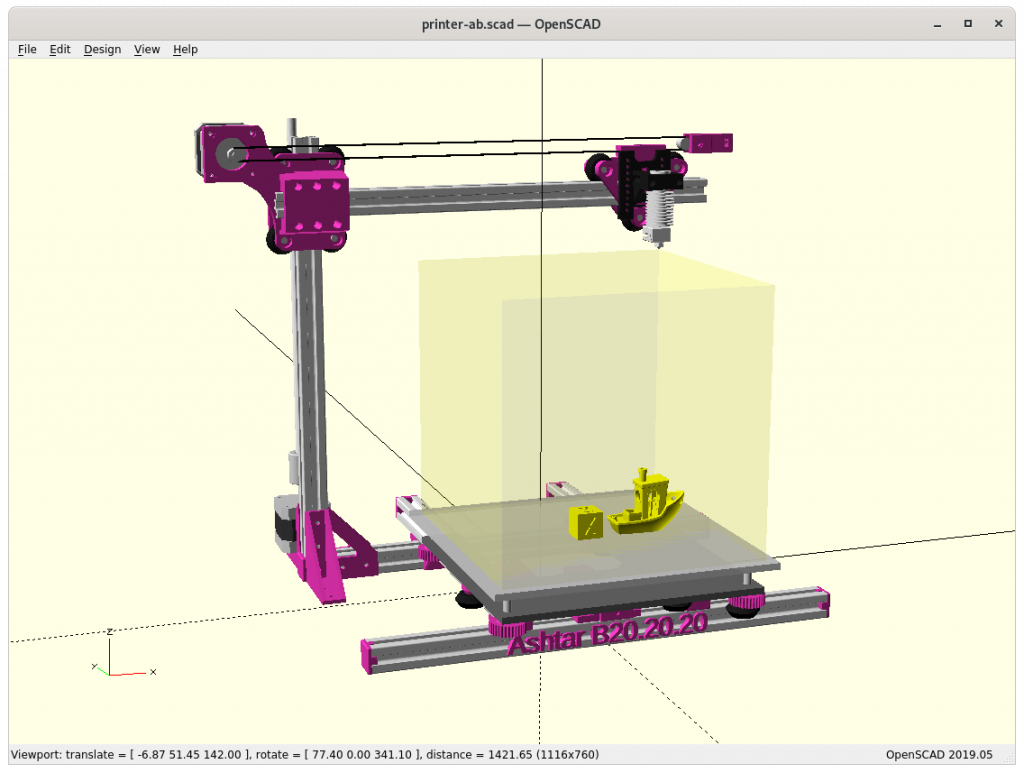
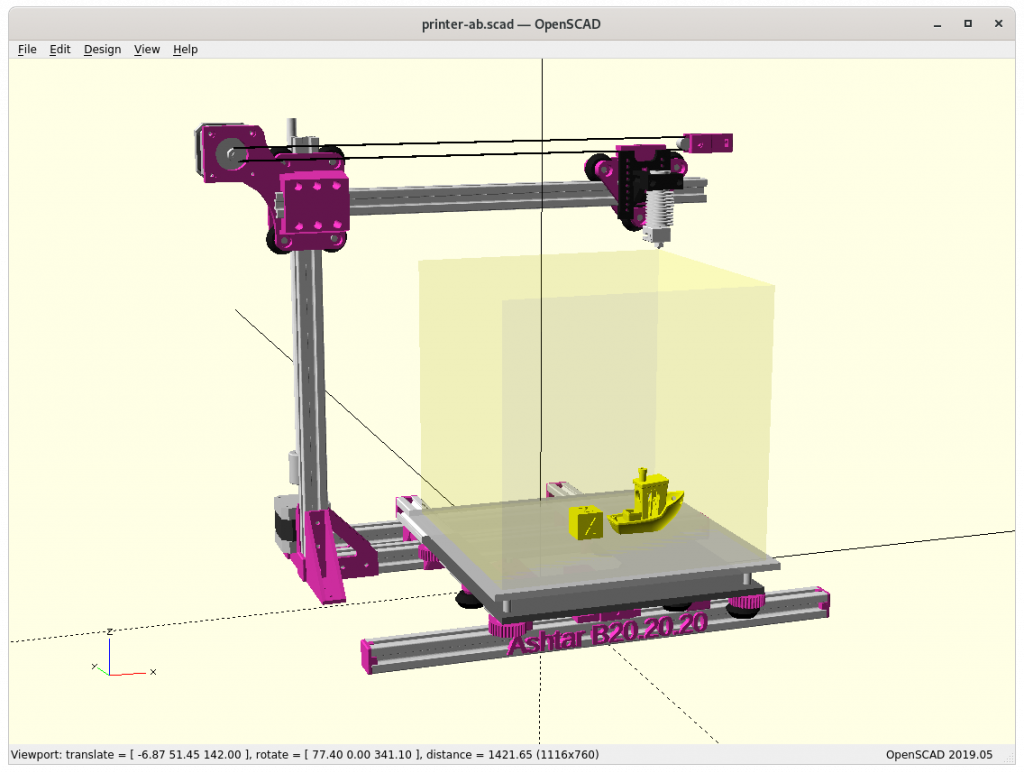
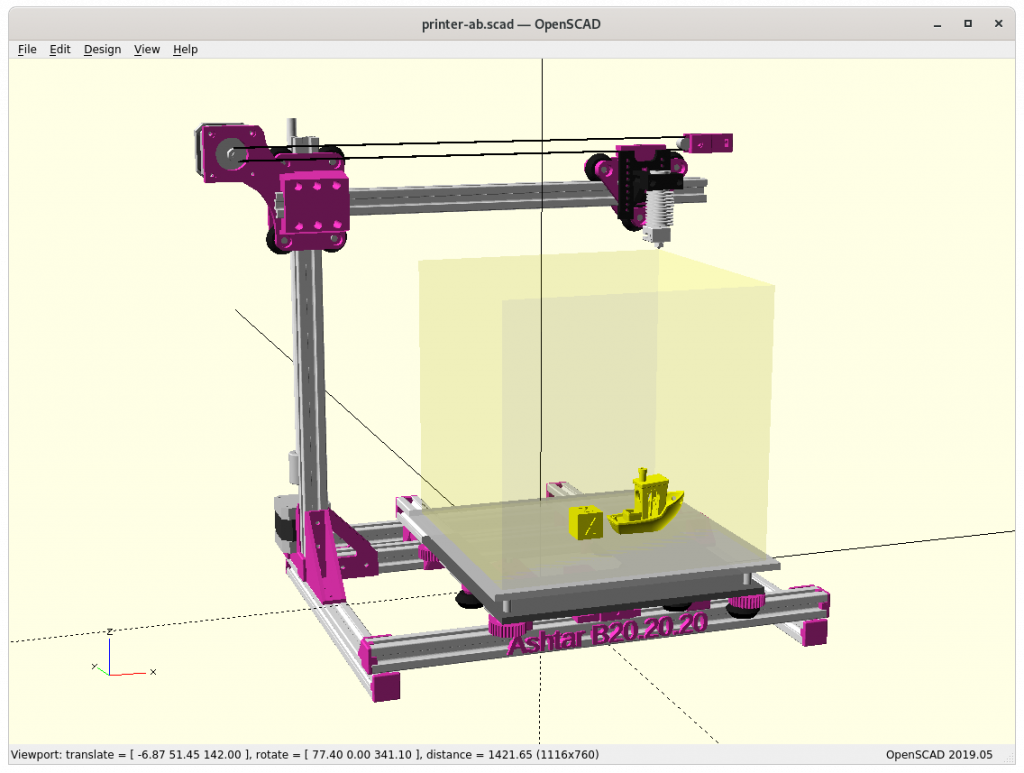
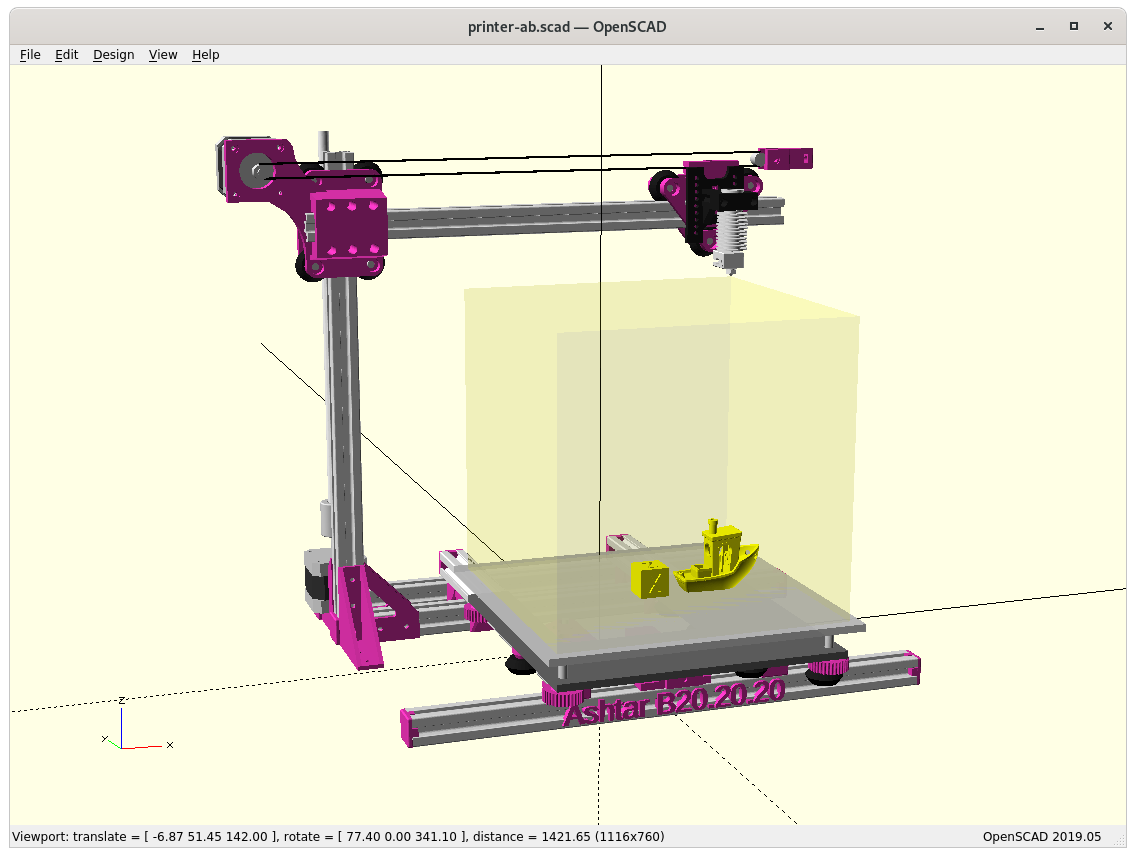
The project page on Ashtar B summarizes the current state.
2020/12/23: added more details on Y bed, and size comparison, blog post published.
2020/12/17: X motor mount done, X belt pulley holder, XZ cantilever x-offset 10mm.
2020/12/12: just the basic idea, an early draft with a few options (extra foot, 3/4 wheels for Z carriage), 6 vs 7 vs 9 beams.
Introduction
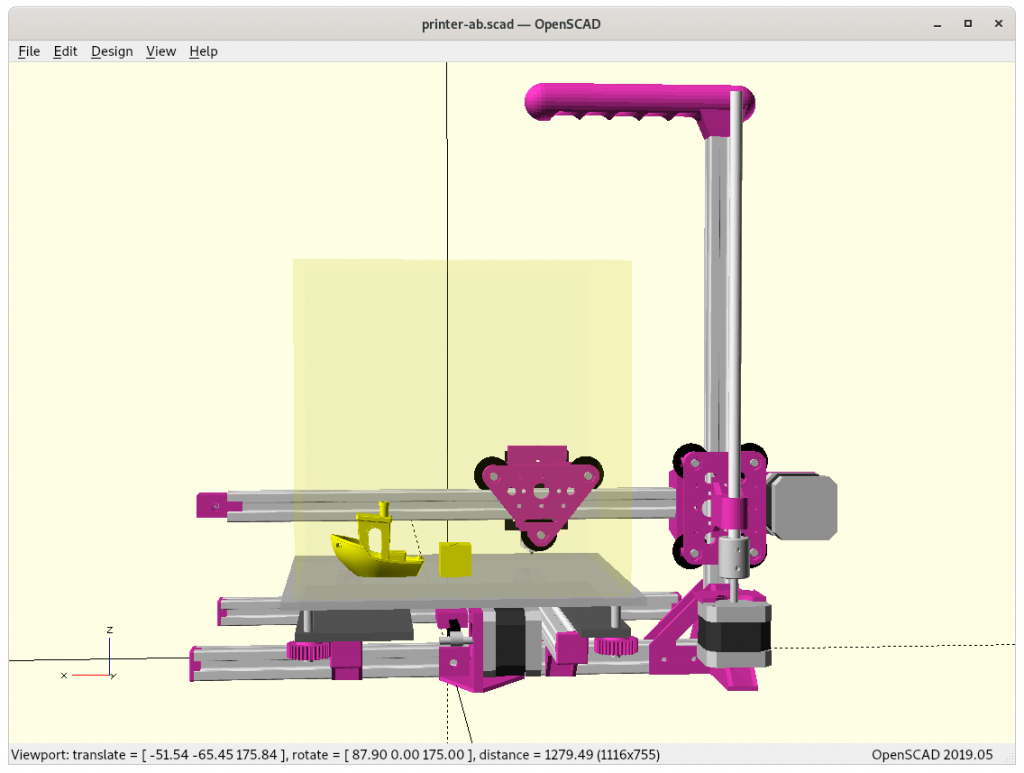
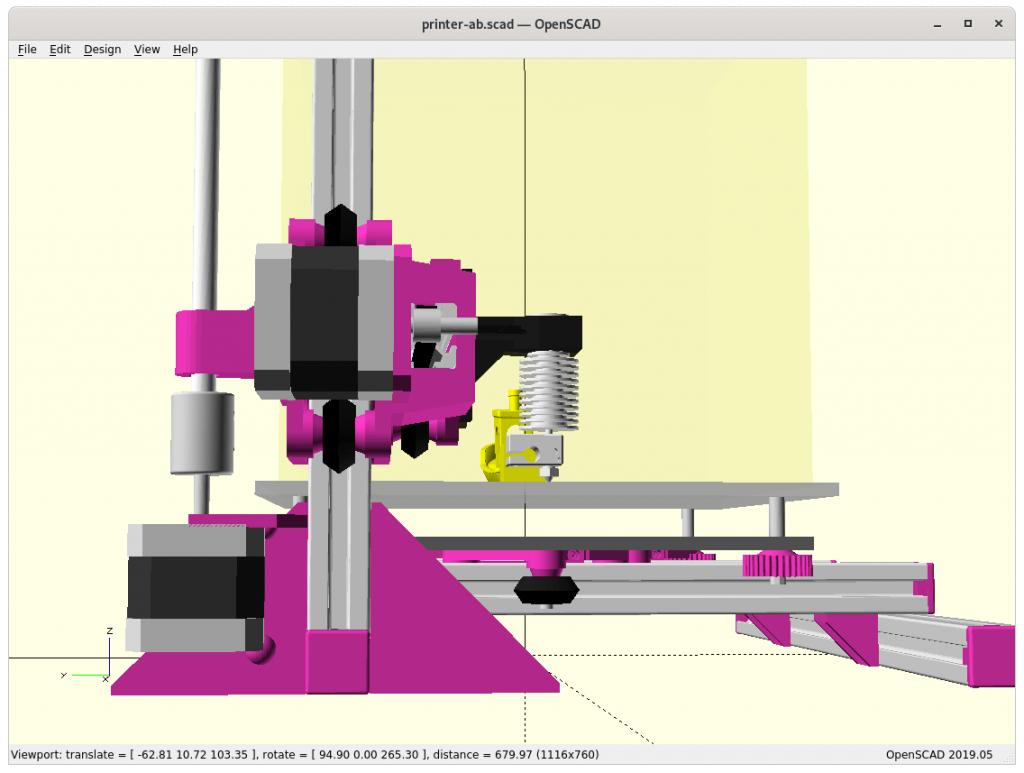
Ashtar K was the first design with 2020 T-slot alu extrusions, and I used 11 beams of 500mm length to make up the entire frame. In the back of my mind I thought also doing a Cantilever 3D printer with 2020 T- or V-slot, like the Prusa Mini or Printrbot Simple Metal, and as before I like to reuse the frame as rails directly and not use any smooth rods or alike, which means X beam as V-slot, and optionally Z beam as well as V-slot, Ashtar B:
T-Slot 2020
V-Slot 2020
V wheel
Draft
At position X = 0
At position X = max
At position Y = 0
At position Y = max
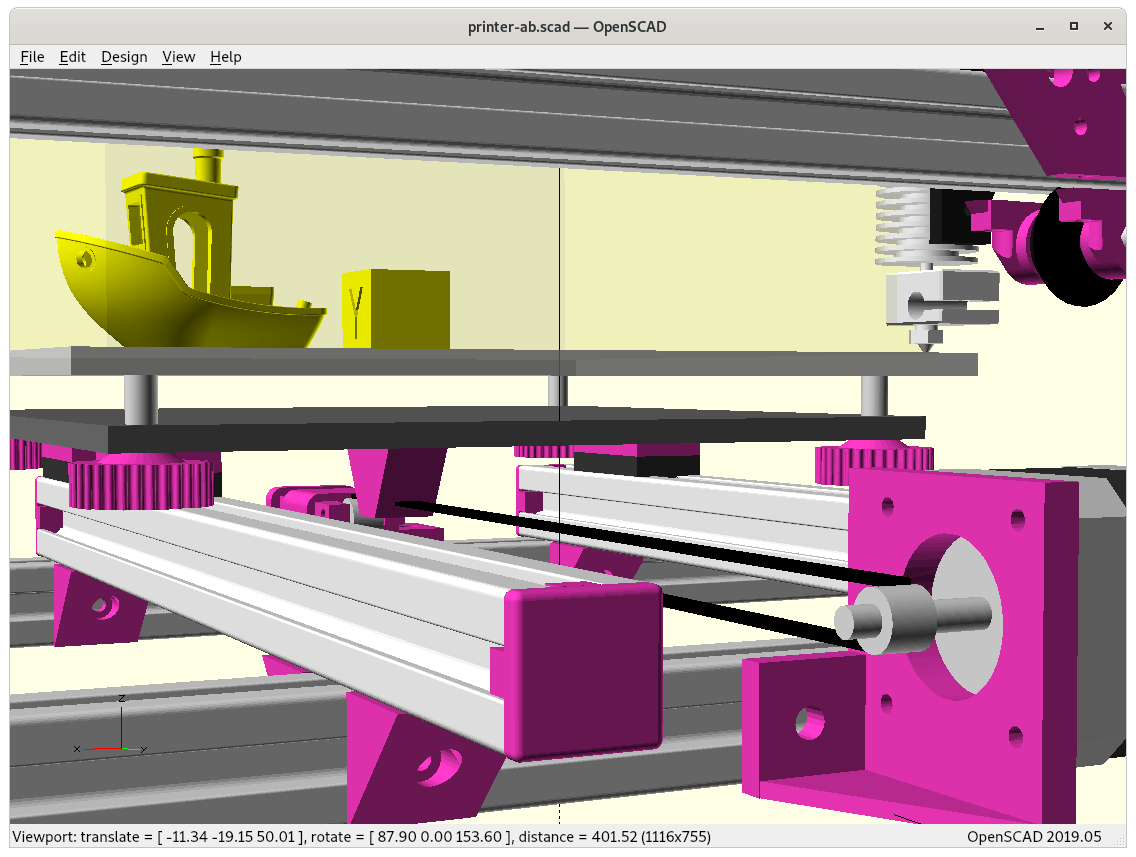
A build-volume of 140mm to 190mm each axis is targeted in order to keep the X axis short – also, likely using a Bowden extruder setup where just a hotend resides on the X carriage.
Specifications
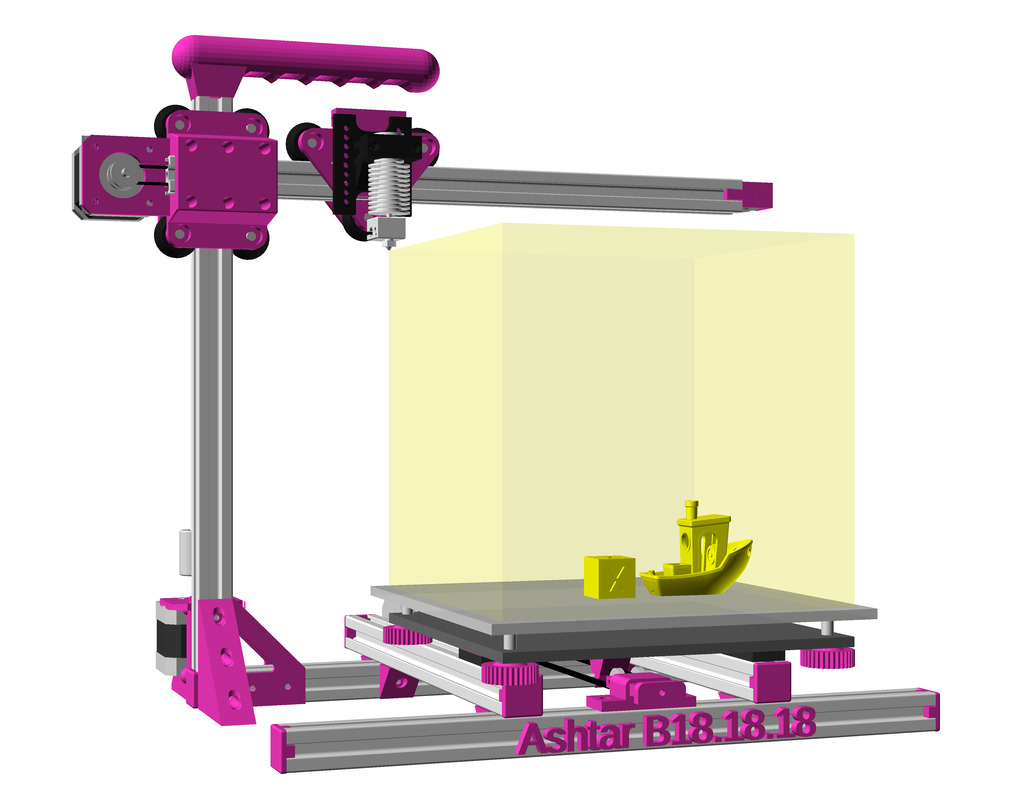
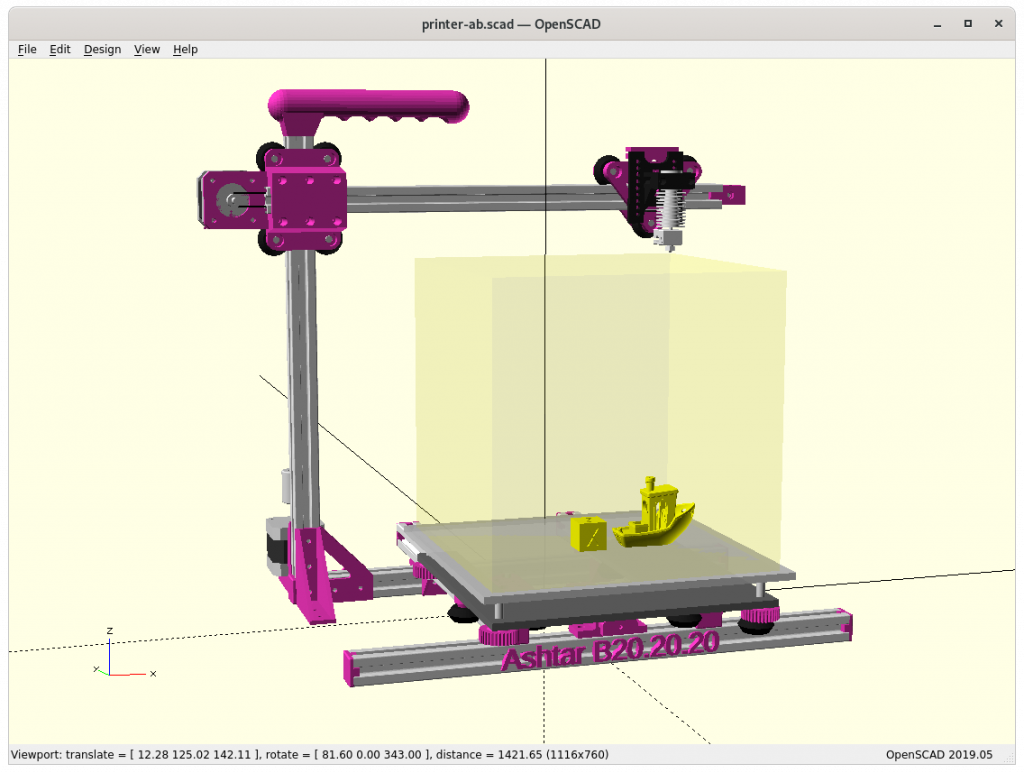
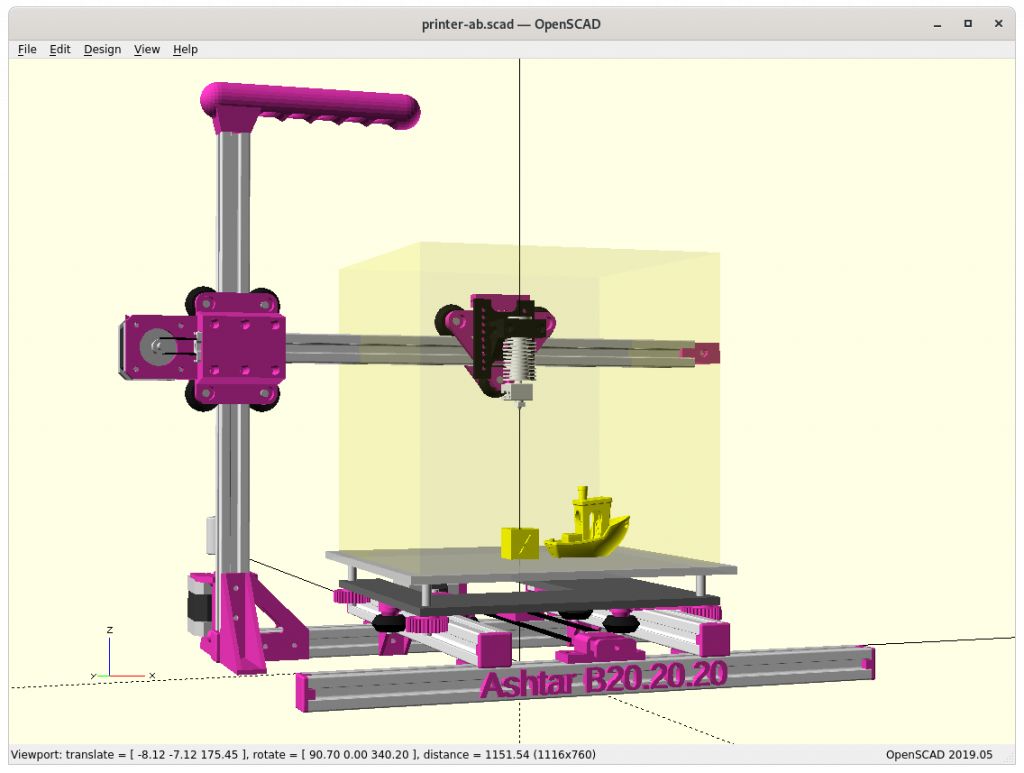
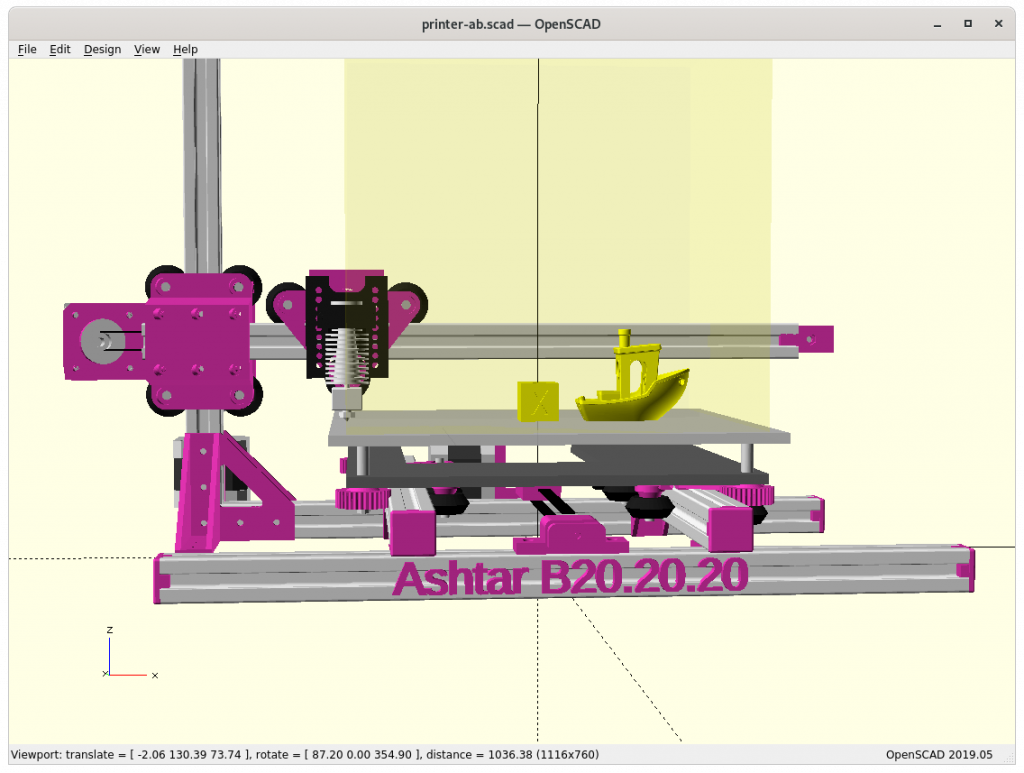
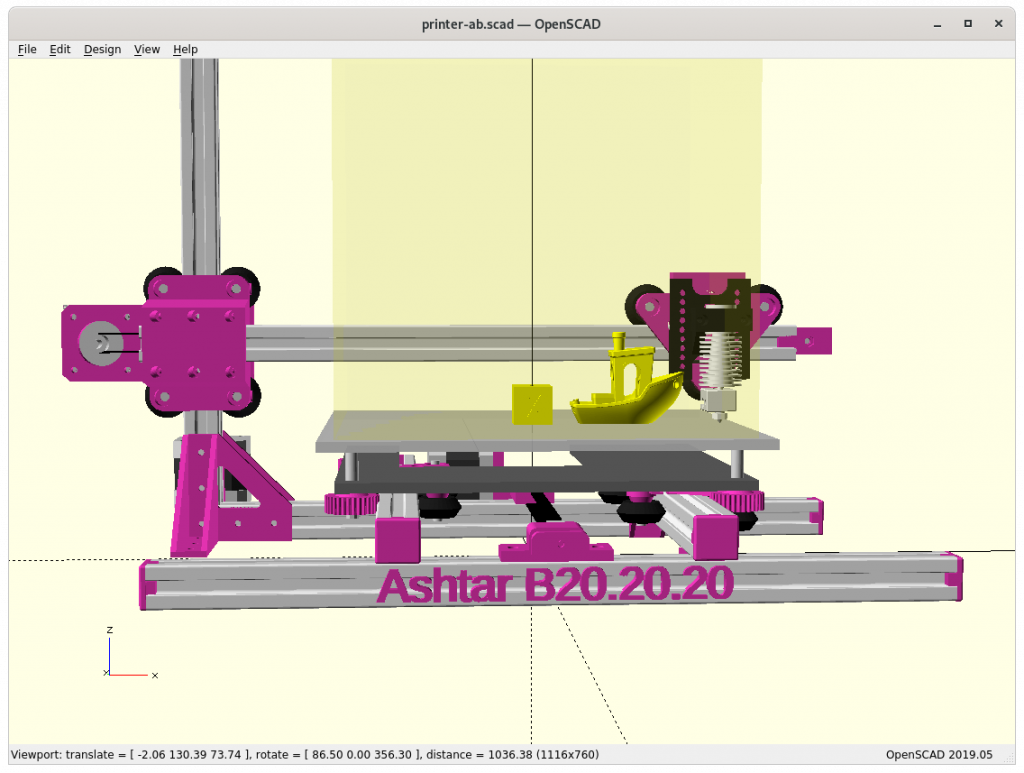
Build Volume: ~180x180x180mm
Frame: 6x 340mm 2020 alu profiles
2x V-Slot (X and Z axis)
4x T-Slot (Y axis with simple sliders where T-Slot are sufficient)
Issues to Resolve
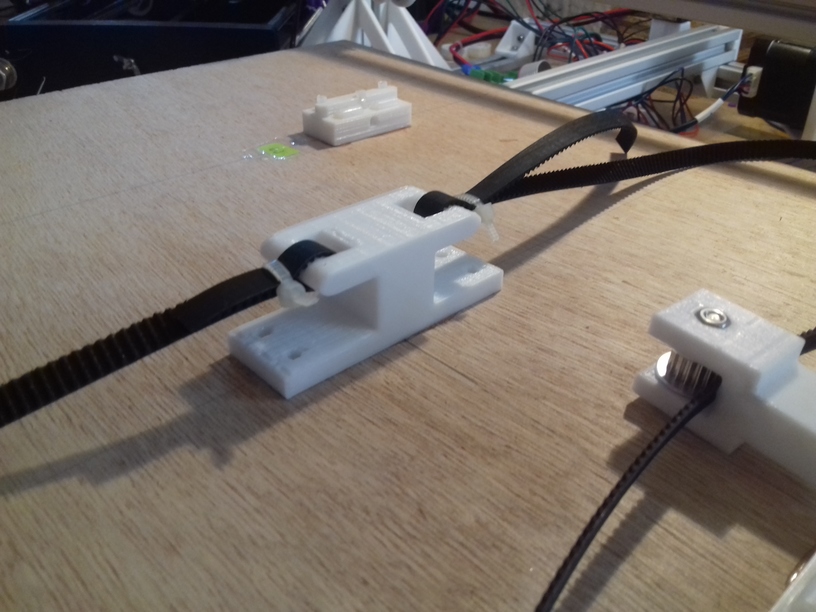
X belt routing: outside of 2020 extrusion or inside
X motor mount: rather simple, perhaps combine with xcarriage_short_hmount_2020(), done
Y motor mount position: will determine overall build volume
3 vs 4 wheels on Z carriage, 4 wheels (see below why)
positioning: extruder, controller, display, power supply, optional filament holder
positions of X, Y and Z endswitches
tune to a common build volume while having uni-length beams/extrusions
150mm, 200mm, 215mm for X & Y build axis length
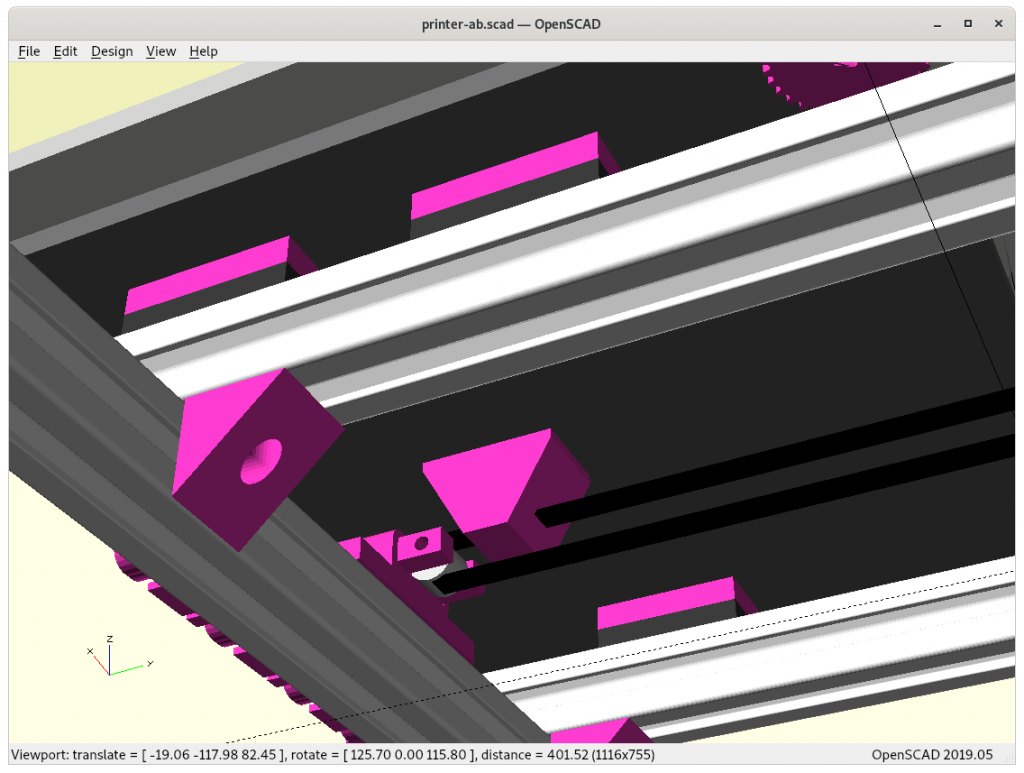
Frame: 6 vs 7 vs 9 beams
6 beams
7 beams (+1 back)
9 beams (+2 left/right)
The 9 beams give an overall better sturdiness, but not sure how essential at small building volume (less than 220mm each axis). I might be able to remove beam, the last beam at the back at the bottom reducing to only 6 beams, in that case the Y motor is mounted on the remaining beam in the back.
Z Carriage: 3 vs 4 wheels module
3 Wheels / 2 Mounts
4 Wheels / 3 Mounts
4 Wheels / 3-wide Mount
4 Wheels / 3-wide Mount, Routing Inside
The 4 wheels looks better also because it allows to add another 2020 horizontal mount or wider mount, some X range is sacrificed (10-20mm).
Different Sizes
Ashtar B 150x150x150
Ashtar B 180x180x180
Ashtar B 200x200x200
The build volume from 150mm to 200mm for each axis, I like to have 200mm but not sure if the X axis can maintain linearity fully (e.g. half of a layer-height such as 0.1mm ⇒ 0.05mm linearity for head X = 0 .. max), I might to have to settle for 180mm or even 150mm. Actual tests and fine tuning of the Z axis (4 wheels V carriage) and X axis (3 wheels V carriage) will tell.
Common quadratic bed-sizes are 150mm, 200mm, 214mm, 220mm and 235mm e.g. for magnetic beds. A 200mm bed can be used but only 180mm be printed, as I have sufficient margin on the XZ cantilever side.
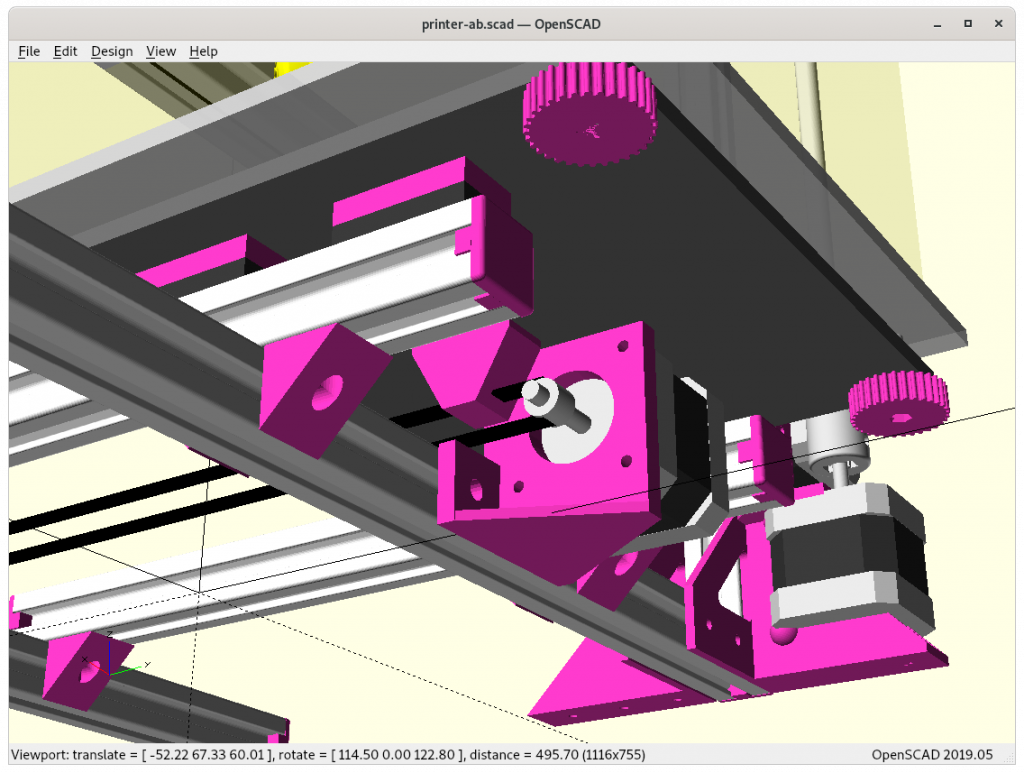
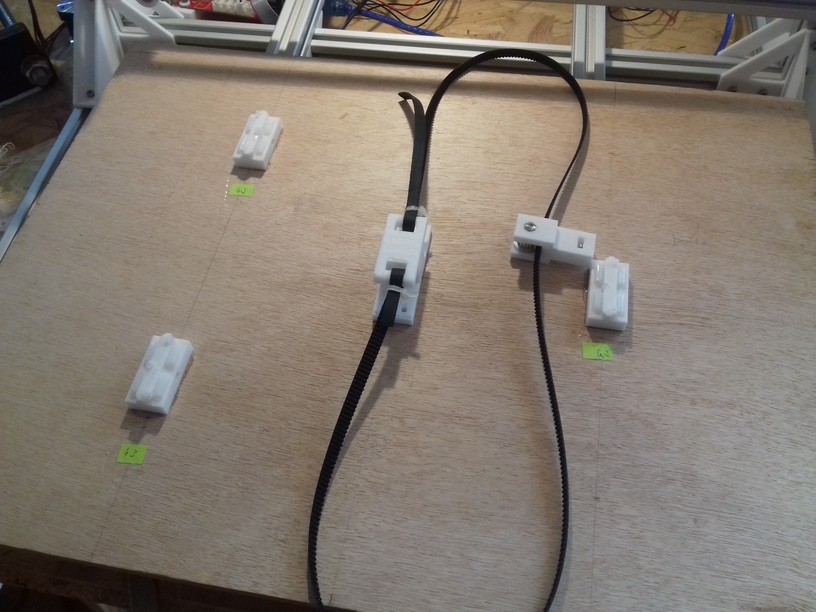
Y Bed
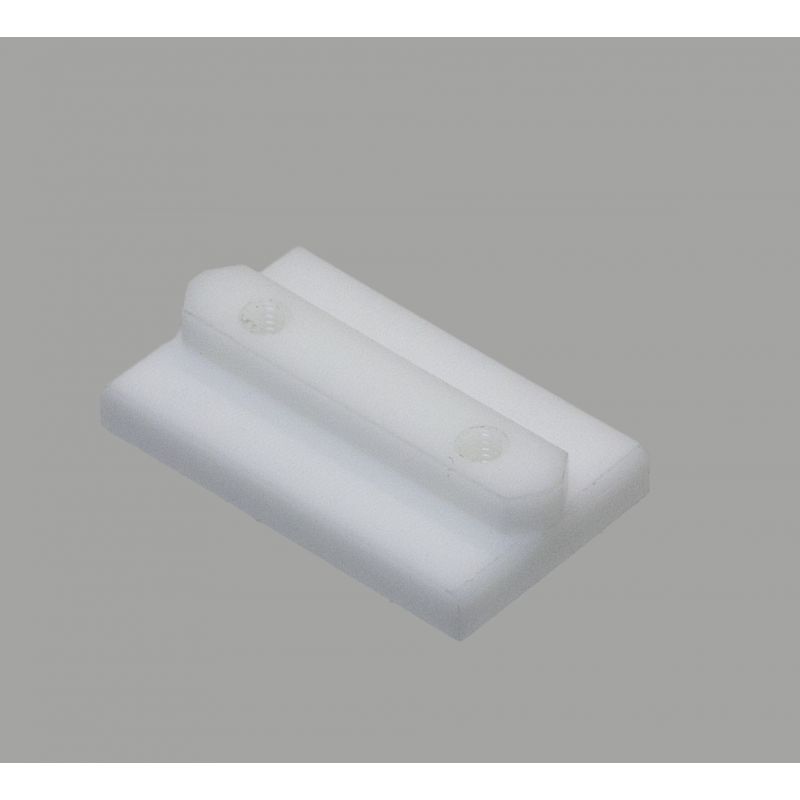
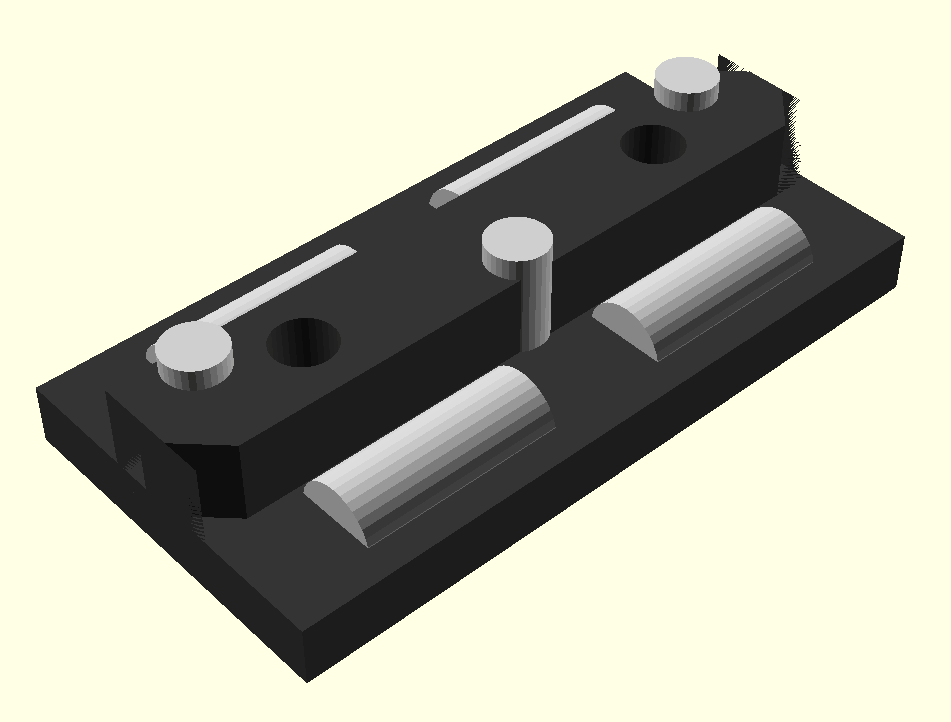
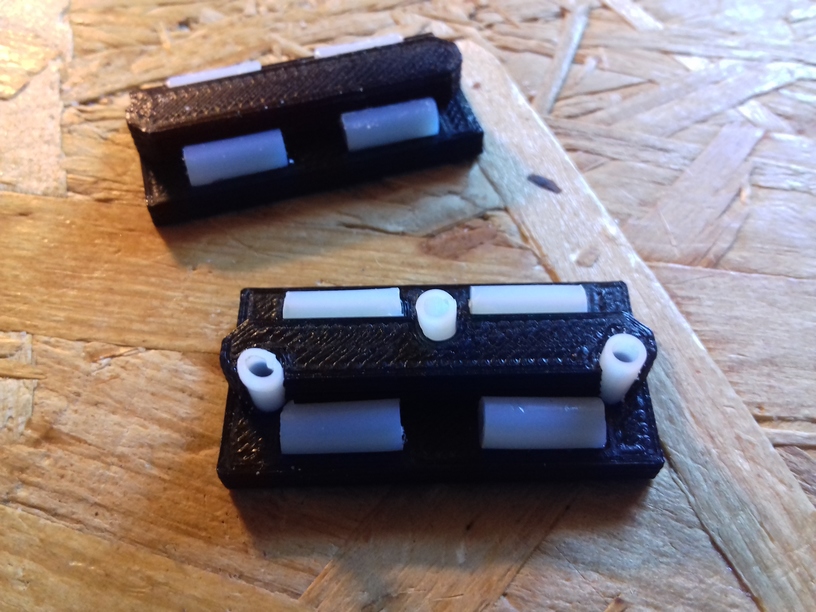
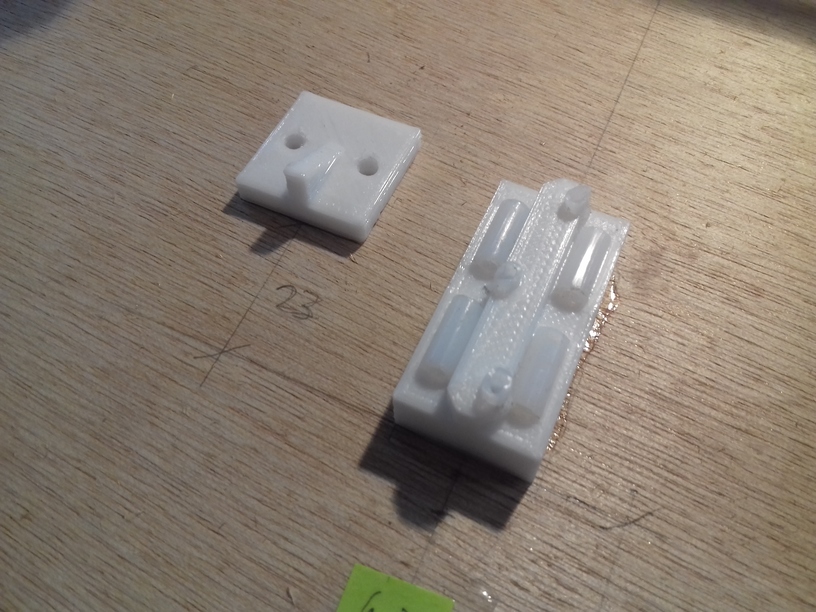
I gonna use the simple slider riding on T-slot (derived from an existing nylon slider) for the Y bed, 3 sliders in total:
Nylon Slider for T-Slot
Slider on T-Slot
Slider model with PTFE tubes
3D printed slider with PTFE tubes
The sliders are glued beneath the Y carriage, then the Y bed snaps into the T-slots easily. I have printed on these sliders with two Ashtar K‘s (K1 = 380×400, K2 = 300×300) for about 1+ years successful. This simple approach requires gravity, and the bed needs its own weight to stay in place (cannot be up-side-down or in no-gravity environment like International Space Station ISS).