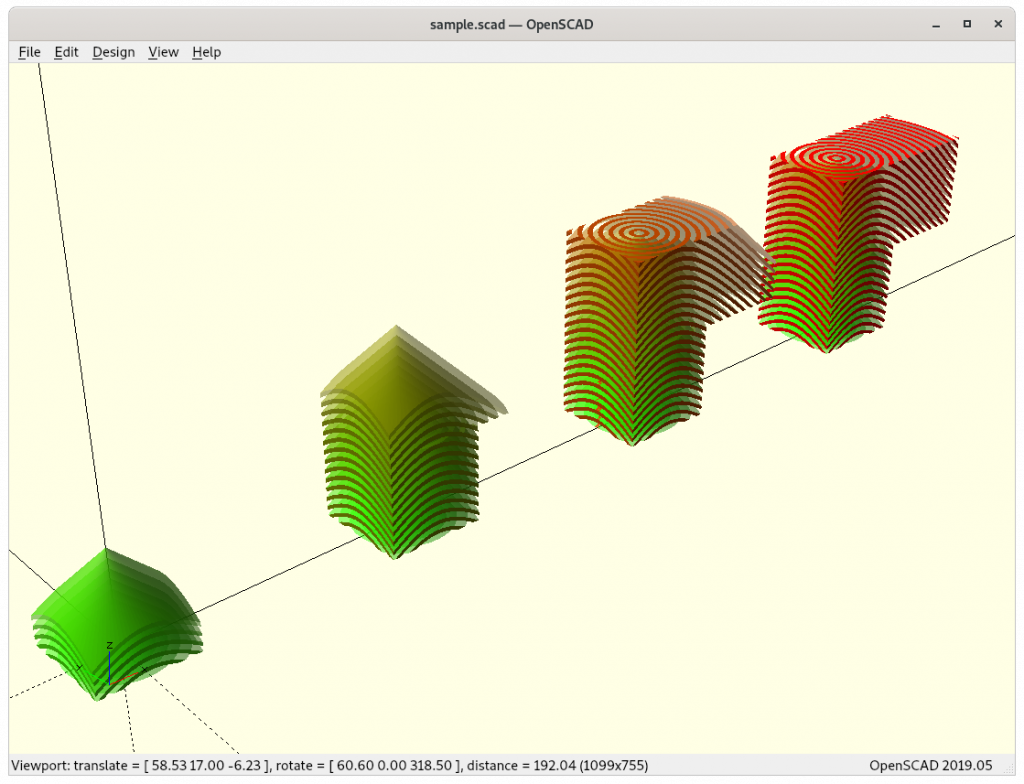
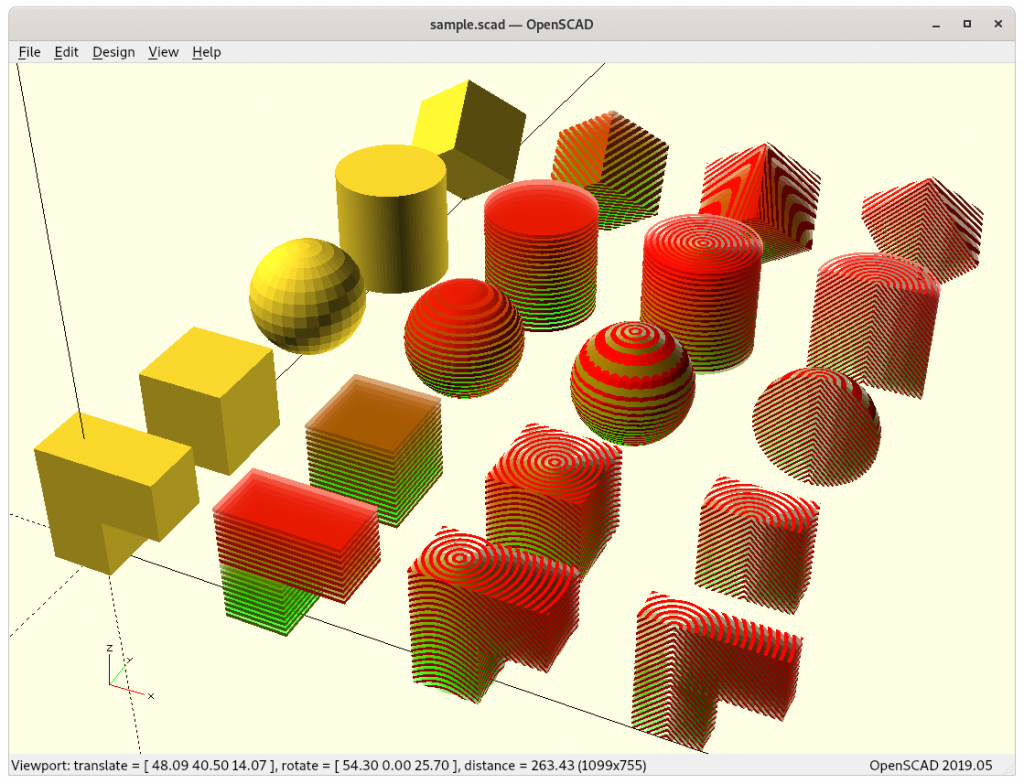
A few basic examples combining planar and non-planar slicing methods on sub-volume segmented models illustrating the possibilities printing without support structures:
Fused Deposition Modeling (FDM) also known as Fused Filament Fabrication (FFF)
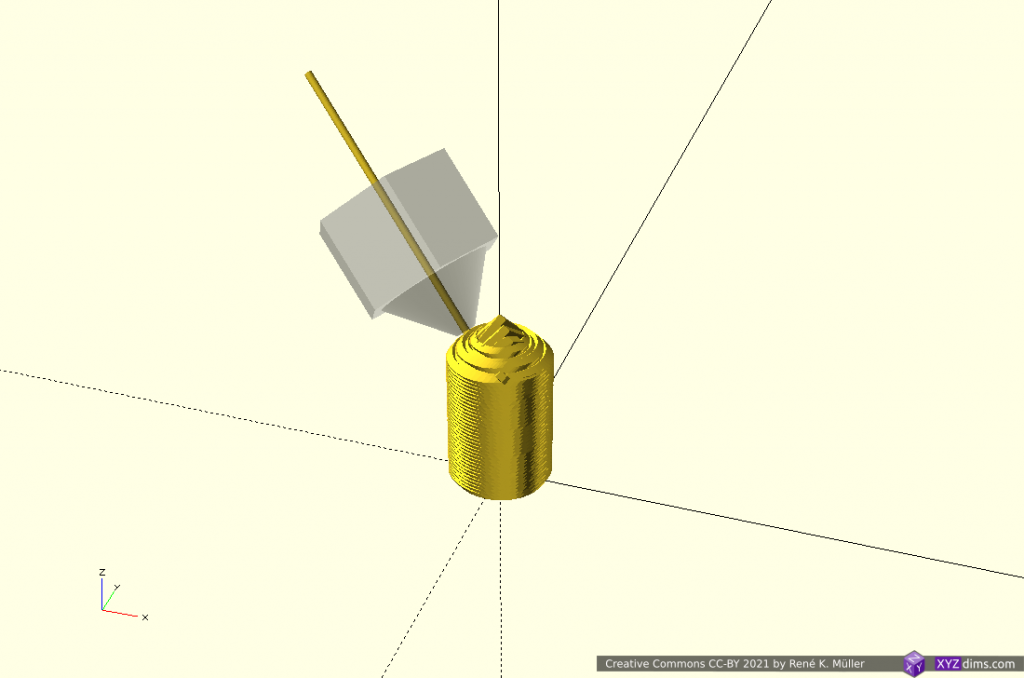
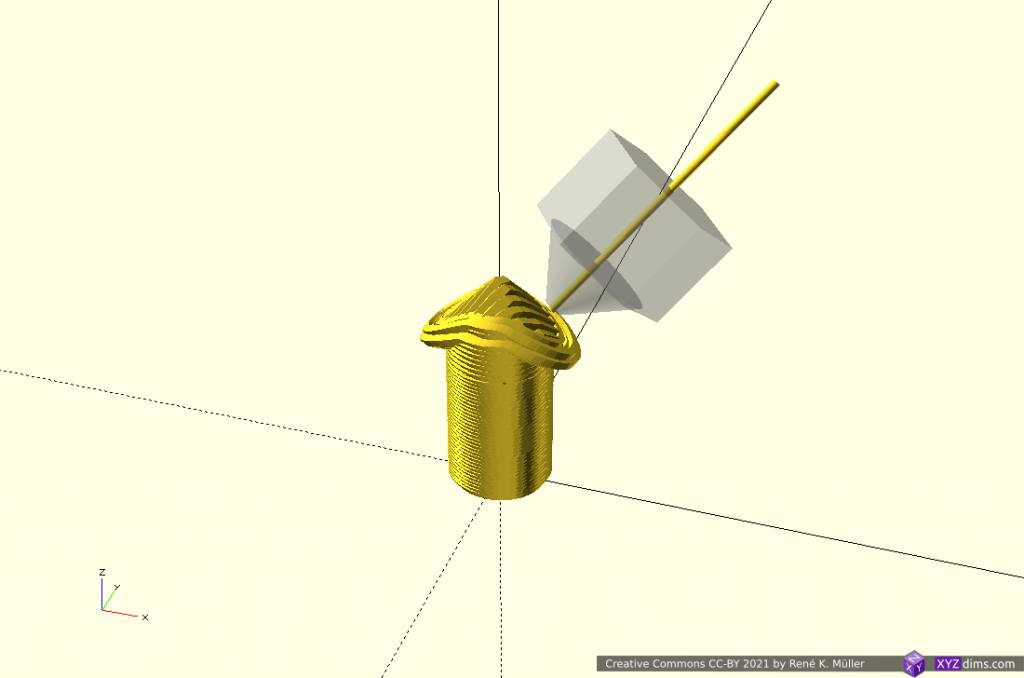
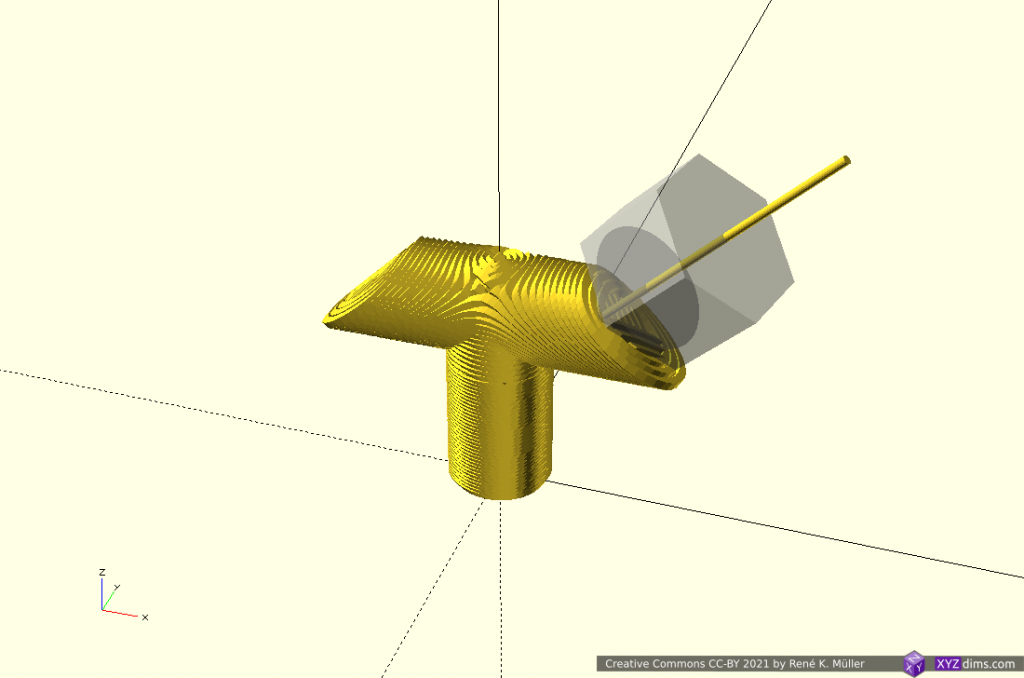
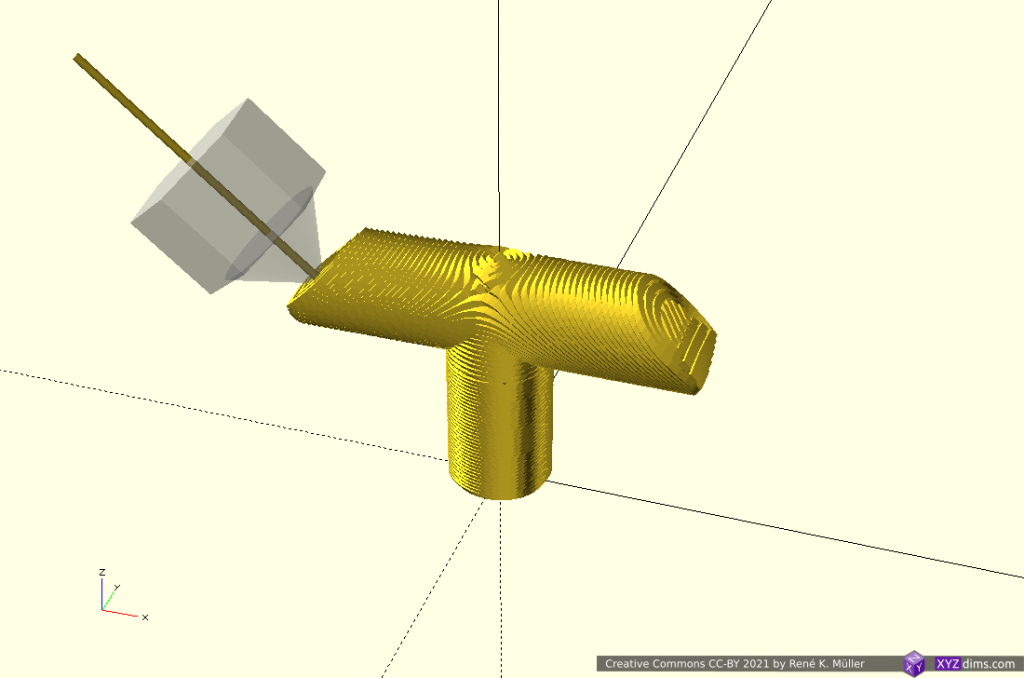
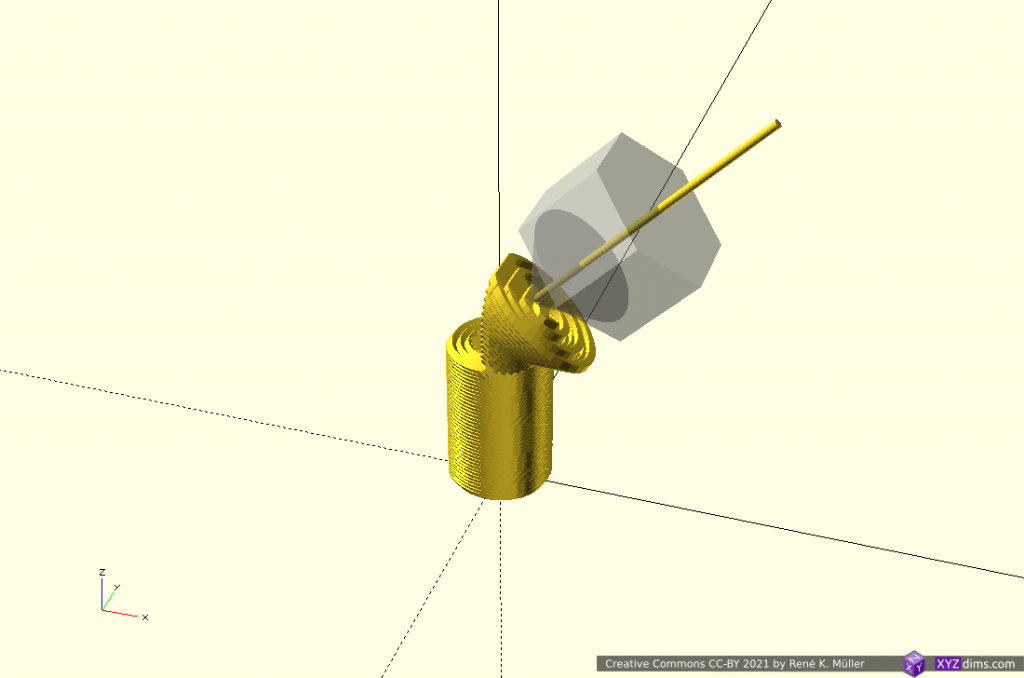
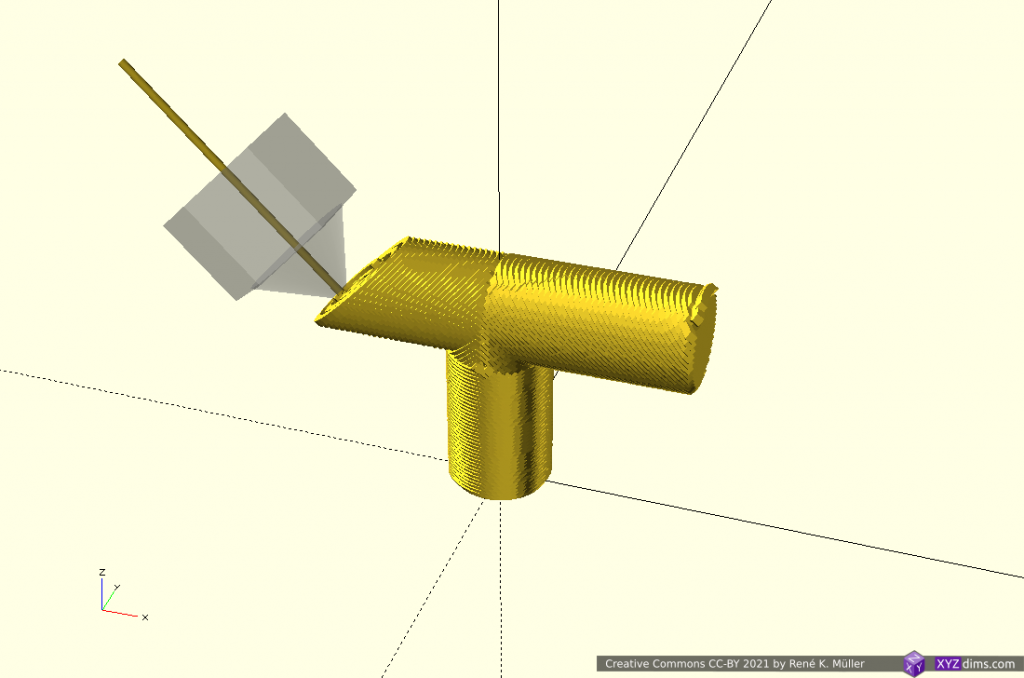
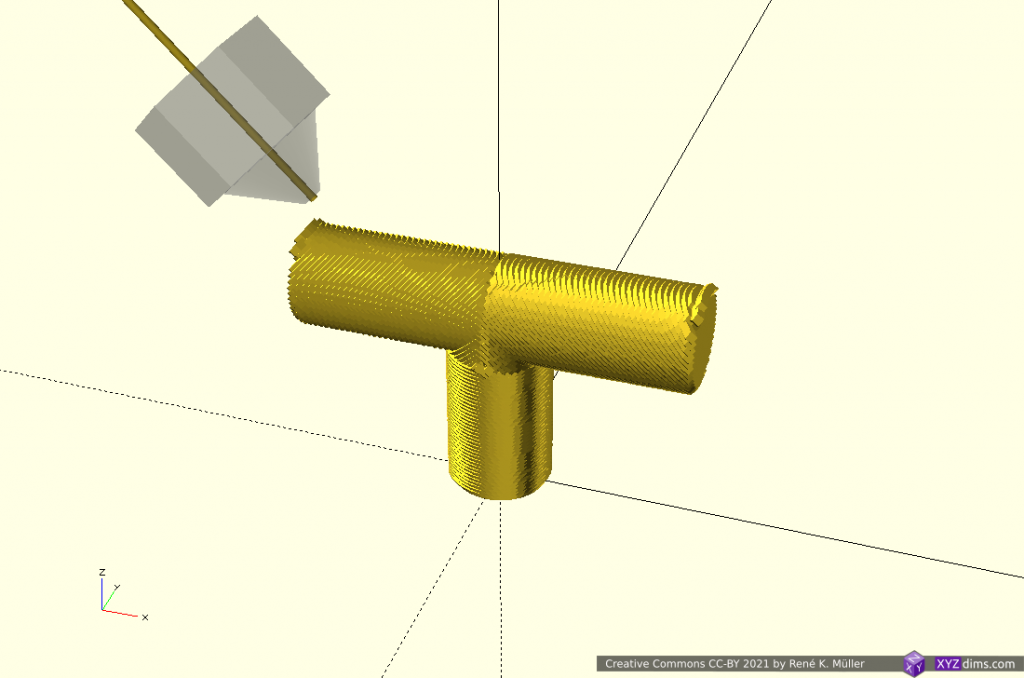
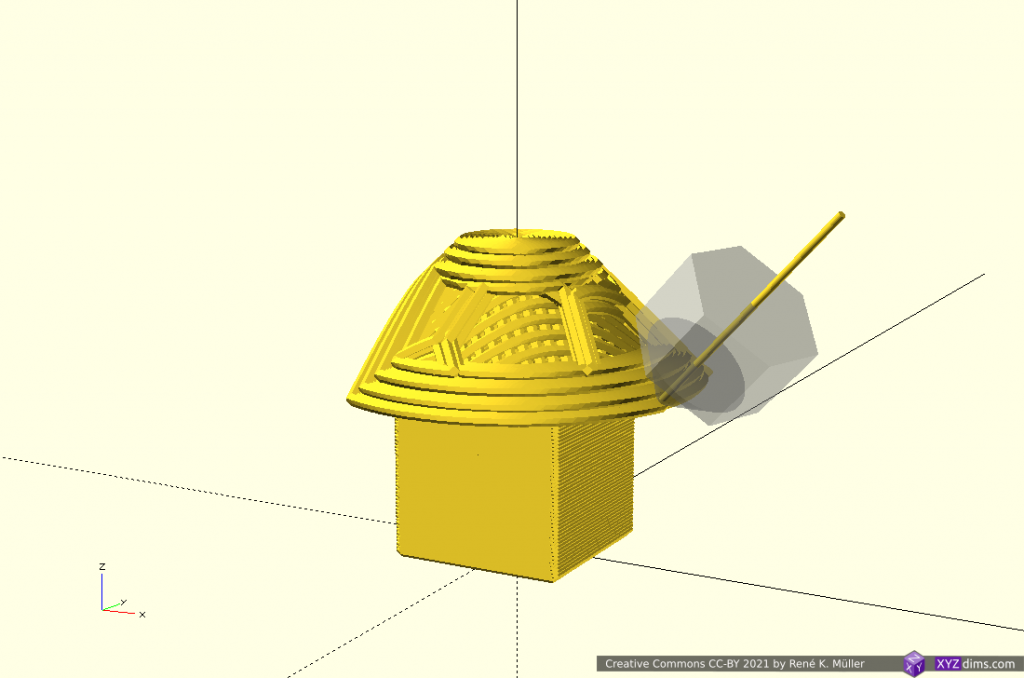
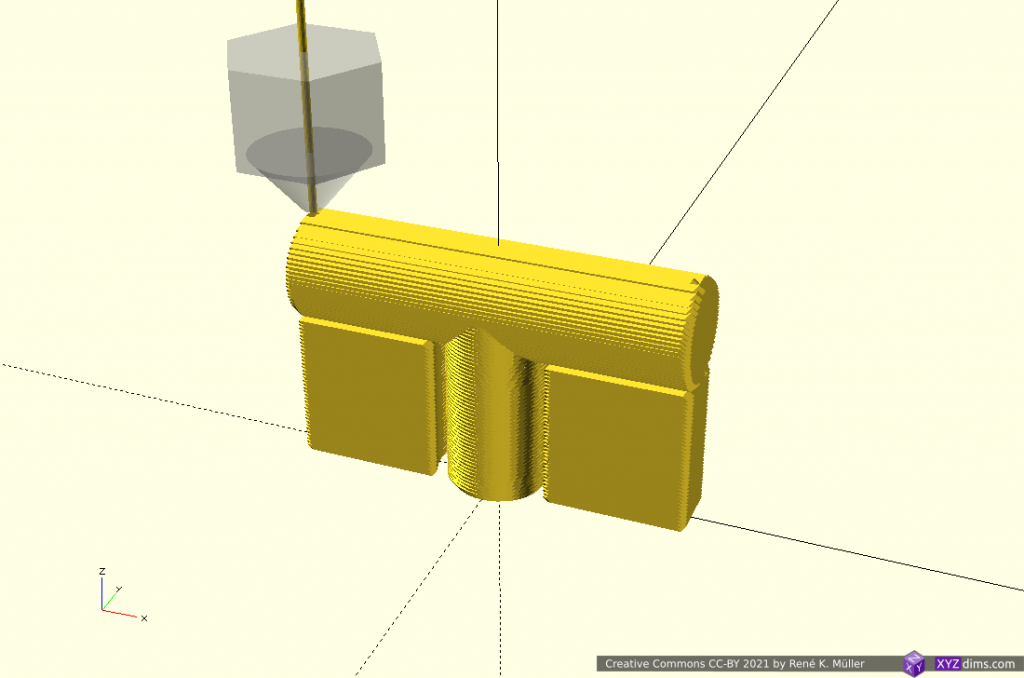
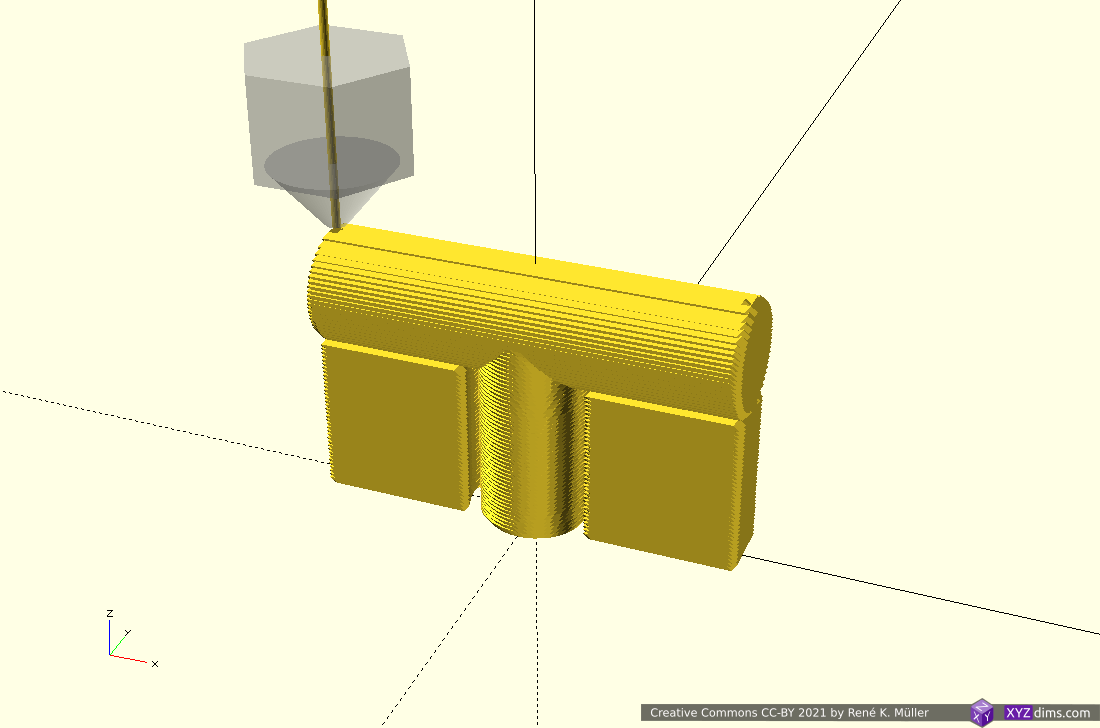
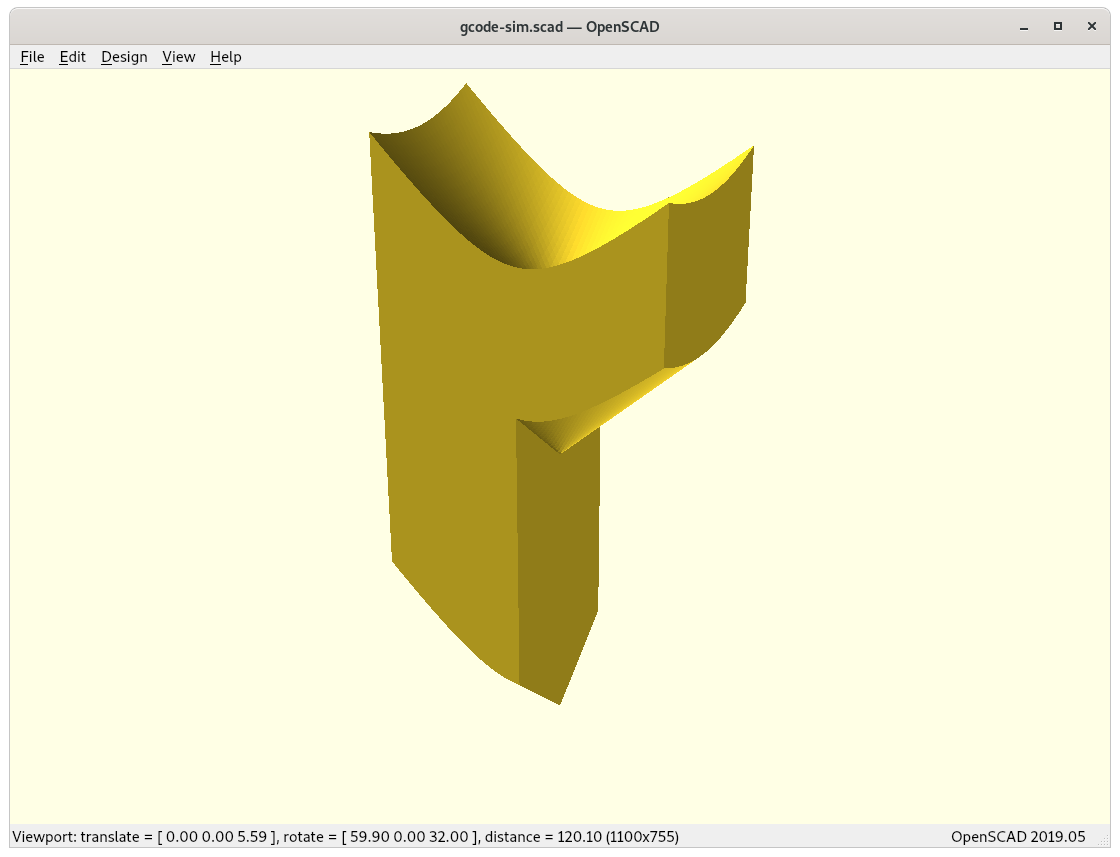
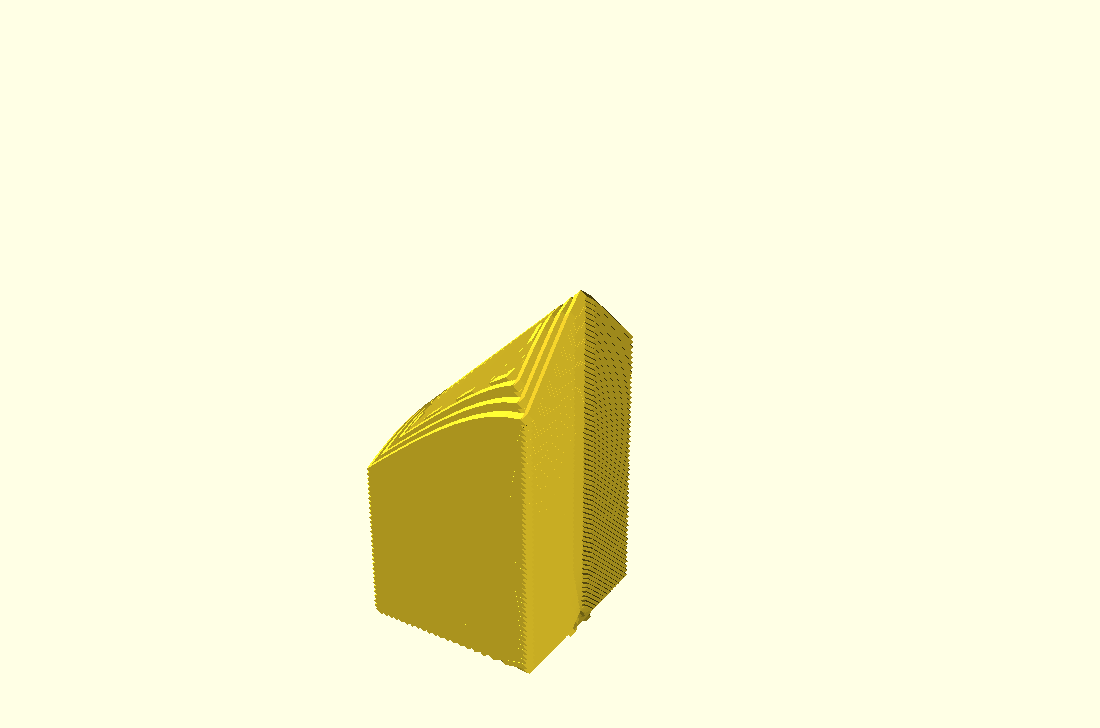
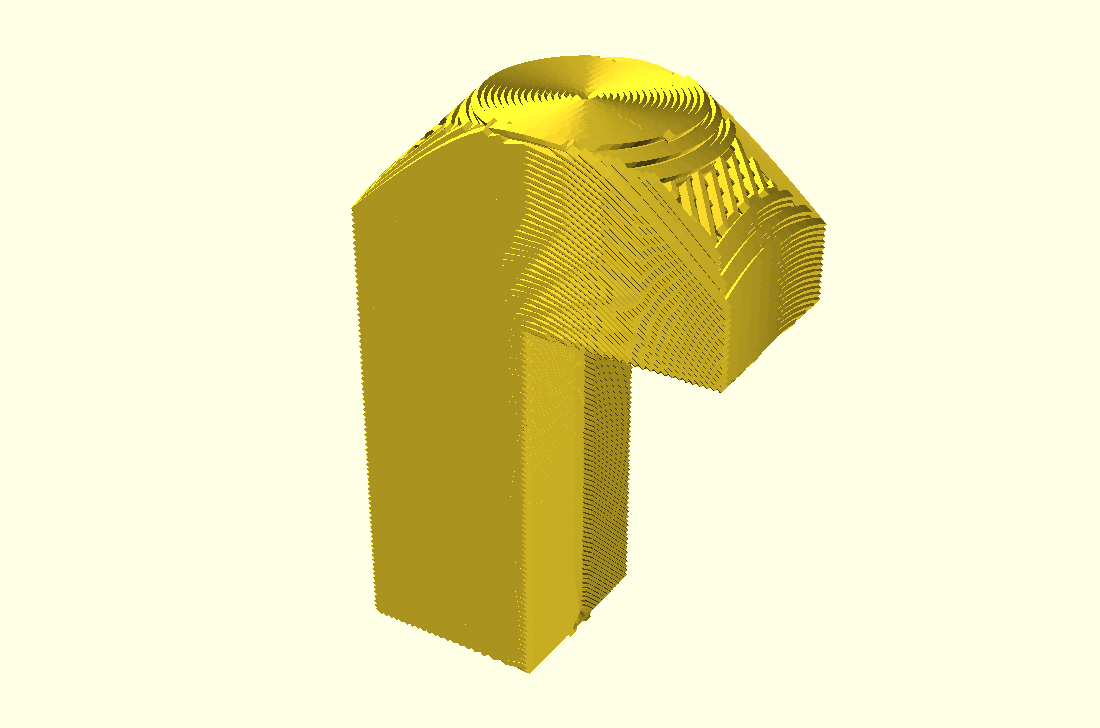
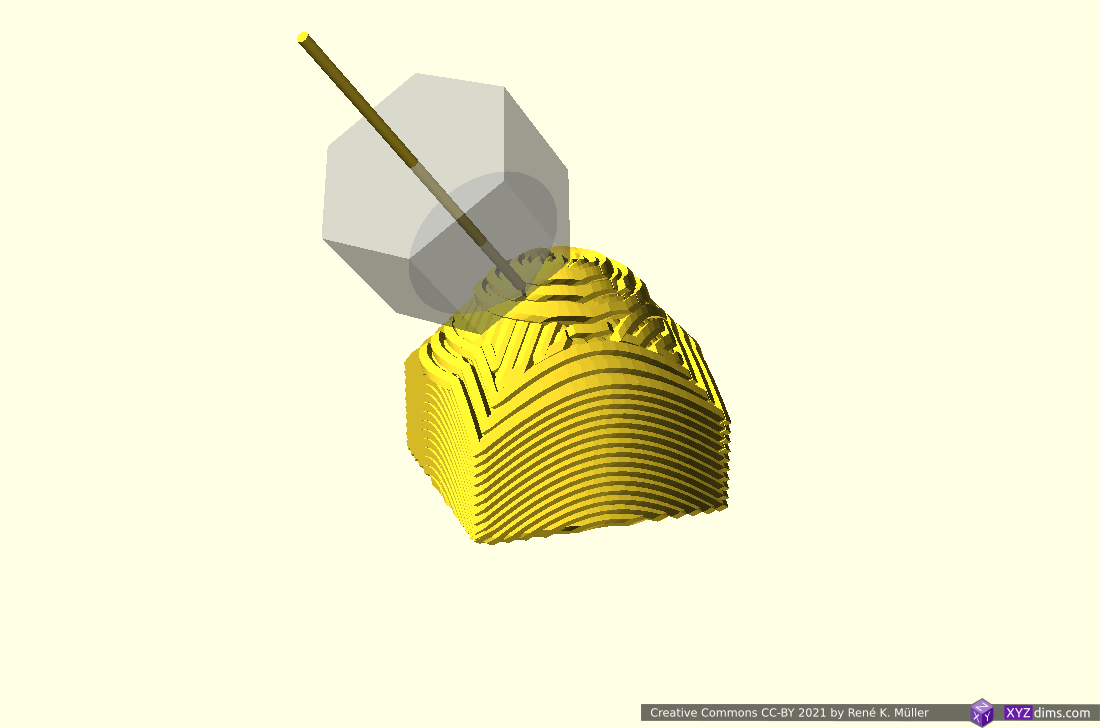
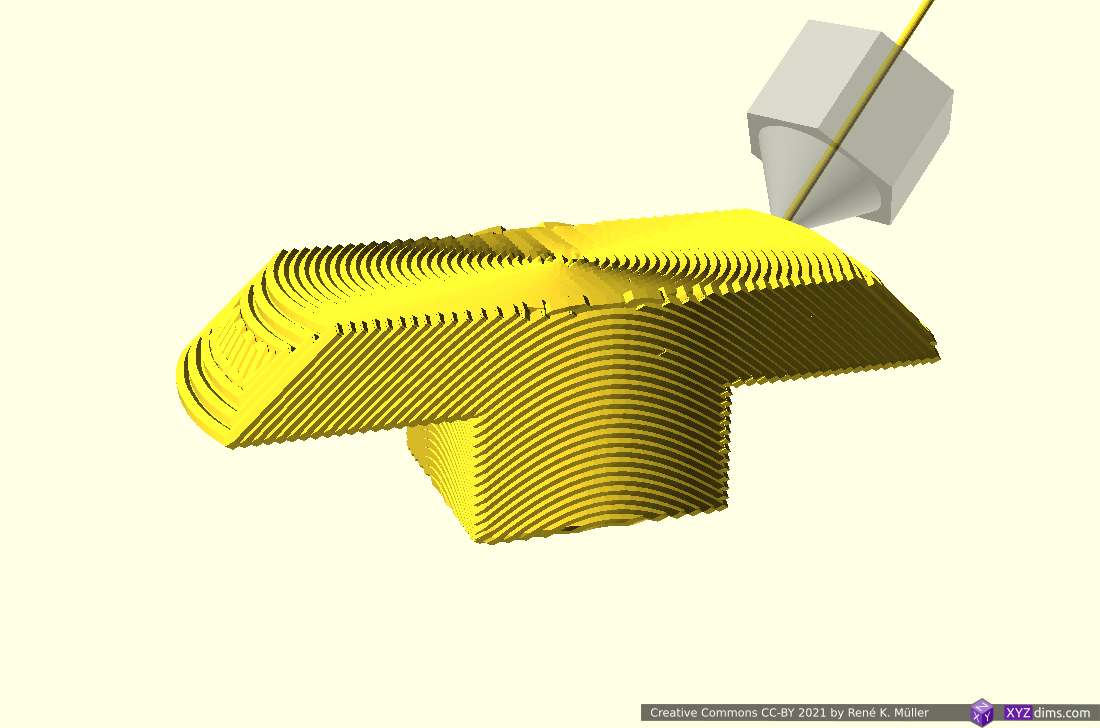
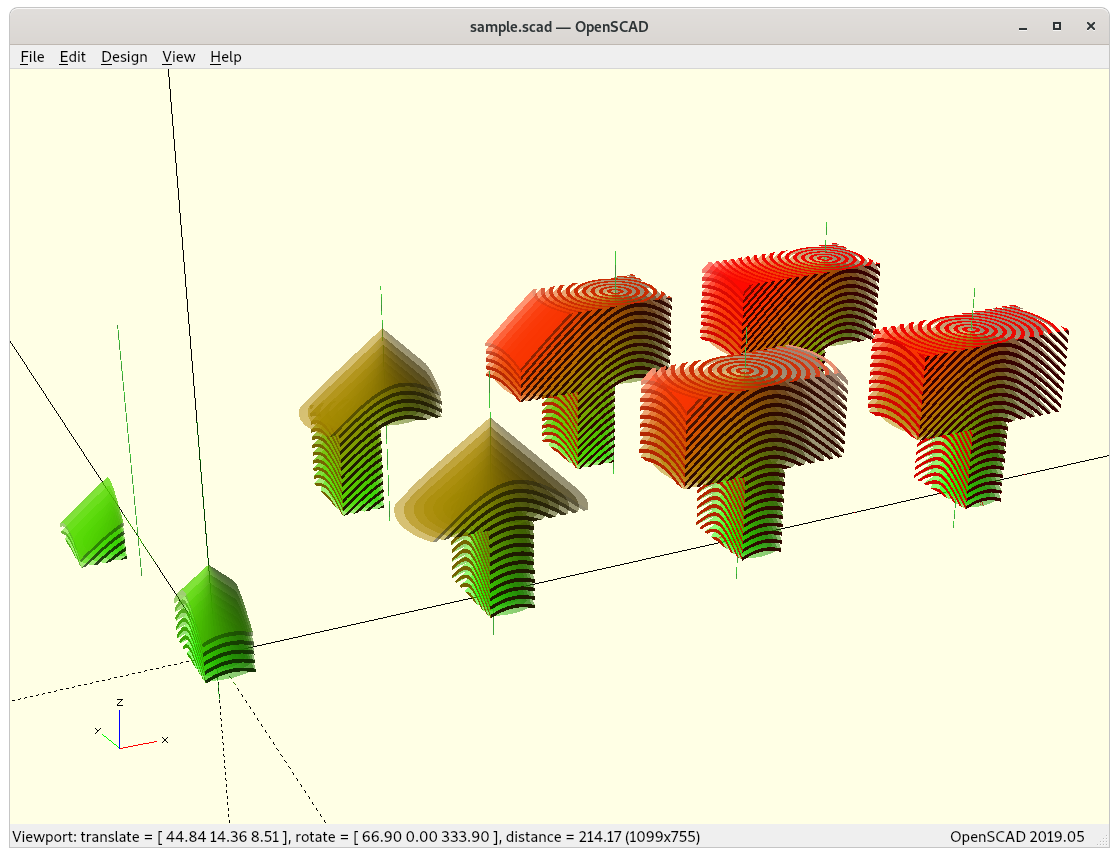
Using non-rotating but tilted sliced (like used with belt-printers) but in two distinct directions:
3 segments: z-planar & 2x tilted
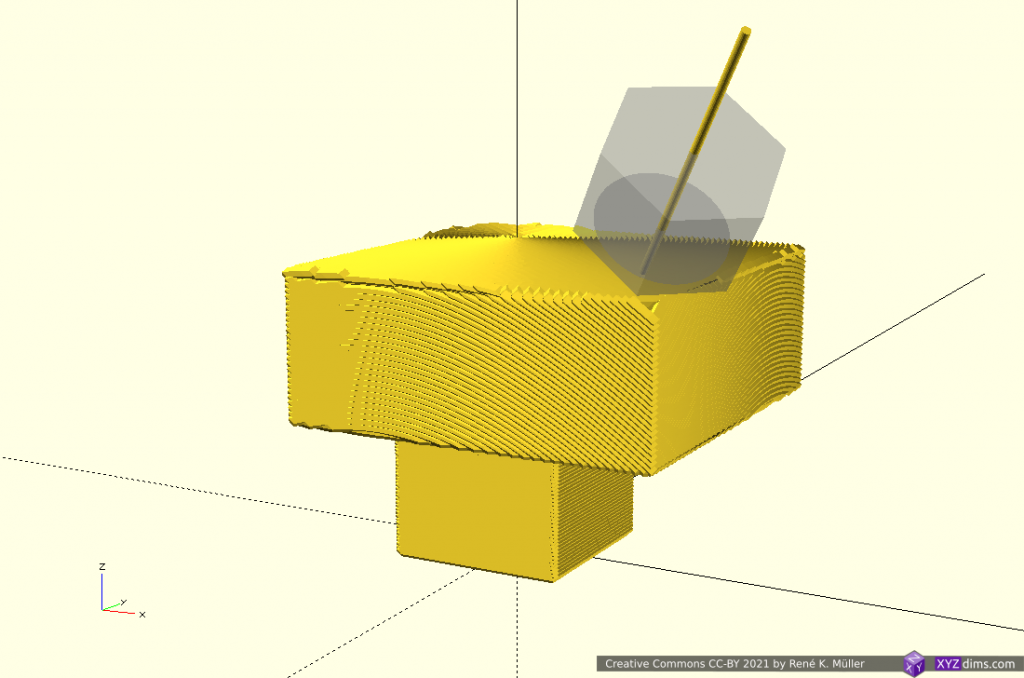
starting z-planar
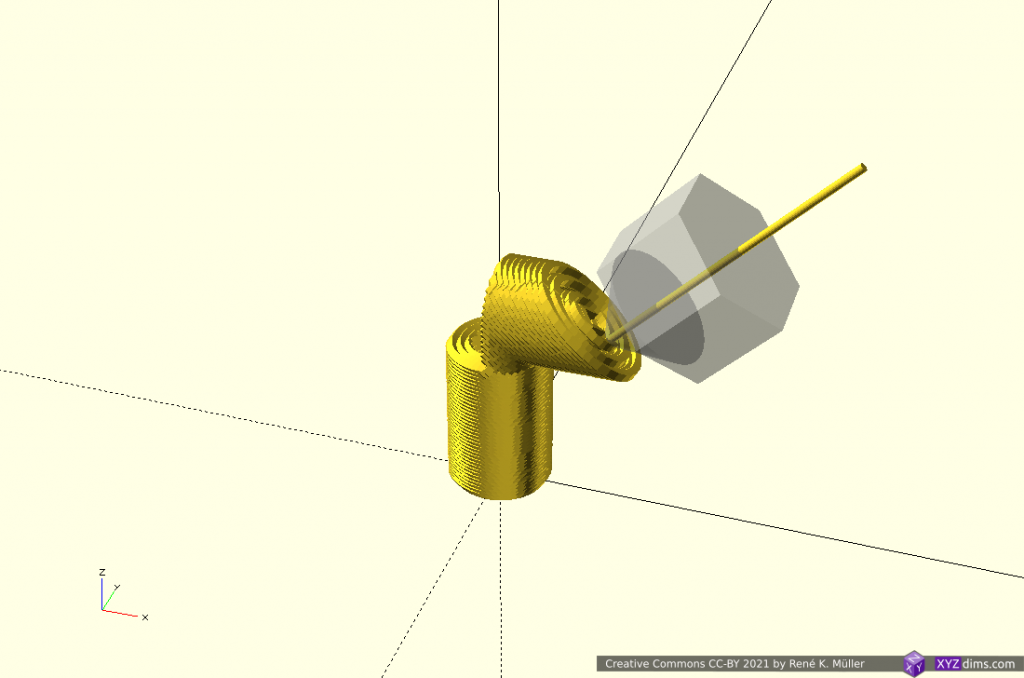
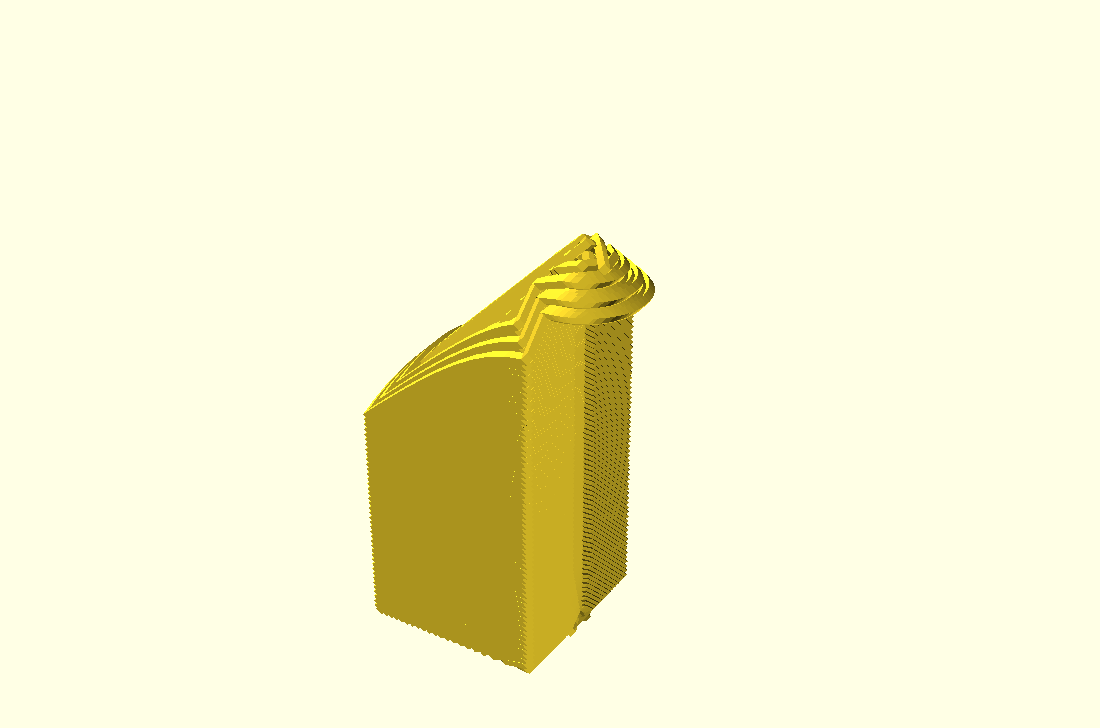
finishing z-planar
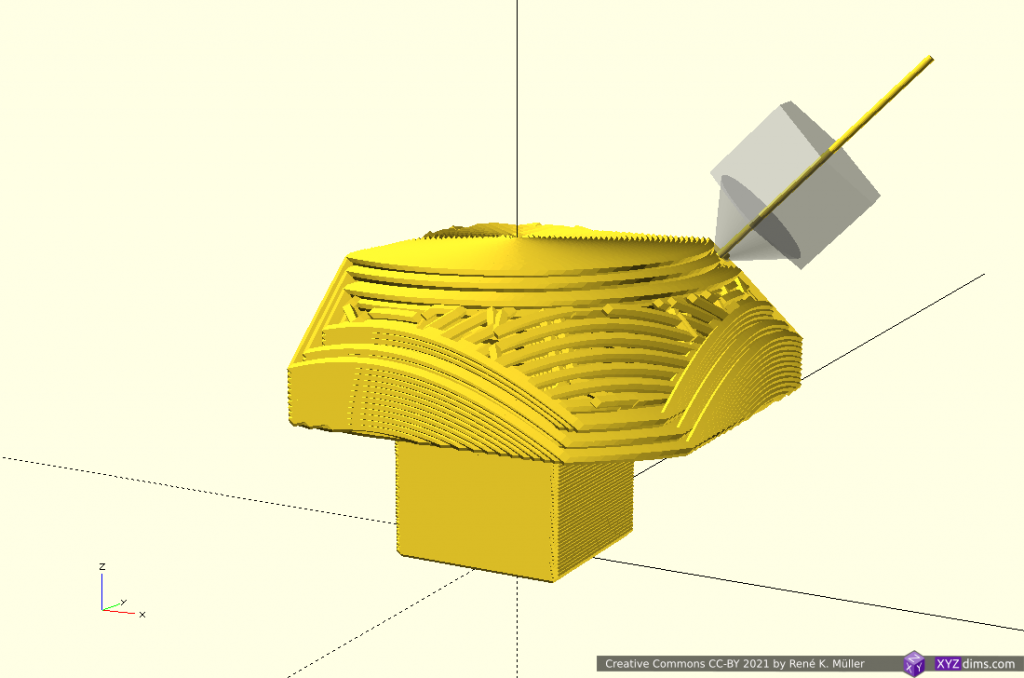
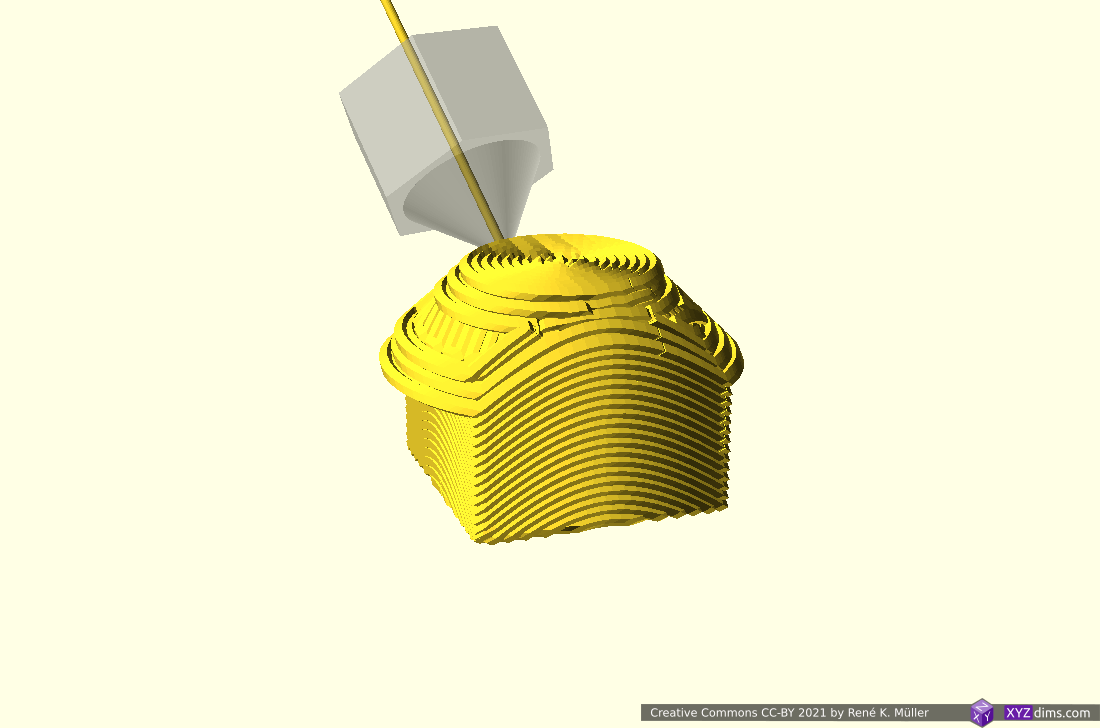
starting 2nd segment with tilted slices into one direction
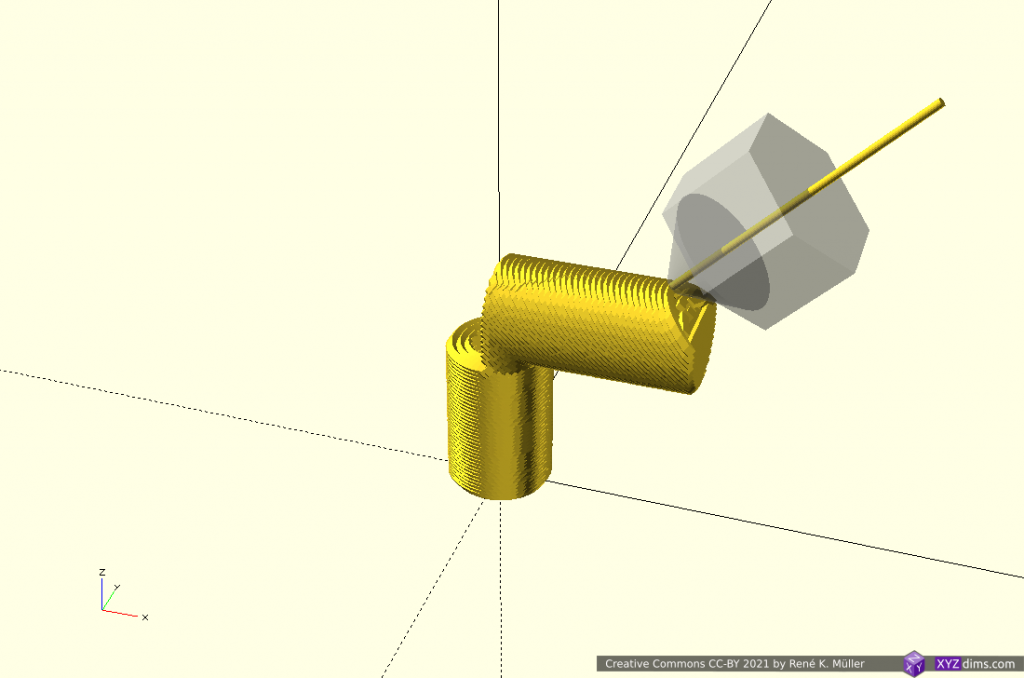
2nd segment tilted continuing
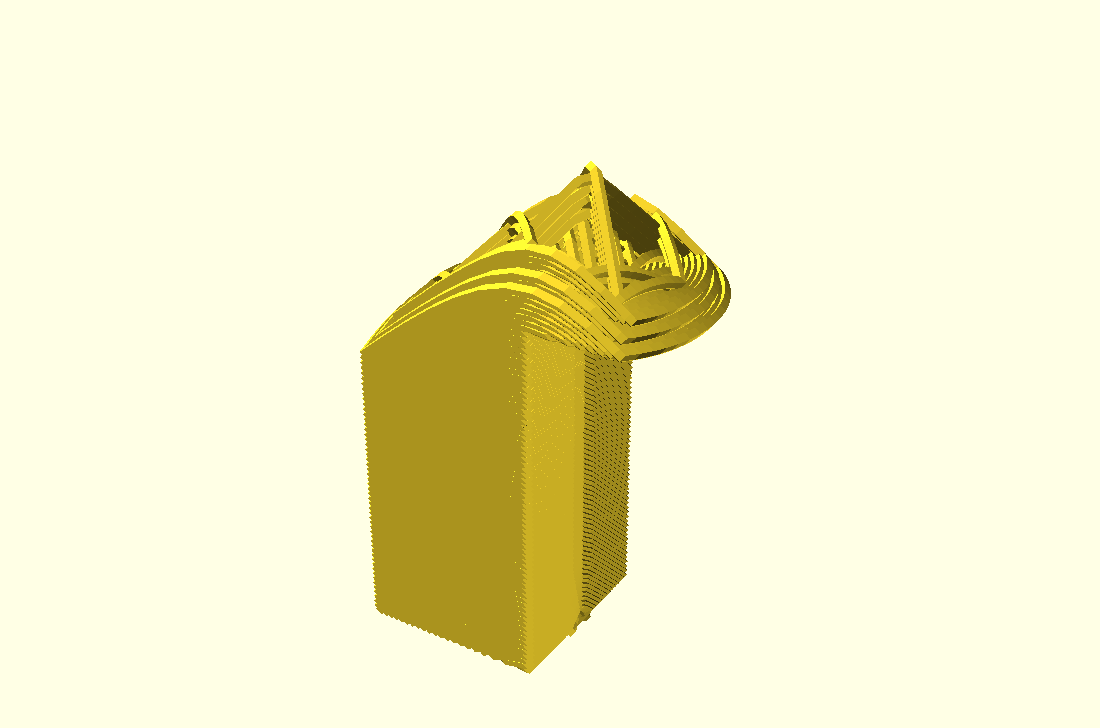
2nd segment tilted finishing
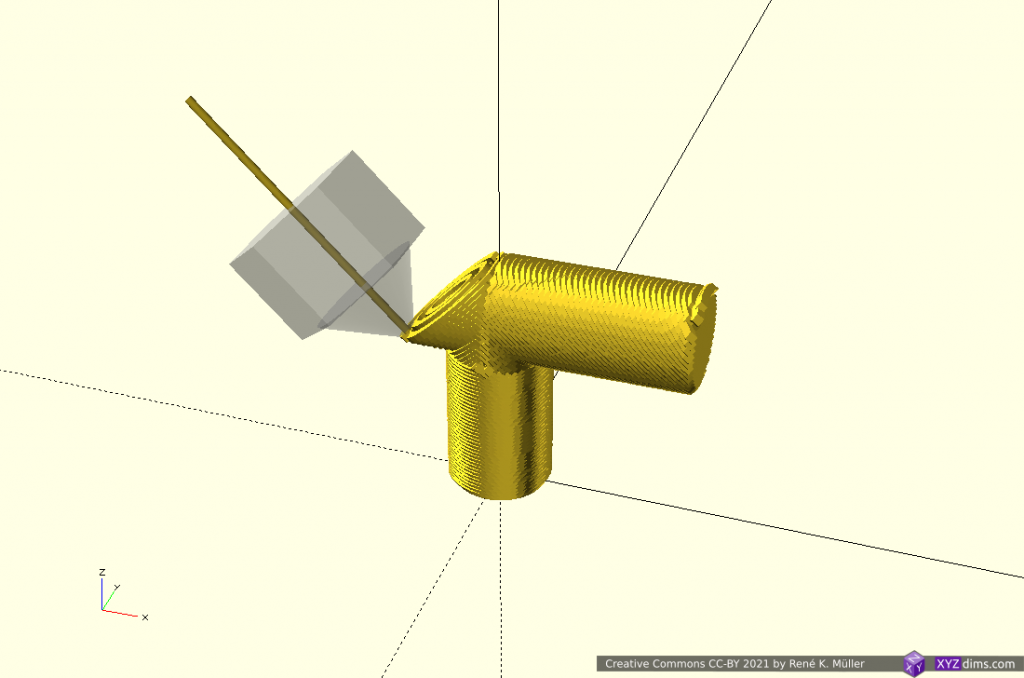
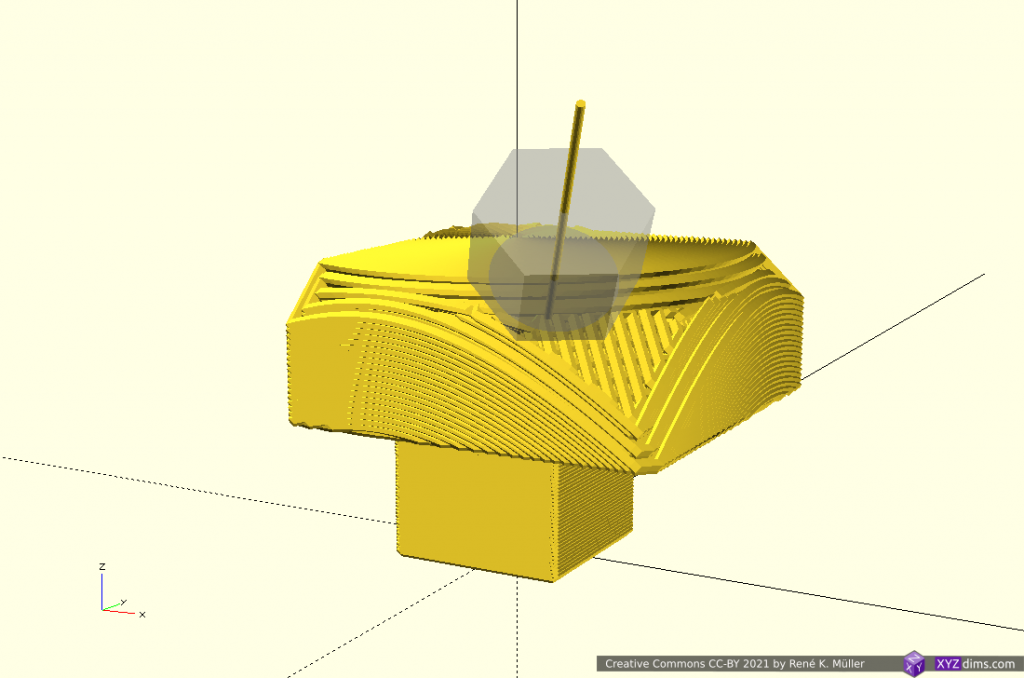
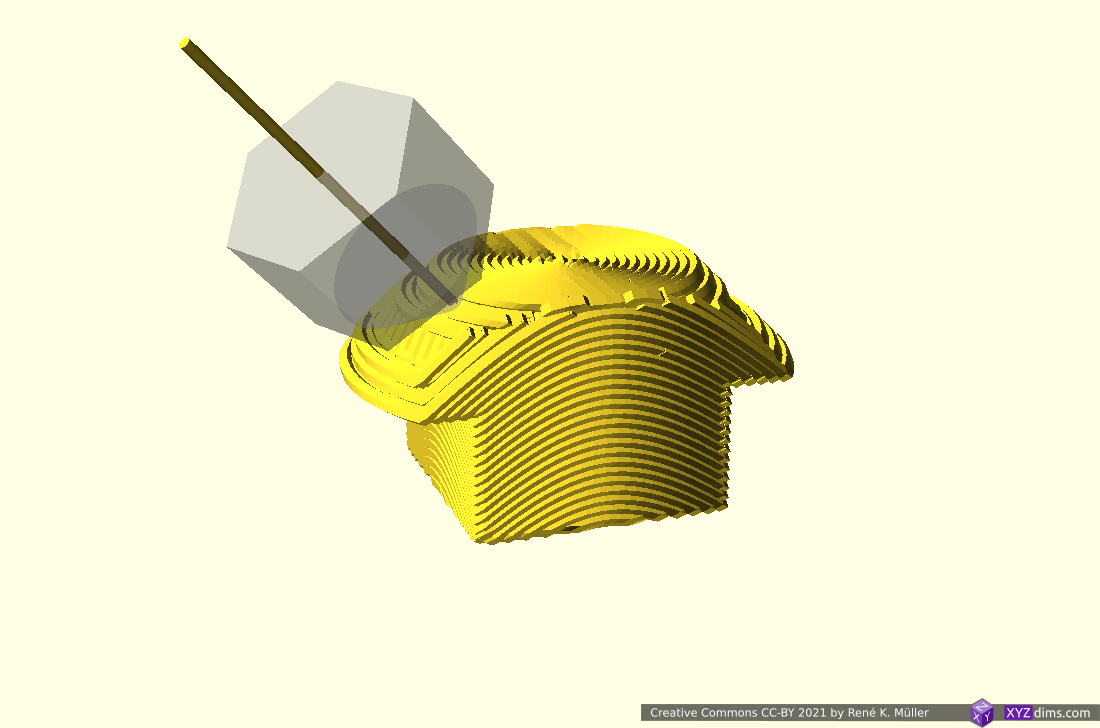
3rd segment tilted into other direction
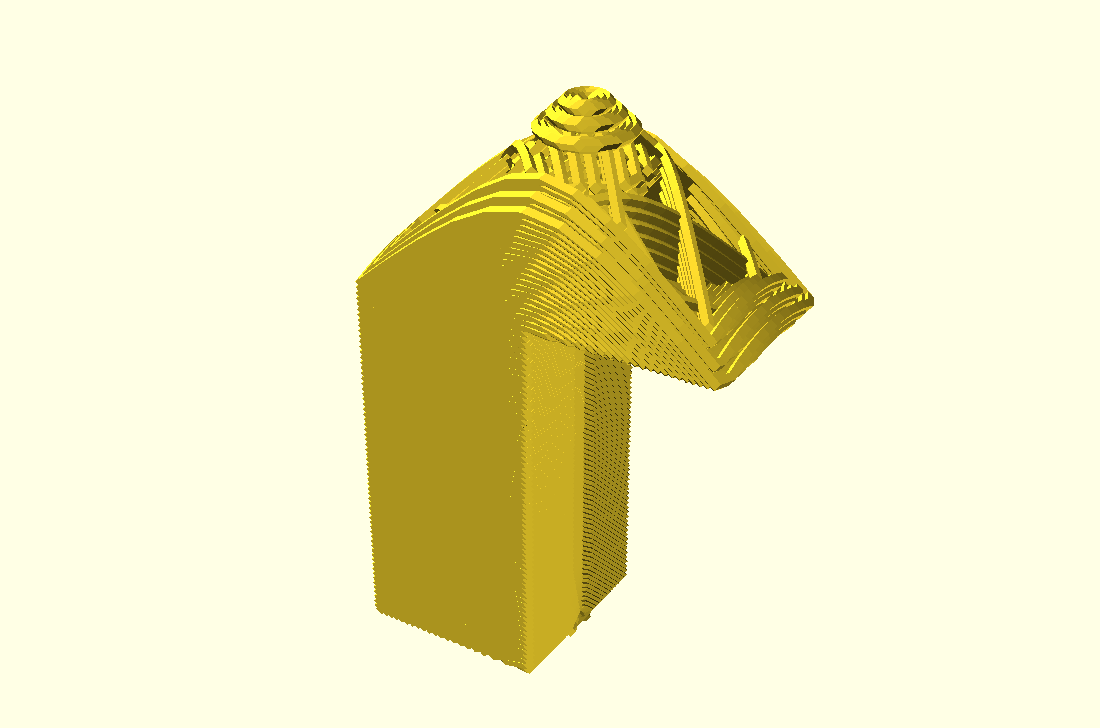
extending 3rd segment further
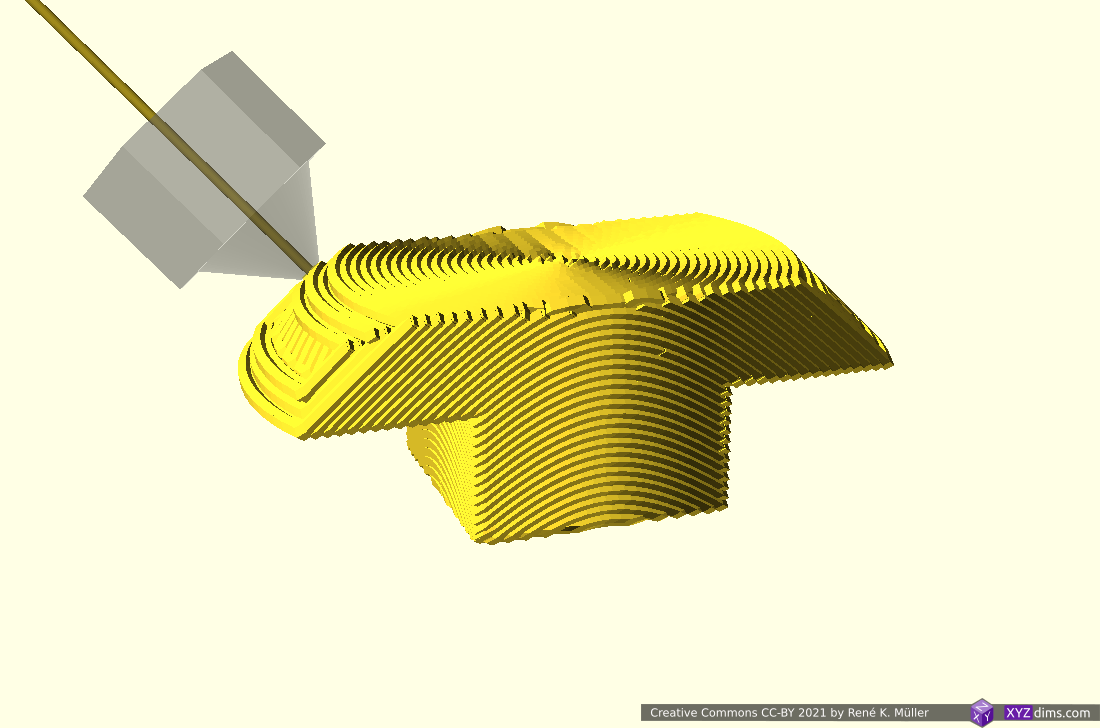
finished piece
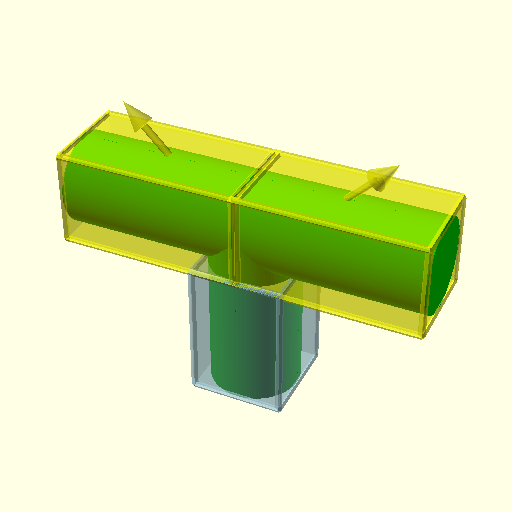
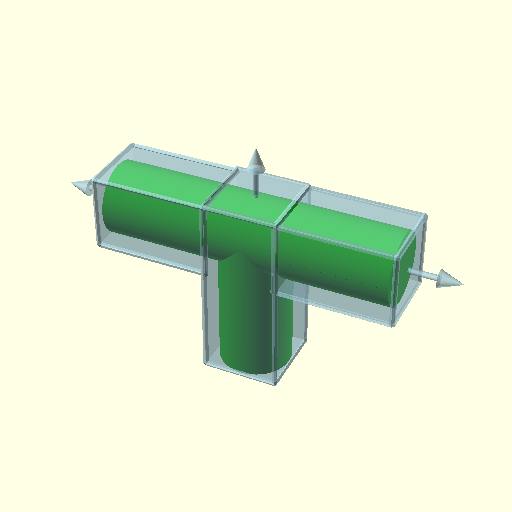
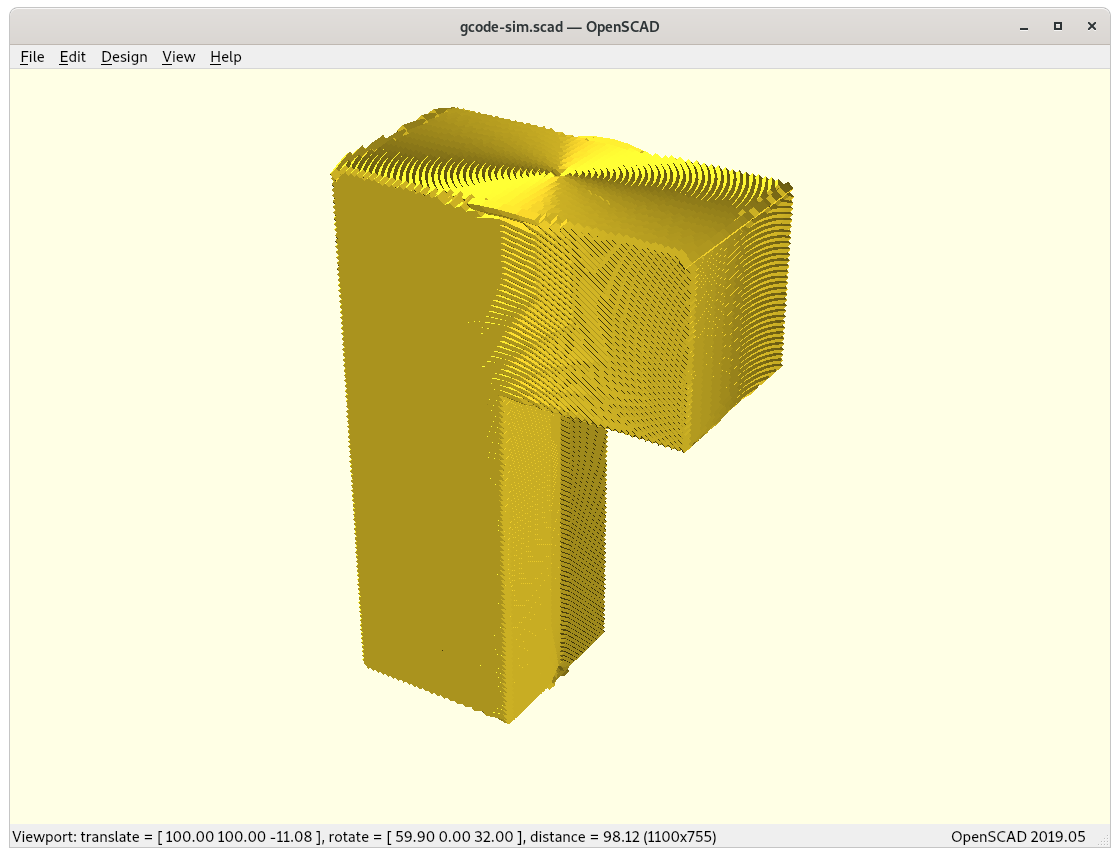
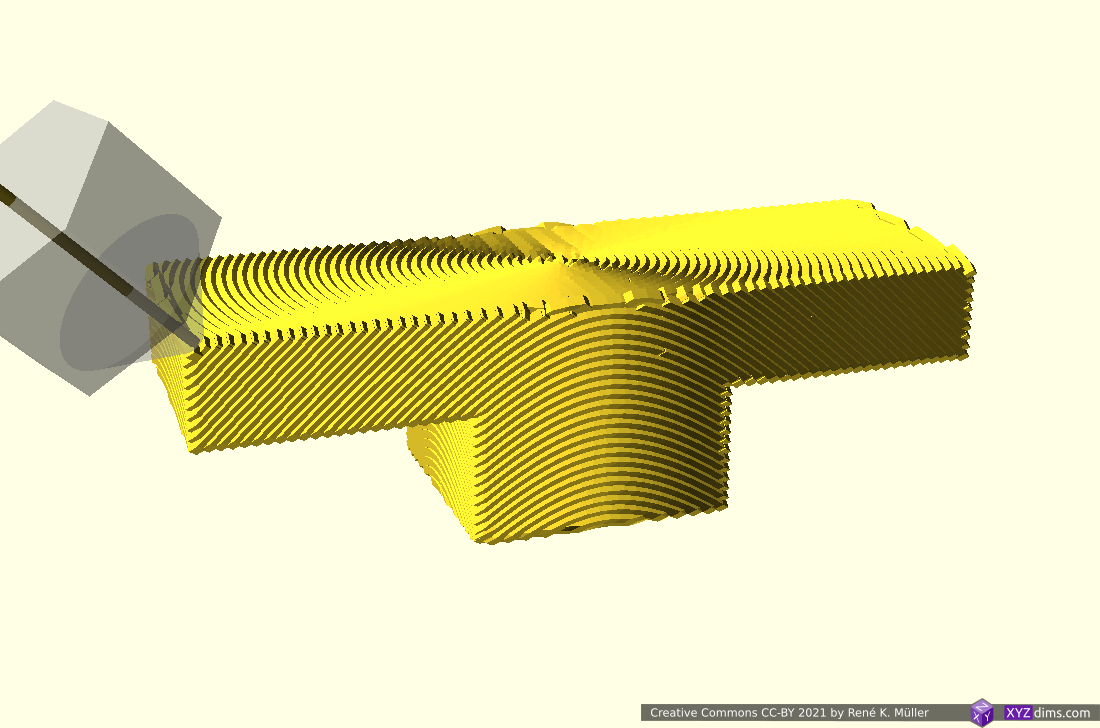
T-model segmented into 2 sub-volumes, sliced z-planar and twice tilted in opposite directions
Tilted slices can be printed with 4-axis Rotating Tilted Nozzle (RTN) but the first Z-planar part, as mentioned above, might not provide sufficient surface quality, whereas a 5-axis Penta Axis (PAX) printhead can print both segments easily.
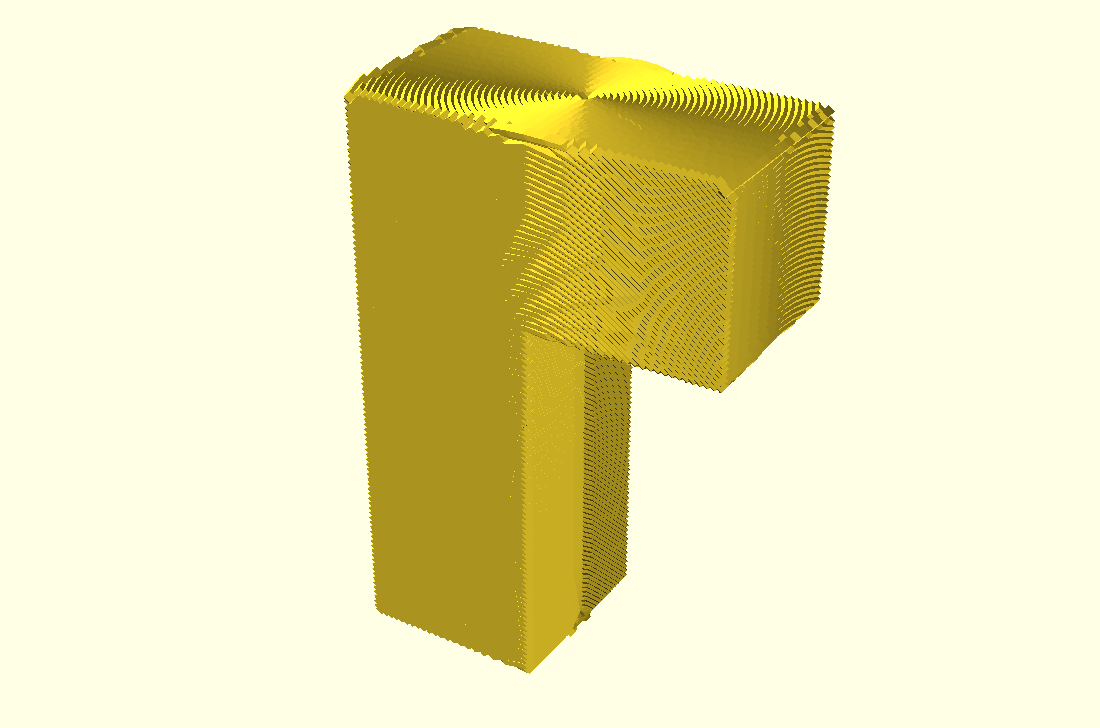
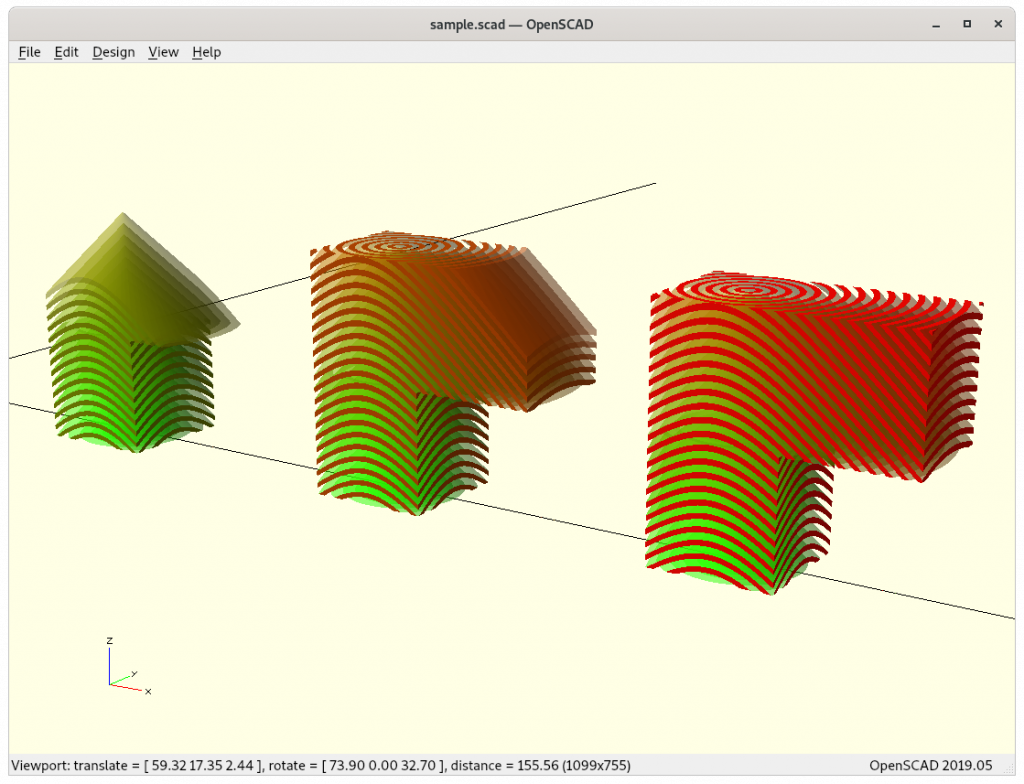
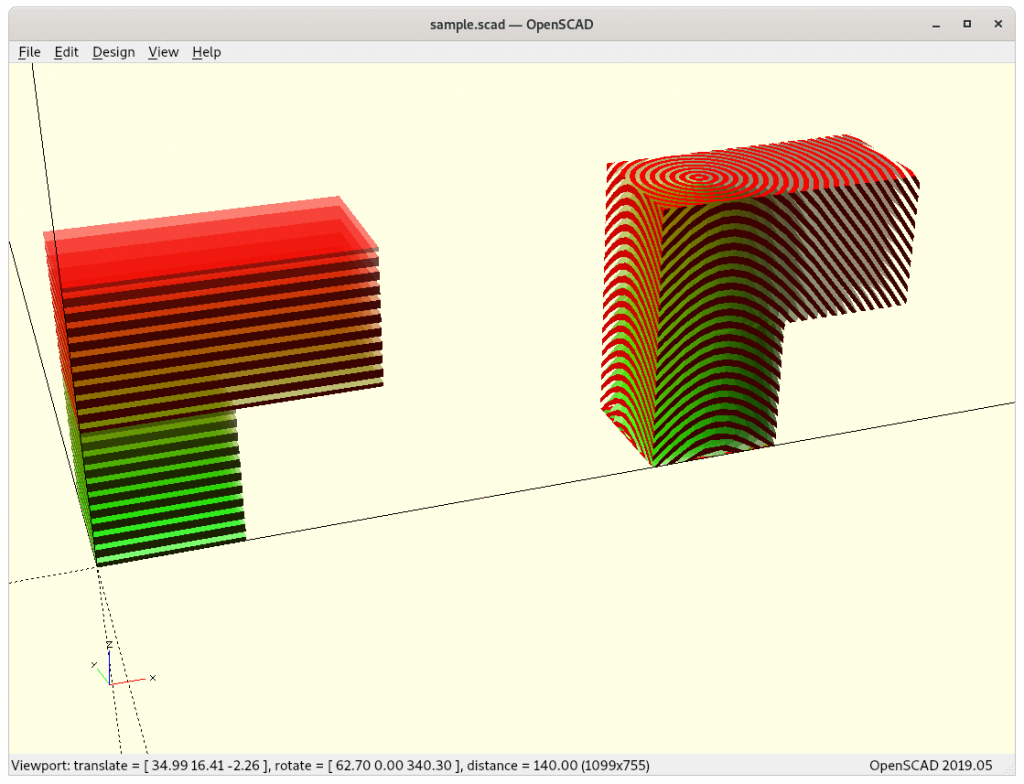
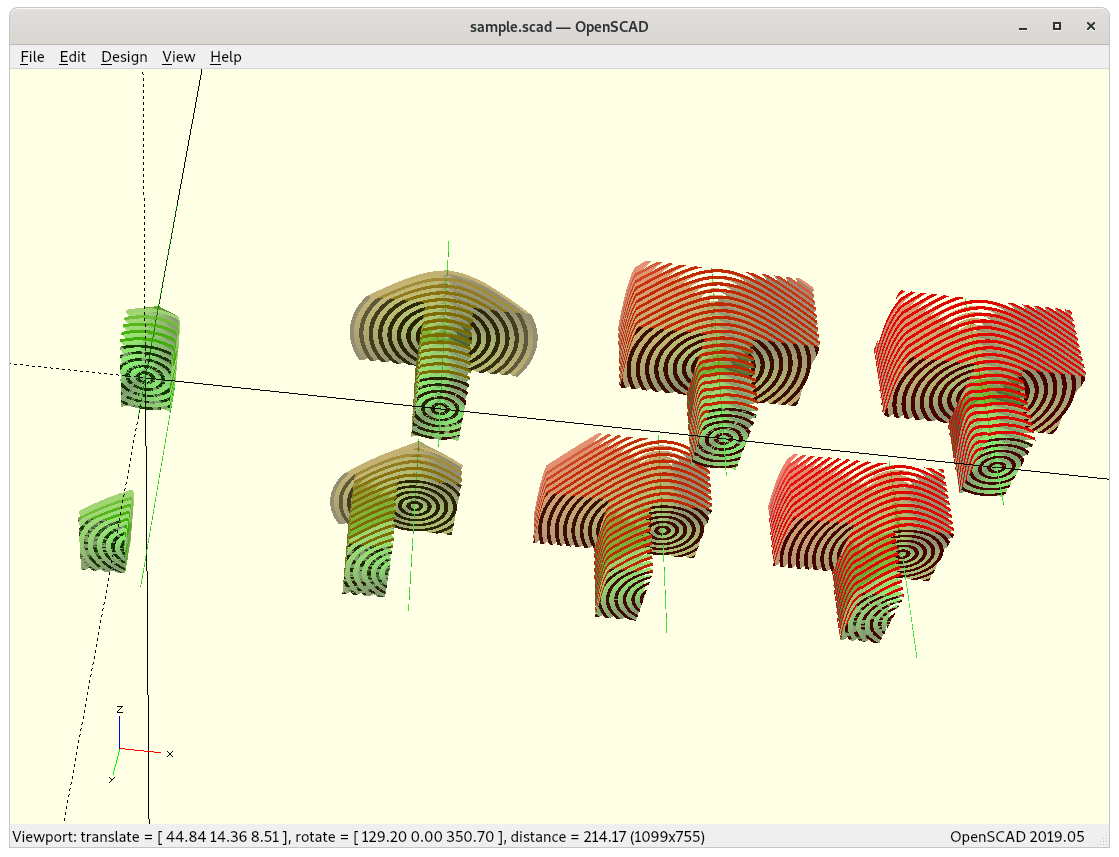
T-Model: 3 Segments: Z-planar & 2x X-planar
A more classic planar approach but with different planes as reference, first Z-planar then twice X-planar in different directions:
3 segments: z-planar, 2x x-planar
building up 1st segment z-planar
finishing z-planar segment
switching to 2nd segment, x-planar
extending x-planar
finish 2nd segment x-planar
switching other side x-planar opposite direction, 3rd segment
extending 3rd segment x-planar
finished piece
T-model segmented into 3 sub-volumes, sliced z-planar and twice x-planar
X-planar printing requires either 5-axis Penta Axis (PAX) printhead or the ability to tilt the bed.
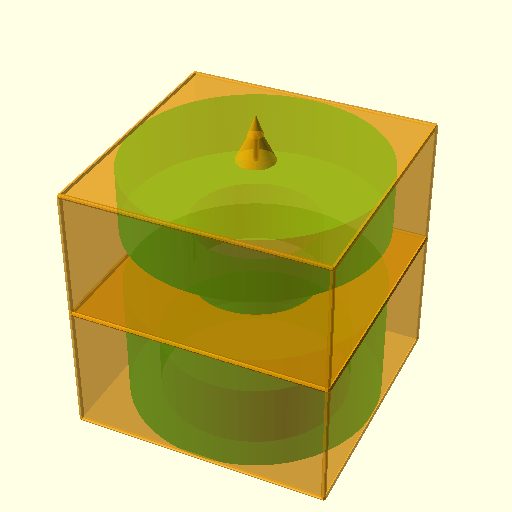
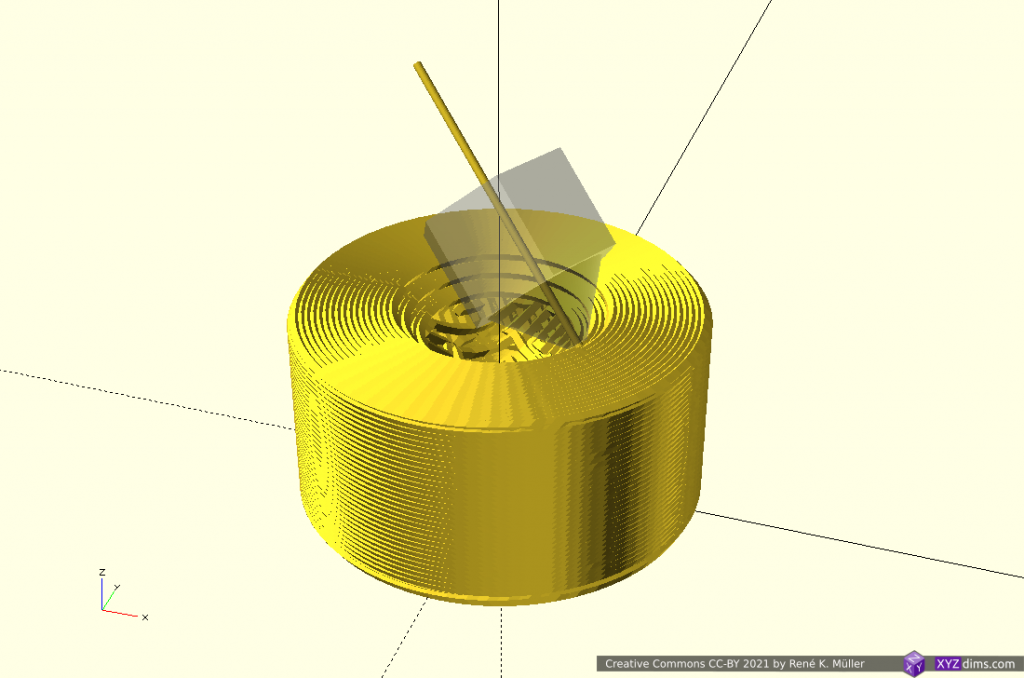
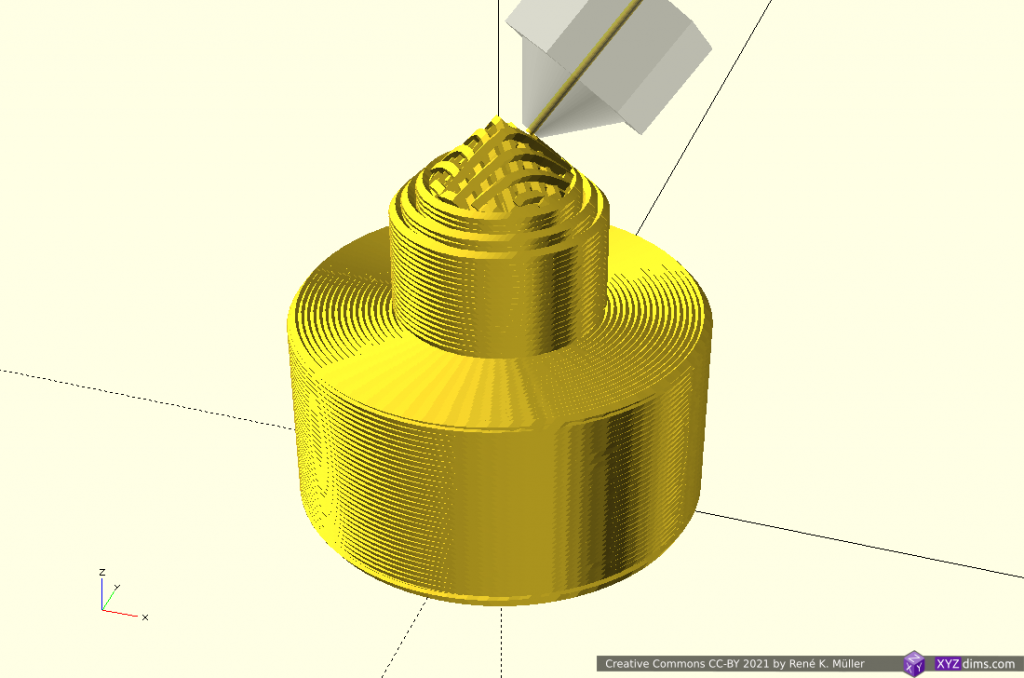
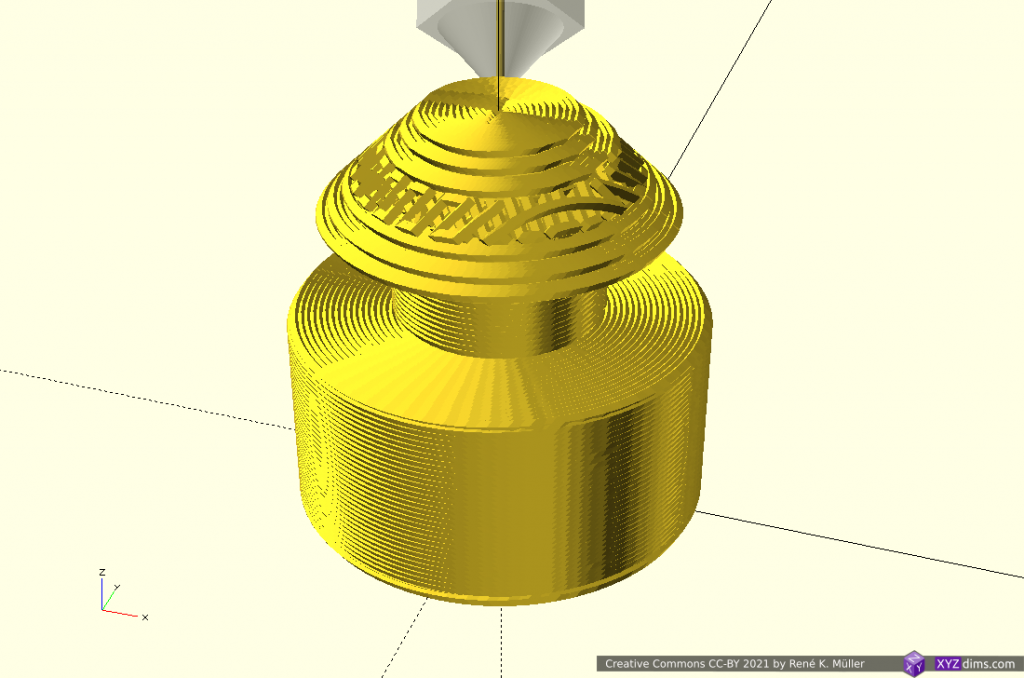
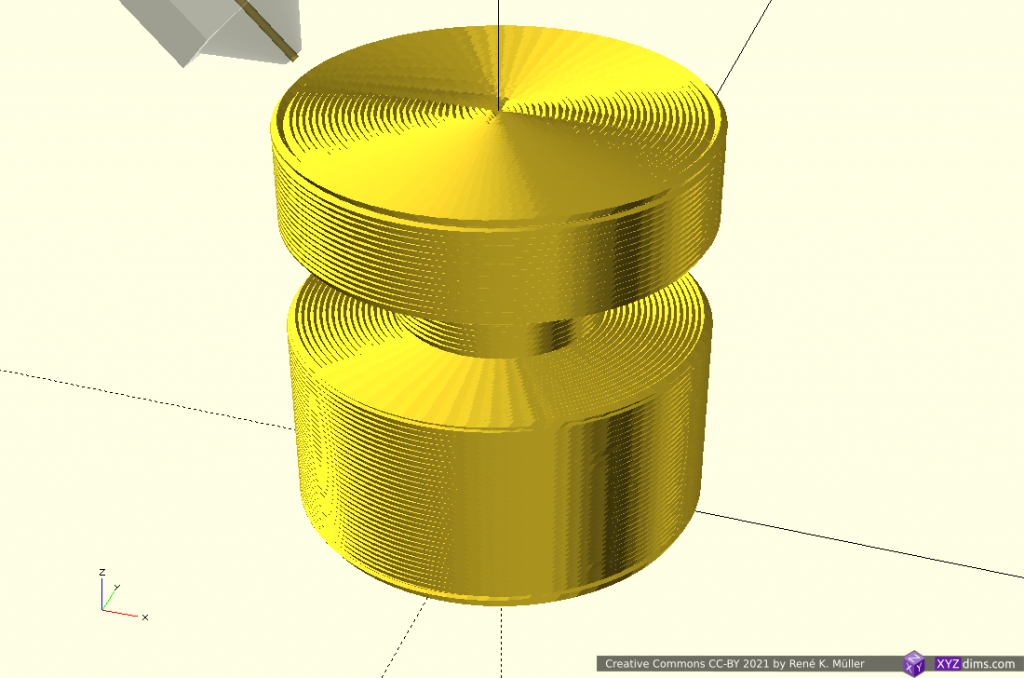
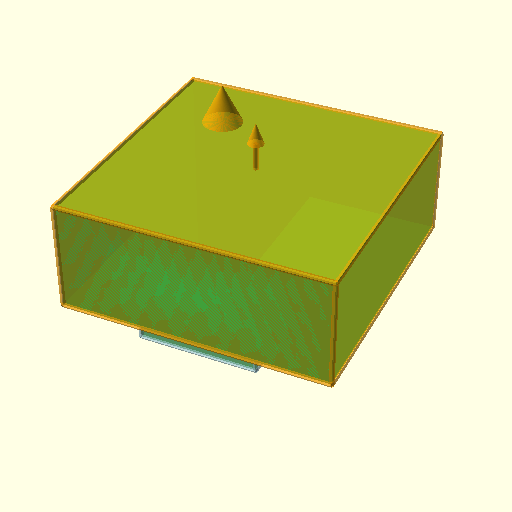
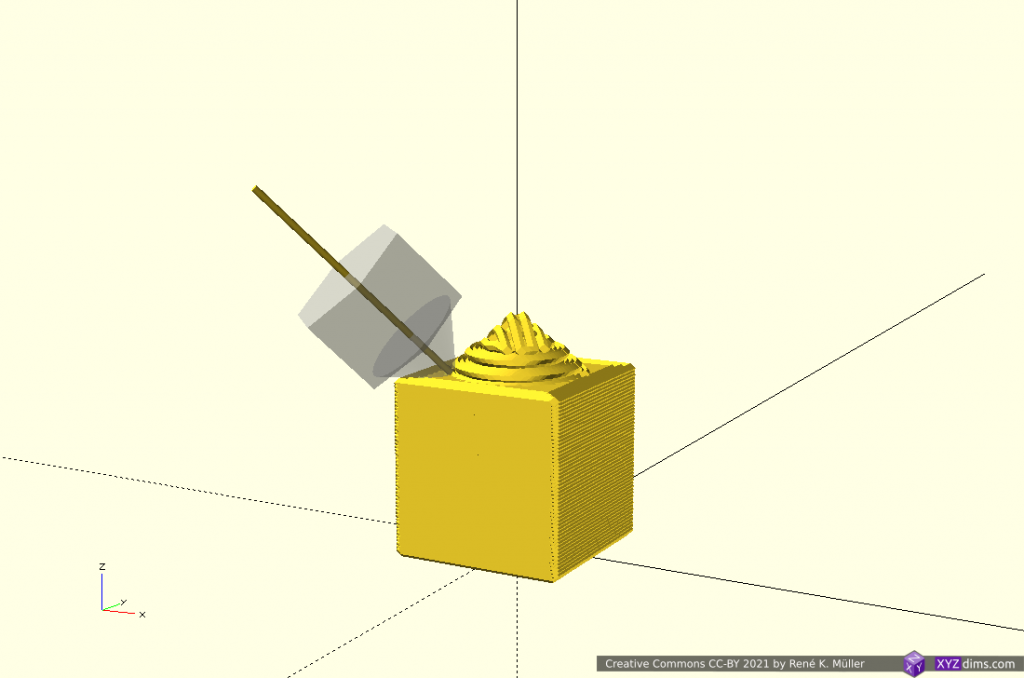
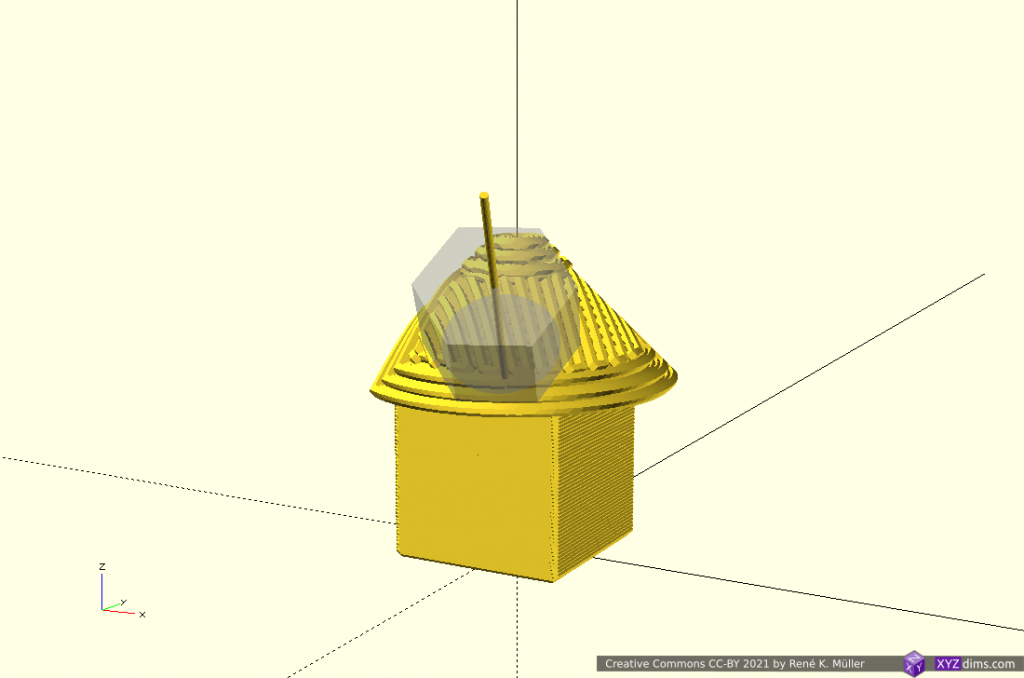
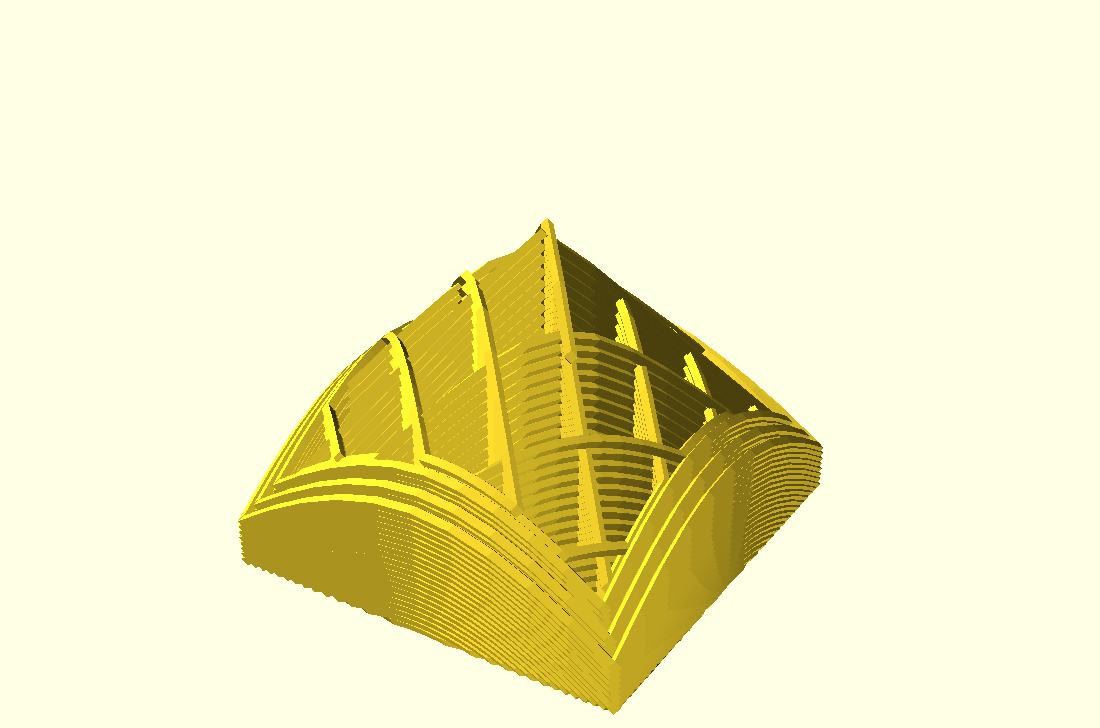
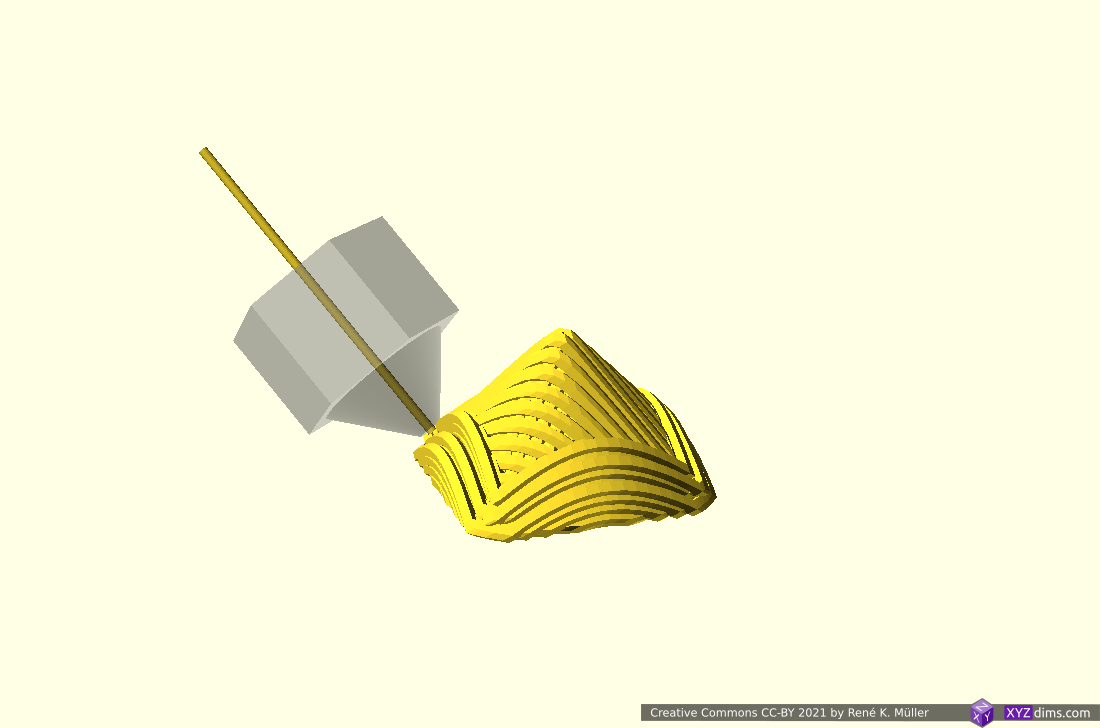
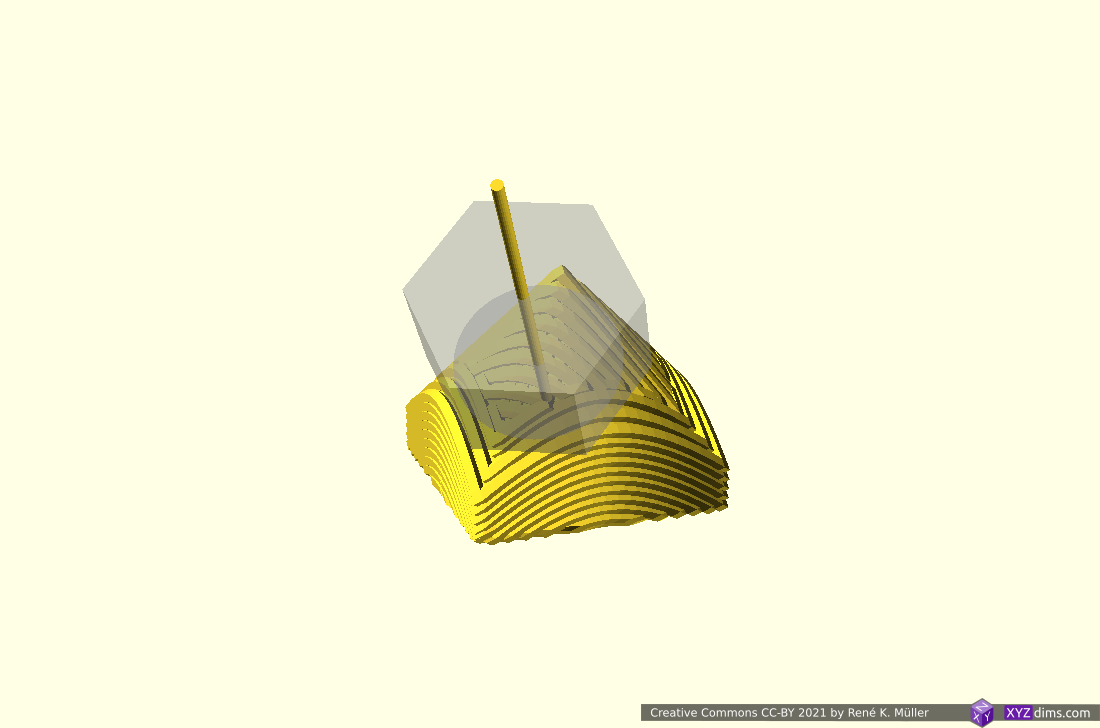
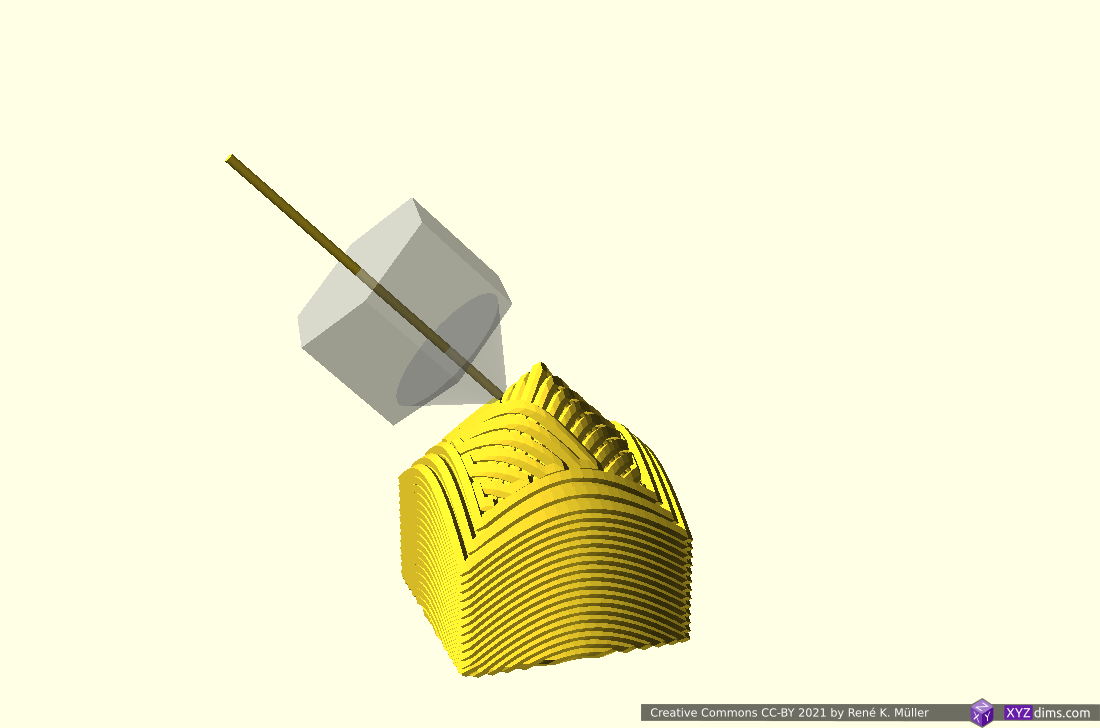
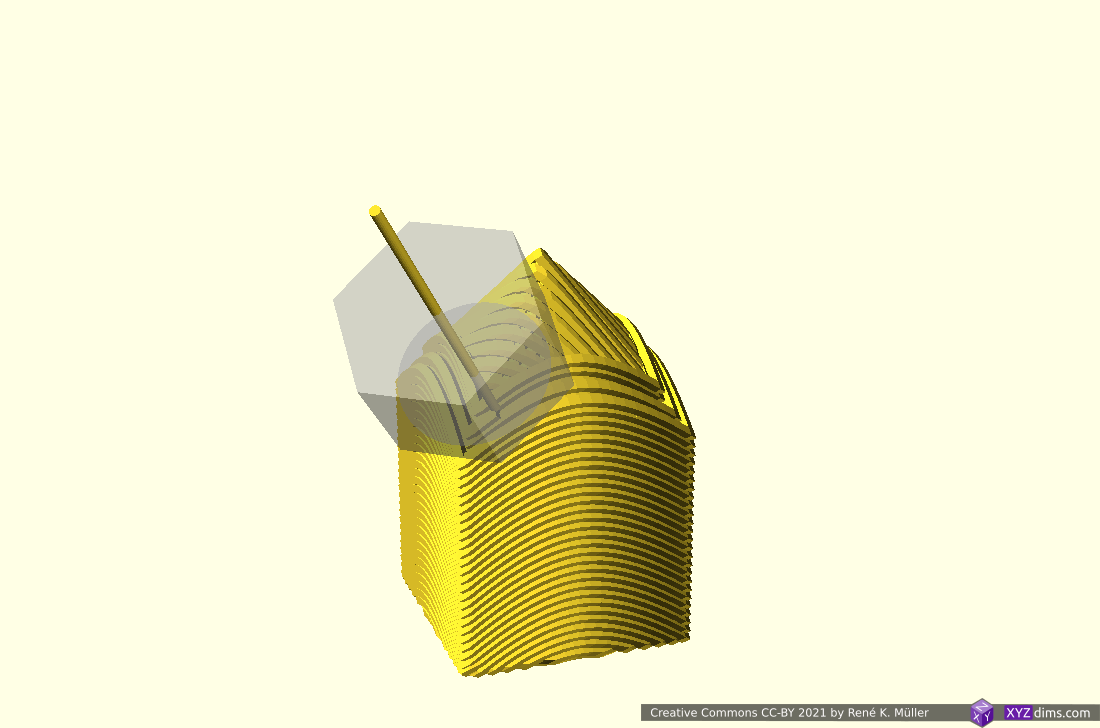
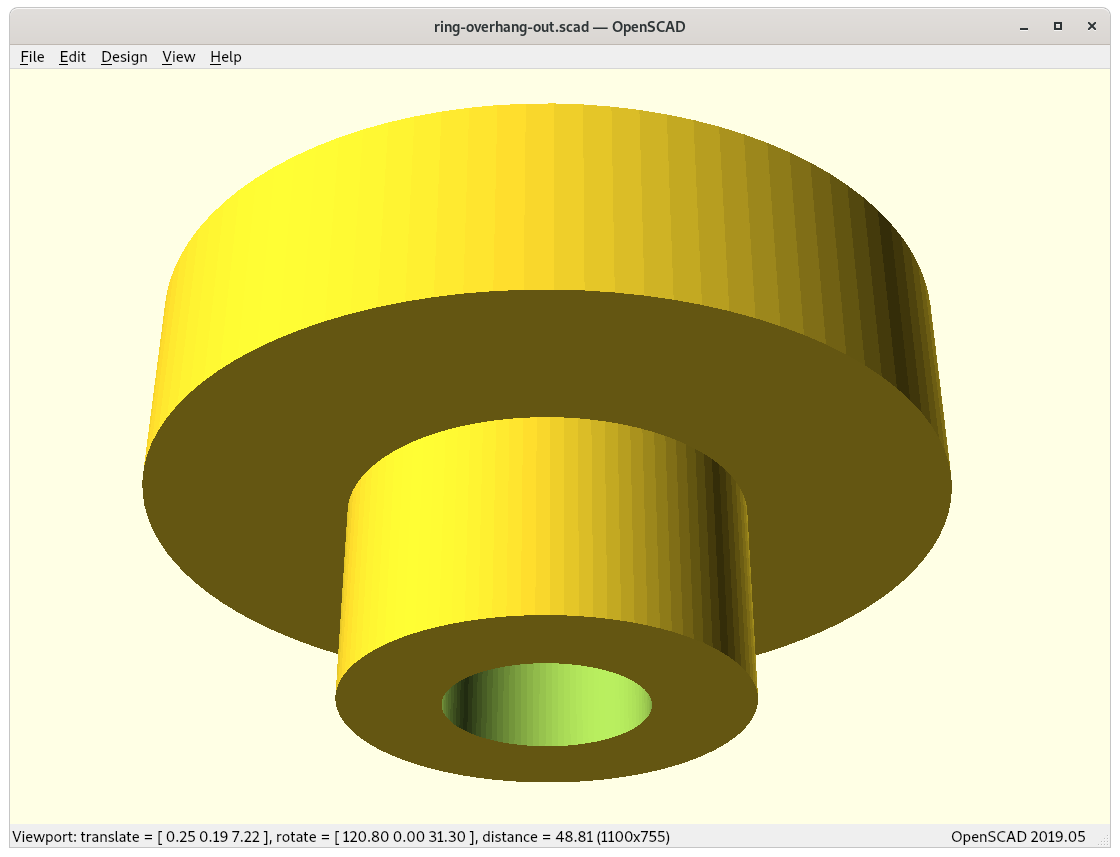
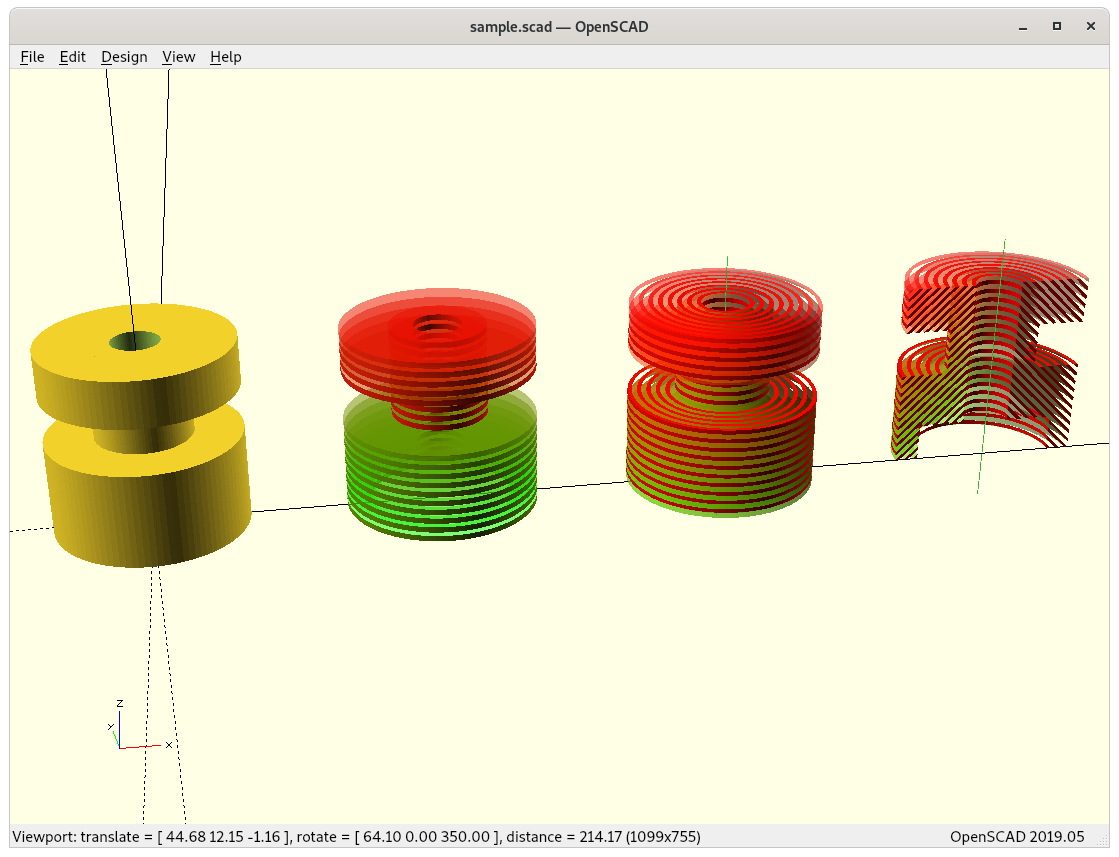
Overhang In/Out: 2 Segments: 2x Conic
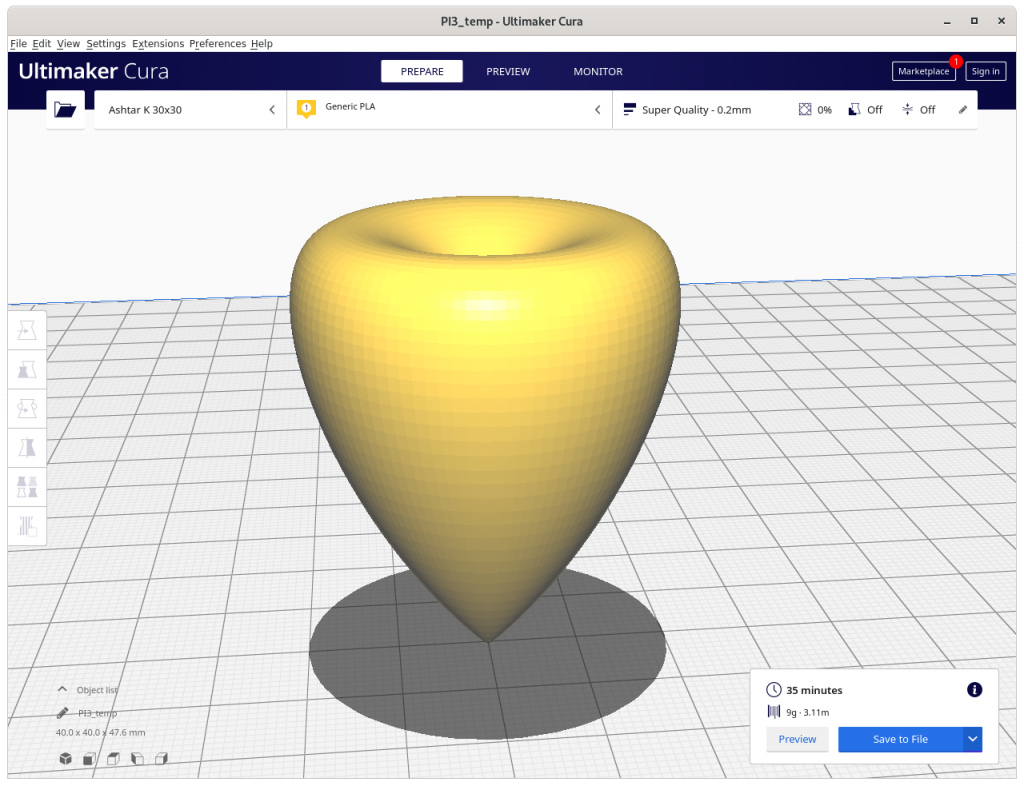
Lower part is sliced with conic slicing with inside-cone mode to print in-going overhang, whereas the upper part is sliced with outside-cone mode to cover the out-going overhang:
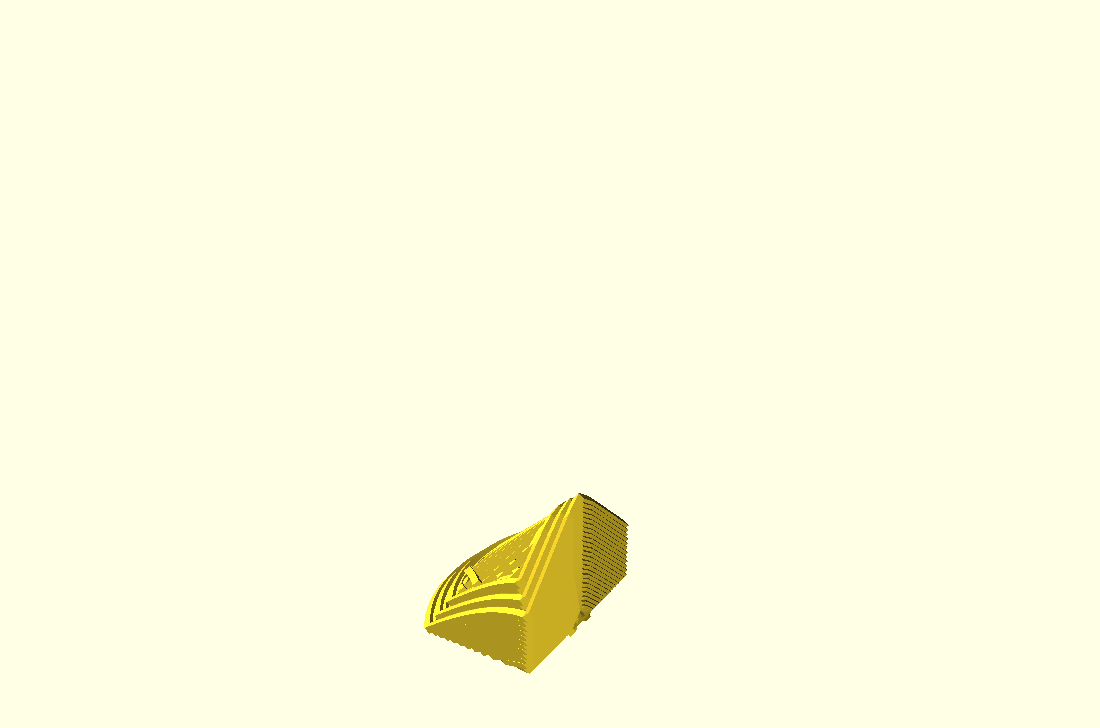
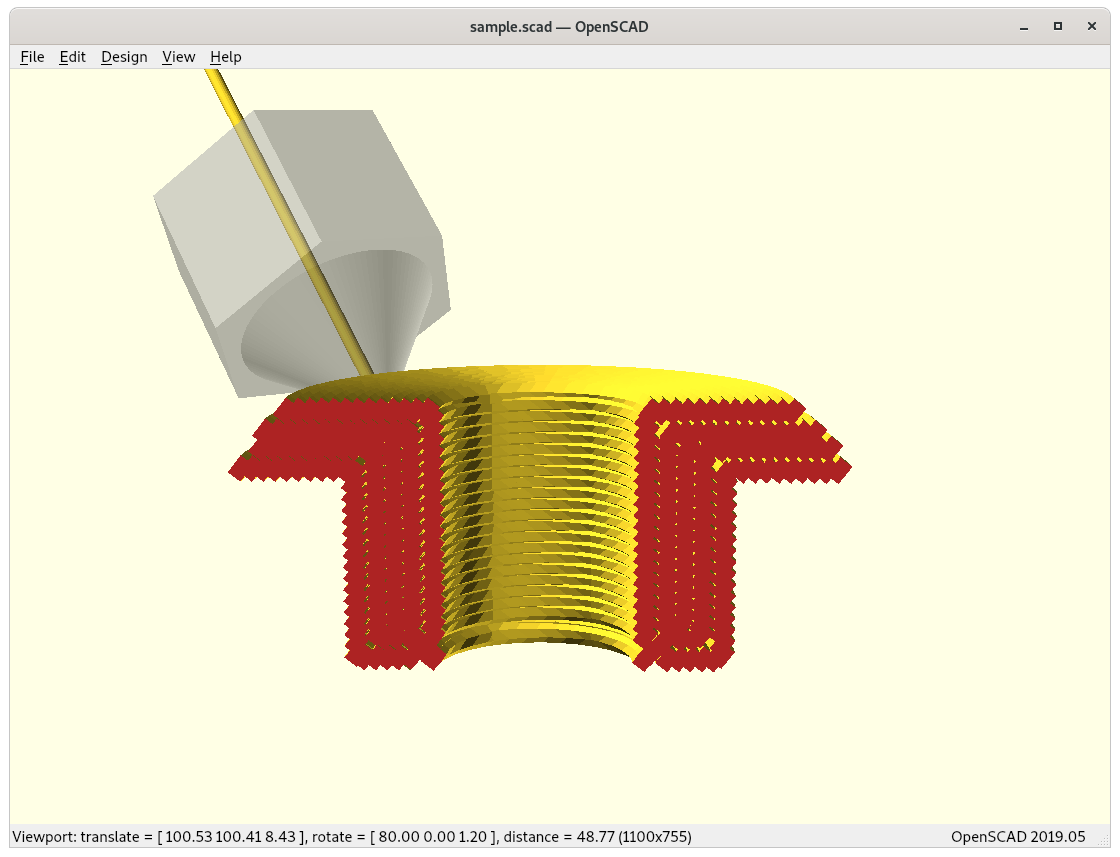
bottom: inside-cone, top: outside-cone
inside cone mode for 1st segment
inside cone mode
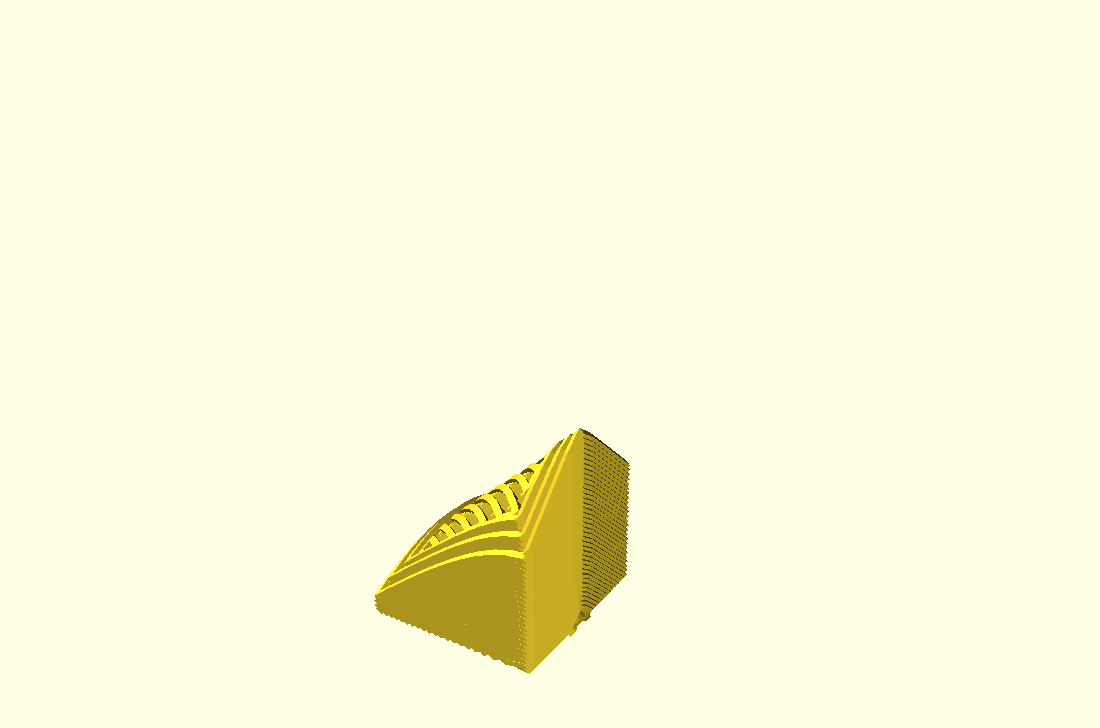
inside cone mode actual inner overhang
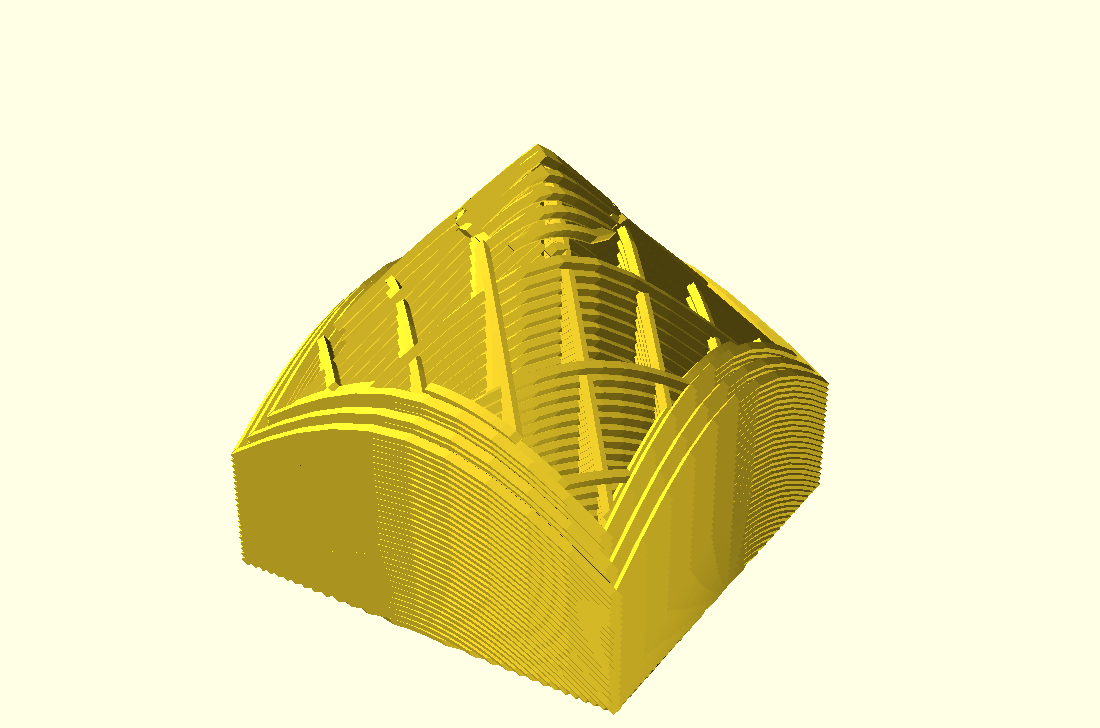
finishing inner overhang
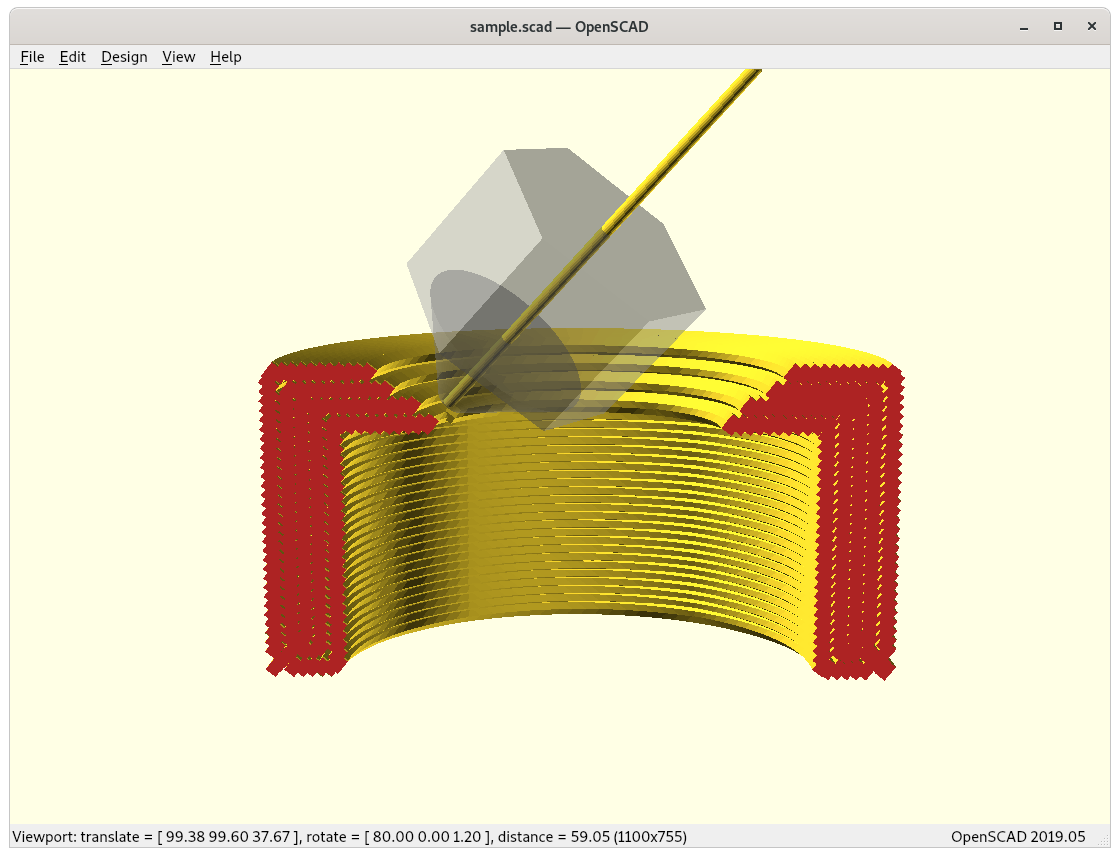
switching to outside cone mode
building up 2nd segment
outside cone mode actual outer overhang
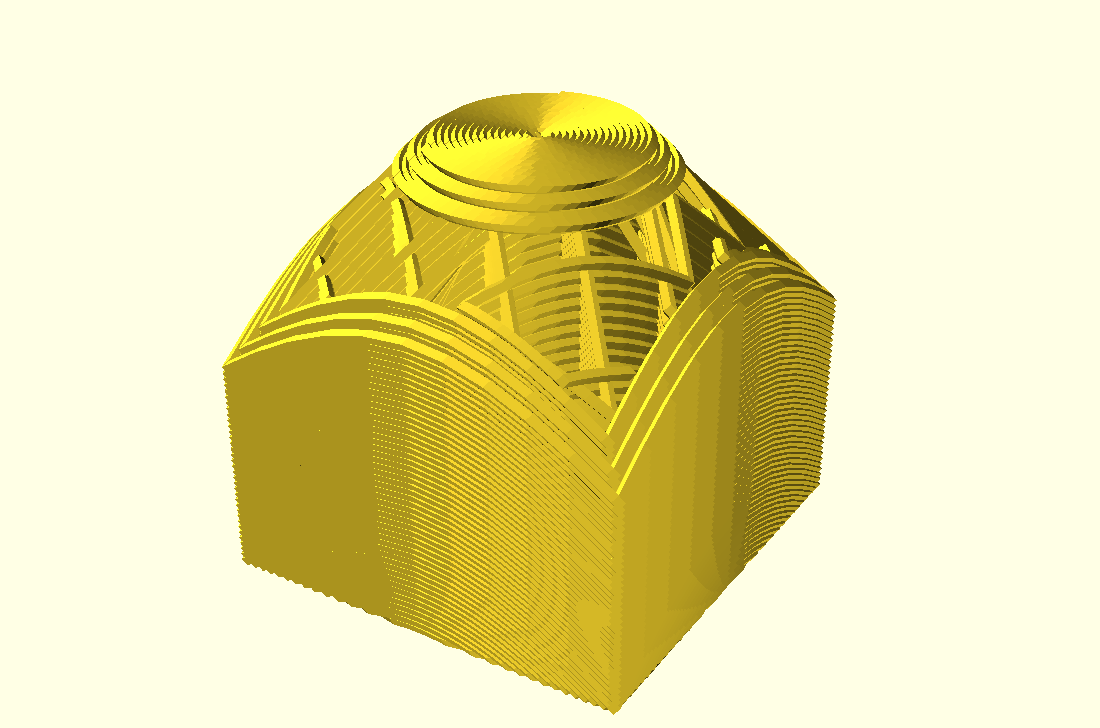
extending outer overhang
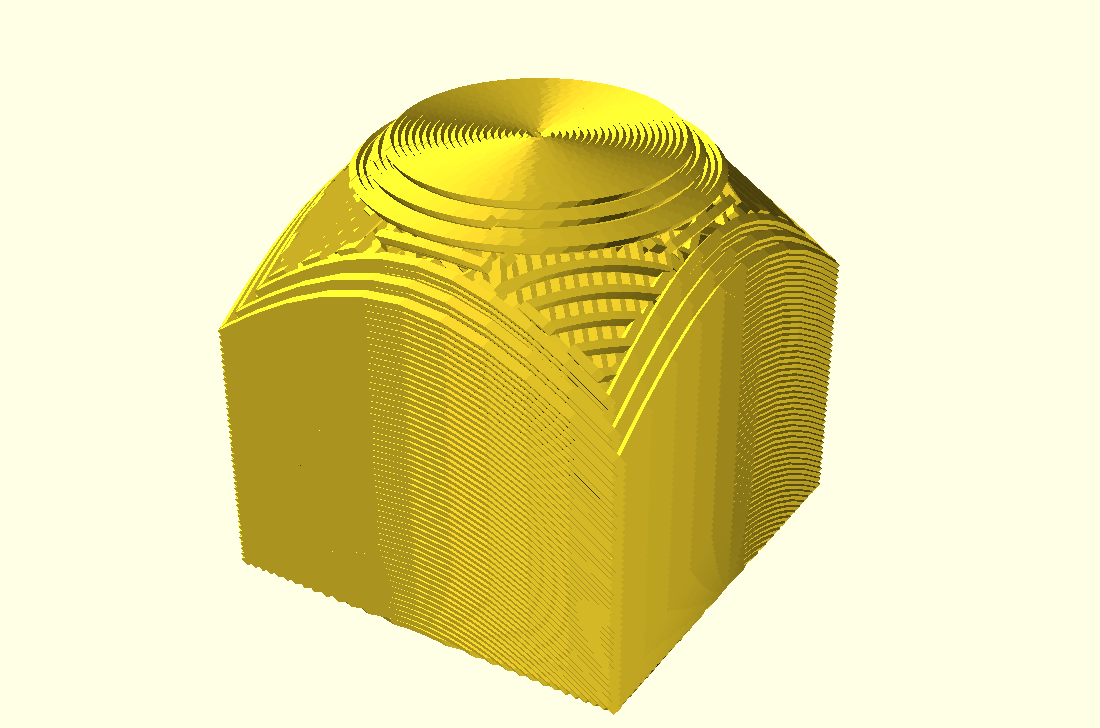
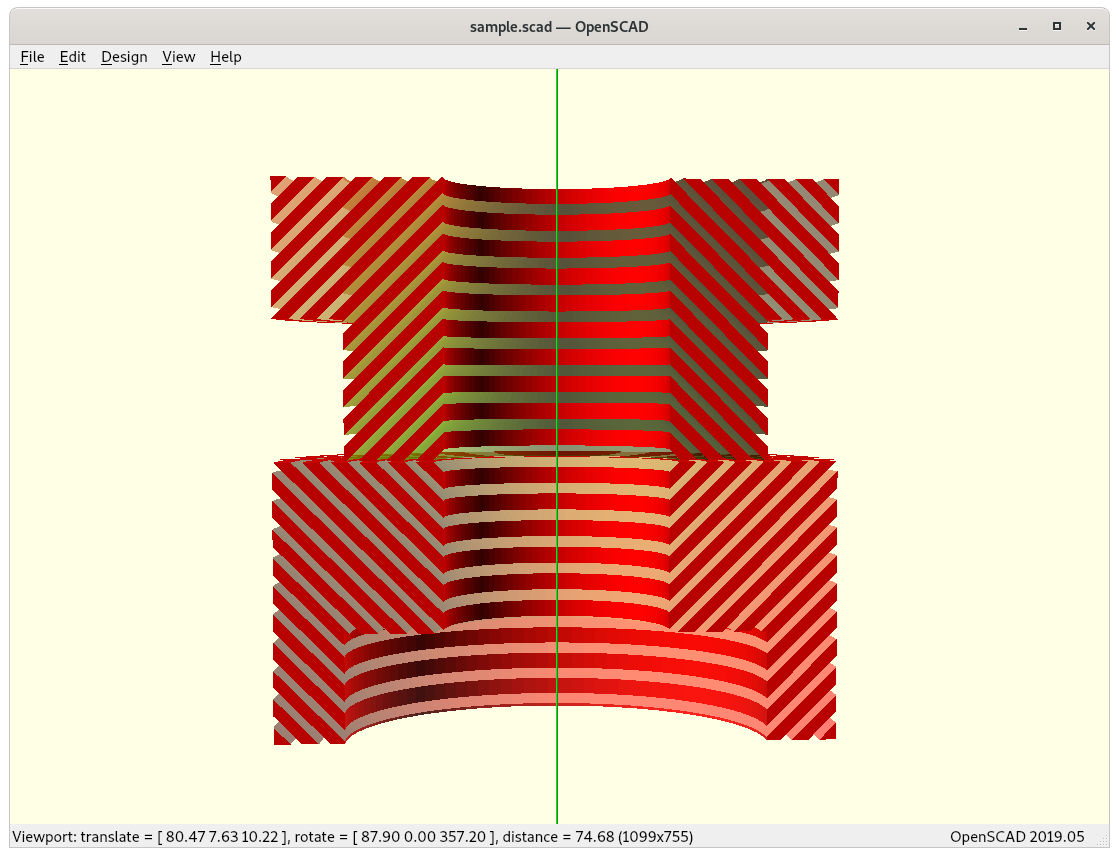
finished piece
Overhang in/out model segmented into 2 sub-volumes: lower part is sliced conic (inside-cone mode) and upper part conic (outside-cone mode)
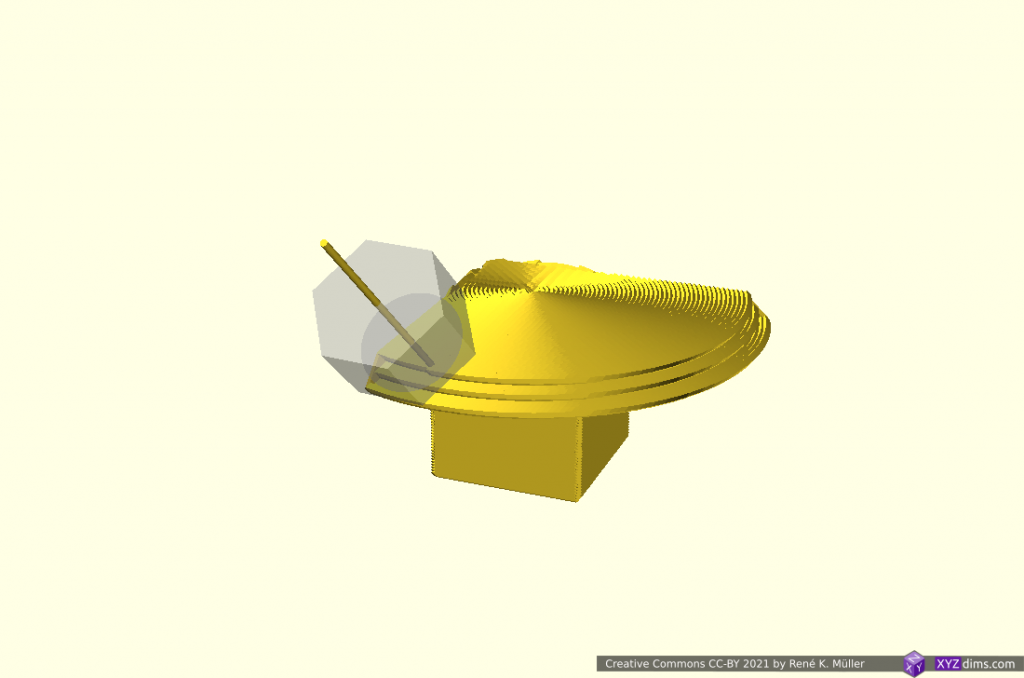
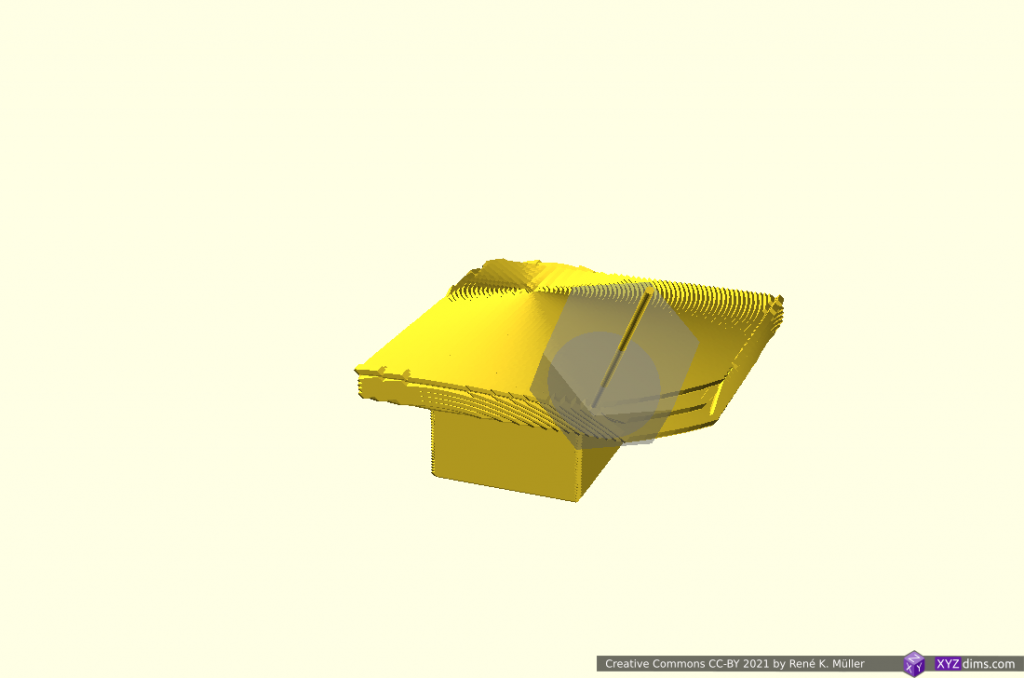
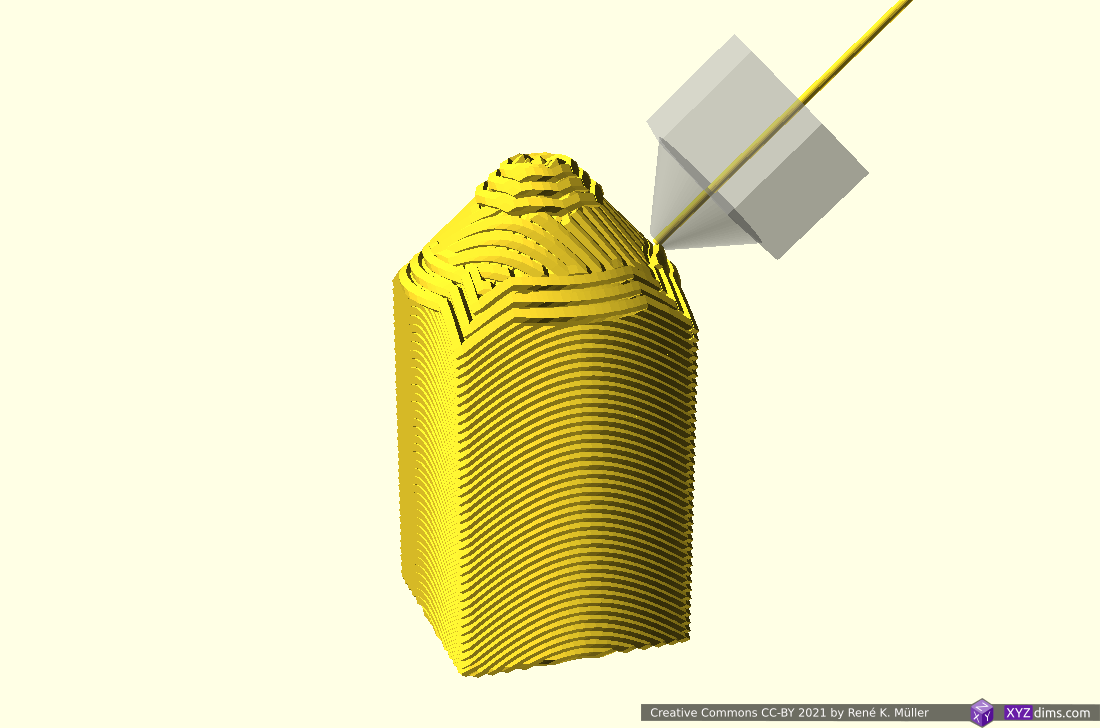
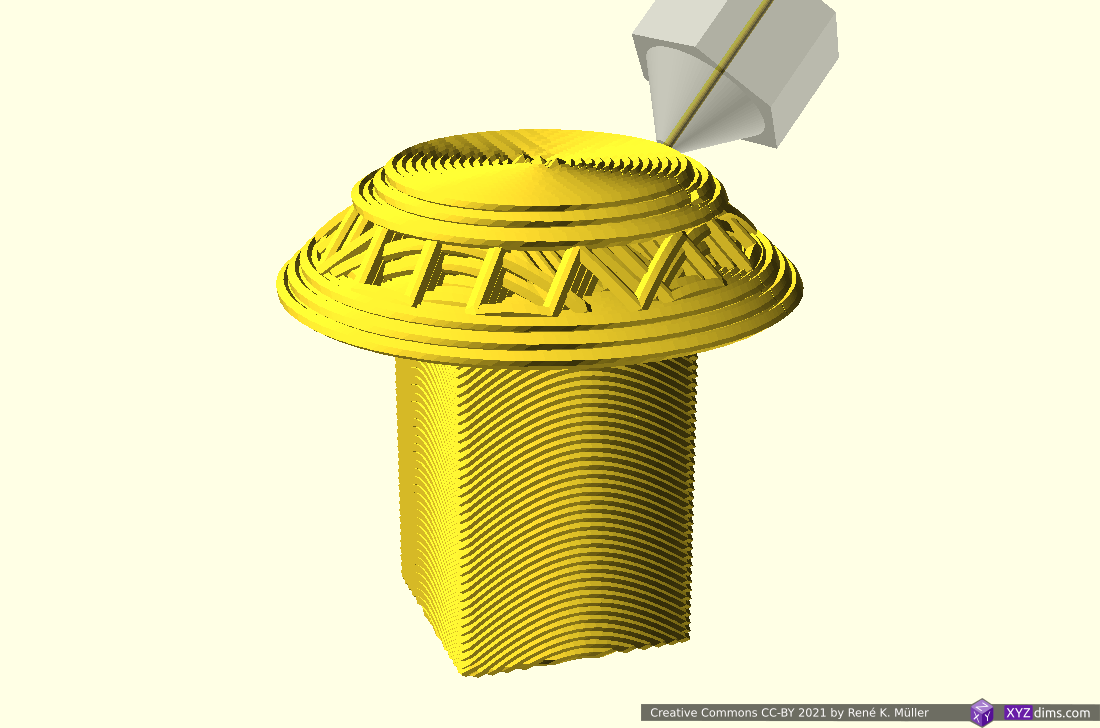
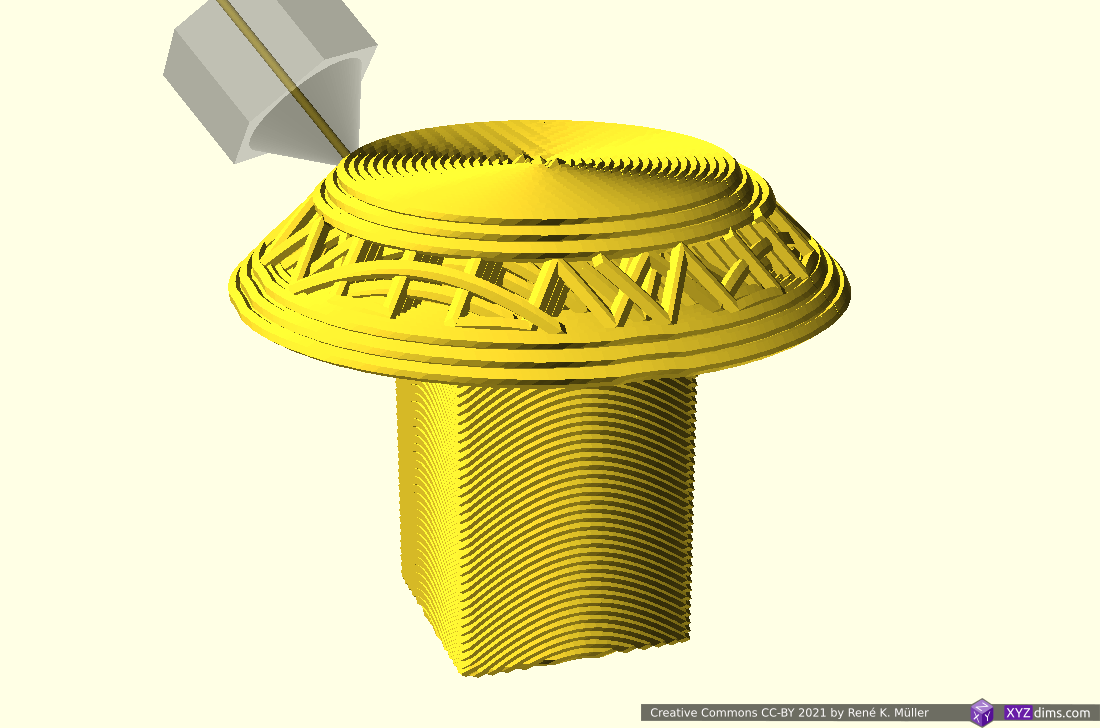
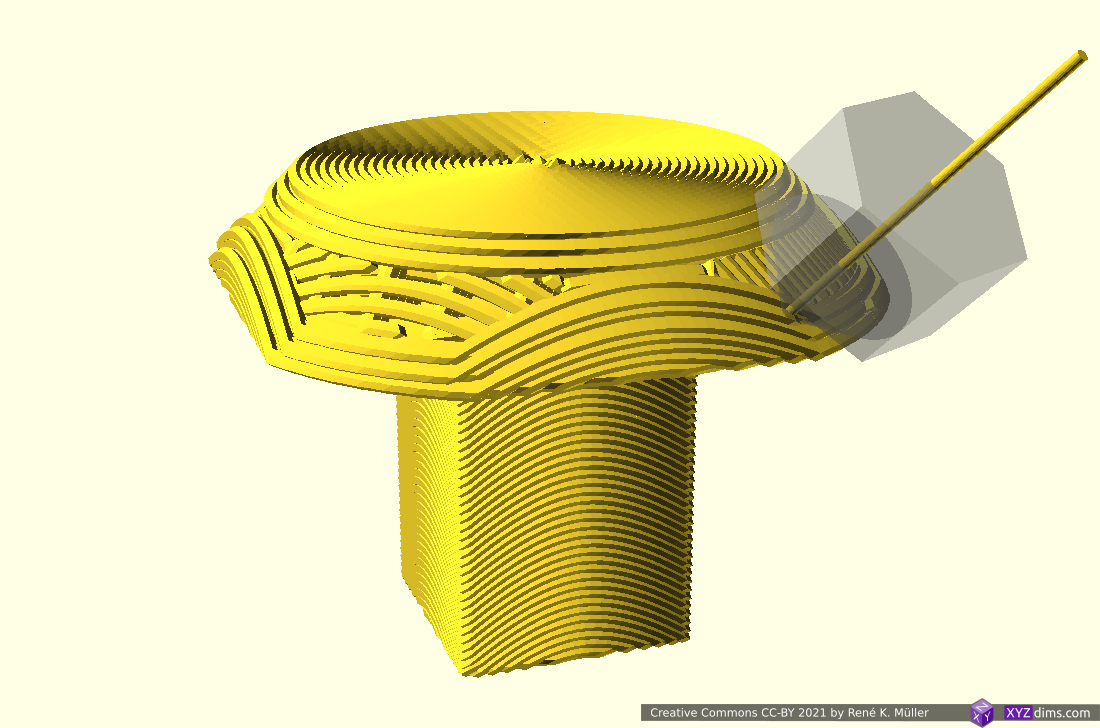
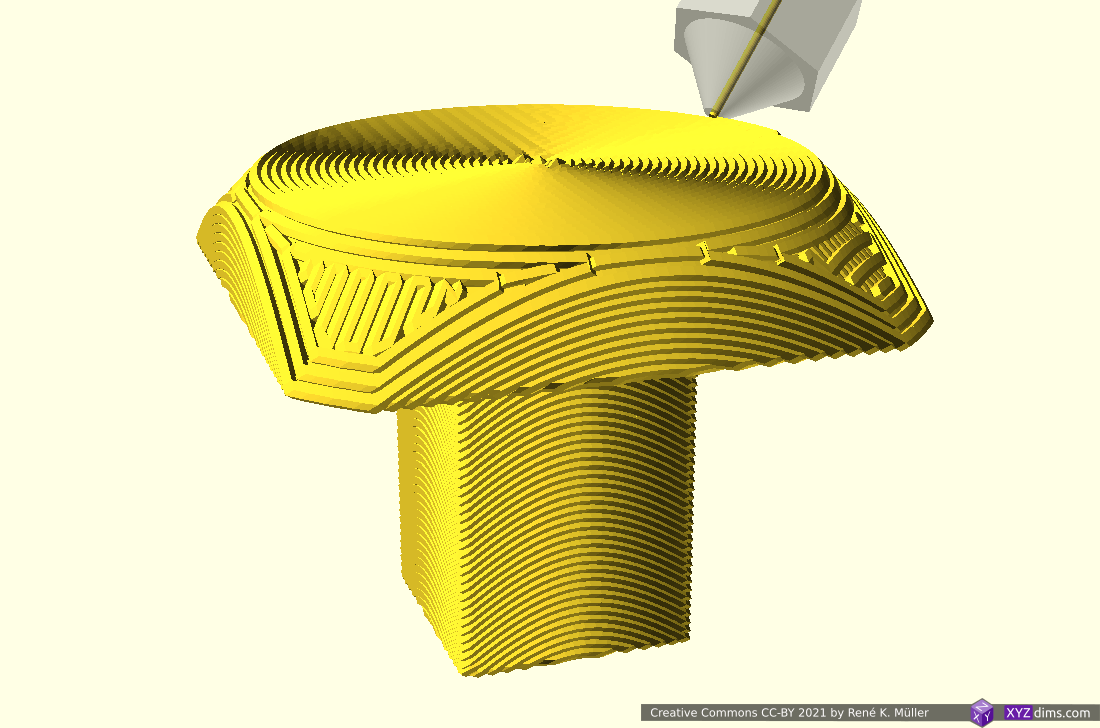
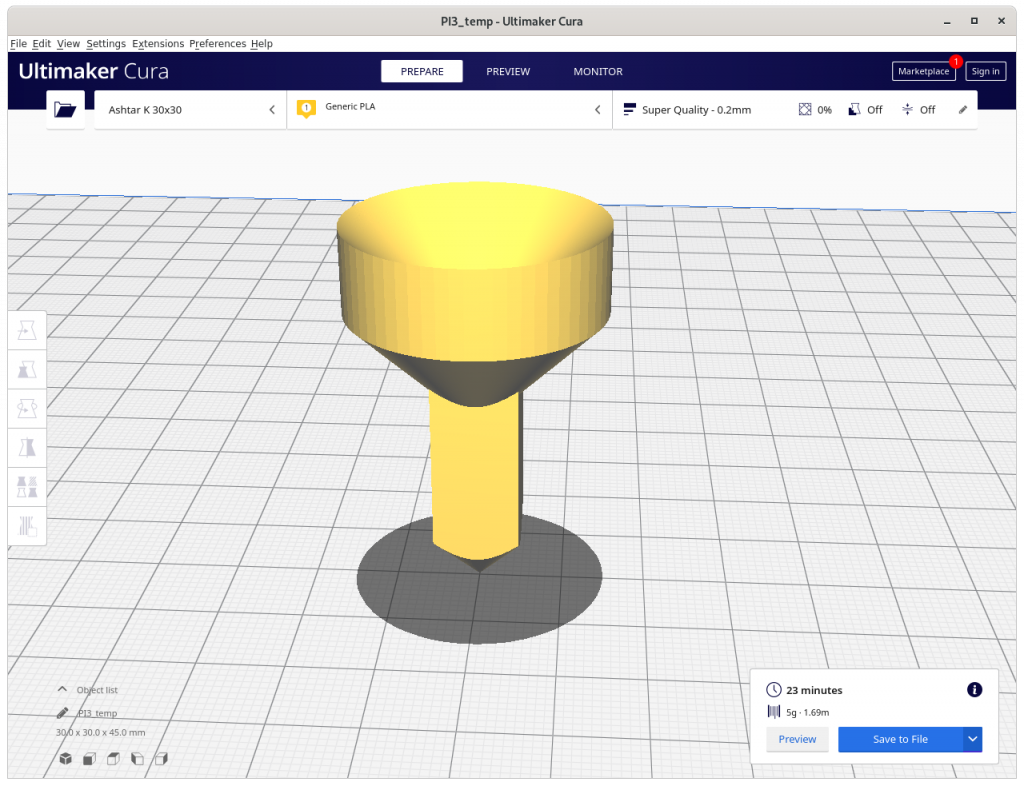
Another overhang piece, stretching out into one direction; the lower part Z-planar, and the overhang conic (outside-cone mode) with an offset to align better with the lower segment:
2 segments: planar (bottom), conic with center offset (top)
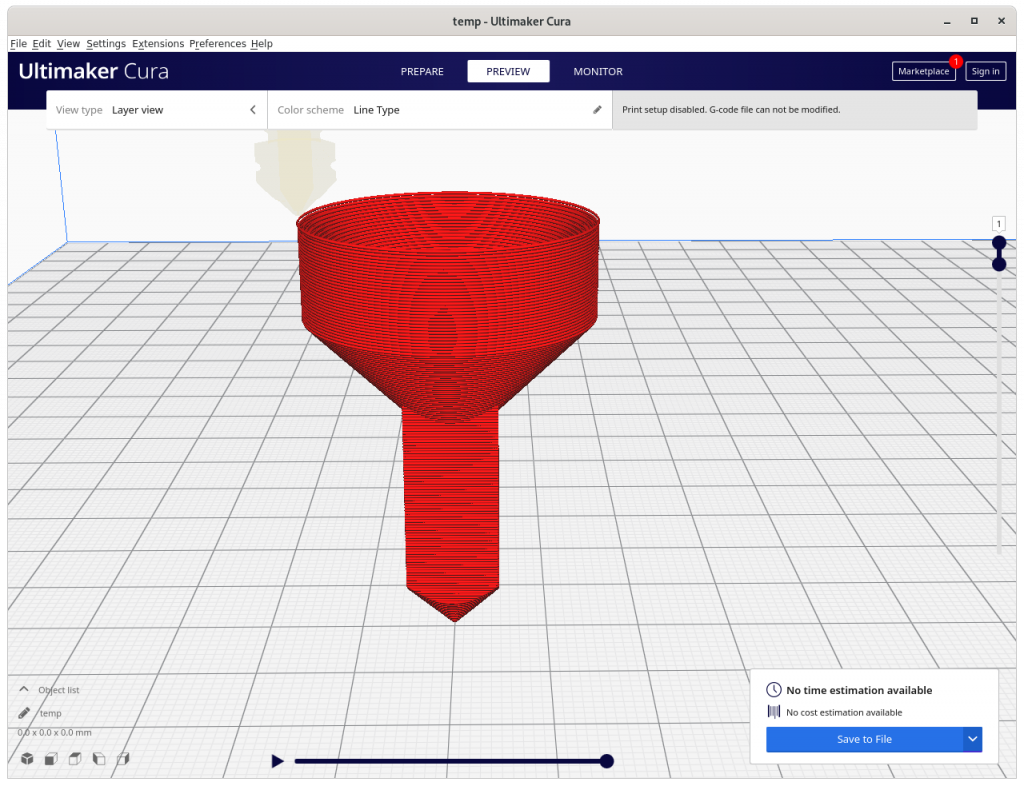
after z-planar switching to conic (outside cone), conic center align with lower segment
conic part reaching edge of lower segment
full height of overhang segment
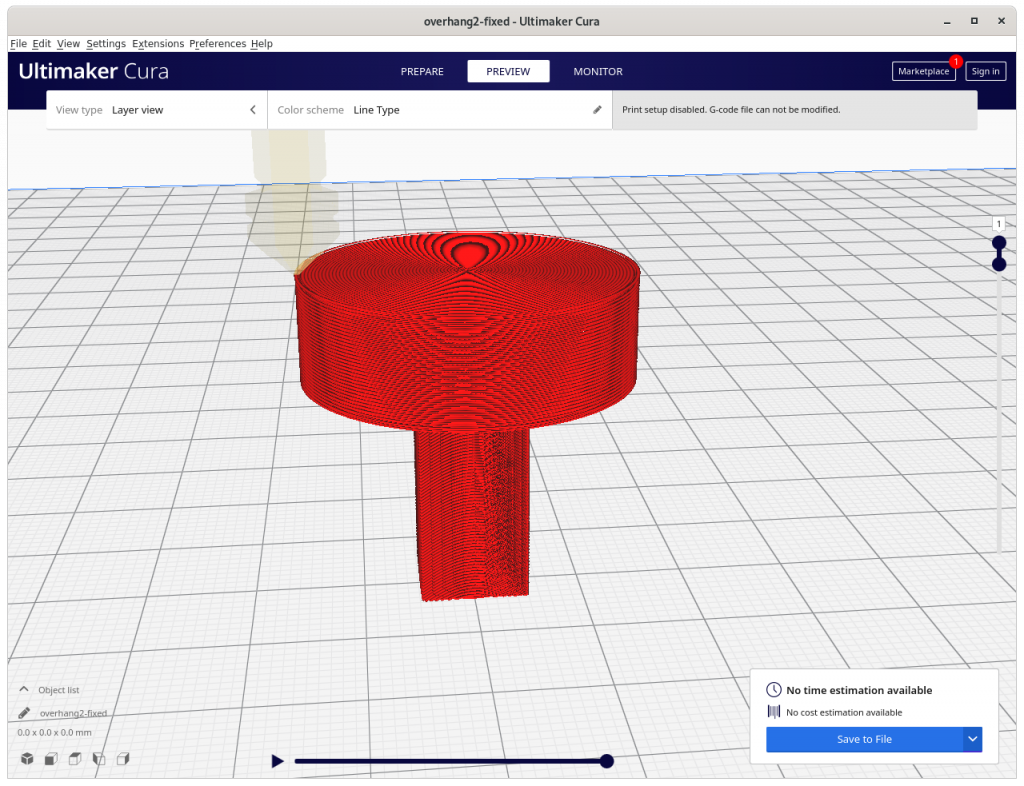
extending the overhang further
conic part asymmetrically extending
conic parts reached all horizontal model limits
finishing up the segment
finished piece
Overhang Out No 5 model segmented into 2 sub-volumes: z-planar at the bottom and overhang segment conic (outside-cone mode)
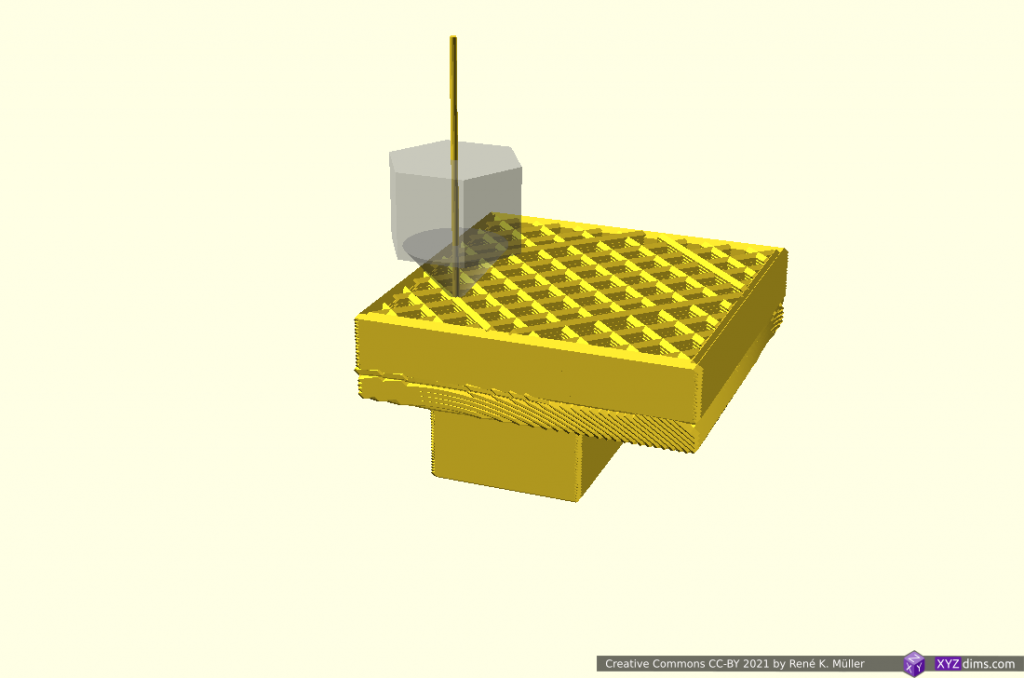
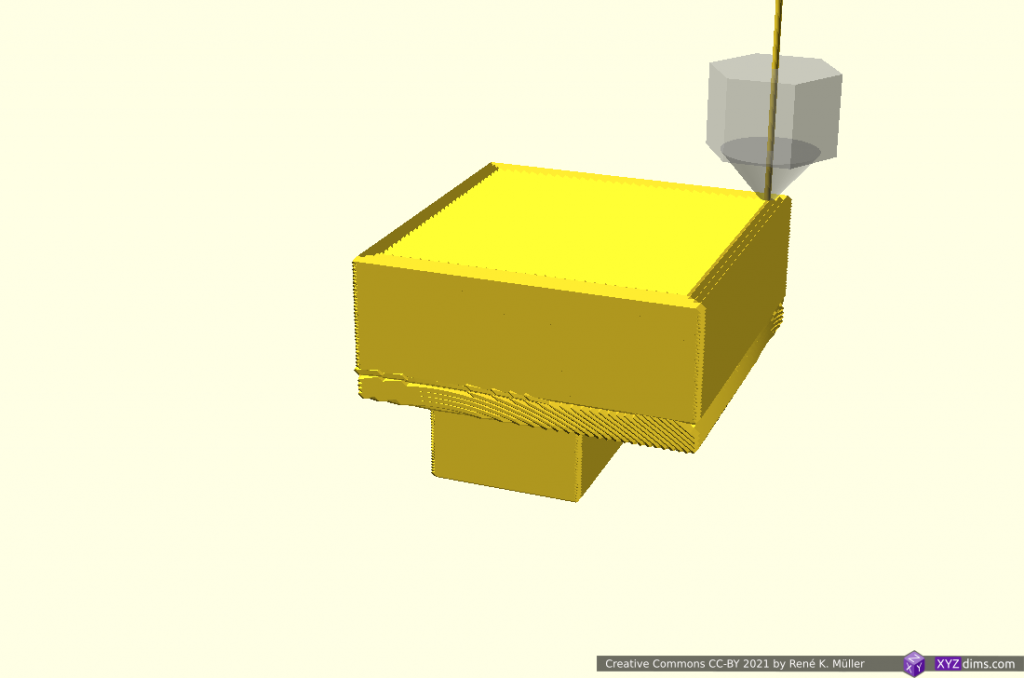
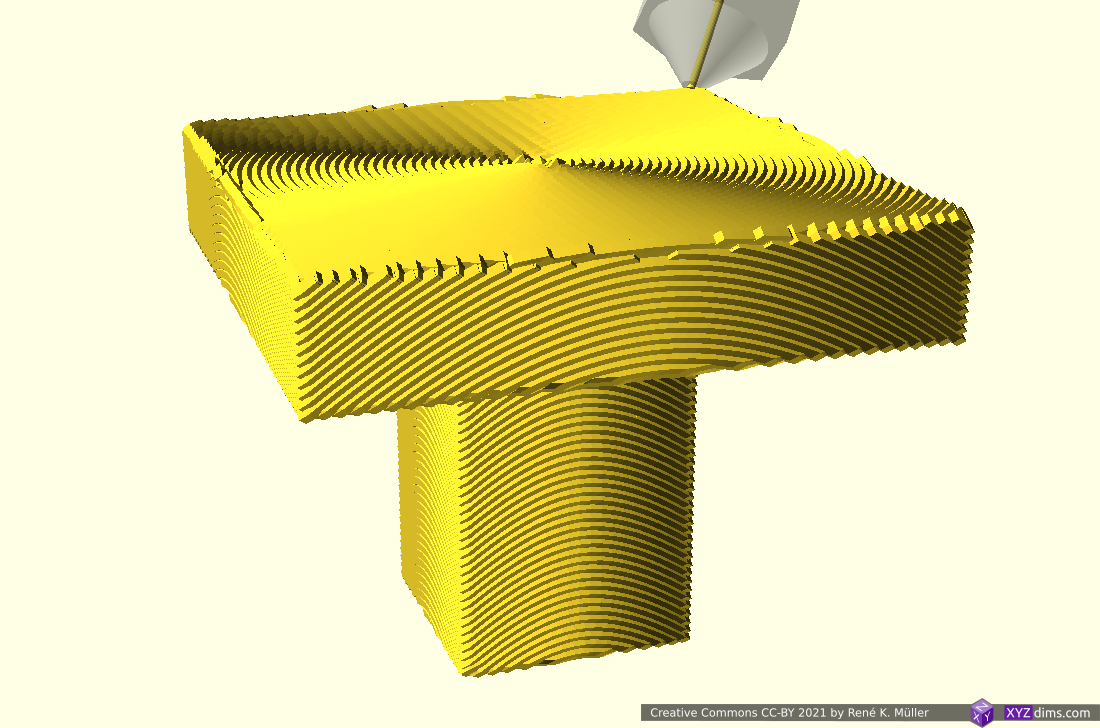
Overhang Out No 5: 3 Segments: 2x Z-planar & Conic
Perhaps a more realistic approach using the conic part as a “balcony” just for the overhang part sufficiently thick to carry next segment and switching back to Z-planar:
3 segments: planar (bottom), conic (middle) and planar (top)
z-planar segment
changing to conic segment
building up the conic overhang segment
actual overhang with conic slices
reaching out the 2mm thick segment
finishing the 2mm thick conic segment
and continuing with z-planar segment
finished piece
Overhang Out No 5 model segmented into 3 sub-volumes: z-planar first, then conic (outside-cone) building a thin “balcony” as support for the z-planar part on top again
Early tests have shown the thickness of the conic overhang “balcony” depends on the actual length of the in-air overhang, where print speed, part-cooling capacity and extrusion consistency determine the geometrical accuracy. More examples with “balcony” printed with 3-axis FDM printer followed.
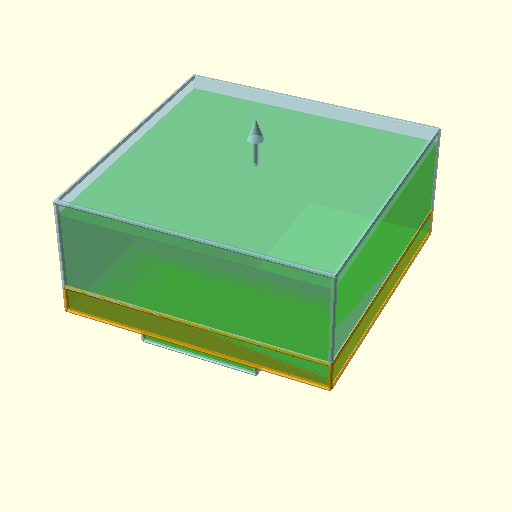
Conclusion
Unlike with ordinary Z-planar slicing, it may be suitable to dedicate a particular slicing method and orientation for sub-volumes in order to take advantage of the possibilities like avoiding support structure, particular strength properties or surface quality.
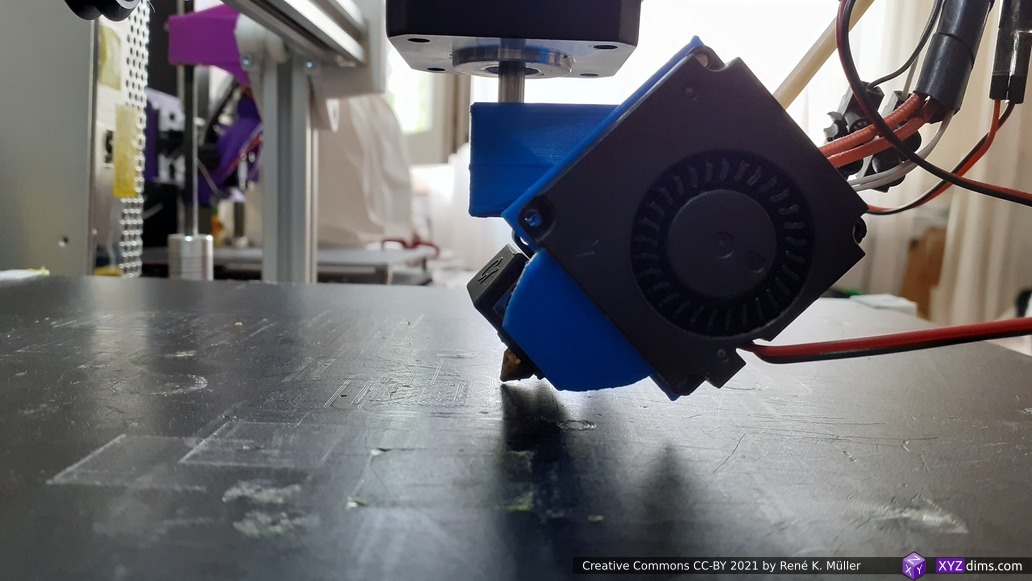
solely z-planar sliced, support structure required using 3-axis FDM printer
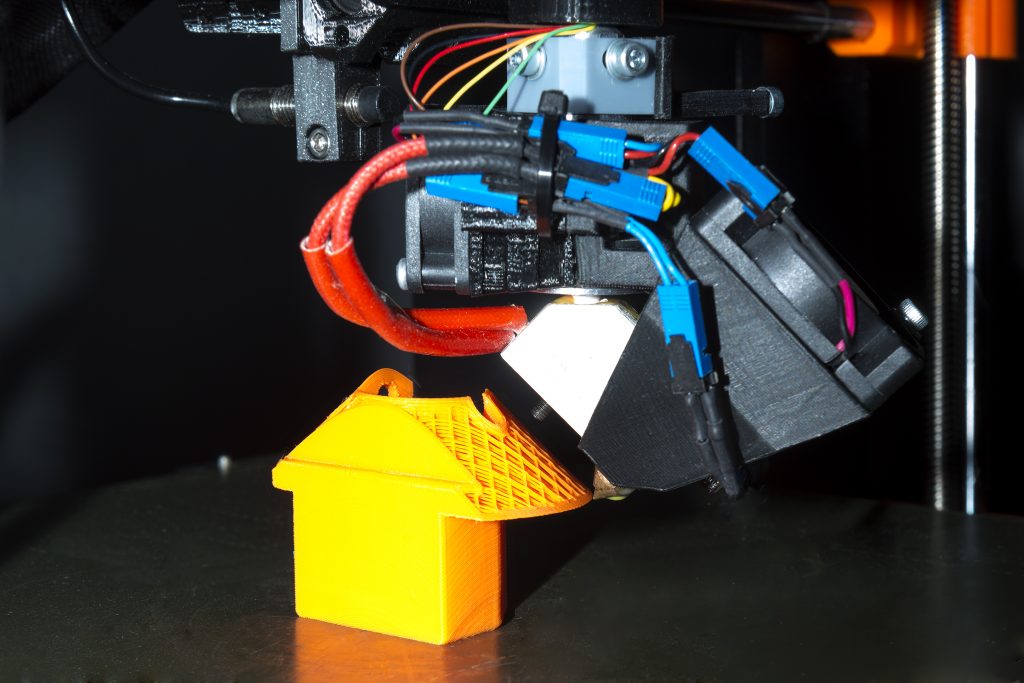
sub-volume segmented, z-planar and conic sliced printable without support structure using 5-axis FDM printer
This of course opens a wide-range of possibilities and complexity therefore:
but I think it’s worth it, in particular when a piece is printed more than once like with small series manufacturing / production.
The examples have been produced with various slicers and combined with a new application coordinating the segmenting and dedicated slicing methods, which currently (2021/04) is in development; it also involves a new file-format describing the segmenting and its slicing settings. The segment positioning was done manually as a start, but I expect with more experience and research some cases can be detected automatically.
Sub-volume segmenting is just one approach to take advantage of 5-axis FDM printing, another is continuous slicing along the form.
State: early draft, mostly simulations with a few tests with 3-axis printer only
Conic sliced overhang model with two overhangs, printing with Rotating Tilted Nozzle (RTN) 90° overhang structure without support structure
Updates:
2021/09/28: added reference to paper by ZHAW describing slicing procedure
2021/03/22: slicer4rtn released, see dedicated page Slicer4RTN
2021/03/16: removing details on slicer4rtn as a new dedicated page is in the working (coming soon)
2021/03/08: slicer4rtn 0.2.3 reached (still unreleased), better prints, documenting various settings in more details
2021/03/05: added proper ZHAW reference in the introduction and a few notes
2021/02/27: removed some redundant illustrations and remade some of them, outside-cone vs inside-cone mode & printing
2021/02/26: added inside-cone printing example for inner overhang mode, also early information of slicer4rtn; more animations to observe details of produced G-code, using now also OpenSCAD to simulate G-code and actual nozzle position
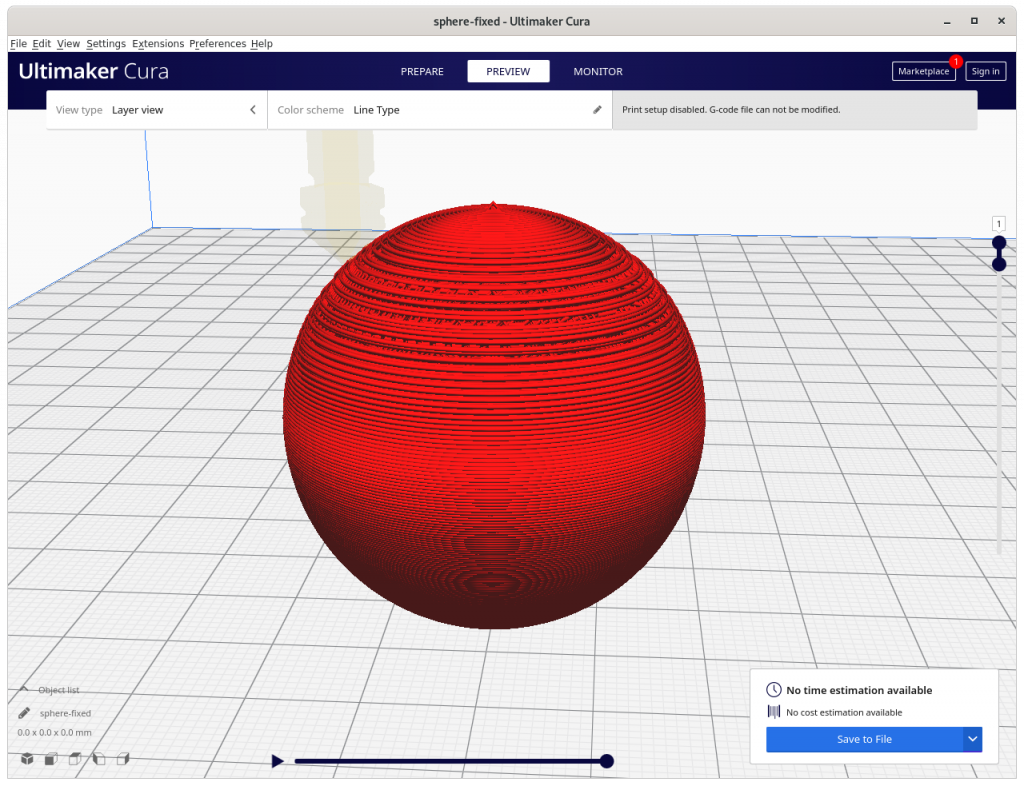
2021/02/24: better tests with 20mm cube and overhang structure, included two short G-code simulations as videos, added 20mm sphere and 3D Benchy and discover first issues with volume decomposition and overhang recognition
2021/02/23: first write up, pseudo code and first attempt to conic slice 20mm cube
As I progress I will update this blog-post.
Introduction
The main idea is to utilize existing 3D printing slicers but create conic slices for the Rotating Tilted Nozzle (RTN) 4 Axis Printer. ZHAW published in their announcement in 2021/01 something about utilizing existing slicers, but the details remained concealed and later published as a paper but I did not want to wait and pondered on the problem, and came up with a solution. In its current state it’s purely theoretical and untested for now (2021/02)barely tested yet.
Michael Wüthrich confirmed my solution is comparable with their solution. ZHAW planned their paper to be published sometime 2021. So, the main credit goes to ZHAW and the researchers (Prof. Dr. Wilfried Elspass, Dr. Christian Jaeger, Michael Wüthrich, Maurus Gubser, Philip Bos and Simon Holdener) there, I was just impatient and tried to find a solution with the information available.
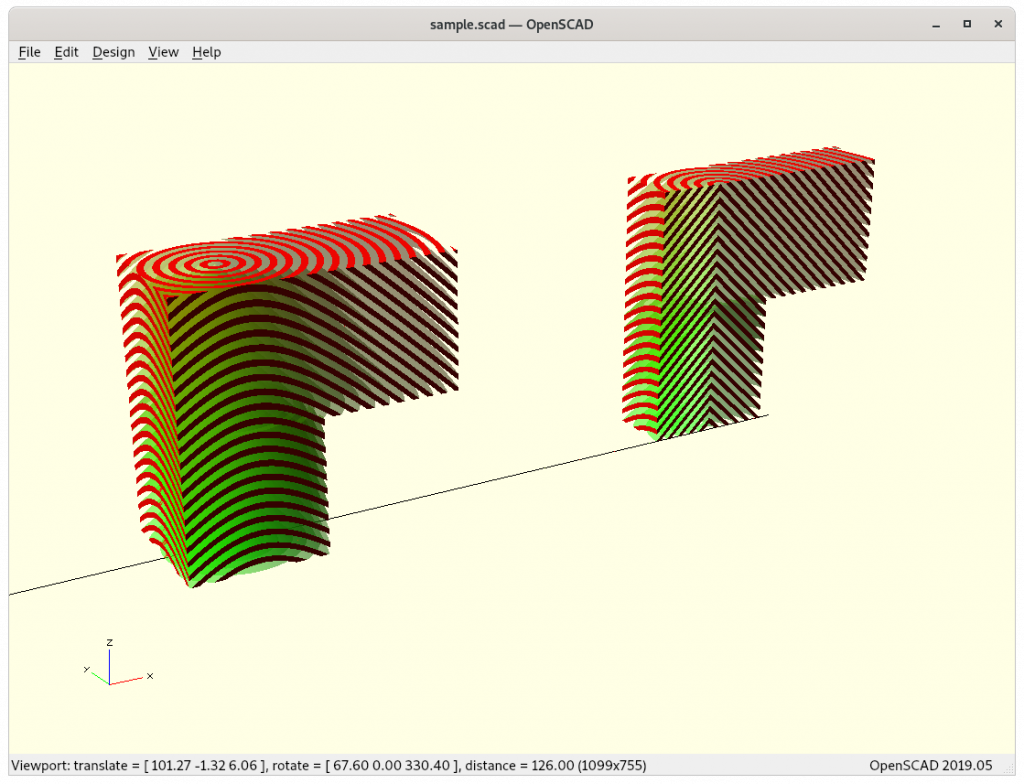
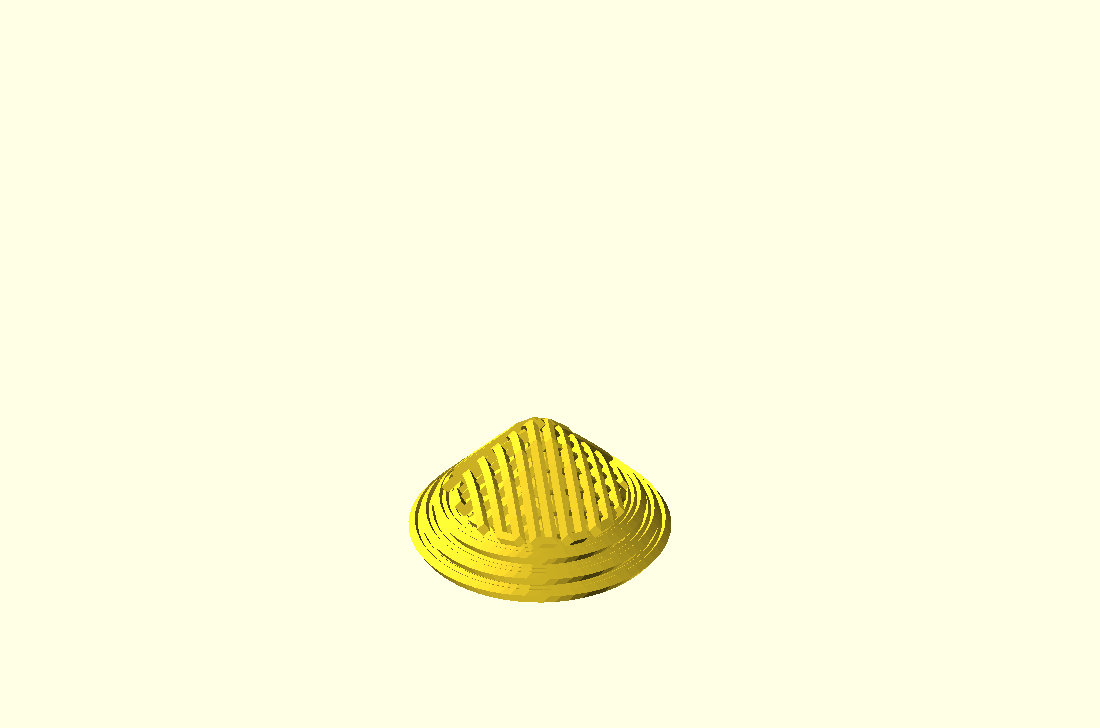
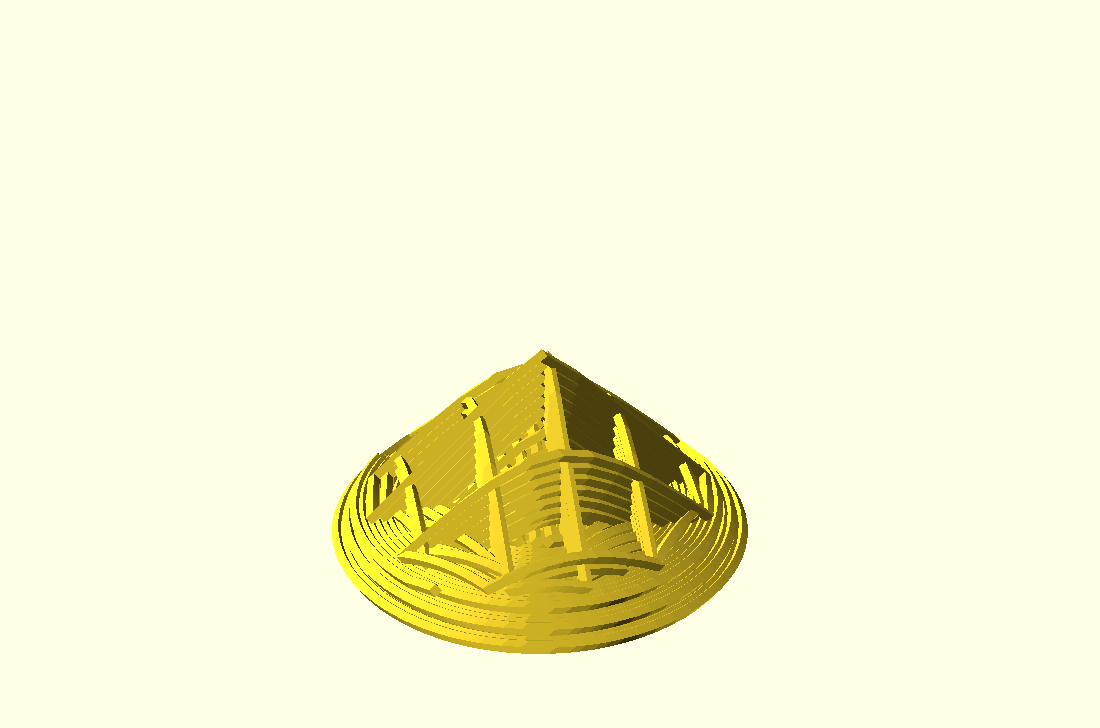
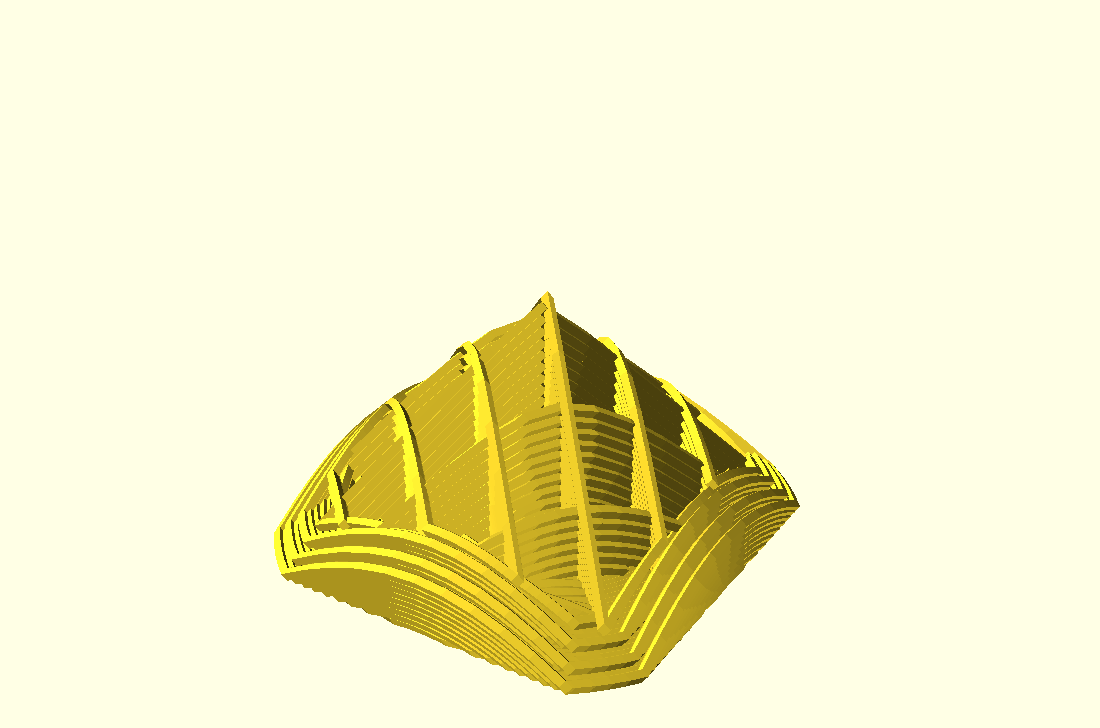
The 4-axis Rotating Tilted Nozzle (RTN) physical setup implies its slices are of non-planar conic shape, allowing to print overhangs without support structure, such as:
Conic slices of an overhang model
I also like to master the conic slices properly as they promise to become a subset of 5 axis printhead (PAX) features too – so it’s worth the effort even if the RTN itself might be too limited in its application with its fixed tilt – we will see.
function conicSpaceMapping(cx,cy,x,y,z,dir='direct') {
   dx = x-cx;
   dy = y-cy;
   d = sqrt(dx*dx + dy*dy);
   rot = atan2(dy,dx);
   return (x,y,dir=="direct" ? z-d : z+d,rot);
}
Pseudo-Code
The entire procedure goes like this:
m = loadModel("cube.stl");
m = subDivide(m,5);
for(p of m.vertices) {
    m.vertices[i] = conicSpaceMapping(cx,cy,p.x,p.y,p.z,'inverse');
    i++;
}

gcode = sliceModel(m);

foreach(line of gcode) {
   (code,x,y,z,e) = extractCoordsExtrusion(line);
   (x1,y1,z1,zrot) = conicSpaceMapping(cx,cy,x,y,z,'direct');
   outputGcode(code,x1,y1,z1,e,zrot);
}
Note: the pseuco-code is incomplete as extrusion E is not yet taken care of, as soon I found a definitive solution I will write it up.
Examples
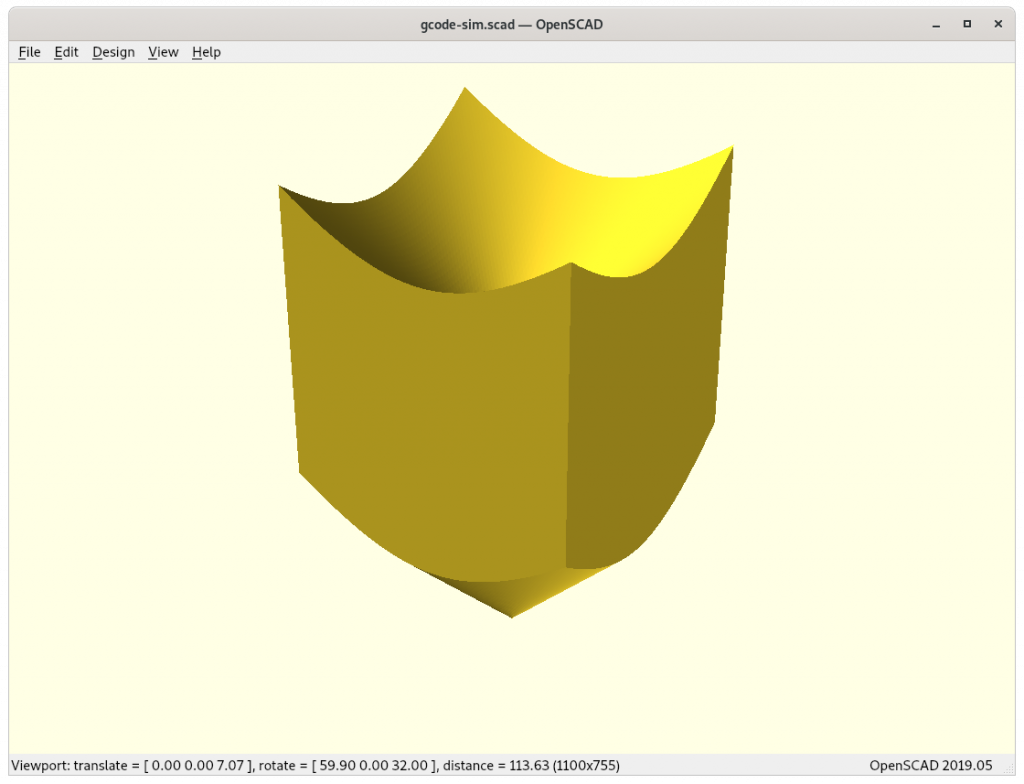
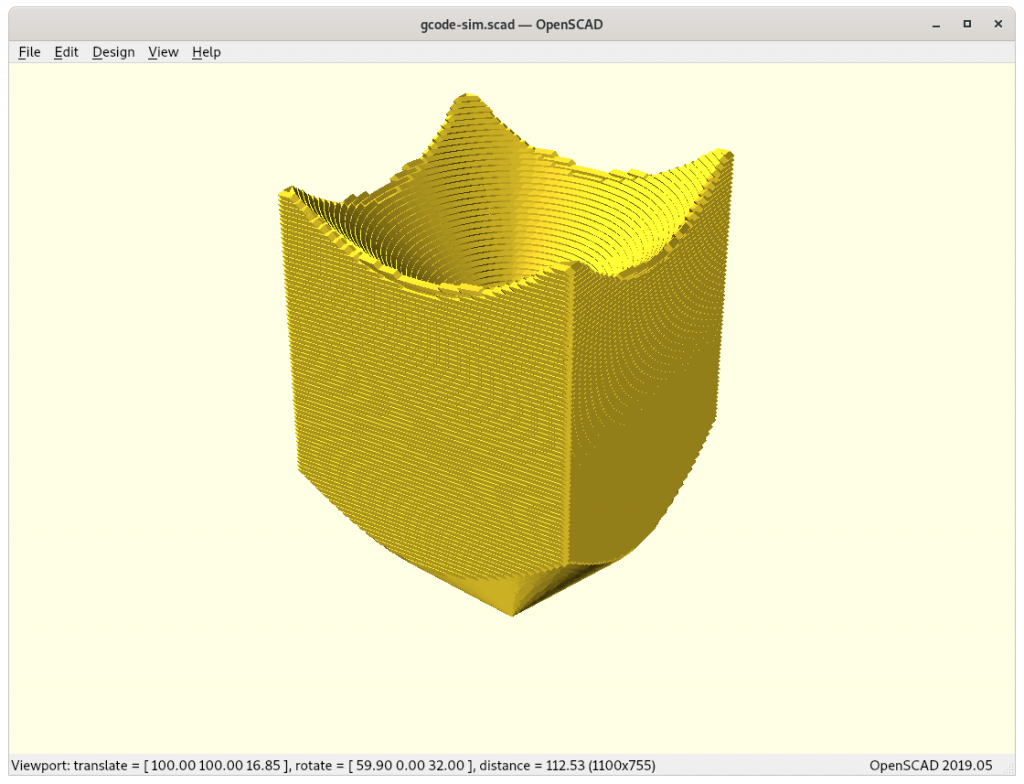
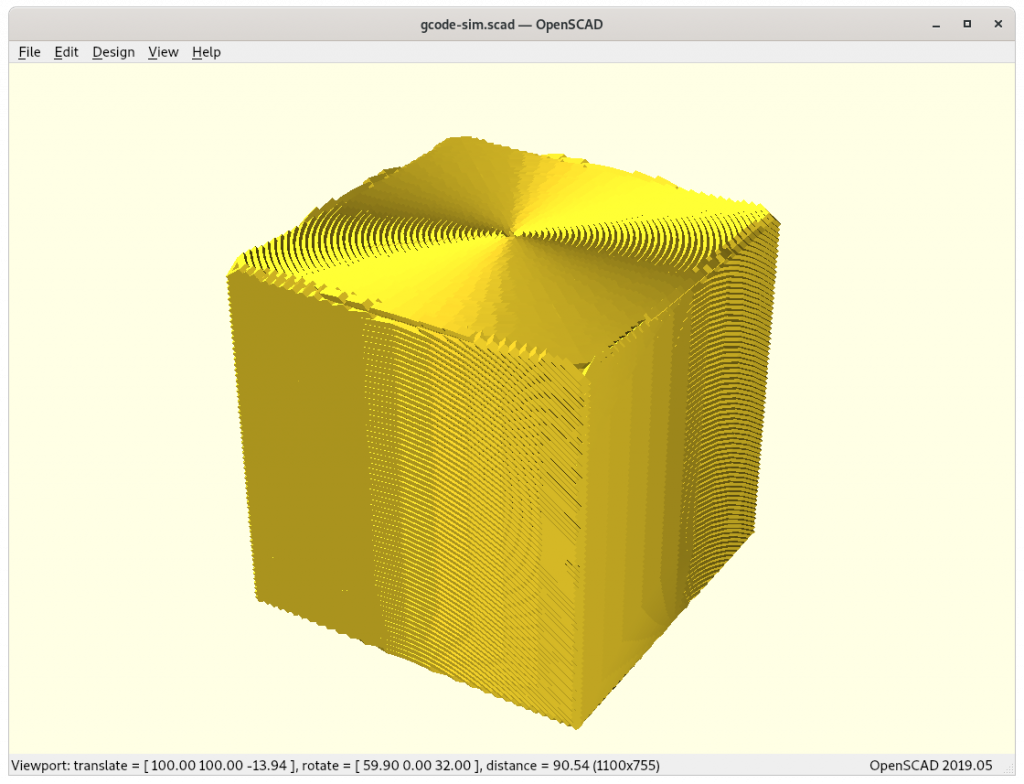
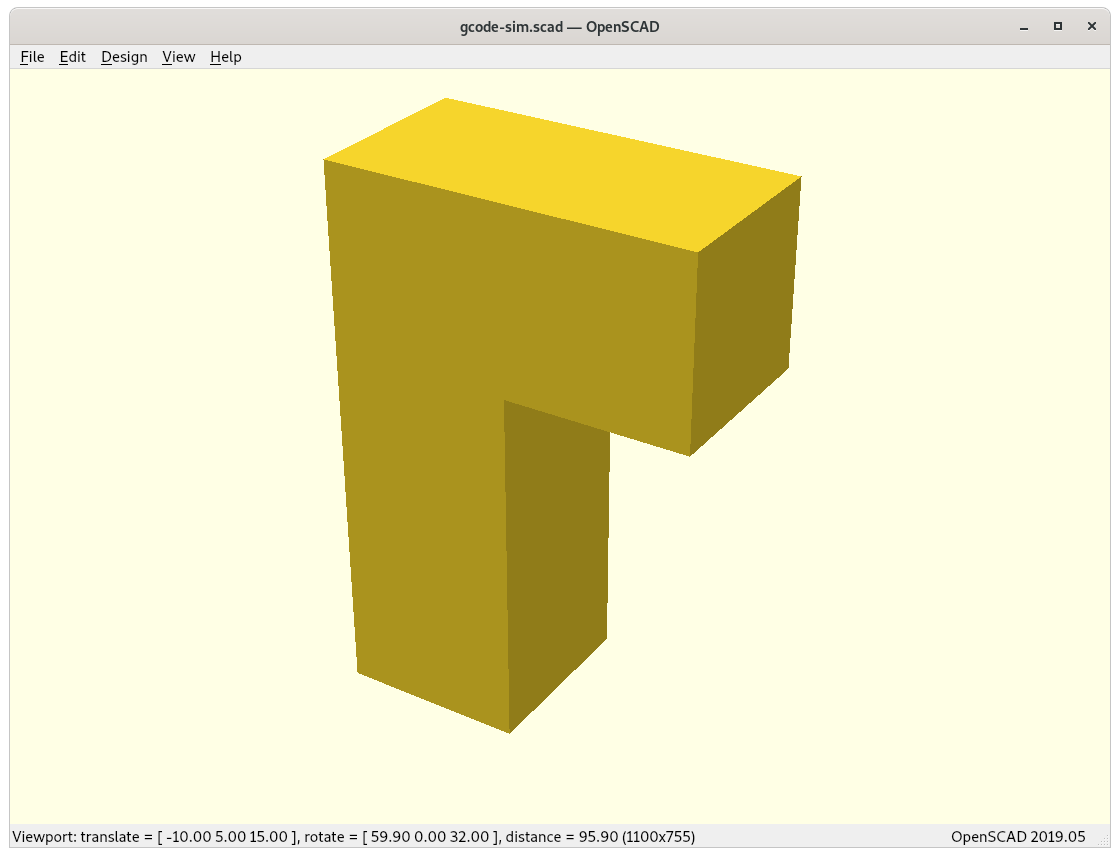
I implemented the pseudo-code with some more details like taking care of G-code E extrusion as well and fine-step linear extrusion – here some early tests using OpenSCAD as STL & G-code viewer and Slic3r as actual slicer:
find good pre-processing face sub-division strategy
in its current form the algorithm requires fine-grained sub-divided faces otherwise inaccurate G-code is created which cannot be recovered
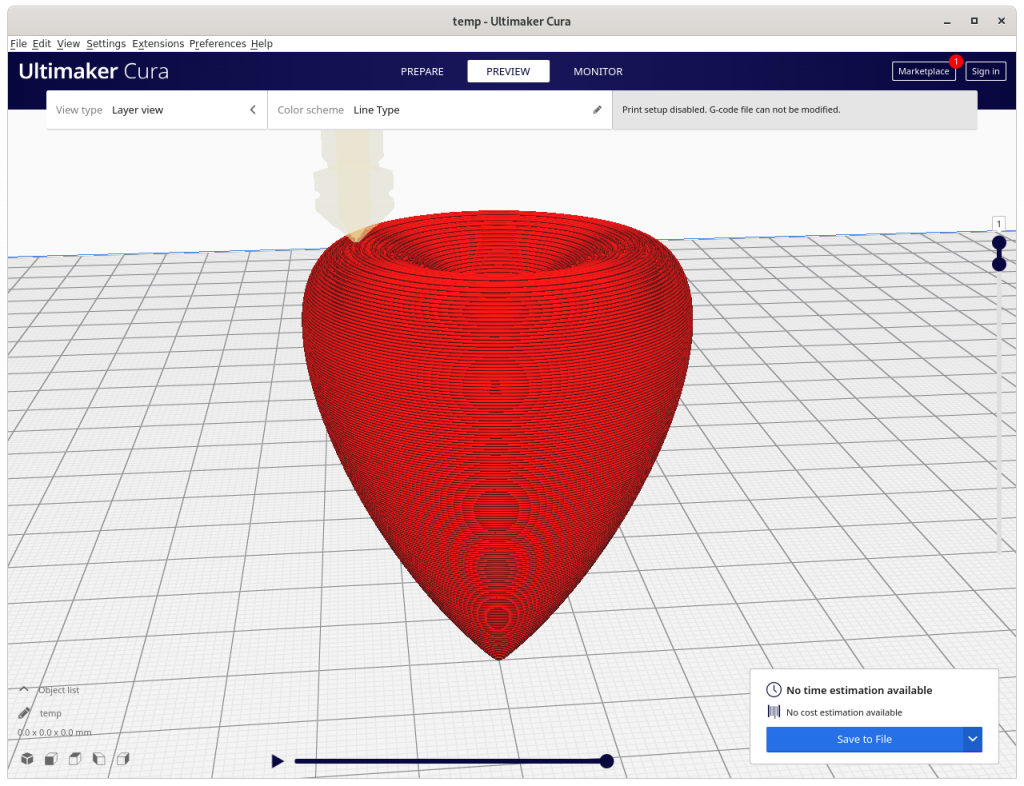
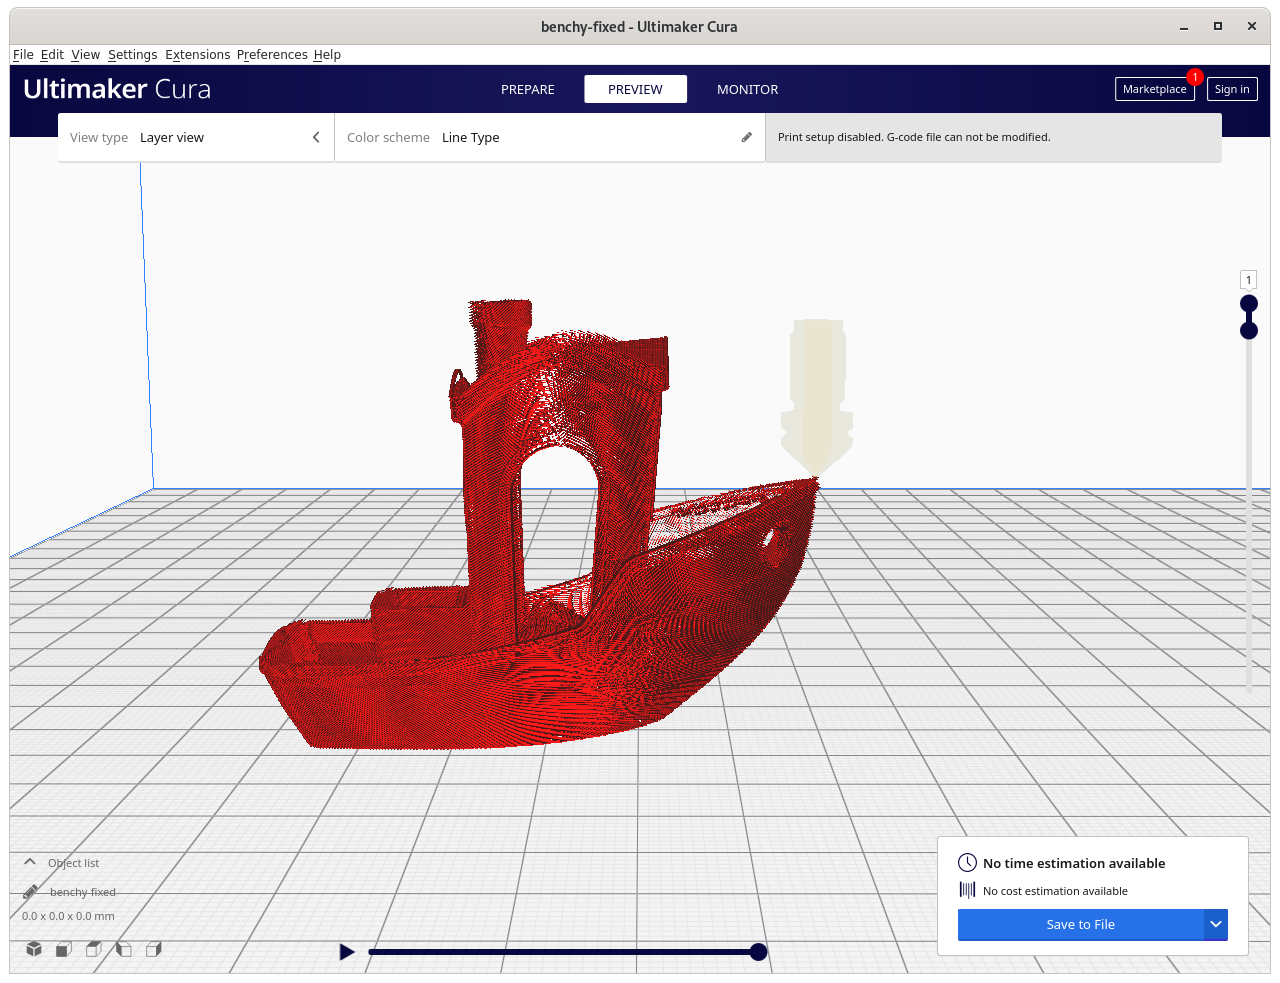
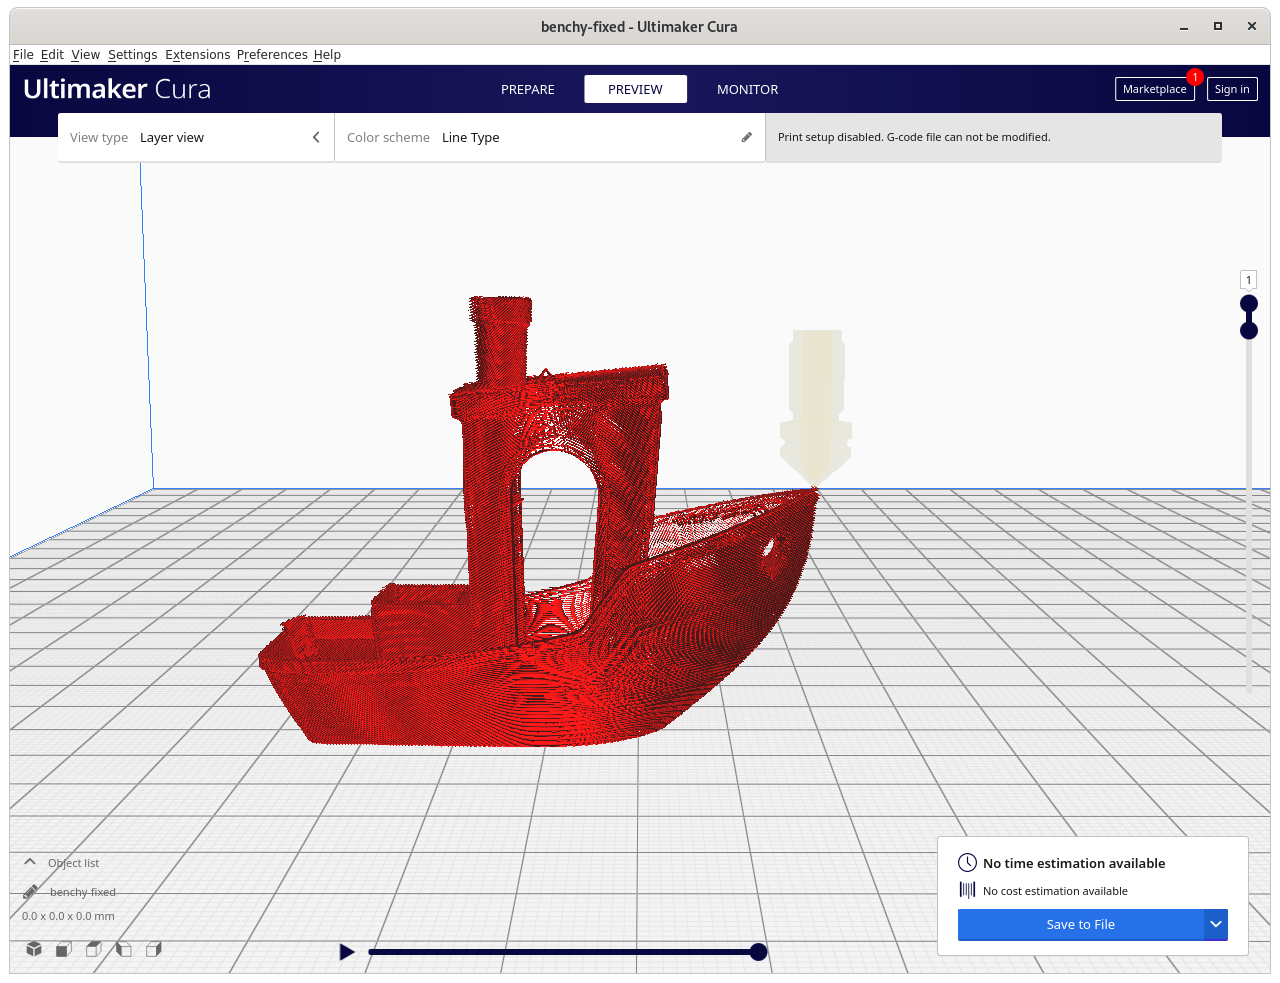
3D Benchy conic sliced with Original Faces
3D Benchy conic sliced with Refined Faces
slice more complex parts
3D Benchy: requires more thorough examination, e.g. volume decomposition to segment roof apart:
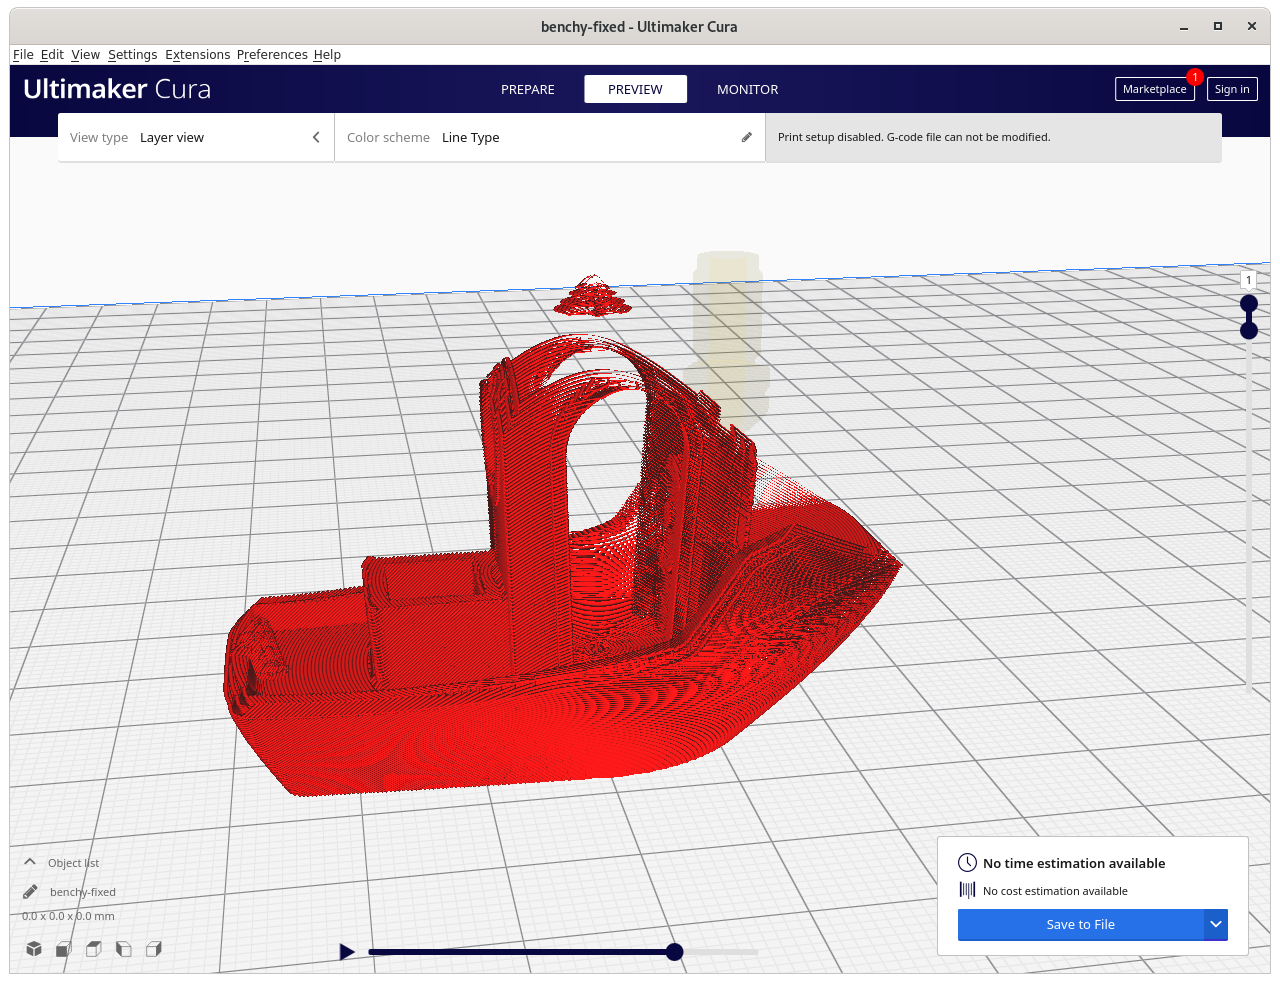
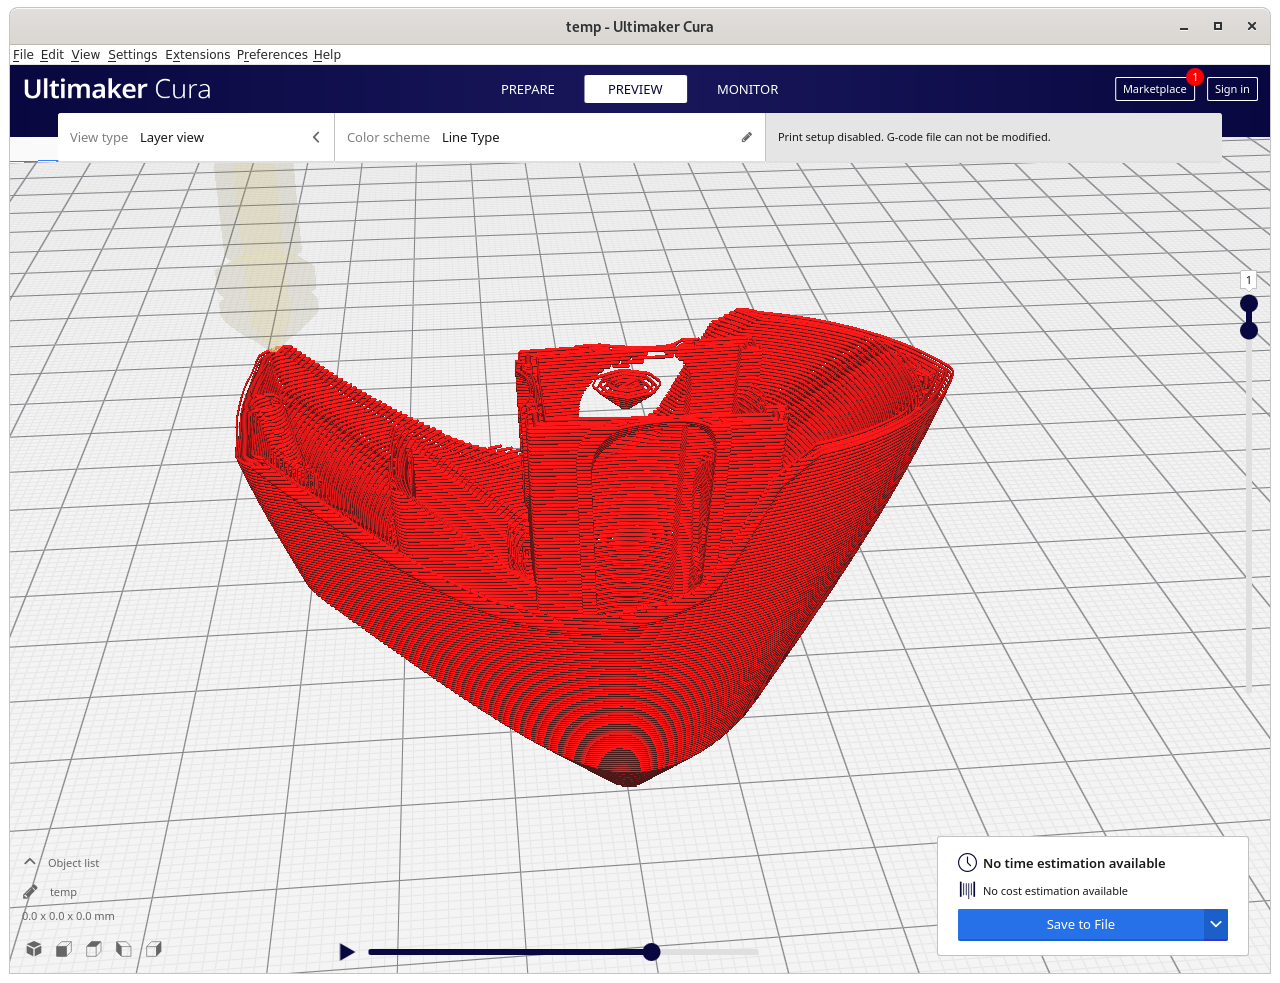
Impossible printing: current conic slicing needs to recognize overhangs and apply volume decomposition to choose right strategies – otherwise new issues arise which in Z planar slicing do not exist
Same G-code position of the Inverse Conic sliced model: > 90° overhang created, and causes in-air structure – might require actual support structure (!!), volume decomposition required
document all details
release source code to public
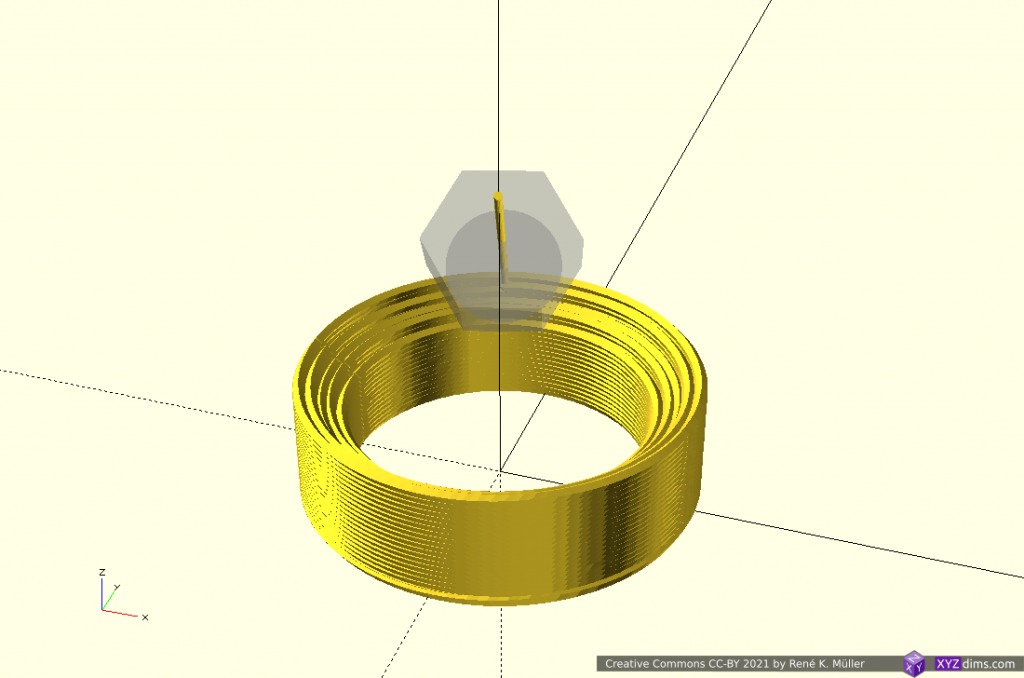
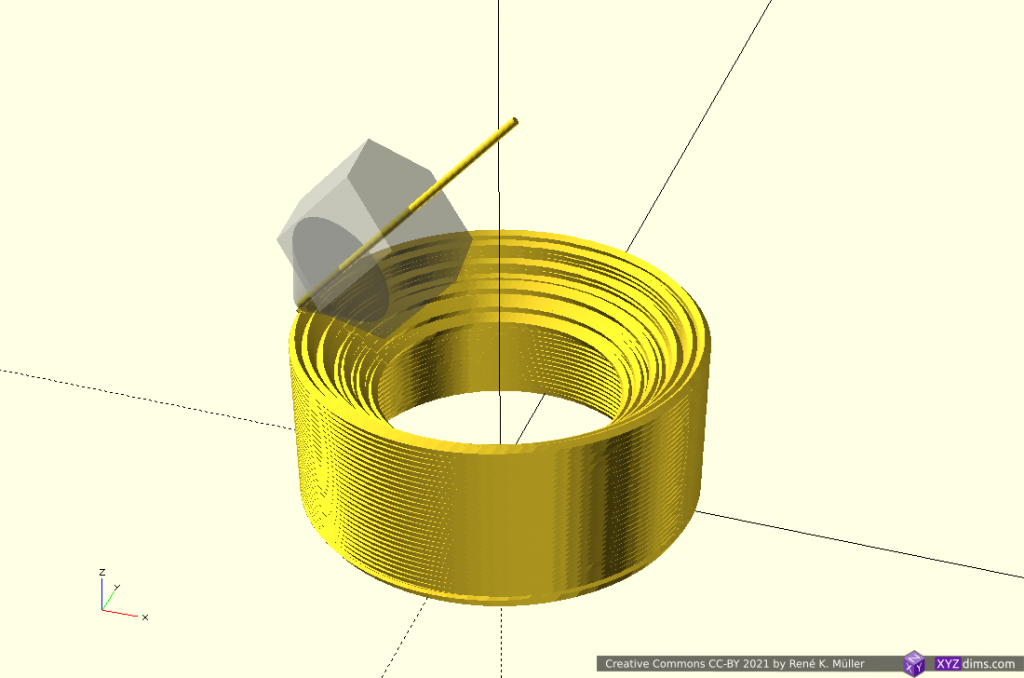
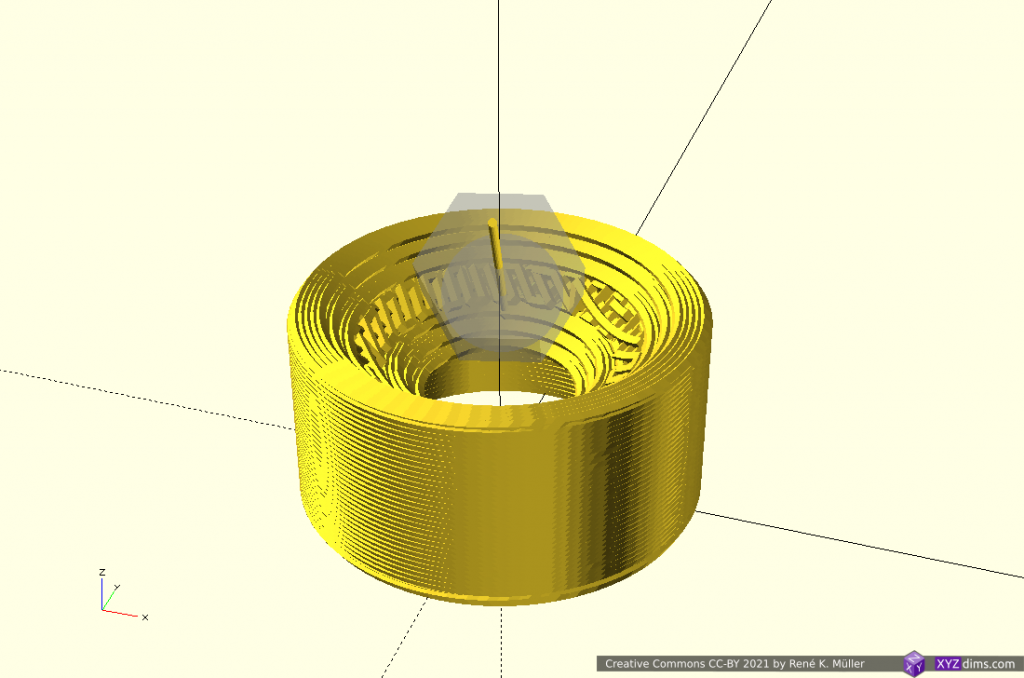
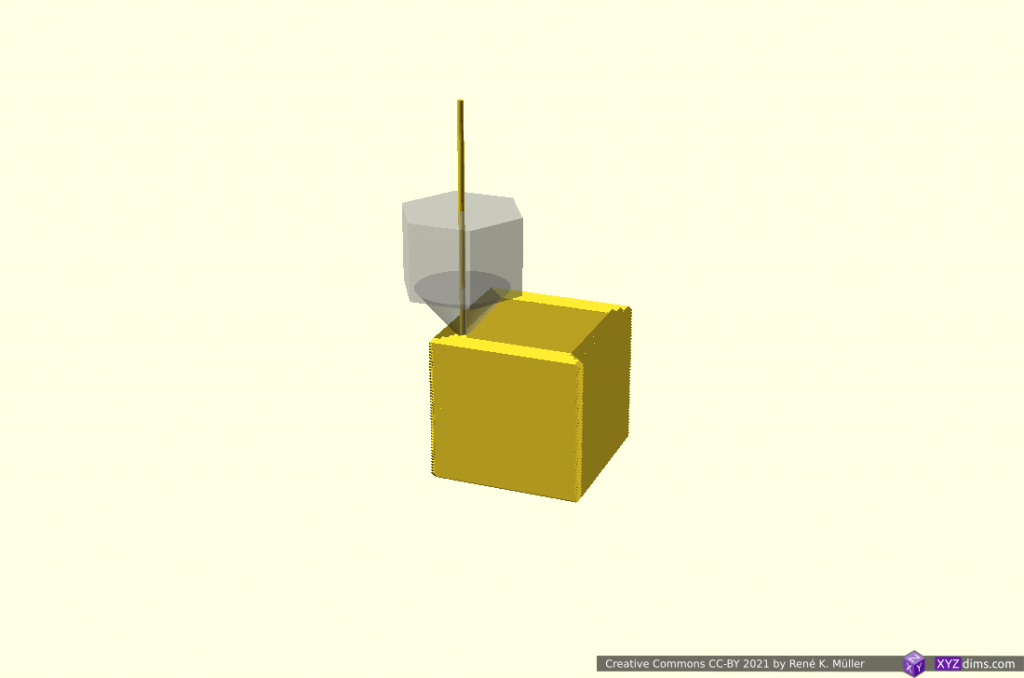
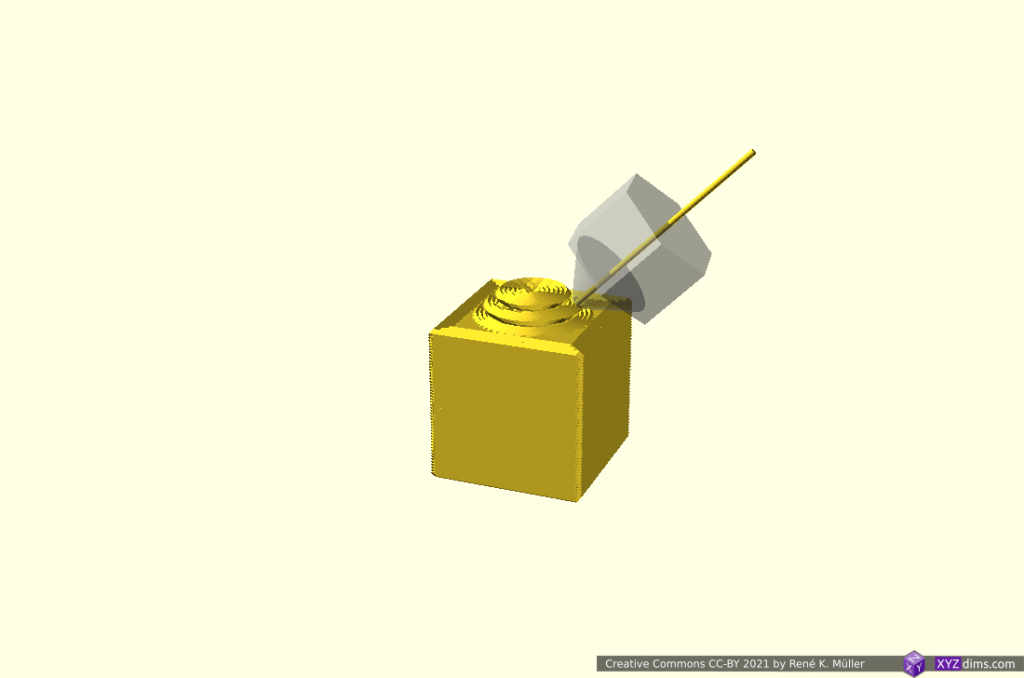
Close-Ups
Some close-ups of conic sliced models:
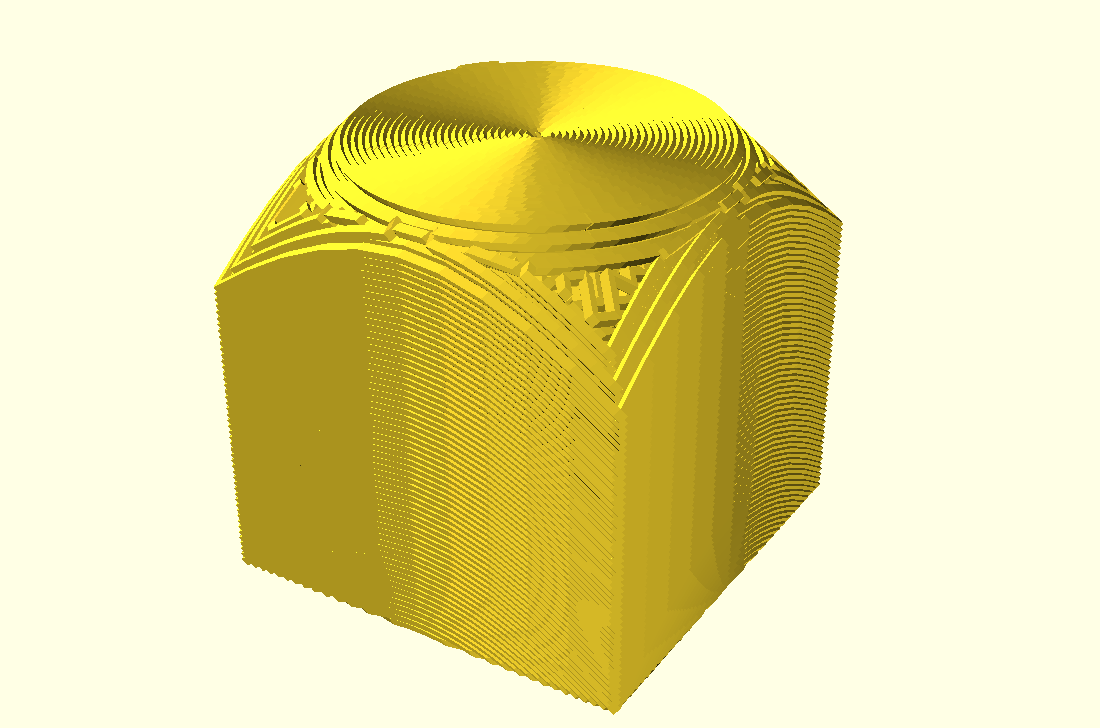
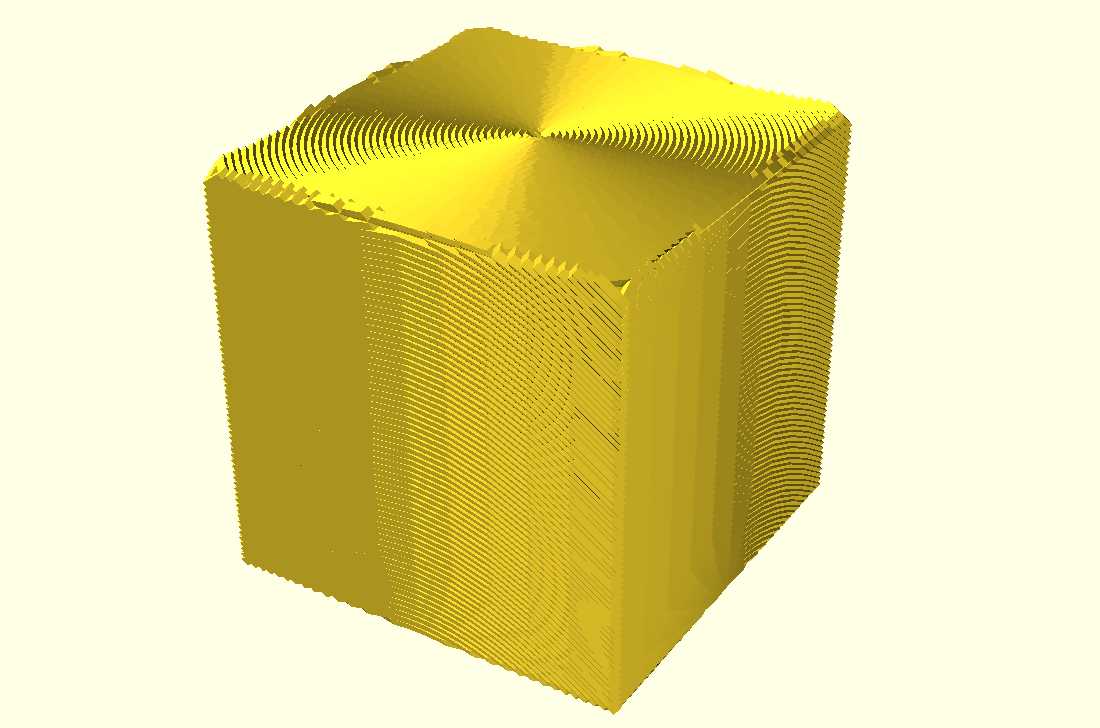
20mm cube (partial)
3D Benchy (roof & chimney)
3D Benchy (cabin)
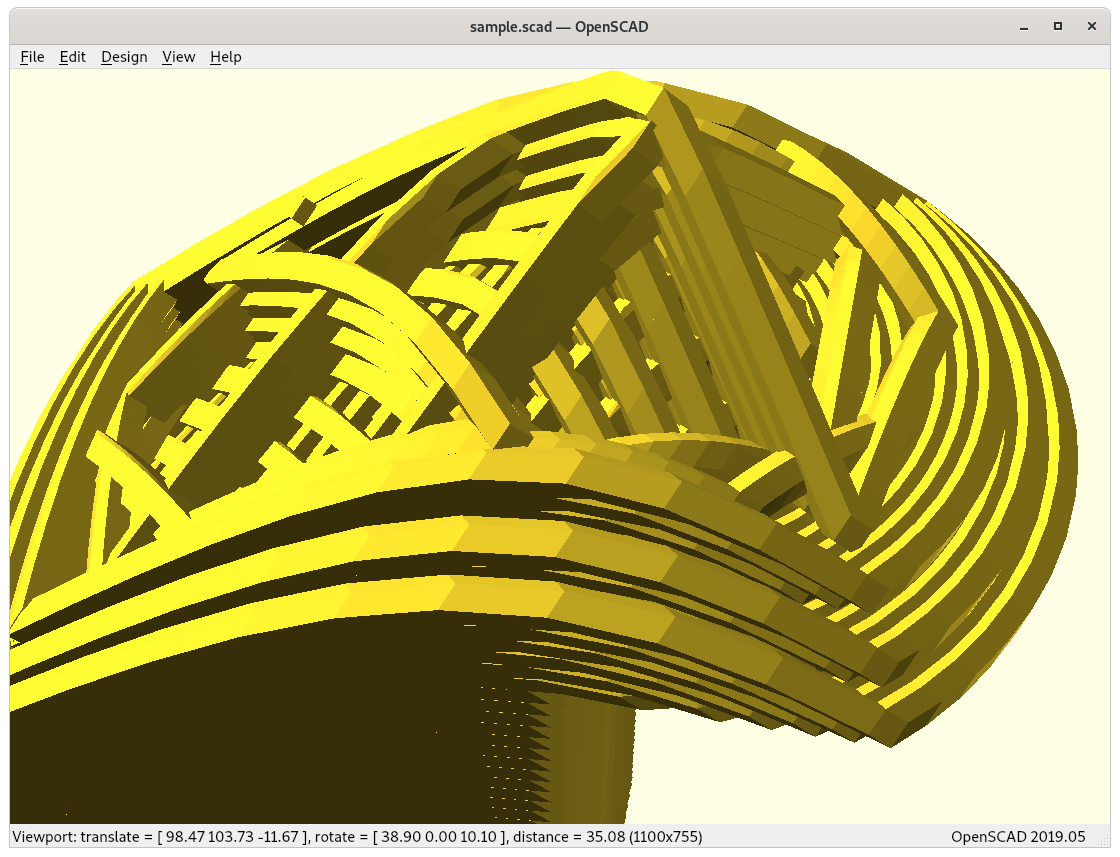
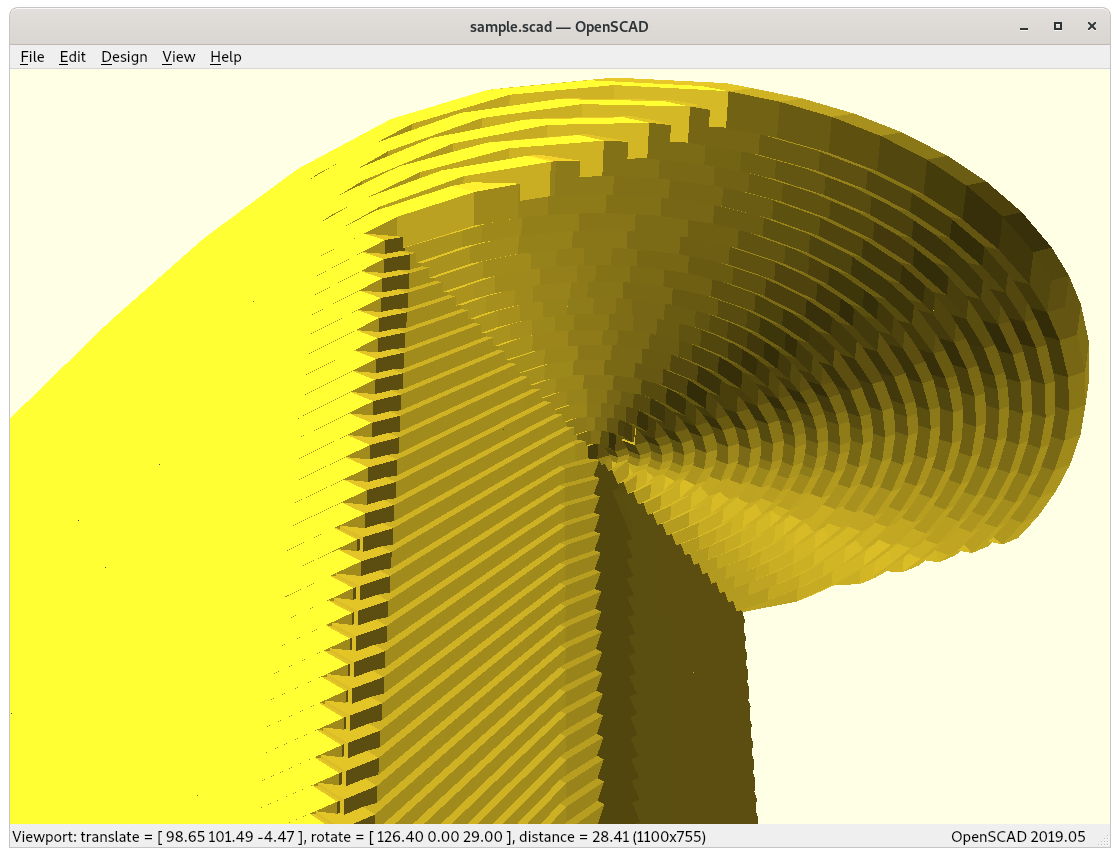
Overhang model (top view)
Overhang model (view on actual overhang)
Outside- vs Inside-Cone Printing
As pointed out in the previous blog-post, the RTN has two main modes of operation, outside-cone and inside-cone printing to cover outside overhangs and inside overhangs – the slicer must recognize those and switch operation mode. Further, these two modes cannot easily be mixed, and need to be segmented or separated, hence speaking of volume segmentation.
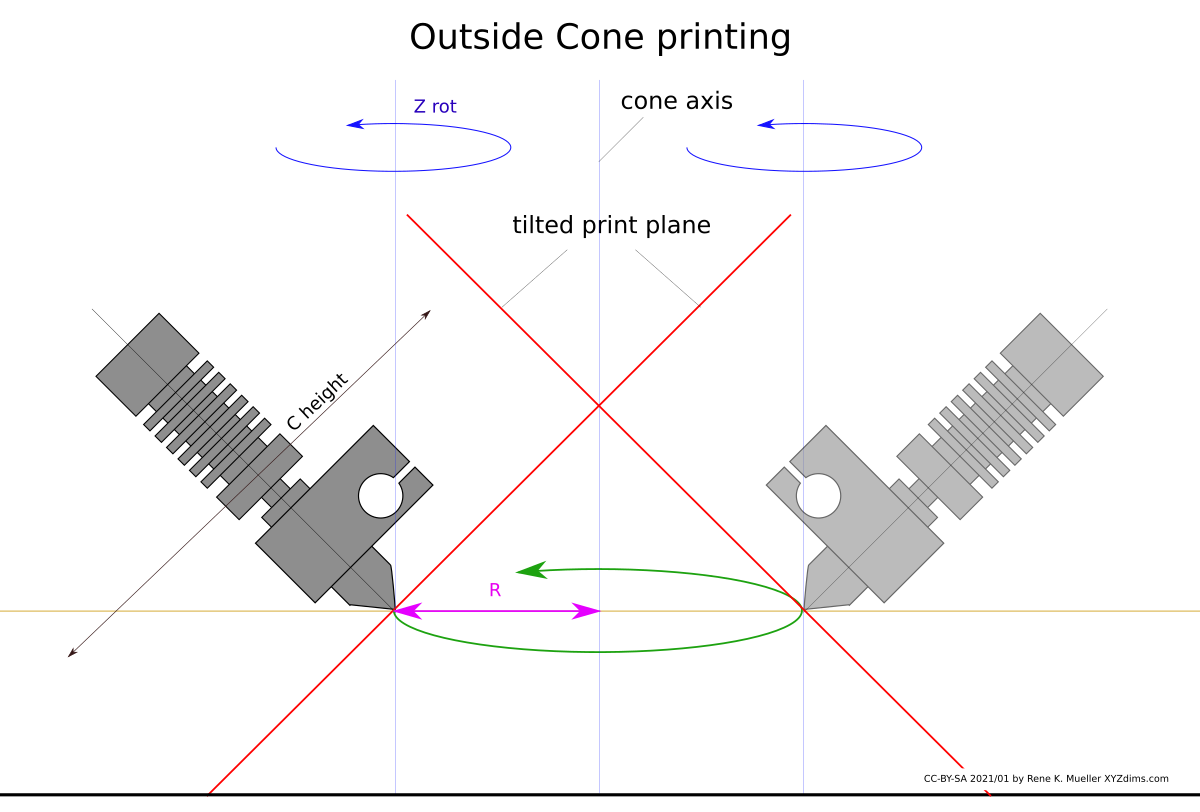
Outside Cone printing
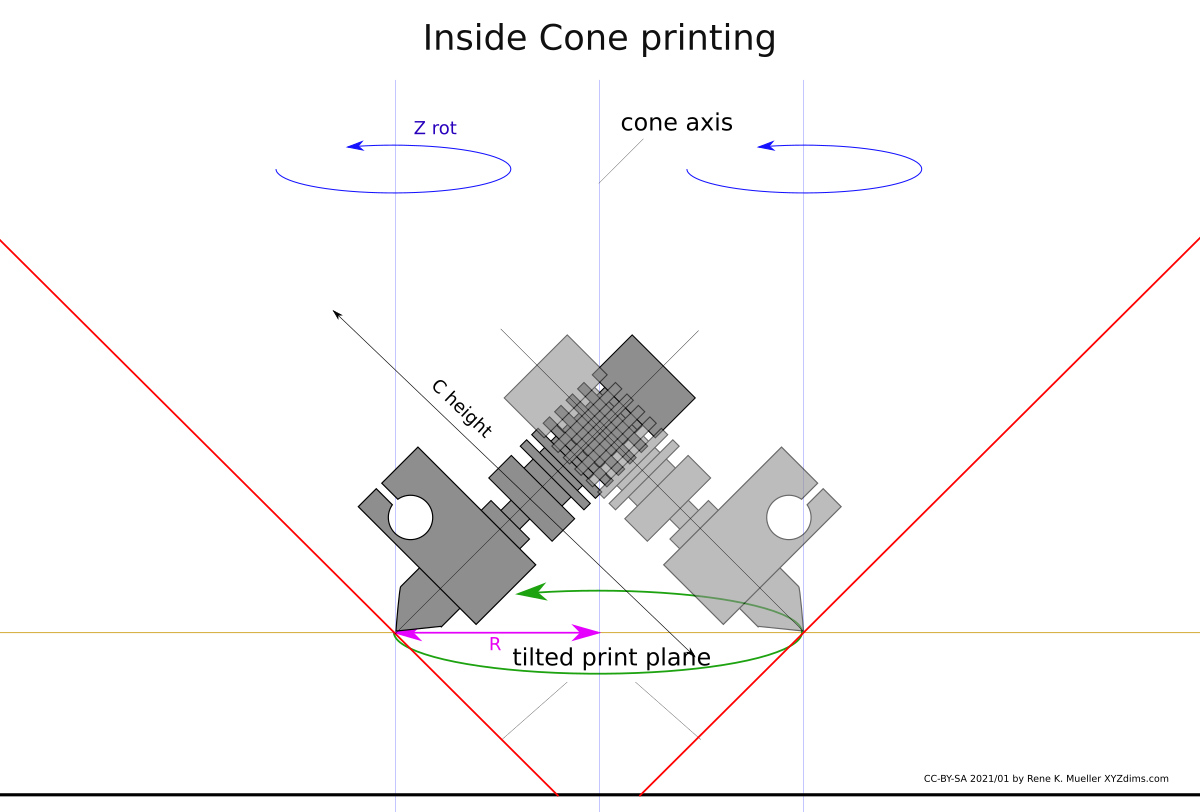
Inside Cone printing
outer overhang
inner overhang
outside-cone printing for outside overhangs
inside-cone printing for inside overhangs
Inside cone for inner overhangs (bottom) vs outside cone for outside overhangs (top)
This poses significant grow of complexity from just planar slicing, the 4-axis RTN provides features to print 90° overhangs without support structure, but only when the part can be properly analysed and segmented so that those operational mode can be applied.
The difference between inside- and outside-cone printing is to change the order of conic mapping for the model and post slicing:
outside-cone mode
map model inverse conic
slice model
map G-code direct conic
inside-cone mode
map model direct conic
slice model
map G-code inverse conic, Zrot + 180°
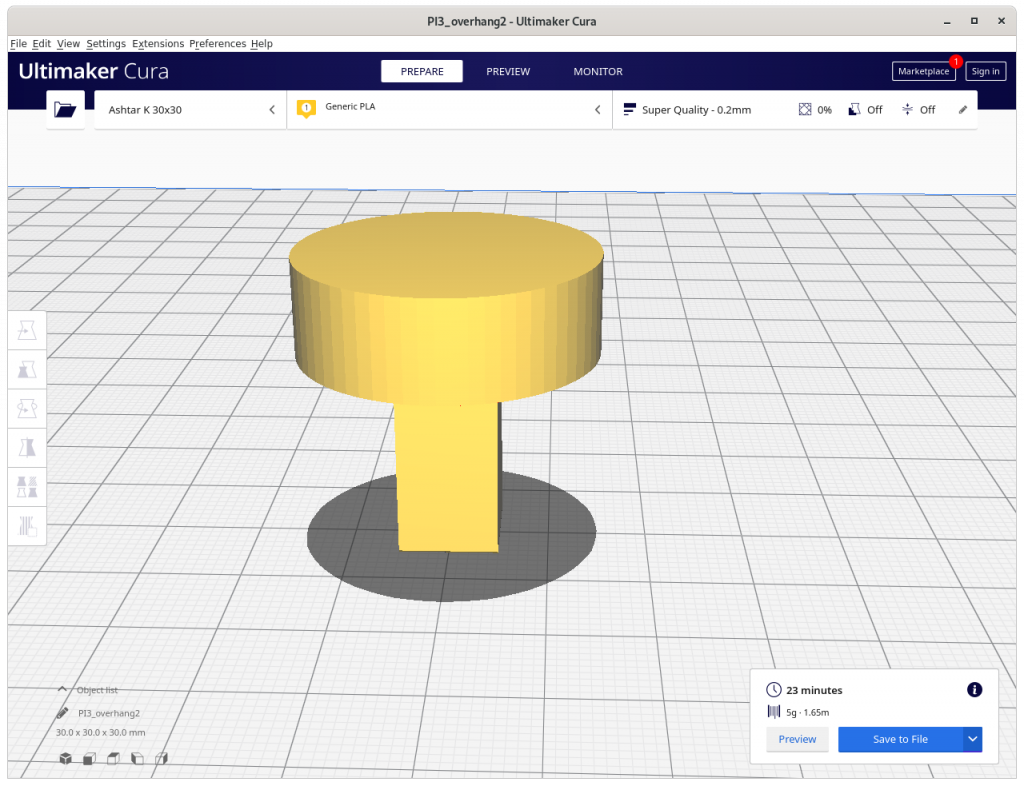
Slicer4RTN
The pseudo-code turned into an actual application I named slicer4rtn and is a command-line tool, slicing STL into G-code:
I gonna released Slicer4RTNeventually 2021/03/22, in its early version the model currently can only be sliced for outside-cone or inside-cone printing, so the volume decomposition or segmentation needs to be done separately. For now it helps me to verify some of the 4-axis and 5-axis printer designs I work on.
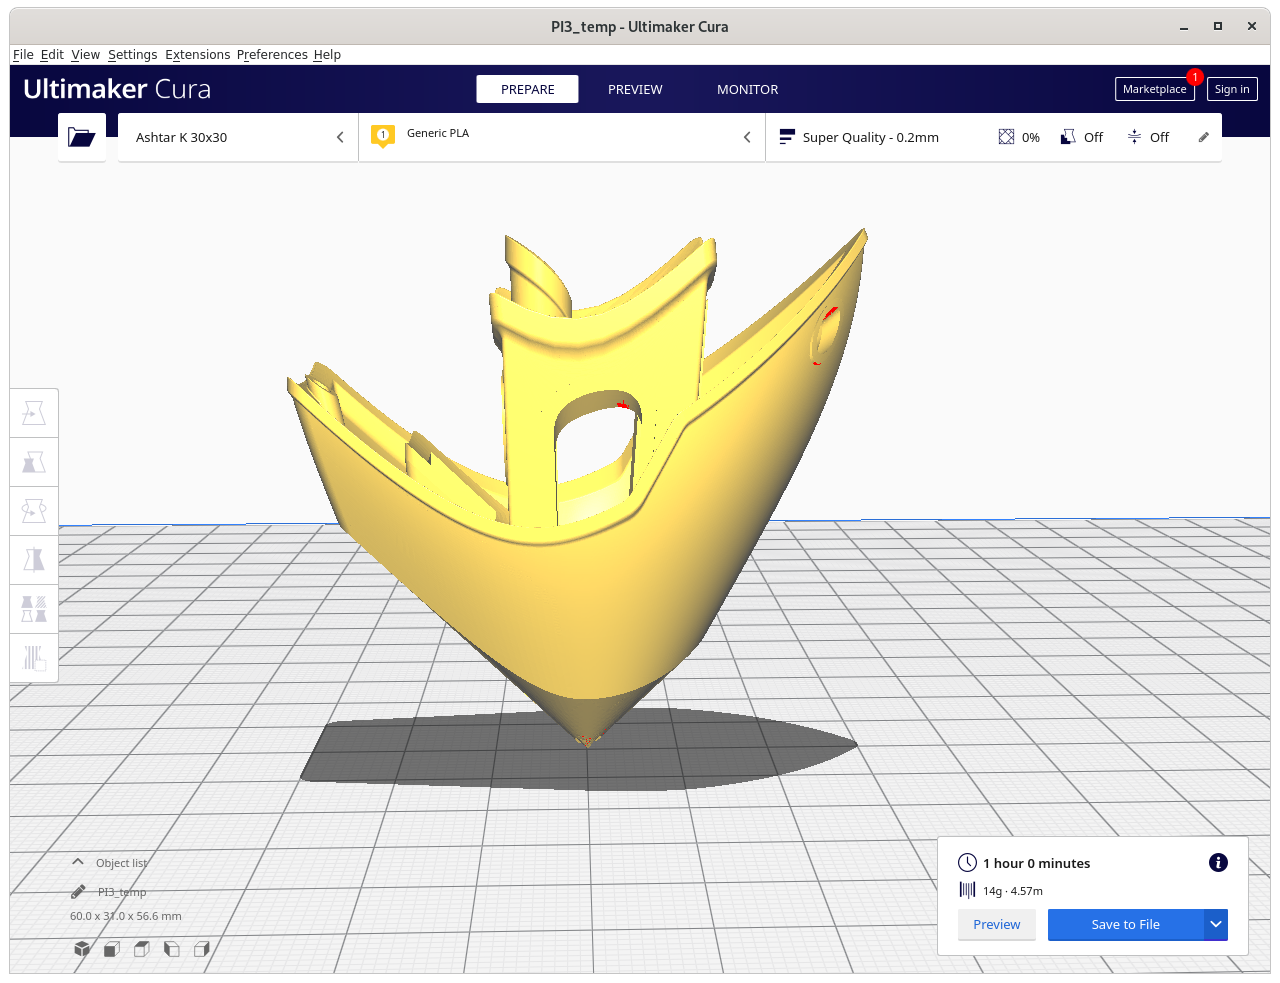
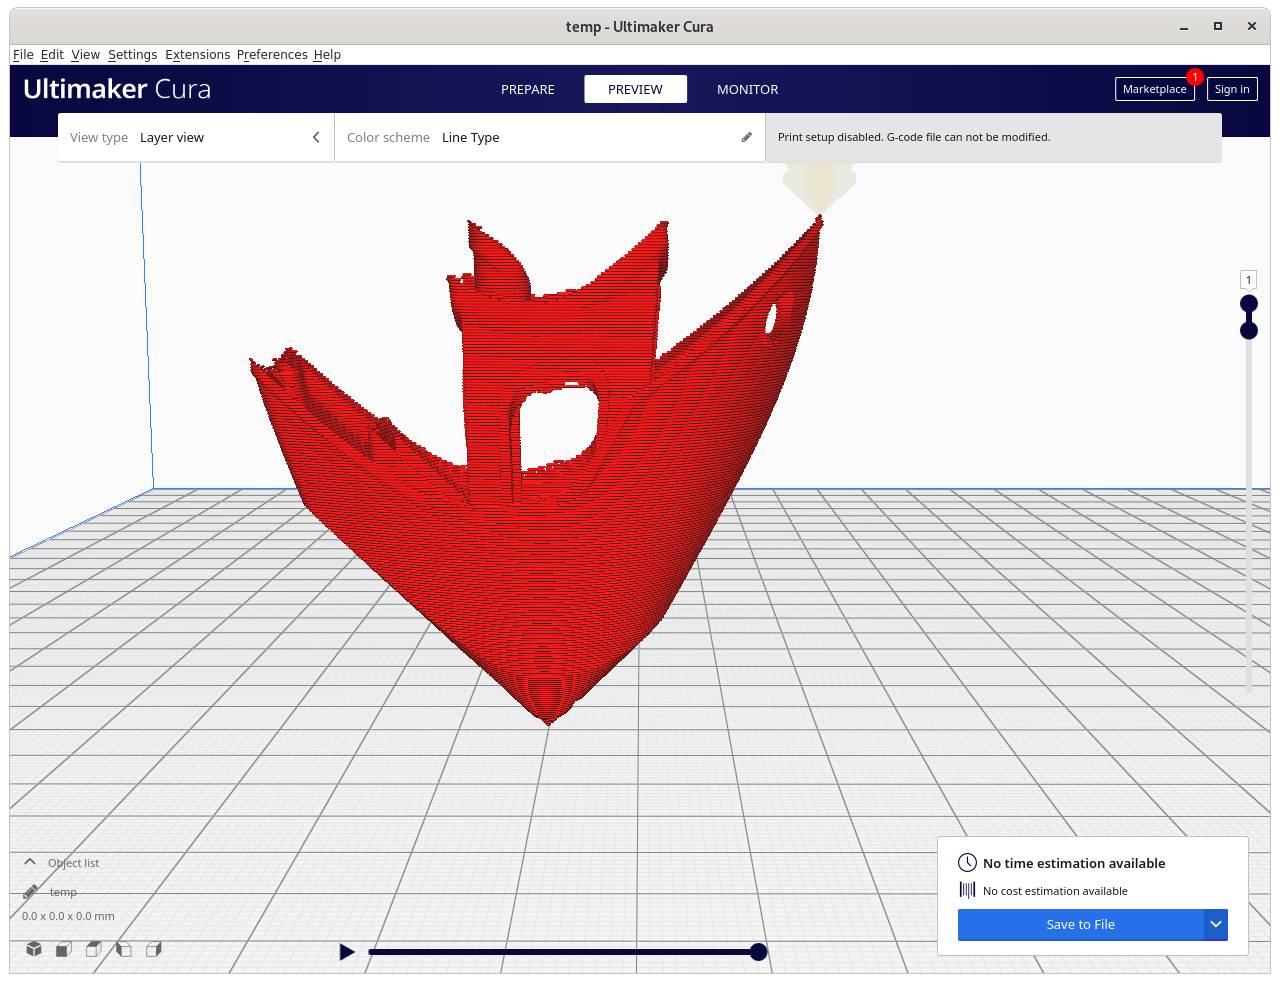
Ashtar K RTN printing conic sliced 20mm cube (close up, animation)Ashtar K RTN printing conic sliced overhang model without support structure (close up, animation)Ashtar K RTN printing conic sliced overhang model nr 6 (table-like) without support structure (close up, animation)
RotBot by ZHAW, the inventors of the Rotating Tilted Nozzle (RTN) approach by Prof. Dr. Wilfried Elspass, Dr. Christian Jaeger, Michael Wüthrich, Maurus Gubser, Philip Bos and Simon Holdener
[..] a novel 4-axis FDM printing process with a newly designed printhead, for the printing of overhangs without support structures. With conventional FDM printing, overhangs of more than 45deg–60deg must be supported.
For this novel printing process, the printhead is rotated 45° around a horizontal axis and equipped with a vertical, rotational axis. The printhead no longer follows layers parallel to the build platform, but moves on the surface of a 45deg cone. The printing cone increases in diameter from layer to layer. With this cone-shaped layers, the printable angles increases by 45°, which leads to printable overhangs of up to approximately 100°.
New slicing strategies for this printing process have been developed to slice the parts for the novel printing process. The feasibility of the concept has been prototypically demonstrated. The novel design achieves the advantages of higher speed and quality with lower cost at the same time.
A brief video sequence of printing (YouTube) shows the machine movement. Unfortunately, as of 2021/01 not much more details have been published by ZHAW except a paywalled paper [sigh] which contains useful overview of their research. I contacted ZHAW and Michael Wuethrich mentioned that they are in negotiations with different companies to develop a product (2021/01) and eventually release the details of their slicing approach with pre- and post-processing while using an ordinary slicer.
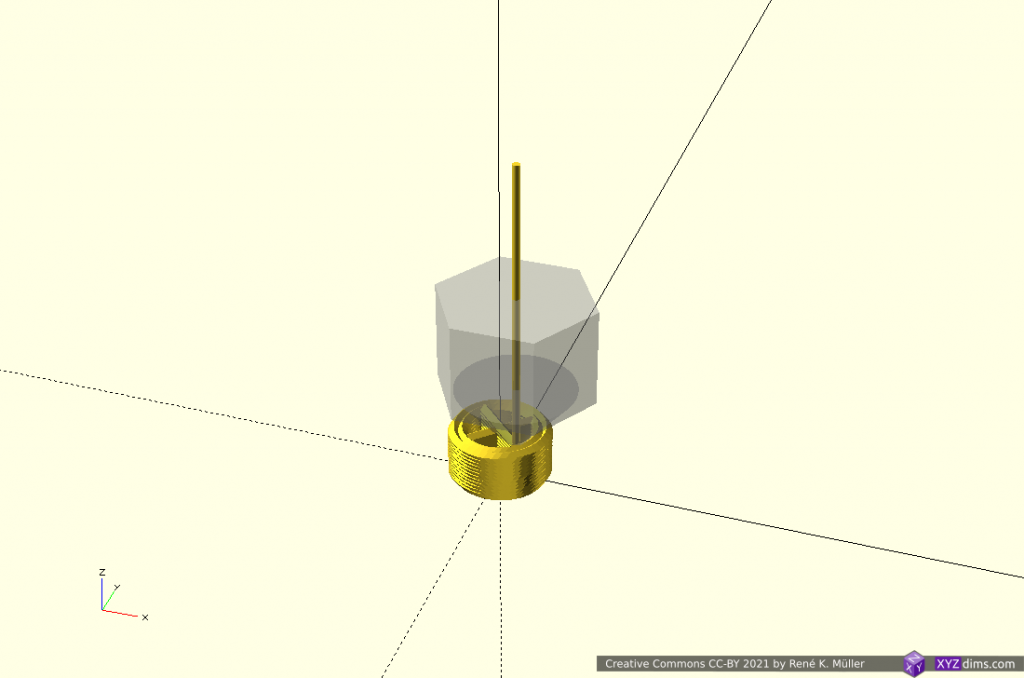
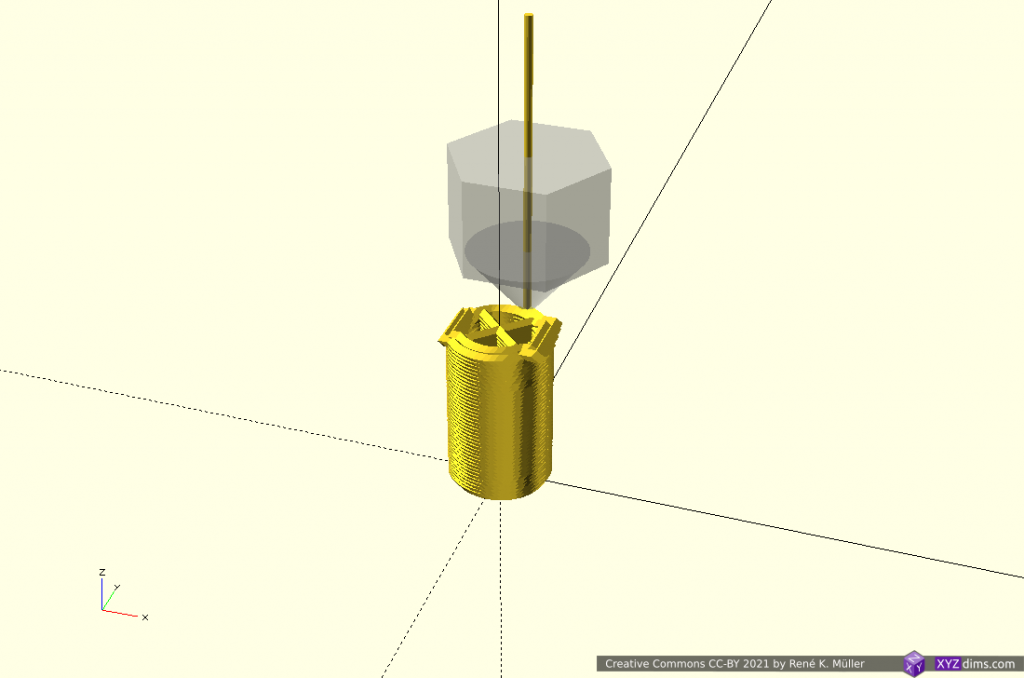
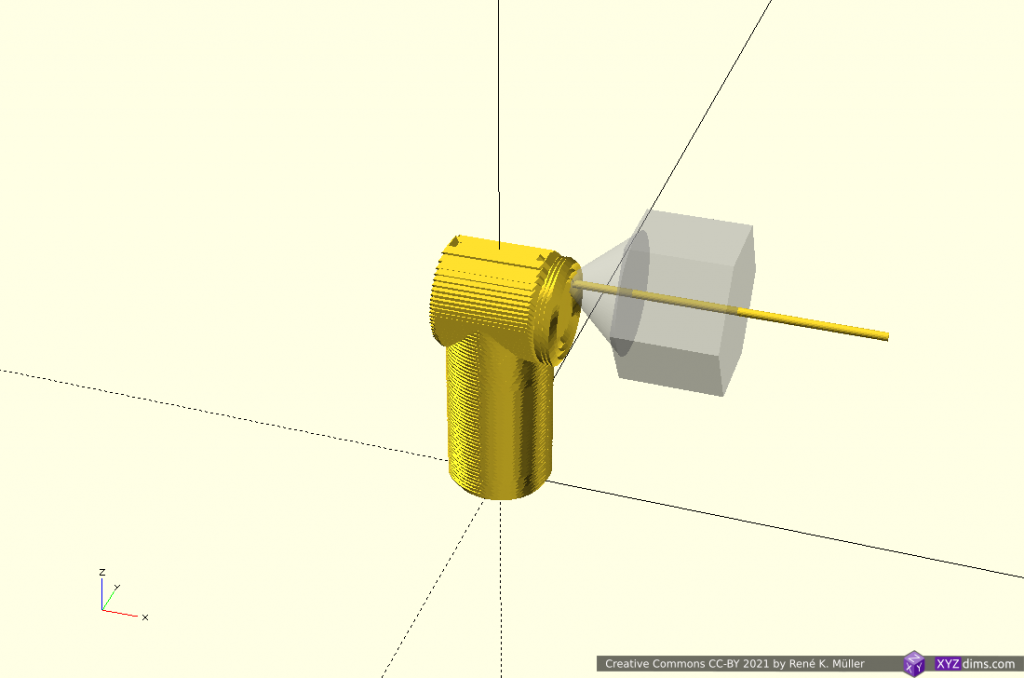
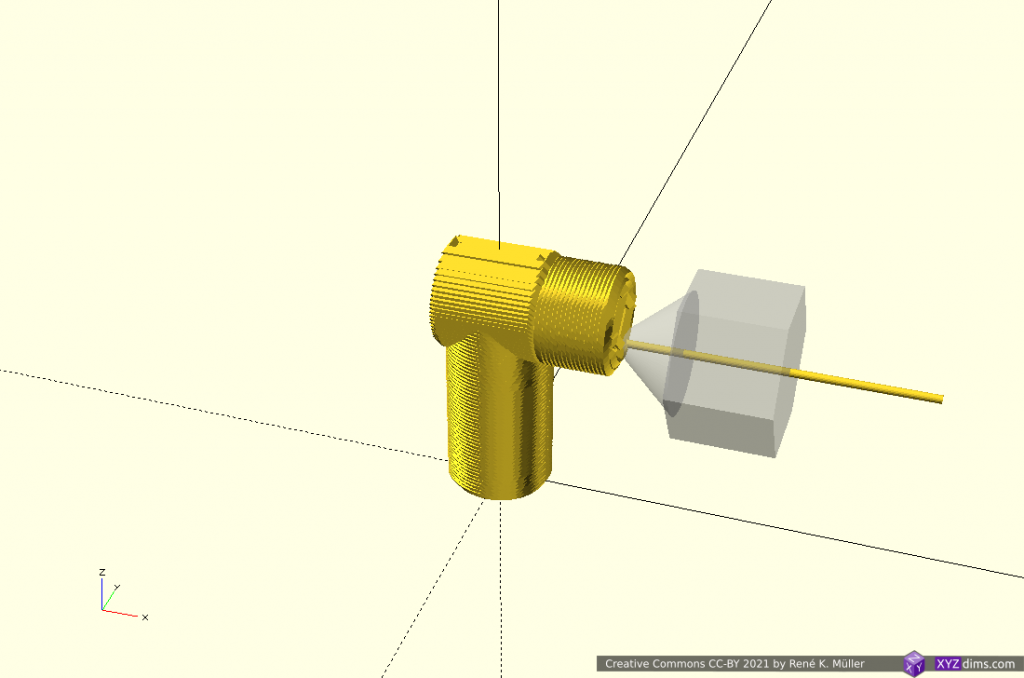
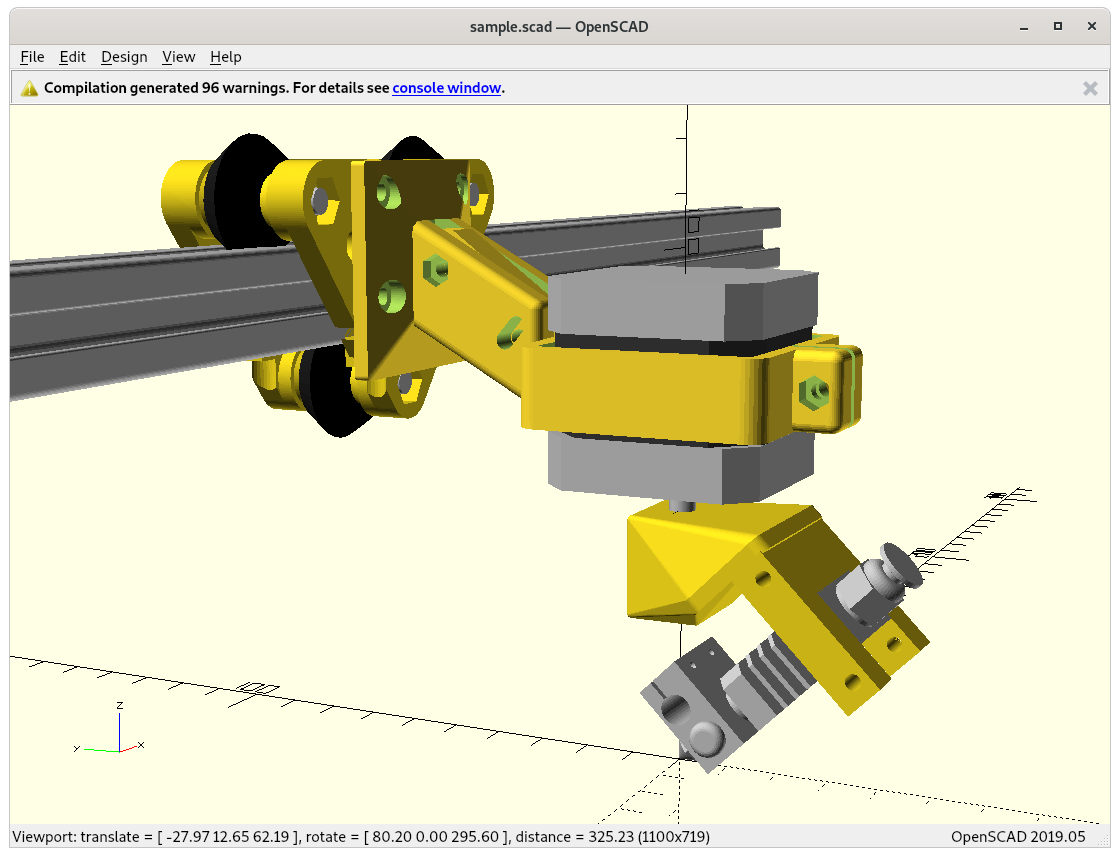
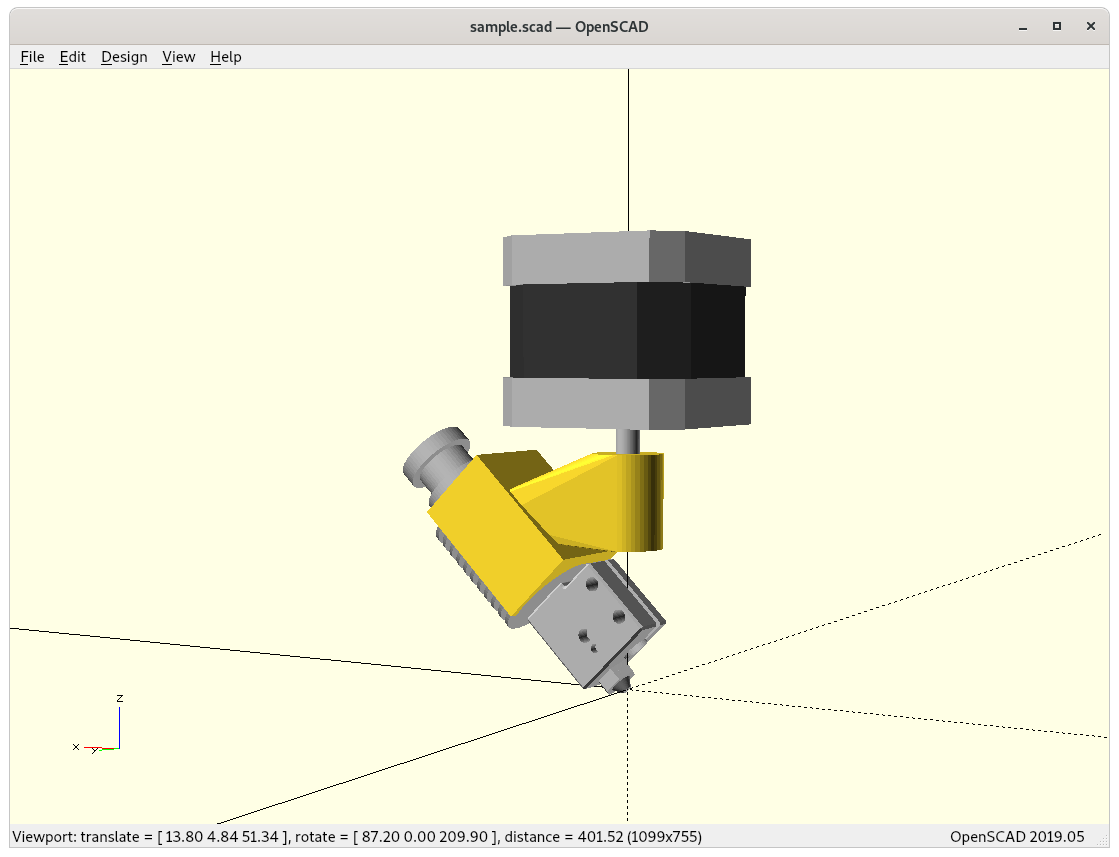
I thought to try my own implementation of this Rotating Titled Nozzle 4 Axis option. The main idea to keep the entire hotend in Bowden style and rotate that around only once (non-continuous) with all wires, that would simplify things greatly:
45° titled nozzlerotating 45° tilted nozzlerotating 45° tilted nozzleat 0° rotation positionyet no space for bowden tube at -180° or +180°… therefore to make some distance.. with proper mount
The challenge is the +/-180° position when the nozzle opening looks forward, where the printhead bowden tube (and all cables) comes most close to the X beam. As a consequence only -180° to +180° rotation is allowed and not multiple revolutions.
It would also mean, once the printhead reaches -180°, and it has to rotate to +180° and decrease from there again to fulfill 360° rotation – whether this is suitable has to be seen, this likely creates a seam there.
The main advantage of this simplified 4 axis approach is to use existing pieces plus just an additional NEMA 17 motor.
Update 2021/01/26: Wuethrich from ZHAW mentioned that they started first also with a full printhead rotating but then switched to the more complex continuous rotating printhead to avoid a seam, have direct drive extruder, faster prints as simpler decision making to change rotation direction and no start/stop of rotation and de/acceleration when reaching -180/+180° position.
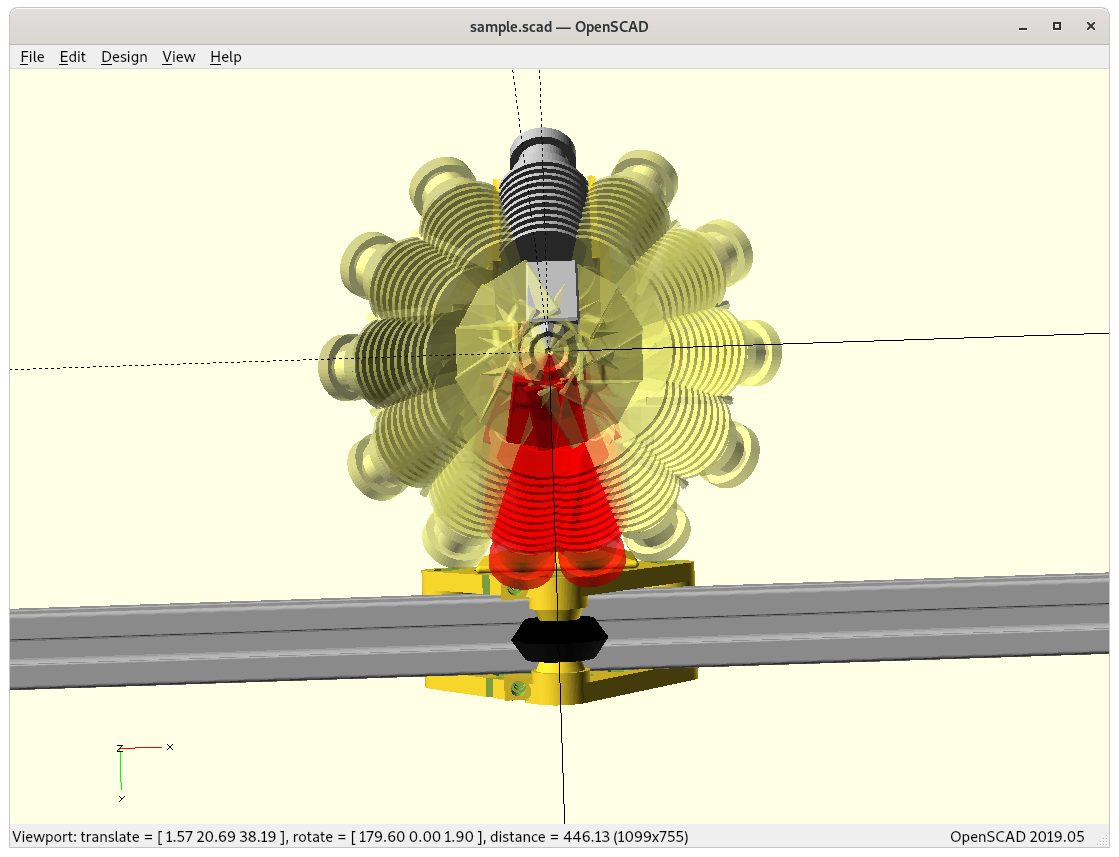
Single Revolution with Rotation Shadow
As I pondered on the limits of single rotation approach, there is a range where the bowden tube (and all wires with it) is touching and bending on the X carriage or printhead holder – let’s call it the rotation shadow – ideally it would be zero or slightly sub-zero to have a bit overlap to conceal a possible seam with “ironing” the section (move nozzle over section without extruding).
E3D Volcano
My first attempt is modeling with E3D Volcano hotend like the RotBot by ZHAW:
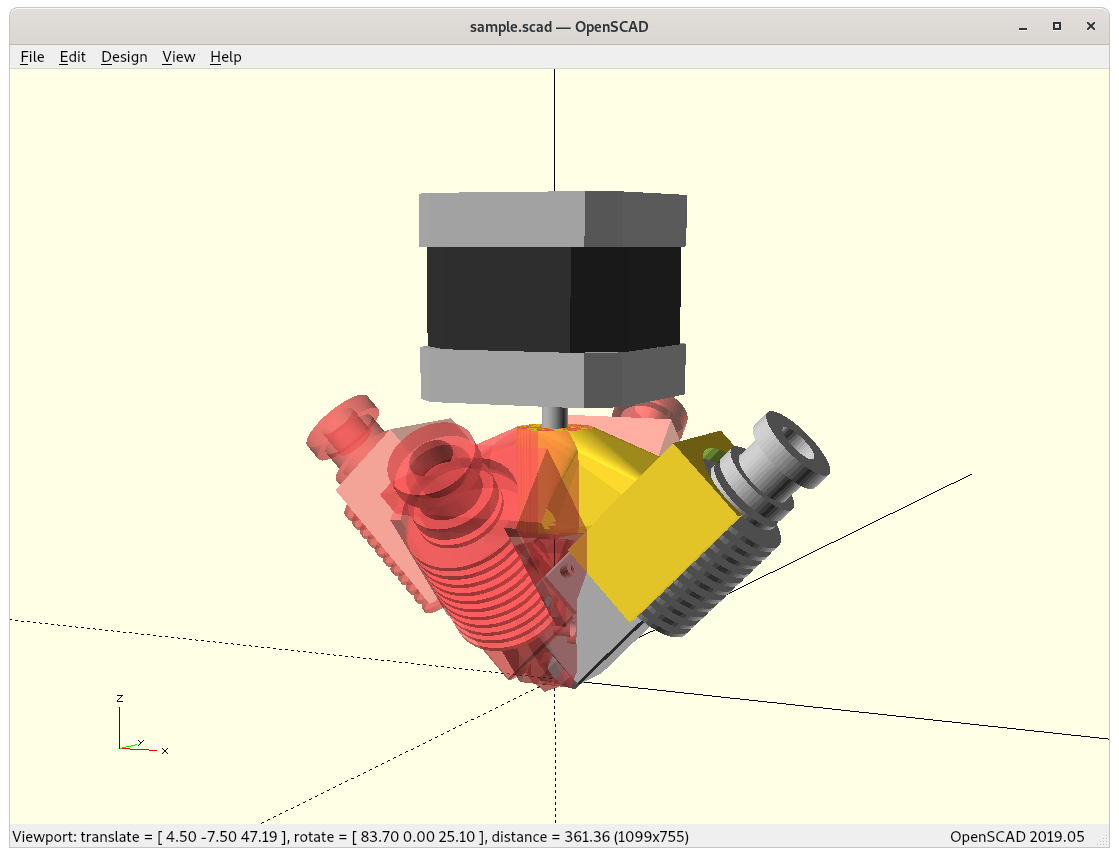
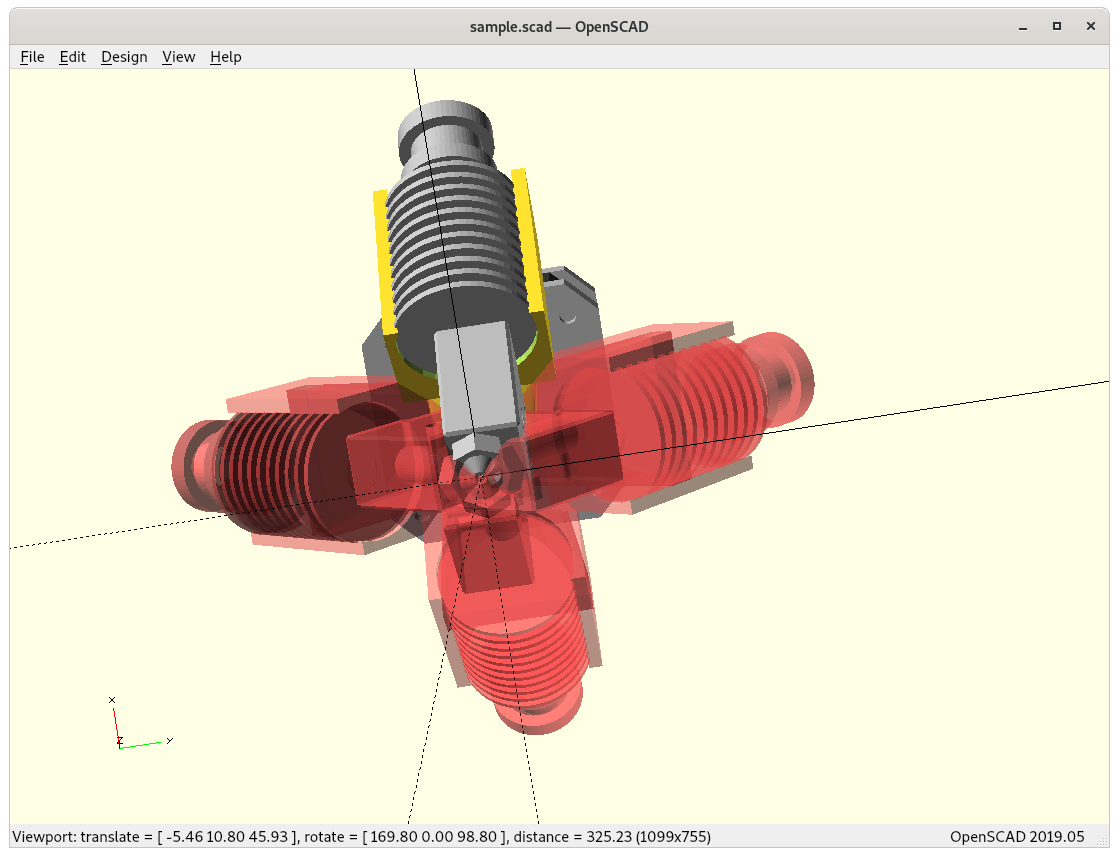
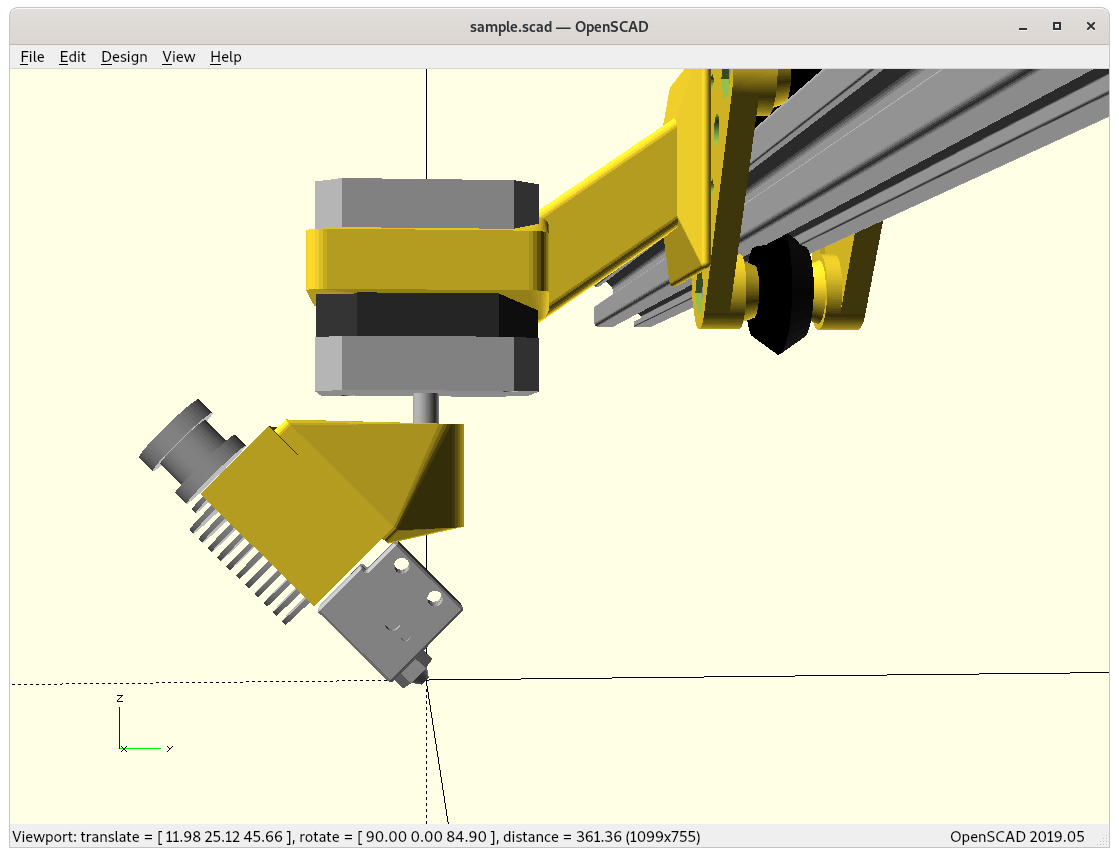
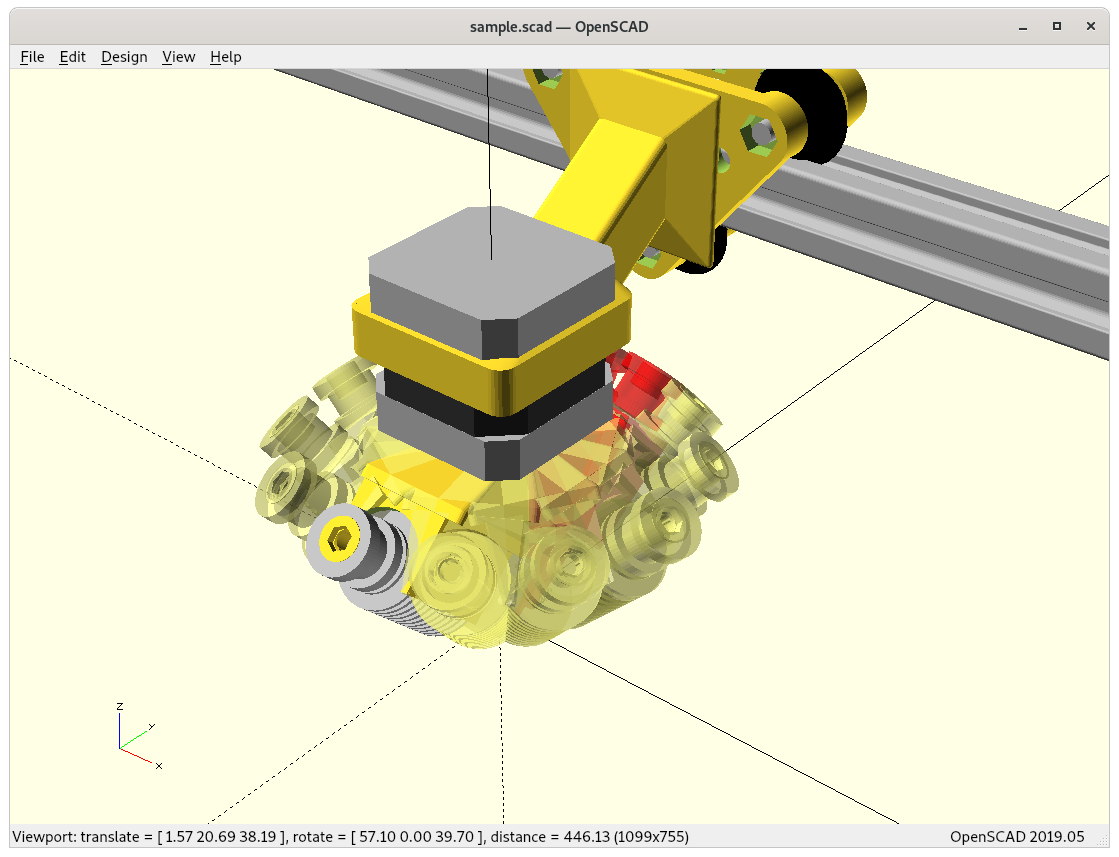
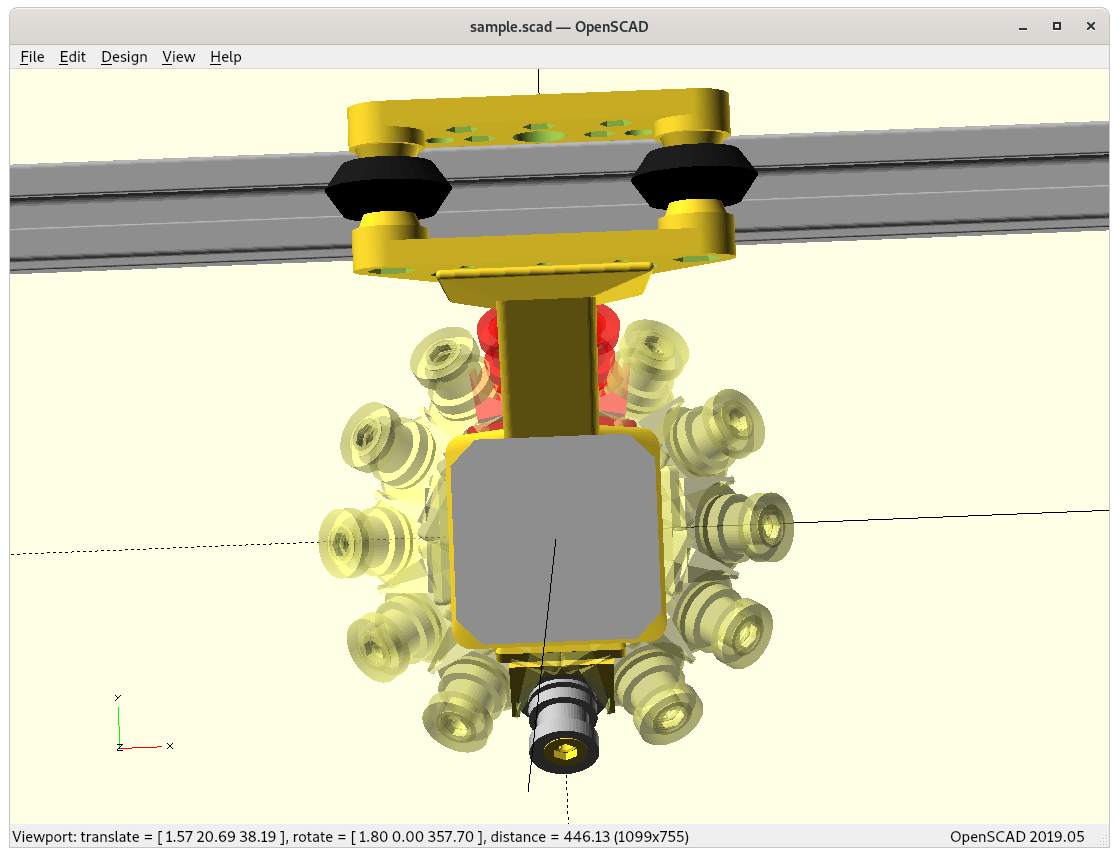
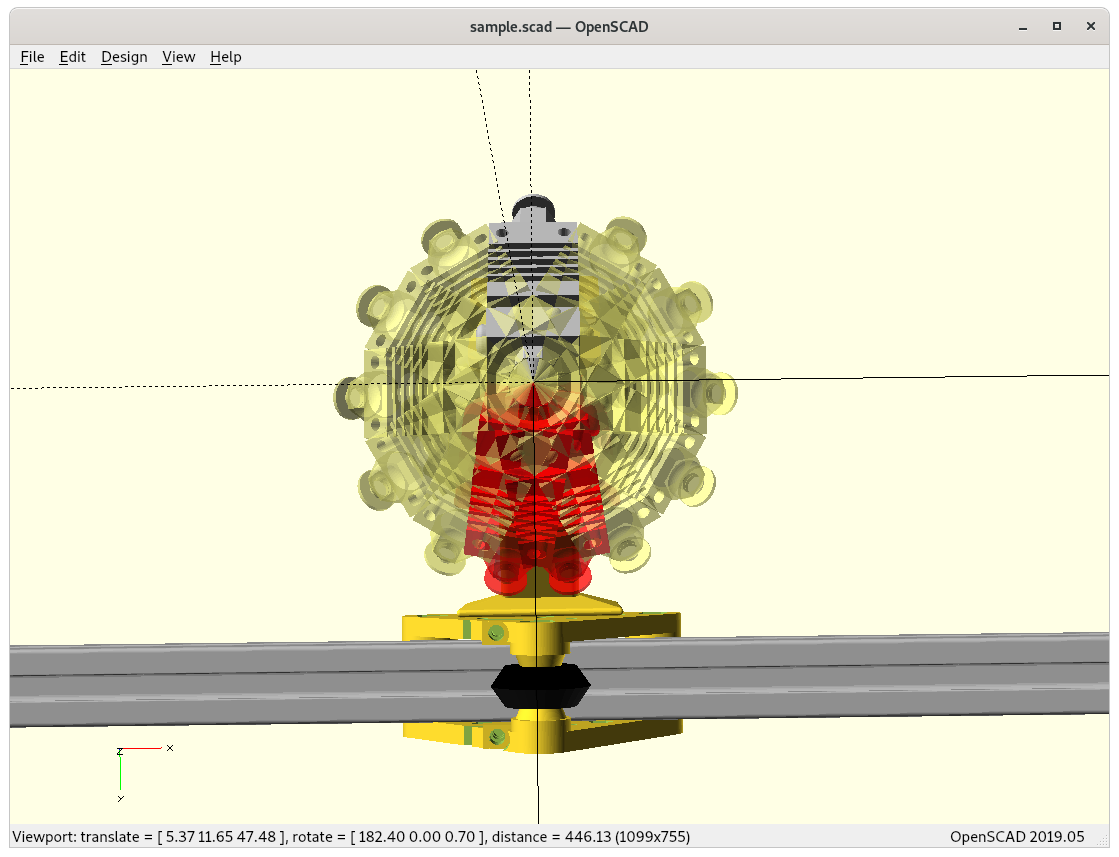
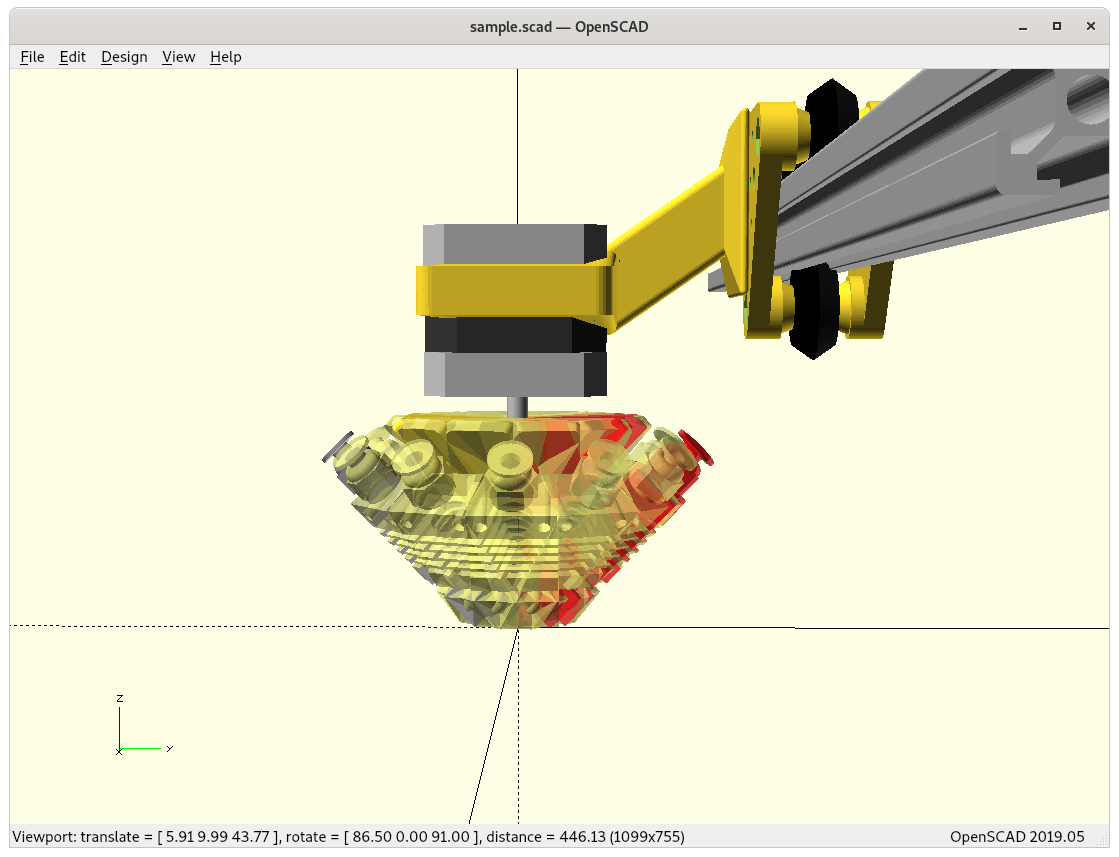
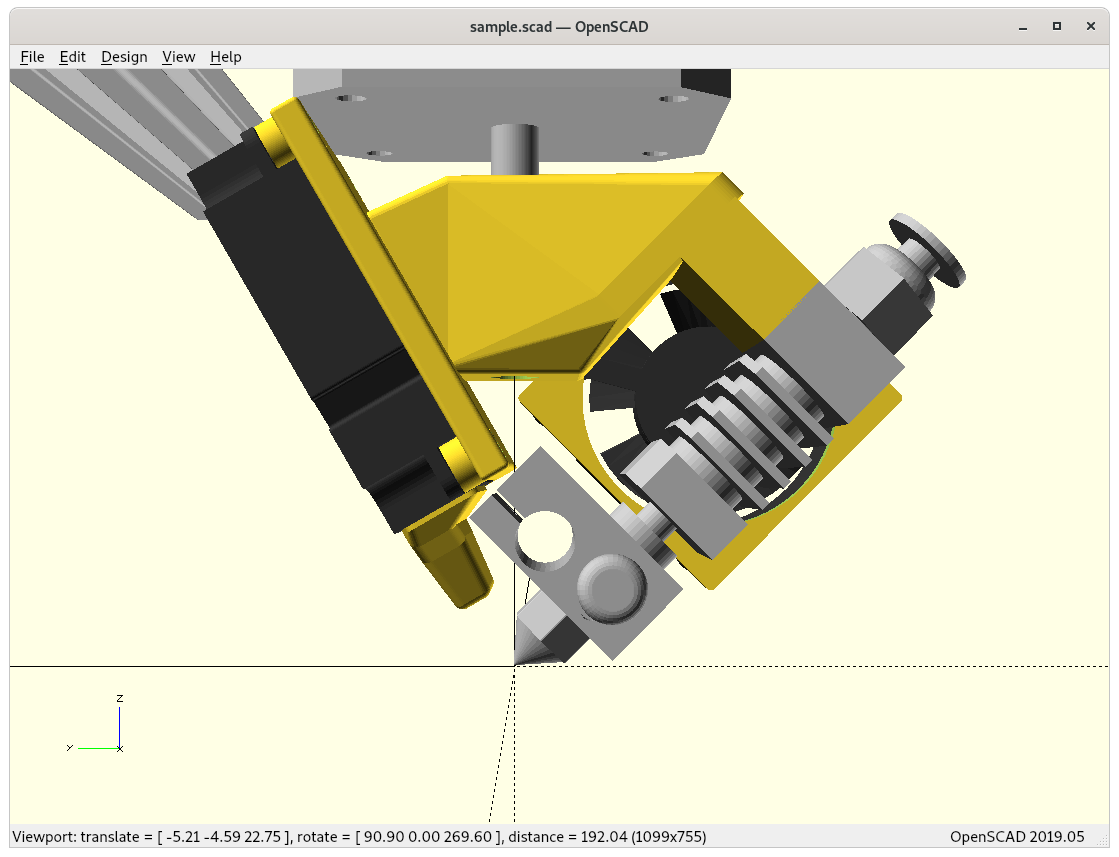
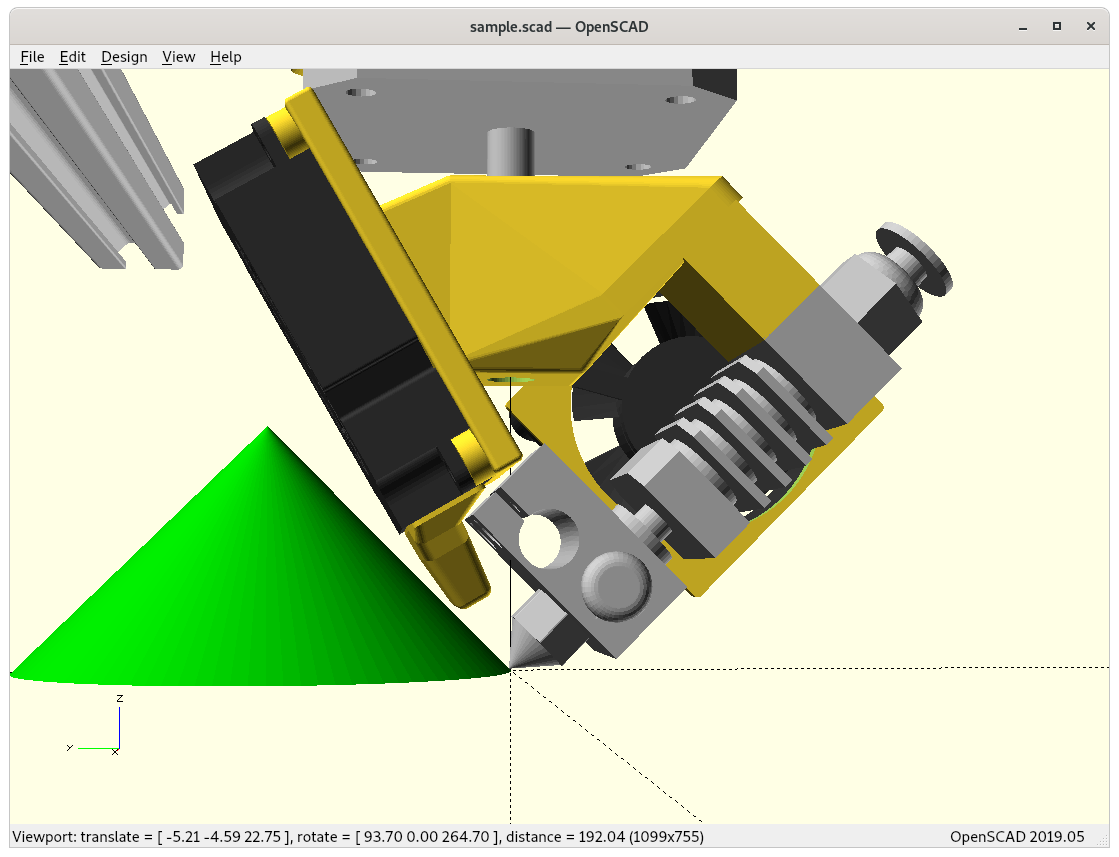
4D E3D Volcano at 0° Z rotation4D E3D Volcano4D E3D Volcano4D E3D Volcano: rotation shadow (red) – top view4D E3D Volcano: rotation shadow (red) – bottom view
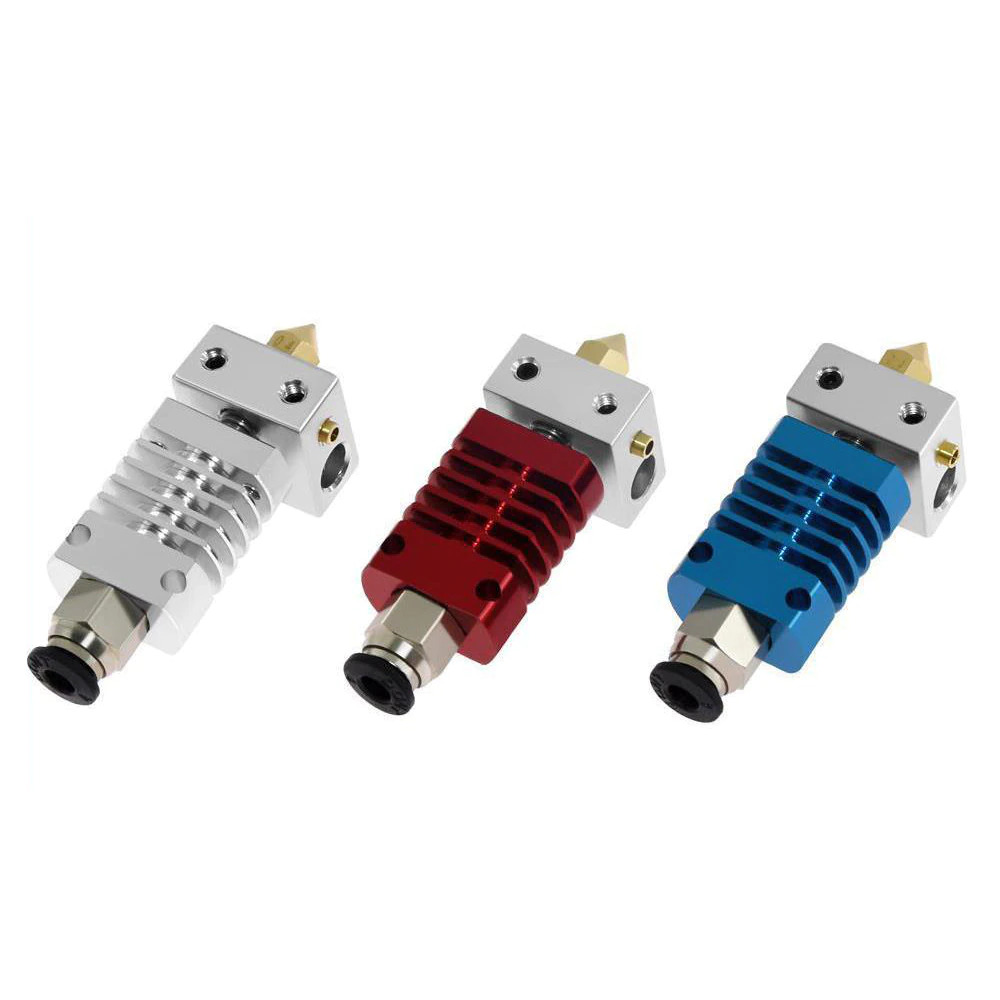
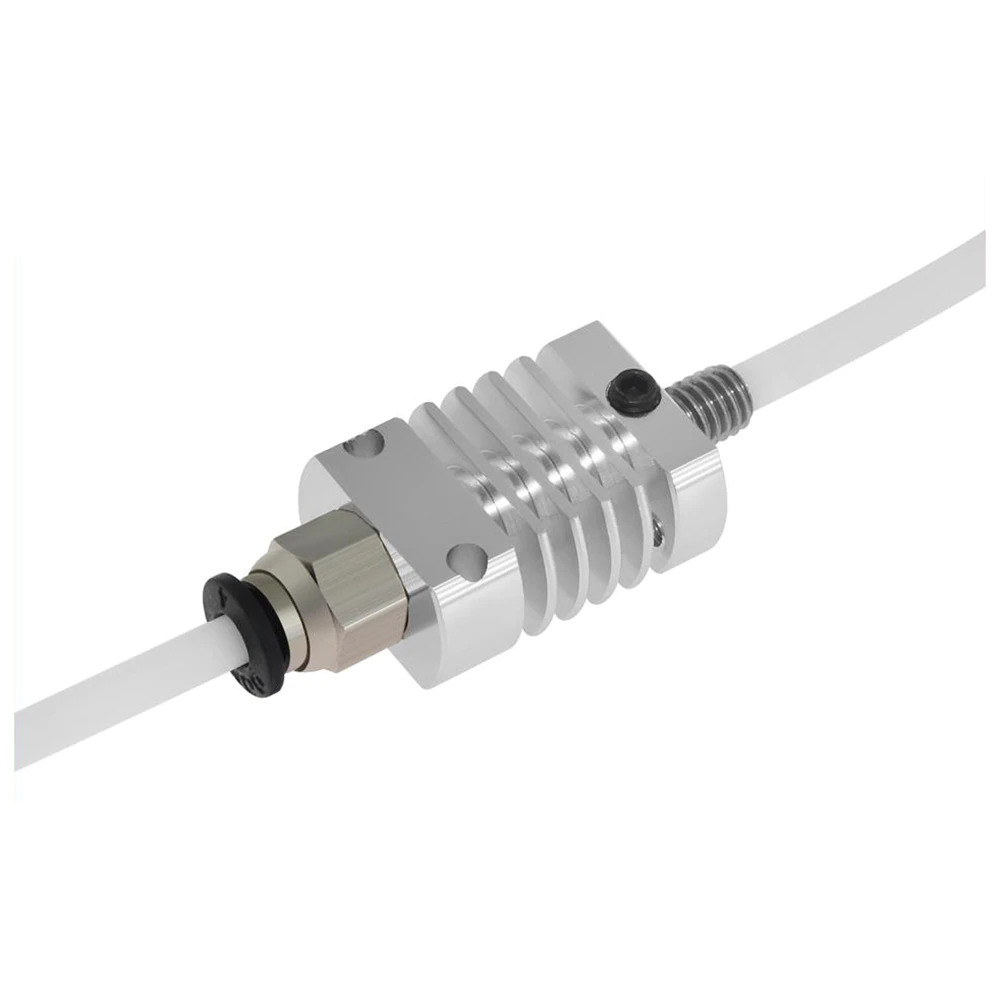
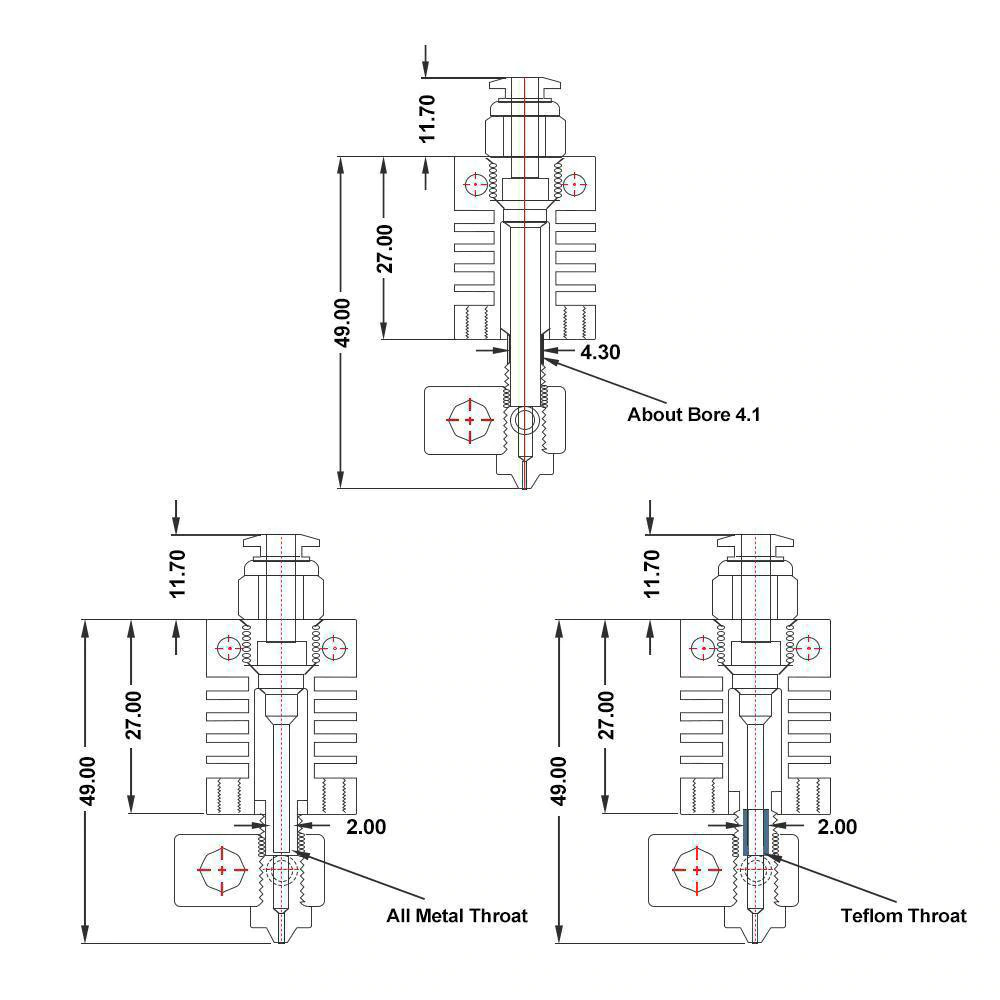
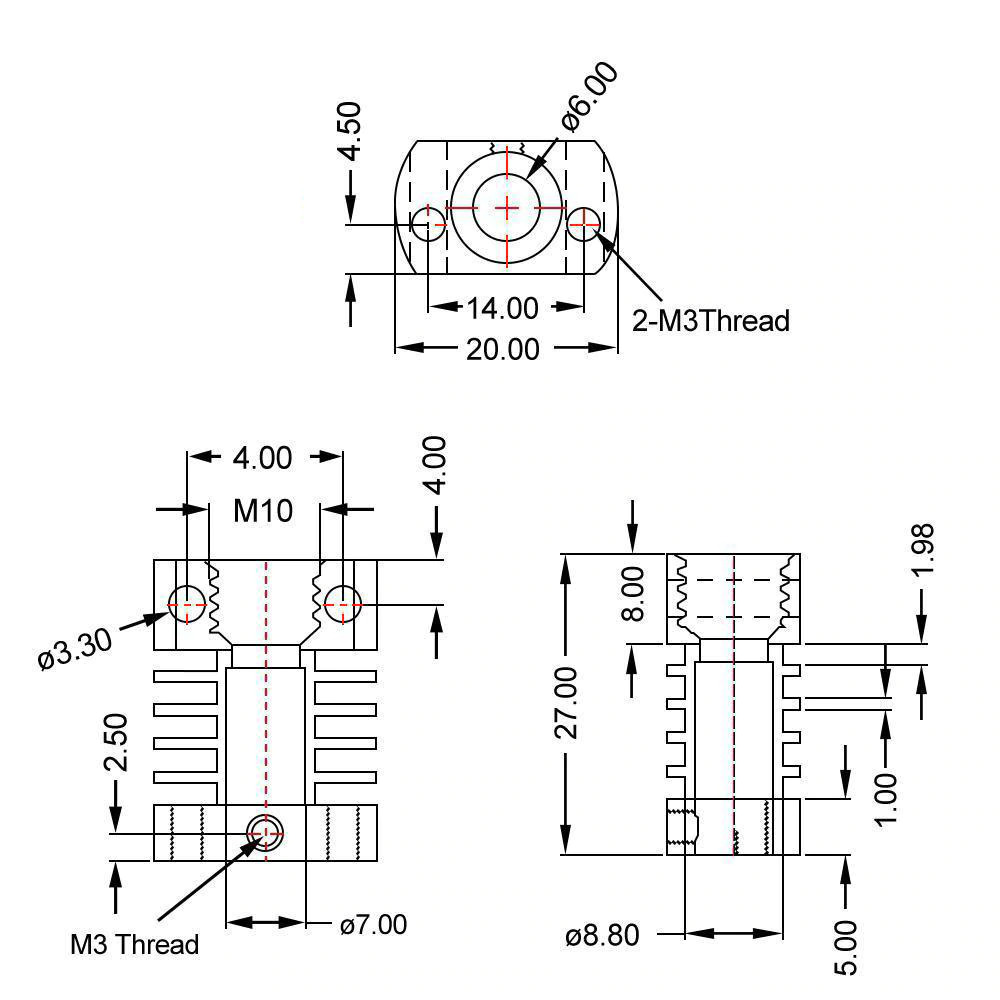
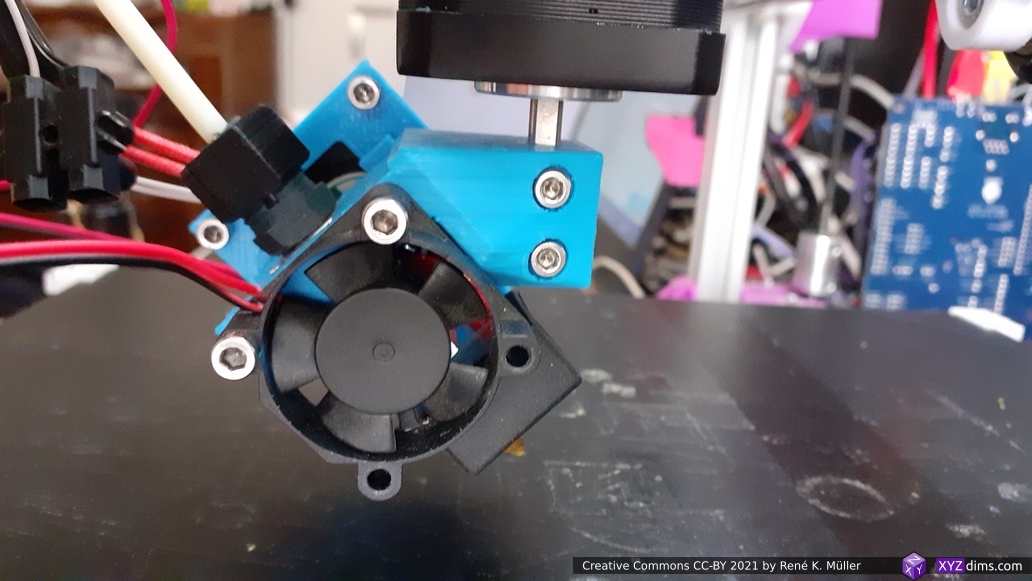
Micro Swiss / CR 10 Hotend
And as alternative the smaller Micro Swiss / CR 10 printhead which gives significant more space for the bowden tube (and all wires with it) to bend or flex near -180/+180°:
4D Micro Swiss at 0° Z rotation4D Micro Swiss4D Micro Swiss4D Micro Swiss: rotation shadow (red) – top view4D Micro Swiss: rotation shadow (red) – bottom view
Comparison Volcano vs Micro Swiss
4D with E3D Volcano4D with E3D Volcano4D with E3D Volcano4D with Micro Swiss / CR10 hotend4D with Micro Swiss / CR10 hotend4D with Micro Swiss / CR10 hotend
At this point I continue with the Micro Swiss (MS) option, as the smaller heatsink gives me more space to make full 360° turn with -180° to +180° and have ~0° rotation shadow, perhaps even sub-zero as of overlapping.
This particular Swiss Micro clone aka CR10 hotend comes without screws stabilzing the heatblock, and just a small worm-screw fastening the heatbreak on the heatsink, yet make it easy to adjust the overall length, which in this case is desired.
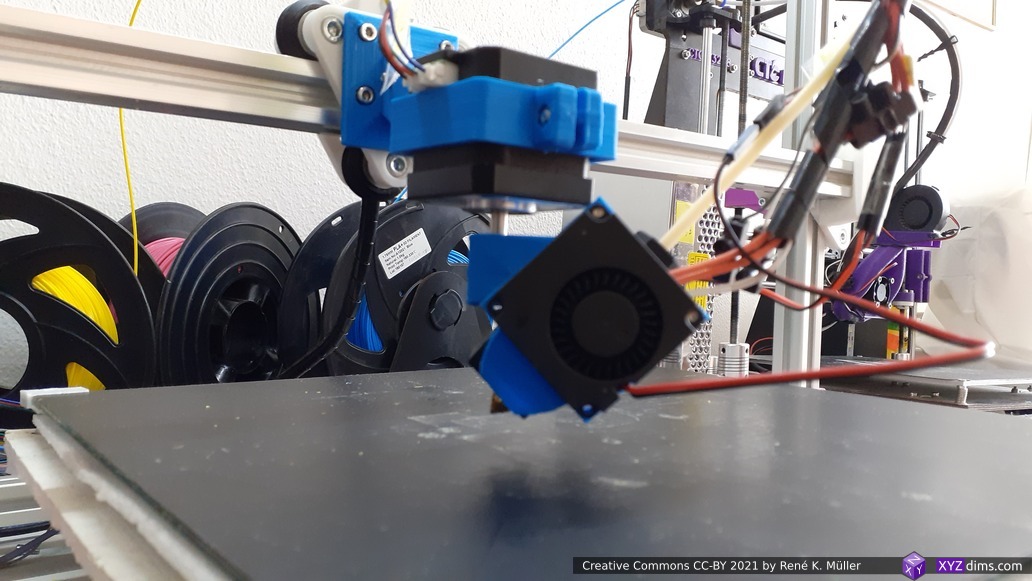
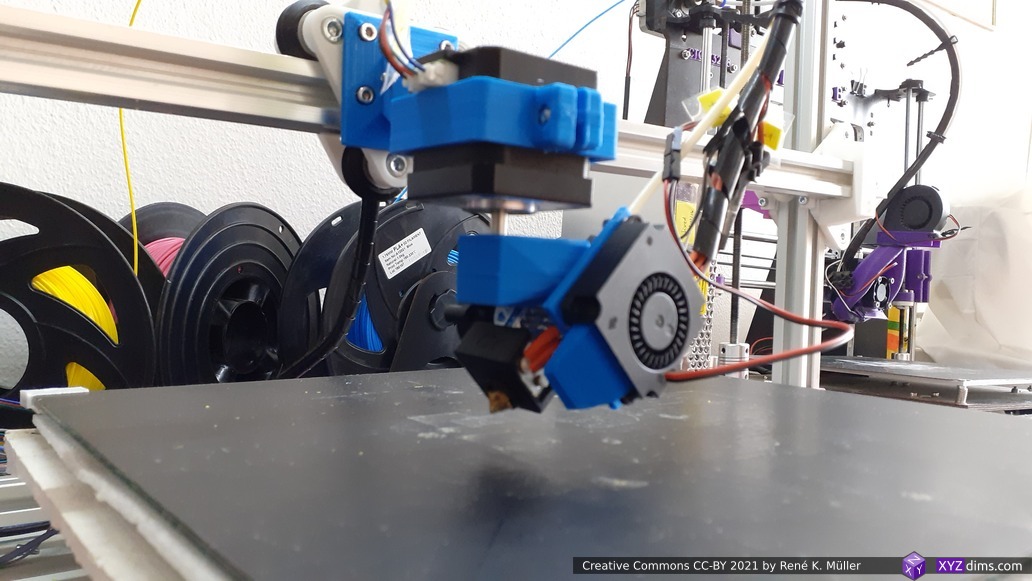
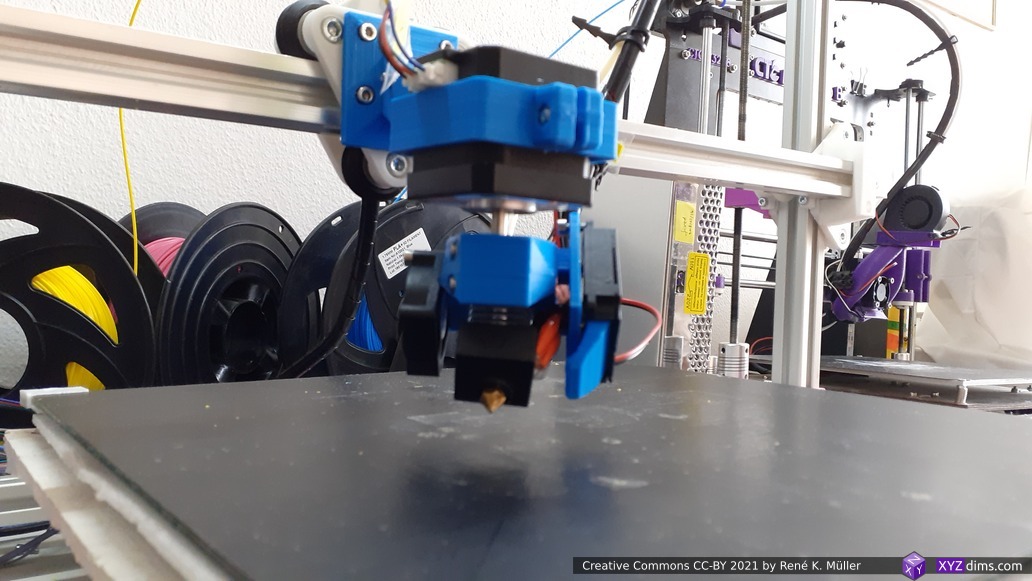
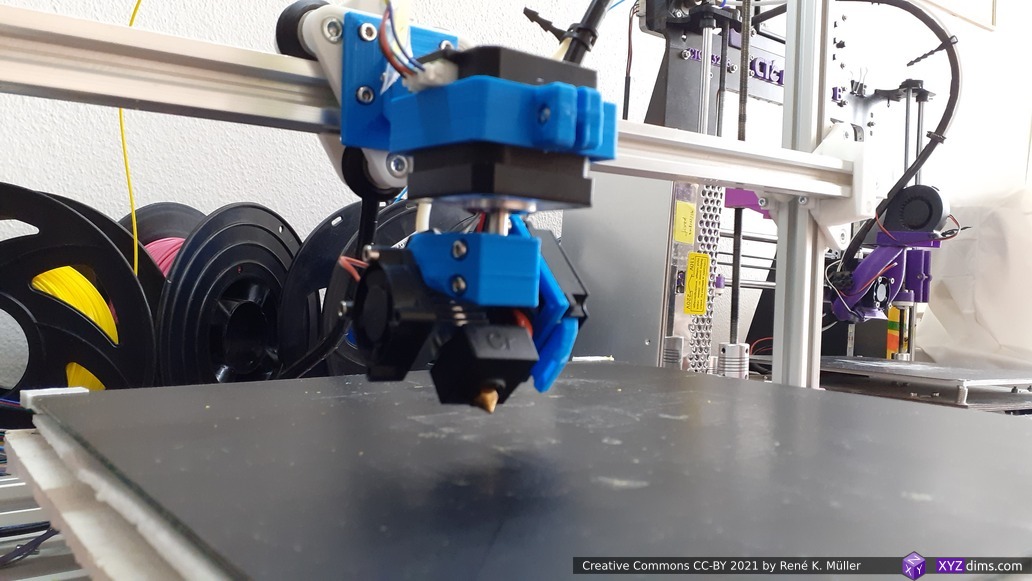
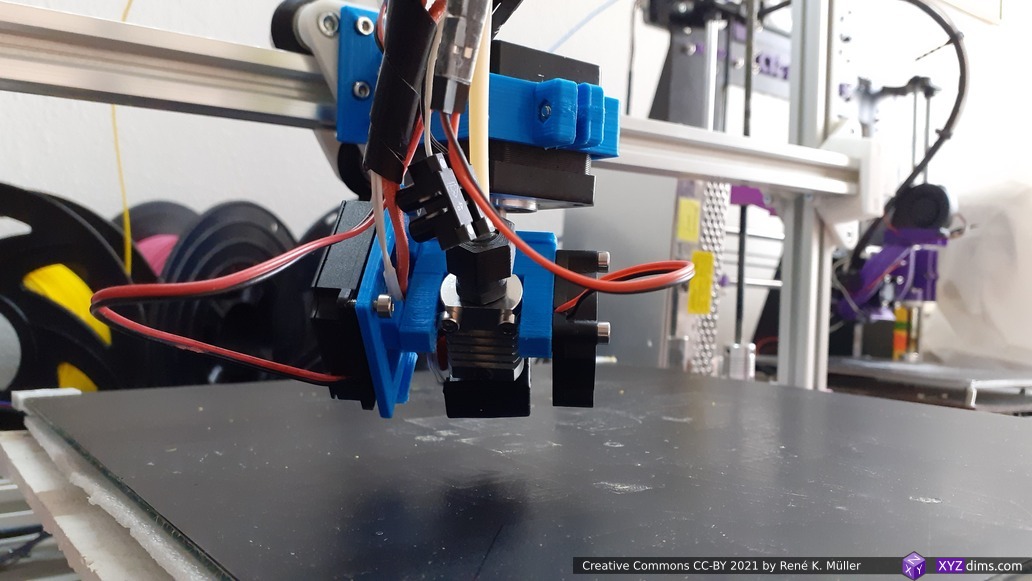
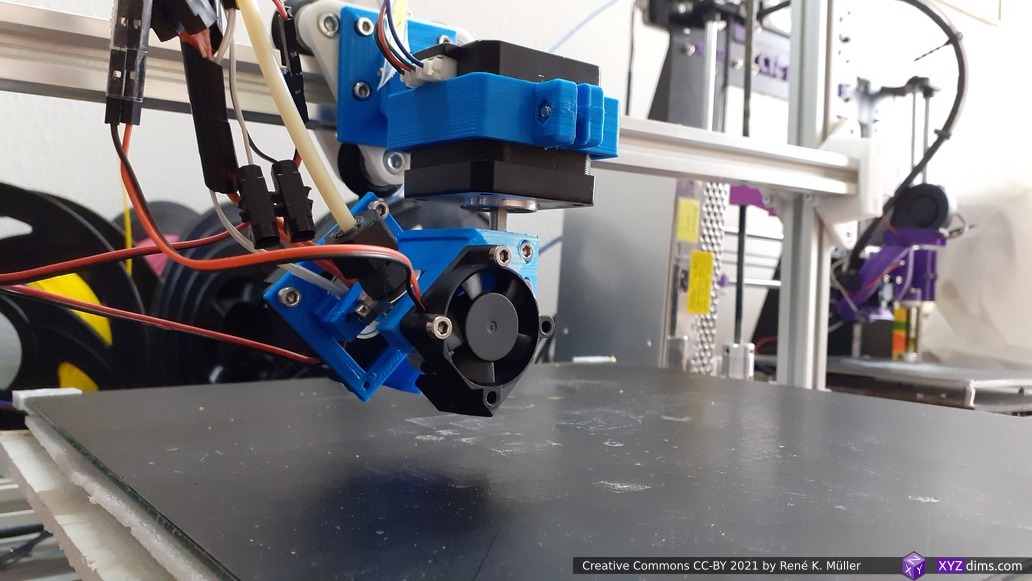
Prototype
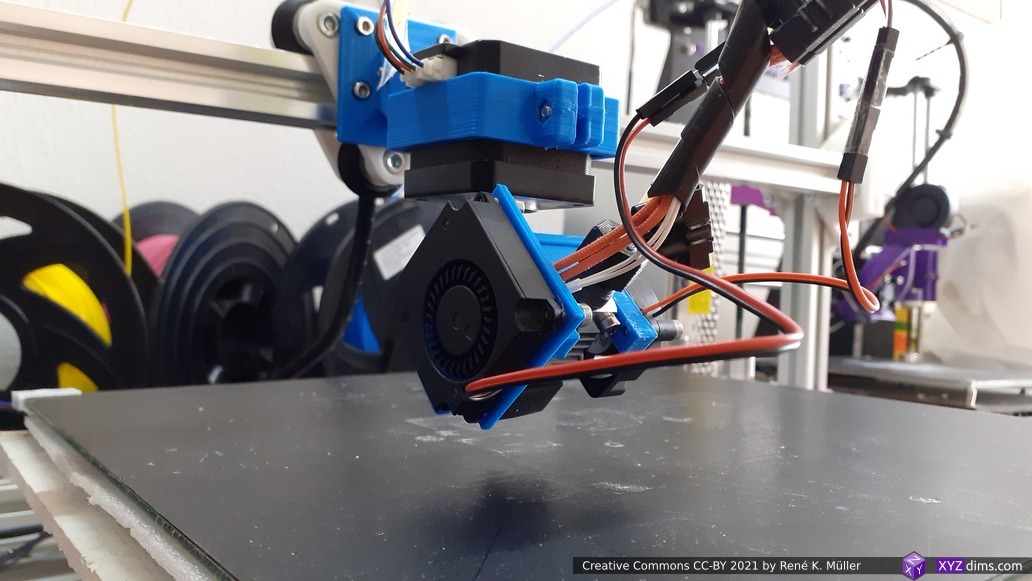
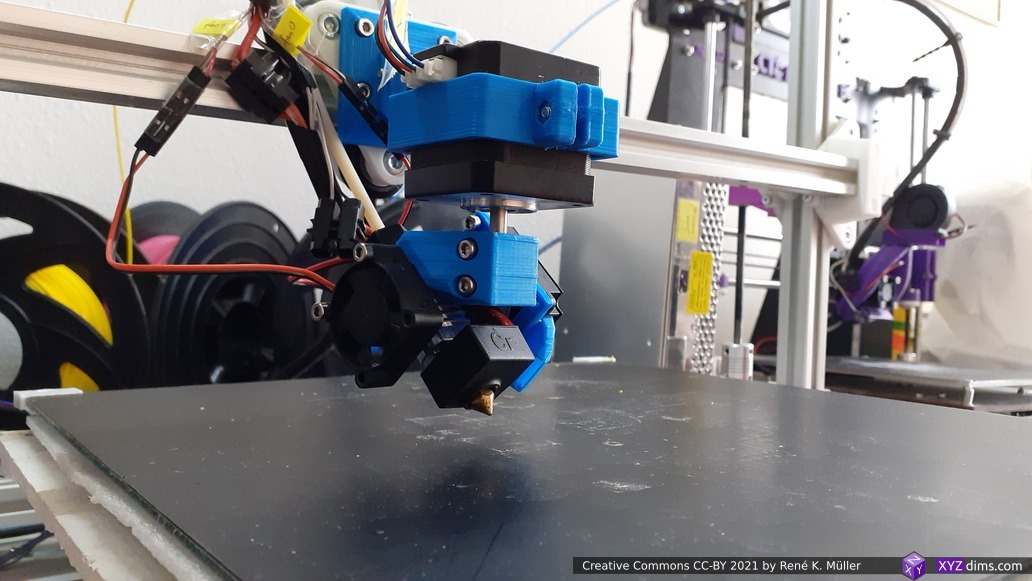
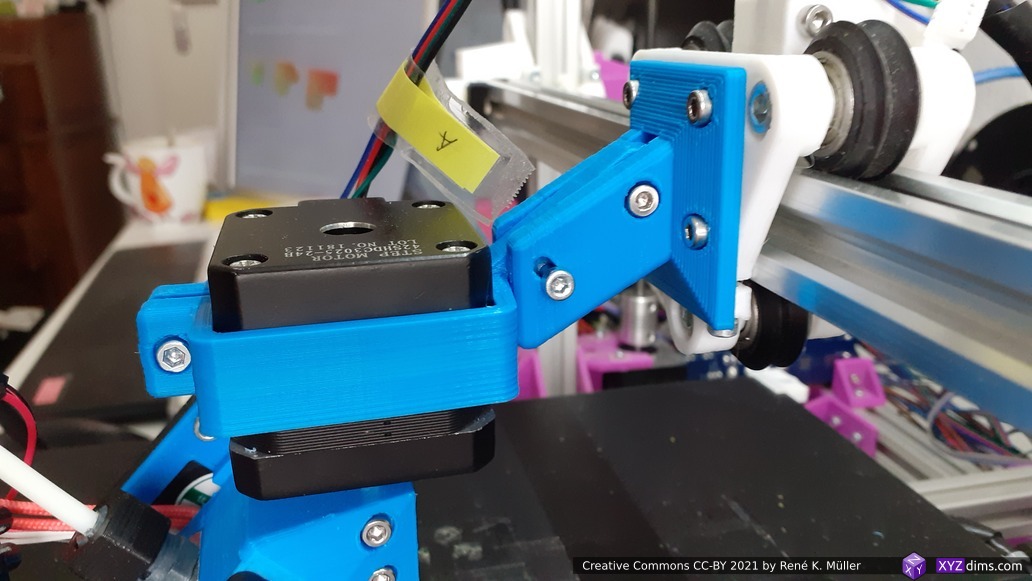
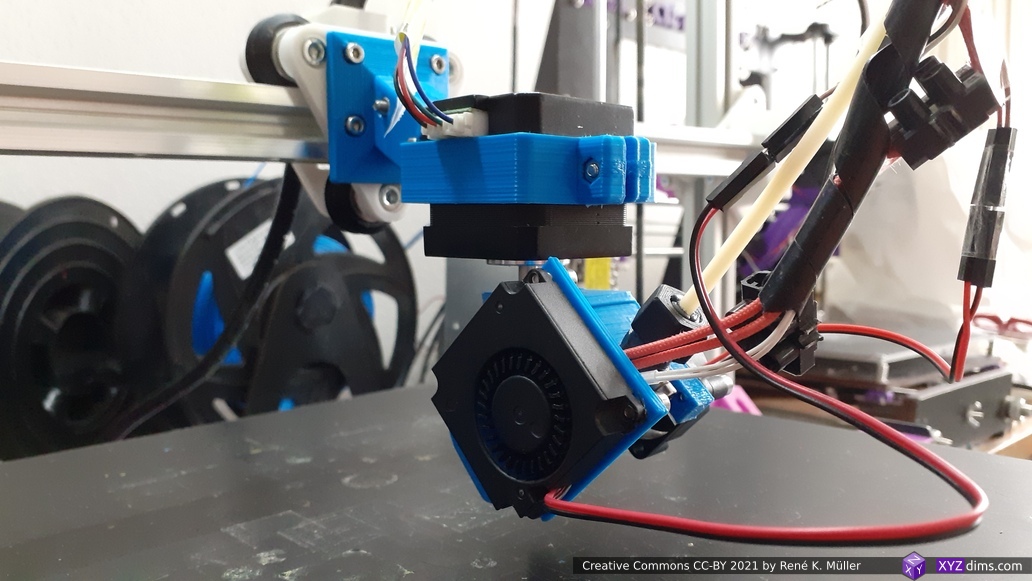
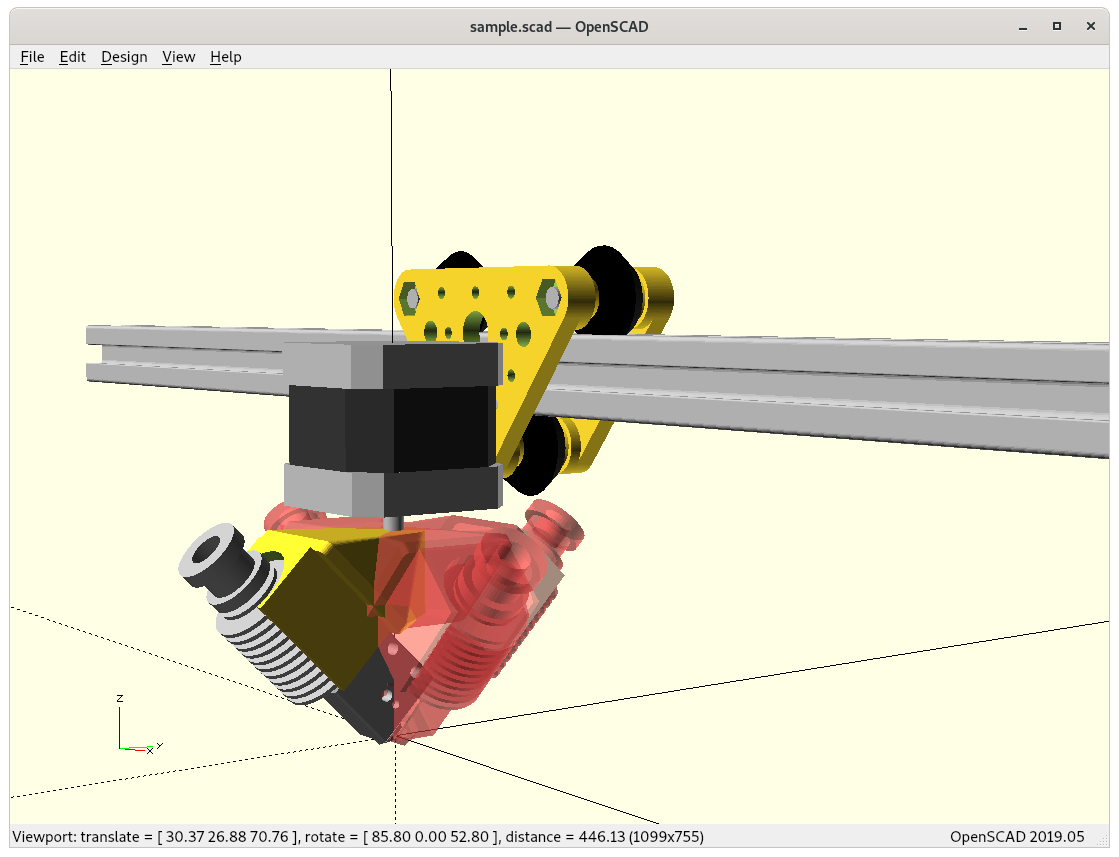
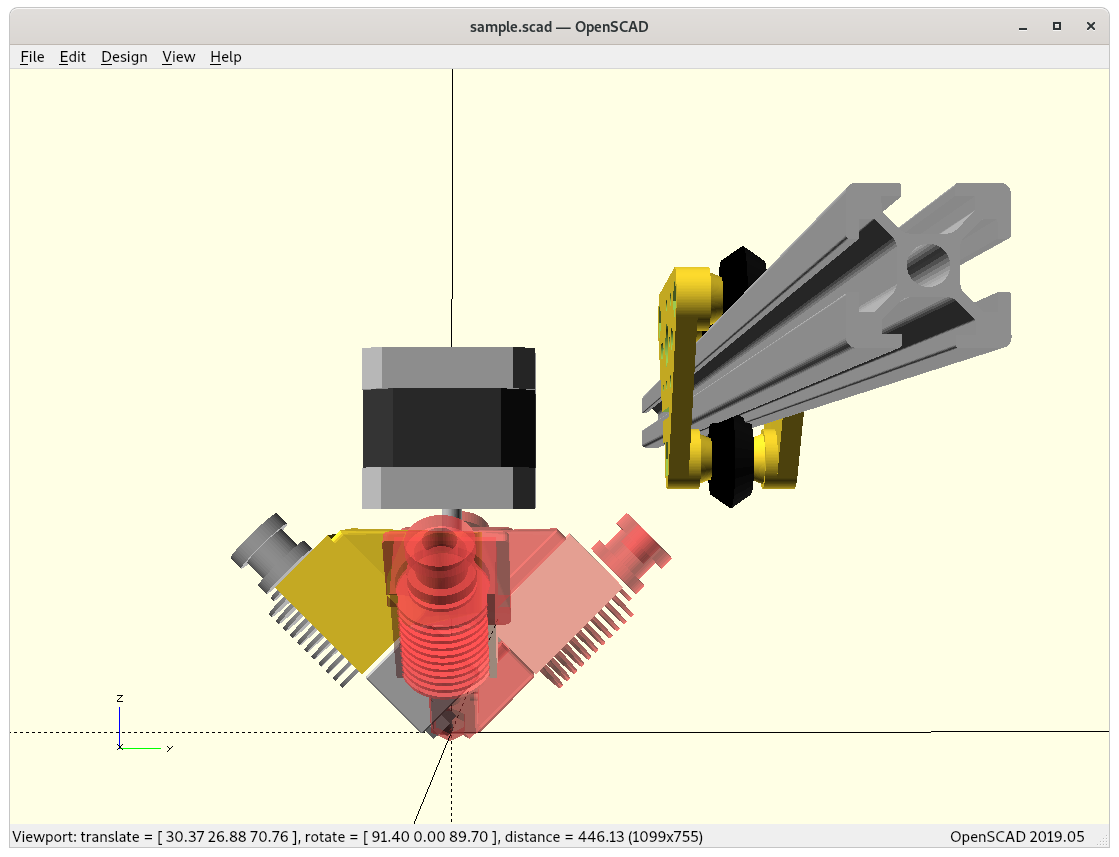
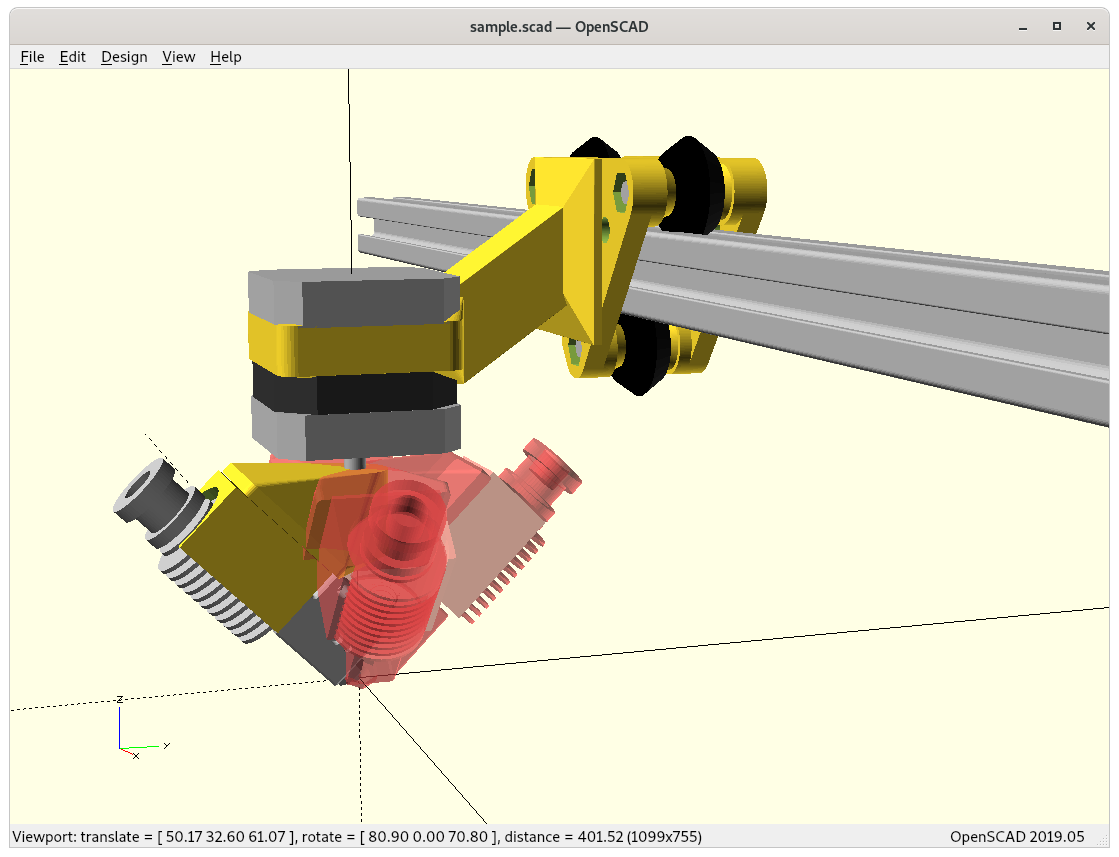
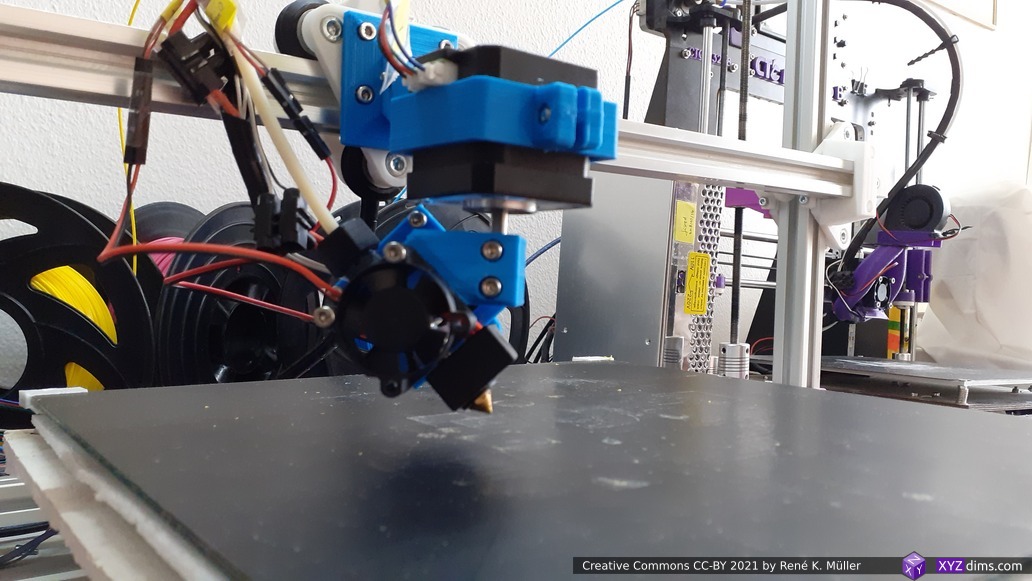
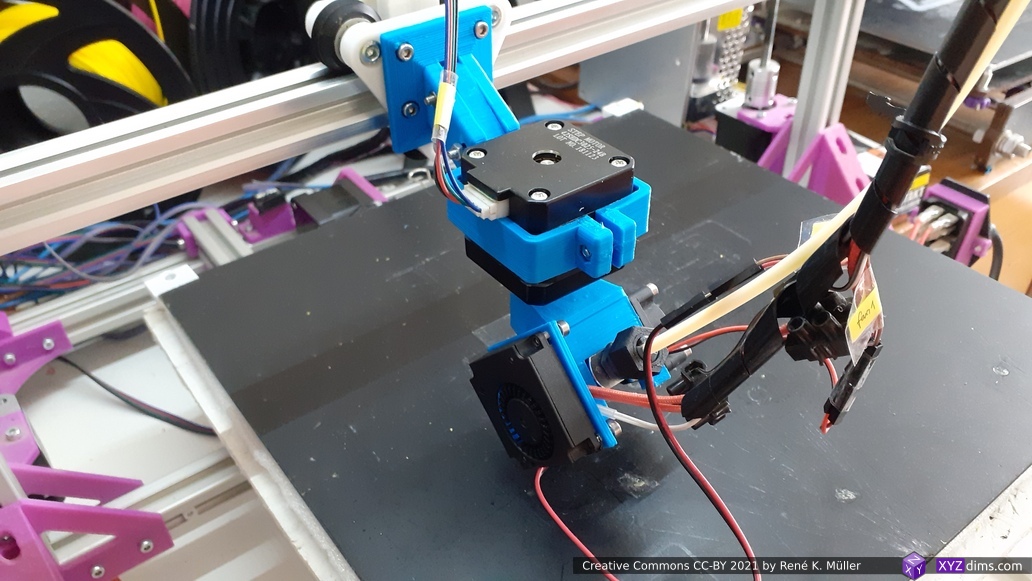
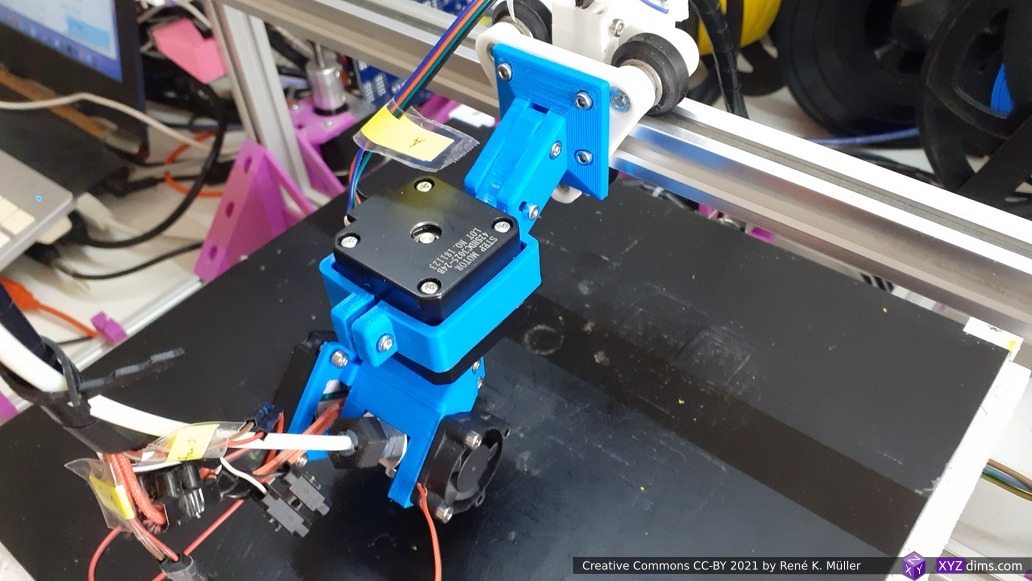
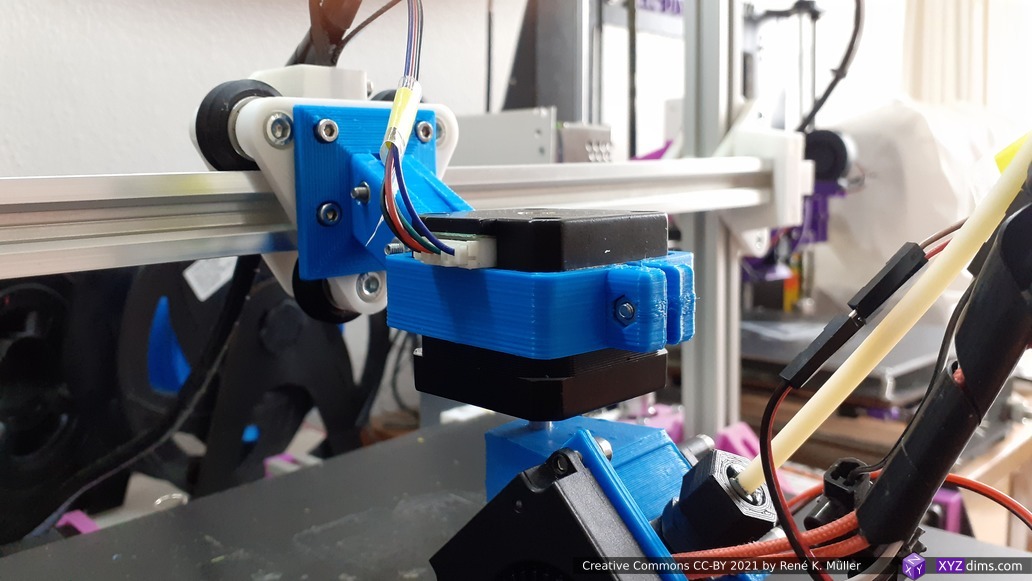
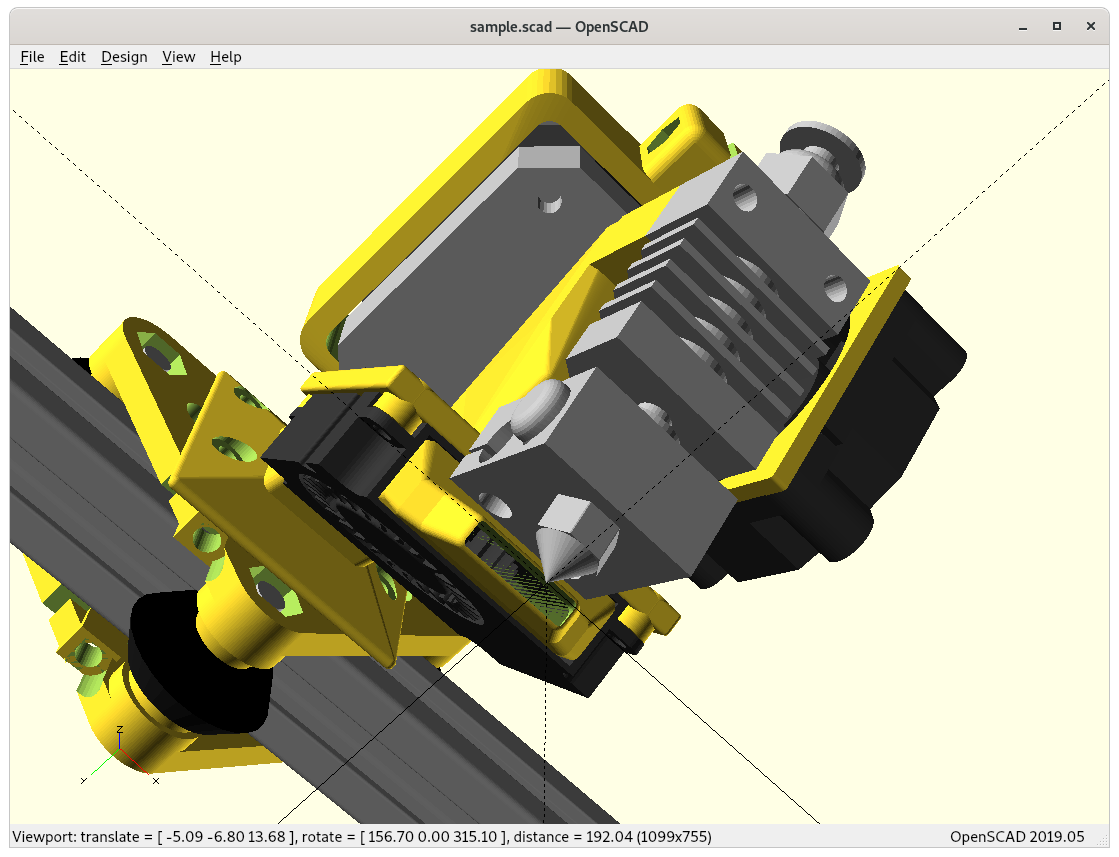
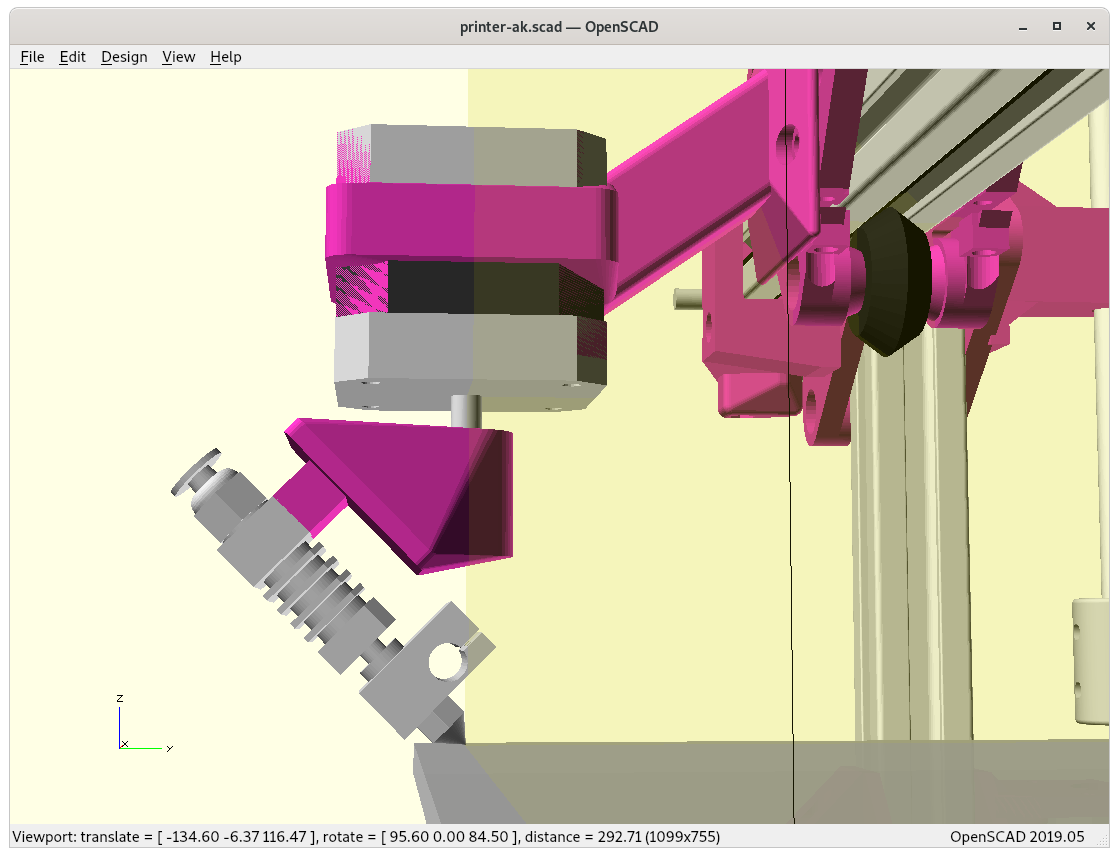
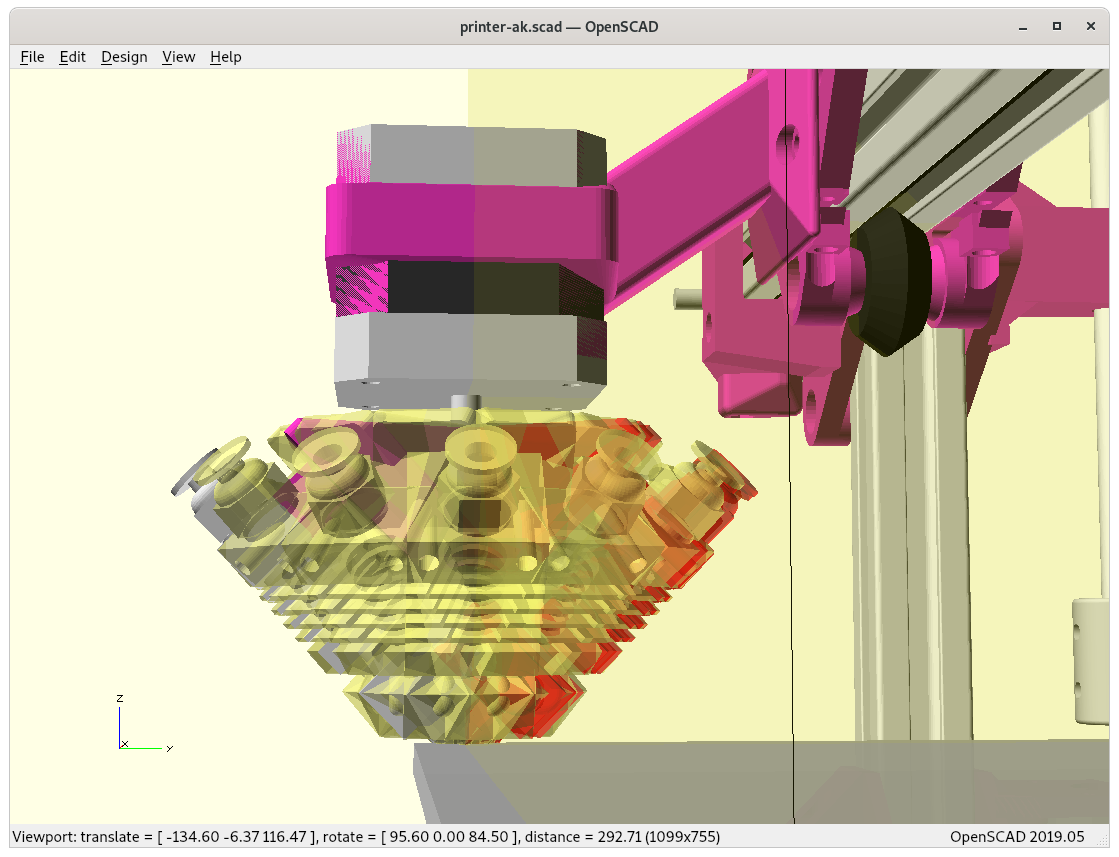
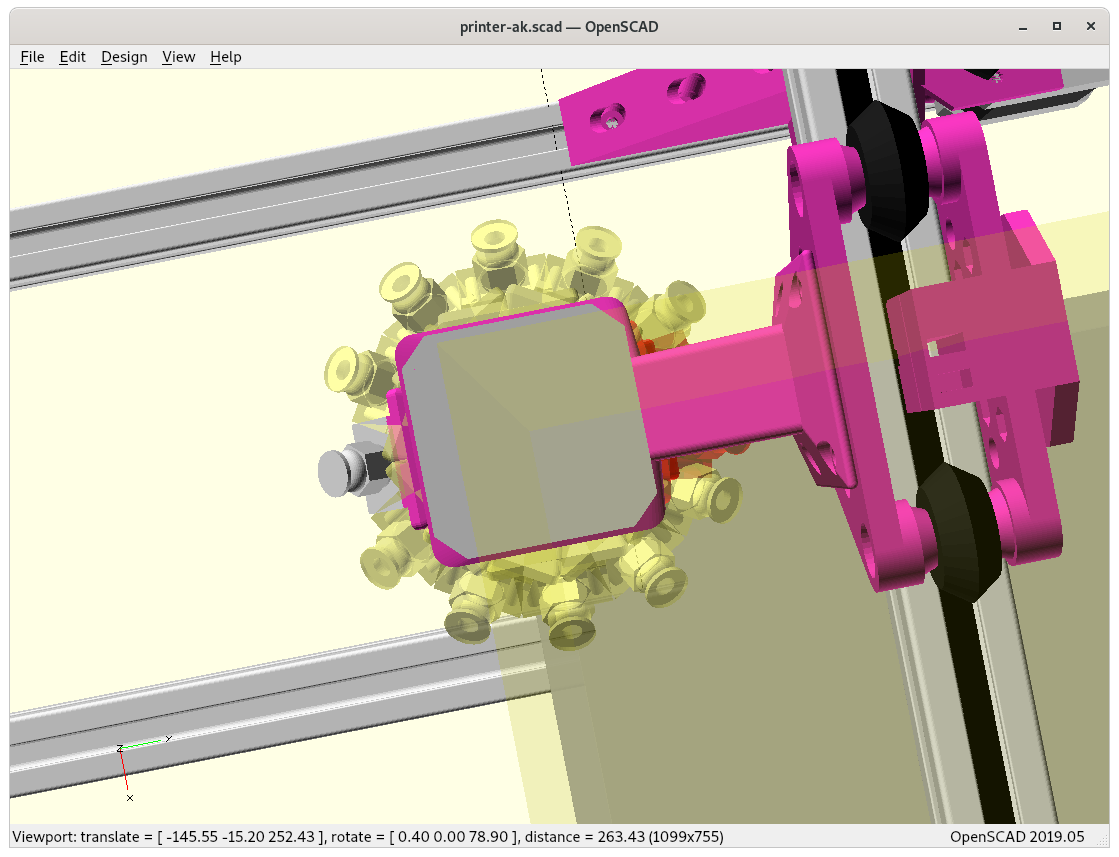
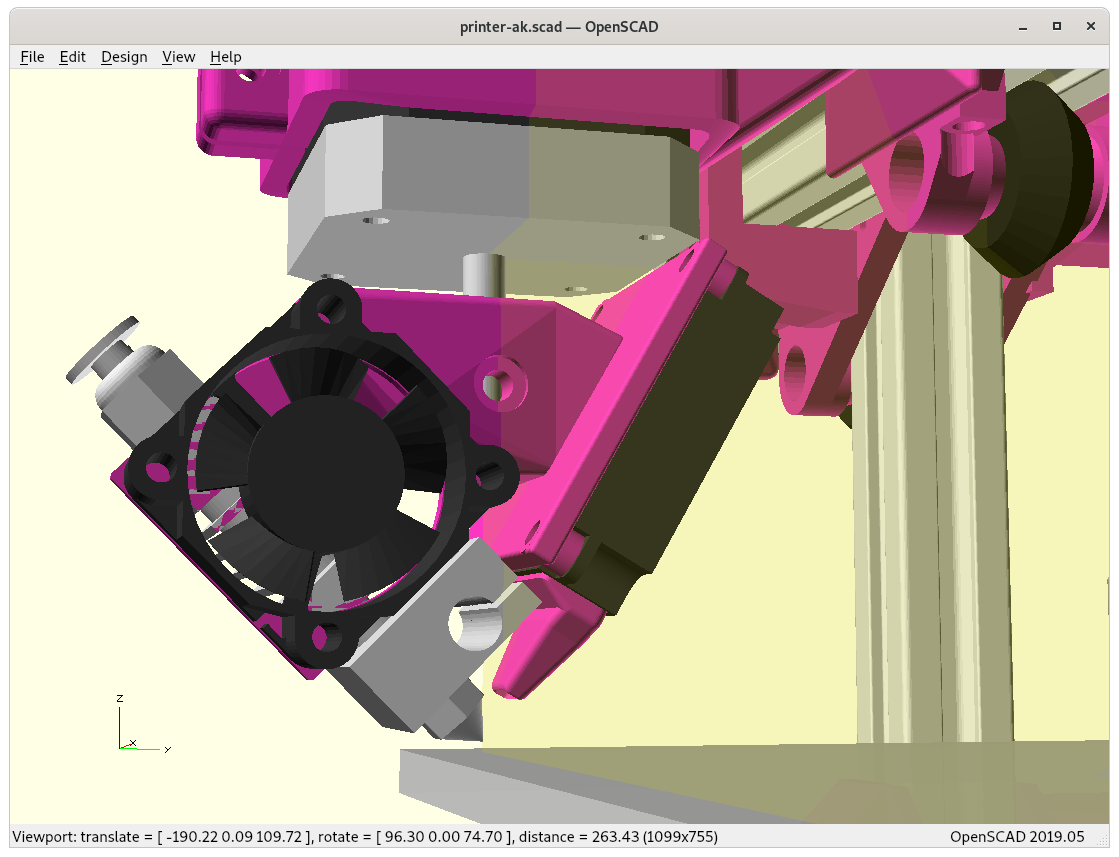
Eventually I took the time to print and assemble my Micro Swiss-based Rotating Tilted Nozzle (RTN):
RTN at default position Zrot=0°Zrot=45°Zrot=90°Zrot=135°Zrot=180°Zrot=-45°Zrot=-90°Zrot=-135°Zrot=-180°heatsink fan & shaft fastenersadjustable arm (to compensate tilt)
First test run revealed:
rotation 170°..180° and -170°..-180° were not reliable with NEMA 17 37mm as skipping steps due the stiffness of PTFE tube with filament – resolvement: increase arm length (away from X carriage down/forward)
partially resolved by limiting A to -170°..170°: M208 A-170 S1 and M208 A170 S0 in config.g of Duet 3 Mini 5+ setup
micro swiss / CR 10 hotend heatblock socket touches the bed (same height as nozzle), fixed due slight tilt from X carriage due weight, newer design allows angle readjustment
single rotation requires refinement by the Slicer4RTN, addressed partially with Slicer4RTN 0.6.0, might require more fine-tuning.
I’m focusing on the hardware-side on the Penta Axis (PAX) 5-Axis printhead and transfer some of the experiences back into the RTN design.
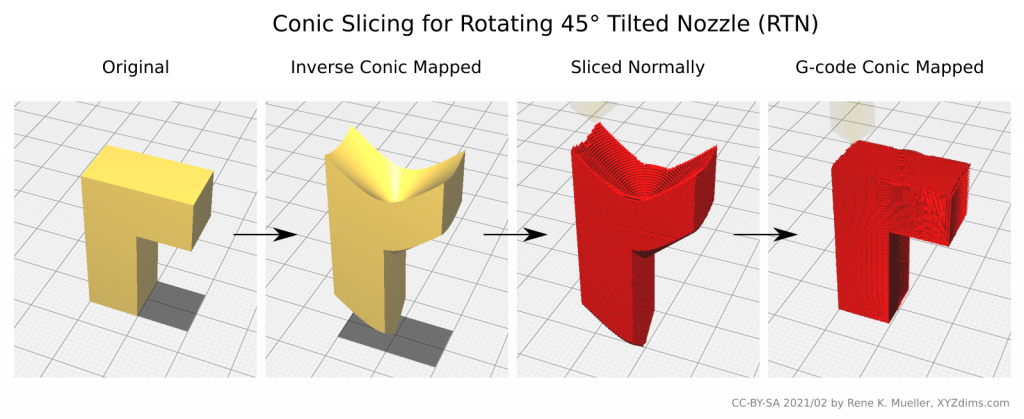
Slicing for Rotating Tilted Nozzle: Conic Slicing
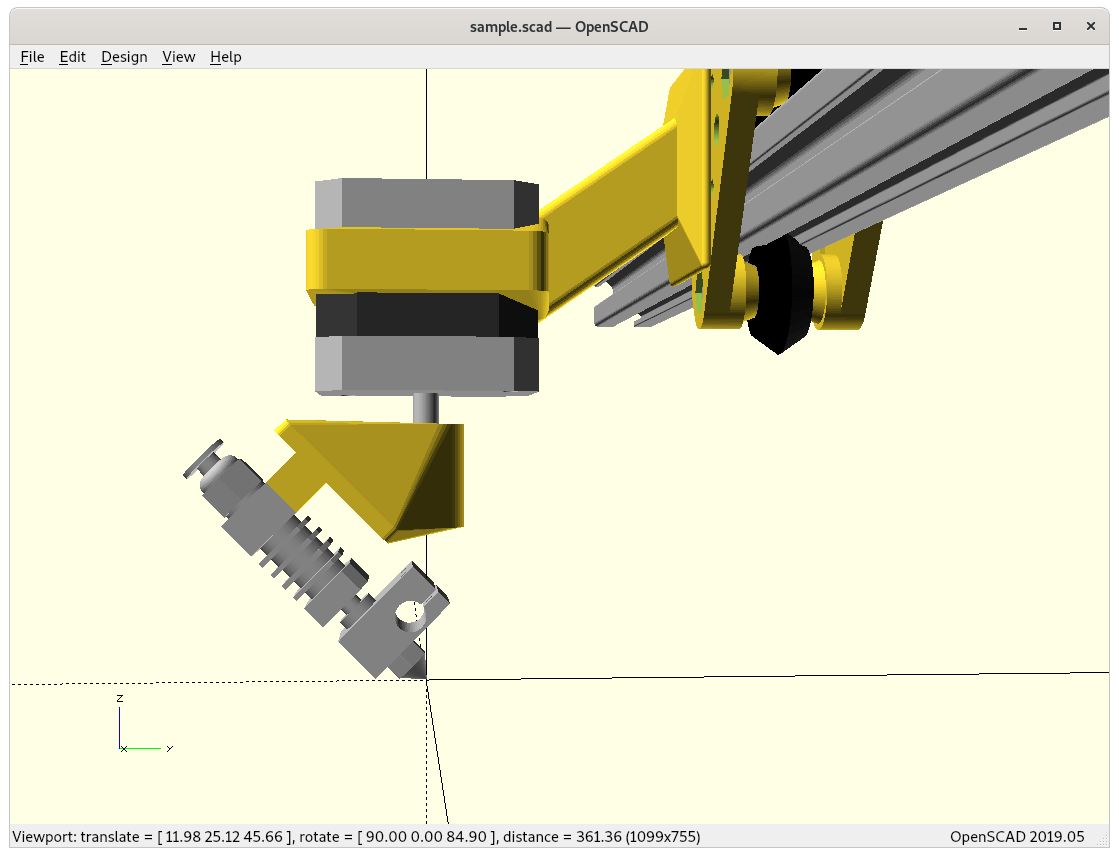
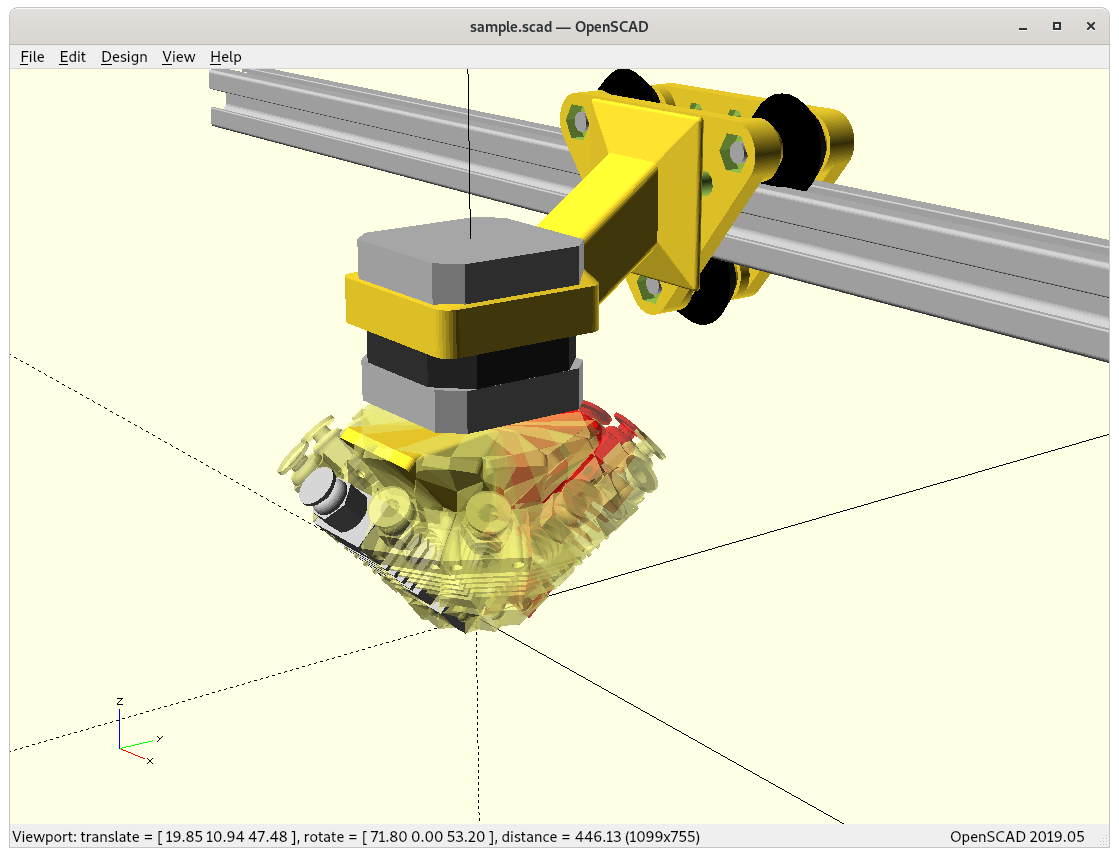
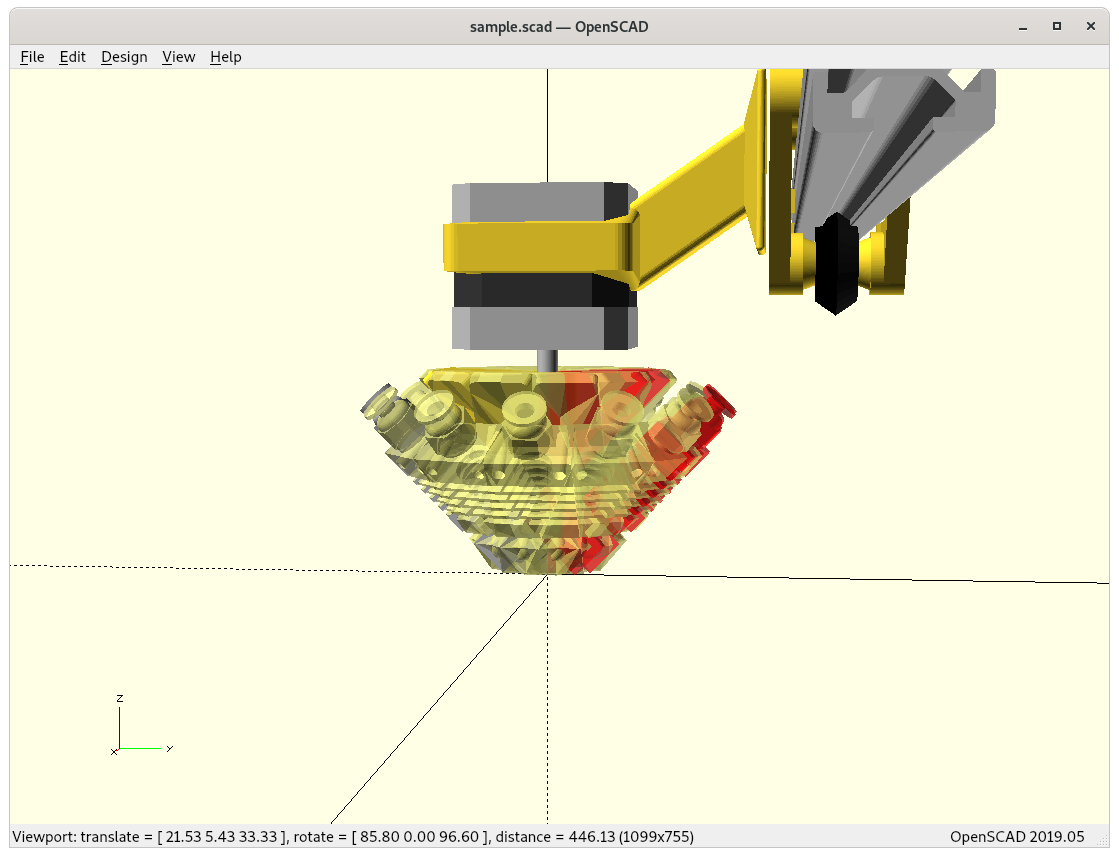
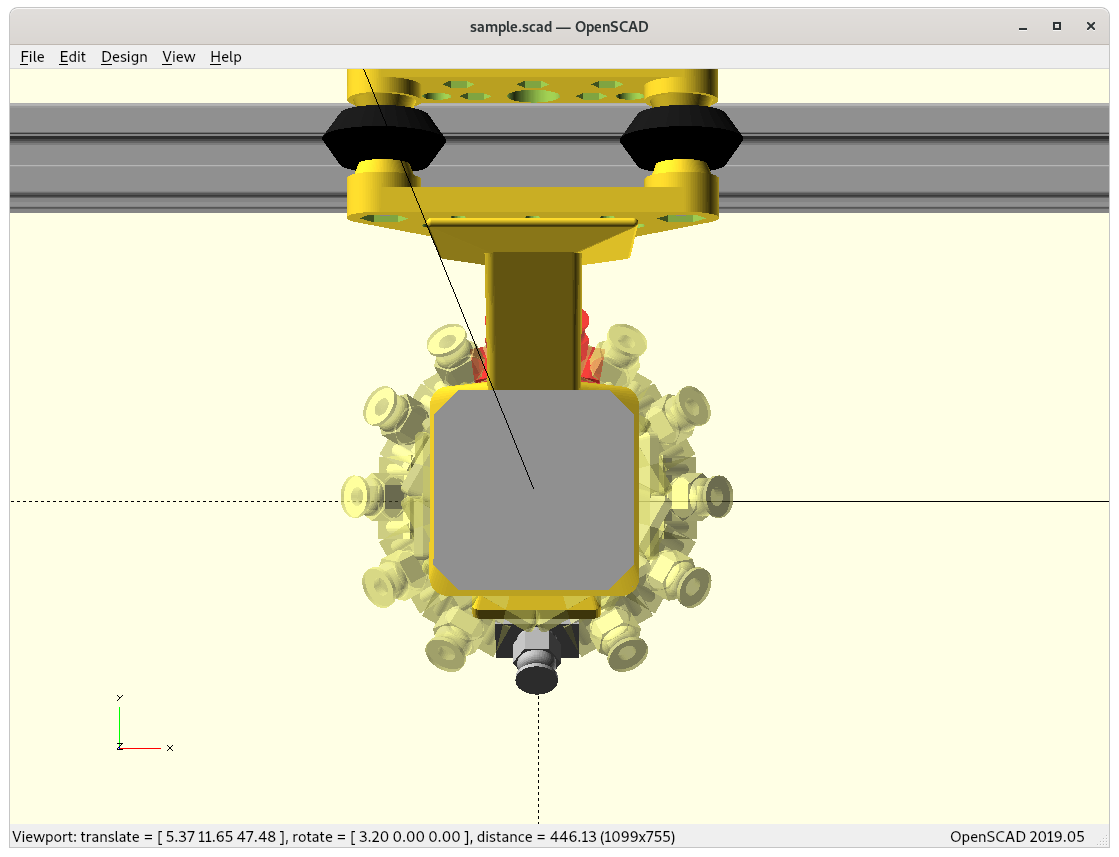
I had to visualize the novel conic slicing approach as mentioned in the article and in the video:
Rotating Tilted Nozzle: Outside Cone – tilted print plane with Z axis rotating leads to conic print planeRotating Tilted Nozzle: Inside Cone – tilted print plane with Z axis rotating leads to conic print plane
f(Z rot, C height, R) ⟹ X, Y, Z
X = sin(Z rot) * R Y = -cos(Z rot) * R Z = C height / sqrt(2)
Z rot = atan2( -Y, X ) R = sqrt( X*X + Y*Y ) C height = Z * sqrt(2)
A single conic slice is covered by Z rot, C height and R, whereas slices are separated by increasing Z offset to C height, forming conic slices on top of each other:
Let’s inspect the motion of a single layer: it’s curved – obviously – in X, Y and Z – this means, the Z axis has way more motion than in cartesian XZ Prusa-Mendel setup where the Z axis only changes once a layer is finished, here with cone-slicing every trace or track all traditional 3 axis are in motion, plus the 4th – the tangent on that conic trace.
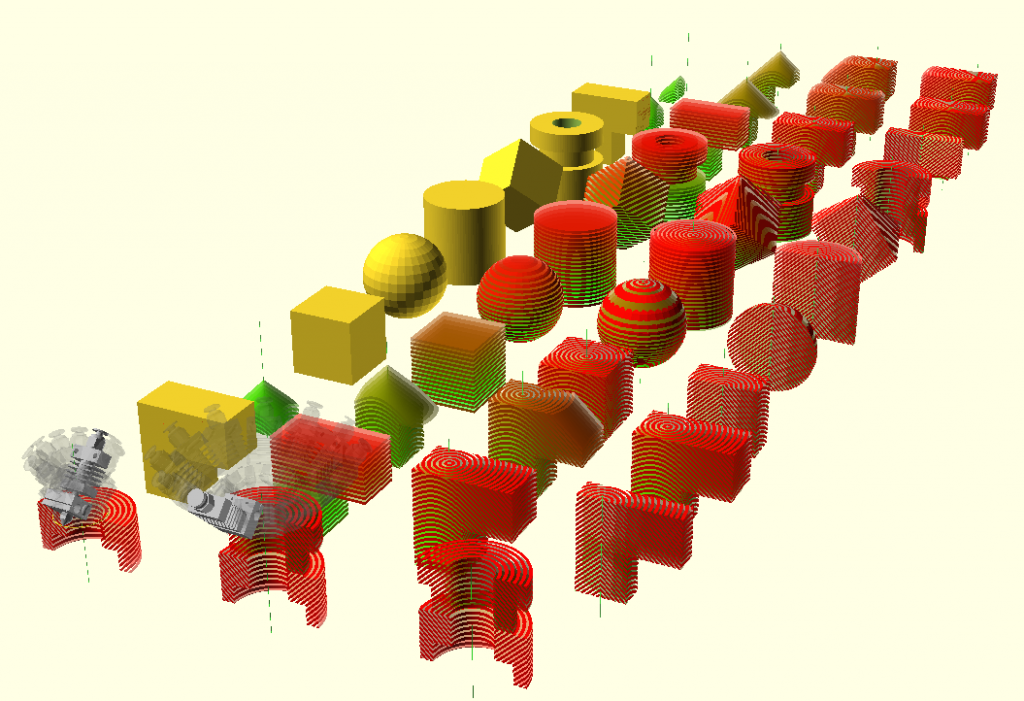
Planar vs Conic LayersMultiple solids sliced planar and in conic manner
The 45° tilted printhead allows three print modes:
non-rotation nozzle with planar Z layers (with ordinary slicer), acts like belt-printer in one direction: overhangs in one direction without support
rotation nozzle with planar Z layers (requires dedicated slicer), might support near 90° overhangs of a certain length in all X/Y plane directions as well – but needs to be tested
rotation nozzle with conic Z layers (requires dedicated slicer or pre- and post-processing while using ordinary slicers)
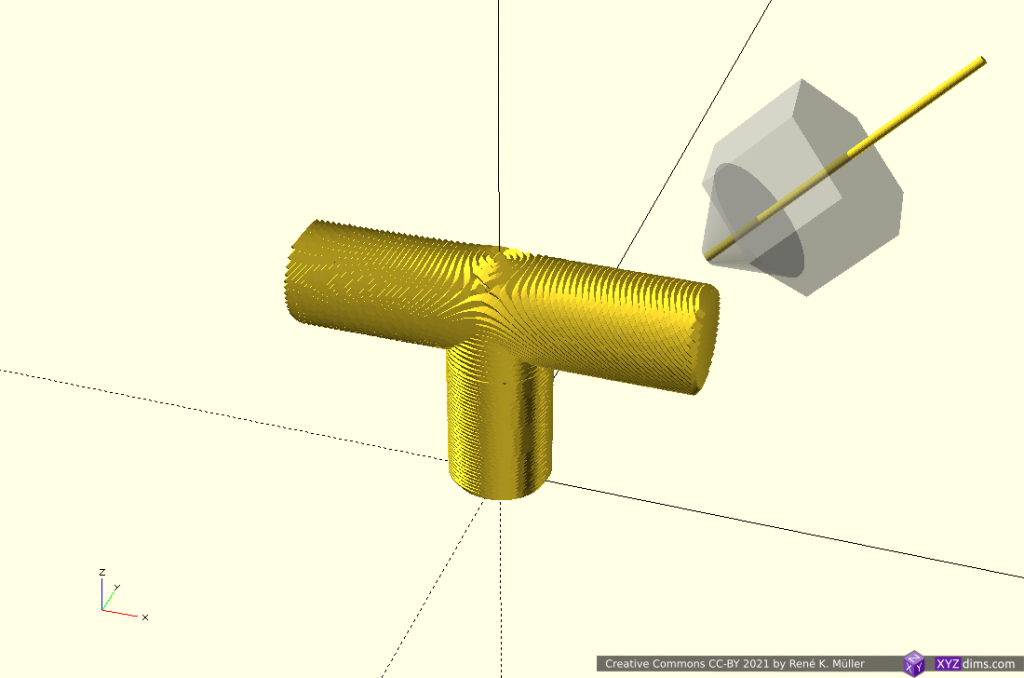
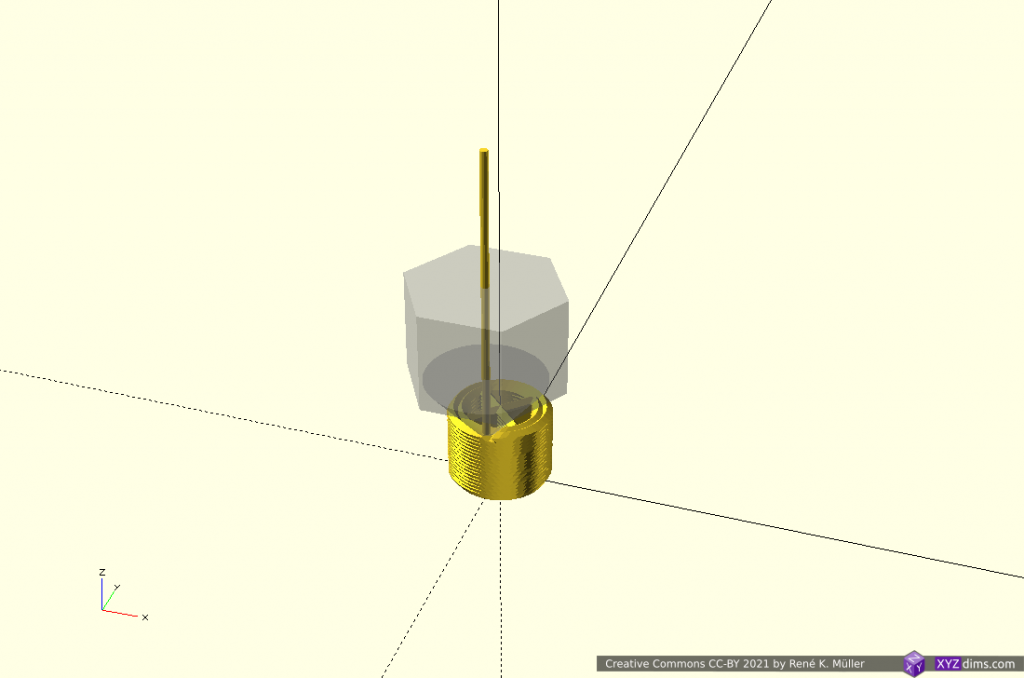
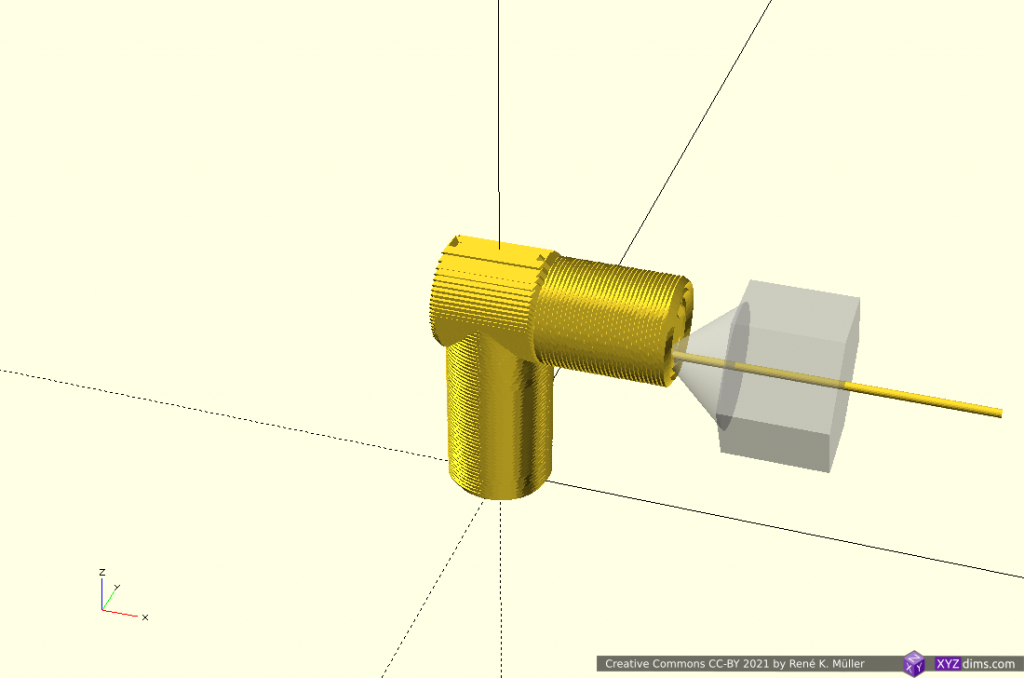
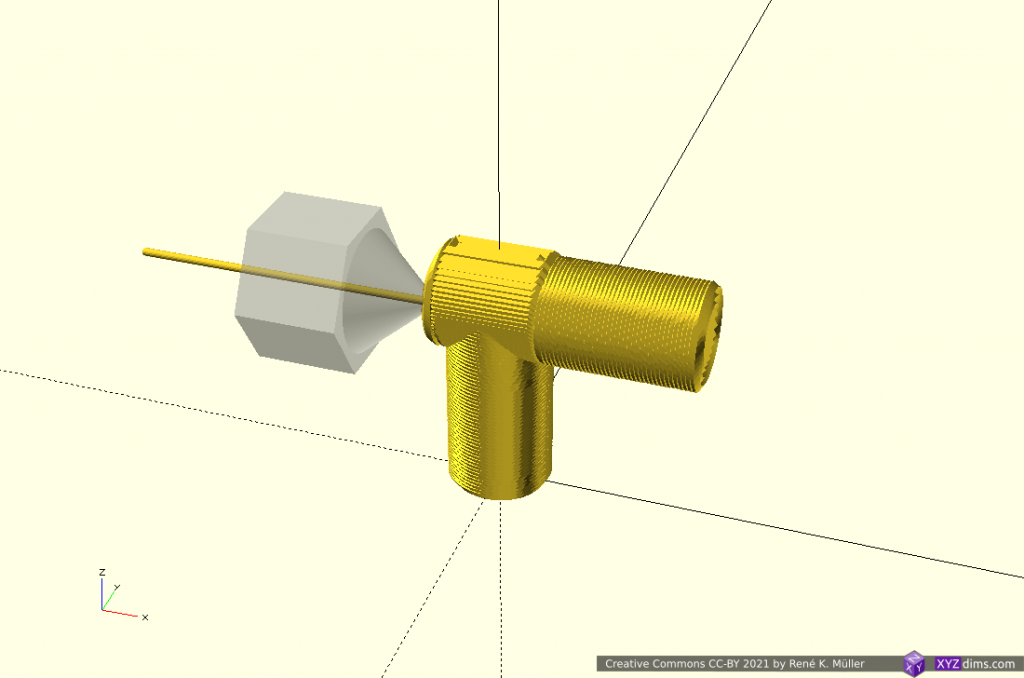
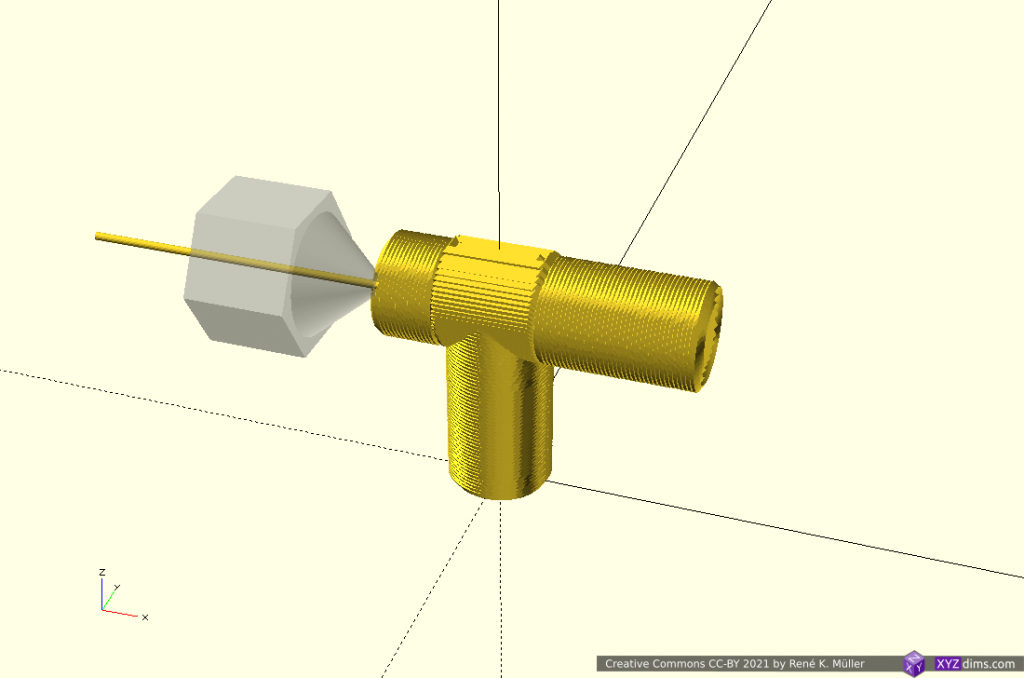
And by choosing the position of the “axis” of the conic slicing within the model and the cone direction matters then as well:
T-piece slicedT-piece with different axis centers: axis center determines printable overhangs or not (2nd row isn’t printable that way)T-piece with different axis centers: axis center determines printable overhangs or not(2nd row isn’t printable that way)overhangs toward and away from axis
The last piece with inside and outside looking overhangs requires a switch of nozzle direction, e.g by default the sliced cones are ordered ▲ (outside-in or outside-cones) where outward overhangs work, but for inward overhangs the opposite direction of the nozzle looking outside is required ▼(inside-out or inside-cones), like this piece:
Vertical splitted: bottom half with overhang toward cone axis Inside Cone print, upper half with overhang away from cone axis Outside Cone printing, all without supportVertical splitted: bottom half with overhang toward cone axis Inside Cone print, upper half with overhang away from cone axis Outside Cone printing, all without support
So the slicing software needs to recognize this, and the sliced cones switched either ▼ or ▲ according Z level.
These aspects opens a whole new range of considerations how to orient a piece and where to position the newly introduced slicing axis, and which kind of cones need to laid at which level.
Issues to Resolve
Heatsink fan mount: needs to be mounted for both variants, Micro Swiss and E3D Volcano ideally
Part cooler:
have the part cooler rotate on Z axis as well? yes for now
using a flexible pipe to blow air near the nozzle instead
heatsink fanwith part coolerpart cooler nozzleensuring the part cooler doesn’t collide/intersect with conic slice
Z rotation calibration:
alike with X or Y stop, but a trigger rotating from one direction only and then set a angle offset
Z rotation motor mount adaptable for different kind of printheads
keep it modular
ensure the nozzle end is centered (allow simple center calibration)
Properly document design and features of Rotating Tilted Nozzle as there isn’t much detail information available
dedicate slicer for conic slicing, e.g. adapt Mandoline Py
Considerations
Pros
conic layers: printing 90° overhangs without support, given some conditions are met:
overhangs must be horizontally or vertically rotational symmetric and aligned with the cone axis to switch from outside to inside cone printing or vice-versa (to do: more use cases explored and documented)
conic layers: stronger pieces as layers cross X, Y and Z in non-planar manner, mechanical forces distribute further than just planar layers
planar layers / rotating nozzle: perhaps close to 90° overhangs (speculative) requires new overhang algorithms in slicer
conic layers: more things to consider (preferably recognized by the slicing software):
overhangs must be horizontally or vertically rotational symmetric and align with cone axis to take advantage of it (complex compartmentalizing of different cone-direction per overhang and newly introduced seams between those)
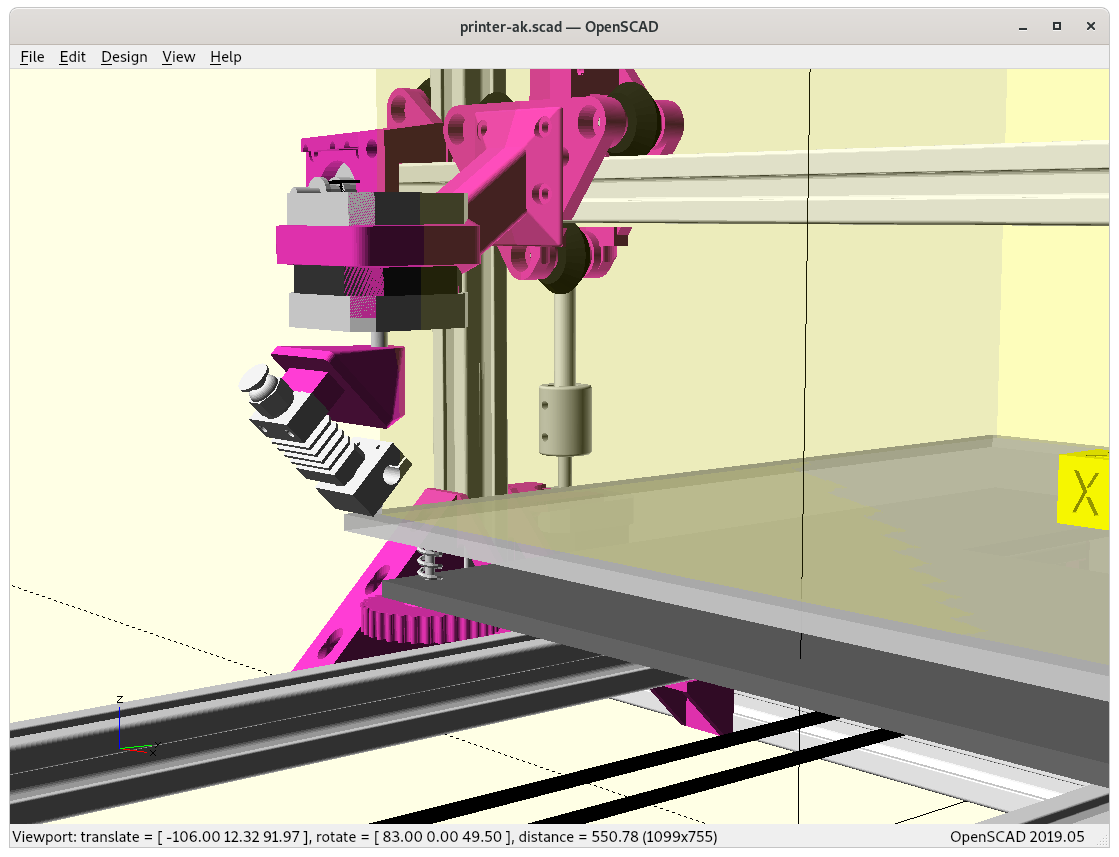
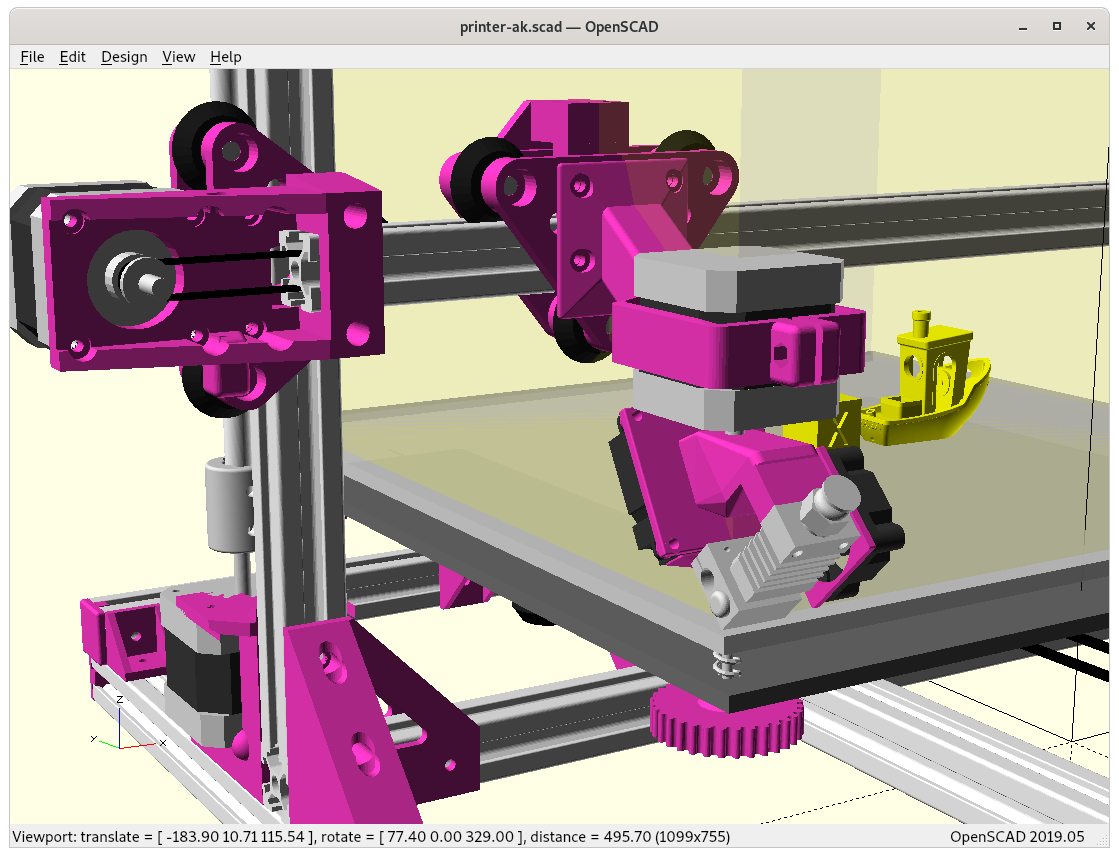
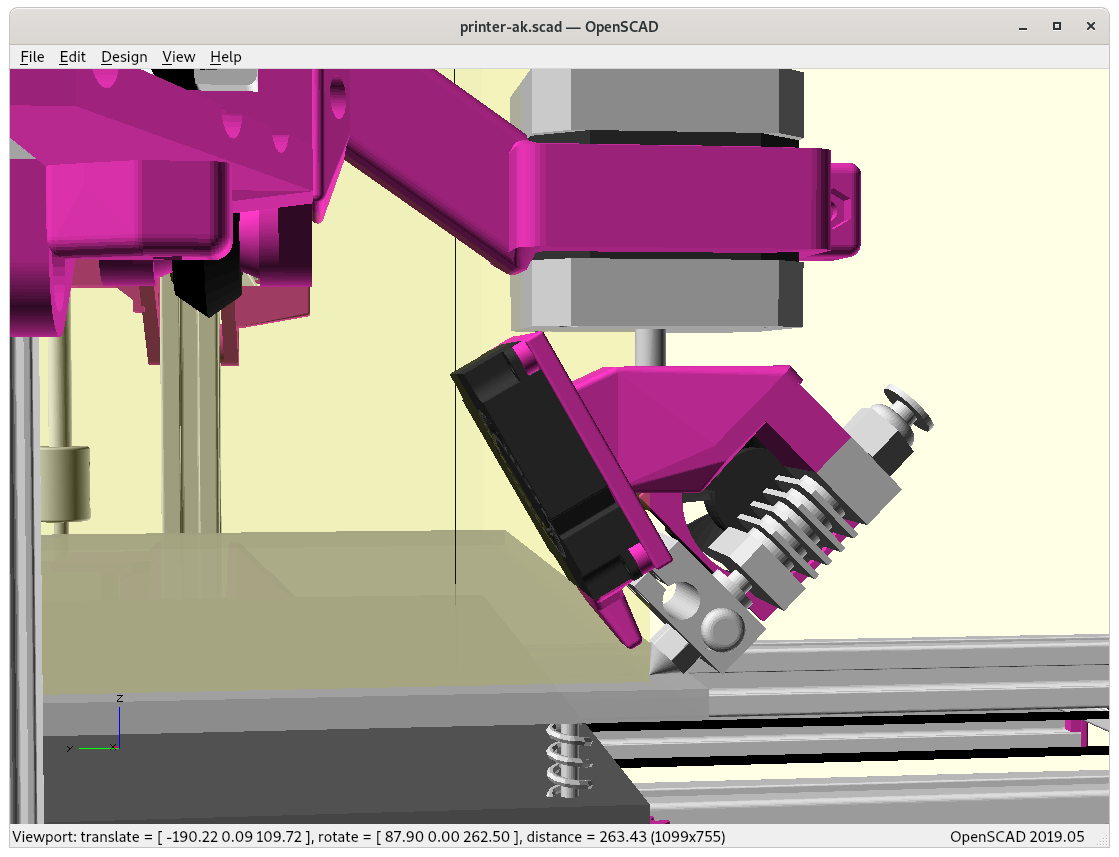
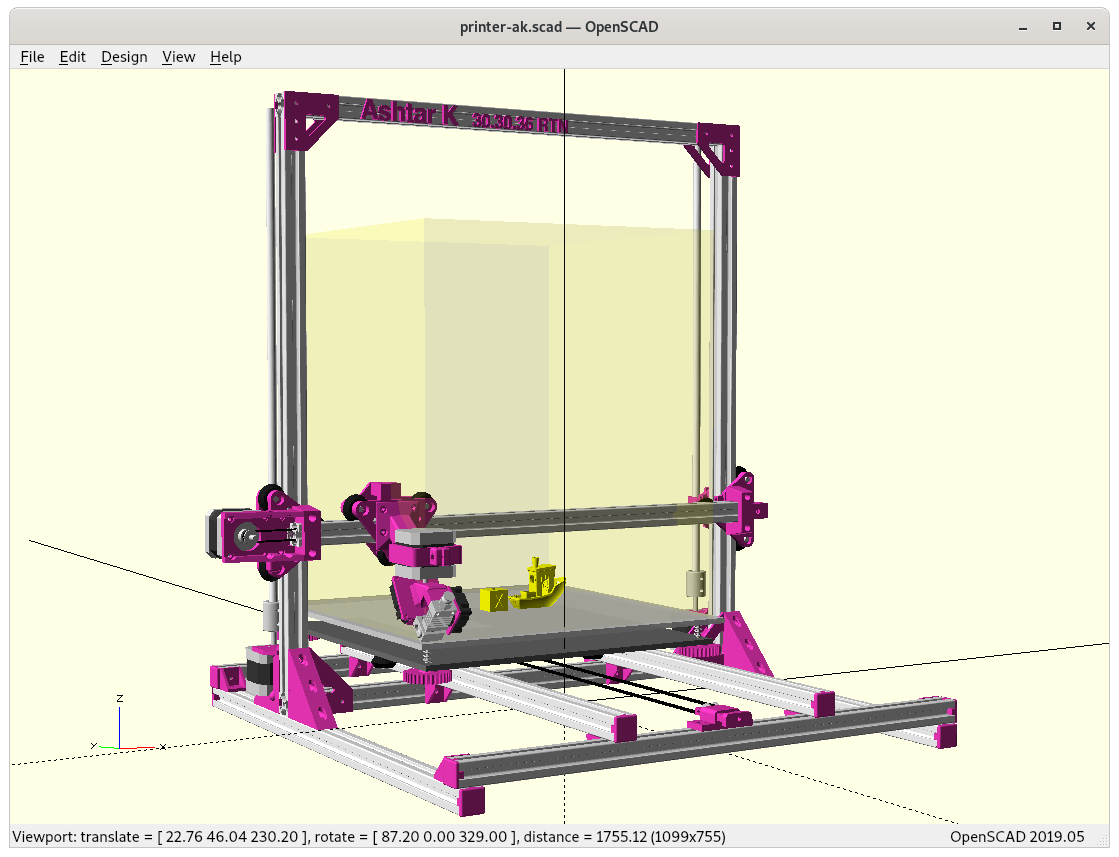
Ashtar K with Rotating Tilted Nozzle (RTN)
The additional Y offset is about 20mm, and losing apprx. 50 mm in Z build volume in its current form:
at X=0, Y=0, Z=0, Zrot=0 positionat 0,0,0,0 positionadding heatsink fan & part coolerAshtar K RTNAshtar K RTN (animated)Ashtar K RTN printing conic sliced overhang model (animated)
Fallback Print Horizontal Slices
Some parts may not require conic slices, e.g. introducing new unprintable overhangs which in horizontal slices would not exist, so a simple way to print traditional sliced models is by adding a proper rotation angle (e.g. G-code A..) so the nozzle extrudes nicely, something like:
Horizontally sliced 20mm cube printing with enhanced G-code with rtnenhancer
I wrote a small script called rtnenhancer which converts existing G-code to enhanced G-code.