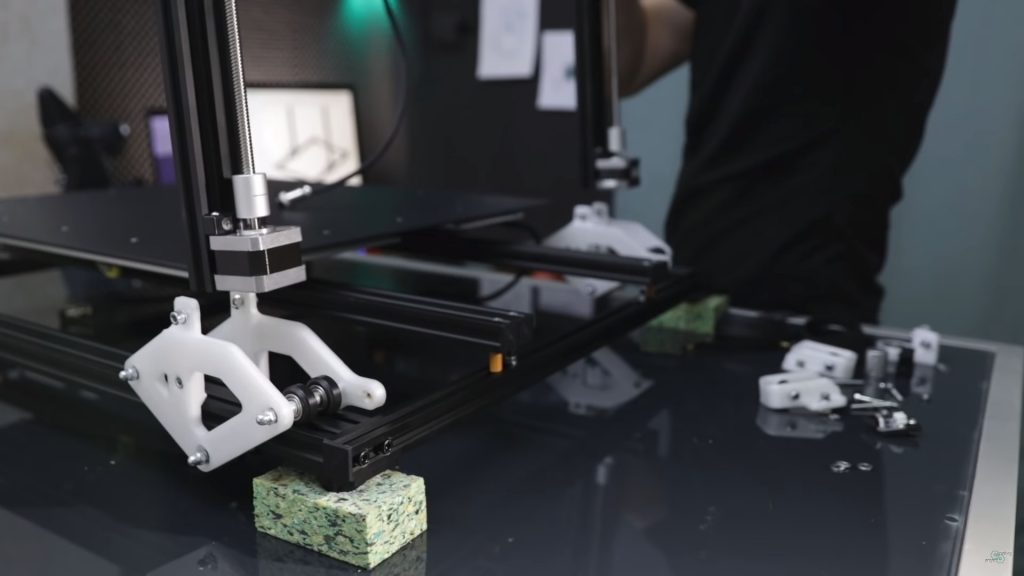
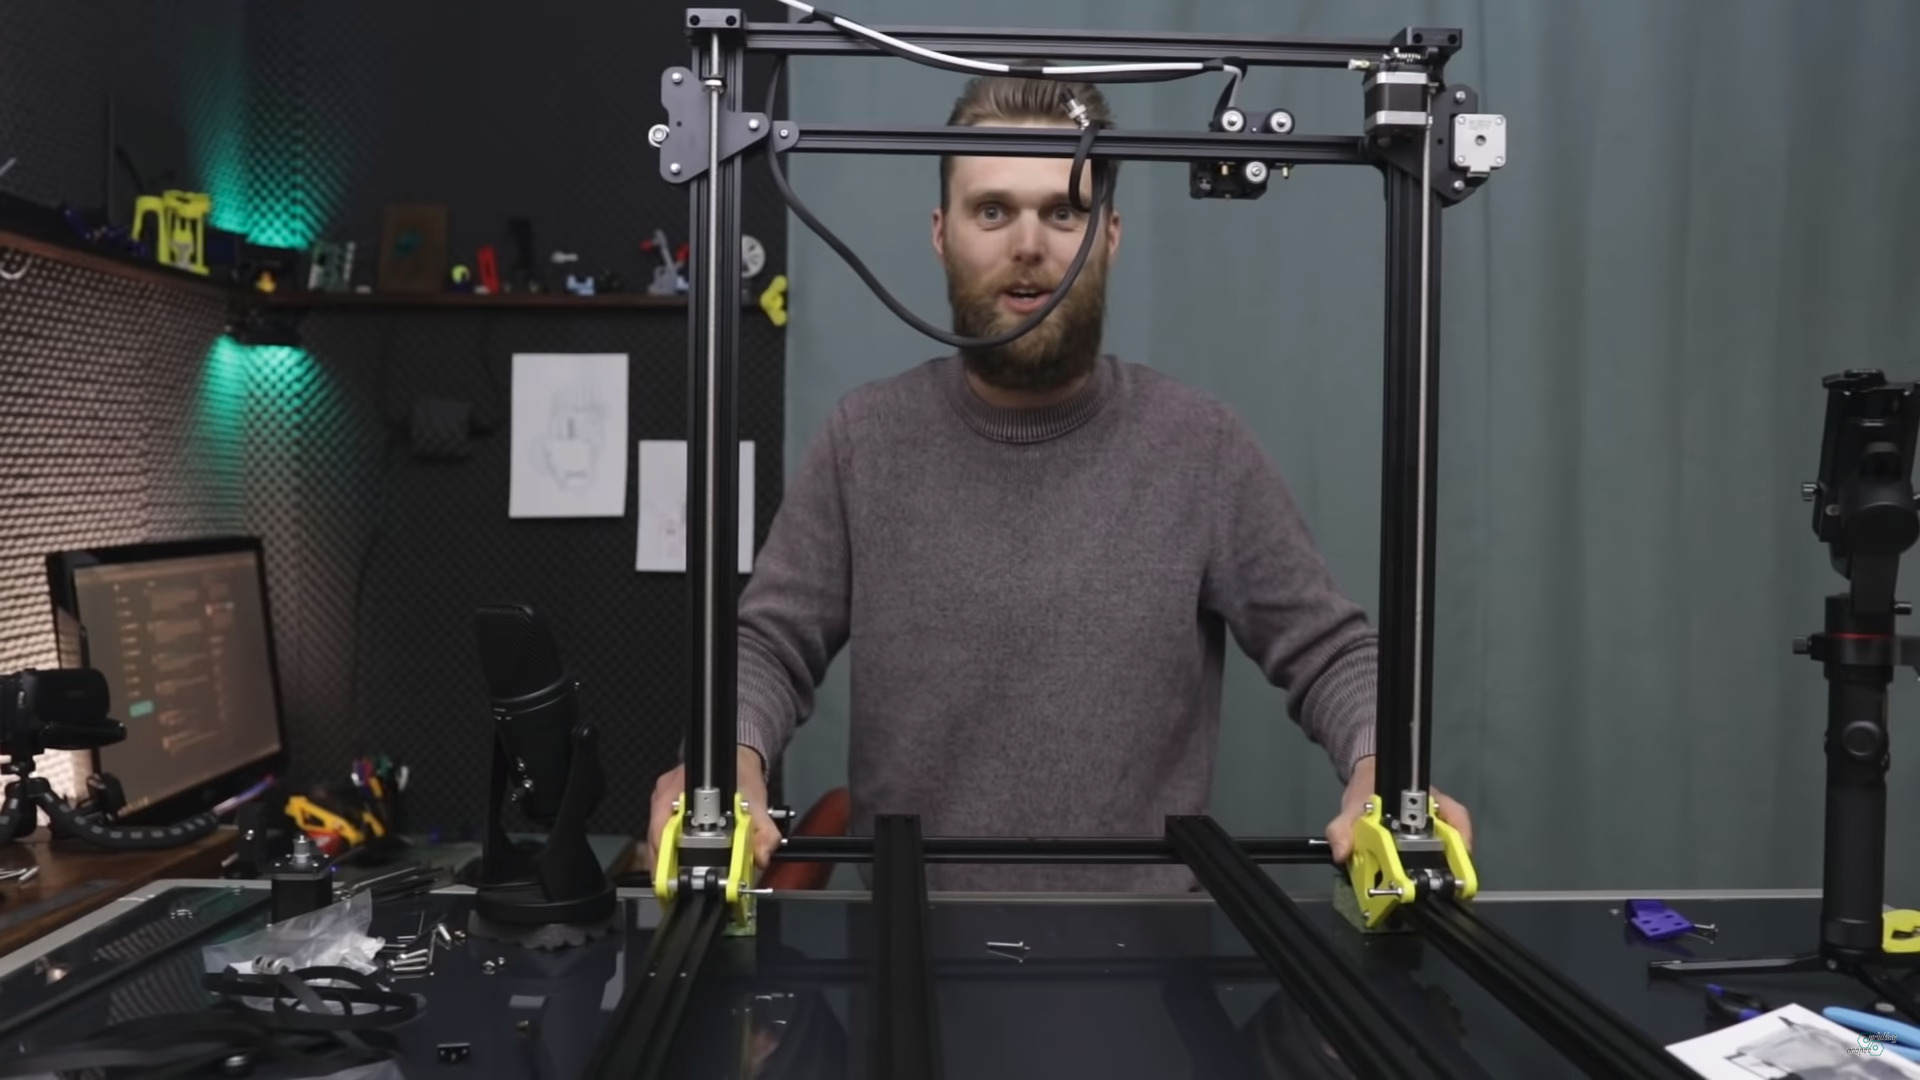
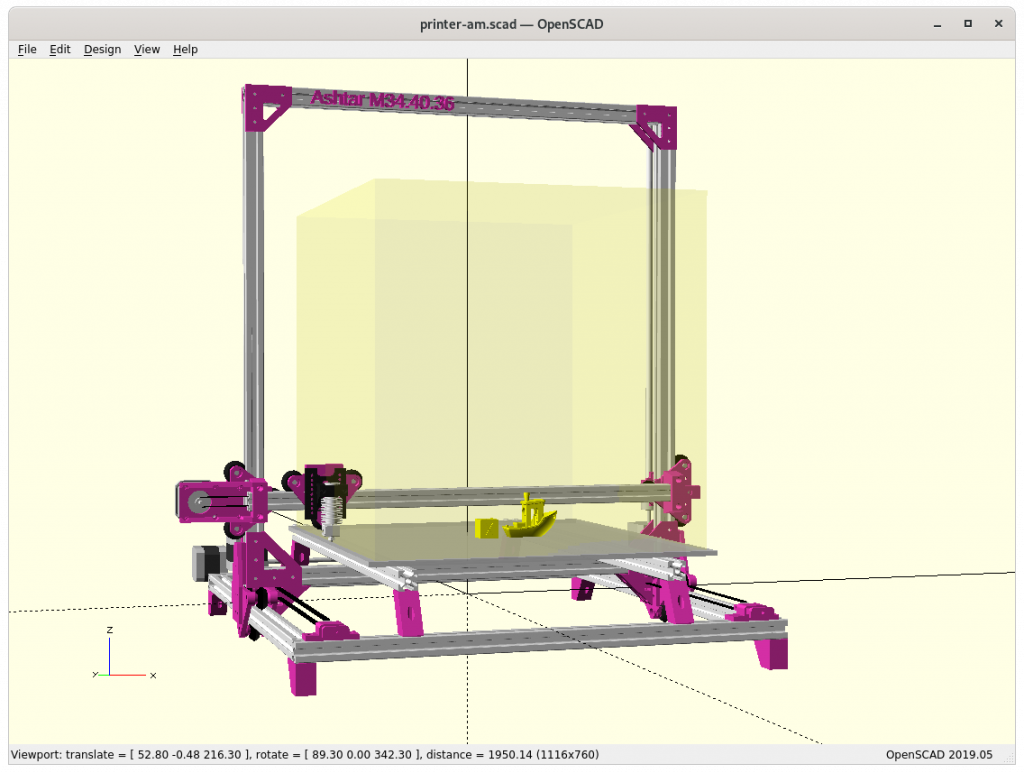
In April 2020 Jon Schone (@properprinting) showed a “Moving Portal” mod for his CR-10 – a Prusa i3 derivative – and I thought to adapt his approach as “Ashtar M” as moving XZ frame or moving gantry in CNC terms.
On a second thought, this approach makes only sense with larger beds, as the bed weight should exceed the weight of XZ frame and X carriage:
weight(XZ frame + X carriage) < weight(bed)
and as I compose my Ashtar 3D printer series with alu extrusions (beams) I can say:
weight(XZ frame) = beam X * 2 + beam Z * 2 + NEMA17 * 2 weight(bed) = X * Y
and it becomes here clear, the bed weight grows X * Y whereas XZ frame only (X + Z) * 2, but also 2* NEMA17 motors of the Z axis are part of the XZ frame.
Moving Portal / Gantry
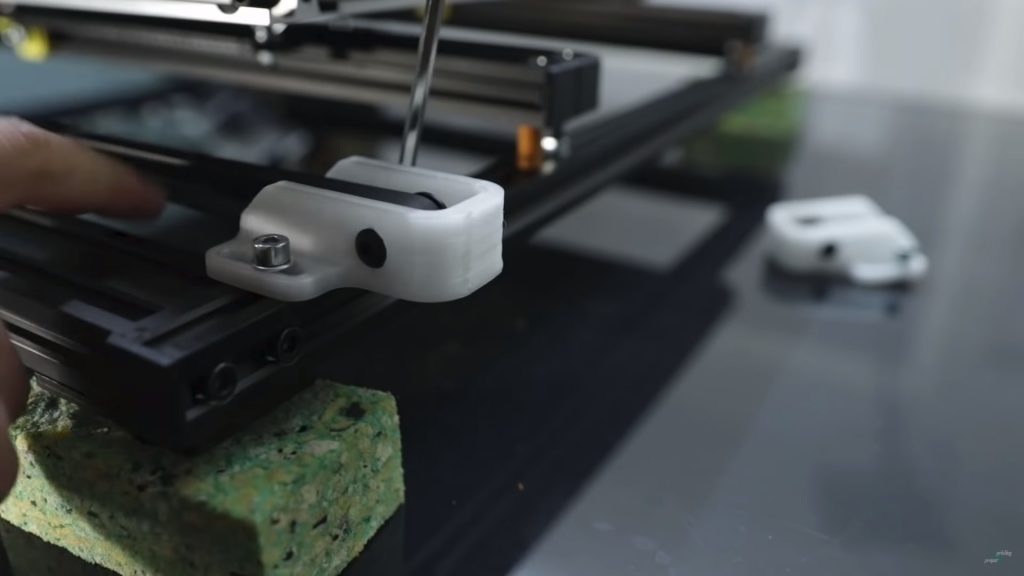
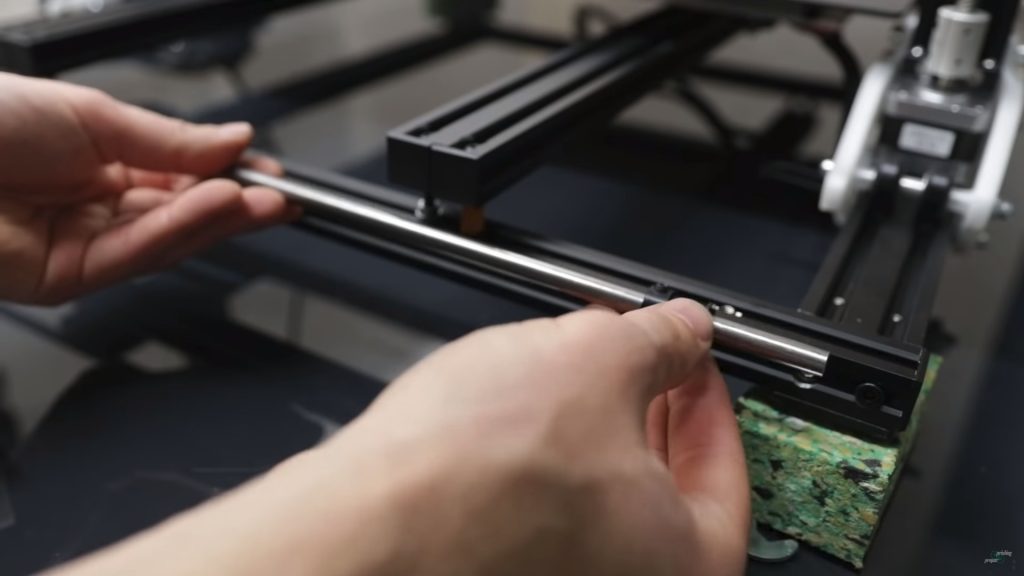
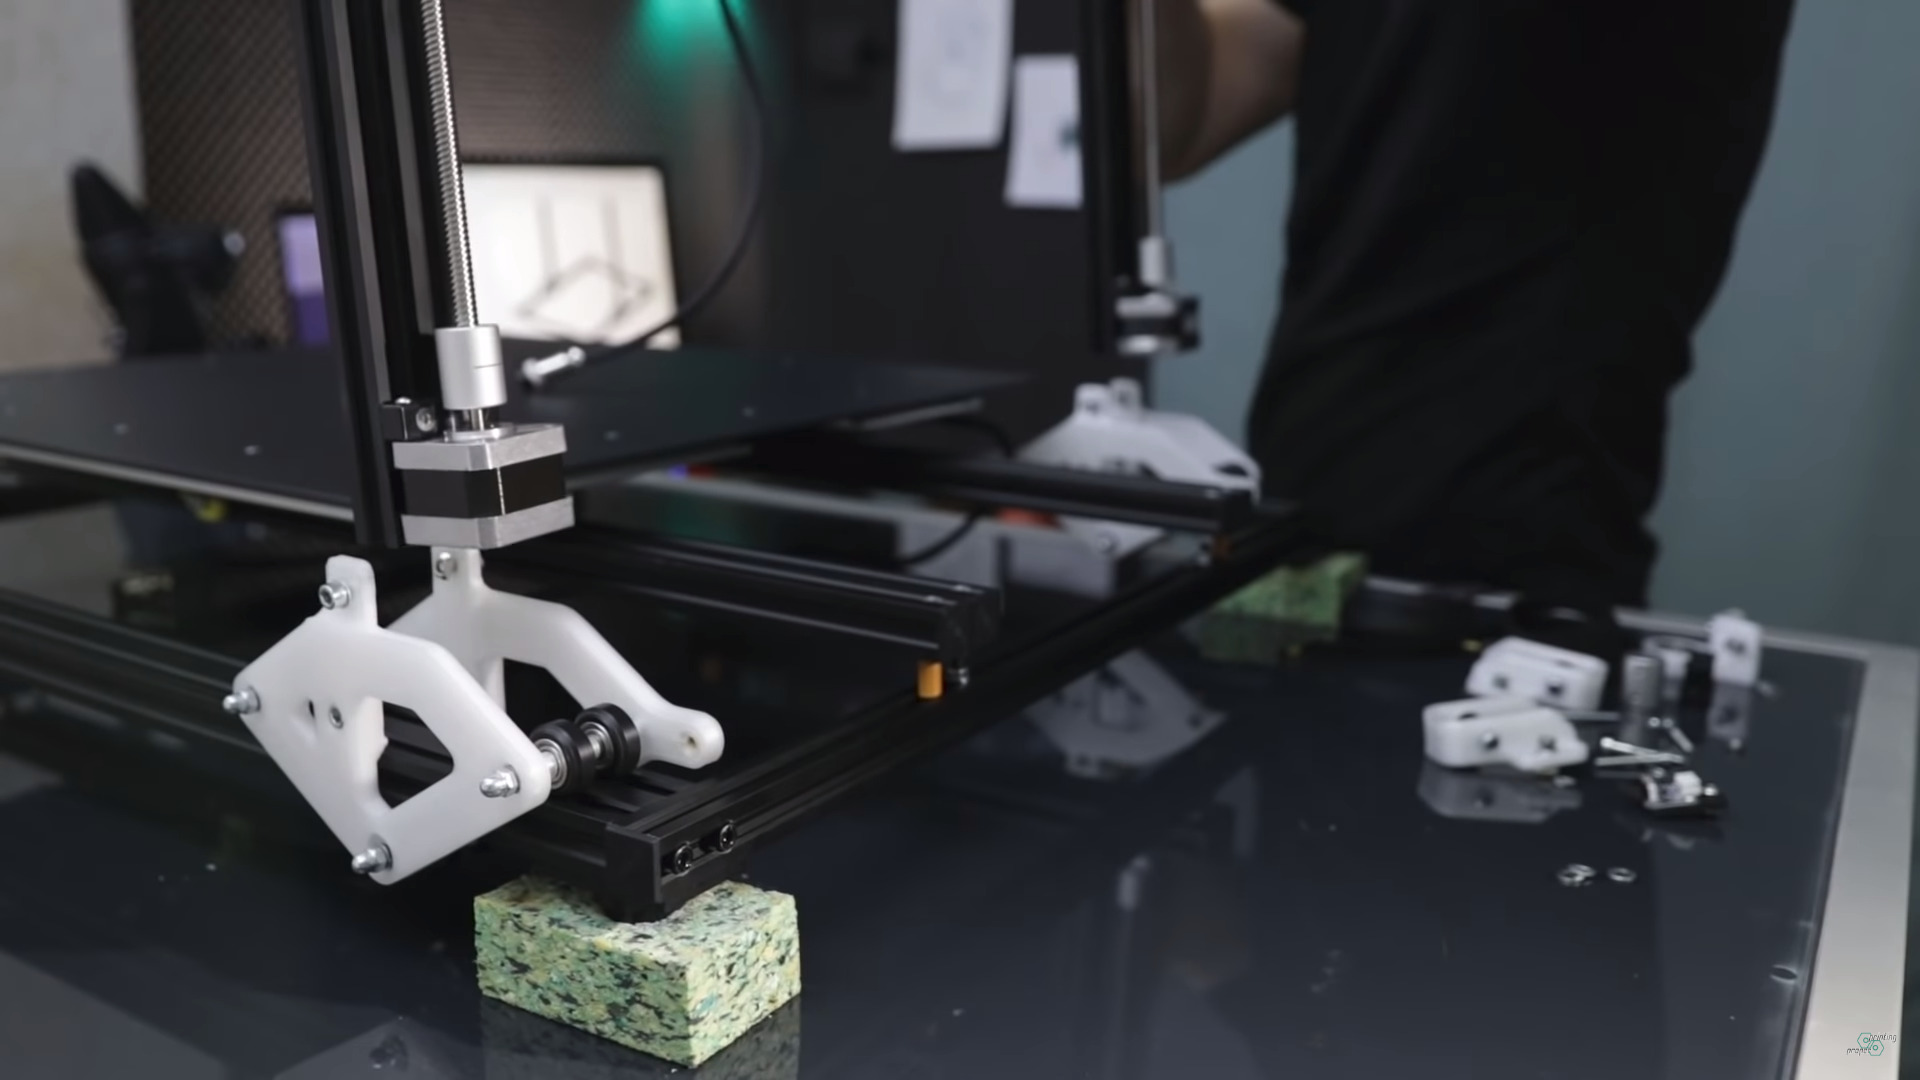
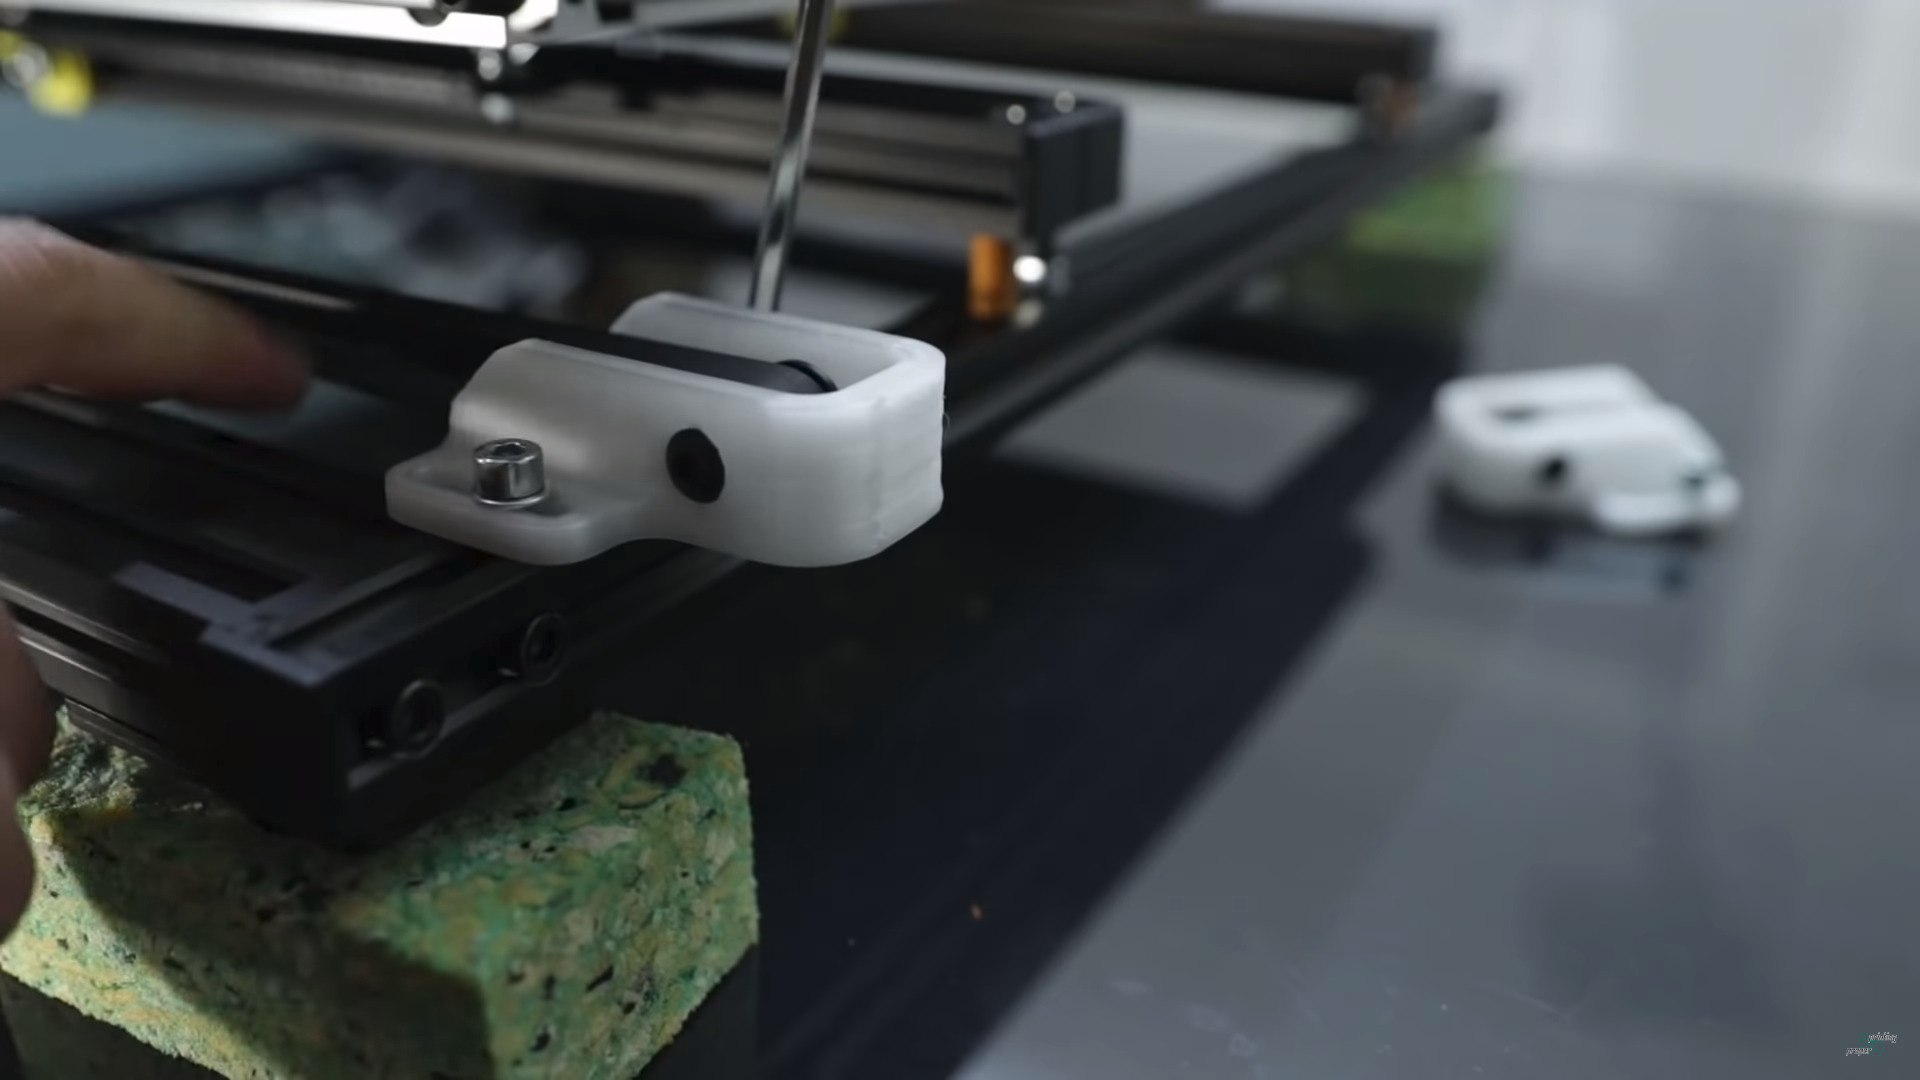
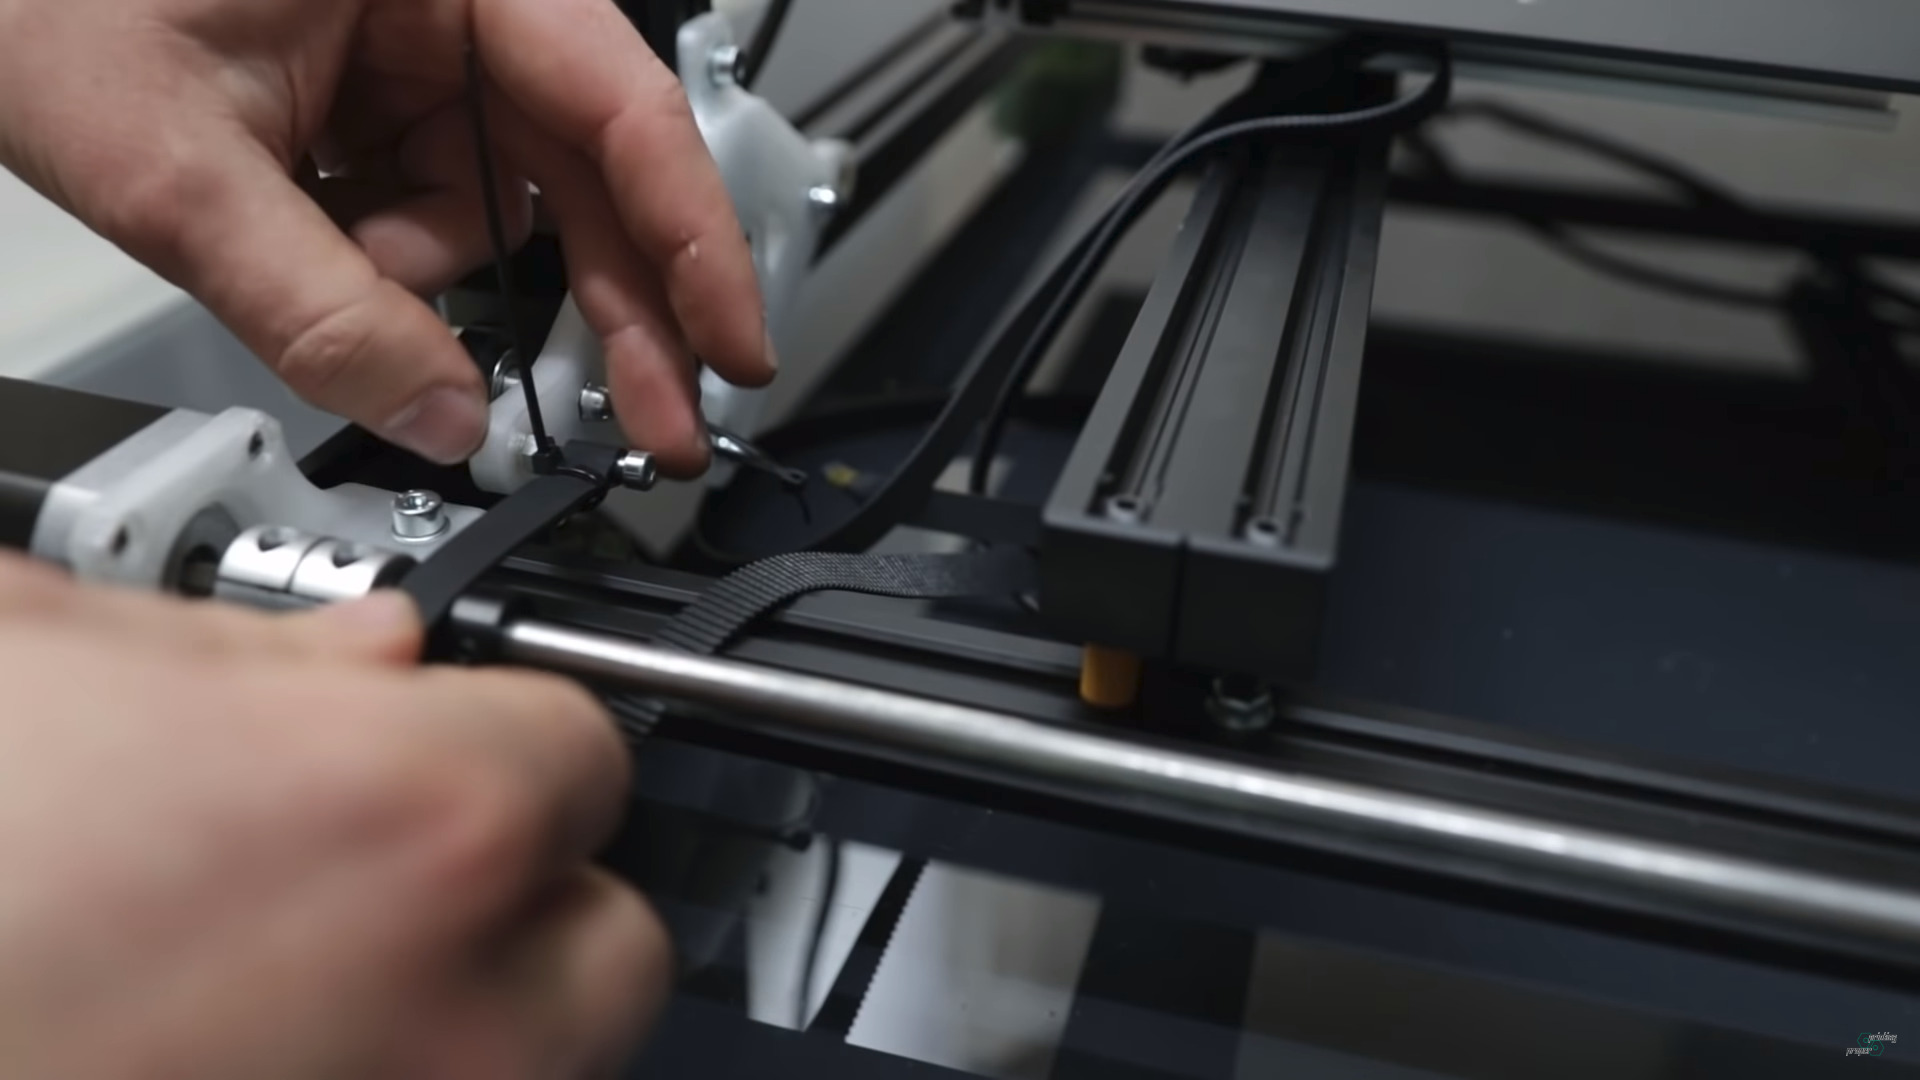
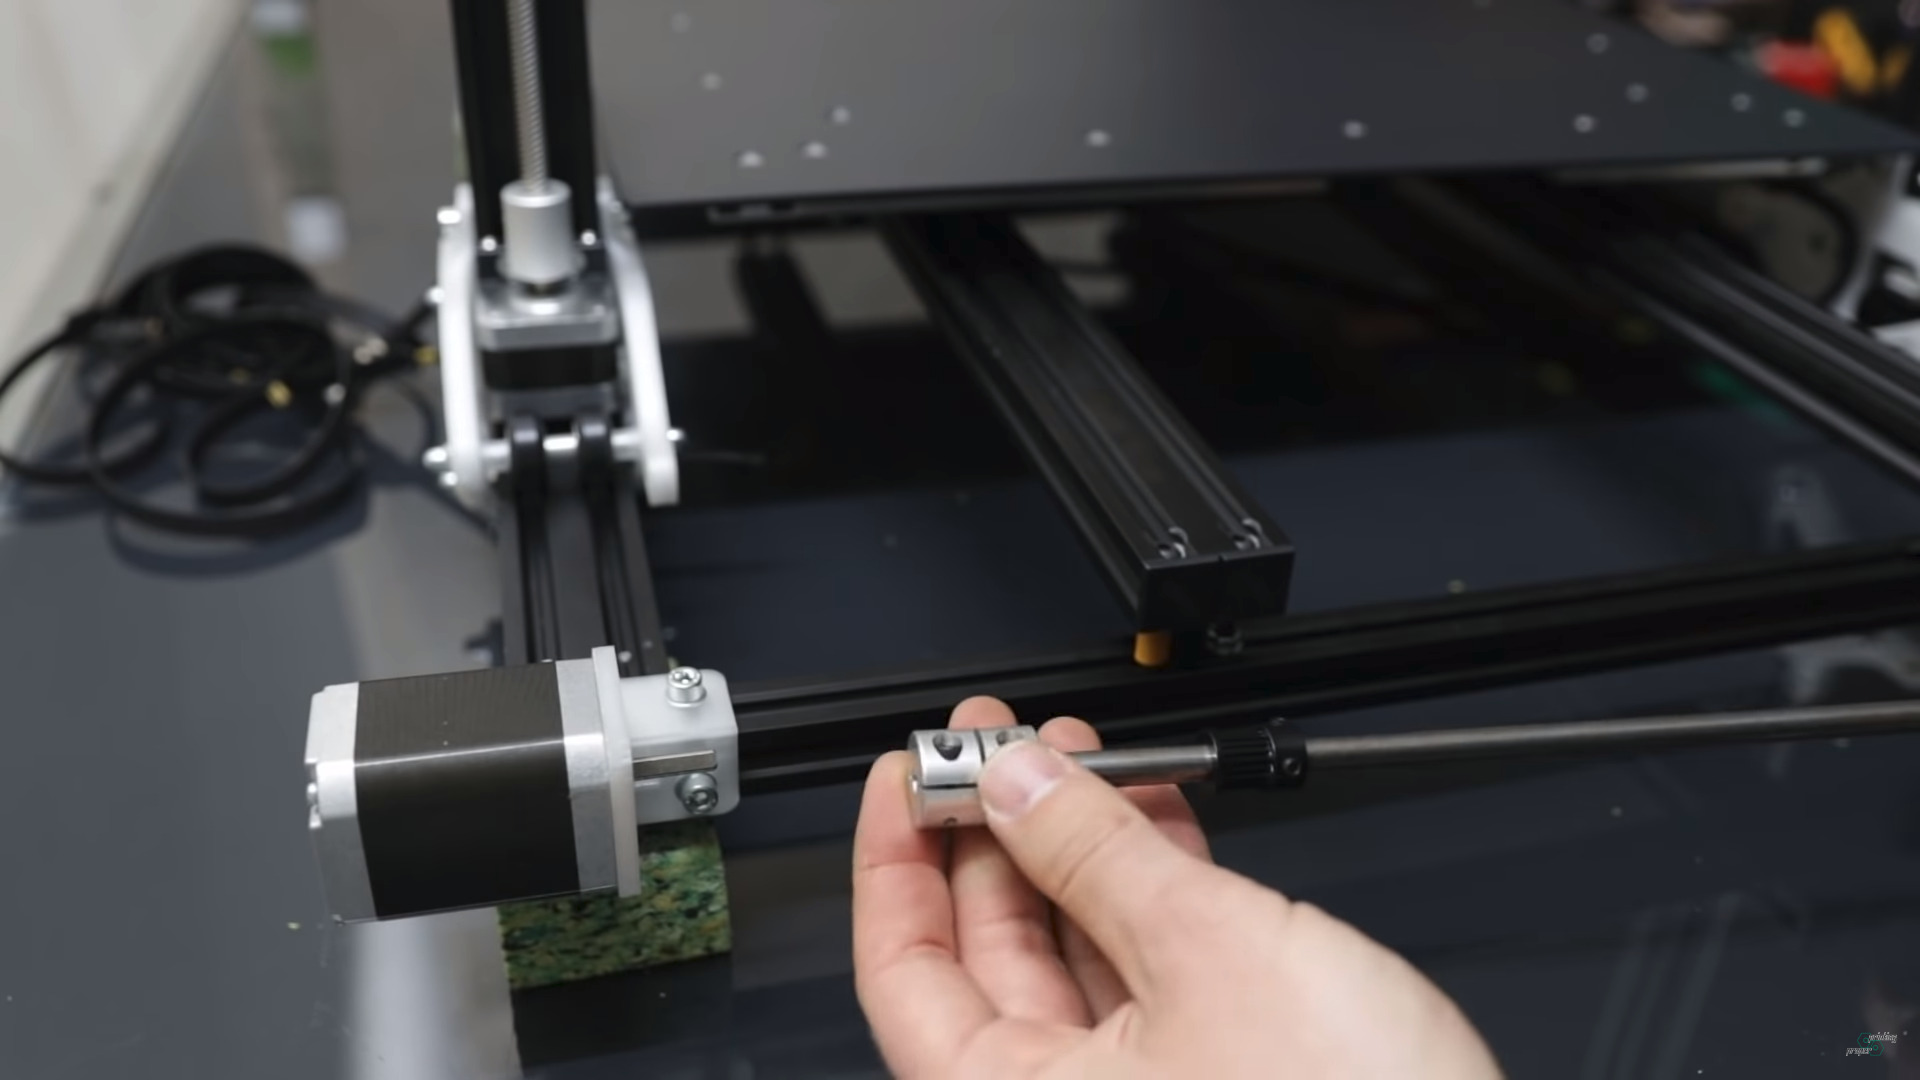
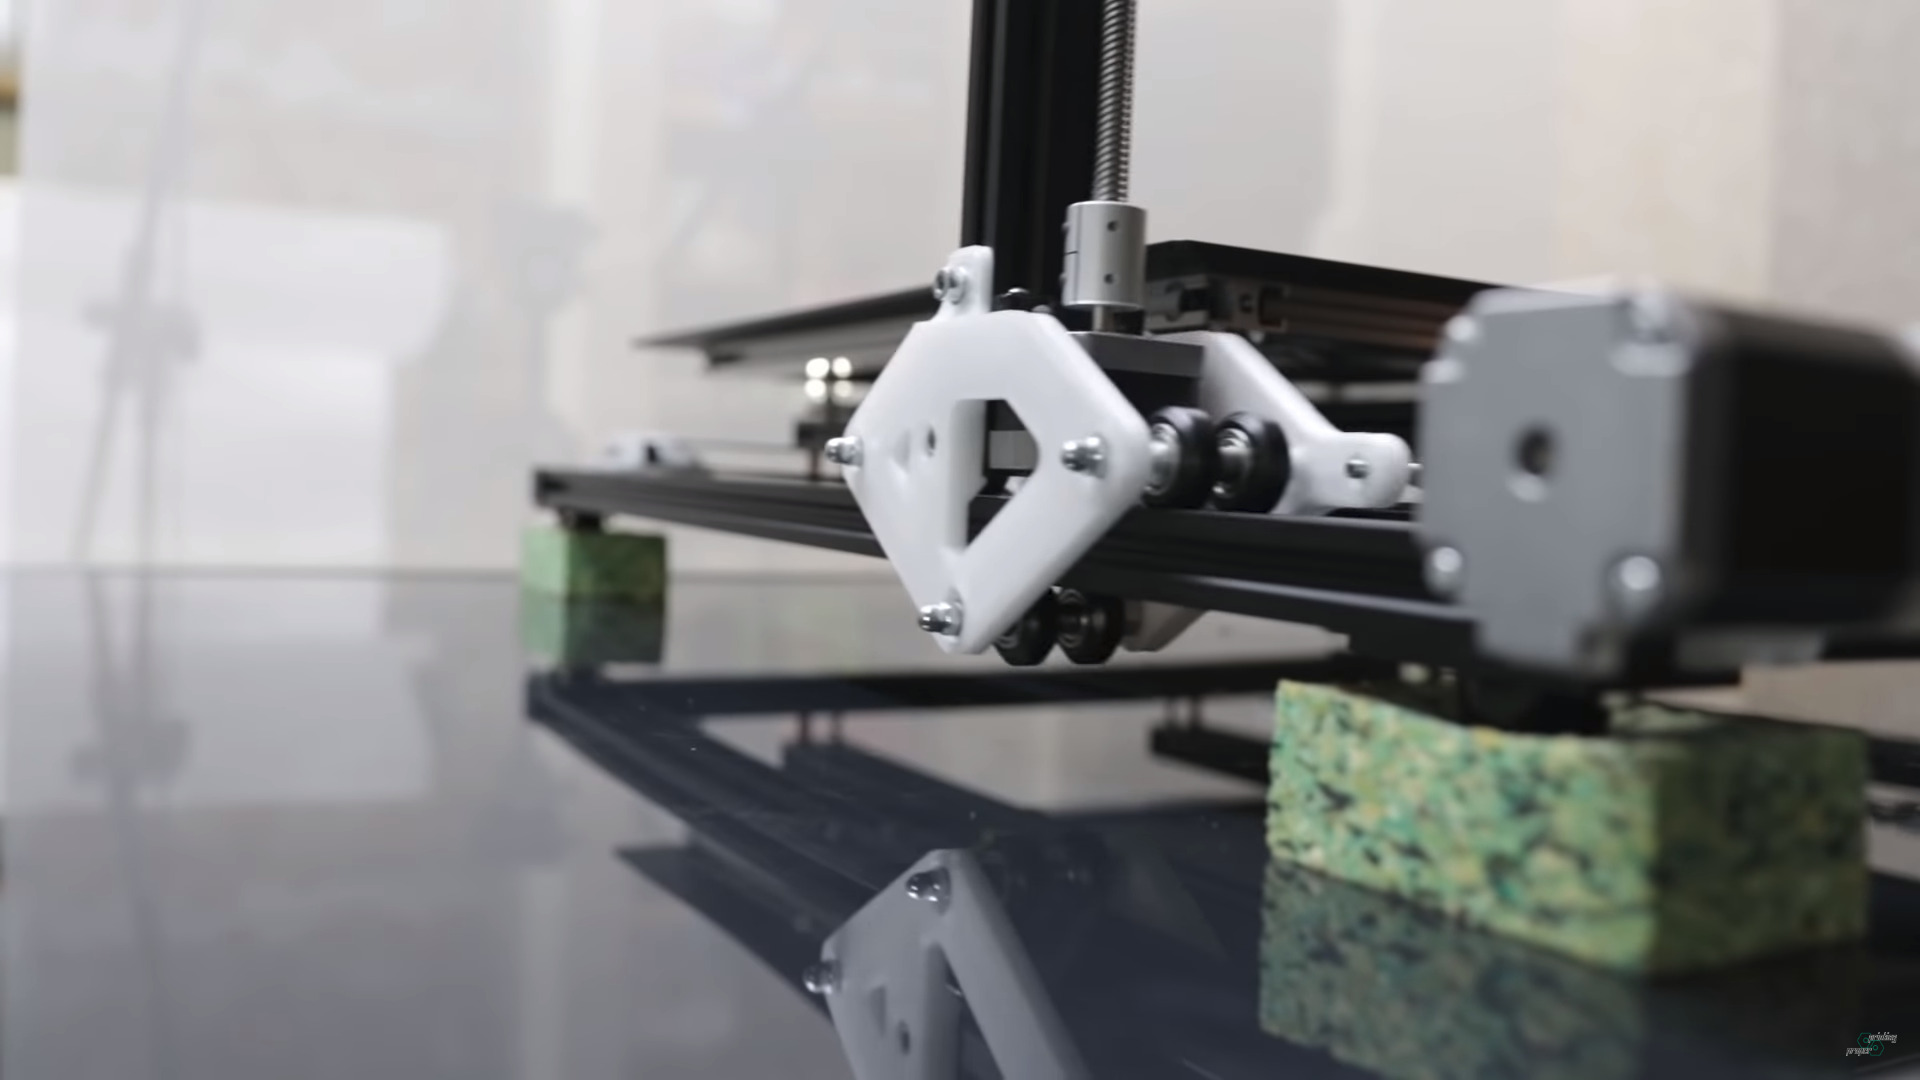
A few still images of Jon’s YT video to look at some details of his approach:
Jon Schone: Moving Portal Mod
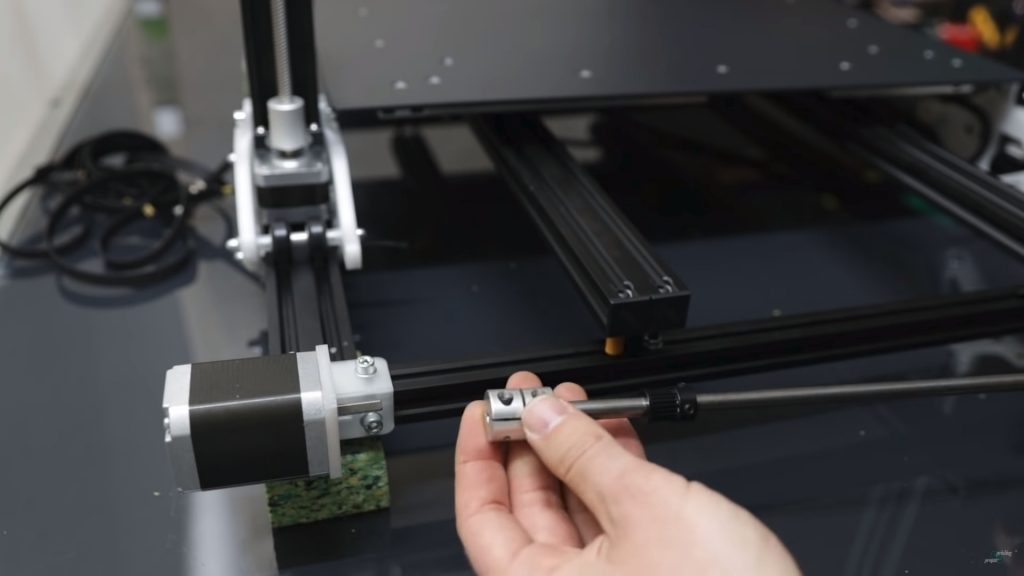
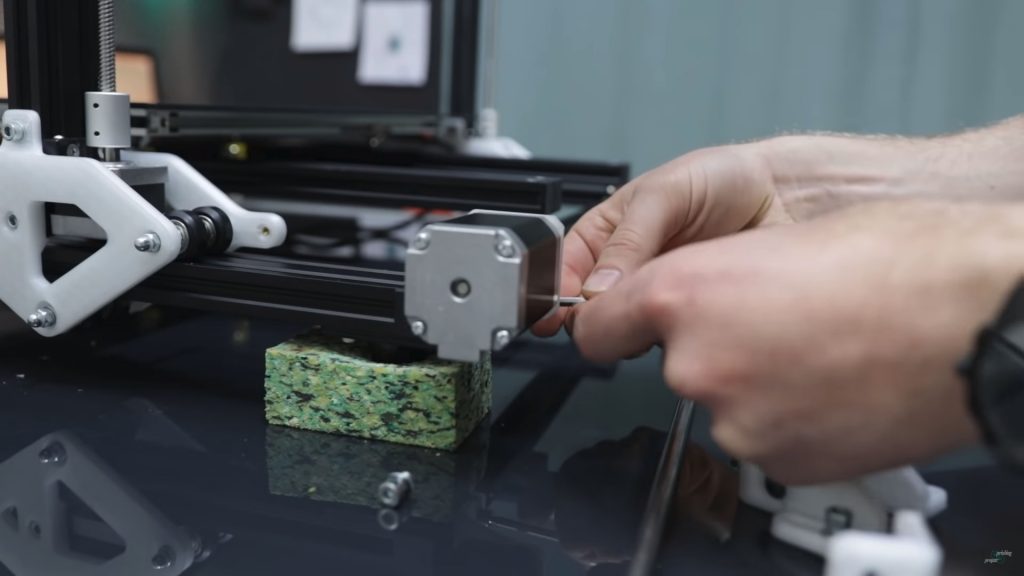
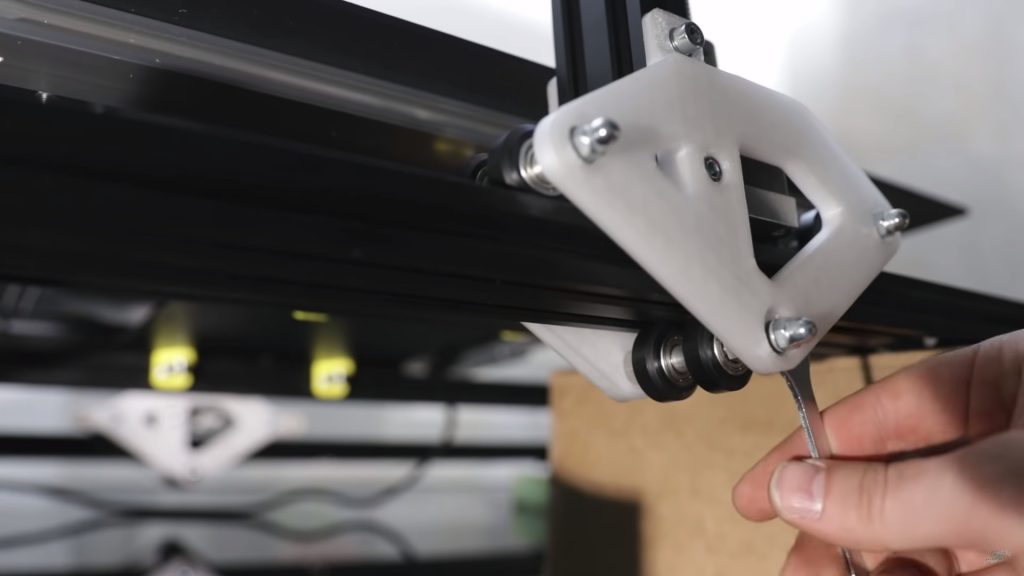
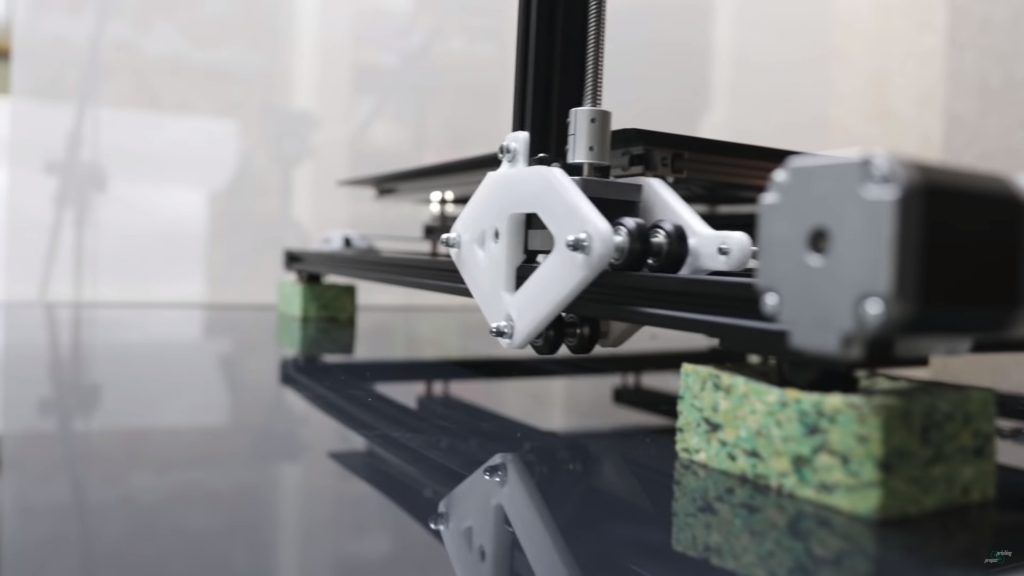
Z motor sits inside the Y carriage (40×20 V alu extrusion)
Y belt end
Single Y motor, 8mm rod to drive two Y belts
XZ frame Y Mount
Moving Portal / XZ Frame
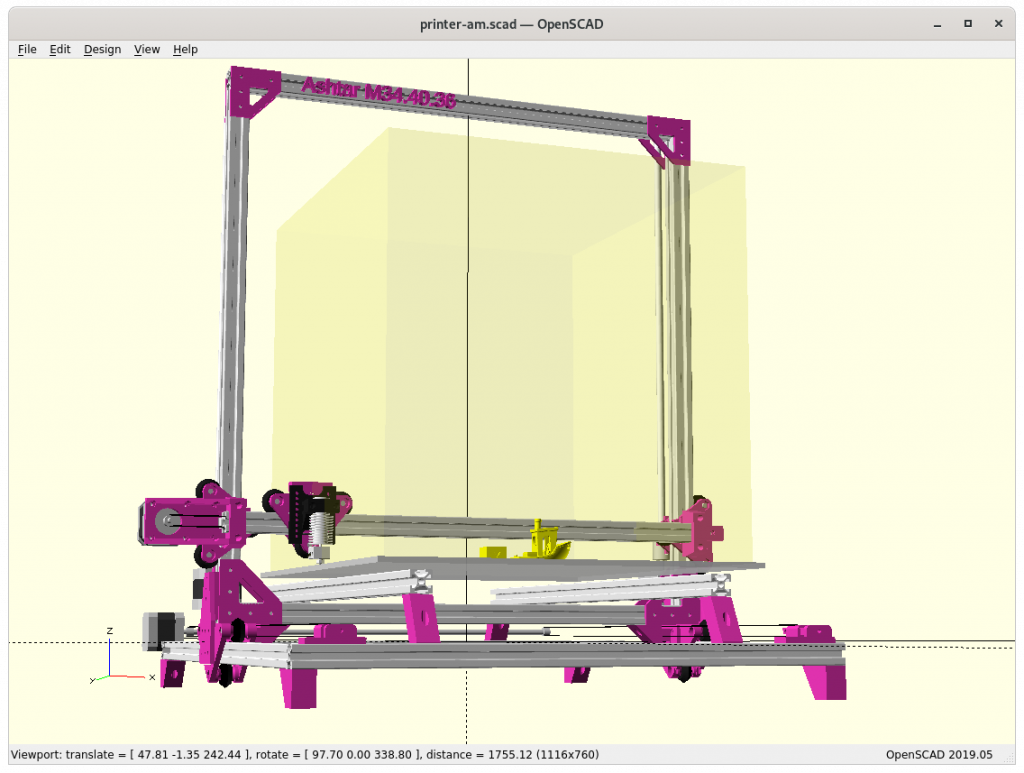
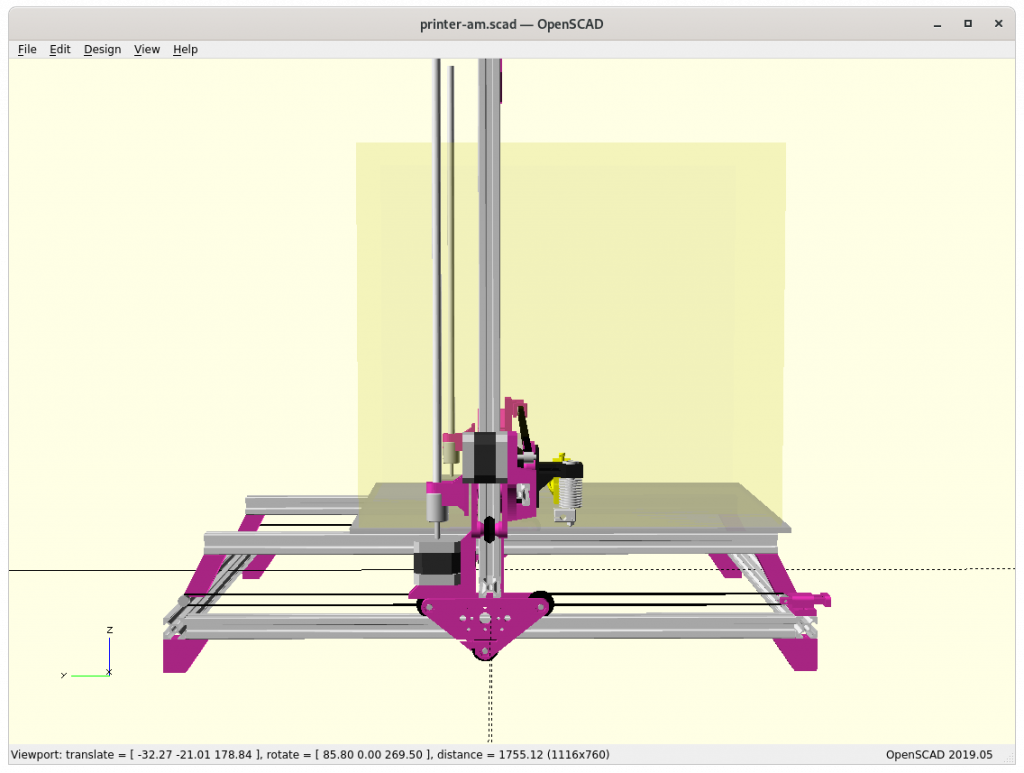
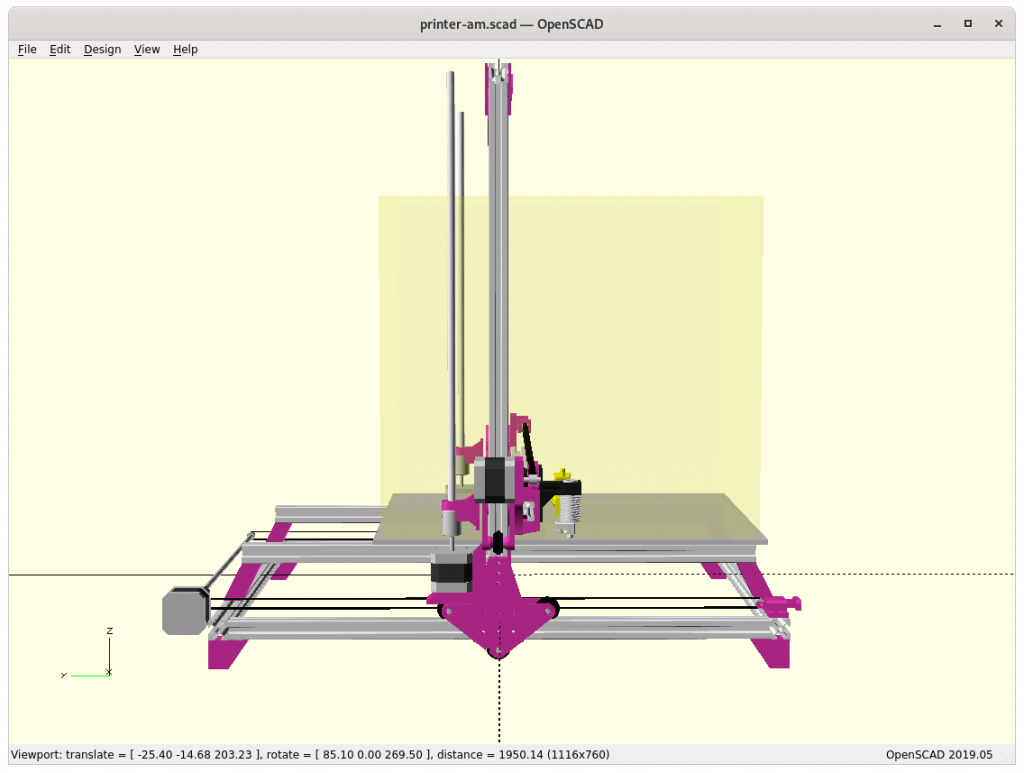
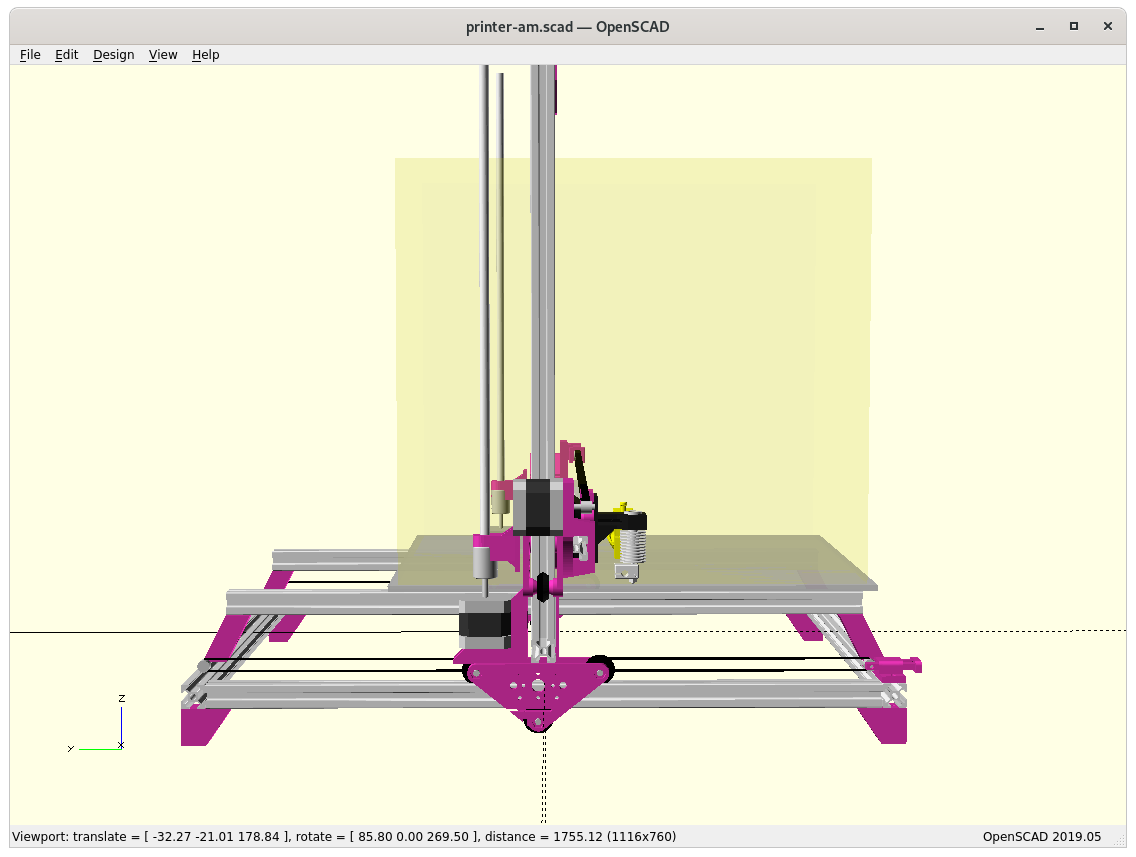
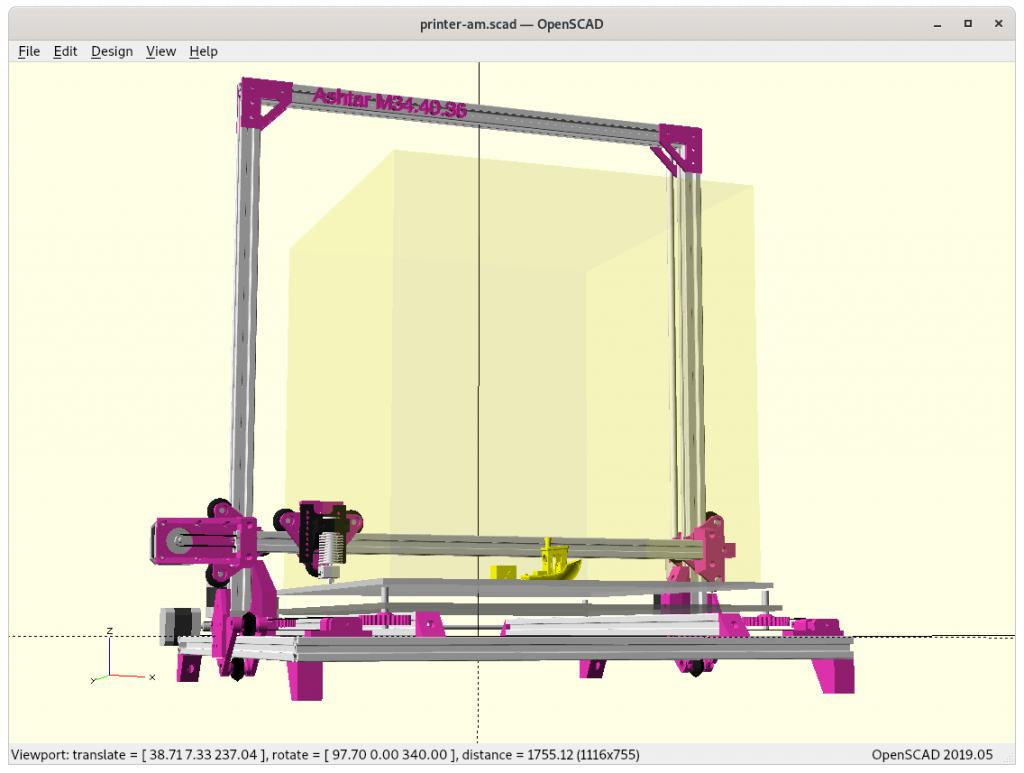
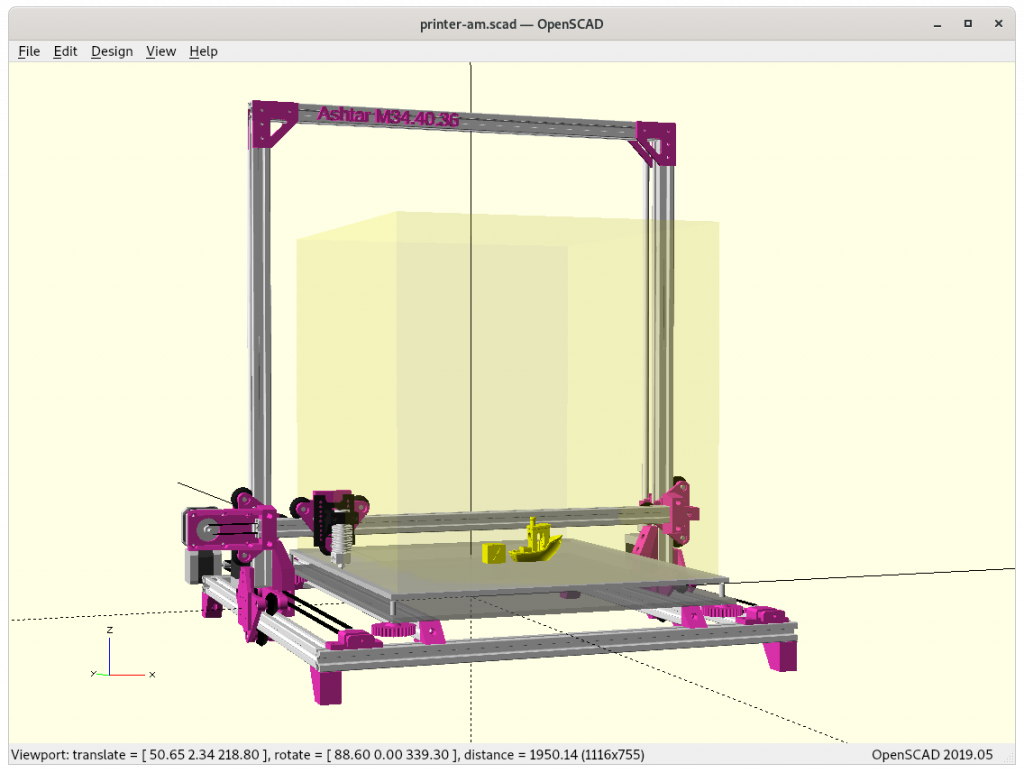
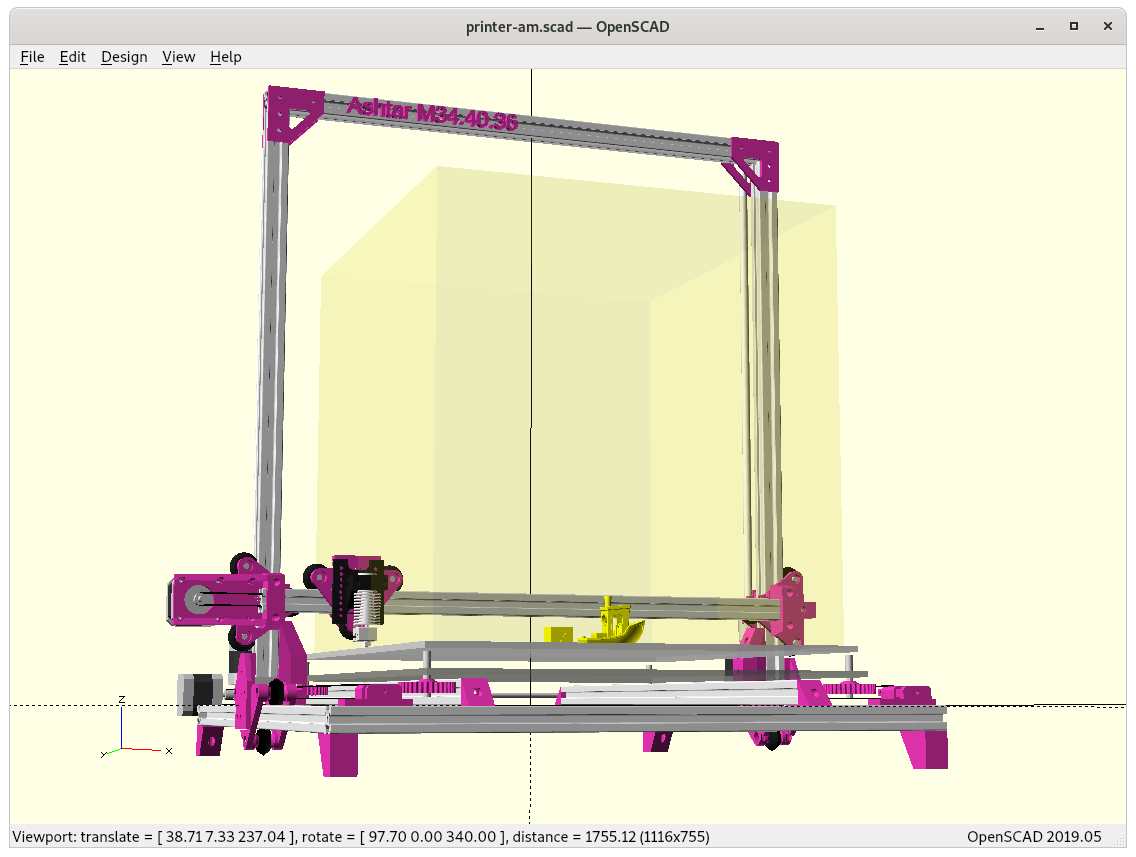
First Draft
using solely 500mm 2020 alu extrusions (T-slot for general frame and XZ frame, V-slot for carriages: X beam, 2x Y beams)
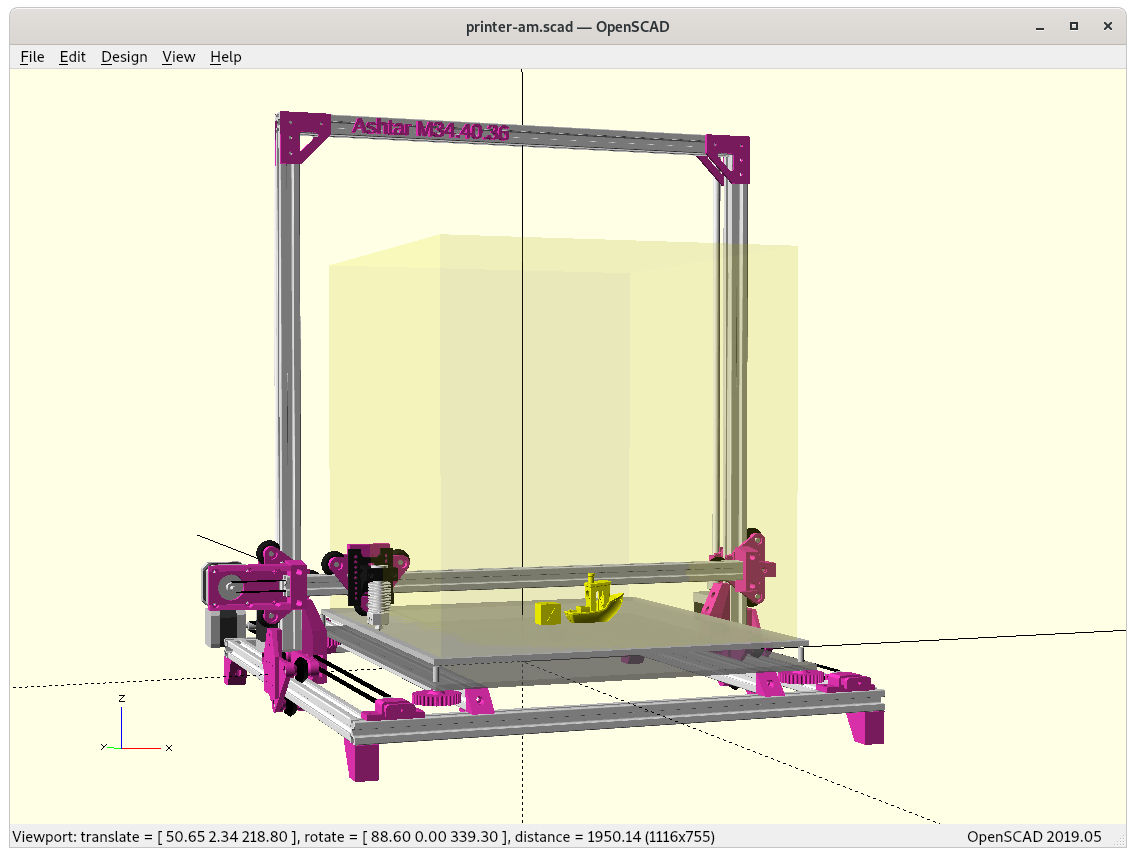
trying to achieve 400x400x400mm build volume as close as possible, alike Ashtar C 38.40.36
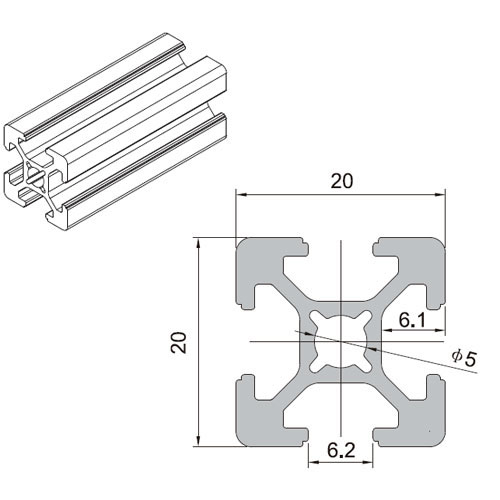
T-Slot 2020
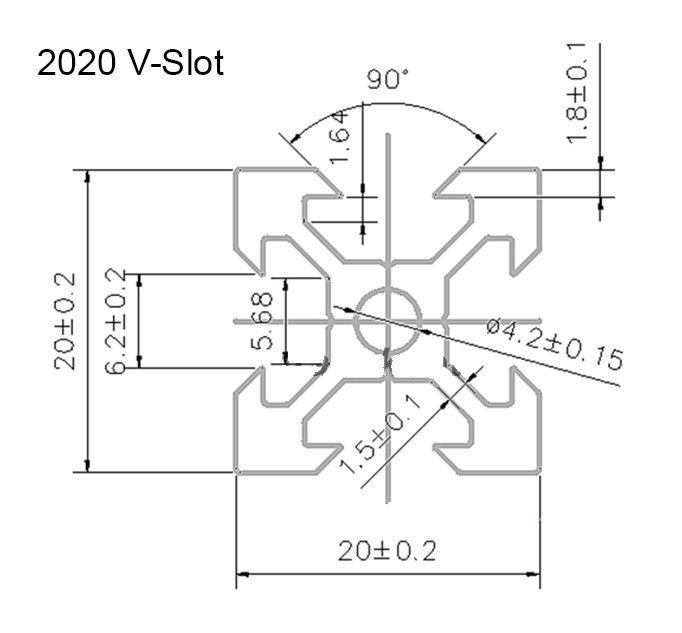
V-Slot 2020
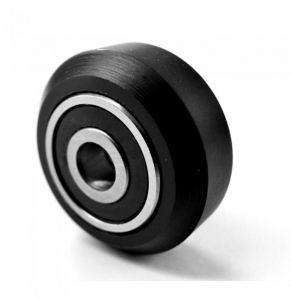
V wheel
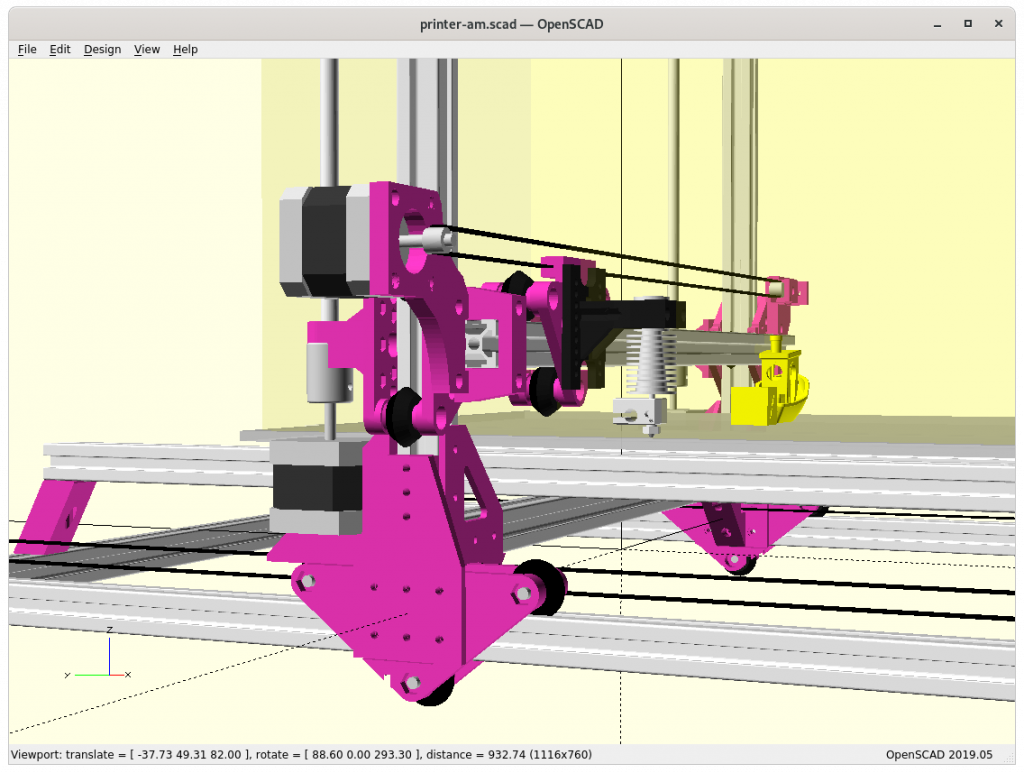
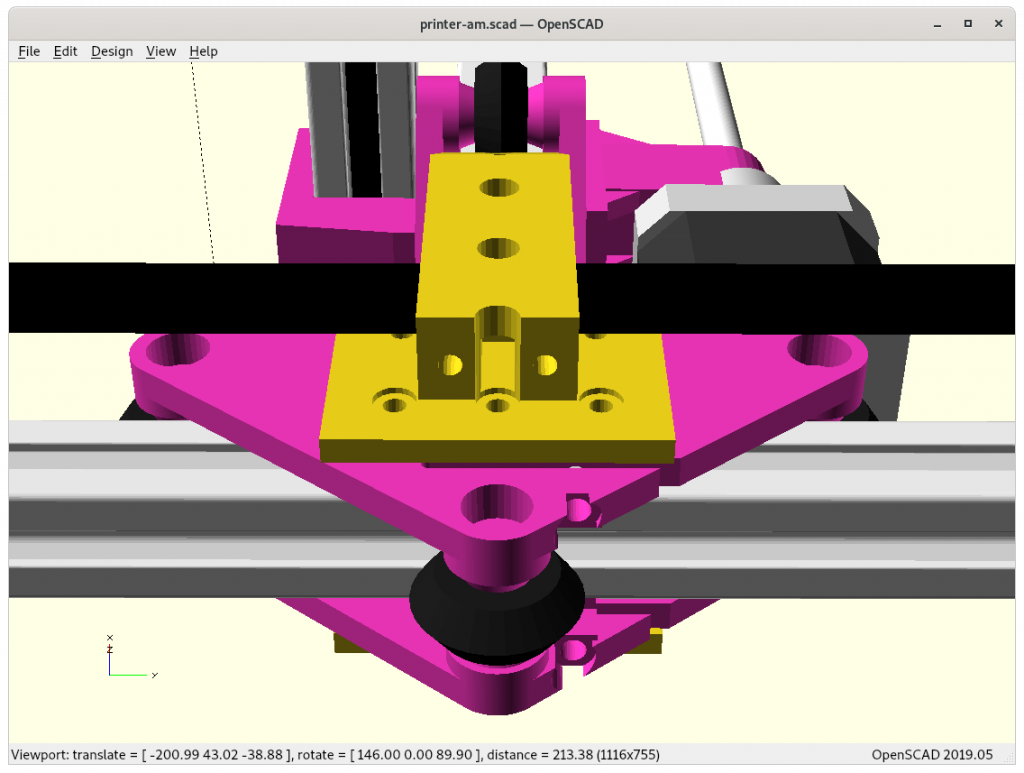
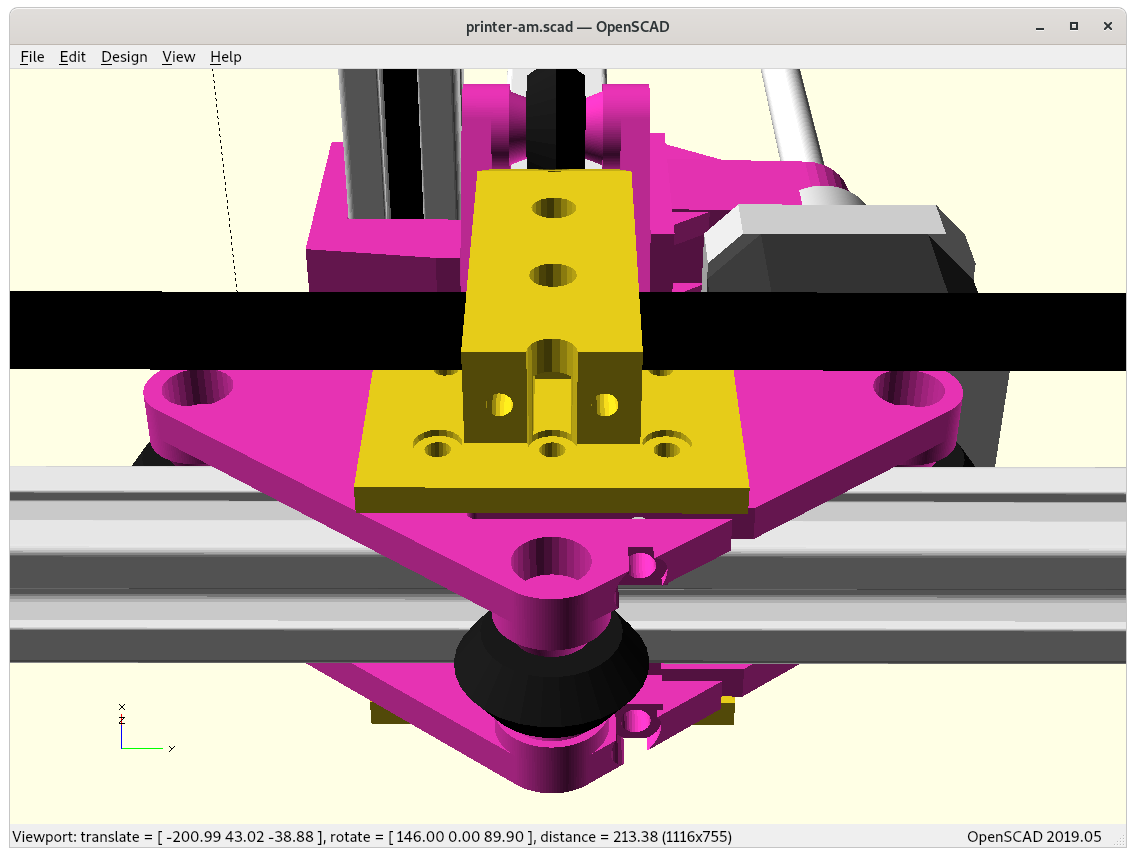
Using for Y carriages existing vcarriage2 module with vcarriage2(width=100) to have it wide enough:
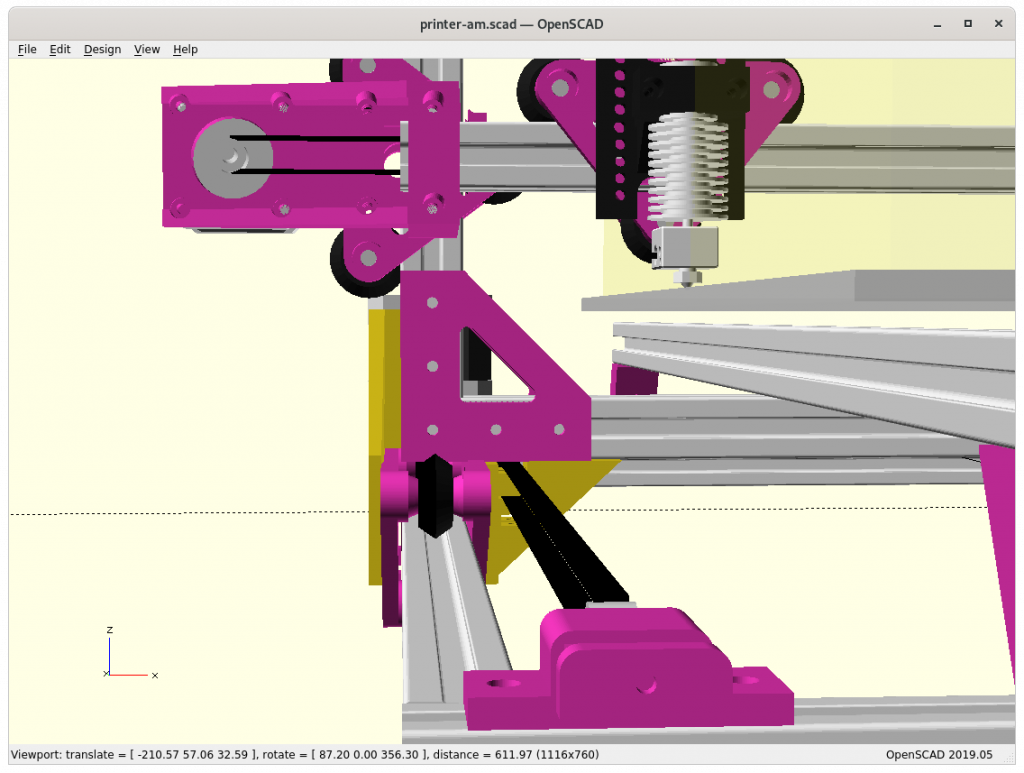
Bare view on Y carriage with XZ frame
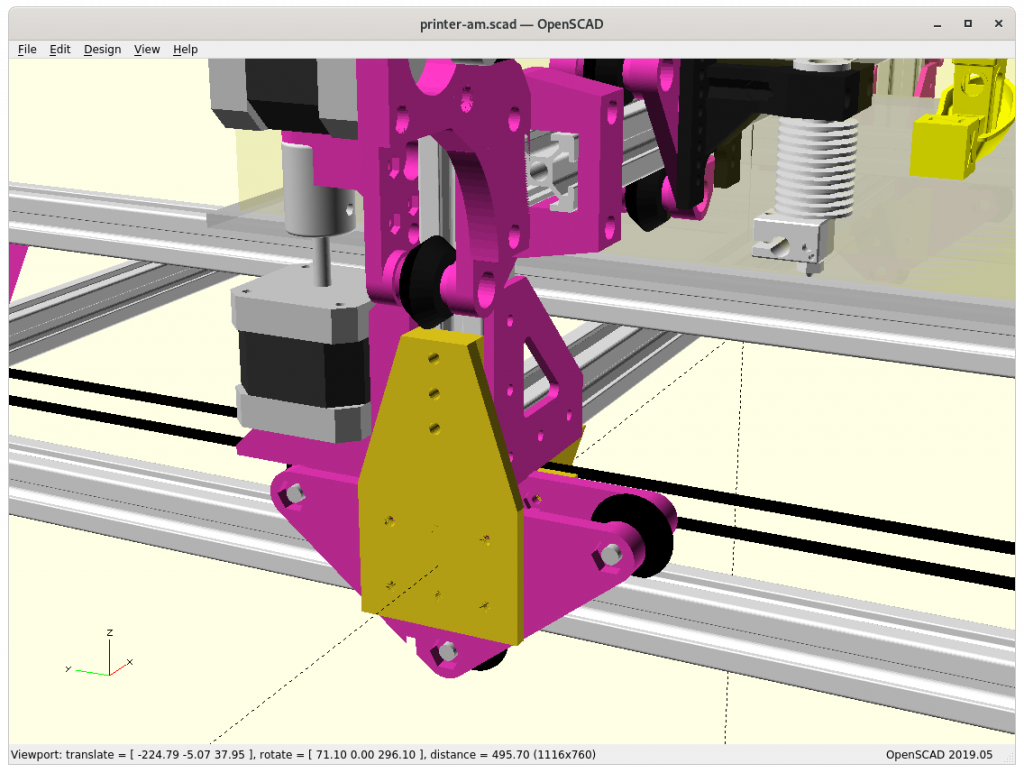
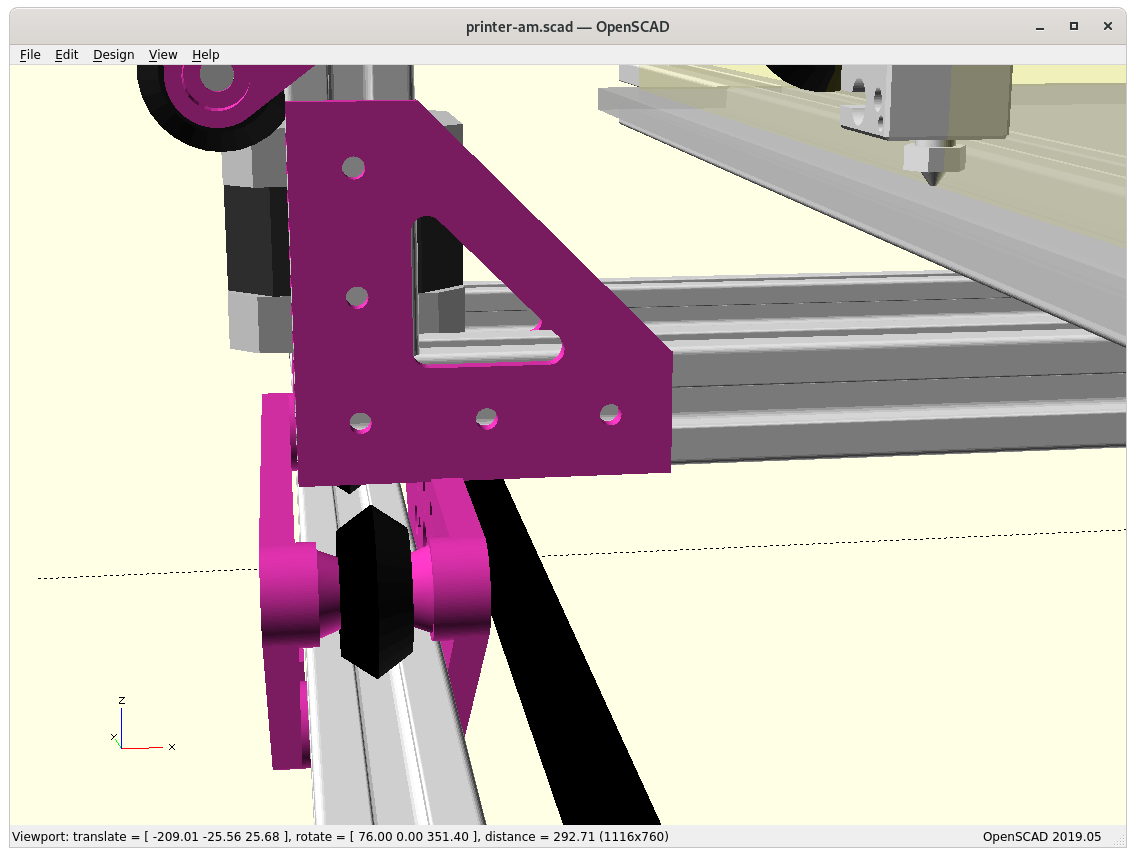
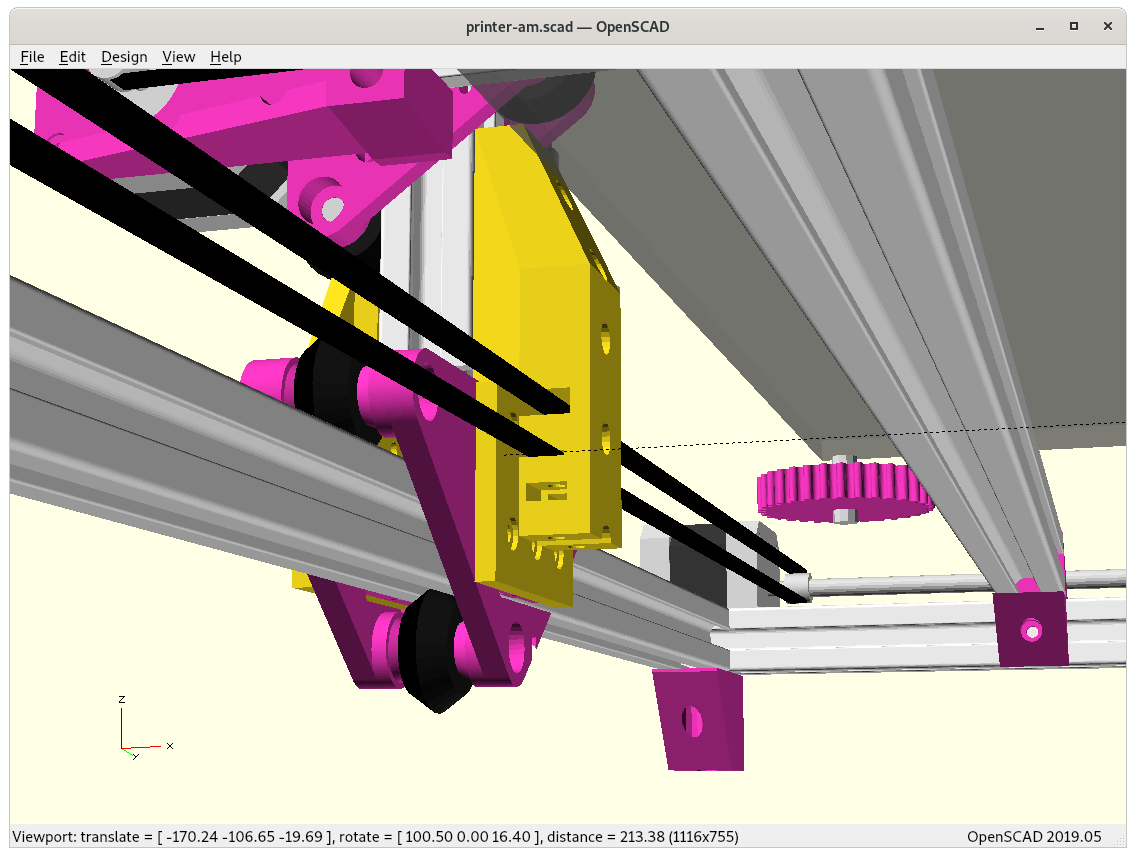
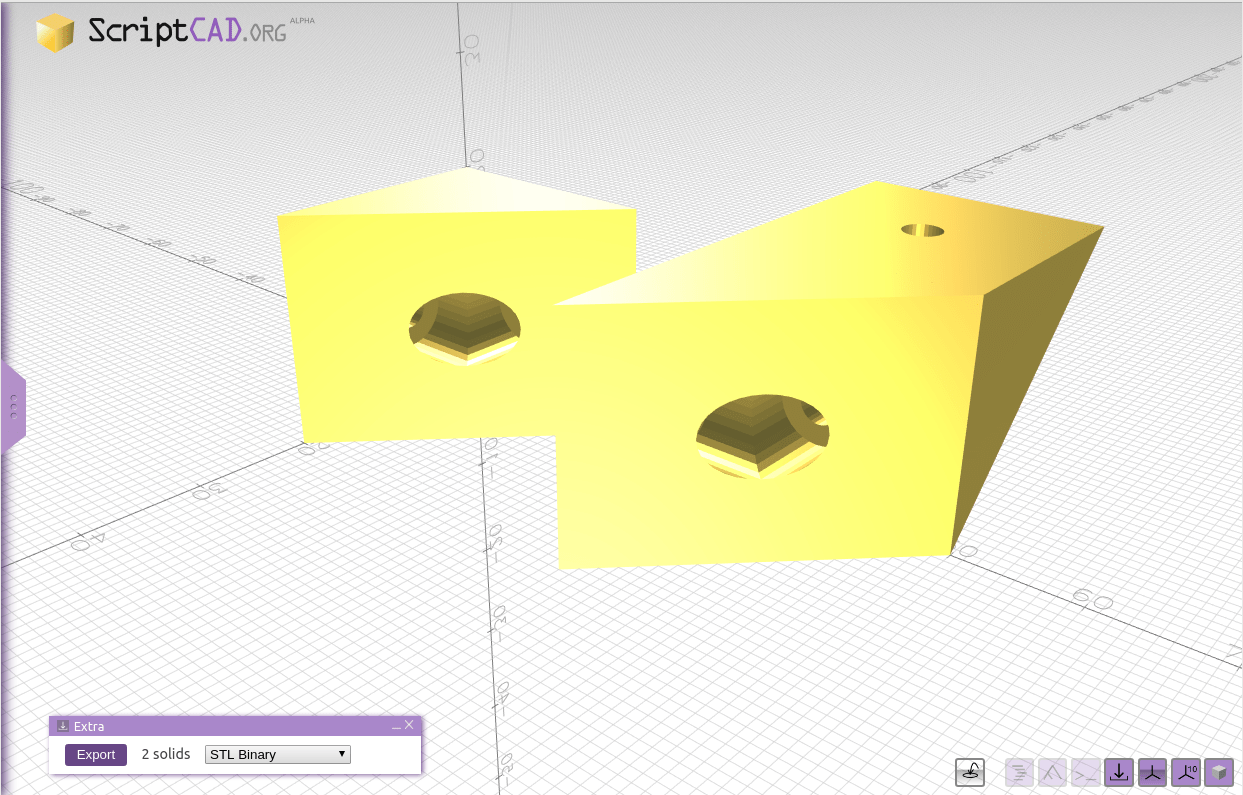
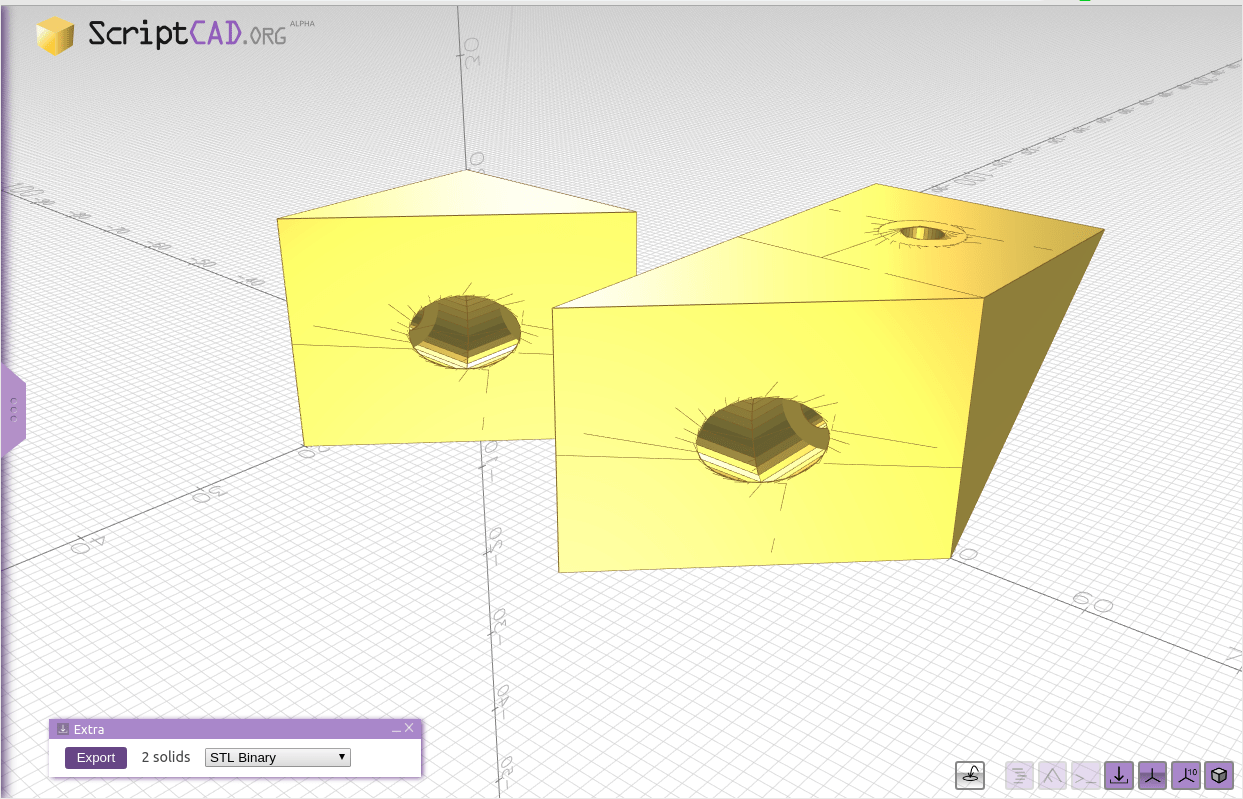
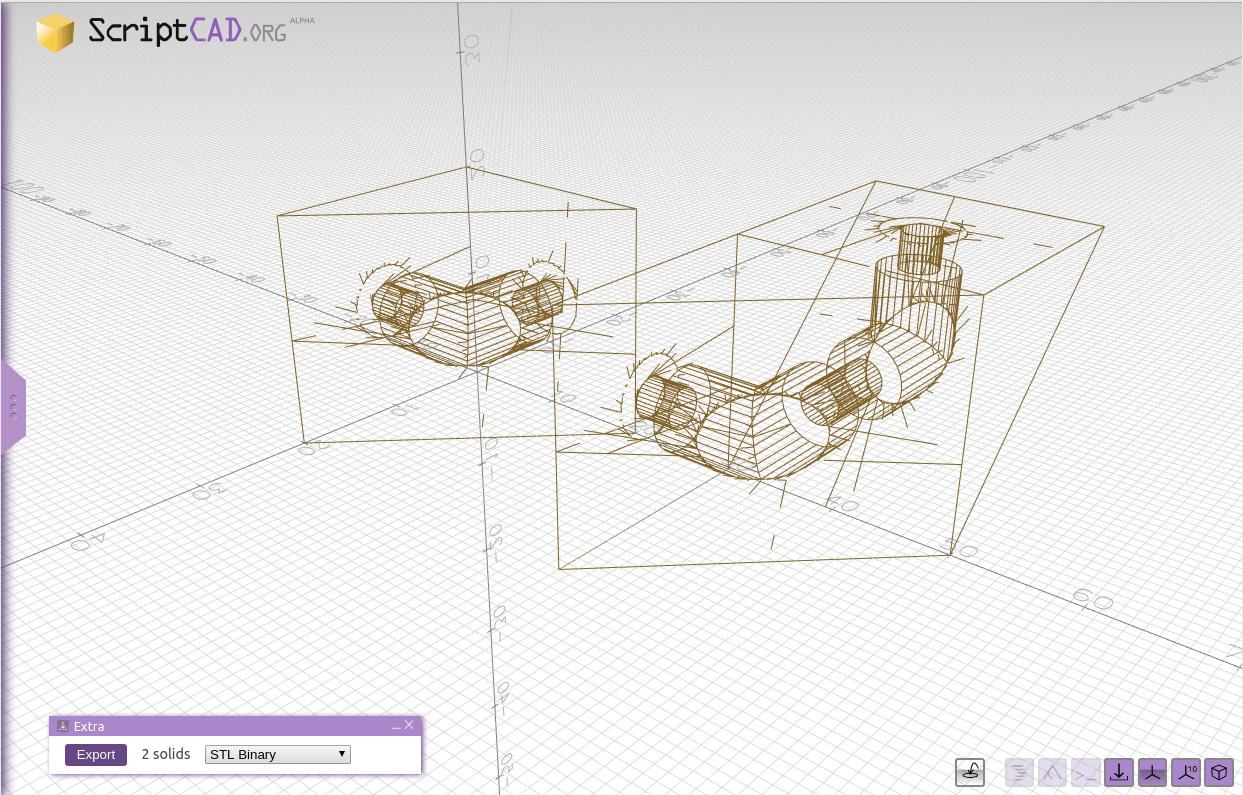
Adding side pieces “A” & “B”
Piece “A” connecting Y carriage with XZ frame
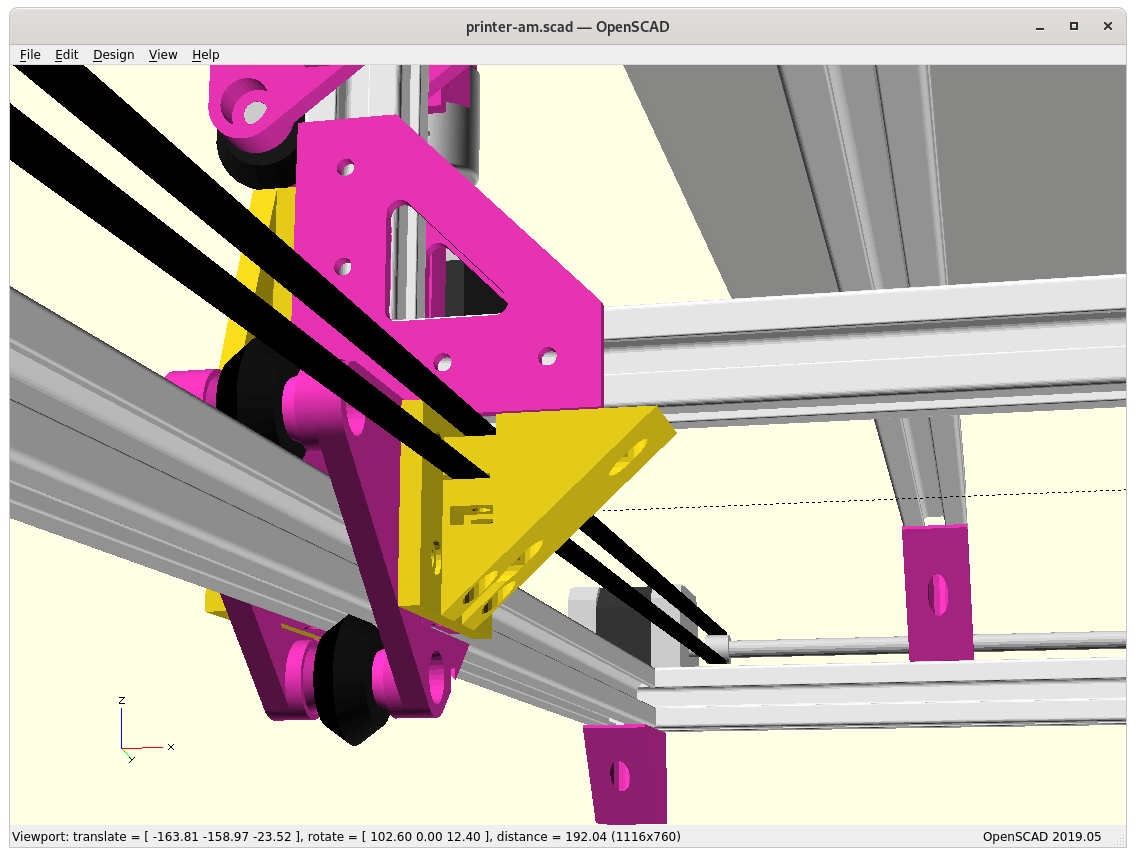
Piece “B” connecting Y carriage with XZ frame
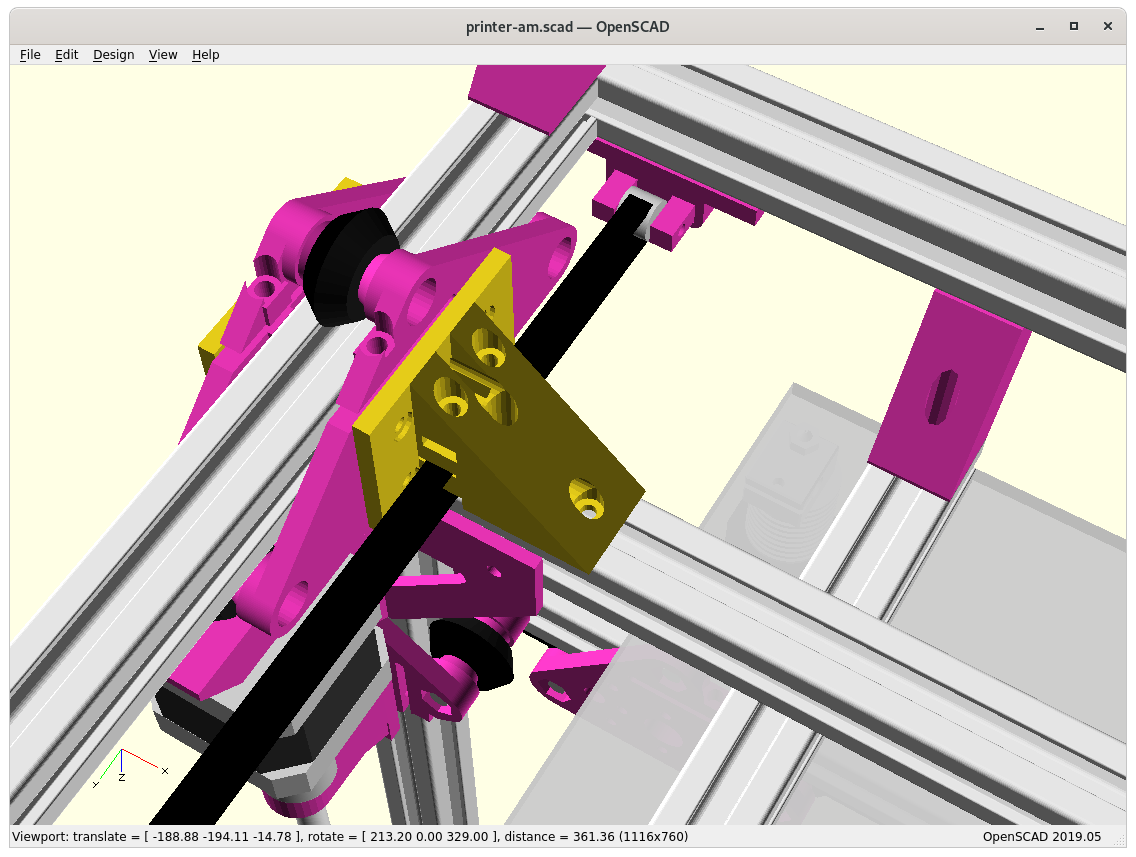
Piece “B” bottom view
At position 0,0,0
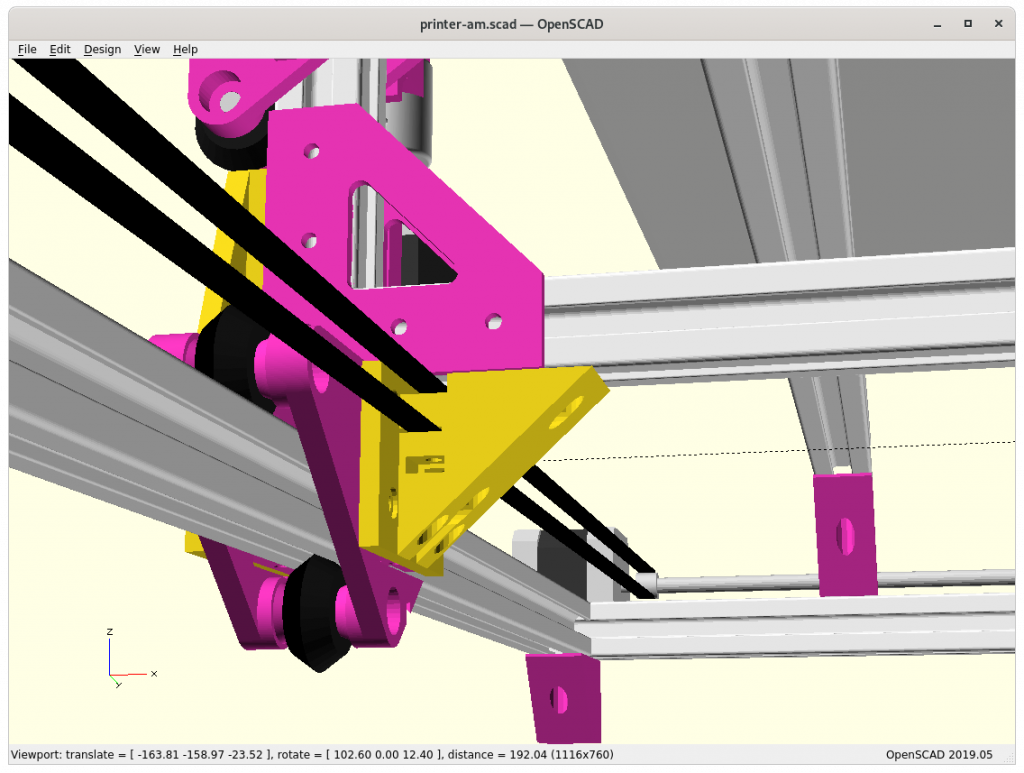
The two main new pieces required were connecting the Y carriage with the XZ frame:
Piece “A” outside ycarriage_xzframe_mount_a(): has to be printed with 0.1mm layer height in order to stay within the +/- 0.05mm tolerance, otherwise it will introduce tilt and stress on the Y carriage and cause long term damage – tricky part to print.
Adding side pieces “A” & “B”
Piece “B” inside ycarriage_xzframe_mount_b(): is quite elaborate already and should be functional, with the Y belt ends fastening with M3 screws and M3 nuts inserts, the belt endings will come out downward:
XZ Arch Option – Removing Lower X Beam
In order to gain some Z build space by lowering the print bed, I may reduce the XZ frame to an XZ arch:
Side pieces “A” & “B” with Arch (lower X-beam removed)
Side piece “B”
Actual physical tests may reveal if it’s suitable to maintain overall geometrical integrity. Removing the lower X beam also reduces moving mass of the XZ arch/frame/gantry.
Pros
gain Z build space
reduce XZ gantry weight / inertia
Cons
decrease XZ gantry stability
Further Development
As I develop Ashtar M further, I will post updates on the blog here, and also keep documenting the current state at Ashtar M page.
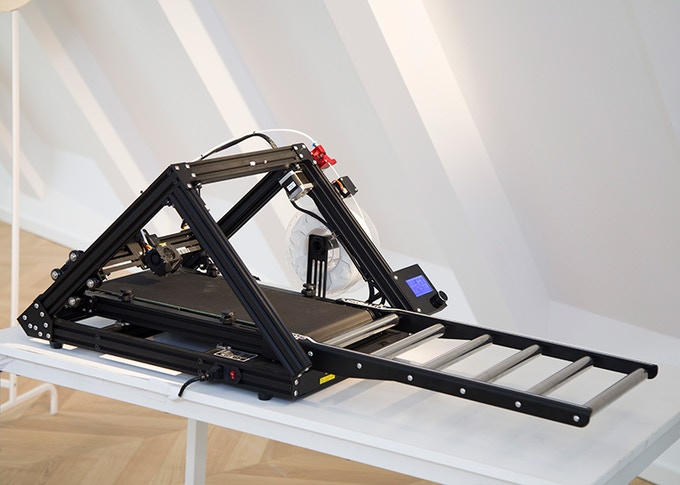
As of December 2020, something remarkable has happened: Creality, a big chinese 3D Printer company has openly acknowledged and worked with western developers to bring forth a belt-based 3D printer.
Usually chinese companies have copied without acknowledge or give credit to development done by others like Adrian Bowyer or Josef Prusa, yet with the influence of Naomi Wu, a maker from Shenzen, Creality seemed to have been swayed to give proper attribution and even actively work with Open Source Hardware inventors to mass produce a belt-based 3D Printer.
CR-30 aka 3DPrintMIll by Naomi Wu with Creality (2020)
The past decades “Western Innovation vs Chinese Manufacturing” combo has been operating very well and brought many consumer products at low cost, including 3D printers.
Now, in this particular case, we see Bill Steele and Karl Brown (White Knight Printer) properly attributed in the 3DPrintMill Kickstarter page:
CR-30 Kickstarter [Screenshot 2020/12/08]
Attributing Adrian Bowyer (RepRap), Bill Steele & Karl Brown (White Knight) [Screenshot 2020/12/08]
And even giving proper context of the overall lineage:
Lineage
All consumer 3D printers currently sold, build in some way on the work of Adrian Bowyer and his RepRap project- Open Source 3D printing. Some 3D printers iterate more than others, some are simply clones and claim innovations as their own that was in fact the community’s work. Others take only the broad strokes of an idea and build on it, improve it, and allow others to build on it further. For the 3DPrintMill (Creality CR-30) we have taken pains to involve and consult the talented individuals who brought the technology this far, and built on their work with their permission.
Bill Steele, who first demonstrated Infinite-Z FDM and DLP printers, and Karl Brown who created the first practical, Open Source kit so consumers could build their own Infinite-Z printer. Both Karl and Bill have given the project their blessing- and indeed, without them, it would never have been possible.
Bill Steele Belt Printer (2016)
White Knight belt 3D printer at MRRF 2019
As said, this is remarkable and probably a new level of cooperation of Open Source Hardware movement and chinese manufacturers.
Back in 2010 I thought that the Open Source Hardware movement should actively seek cooperative alliance with chinese manufacturers instead just to complain – but this did not happen. Now in late 2020 it seems happening, thanks to Naomi Wu (Project Head for the CR-30/3DPrintMill), who made an effort to bridge the western innovation culture and chinese manufacturing culture – without a bridge, a canyon keeps villages apart.
Thanks also to Creality, namely Michael Tang (Co-founder of Creality), Steven Han (Brand Director), Zhou Yong (Product Manager), Lei Congjin (R & D Manager), Yu Xianhong (Project Manager) for the acknowledgment as expressed in the Kickstarter page.
Open Source Hardware Commitment
Additionally, and perhaps even more relevant is their on-going commitment to Open Source Hardware as expressed in this passage:
Bringing the 3DPrintMill (Creality CR-30) to life would need the resources of a full engineering team and a company with substantial 3D printer manufacturing experience. So a deal was struck, Creality would invest the R&D resources necessary to make the 3DPrintMill(Creality CR-30) real, and as soon as that expense was recouped, the entire product would be fully Open Sourced for the benefit of the community. When the 3DPrintMill (Creality CR-30) reaches 5 million USD in crowdfunding, the whole machine- CAD files, BOM, firmware, schematics, will be fully Open Sourced. Anyone in any country can make their own version, iterate and improve on it- leading to vastly accelerated development.
This is probably what many Open Source Hardware (OSHW) enthusiasts have been waiting for, one of the big player like Creality join the common OSHW efforts once more, after having released all plans of the Ender 3 in 2018 and giving an example for other companies.
Bigger Context
And I look at Apple, Microsoft, IBM, ARM, Intel, AMD and I wonder, with the Open Source ISA (Instruction Set Architecture) of RISC-Vonthe horizon, whether we are going to see the full stack of Open Source Hardware from the CPU design up to the PCB and final assembled computer (GPU, RAM, I/O); and if any of the big players take a moment, and look at what Creality did here?
Naomi Wu ranted away on Twitter with the following, which hits the nail about Open Source and Open Source Hardware is really about:
Software? Fusion360, Adobe Creative Cloud, John Deere tractors- a tradesperson can’t even own their own tools anymore. We’re all sharecroppers. Everything is rented.
…
Every single thing we own is being taken, put in the cloud, and rented back to us. Willingly. Because no one wants to know how to do anything beyond a narrow scope. We’re a world of carpenters willing to rent sharp chisels and saws rather than learn to sharpen them ourselves.
…
Although the rant started as people seemingly complained on the non-existing or poor customer support of Creality, her main argument is, rather have Open Source Hardware and a community helping each other, than a Closed Source without any control but good customer support – the rant actually targets the Software- & Hardware Sovereignty, which is behind all of the Open Source movement, that is the core issue: you are allowed, you are given the opportunity to improve what you bought, what you own, you can resolve the needs and requirements of your own use cases – personal evolution – and you contribute and help others by being able to share it again – collective evolution. And the mentioned companies, like Apple, or Microsoft, who have been locking up their hardware and software further and further, to improve usability and simplicity – and believe me, I have been an open critic of poor GUIs in Linux not able to catch up – but the price is high, loss of “digital sovereignty” as of software and hardware.
So, because companies are profit driven, they have to balance their own needs and requirements with the collective interest – and this is done in these statements:
Creality would invest the R&D resources necessary to make the 3DPrintMill(Creality CR-30) real, and as soon as that expense was recouped, the entire product would be fully Open Sourced for the benefit of the community.
When the 3DPrintMill (Creality CR-30) reaches 5 million USD in crowdfunding, the whole machine- CAD files, BOM, firmware, schematics, will be fully Open Sourced.
This is why I consider this an important and significant move, because a profit-driven company has actively and willingly balancing its own needs and requirements with those of the collective of the Open Source Hardware movement, and acknowledged that very product they are about to produce has been possible because of individuals like Adrian Bowyer, Bill Steele and Karl Brown.
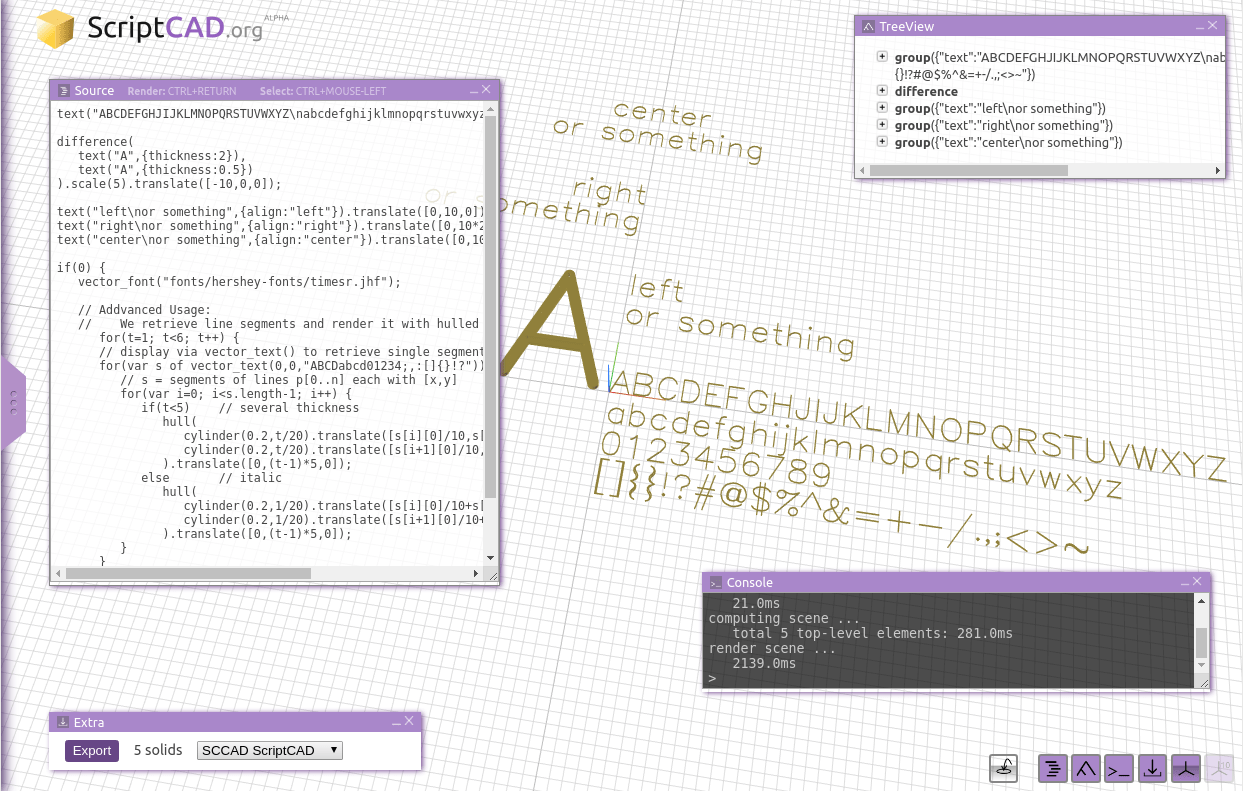
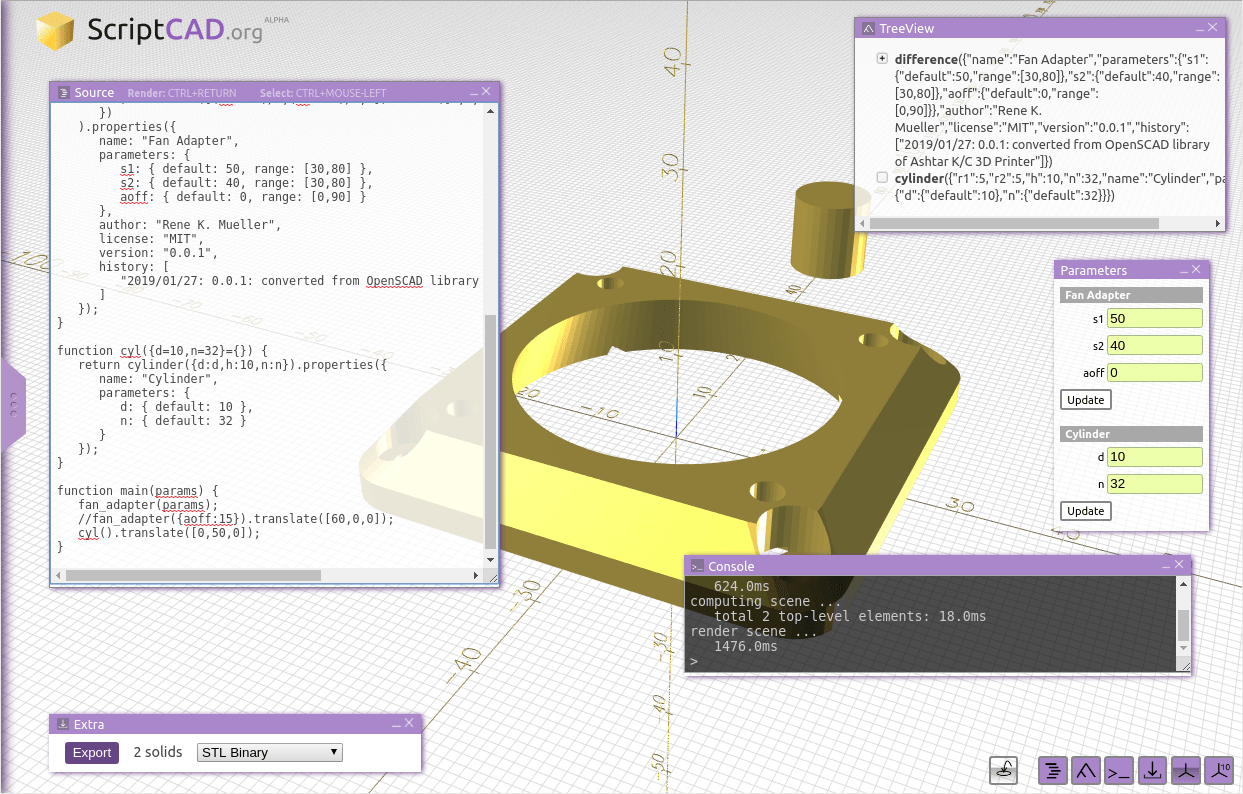
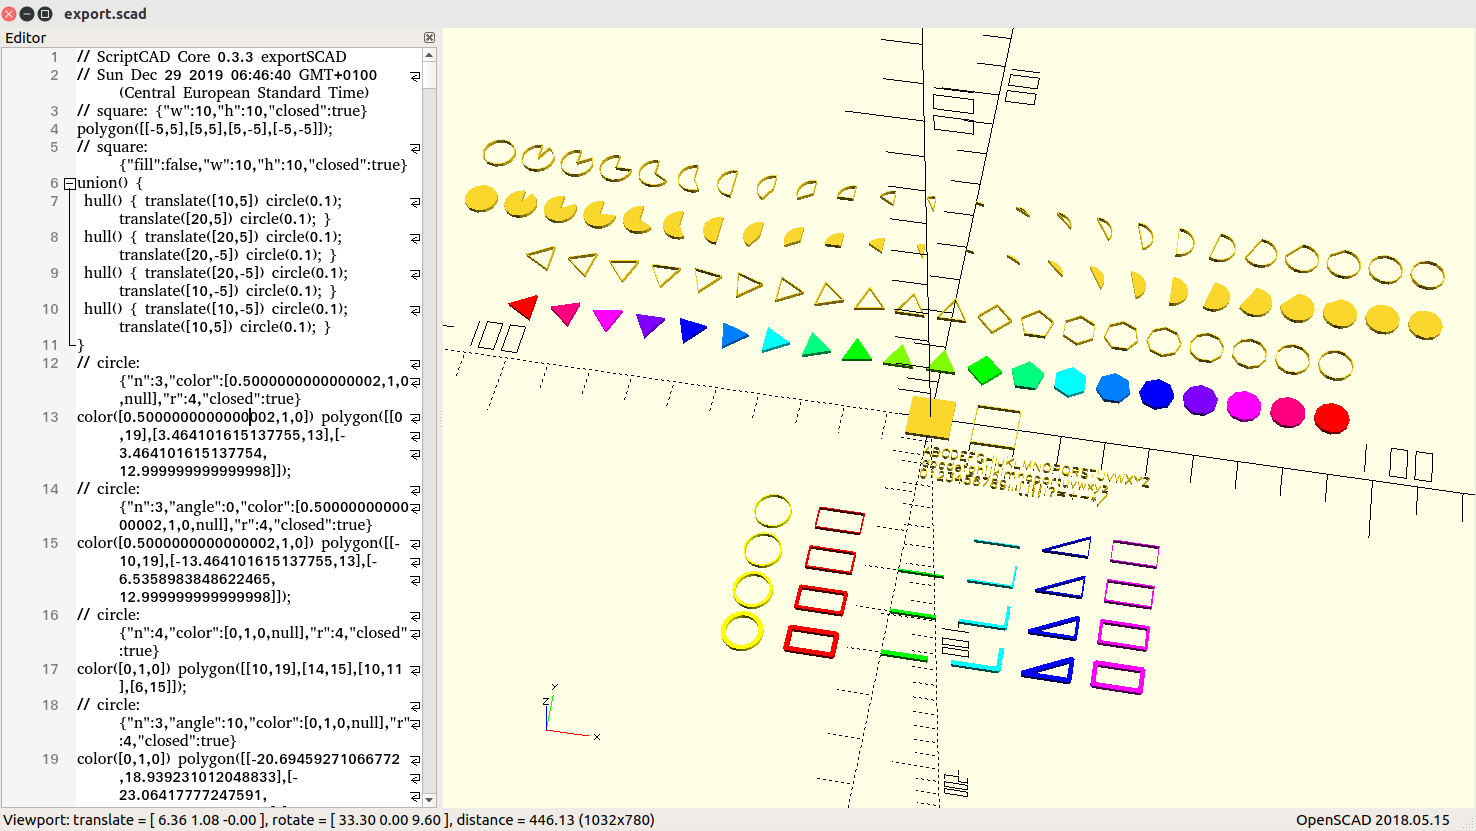
Around February 2019 I bootstrapped a scripted CAD environment named “ScriptCAD”, and resembles closely to OpenSCAD.org and OpenJSCAD.org (which I co-developed for a couple of years) with a new take, developed from scratch:
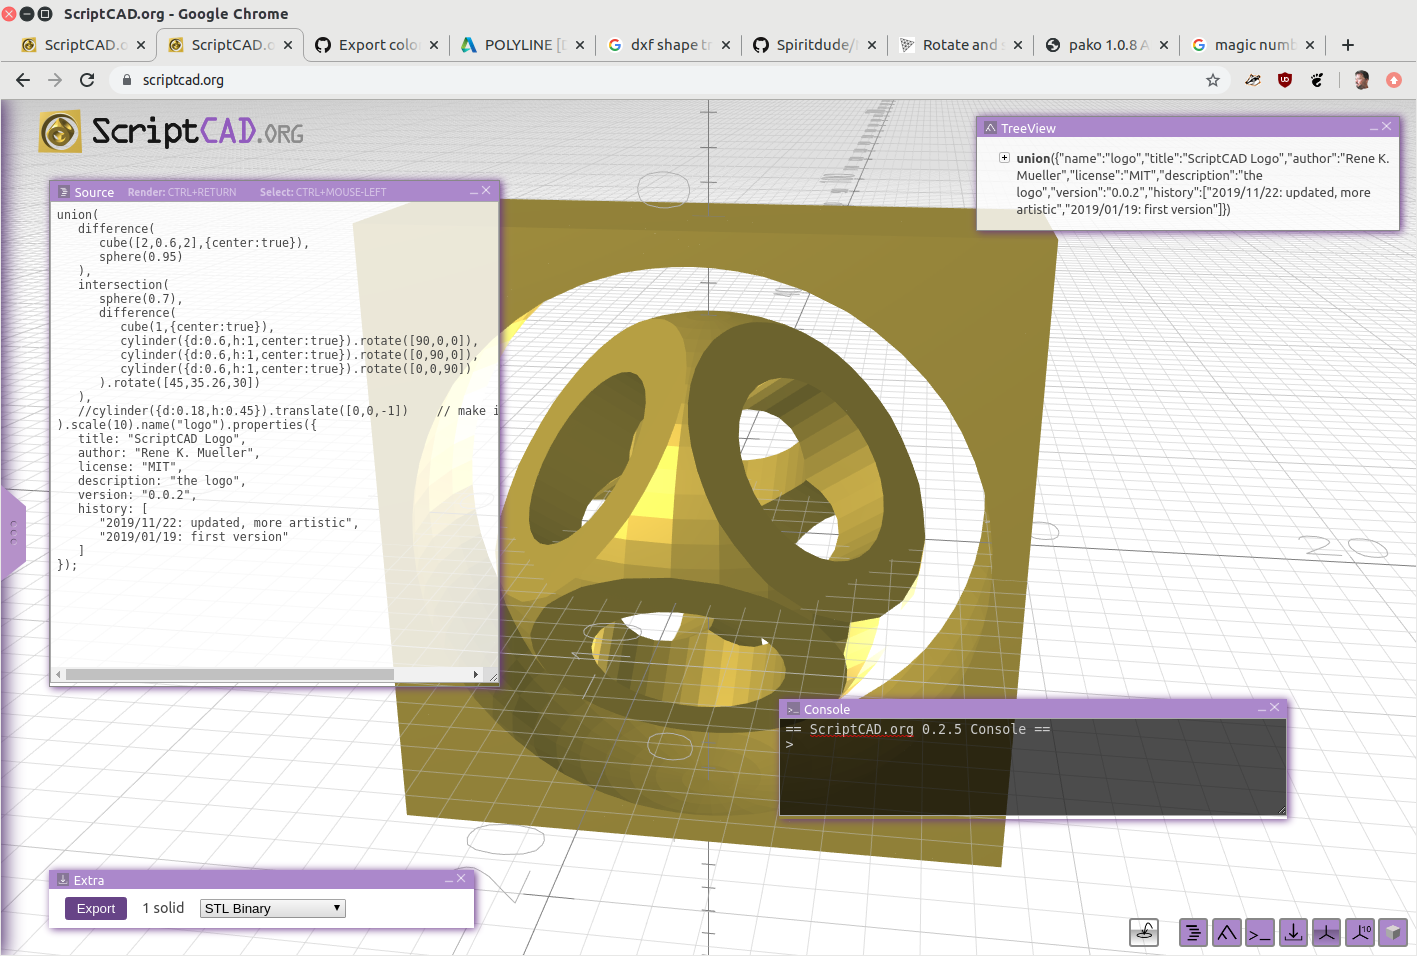
ScriptCAD.org: ScriptCAD Logo 2019/11
Scripting capability using JavaScript
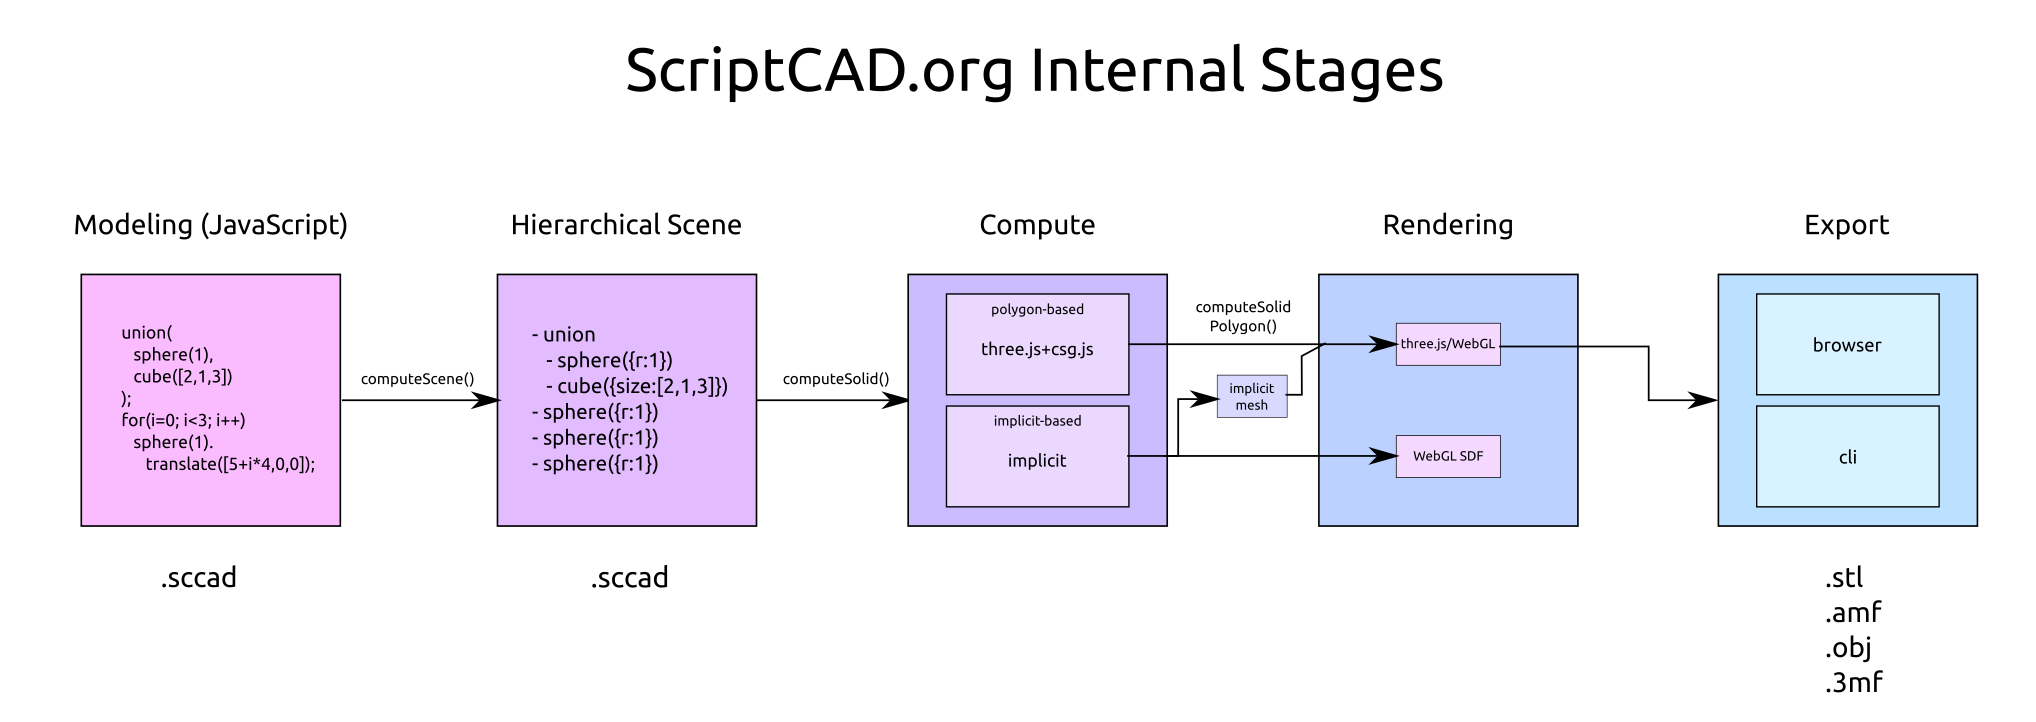
Separate internal representation from display representation
Triangulation or Implicit representation
only triangulate at late stage at display or export
ScriptCAD.org Internal Stages
Intuitive Graphical User Interface (GUI)
Simple export various formats
Select top-level solids
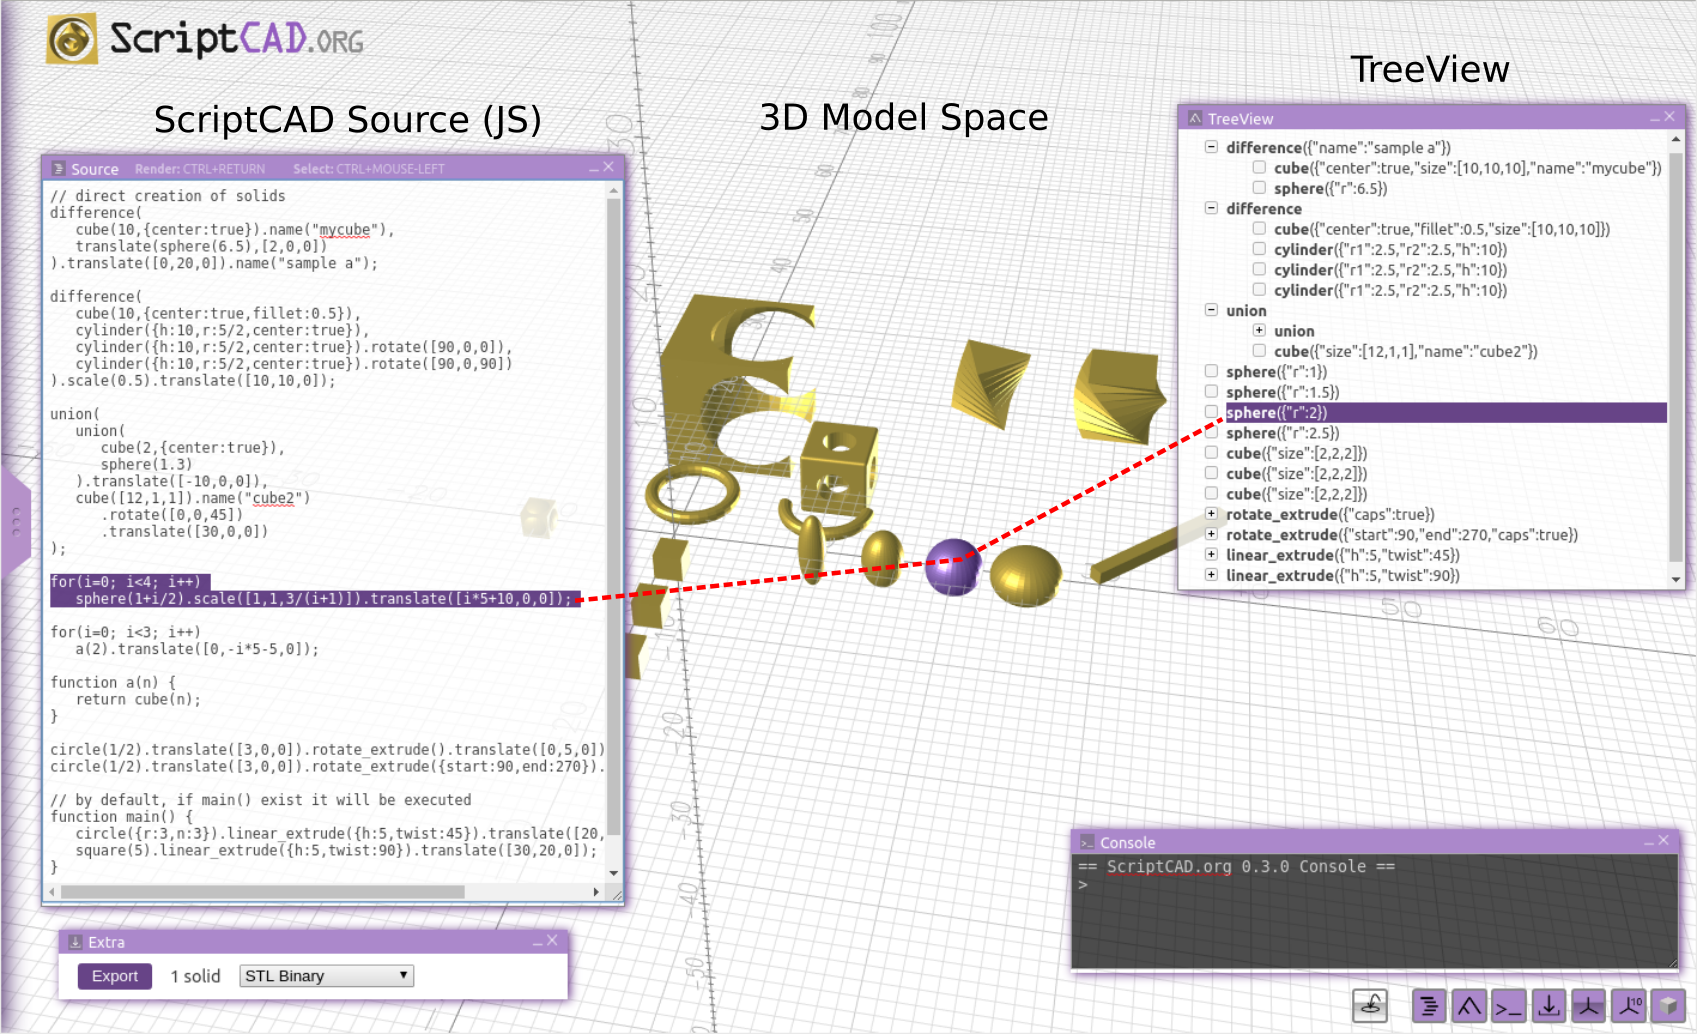
Source <-> TreeView <-> 3D Model selection
Select Source <-> TreeView Item <-> 3D Model
The transparent Source vs Object Tree vs 3D Space has been in the back of my mind for a long time as I keep the connection of each stage intact and transparent.
Ease of use
hiding JS module complexity and notions
Browser use (either use built-in editor or drag-n-drop source with autoreload)
Command Line Interface (CLI) use
Screenshots & Examples
Faces
Faces + Edges
Edges
3D Text with Hershey Font
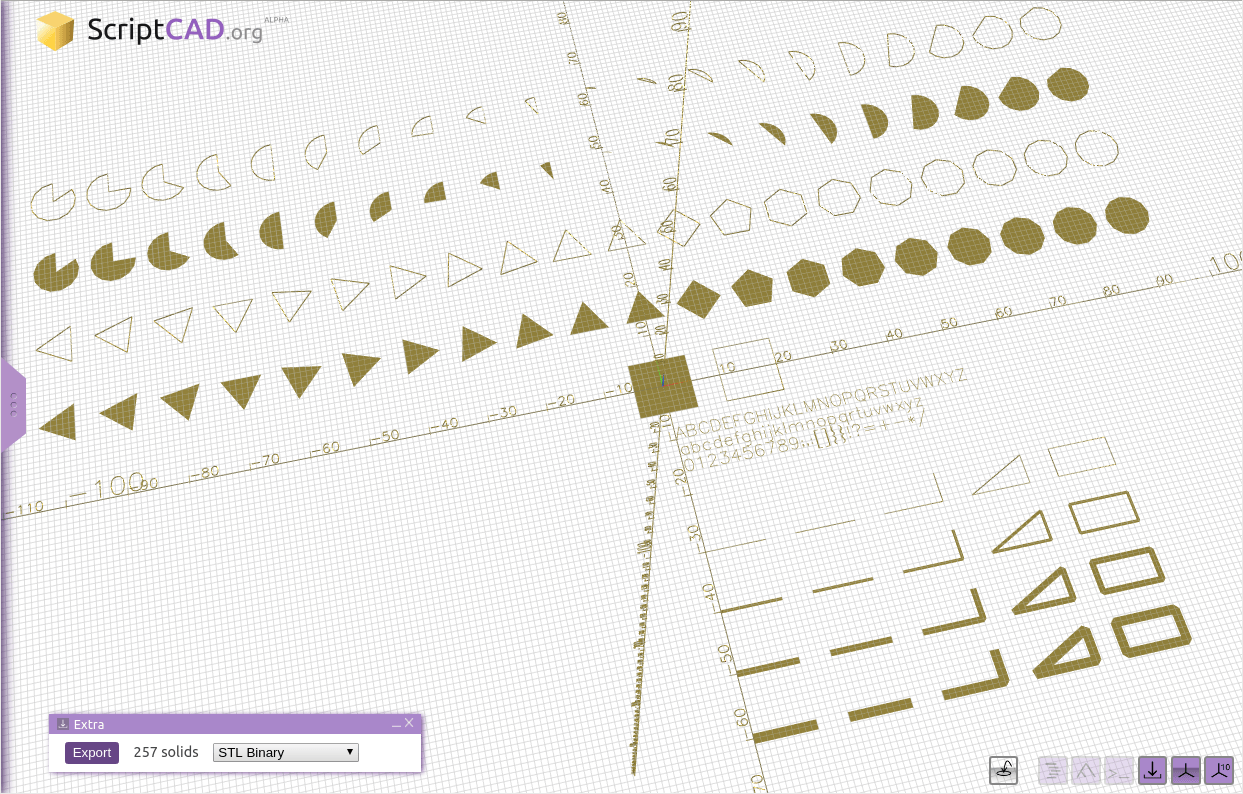
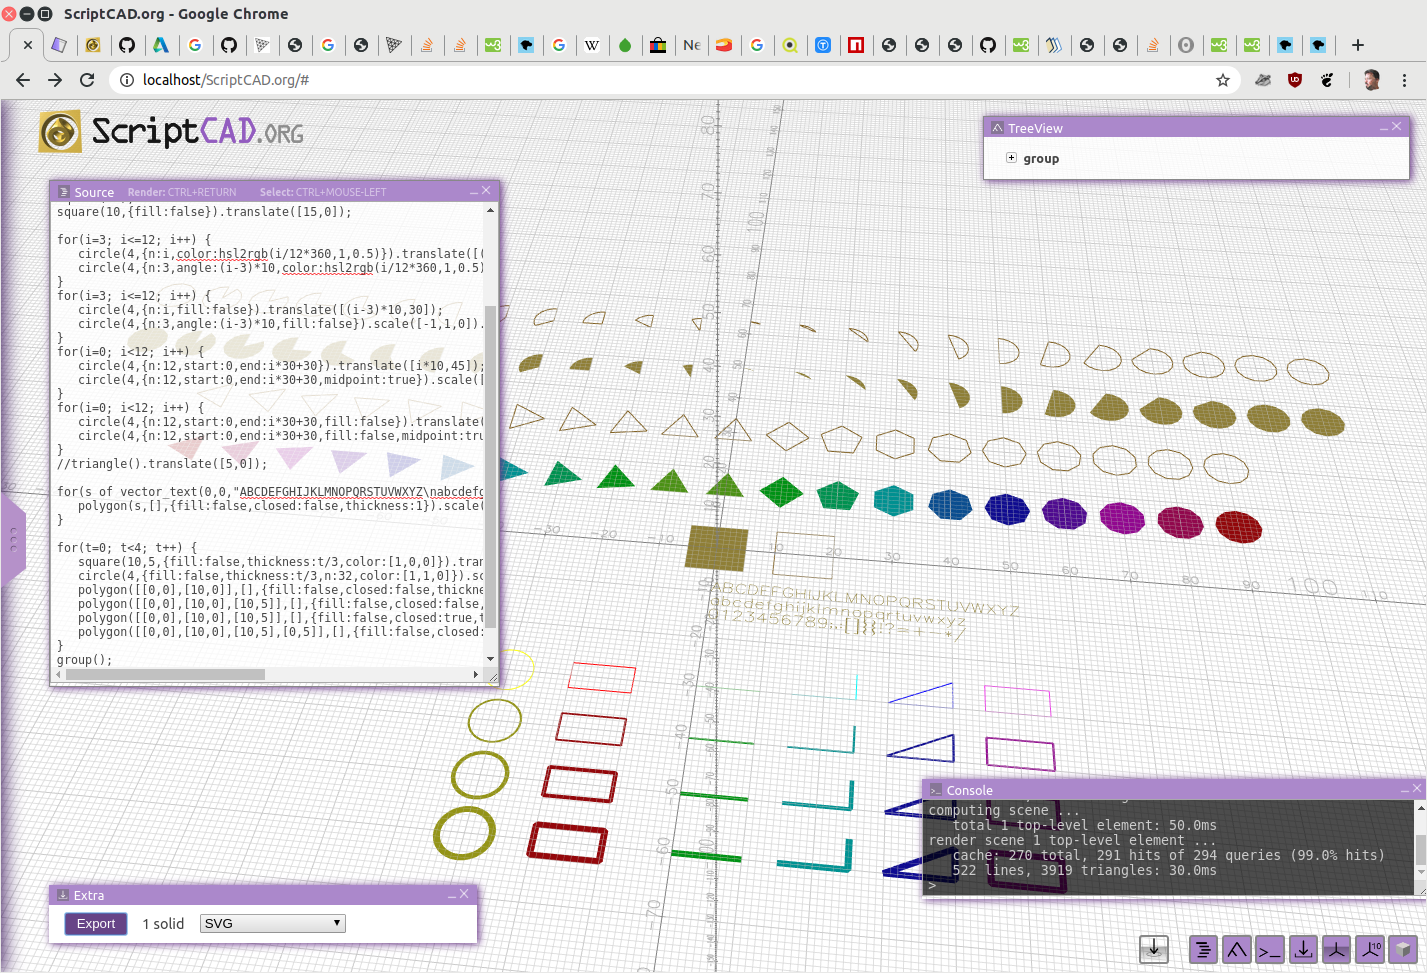
2D Examples
Parametric Designs
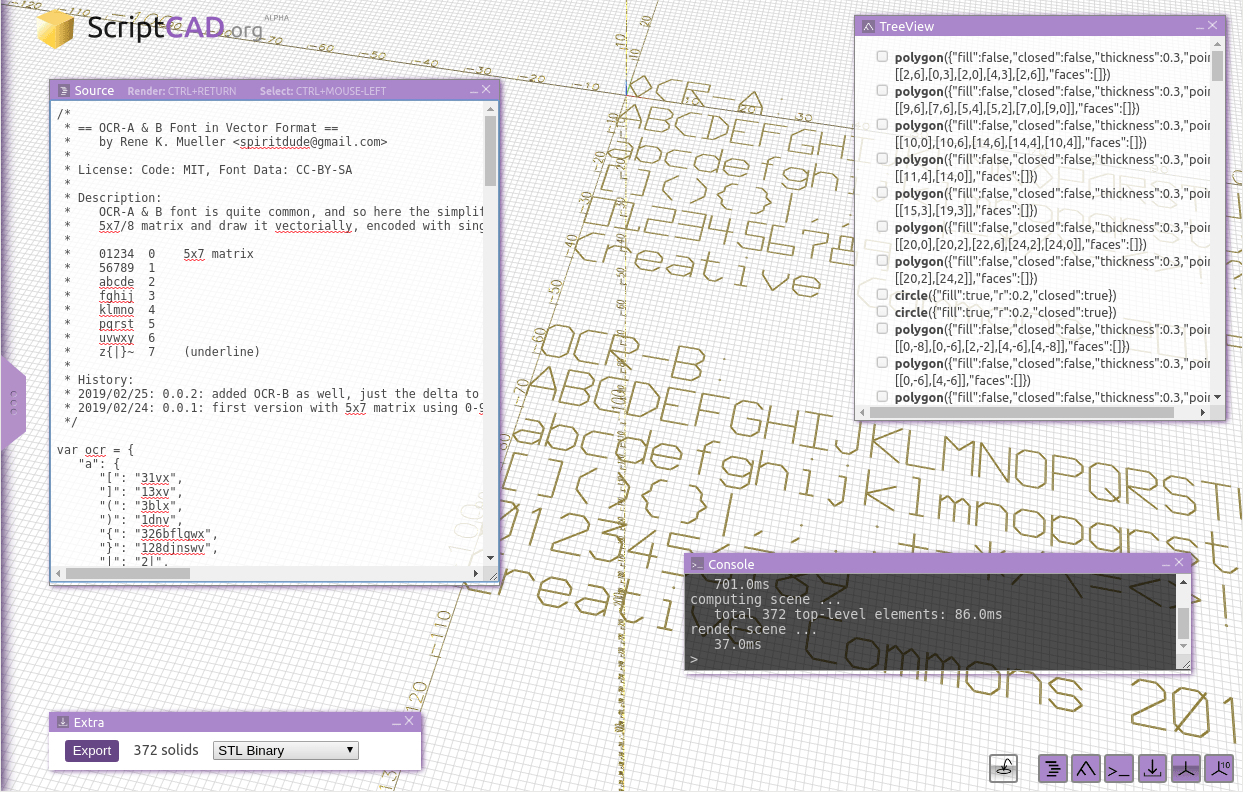
2D OCR A + B Font
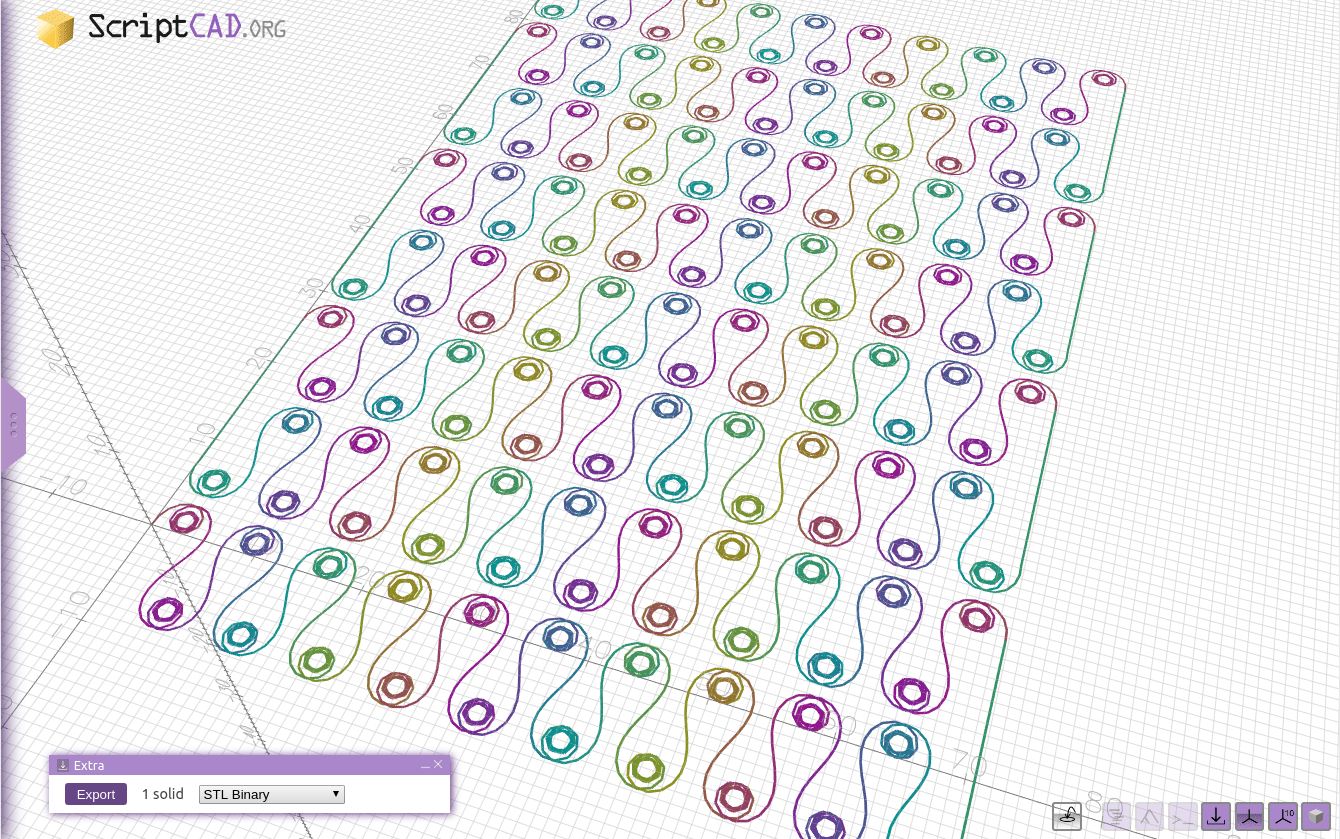
LissaJou 1
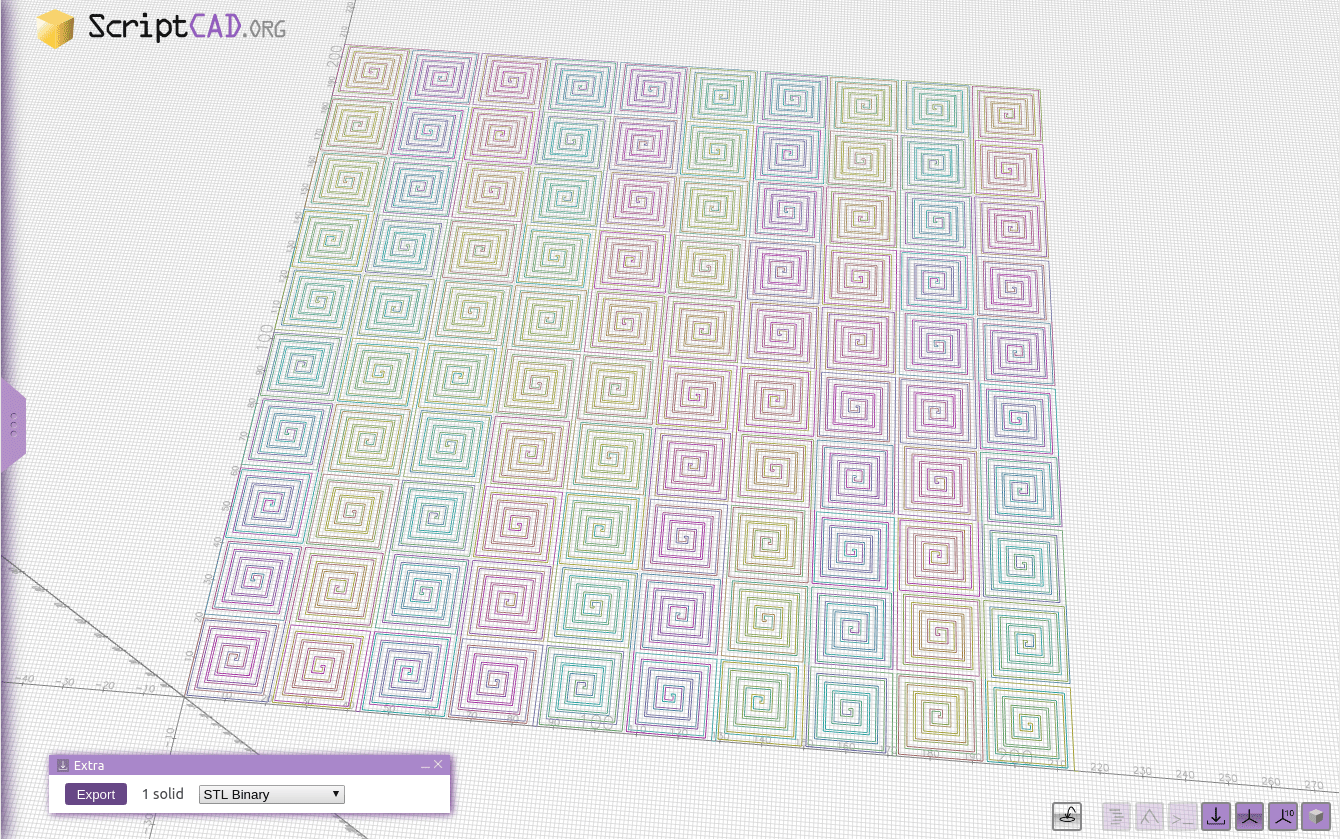
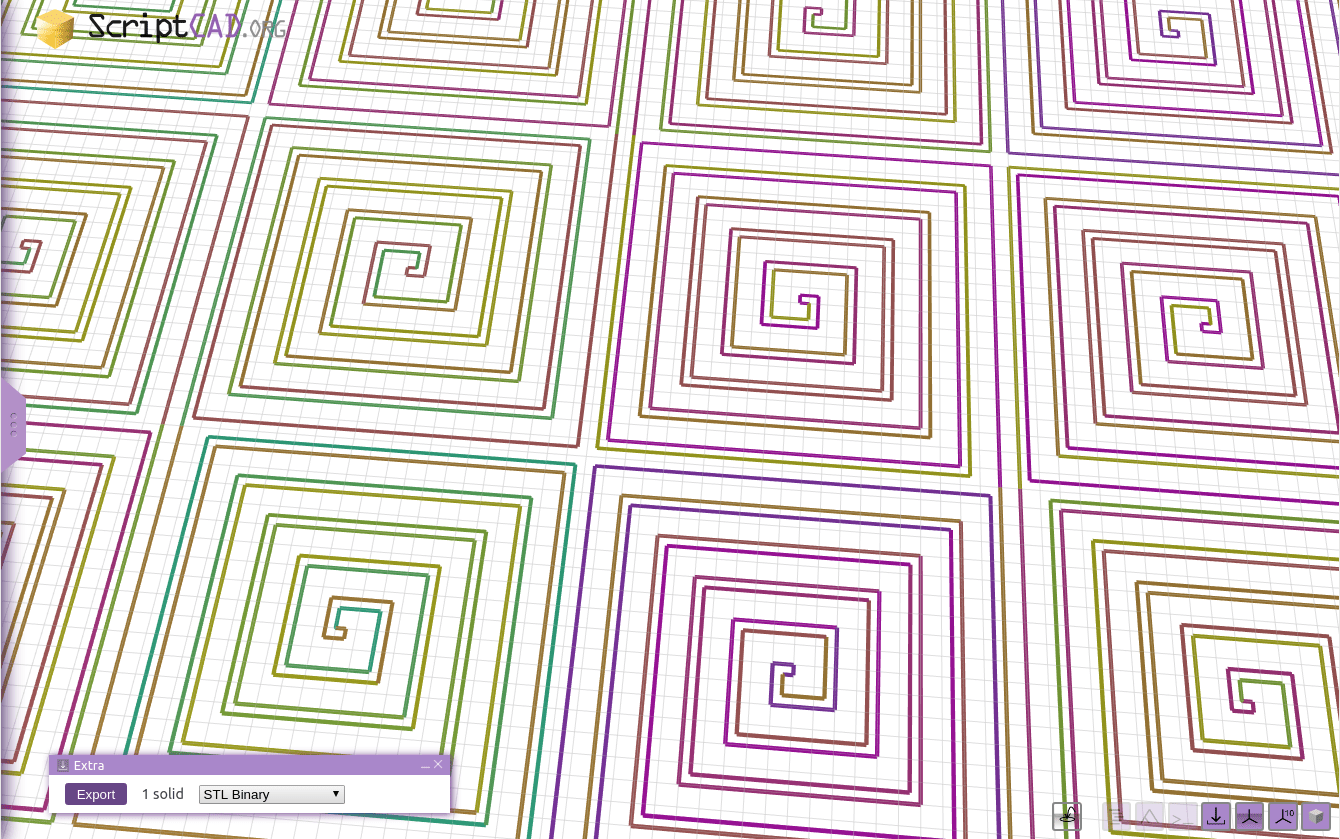
House (Circular Squares)
House (Circular Square) Closeup
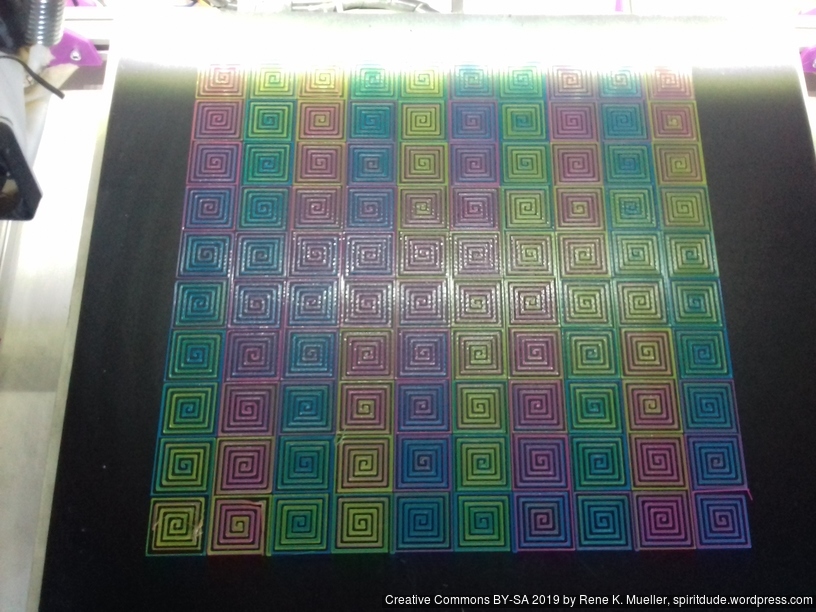
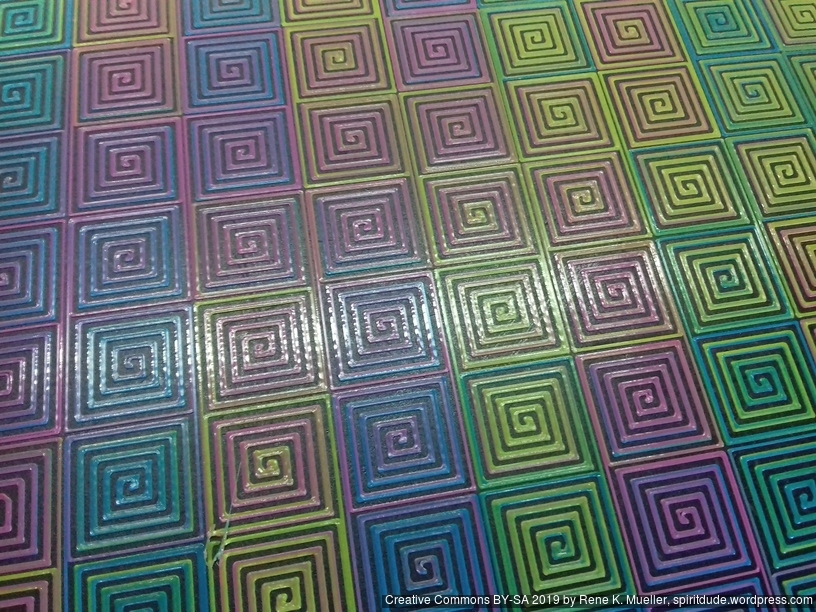
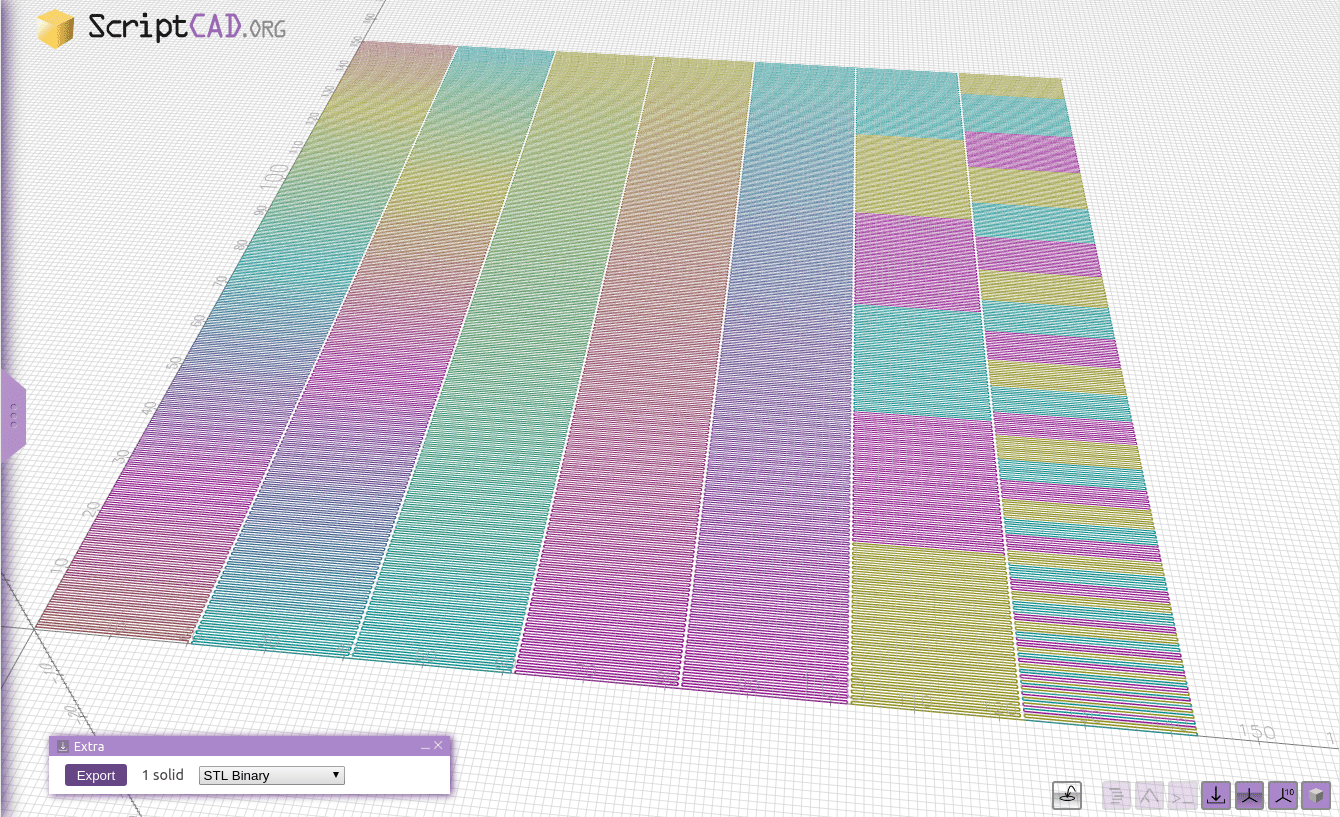
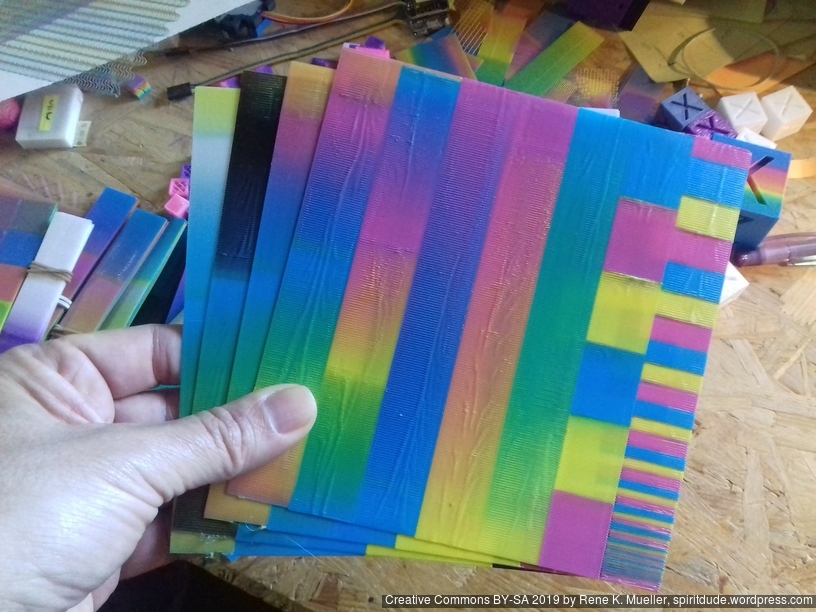
7 strips (20x150mm) testing CMY color transitions
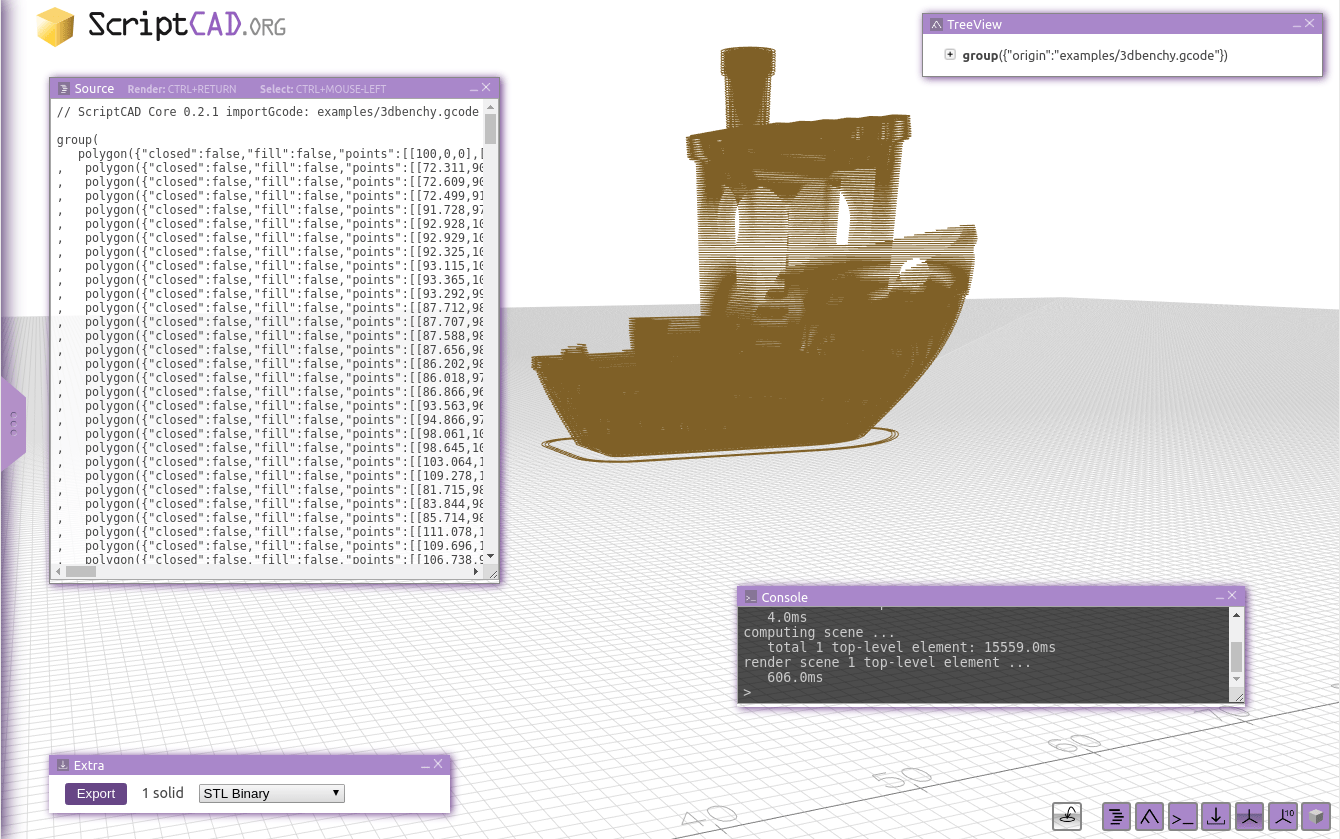
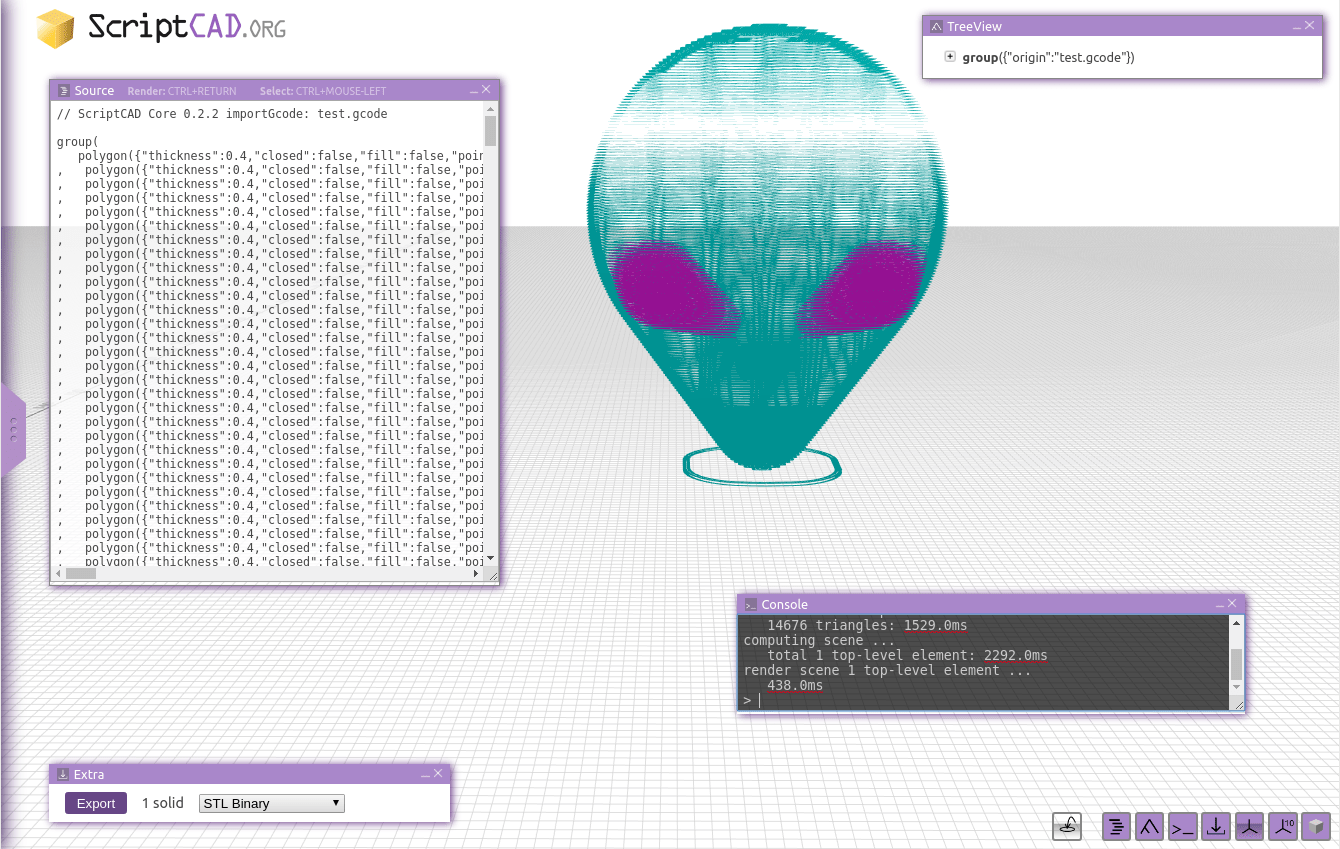
Importing Gcode
Importing Gcode with M163/M164/M165 multi-color Gcode
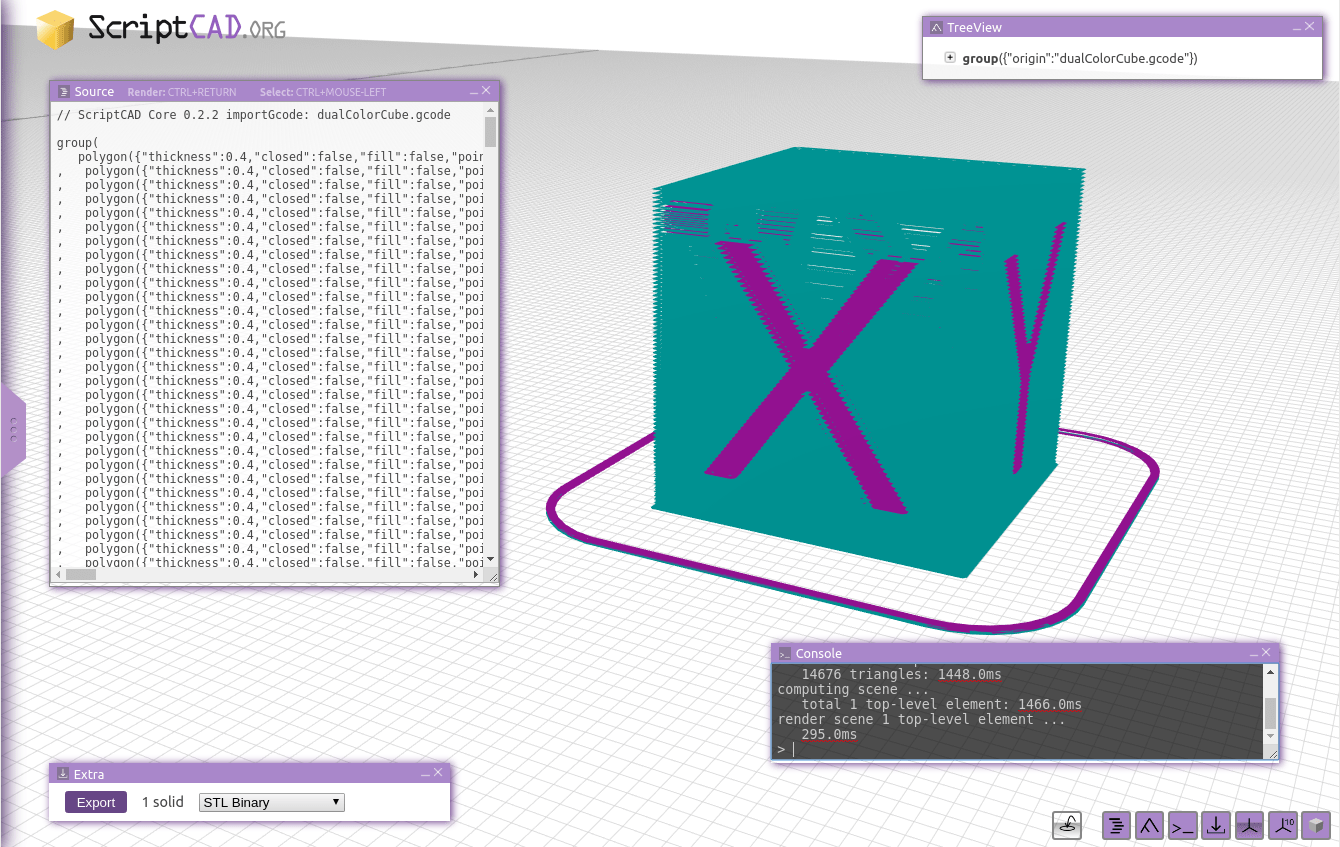
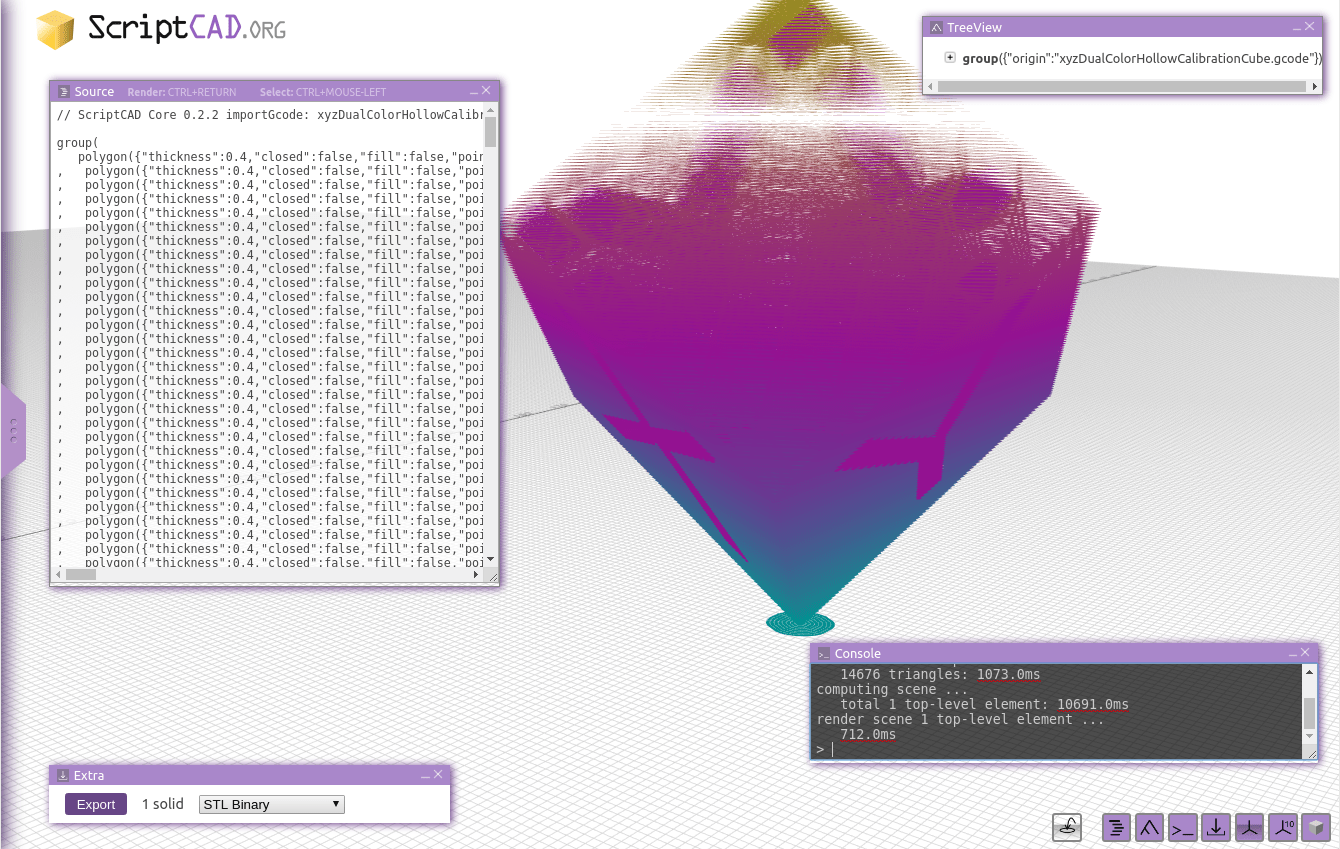
Dual Color Gcode (T0/T1)
Dual Color “XYZ” Cube sliced with Slic3r PE, and applying Z transition of 3 color range
Basic Shapes
Basic Shapes in OpenSCAD
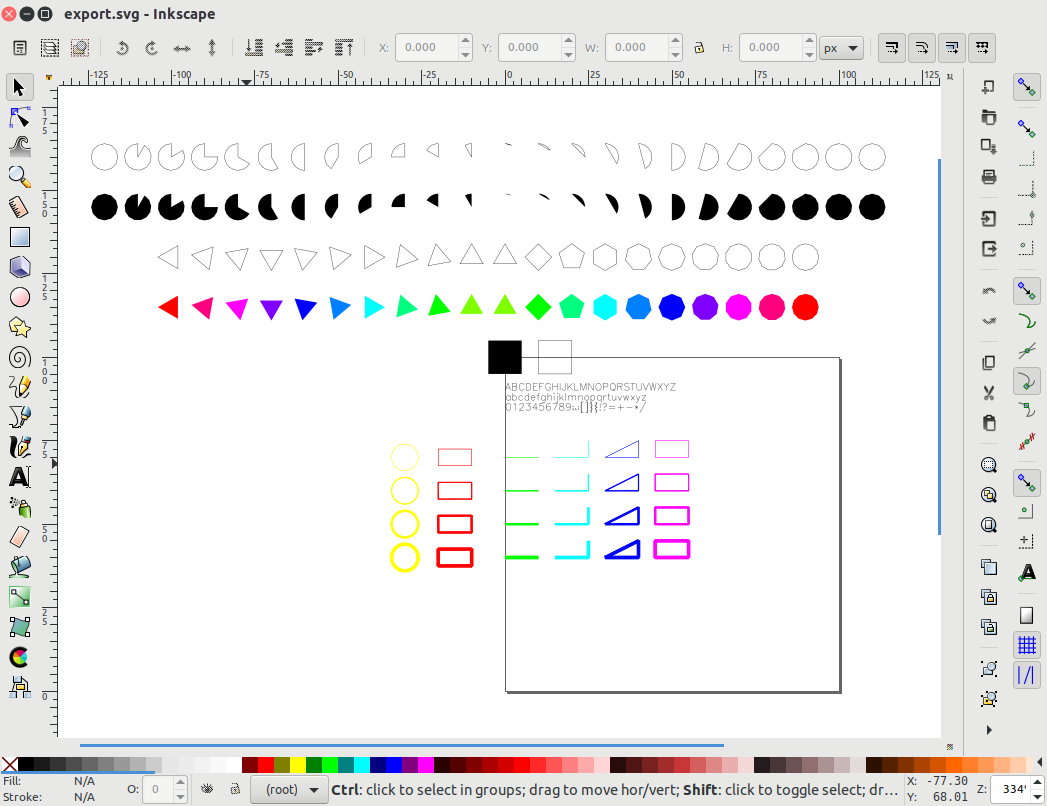
2D Examples
2D Examples: SVG in Inkscape
2D Examples in OpenSCAD
SpiritCAD.org Online as Preview
As of November 2019, ScriptCAD.org is reachable as an early preview (alpha stage), most examples work, some do not yet or display wrong output.
Note: there is only limited documentation yet (2019/11), and the API is subject of changes.
I still tune it to my use-cases and therefore API and overall design of the API might change, even drastically; once the API becomes more stable I will release the source code as well.
Some of use-cases (as seen in the gallery above):
coding low-level Gcode and use ScriptCAD to preview (render) Gcode including colors, scriptcad (CLI) outputs .gcode to actually print
testing single layer color mixed 3D Printing: forms, color mixing
ScriptCAD uses ThreeCSG/csg.js at its core to perform CSG operations, which can be very slow – hence, designing complex pieces can be slow as every change recomputes all again (I like to avoid this in future developments) yet as of 0.3.2 basic caching is implemented so only deltas are recomputed.
A few worthwhile videos done by 3DMN (3D Maker Noob), Vector 3D (Adam) and others at Formnext 2019. I will update this post as more interesting videos become available.
2019/12/11: added 3DMN Trilab DeltiQ 2 video
2019/12/02: added Joel’s (3D Printing Nerd) Formnext 2019 video
bowden style, optionally direct drive style setup (Trilab FlexPrint)
price: 2600 EUR (minimal configuration)
Vector 3D: Continuous Carbon Fibre by Anisoprint
Anisoprint mixes Nylon, PC, PLA, TPU and PETG with carbon fibres (CCF) in their continueous 3D printing procedure.
Vector 3D: Dyze Design & Craftbot
Dyze Design: High volume printing from pellets with 1-5mm large nozzles. Craftbot: Briefly discusses “Craftbot Flow Generation” 3D printer series, not very informative (sales talk).
igus: more infomercial, yet informative: wear resistant filament / prints (e.g. gears) with their own polymer mixture called “iglidur”, optionally also food save.
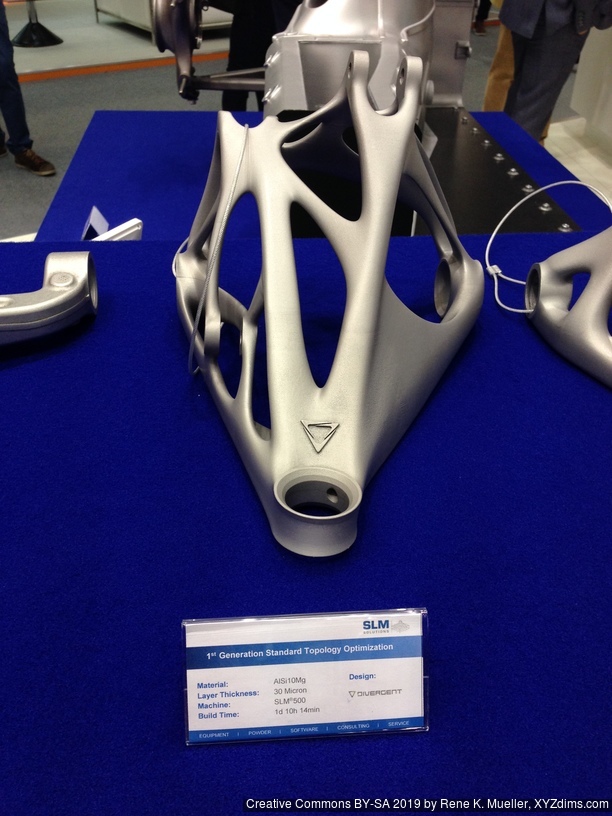
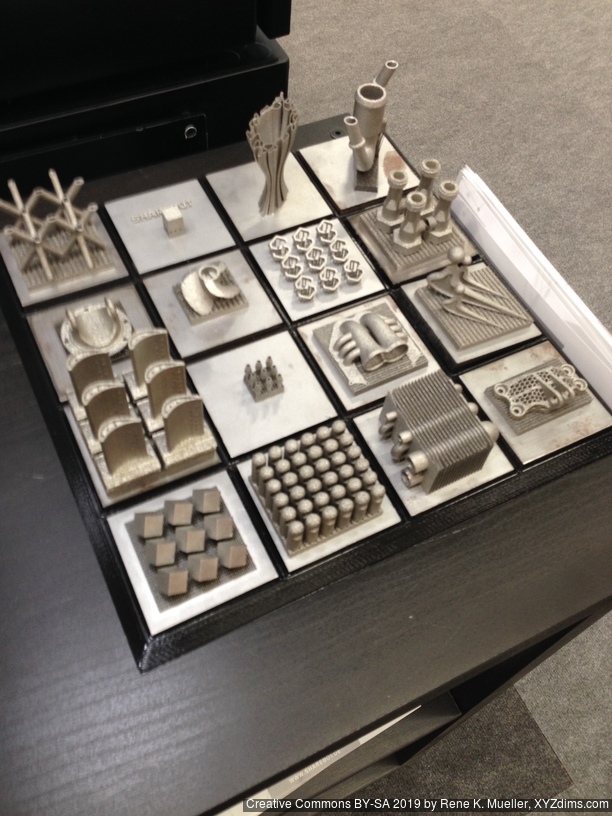
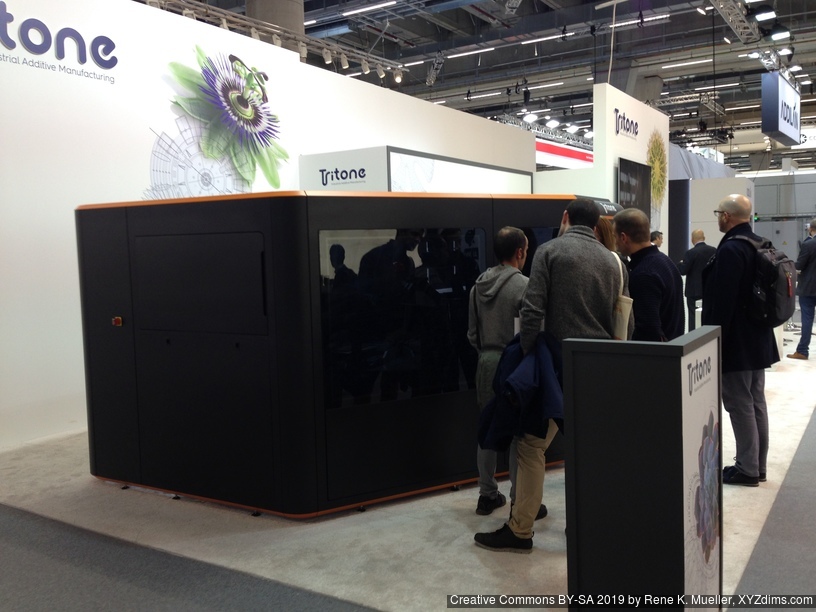
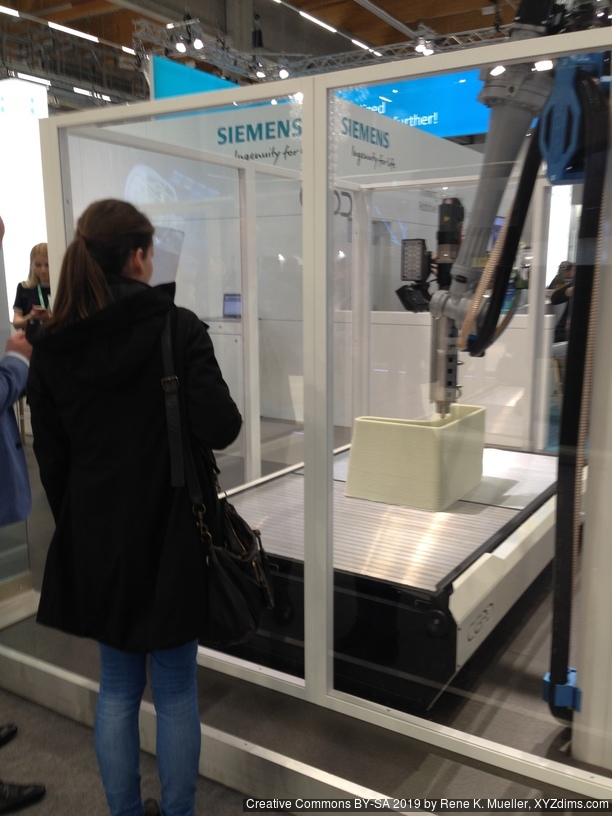
I decided to visit Formnext 2019 in Frankfurt (Germany) November 20, 2019. And to give you the essence first, it was too much – 800 exhibitors in two larges halls each with 2 floors – one day is not enough, and others told me, not even two days is enough to have time to absorb what has been shown at this exhibition.
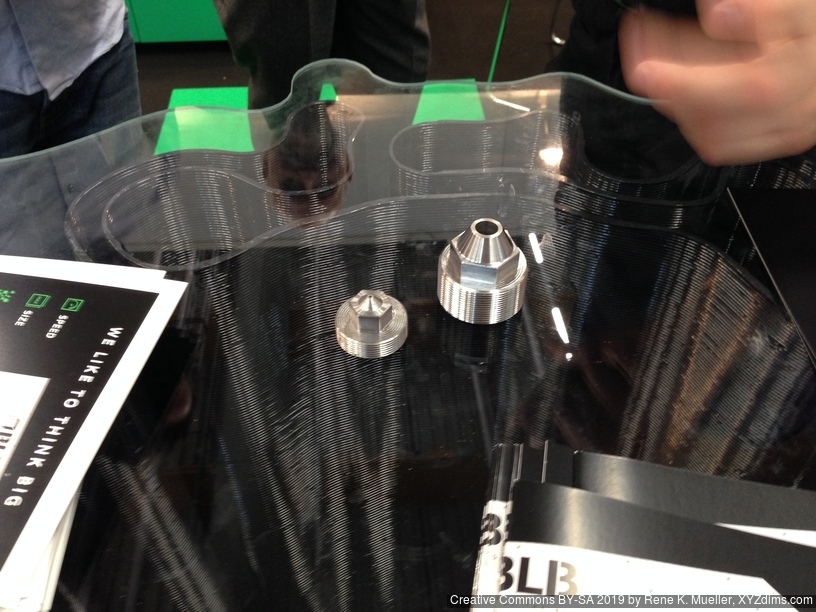
Metal Printing: one of the huge topics of Formnext 2019 was . . . metal printing aka “no more plastic”, it seemed like the motto for 2019, in the corporate sense of it.
Tritone
Ecoparts samples
Ecoparts sample
High precision custom cooling nozzles (sprays 50cm far on CNC machined piece)
Sharebots samples
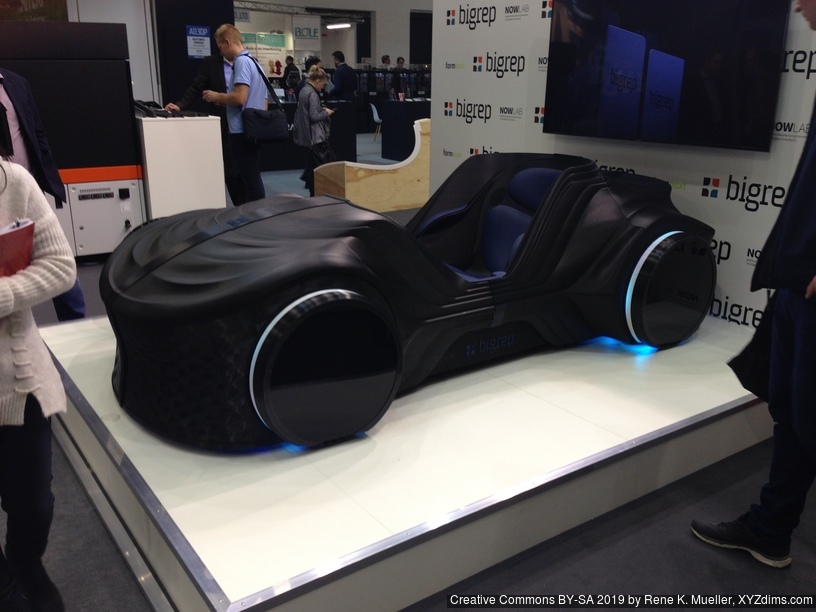
The printers were huge, car or even tractor sized 3D printers.
Tritone
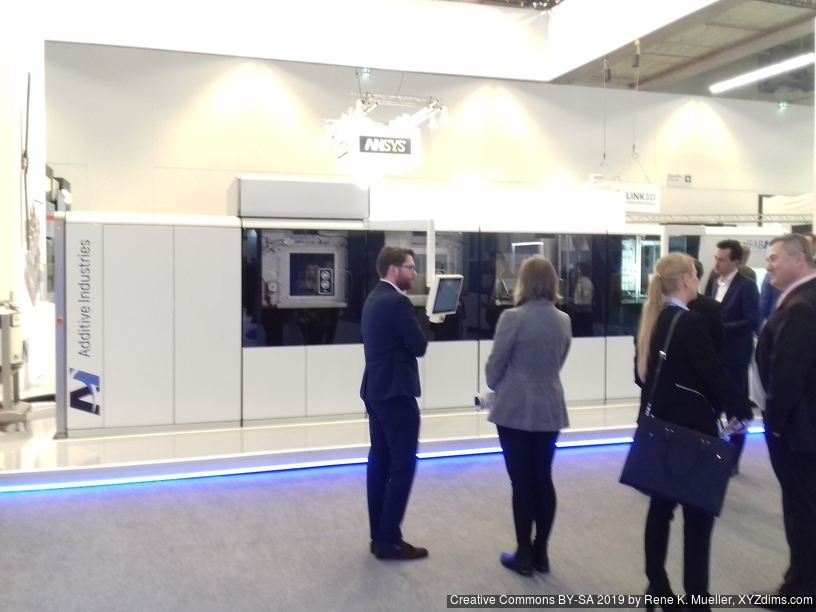
Ansys
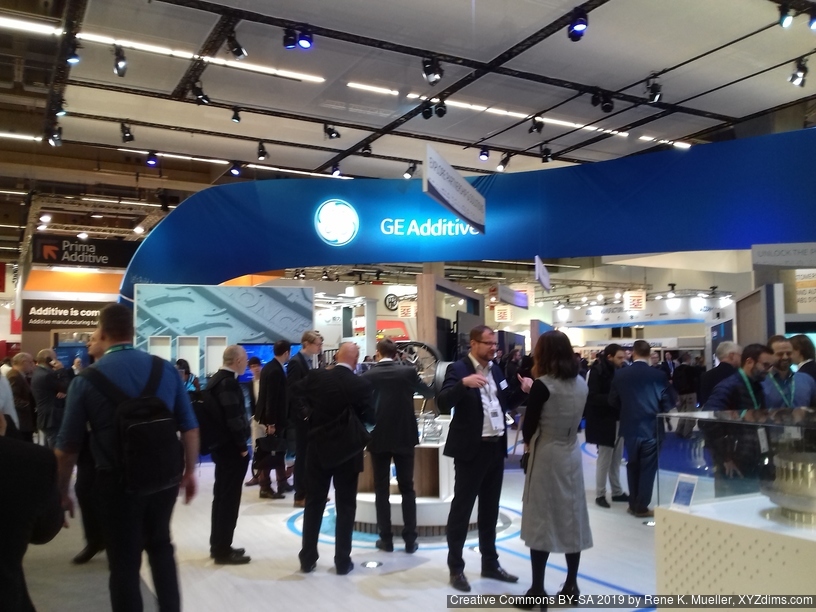
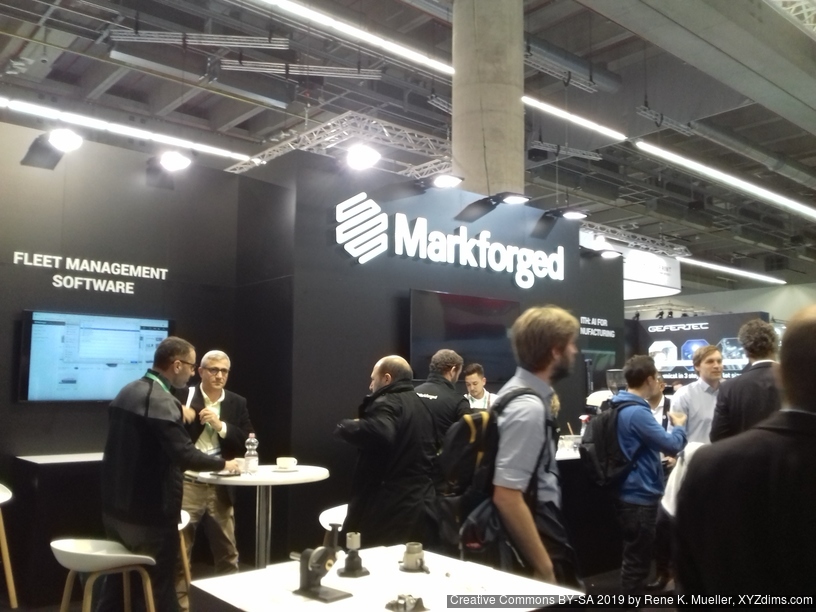
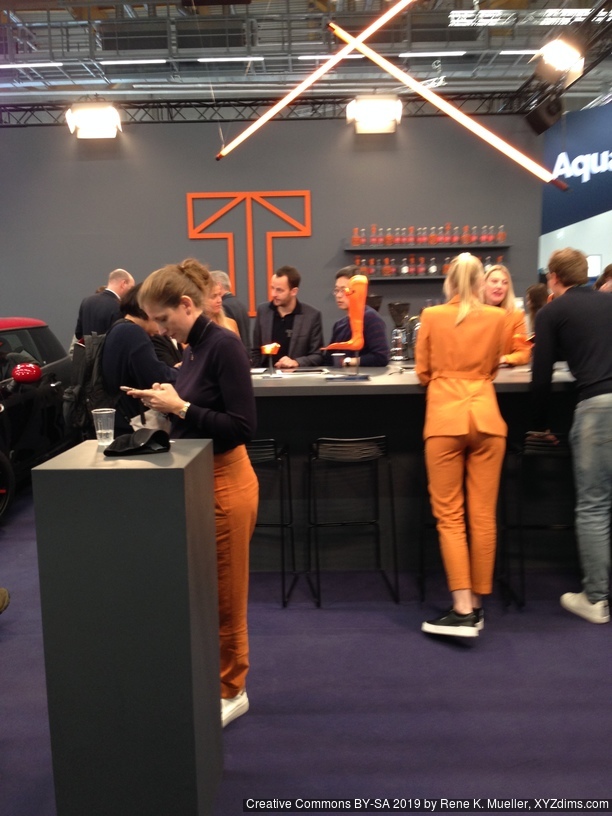
The kind of faceless corporate world:
GE Additive
Markforged
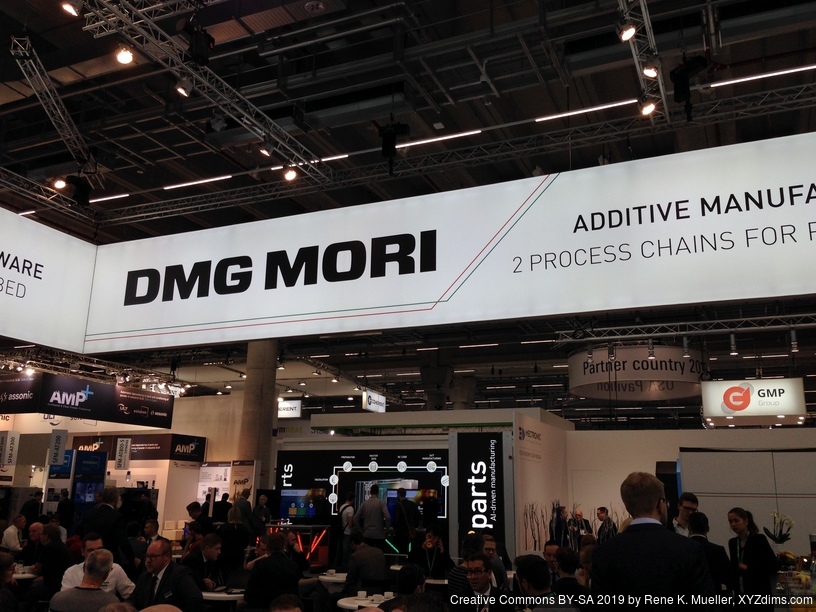
DMG Mori
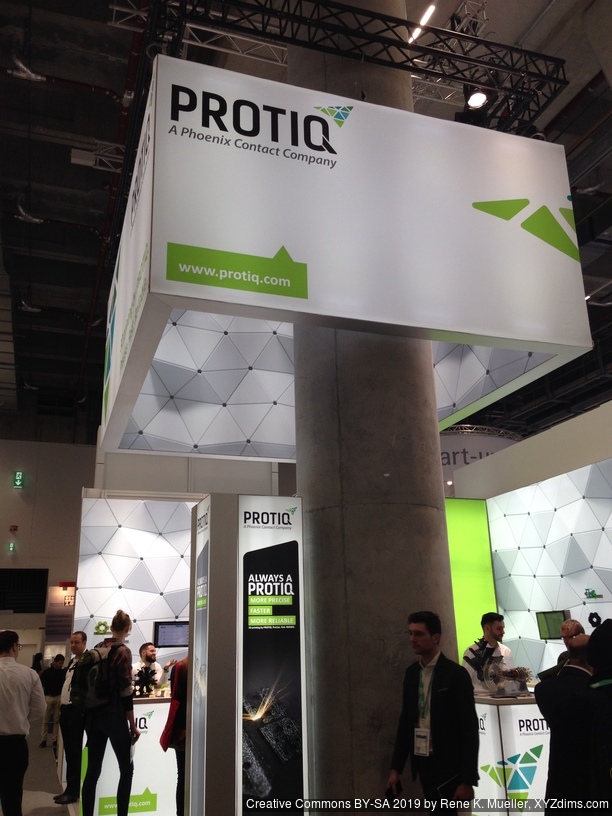
Protiq
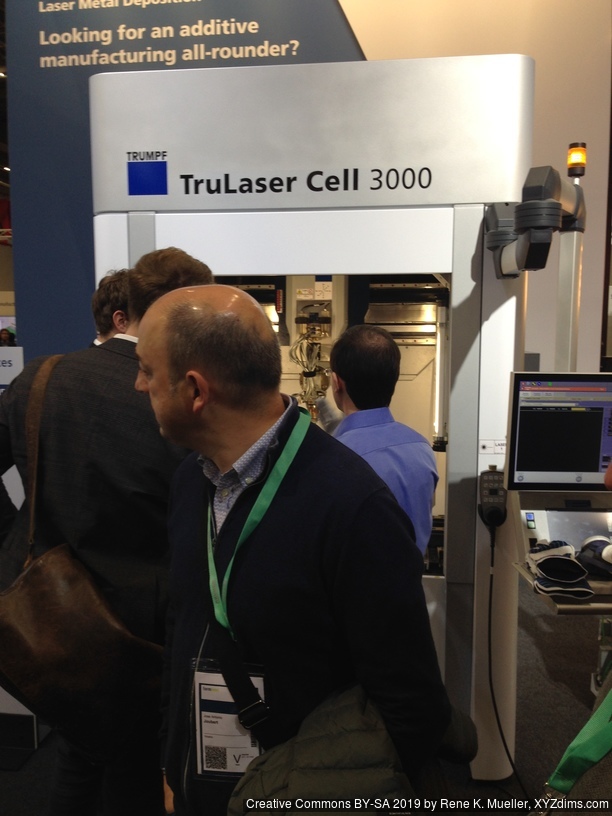
Trumpf
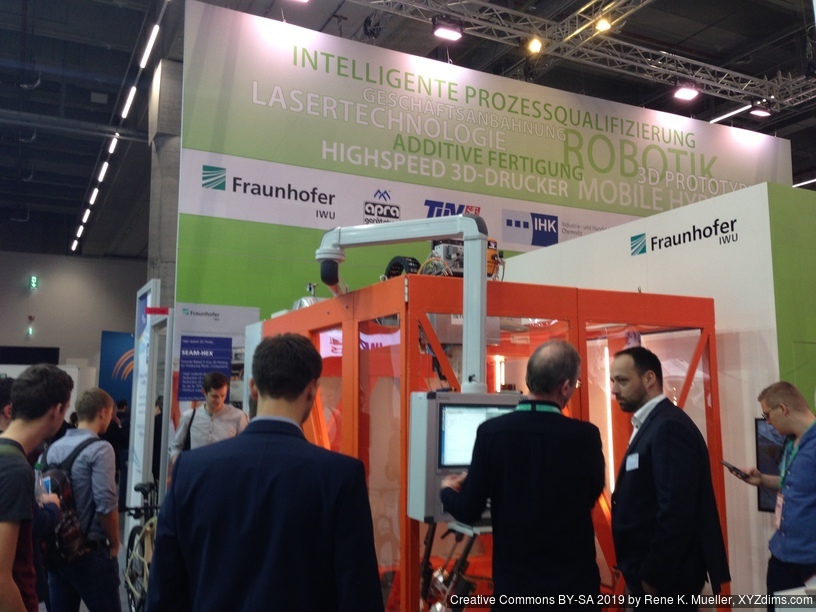
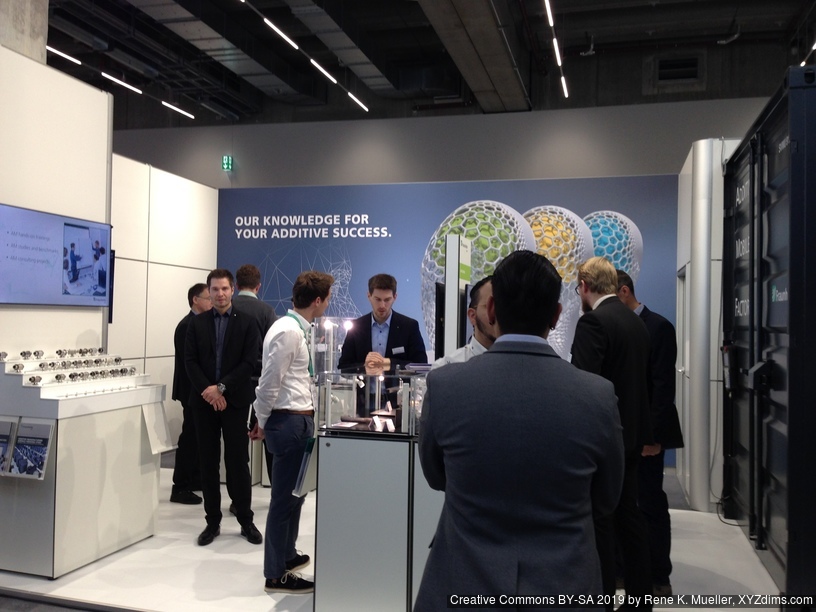
Fraunhofer
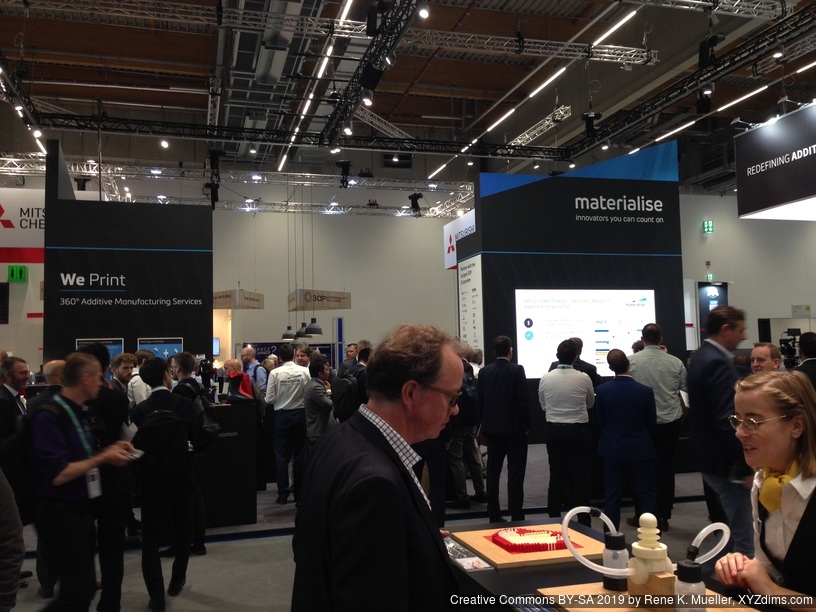
Materialise
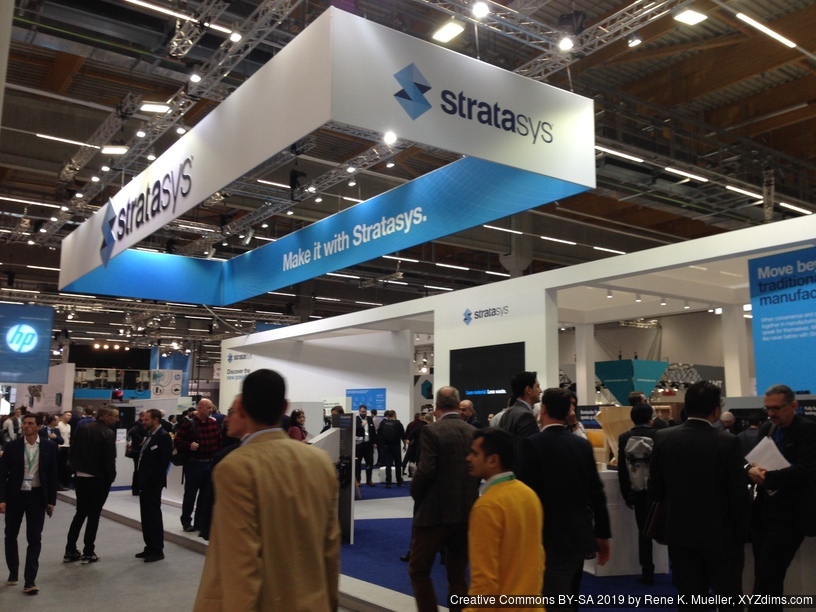
Stratasys
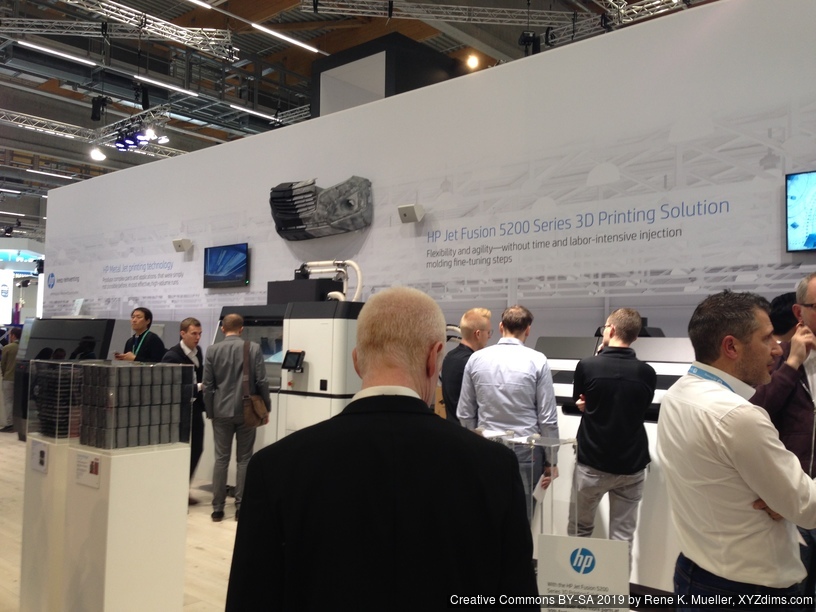
HP
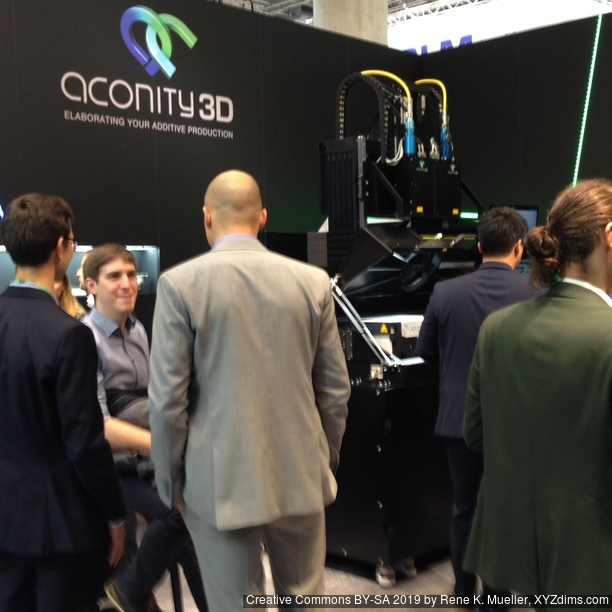
Aconity3D
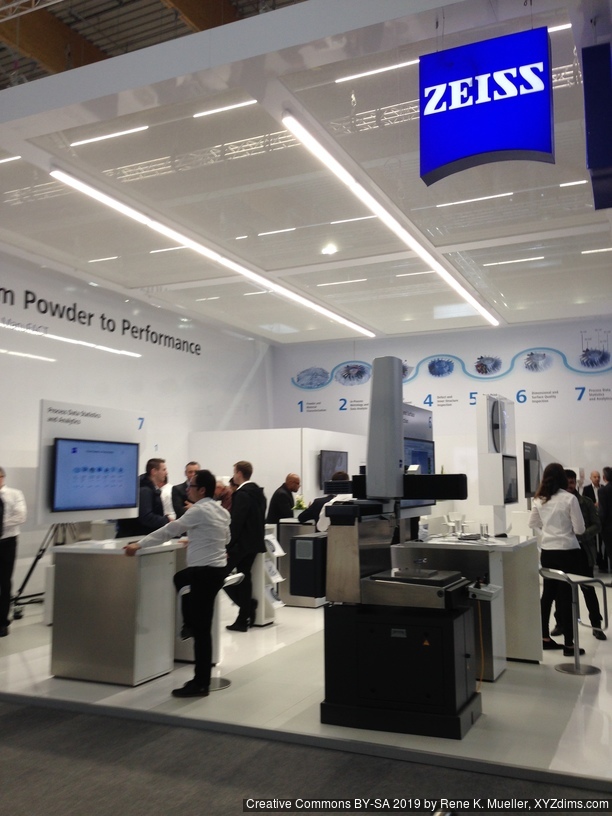
Zeiss
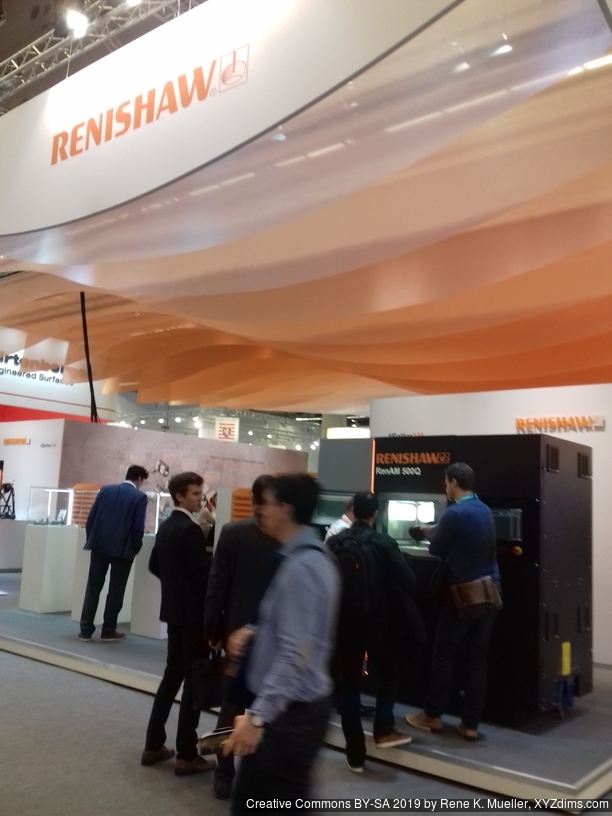
Renishaw
Ultimaker booth
Ultimaker: So I spotted Ultimaker booth, and asked for “Daid”, nobody seemed to know, but “David” was known (as author and driving force of Cura) but not there, as he left the company 2 months ago I was told – either way, I spoke with Roger Bergs and expressed my gratitude for Cura being Open Source and he replied: “you know, we come from there, it’s part of our company culture” . . . nice to see such a commitment to the Open Source, especially compared to the next:
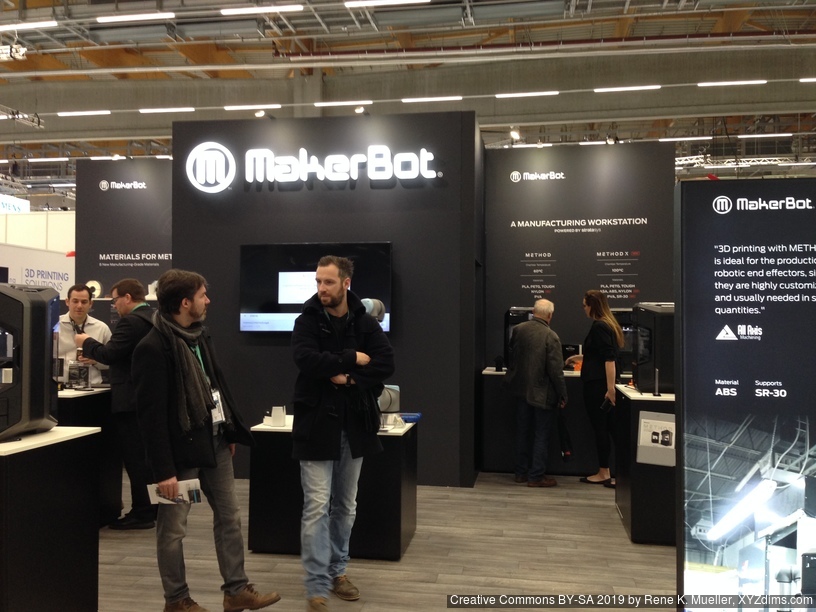
MakerBot: . . . and to my surprise, there was a mid-sized booth of MakerBot, the owner of the struggling Thingiverse, on the brink of collapse. After some brief delay, I was able to talk to Jason Chan, responsible for Thingiverse who was on site, and we had a brief talk:
MakerBot booth
I acknowledged the role MakerBot played in early days of 3D printer development in contrast to the later abandonment of the Open Source principle with the acquisation by Stratasys . . .
I pointed out how important Thingiverse was and still is for existing projects, which still reference the STL files on Thingiverse and if it were to disappear it would be devastating and break many projects out there (not all migrated to github or other 3D model repos)
further I expressed my experience about other the 3D model repositories being functionally inferior compared to Thingiverse
Thingiverse was unbearable slow and unreliable – Jason acknowledged and confirmed my concerns of the current functionality of the site
Jason responded as following:
only 2 web developers are assigned to Thingiverse maintenance as of 2019/11
there is a backlog or debt of problems unaddressed for the years and MakerBot is aware of it (to the public it seemed nobody cares at MakerBot)
Thingiverse is costly running it, and provides no (significant) income
there are commitments within MakerBot to reboot Thingiverse and fix all the backend issues and resolve the “slowness” of the site (that has been said before, nothing happened – just check @makerbot Twitter account)
development of a financially sustainable foundation for Thingiverse, means, to create income – how this is planned he didn’t wanted to reveal in more details
MakerBot kind of was surprised of the immense success of Thingiverse of the past years
Josef Prusa: While visiting Hall 11, I came across Josef Prusa walking alone, and I just briefly shared my admiration for his success by combining Open Source and business to a self-sustaining model. I later visited the Prusa Research booth, and it was packed with visitors and and catched this short video showing Prusa Mini in action:
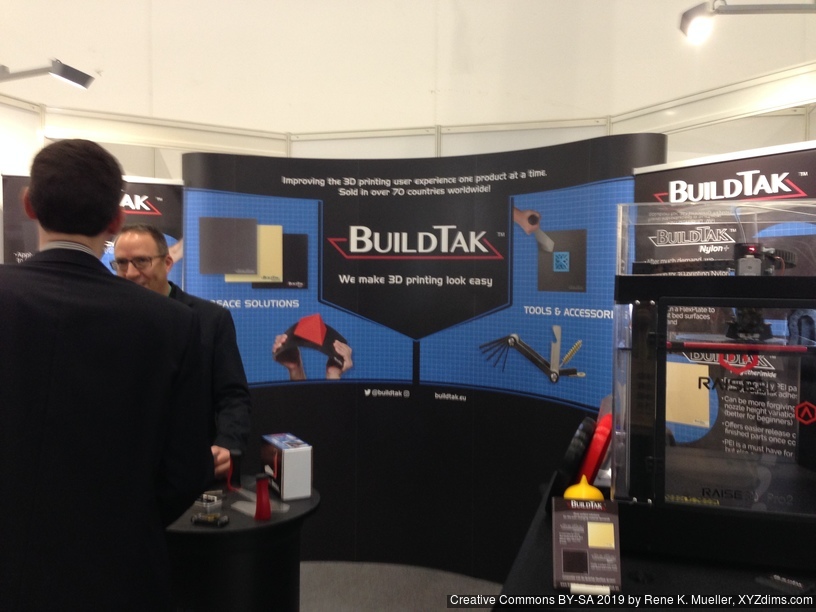
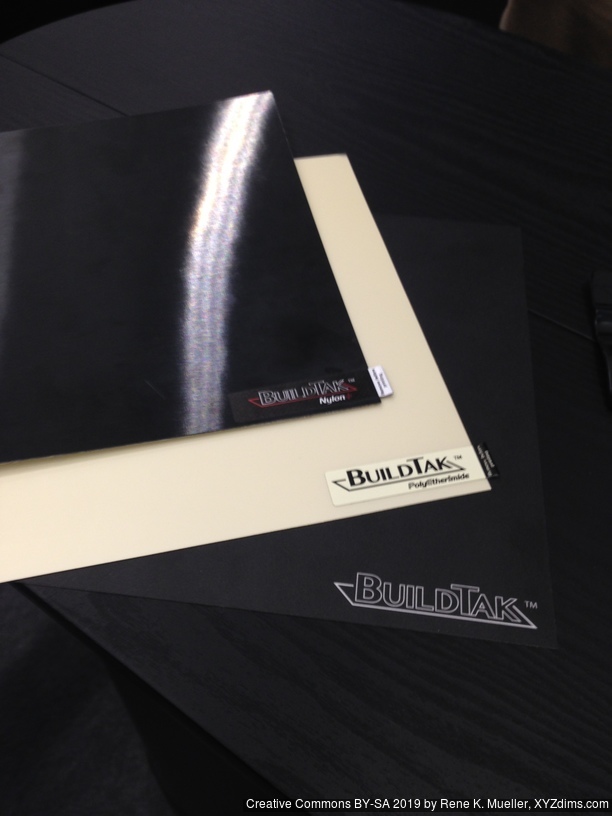
BuildTak: Just a brief talk with Igor Gomes, about their new products and shared a bit of my stuff as laid out on this web-site.
BuildTak booth
Few samples
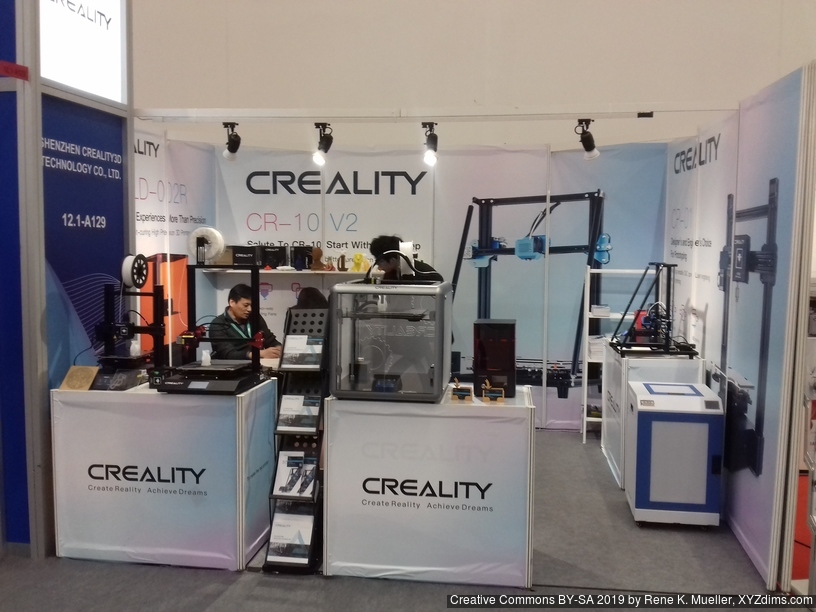
Creality booth
Creality: . . . and there it was, a tiny small booth of Creality – 4 or 5 shy representatives sitting there, and I walked toward them and greeted them in english, and a smile rushed unto their faces (to my surprise), and I expressed my thankfulness of their move to Open Source the Ender 3 entirely, that this move or gesture really was acknowledged in the Open Hardware and 3D printing community in the “West”. In a way it was bizarre, there was this small booth, while in reality, this company had more impact than perhaps the rest of the exhibitors of the entire hall – nobody else ships as many 3D printers as this company as of 2019.
Misc Small Chinese Exhibitors:
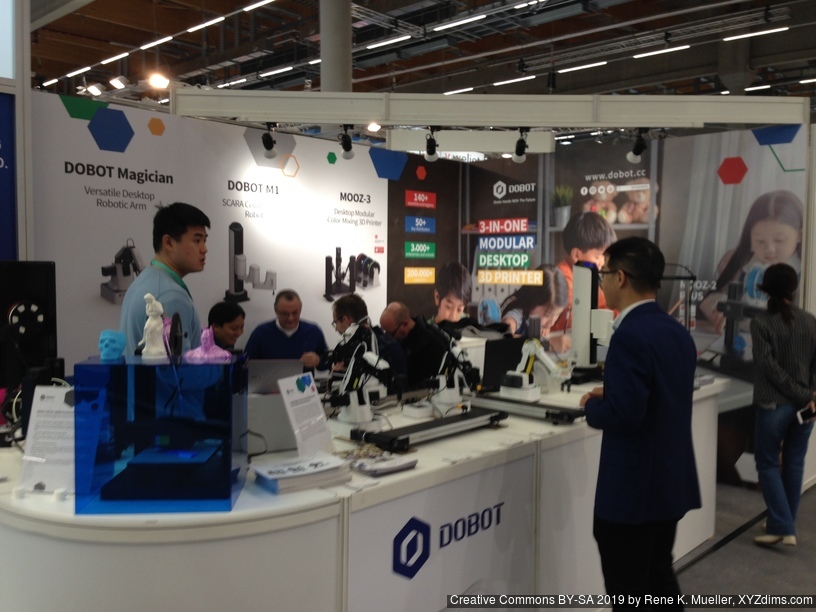
Dobot
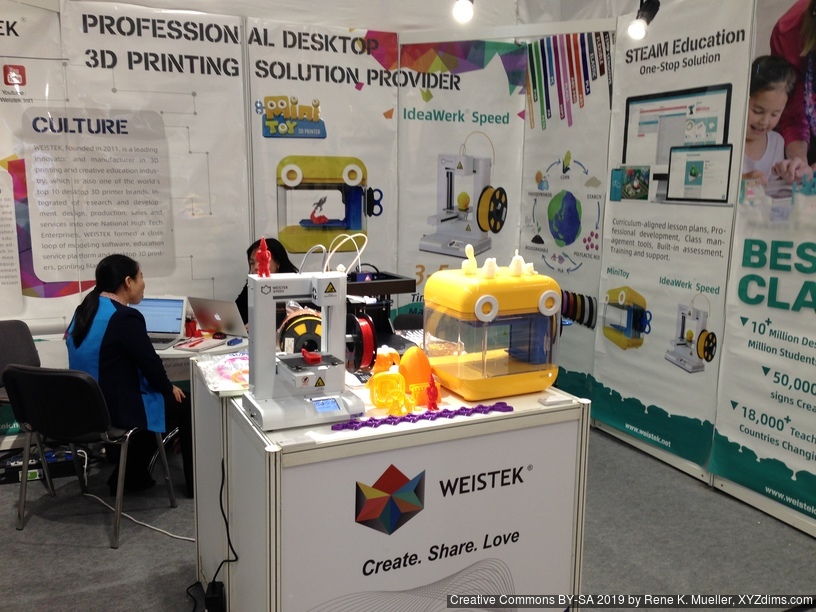
Weistek
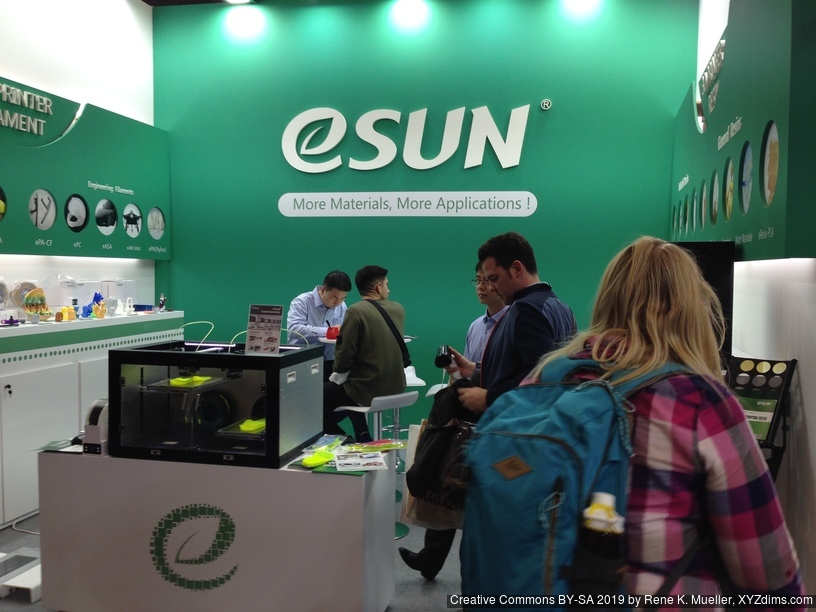
eSun
Too little time to explore their products in more depth.
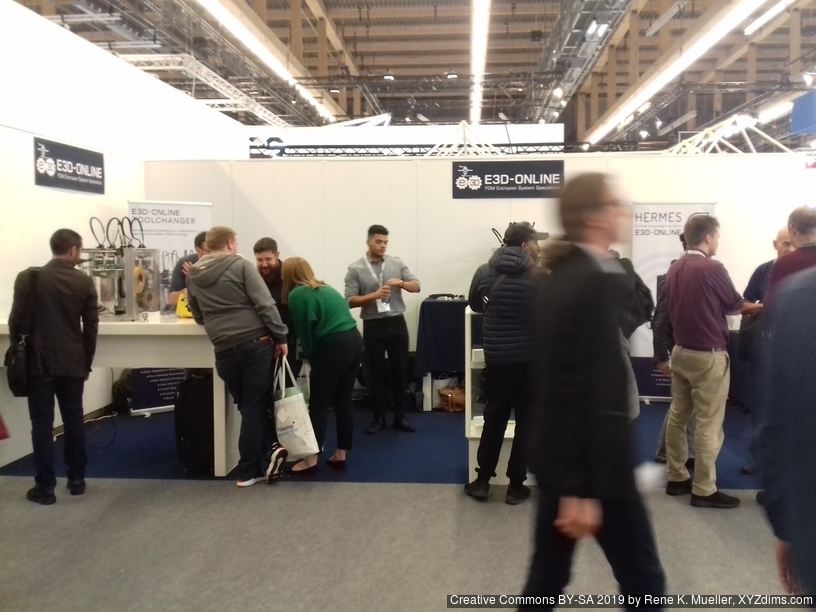
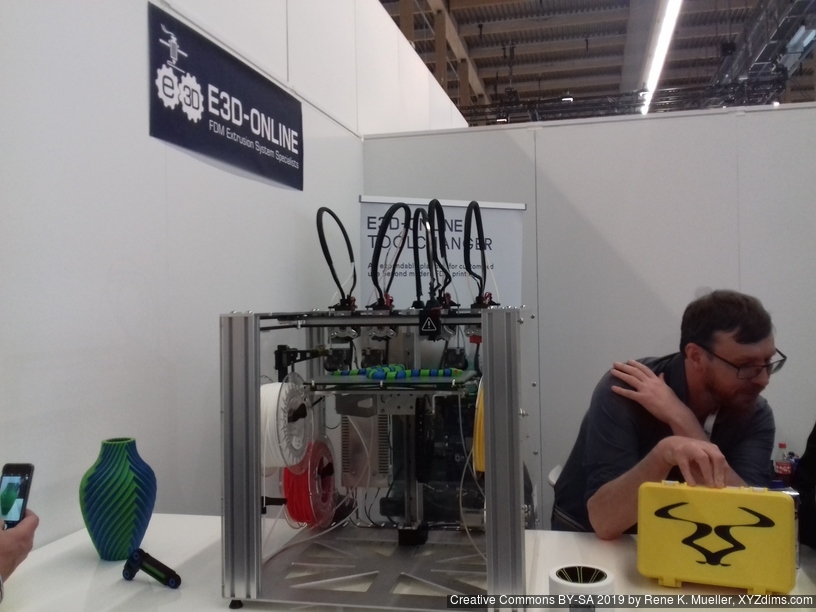
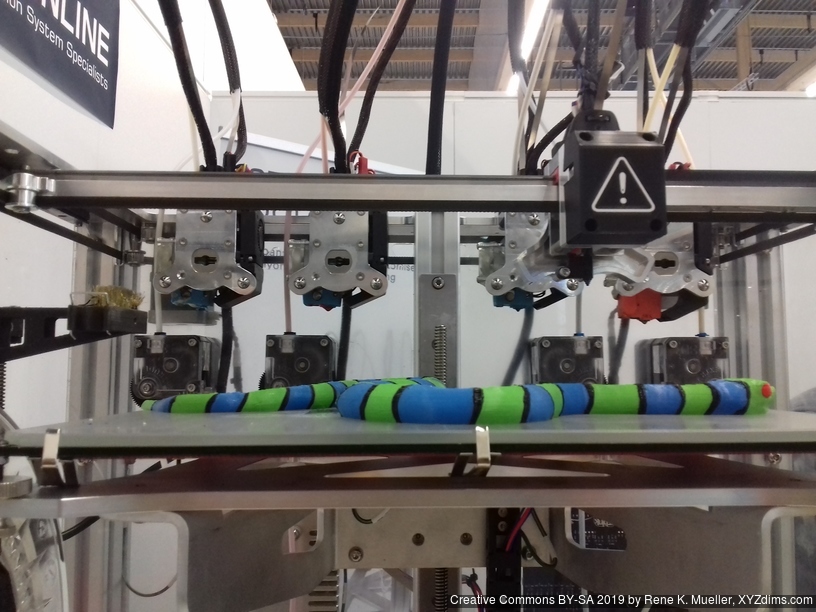
E3D Online: Just briefly glanced at their booth, as I watched already videos online of their tool changer, and I was already significantly exhausted.
E3D Online: Tool changing with metalbrush to clean the changing toolhead
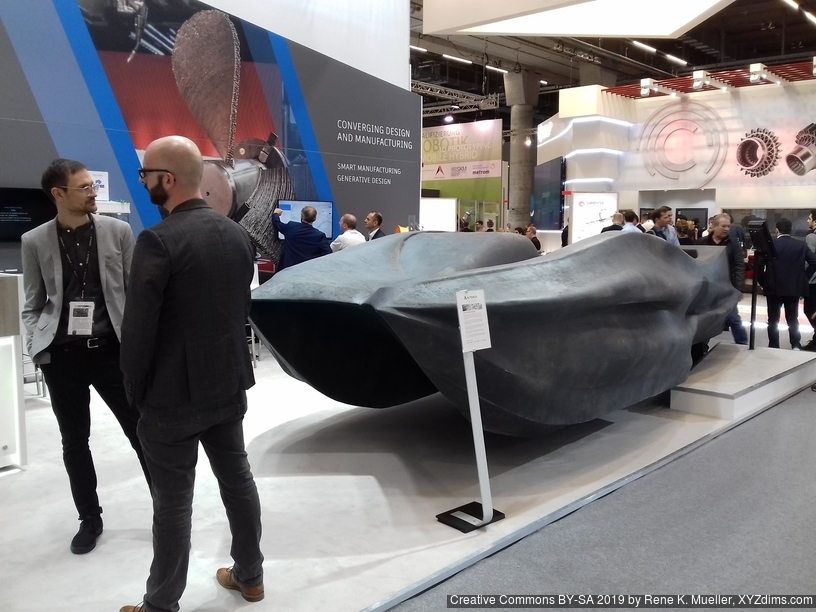
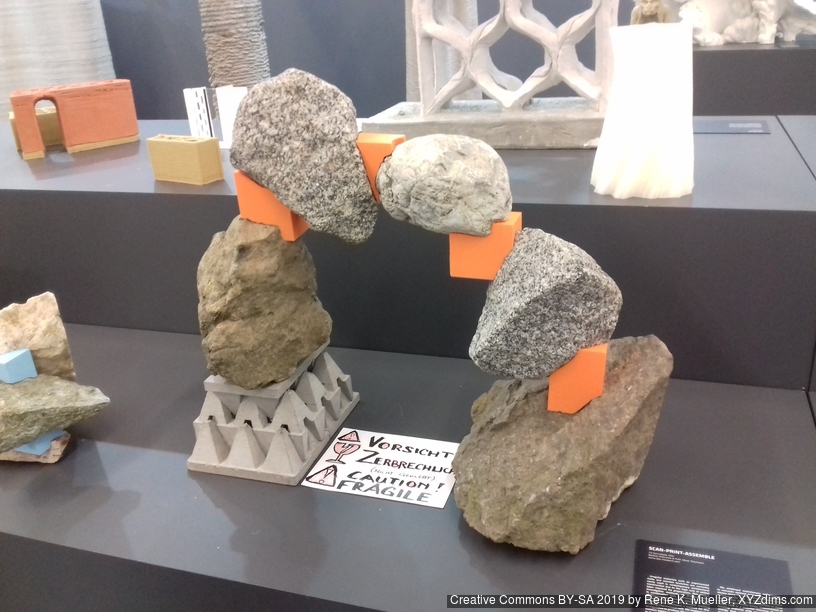
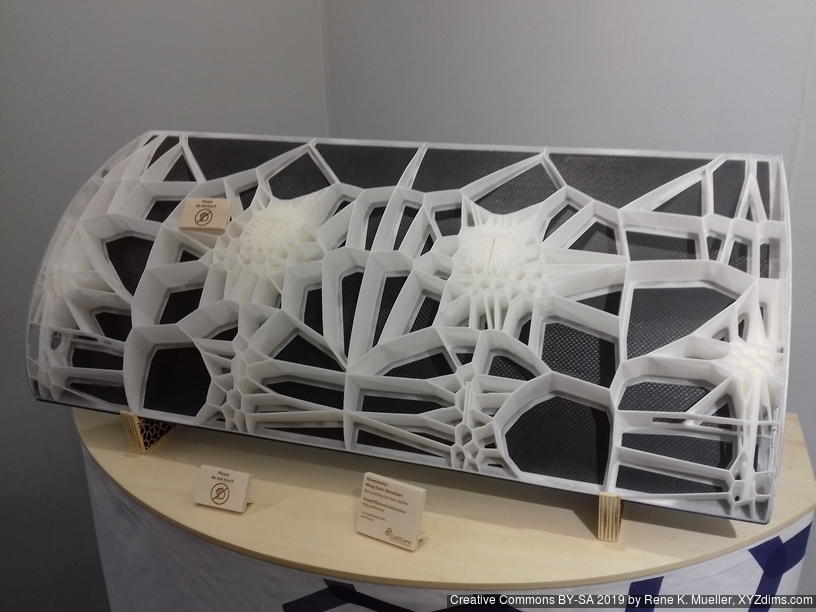
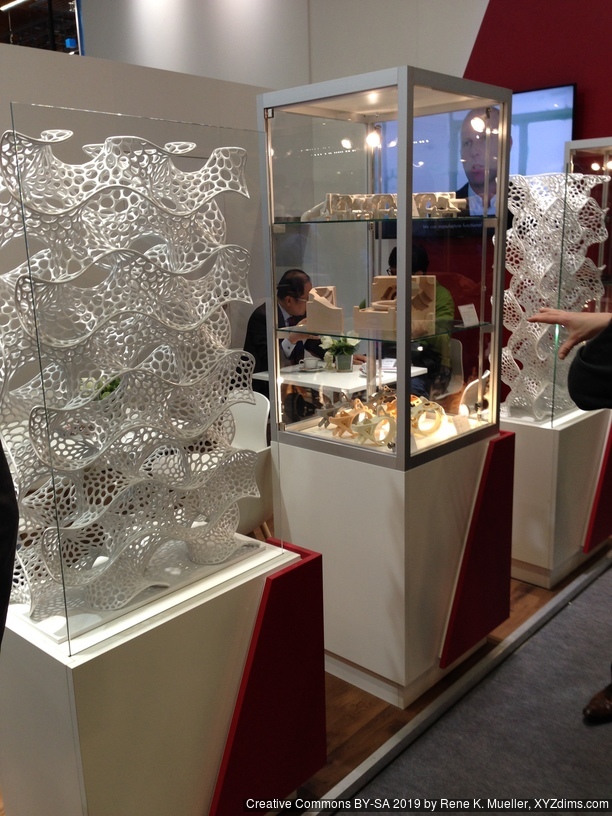
They scanned the stones and computed the junction pieces
Timeless beauty
Computational beauty
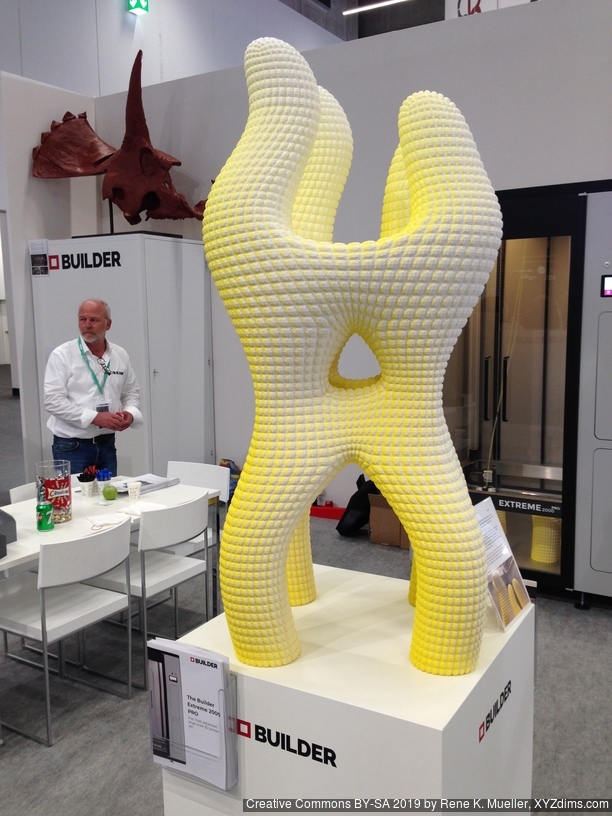
CellCore: organic internal structures for pieces used in F1 racing cars
Proper colors (Pantone)
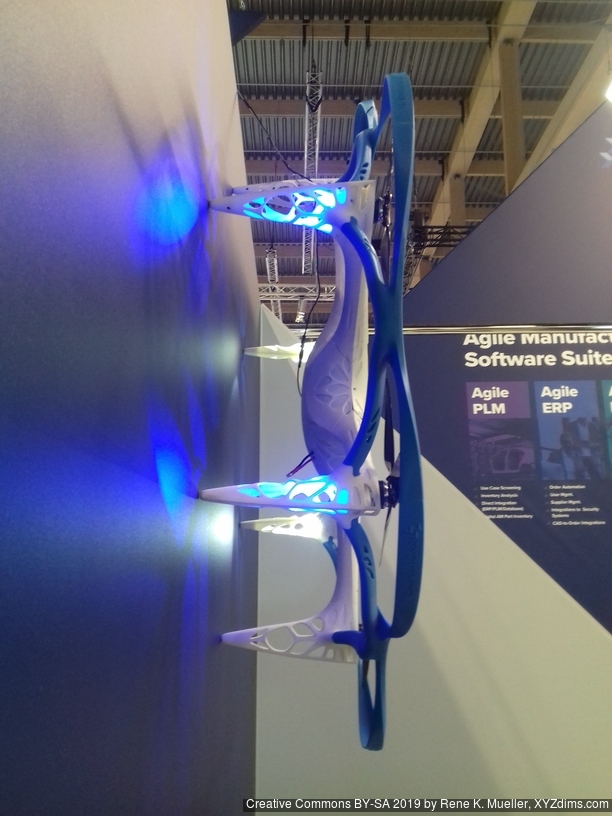
1m diameter printed drone hanging on the wall
Anyway, after 7 hours I was exhausted from all the impressions – it was too much of visual stimulis and constant noise – and I left the exhibition and headed back to Switzerland by train again, and arrive at midnight finally – it was worth my time.
The past year (2018/2019) I printed with my own designed 3D Printers with various printheads and required for each variant a dedicated Part Cooler, and I realized it was worth the time to approach this in a parametric manner using OpenSCAD, using the “bull horn” design and so I came up with a general approach, and as a result was able to create various variants for my use-cases:
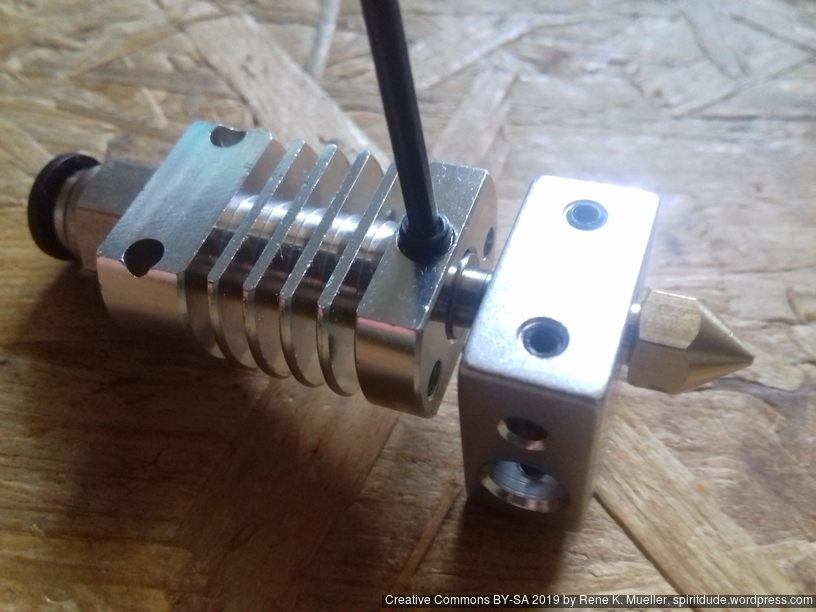
E3D Volcano (1 nozzle, 1 heatsink, large nozzle diameter)
E3D V6 Lite (1 nozzle, 1 heatsink, small / medium nozzle diameter)
a few other specialized setups
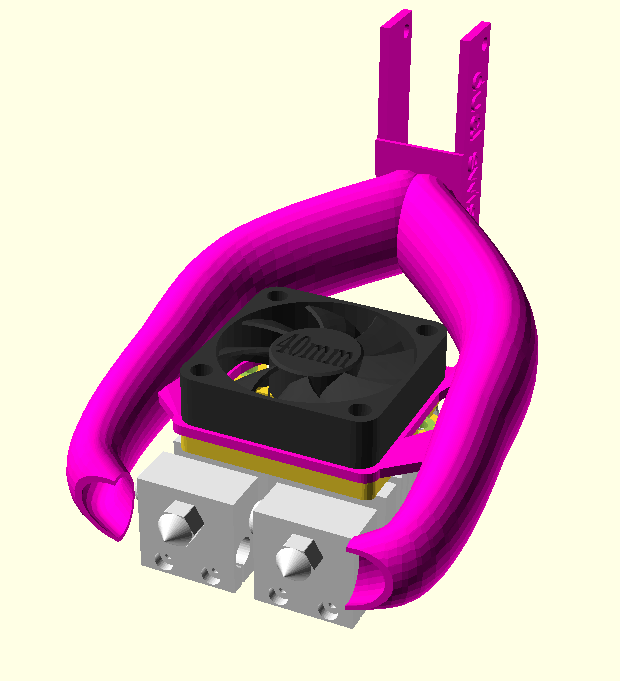
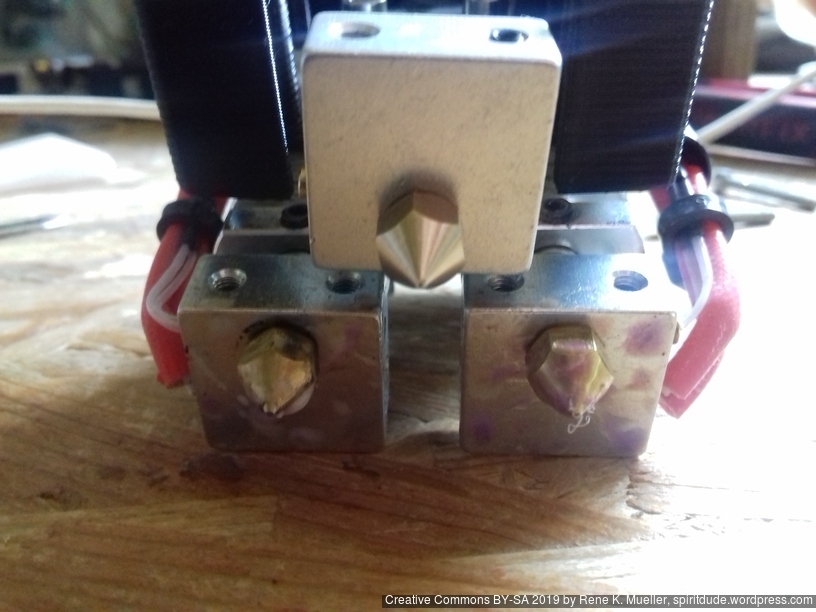
Dual Micro Swiss
Dual E3D V6 Lite
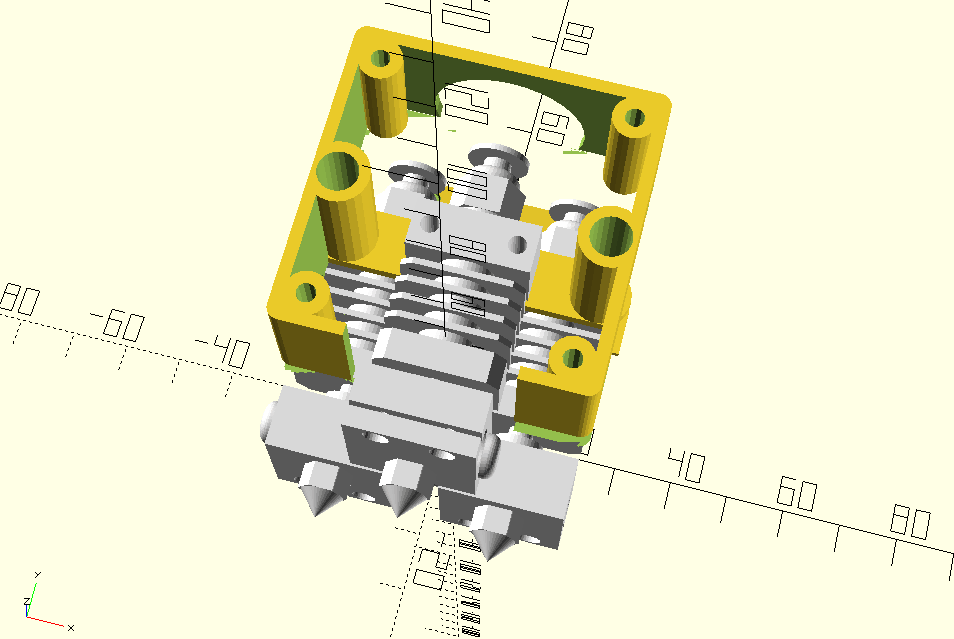
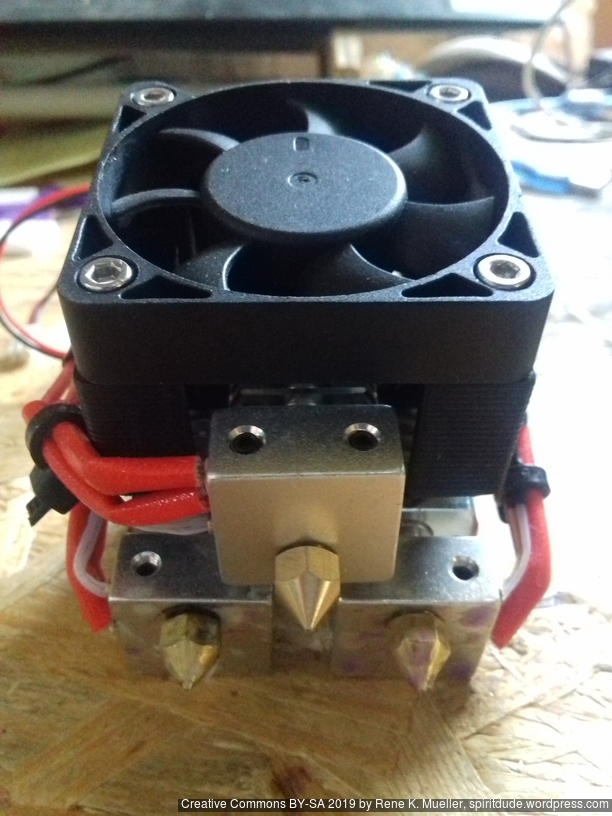
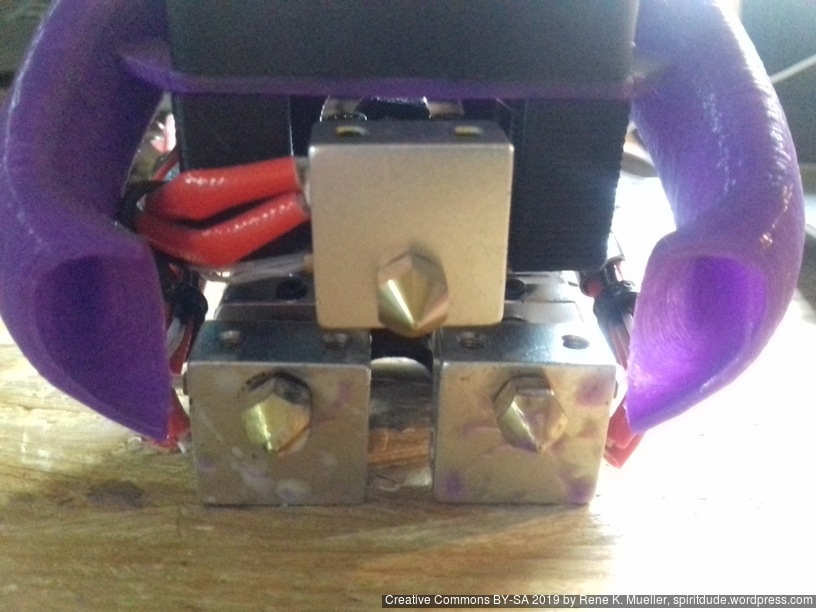
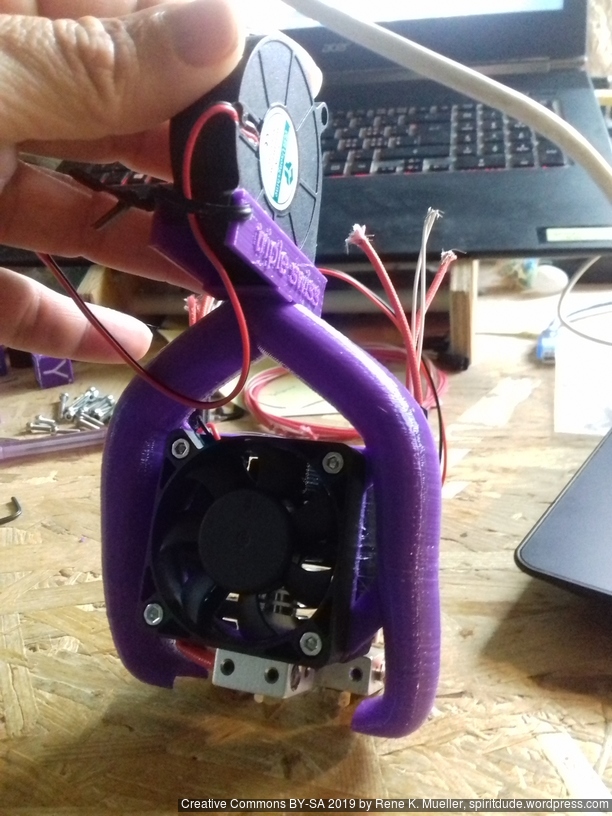
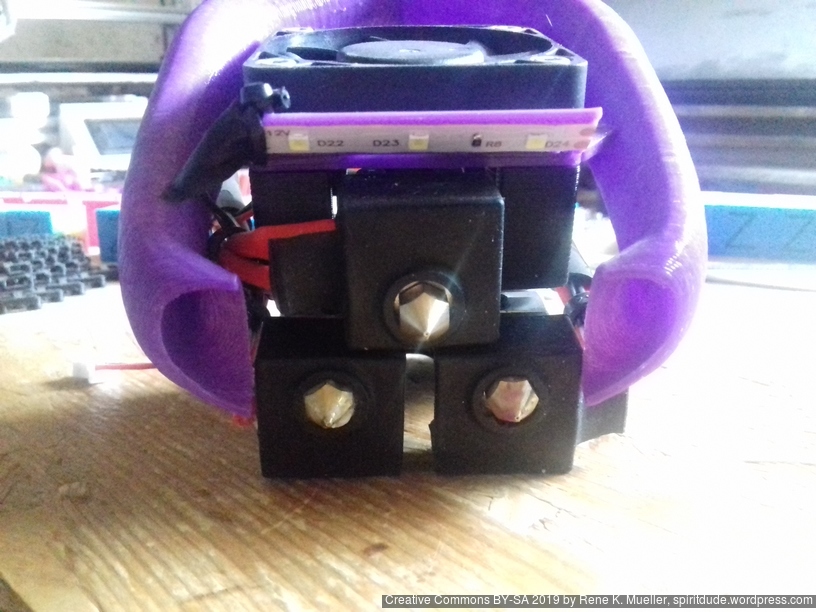
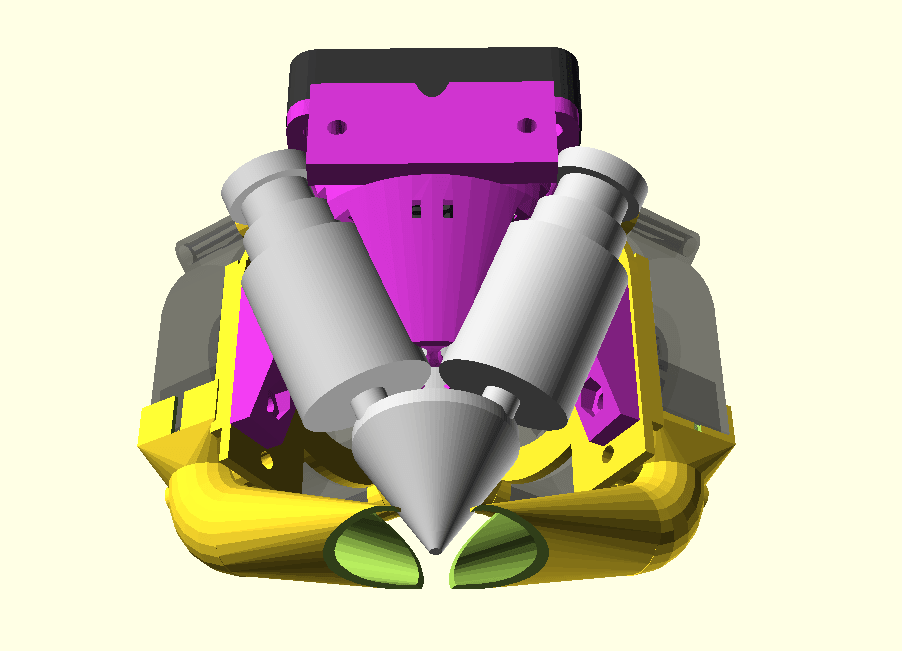
Triple Micro Swiss
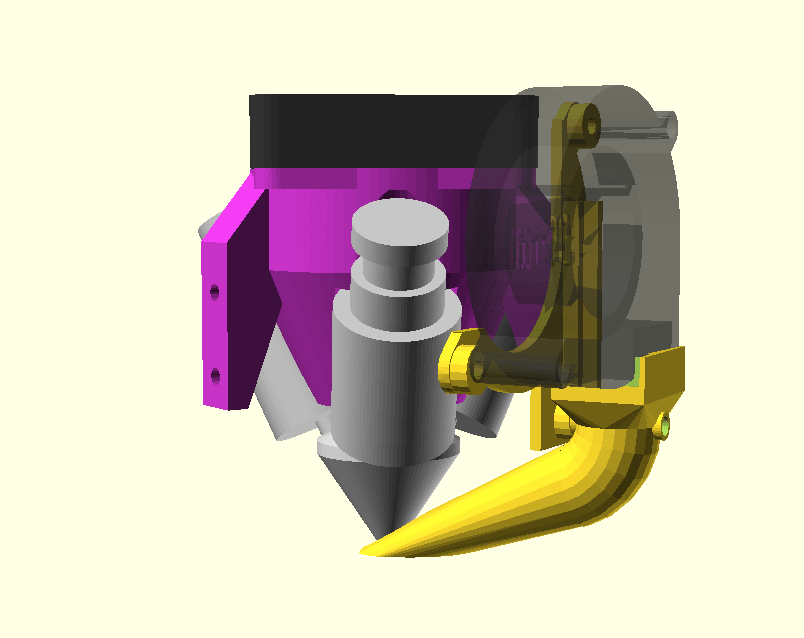
Single E3D V6 Lite
Needless to say, the proven design allowed me to quickly design and print a new variant, and have expected results when using the part cooler – which is a huge time saver.
Yet, one drawback is obvious: in order to adapt a new variant, one requires the surrounding parts like heat sink and nozzle as a model or design it yourself (which can be time consuming as well) so the proper variables can be found to render the part cooler for the setup.
After I designed my 3D Printers also in parametric manner, like the Ashtar K (Prusa i3-like) 380x300x300mm build volume or Ashtar C (Core XY) 380x400x380mm build volume, using this parametric approach for a Part Cooler as well, turned out quite successful too.
It makes sense to develop and design a parametric piece which
maintains a few constraints, a general form, a base functionality
requires a few variables to adapt certain customization, sometimes it makes sense to introduce a lot of variables, and while testing and adapting customized pieces, some variables may become constants and unforeseen variables become more important
It certainly requires expertise about the piece in order to discern the constraints from the variable aspects while still maintaining its base functionality.
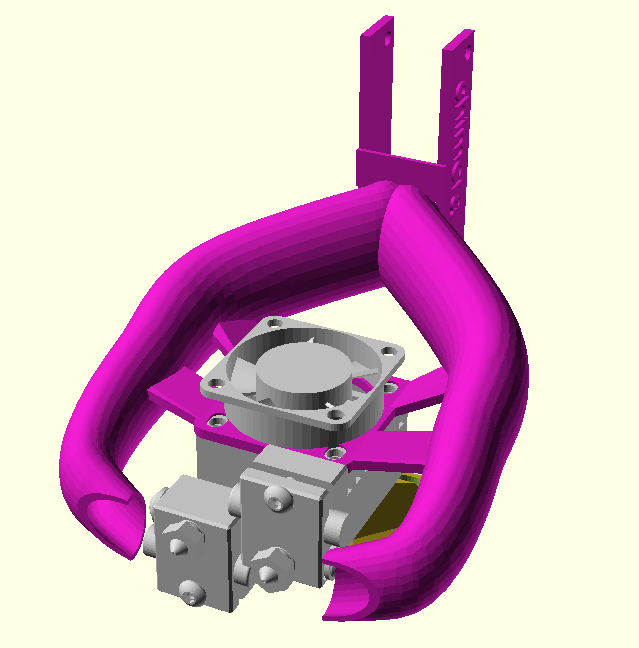
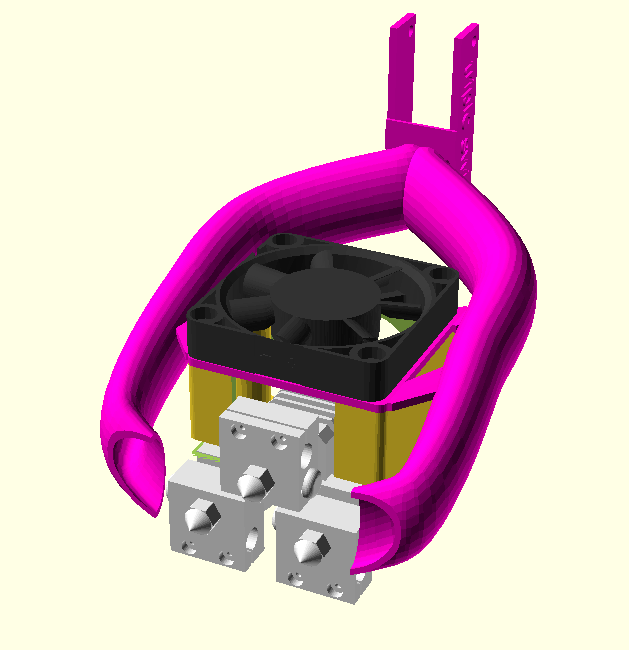
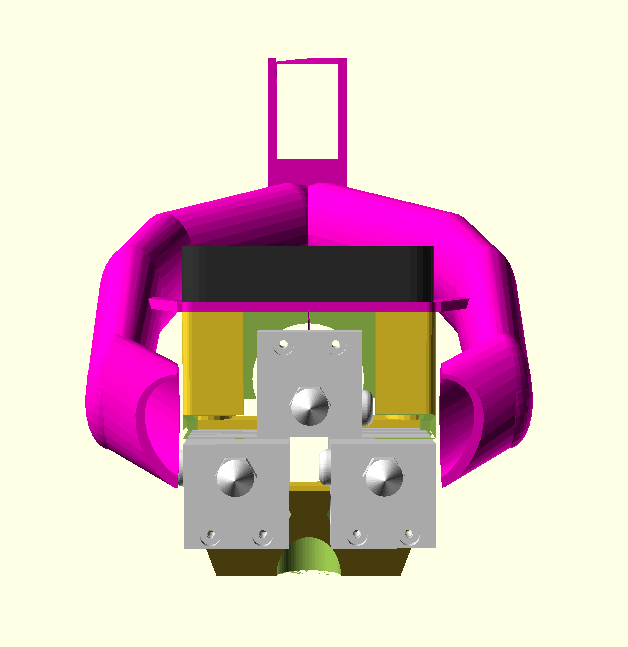
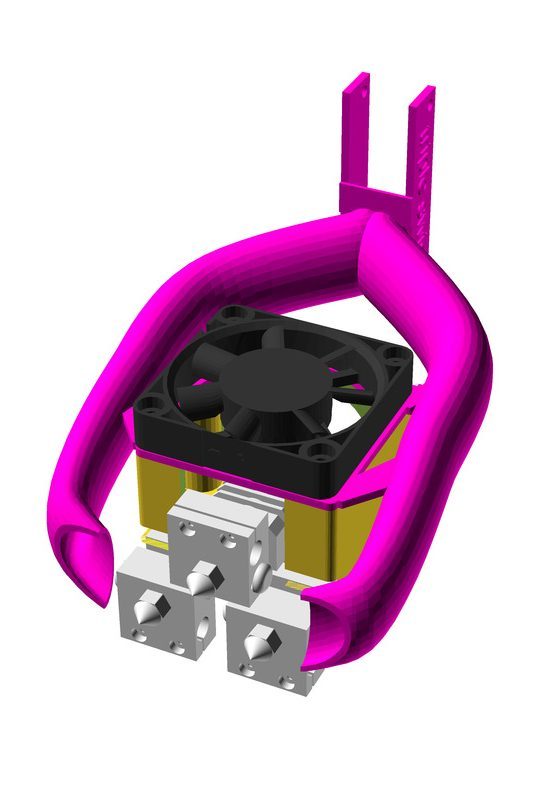
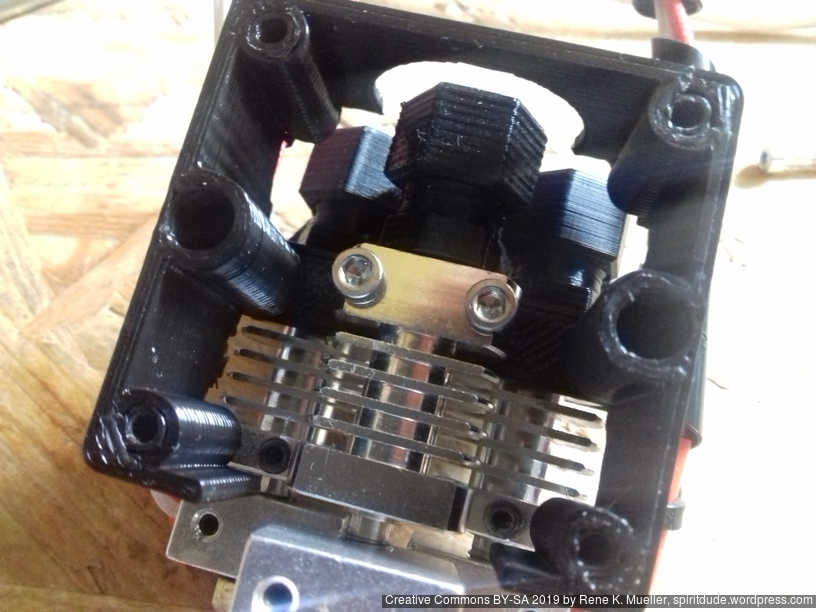
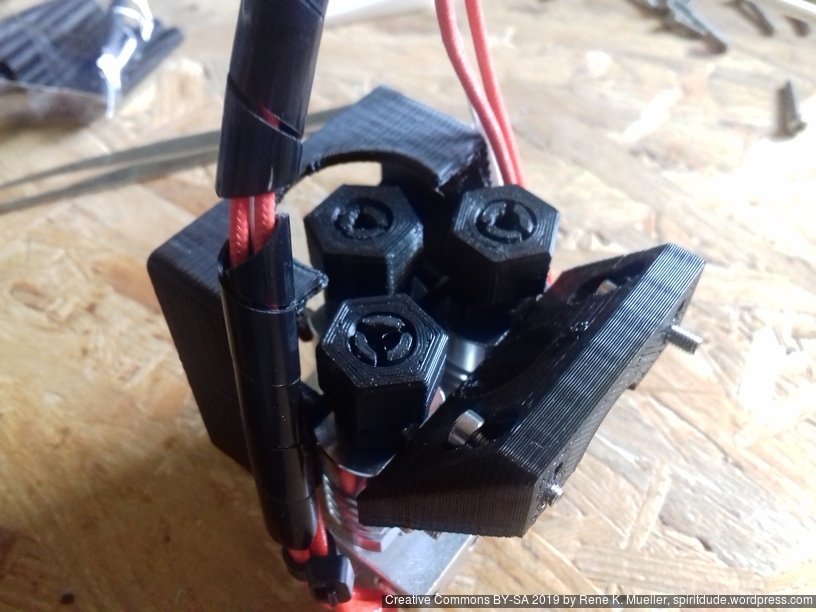
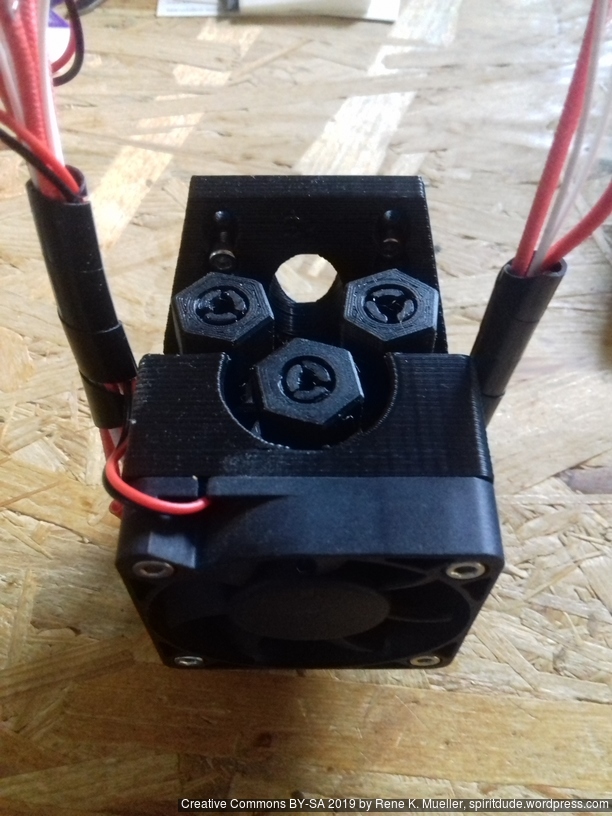
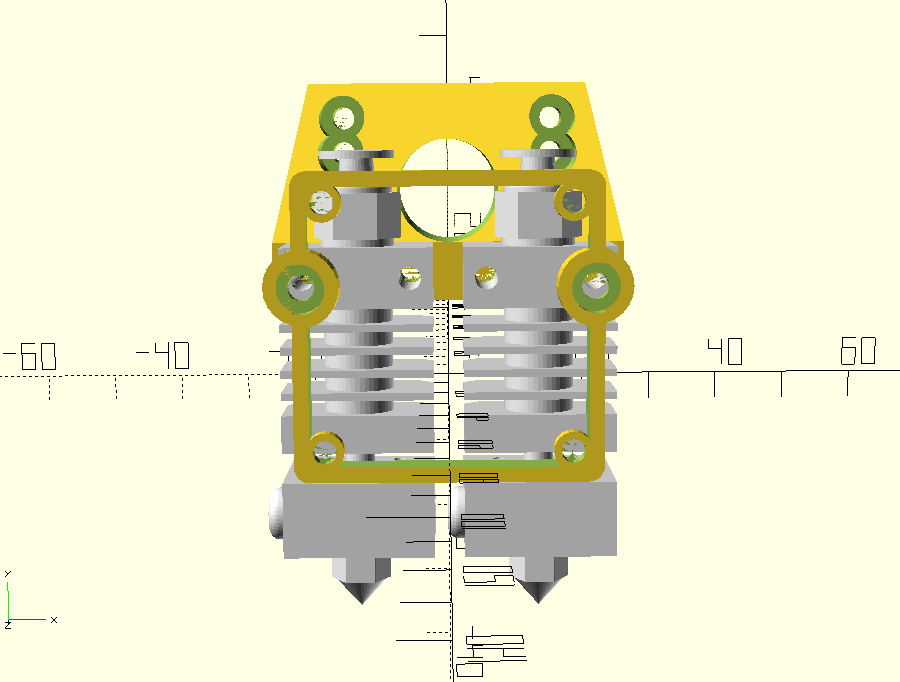
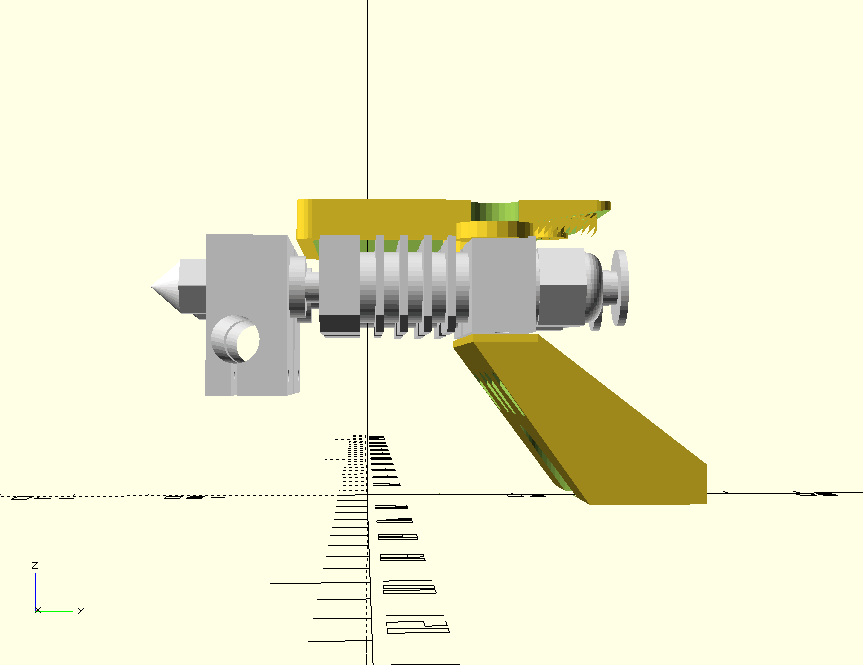
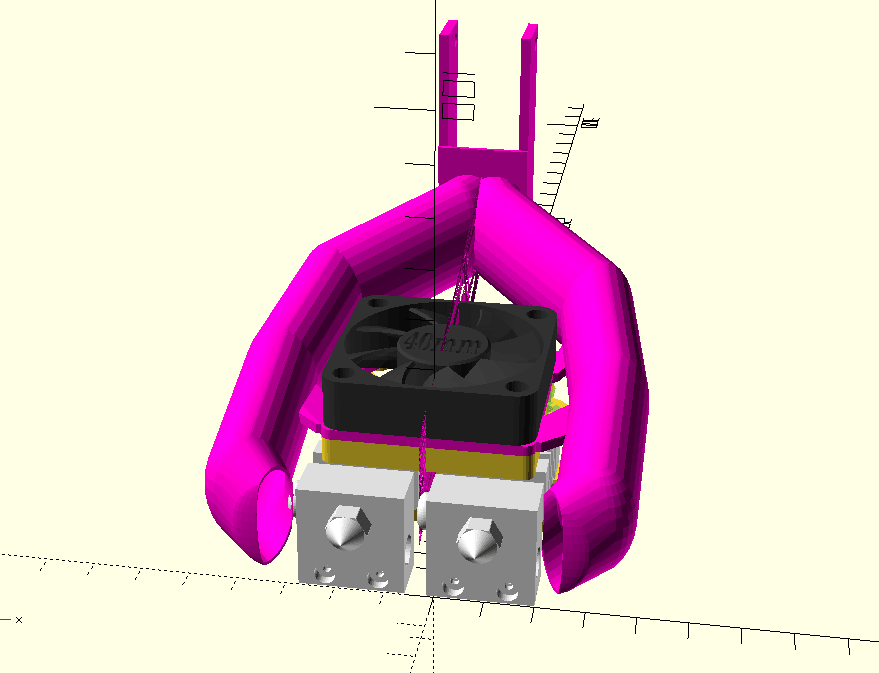
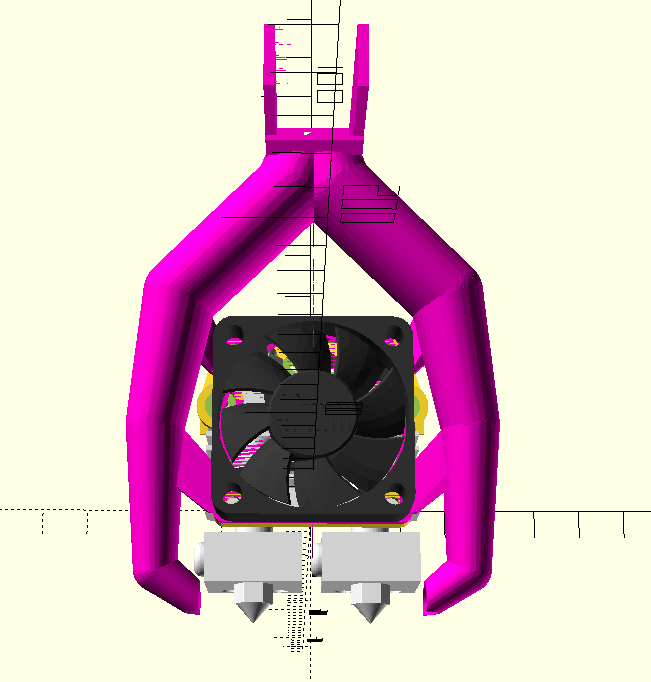
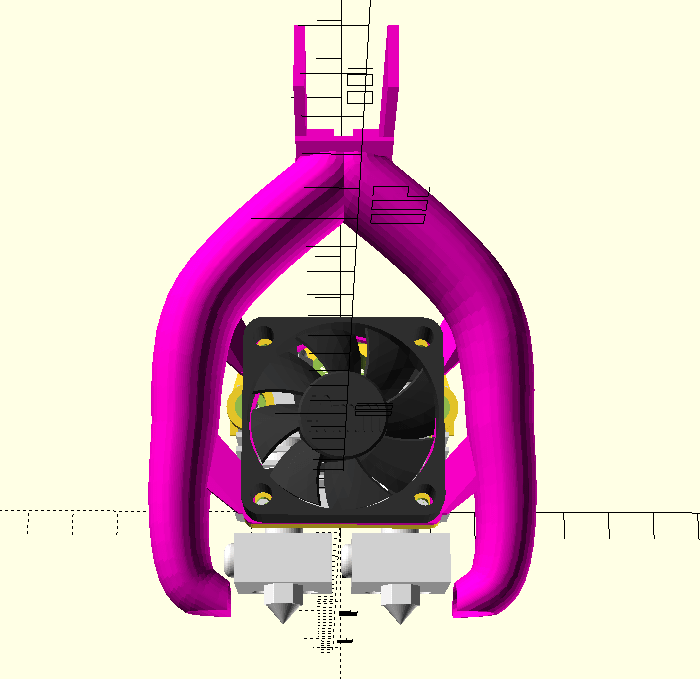
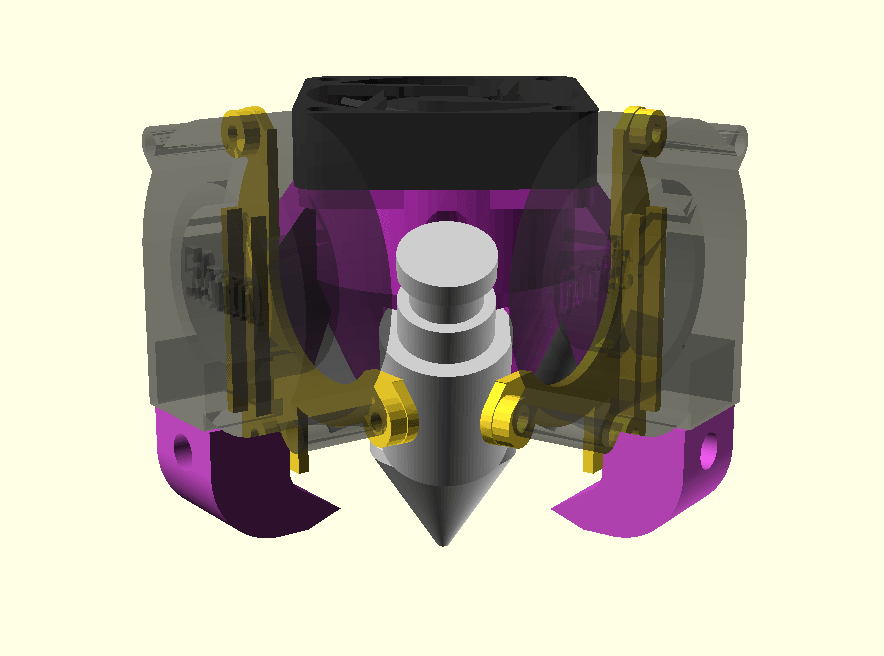
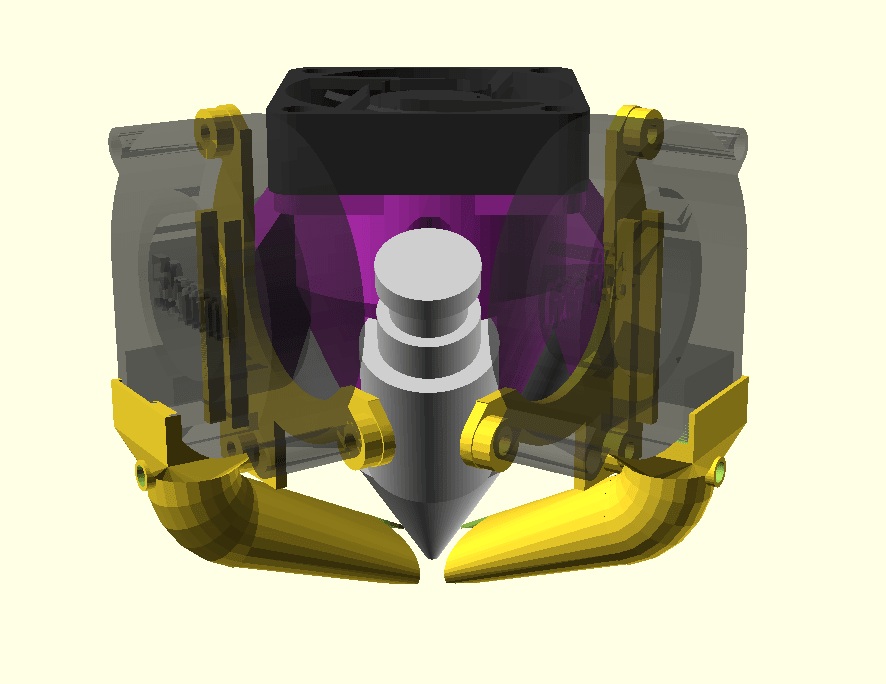
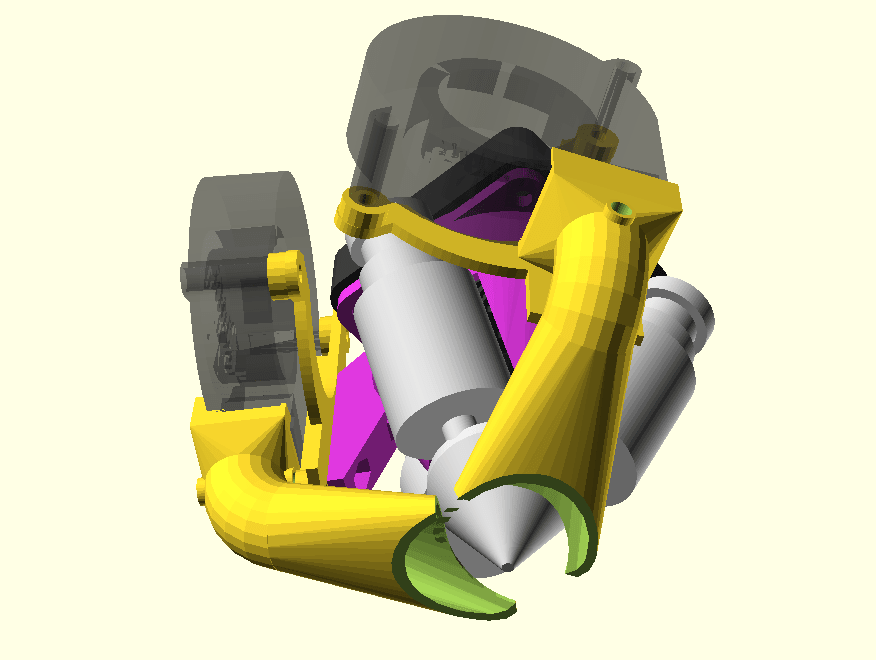
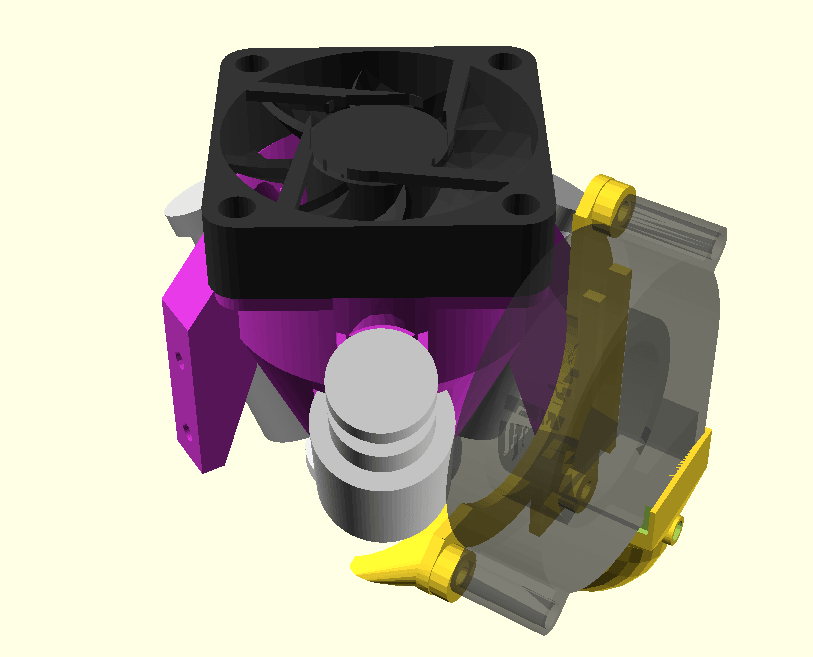
Assemble 3 nozzles in one go, and adding heatsink fan mount:
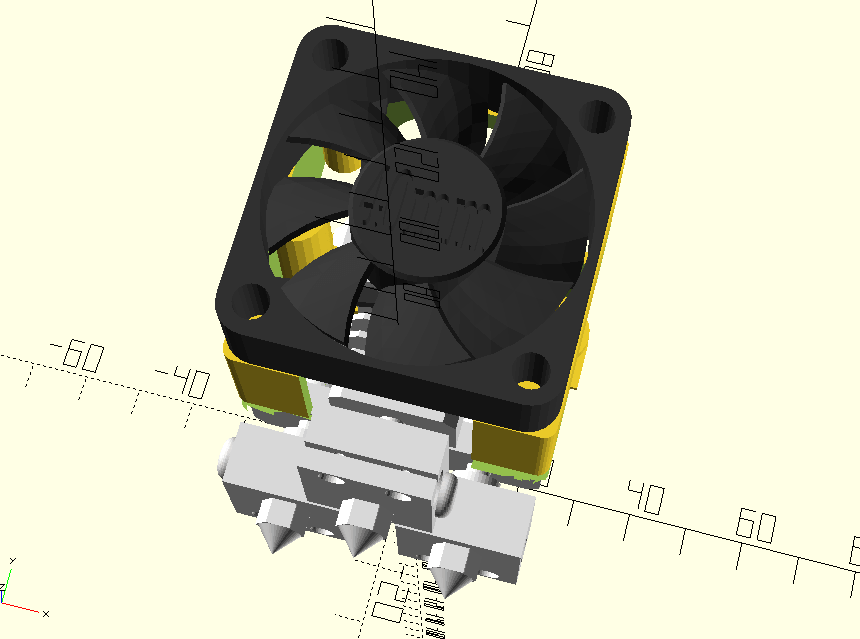
adding 50mm fan on top:
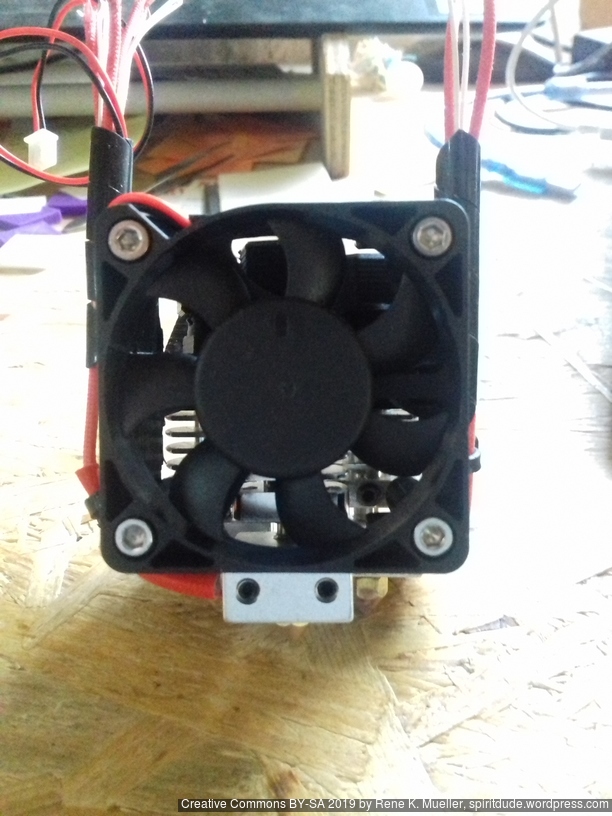
and with the dedicated Part Cooler using 5015 fan blower:
I recommend cover all nozzles with silicon socks when using the part cooler. Optionally LED strip mount in case you want some light on all three nozzles.
Leveling Three Nozzles
It’s essential that all three nozzles have the same distance to the bed, otherwise inactive nozzles might touch and tip-over a piece while printing. See Dual Nozzle Setup for the procedure.
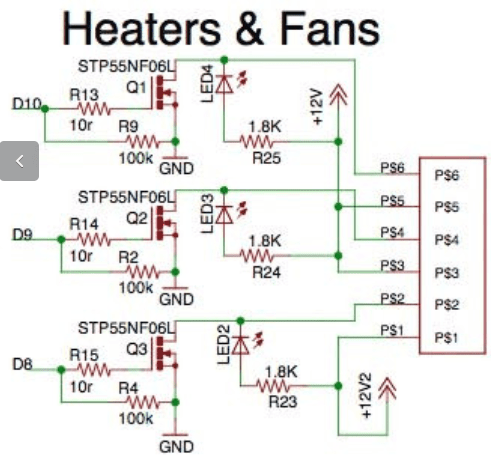
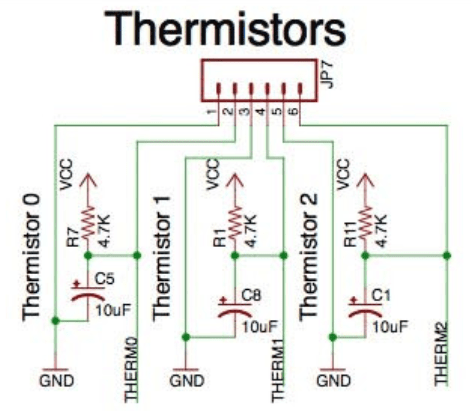
Third Hotend Wiring
One requires a board with 3x MOSFETs to heat all three heatblocks and 3x thermistors inputs, like RUMBA or TANGO (Open Source variant of RUMBA) controller board or extend it with dedicated parts:
per heater: STP55NF06L (MOSFET) with 10R, 100K on a Dx (digital output); LED with 1.8K is optional
per thermistor: 4.7K with 10uF on a Ax (analog input)
You can define X offset via Gcode (e.g. as start gcode):
M218 T0 X0
M218 T1 X24 Y0
given T0/Extruder 1 is left, and T1/Extruder 2 is on the right.
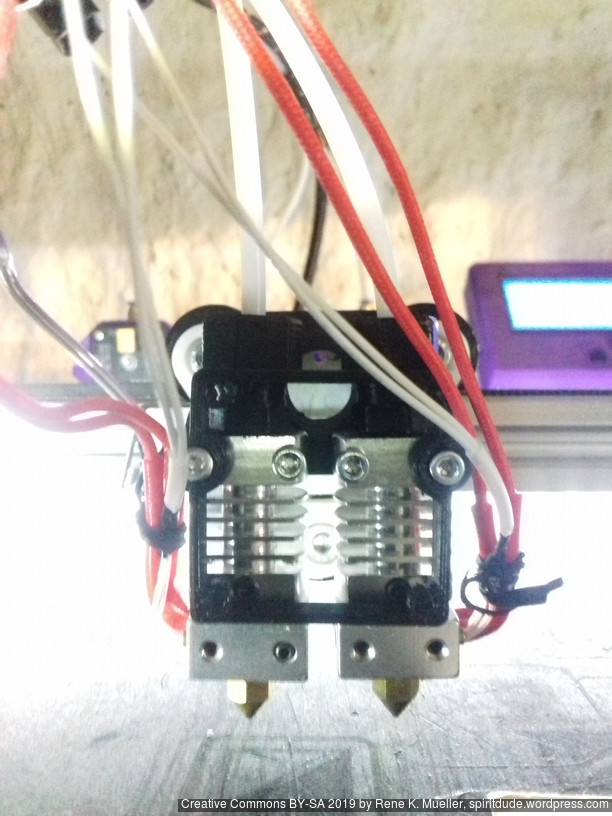
Since “CR10 hotends” are really cheap and not precisely machined, there is too much margin in the mounting 3mm holes – hence, you likely have more or less of 24mm X offset, and possible even Y offset as well. Use a 2-color calibration model to tune the offsets.
in theory no purge block, but if ooze shields are shared among switching extrusions (more than 2 extrusions) there may be cross-contamination between colors/materials
the printheads individually are proven to be reliable
Hints:
single heatblock = same print temperature
dual heatblock = different print temperatures possible
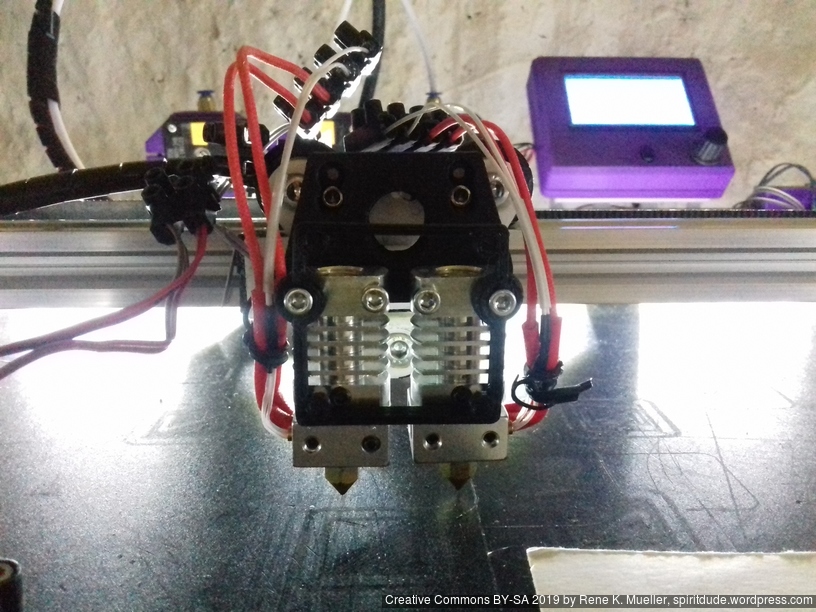
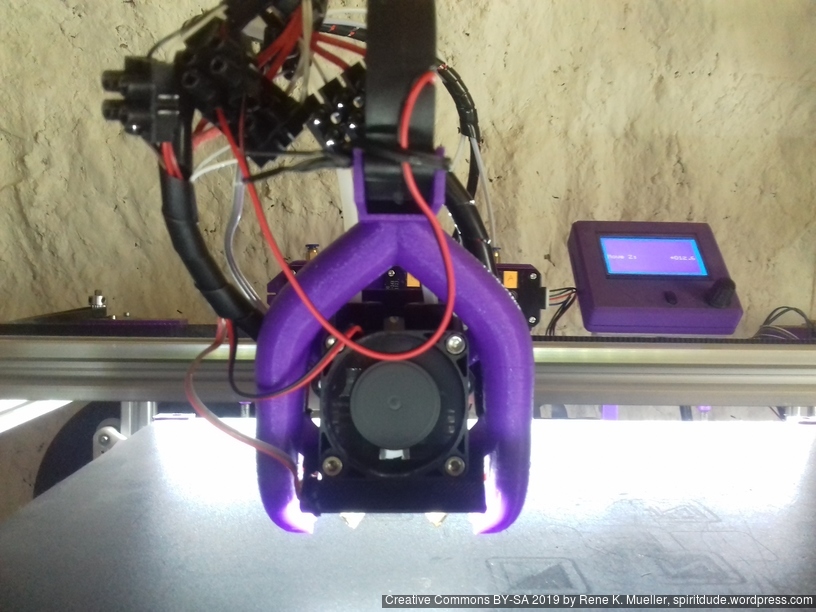
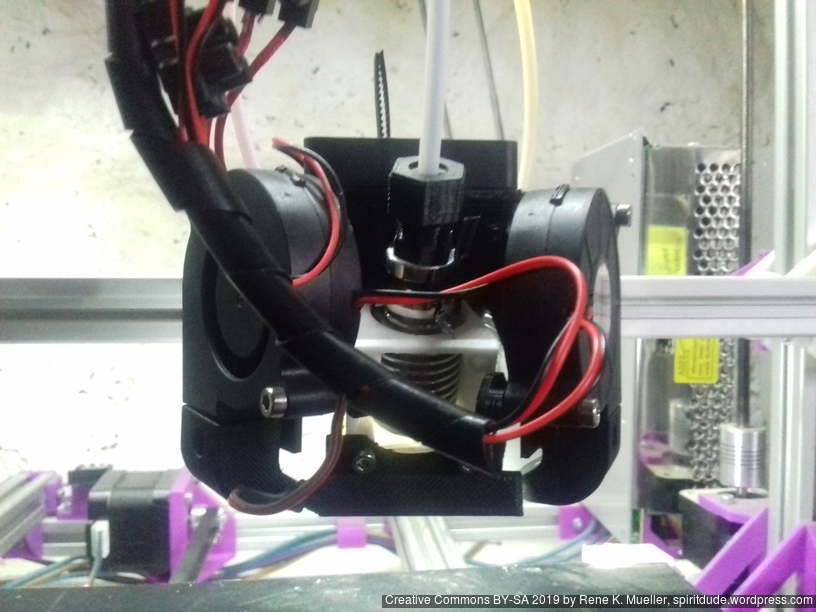
The past weeks (2019/09) I adapted existing Part Cooler designs, and redesigned them in order to work with the Diamond Hotend, as I have been searching for a good part cooler option and did not succeed with what’s out there already.
So here my 3 designs so far with a short review of their use quality:
Dual (or Single) Short Fan Shrouds
At the first sight this looks a promising design, but in reality there were major drawbacks:
adjustment of height (vertical) was critical and required fine-tuning
tendency to cool down the nozzle instead of the molten filament, in particular at lower layers near the bed
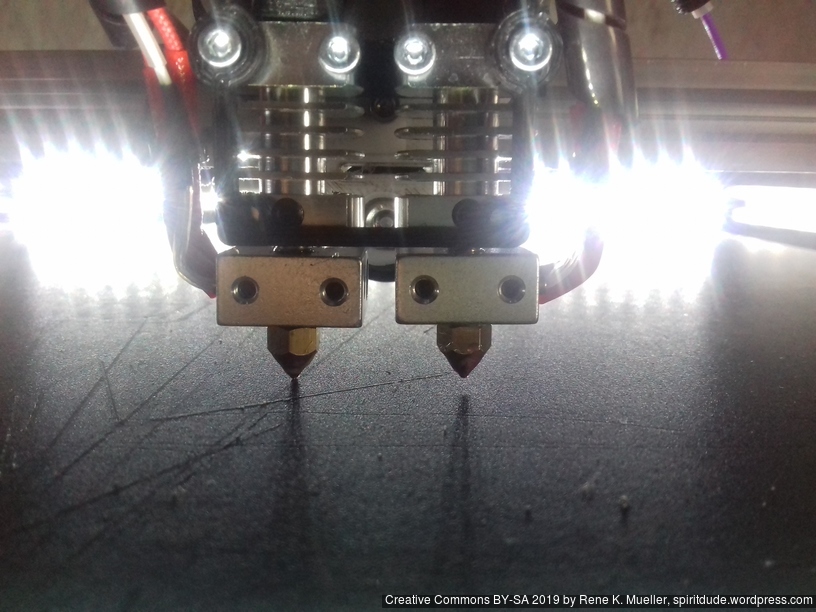
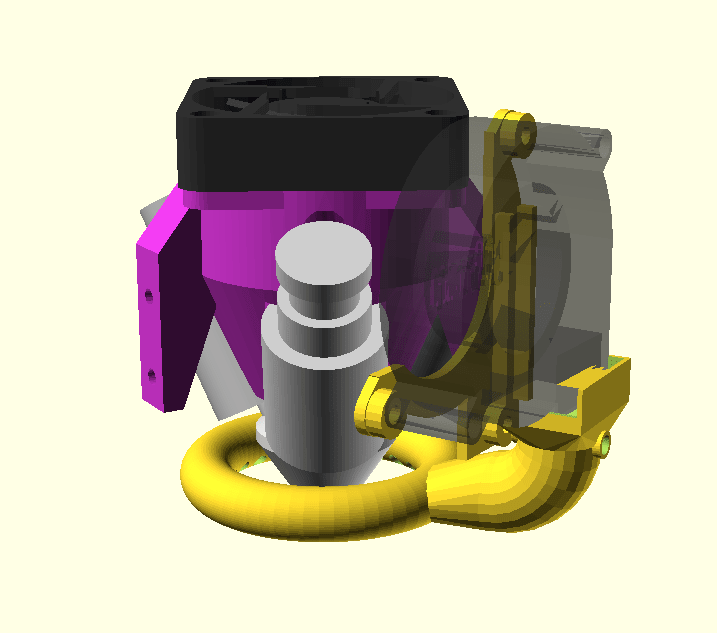
As next I designed the ring cooler, with small holes around the nozzle, also adjustable in the height (Z), but the cooling wasn’t really sufficient, as the nozzle still was cooling off a lot (no more than 45% cooling fan with 5015 blower was possible) – quite a disappointment for the rather sophisticated setup, but this general “ring cooler” design has failed for me also for other printheads like E3D V6 or so, and I switched back to “bull horn” like fan shroud.
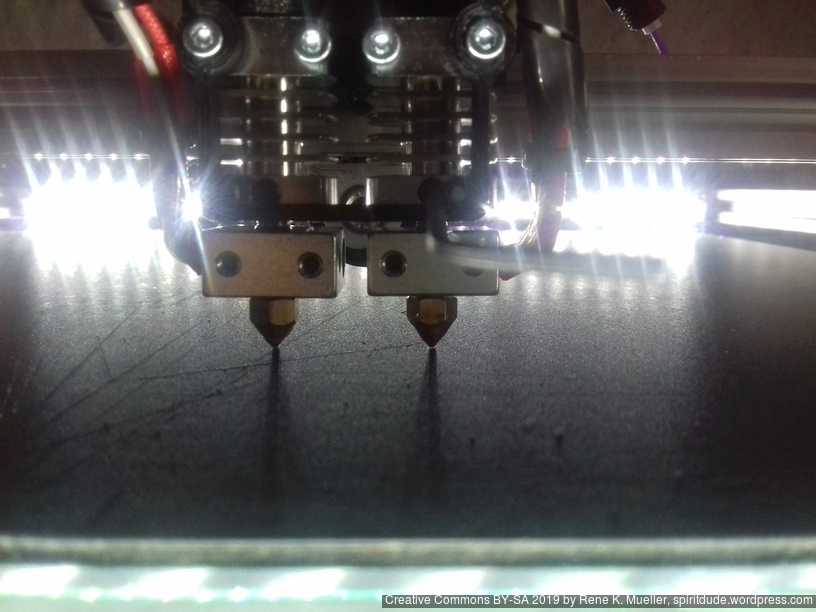
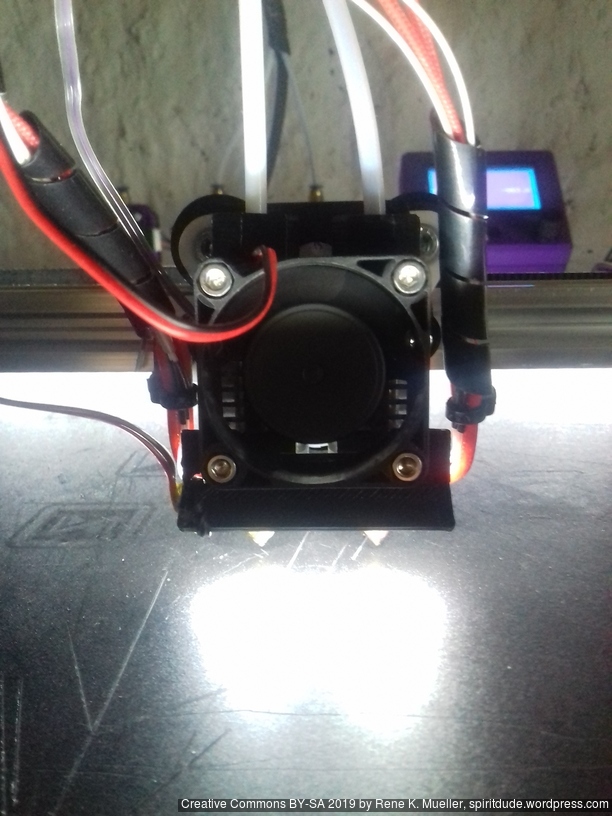
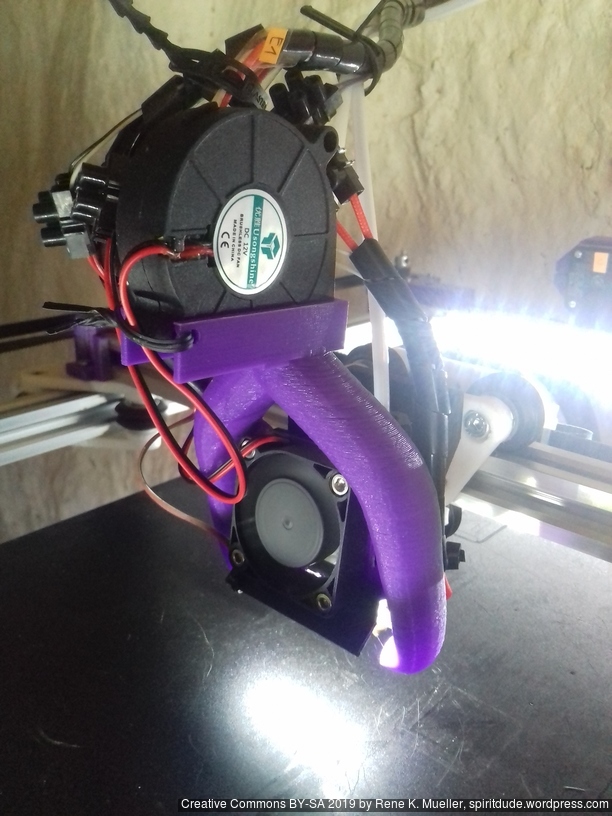
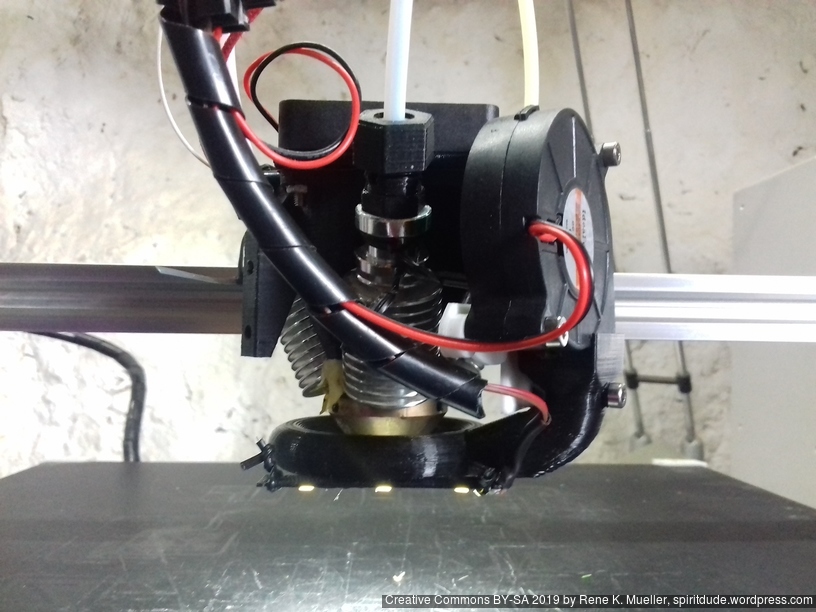
This rather simple design turned out the best option so far:
wide: 5015 blower runs at 80% without cooling the nozzle too much
narrow: 5015 blower runs at 50% without cooling the nozzle too much
creates sufficient disturbance around the nozzle to cool opposite side as well
and the XYZ 20mm Hollow Calibration Cubes came out quite well, on all 4 sides the letters were printed OK – not as good as E3D V6 and other printheads.
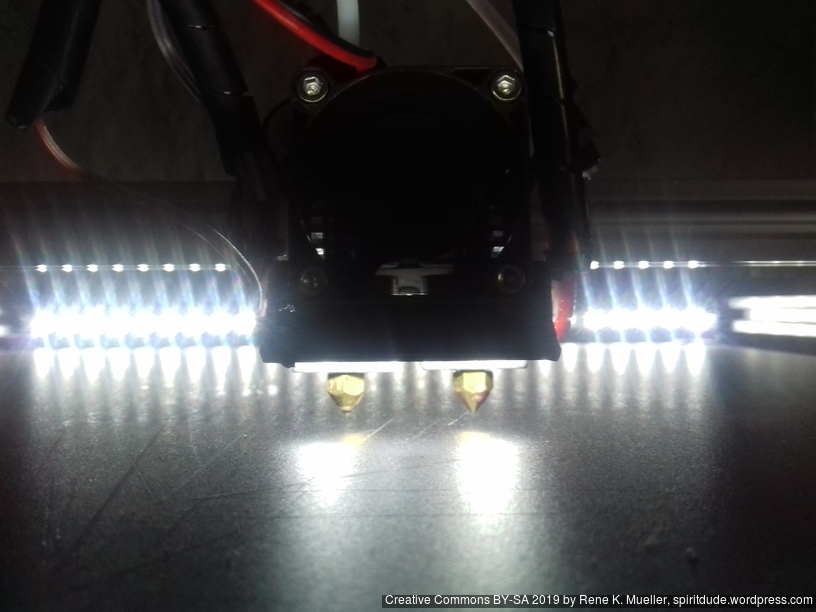
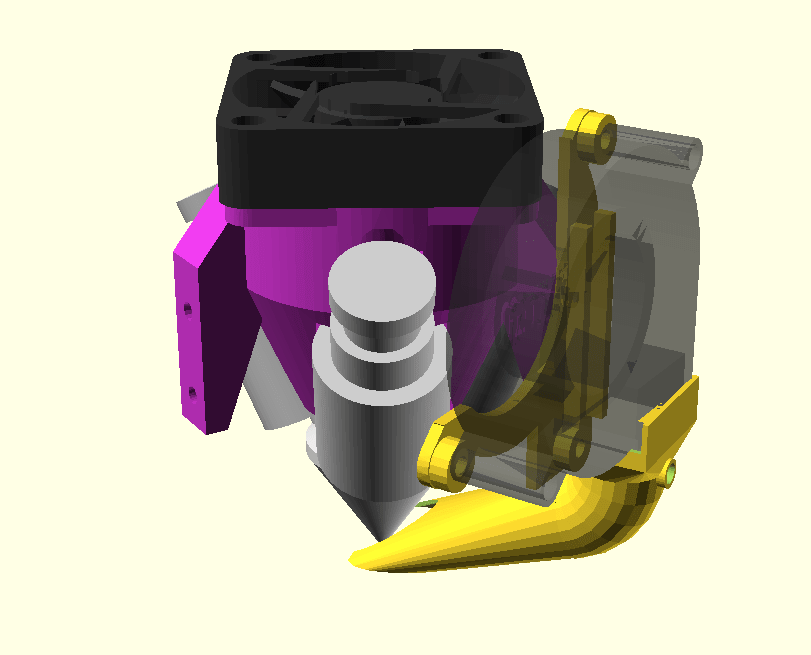
Although it seemed logical to use two direct cooler, but the amount of air around the nozzle in operation was too much, and it required 20% fan cooling so the nozzle was still properly heated, but this was too low to provide any sufficient part cooling. So this option, without silicon sock on the Diamond Hotend, is not suitable.
Rating: ★★★★★
Summary
The winner is the Directional Part Cooler as it brings the cool air close enough where the molten filament exits the nozzle, without affecting the bare nozzle too much. As mentioned, either way a silicon sock would be recommended when using a part cooler with the Diamond Hotend – so far (2019/09) there is no commercial source but DIY approach with this thing.
As you can see I used simple E3D V6 Fan mount in combination of LED Strip holder to lighten up the tip of the nozzle and the printing operation.