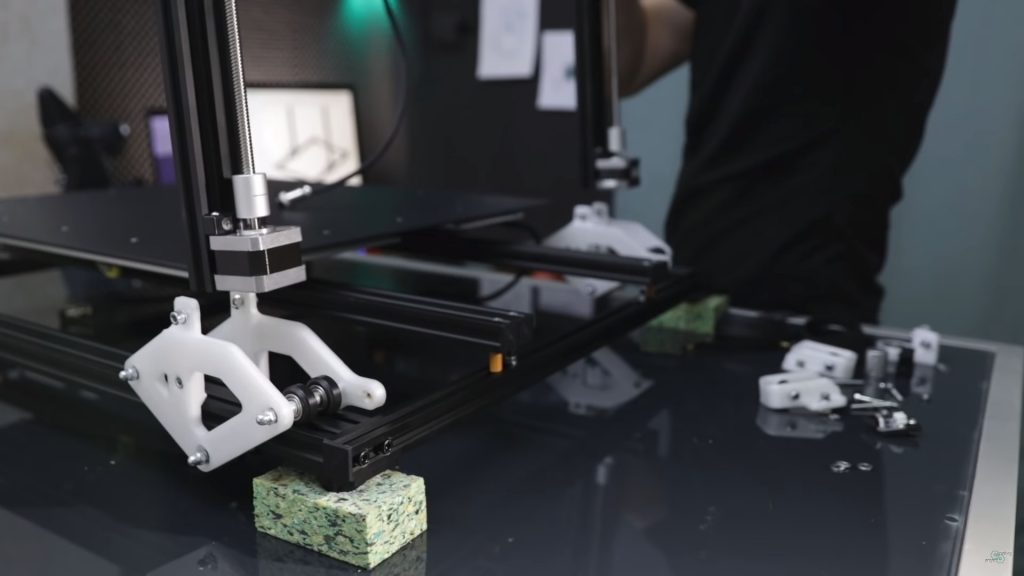
In April 2020 Jon Schone (@properprinting) showed a “Moving Portal” mod for his CR-10 – a Prusa i3 derivative – and I thought to adapt his approach as “Ashtar M” as moving XZ frame or moving gantry in CNC terms.
On a second thought, this approach makes only sense with larger beds, as the bed weight should exceed the weight of XZ frame and X carriage:
weight(XZ frame + X carriage) < weight(bed)
and as I compose my Ashtar 3D printer series with alu extrusions (beams) I can say:
weight(XZ frame) = beam X * 2 + beam Z * 2 + NEMA17 * 2 weight(bed) = X * Y
and it becomes here clear, the bed weight grows X * Y whereas XZ frame only (X + Z) * 2, but also 2* NEMA17 motors of the Z axis are part of the XZ frame.
Moving Portal / Gantry
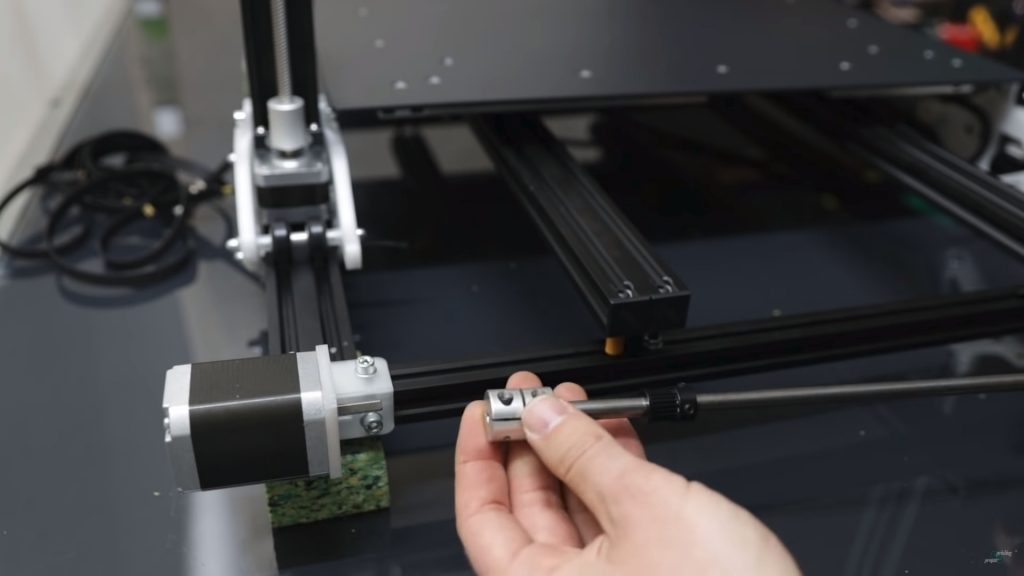
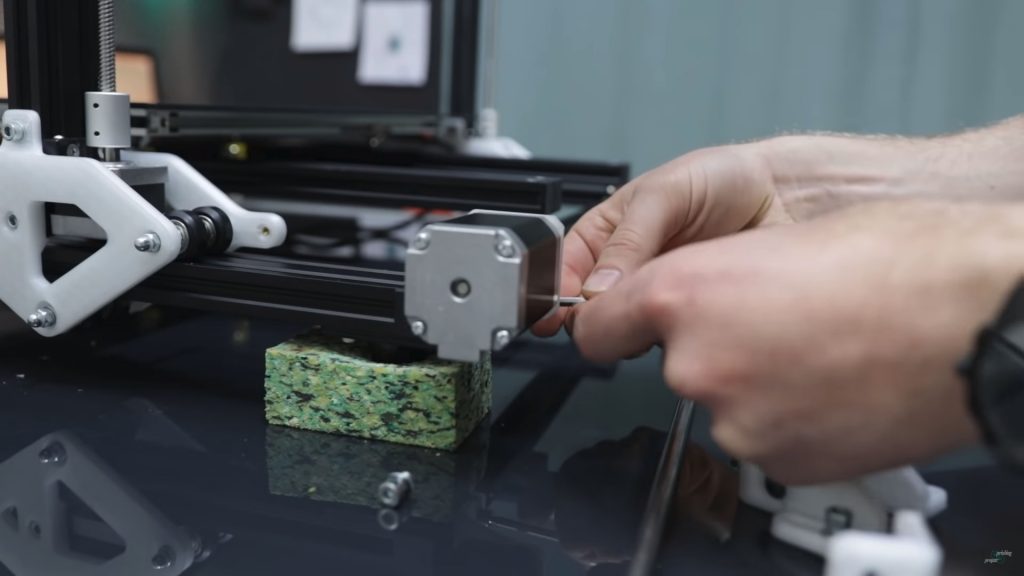
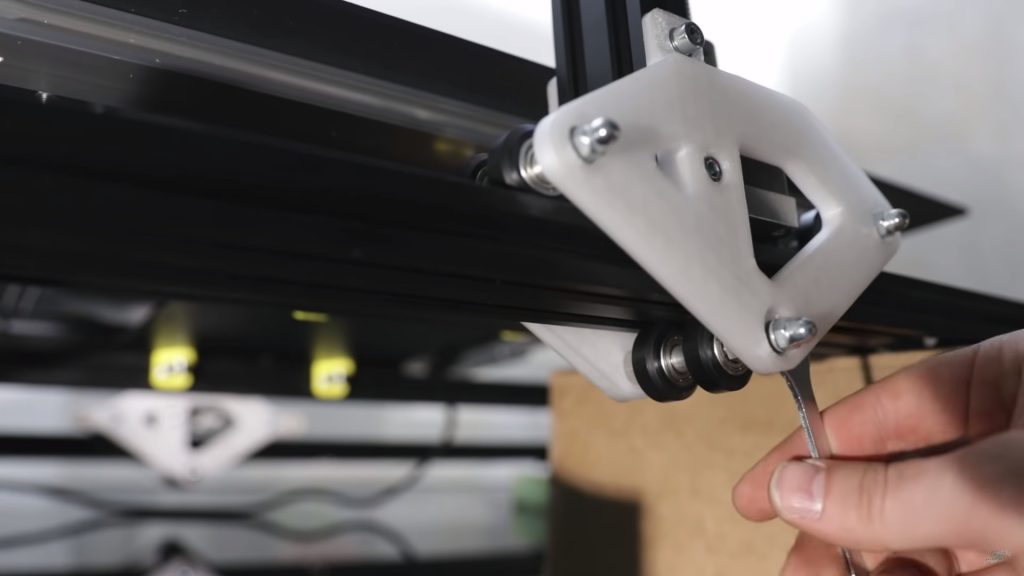
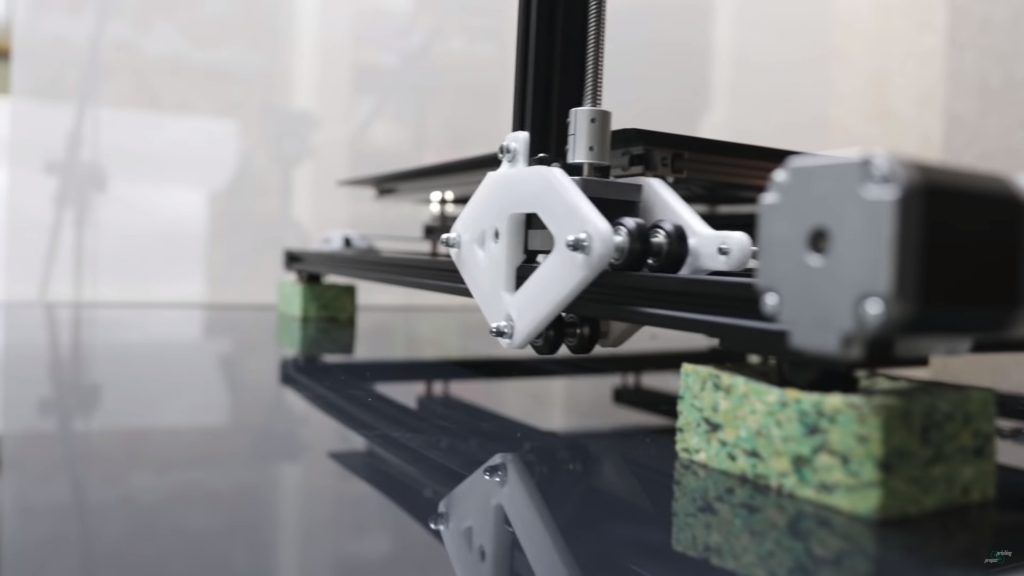
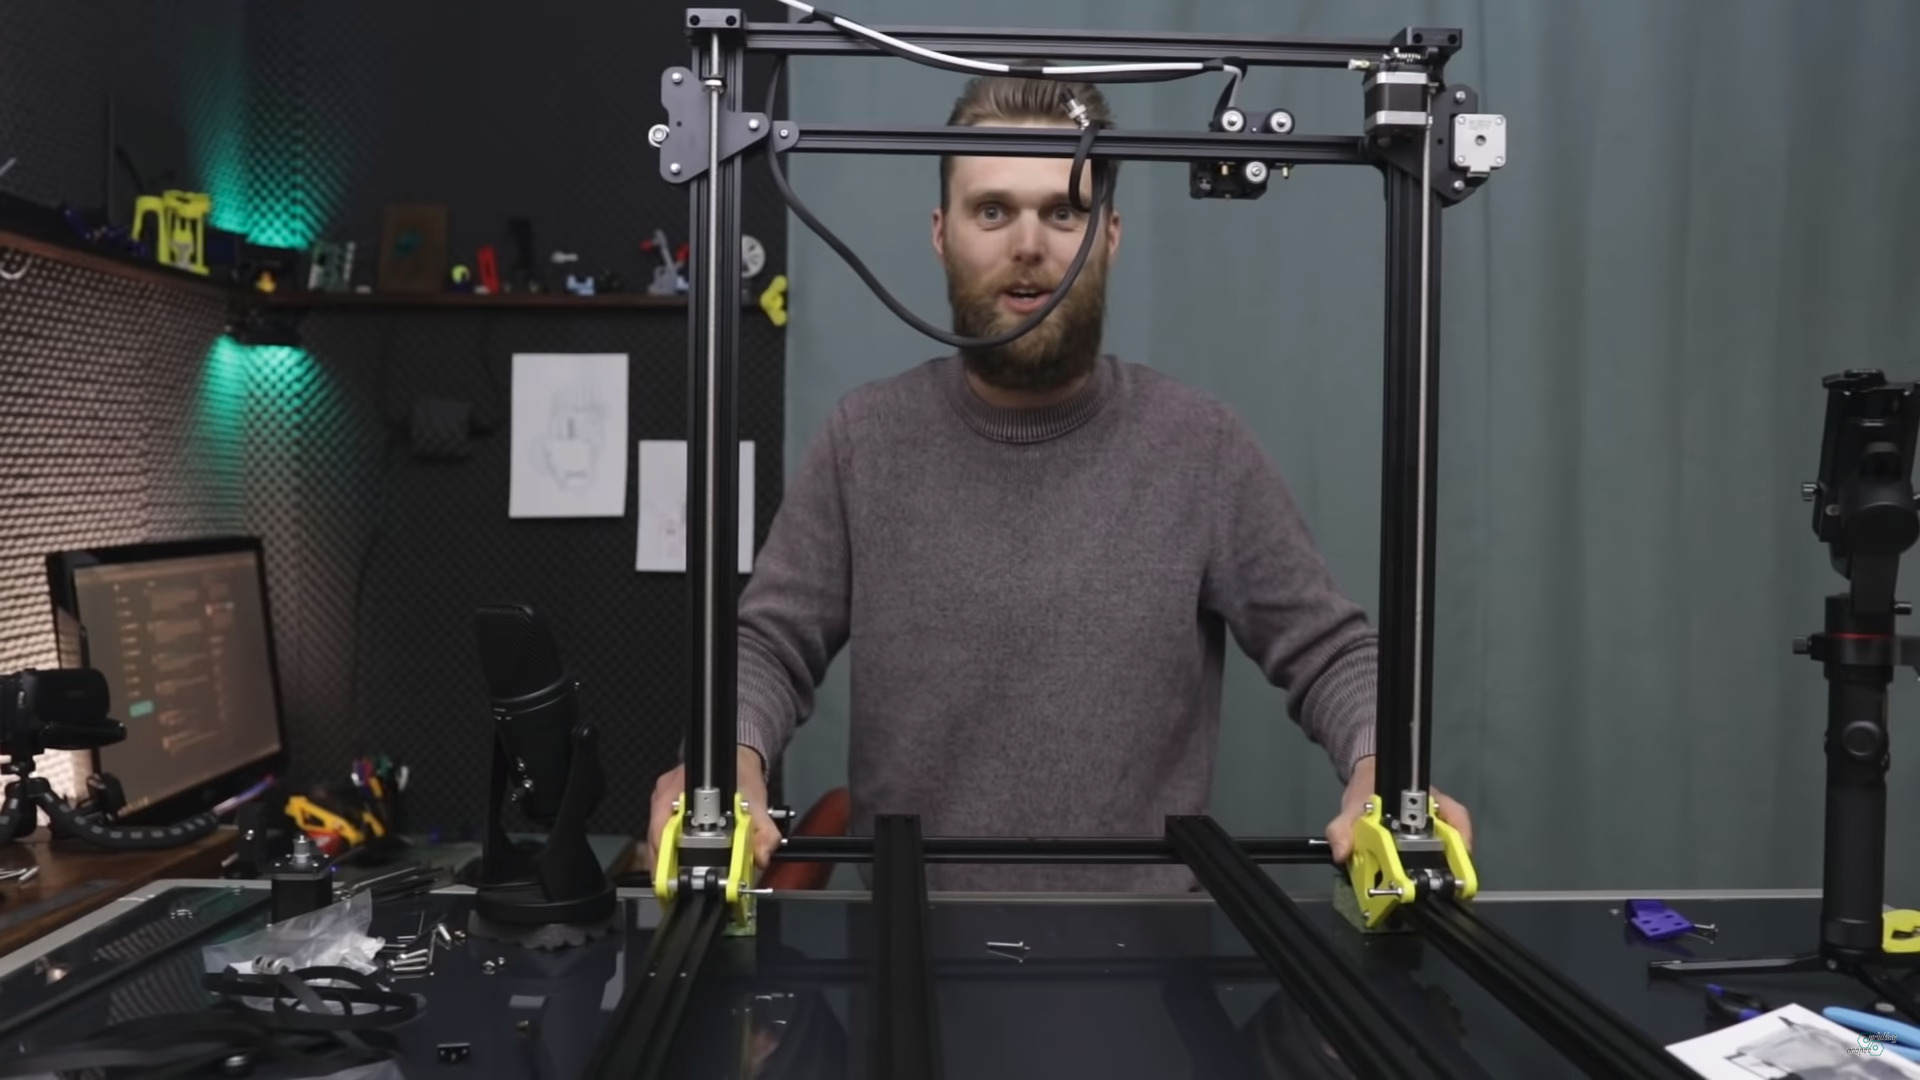
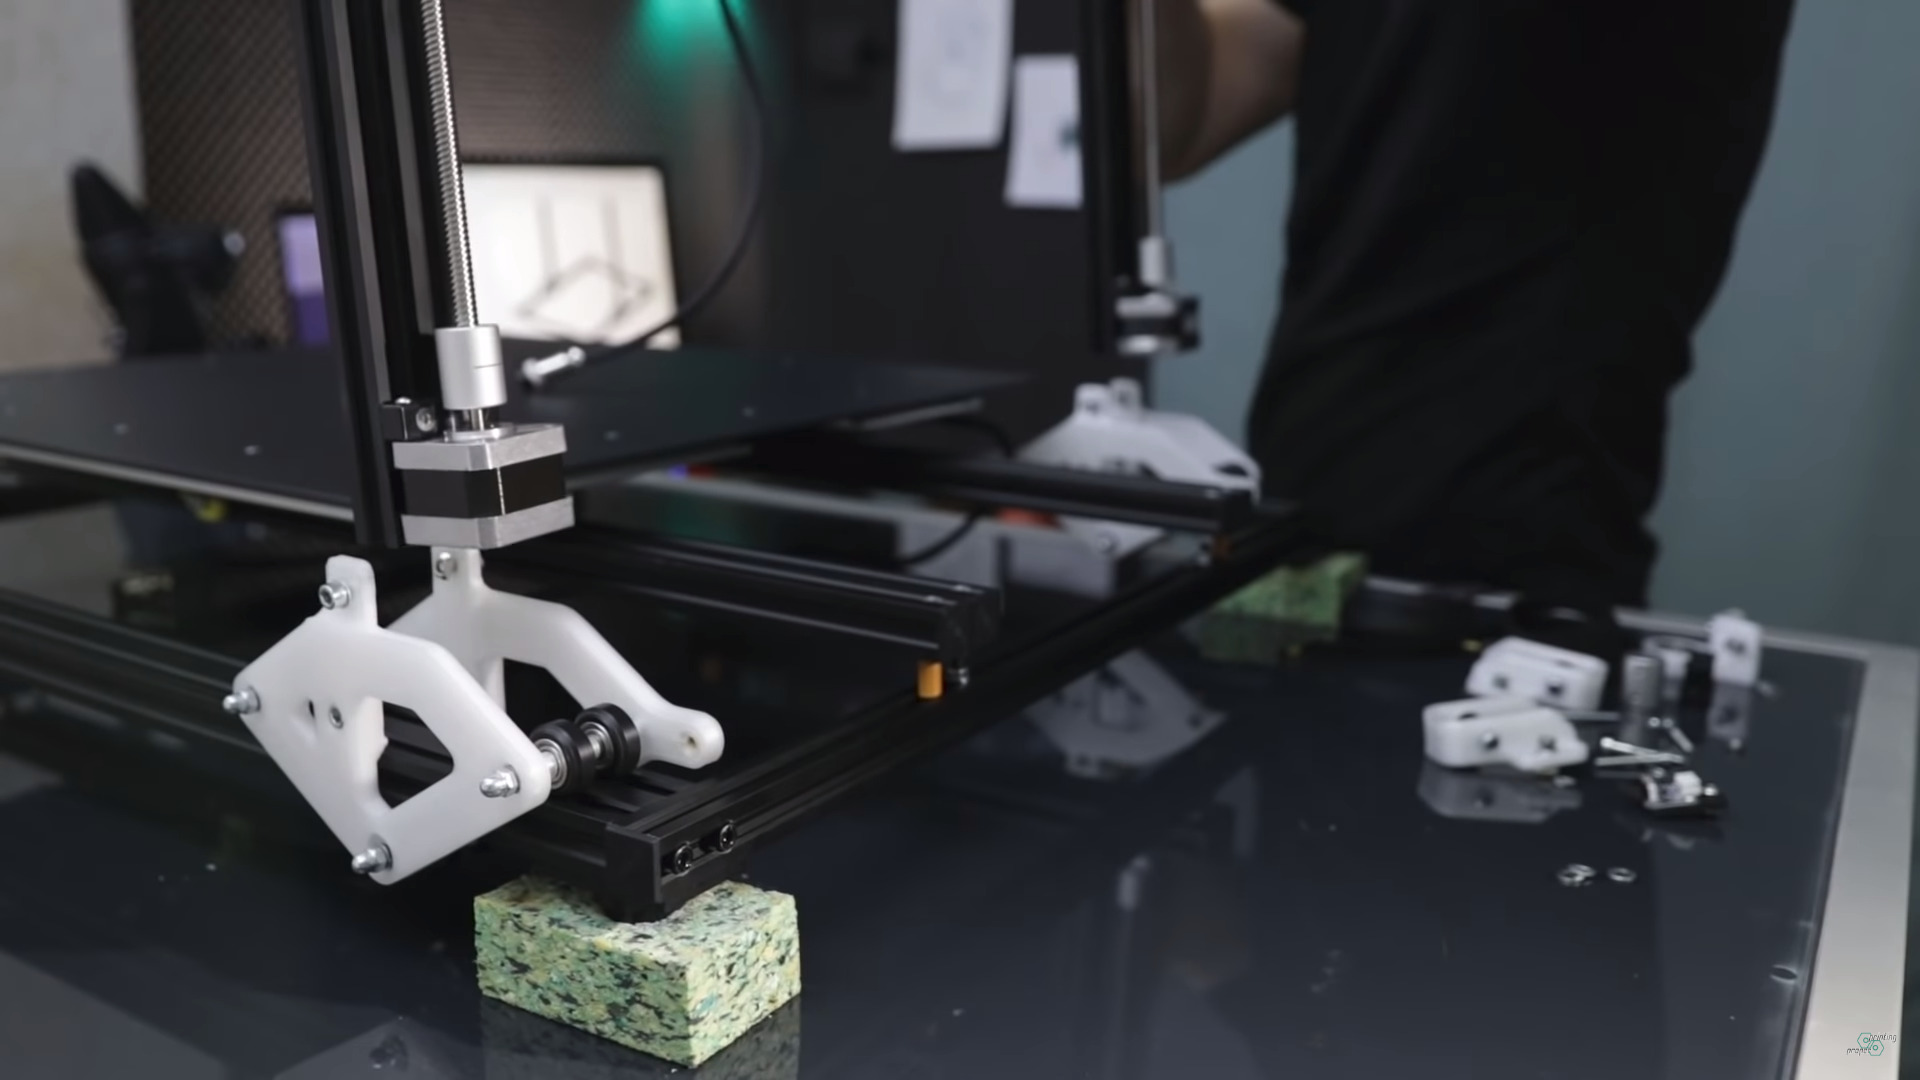
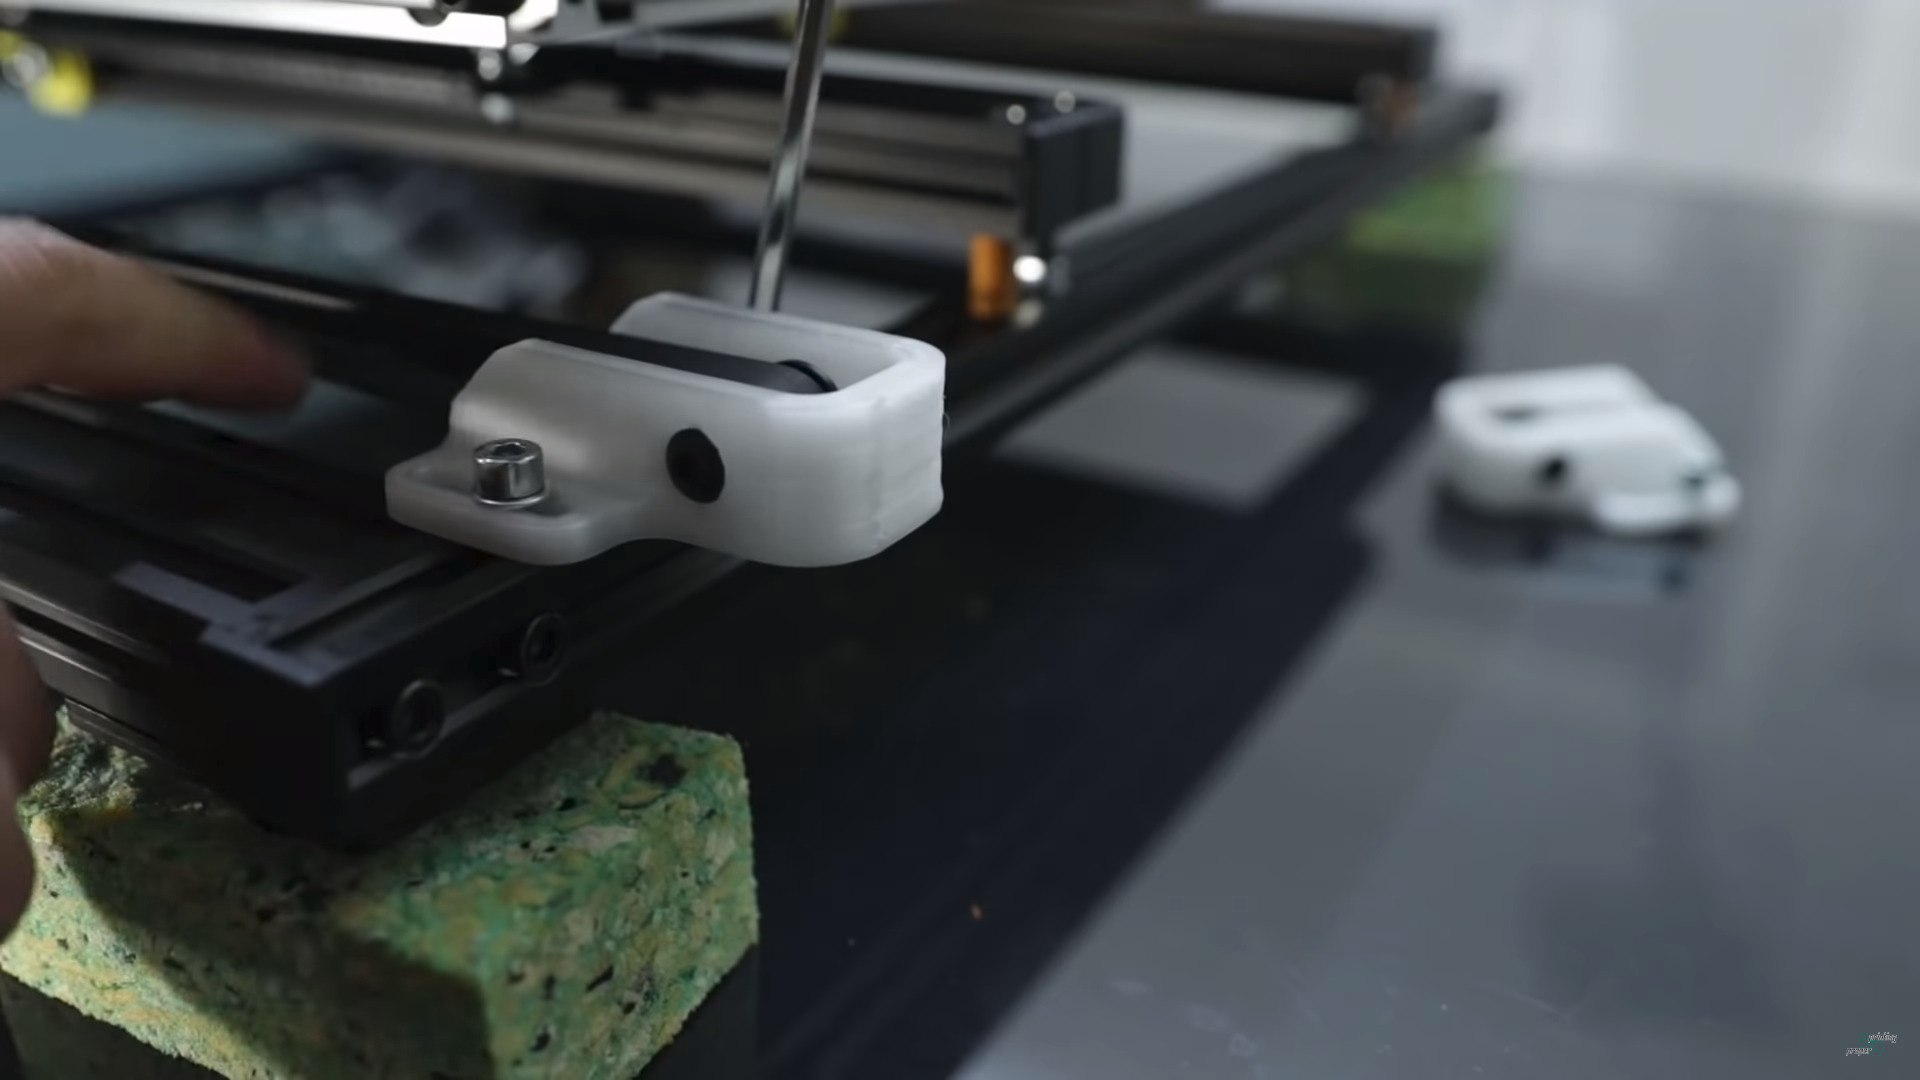
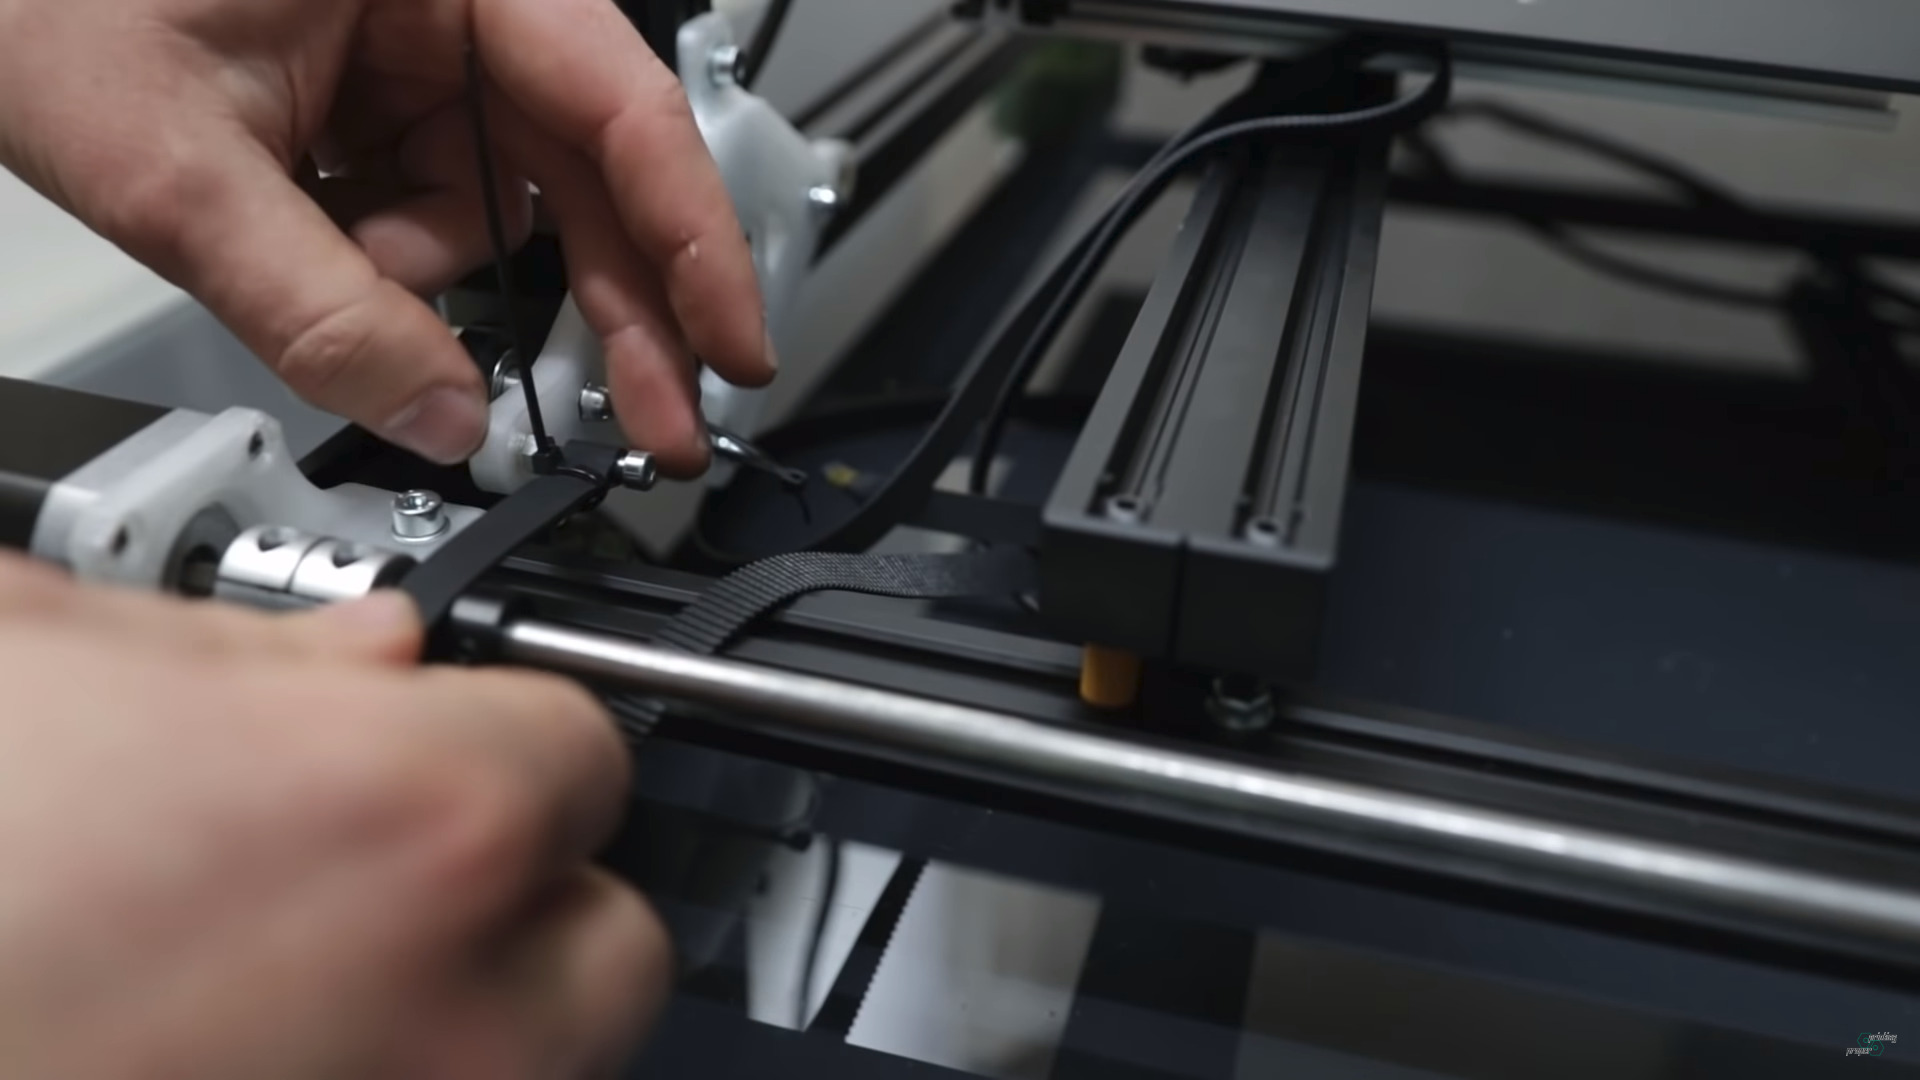
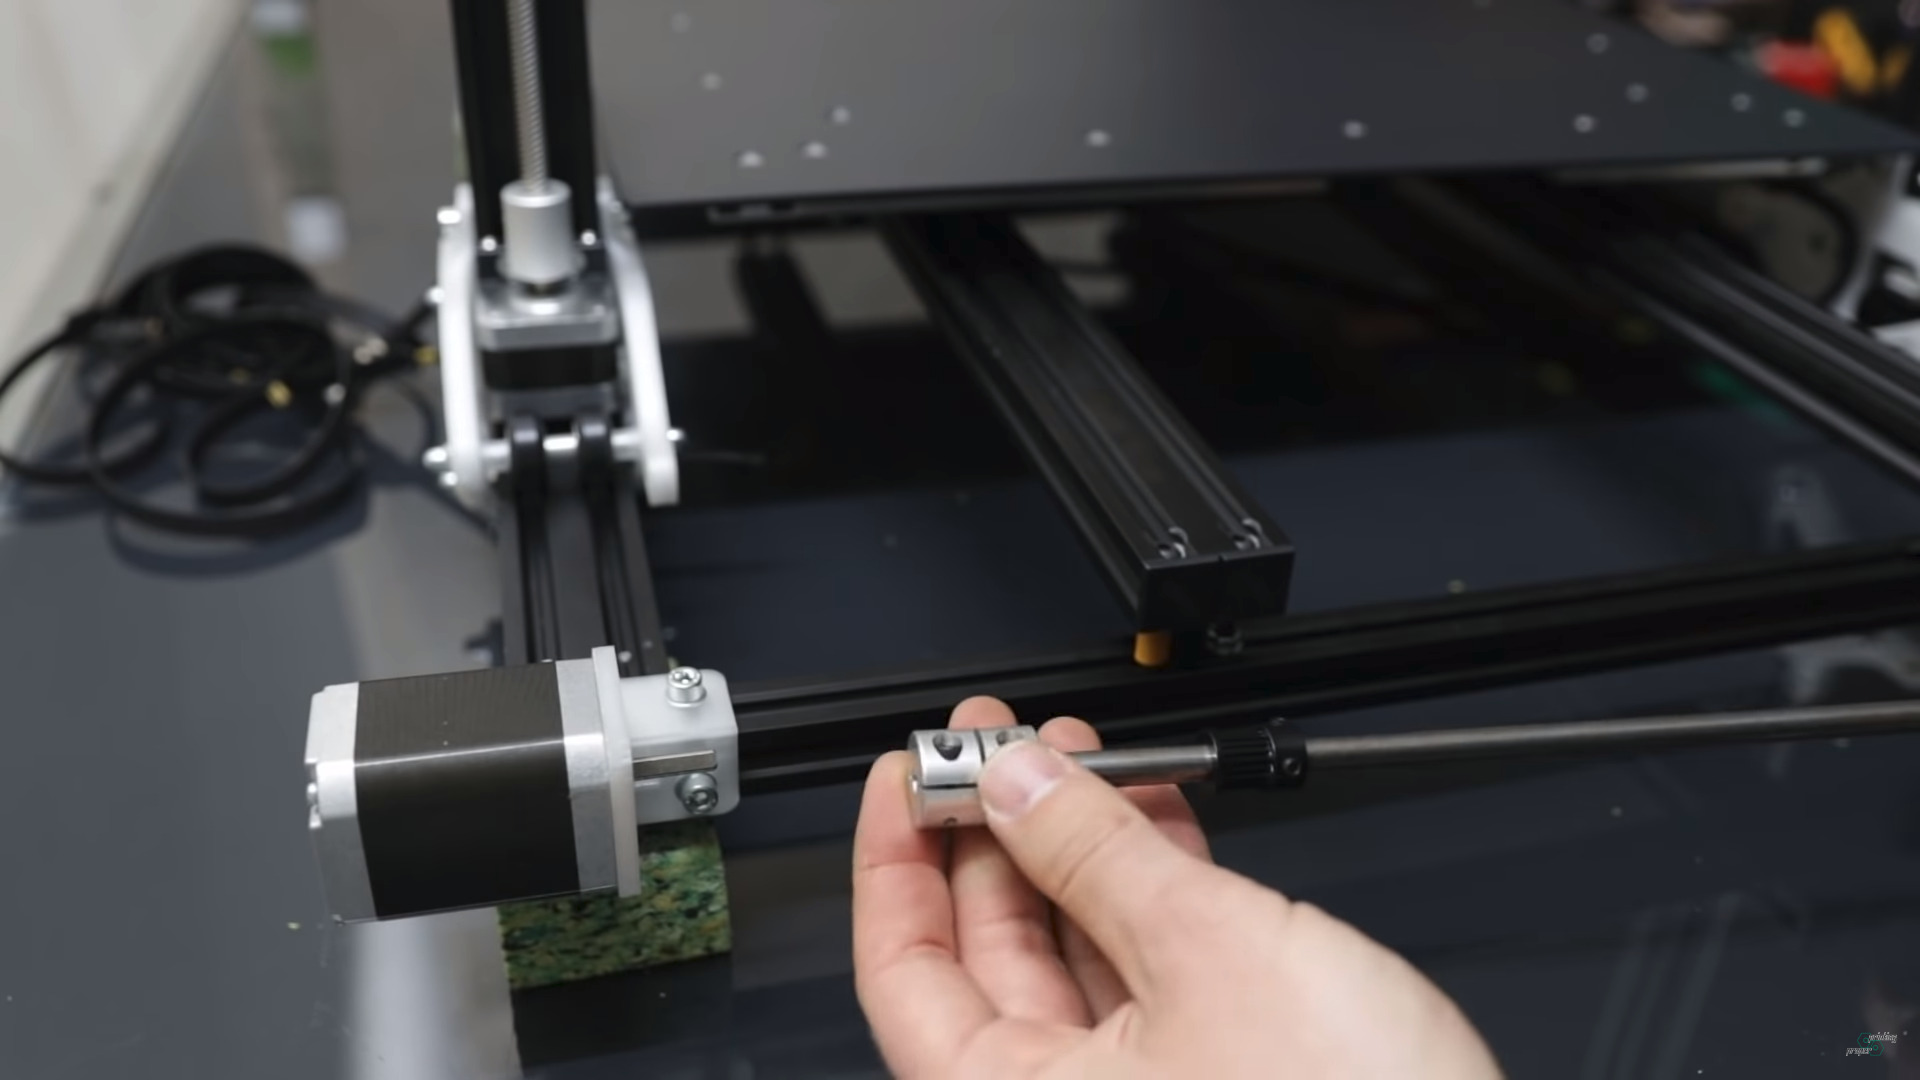
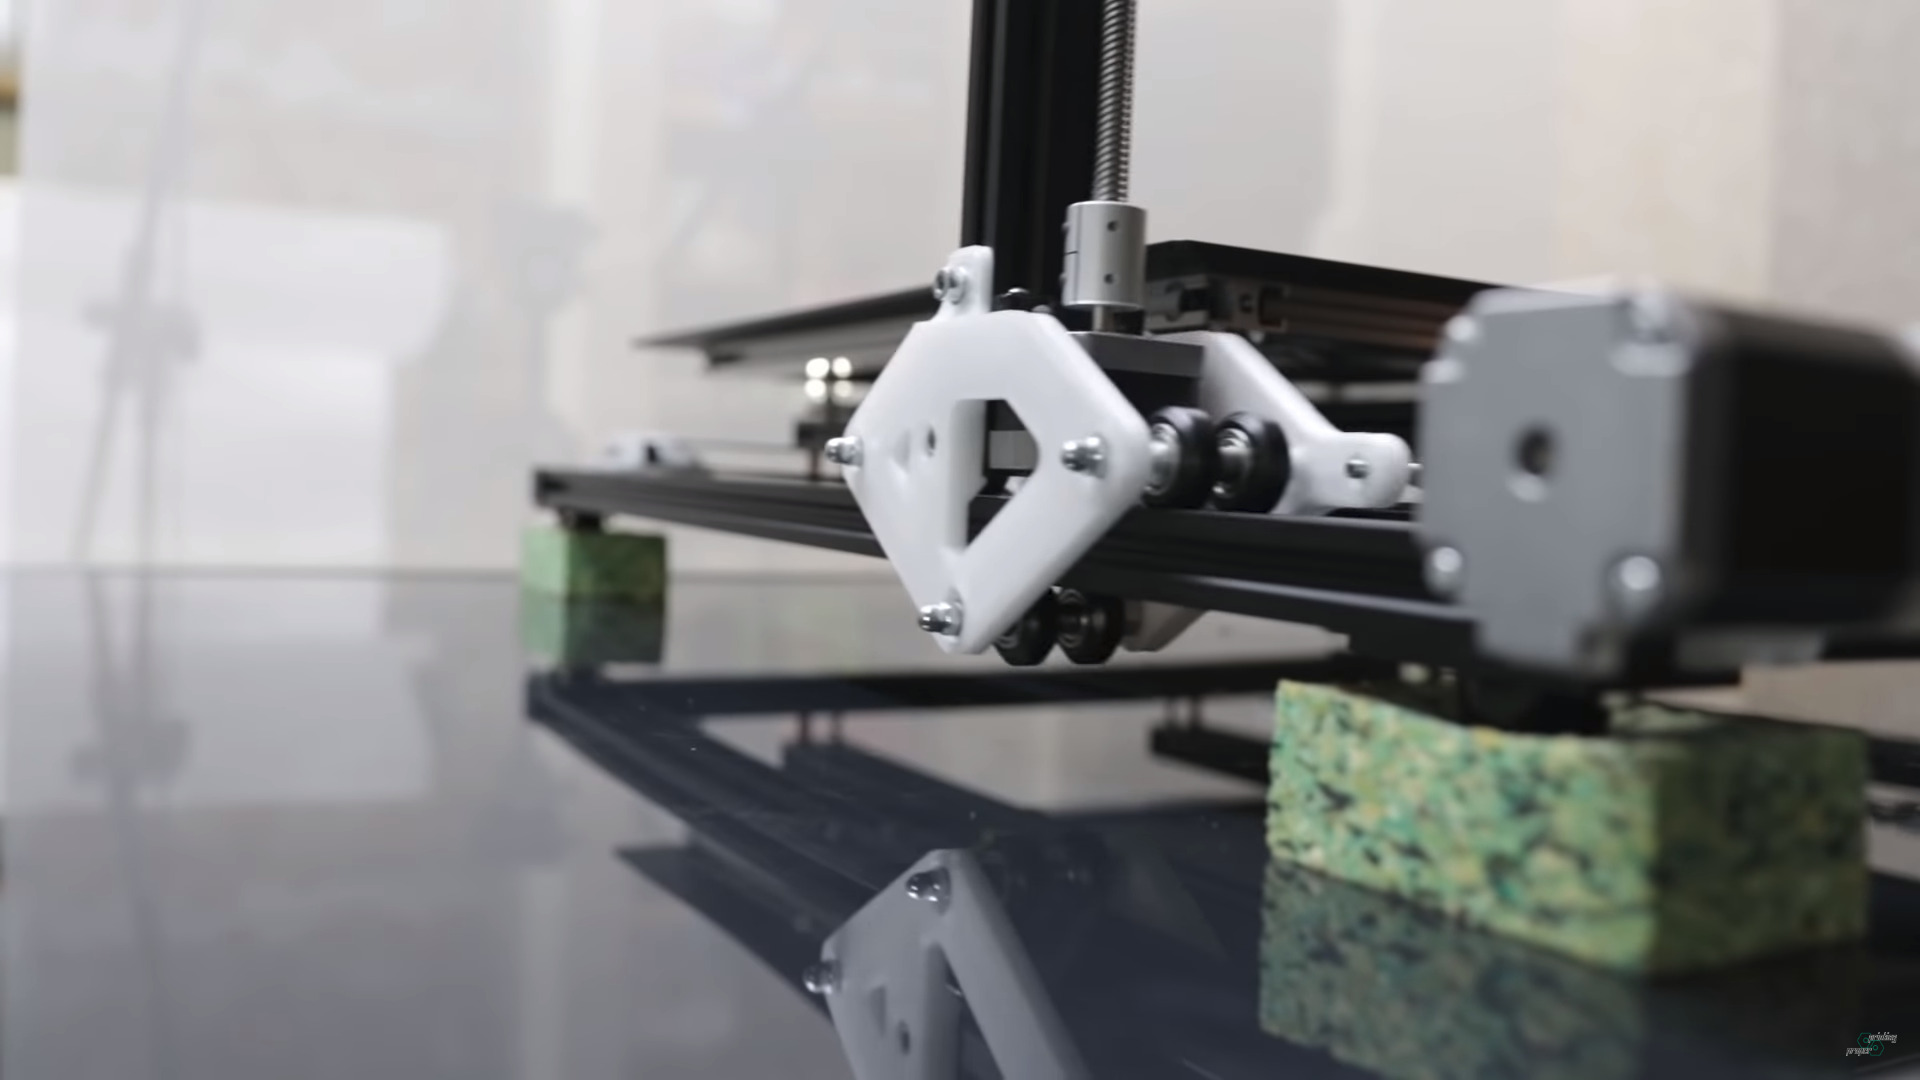
A few still images of Jon’s YT video to look at some details of his approach:
Jon Schone: Moving Portal Mod
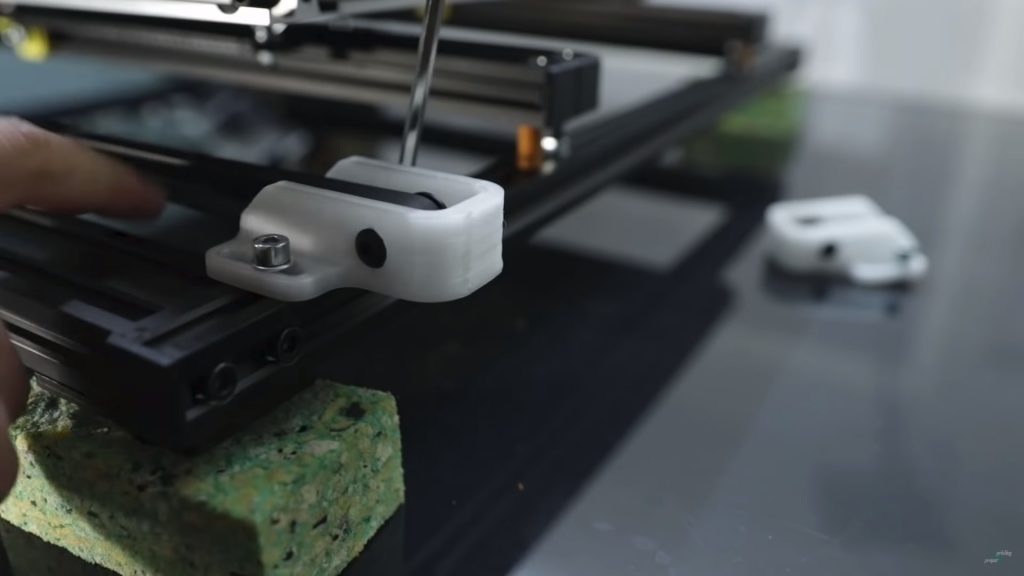
Z motor sits inside the Y carriage (40×20 V alu extrusion)
Y belt end
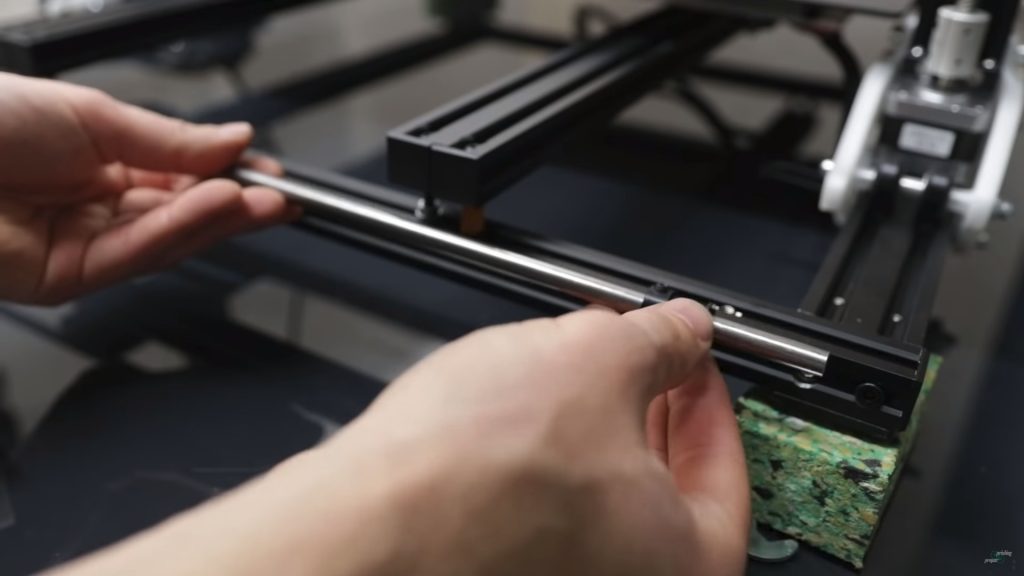
Single Y motor, 8mm rod to drive two Y belts
XZ frame Y Mount
Moving Portal / XZ Frame
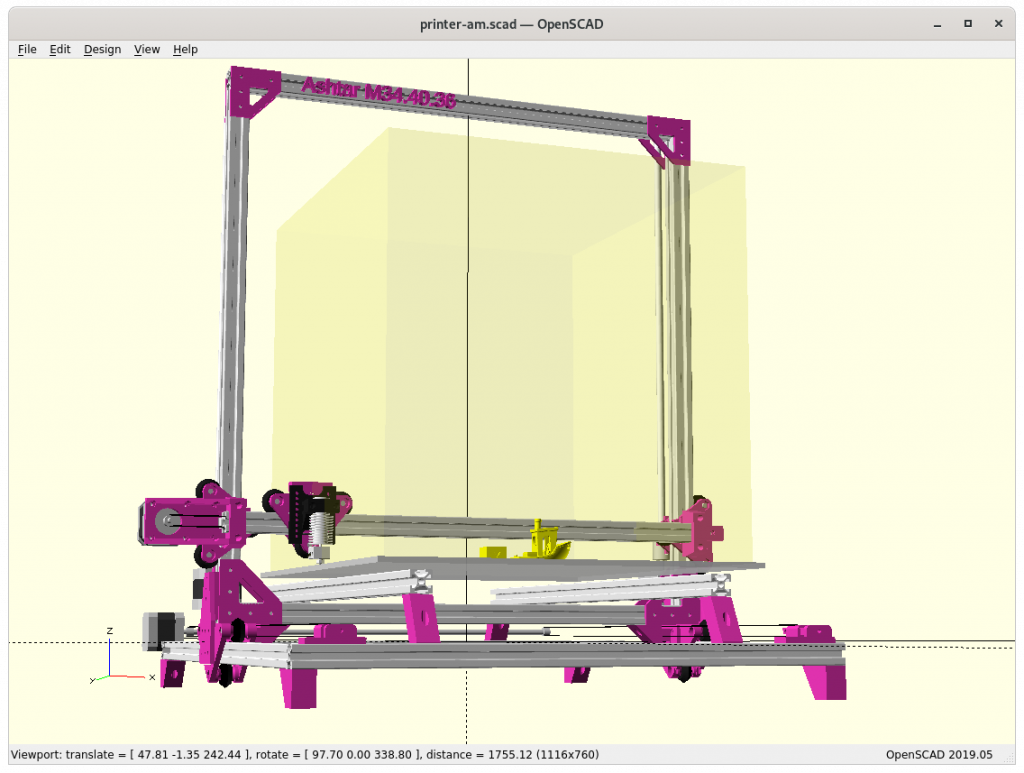
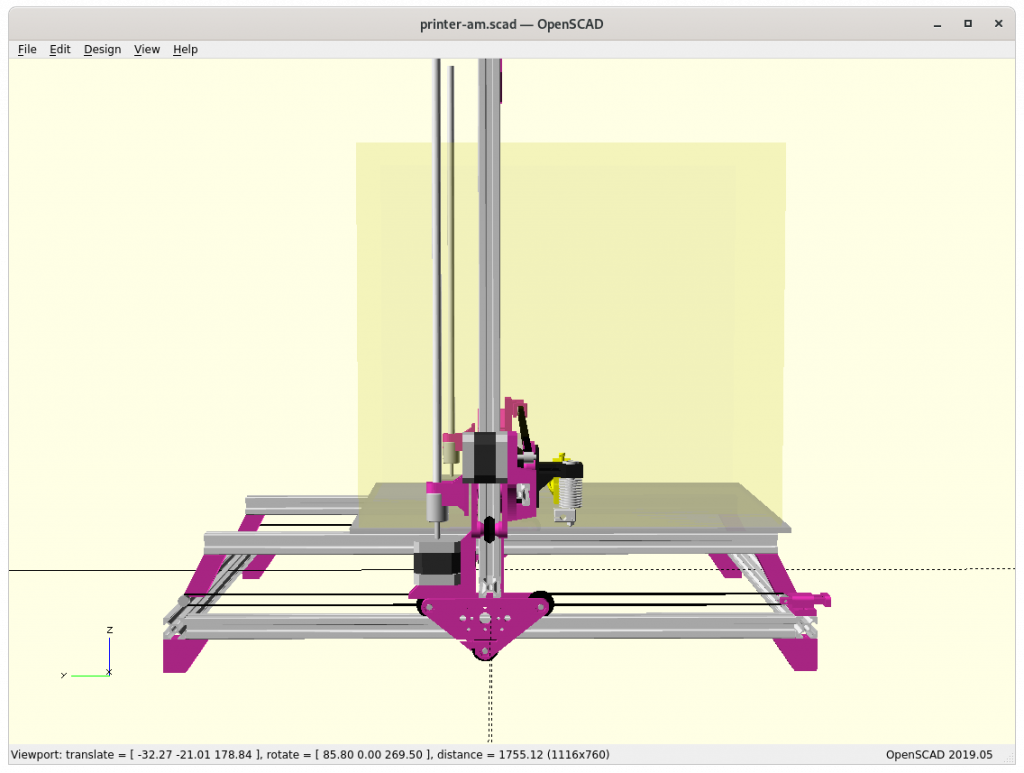
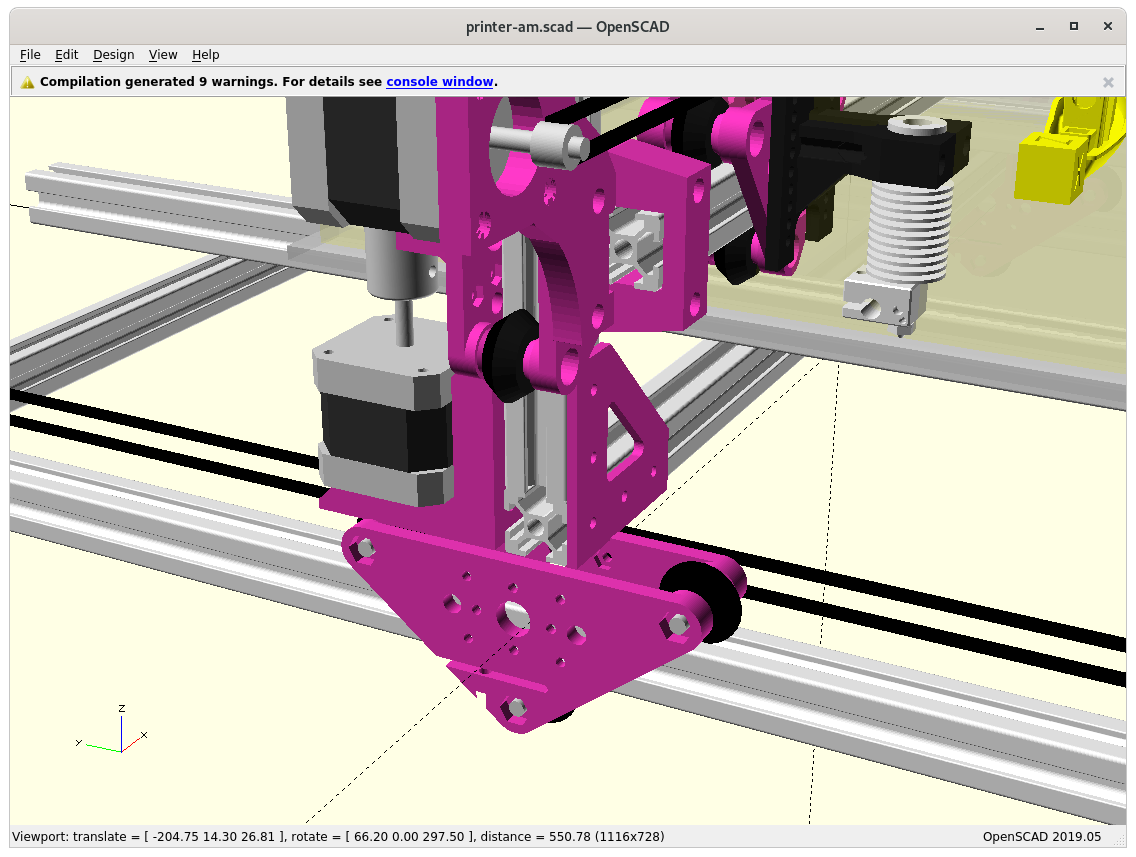
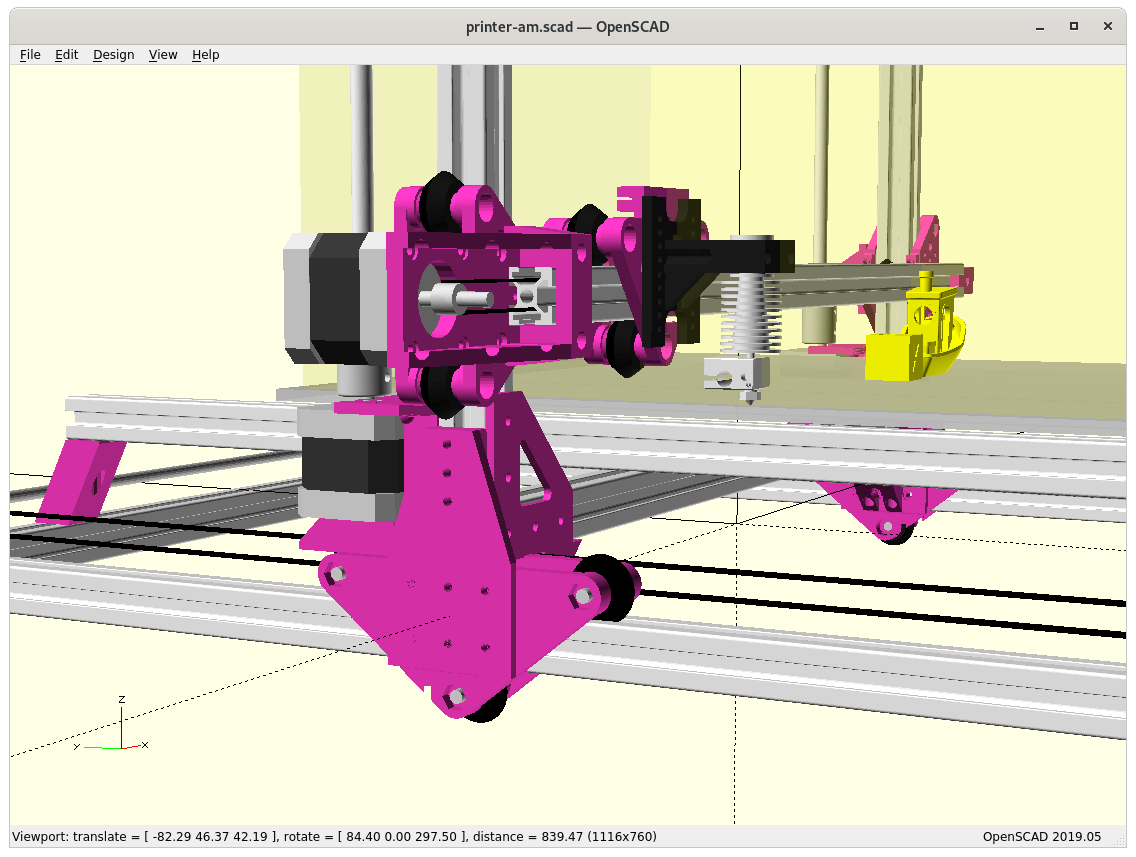
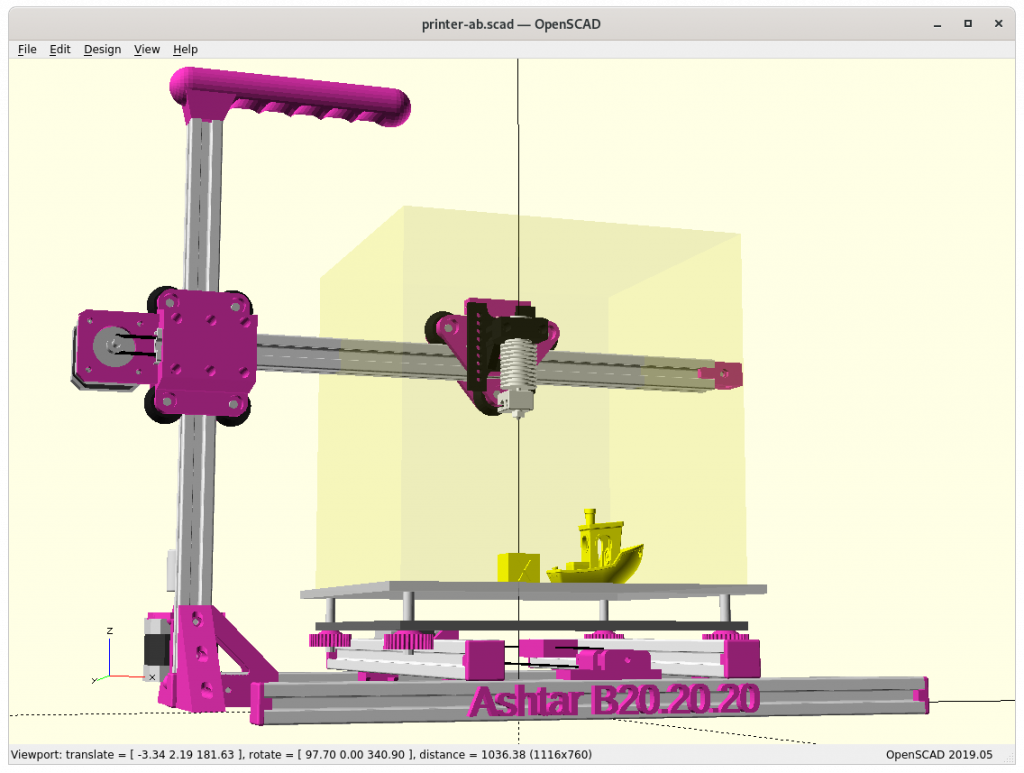
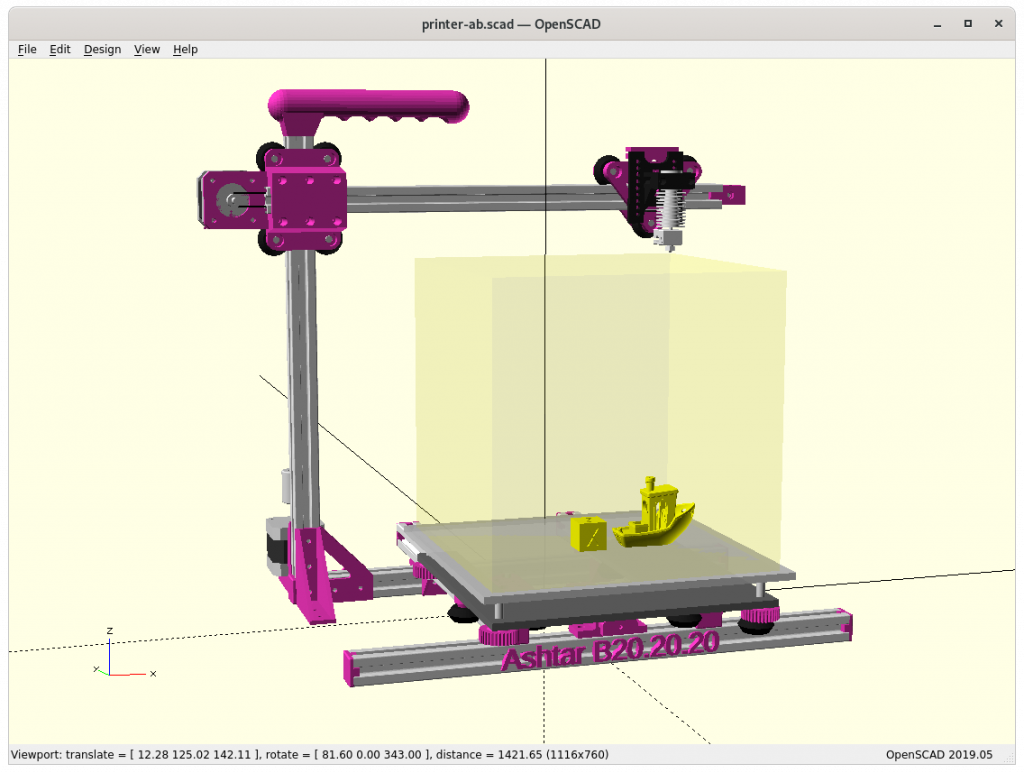
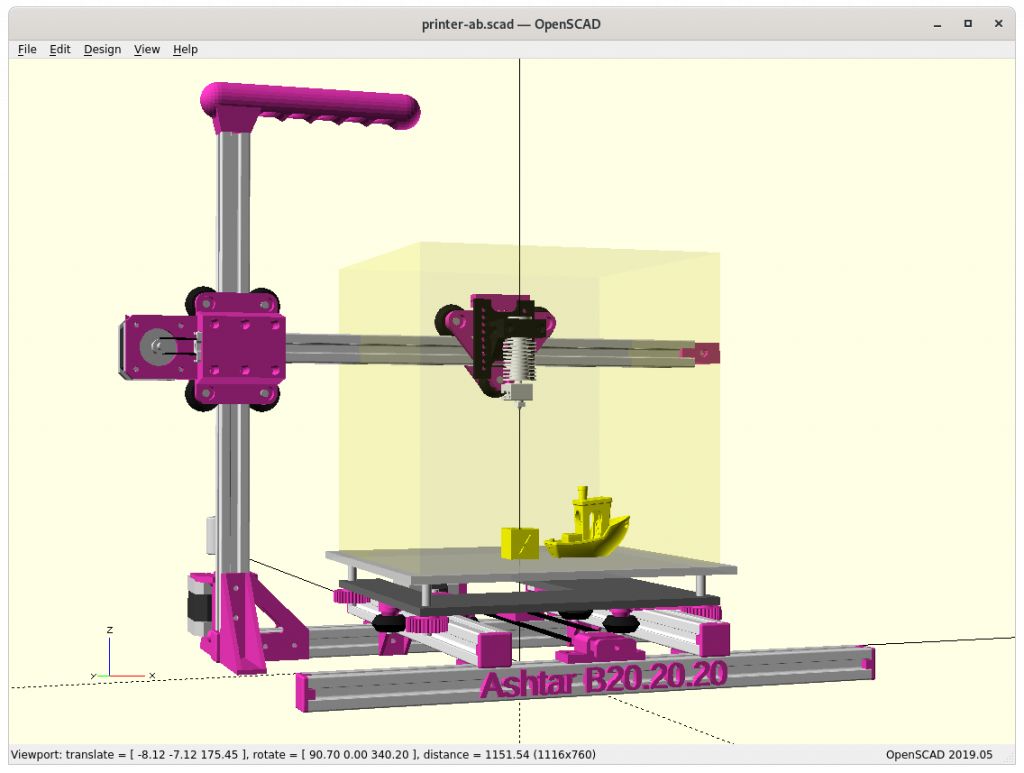
First Draft
using solely 500mm 2020 alu extrusions (T-slot for general frame and XZ frame, V-slot for carriages: X beam, 2x Y beams)
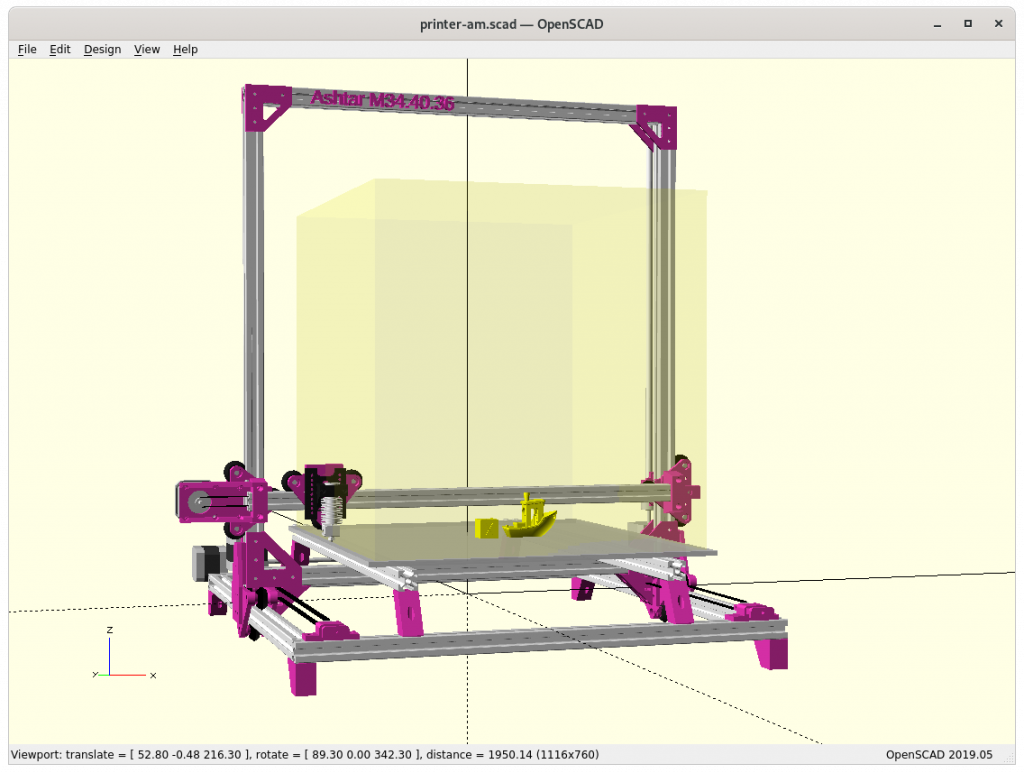
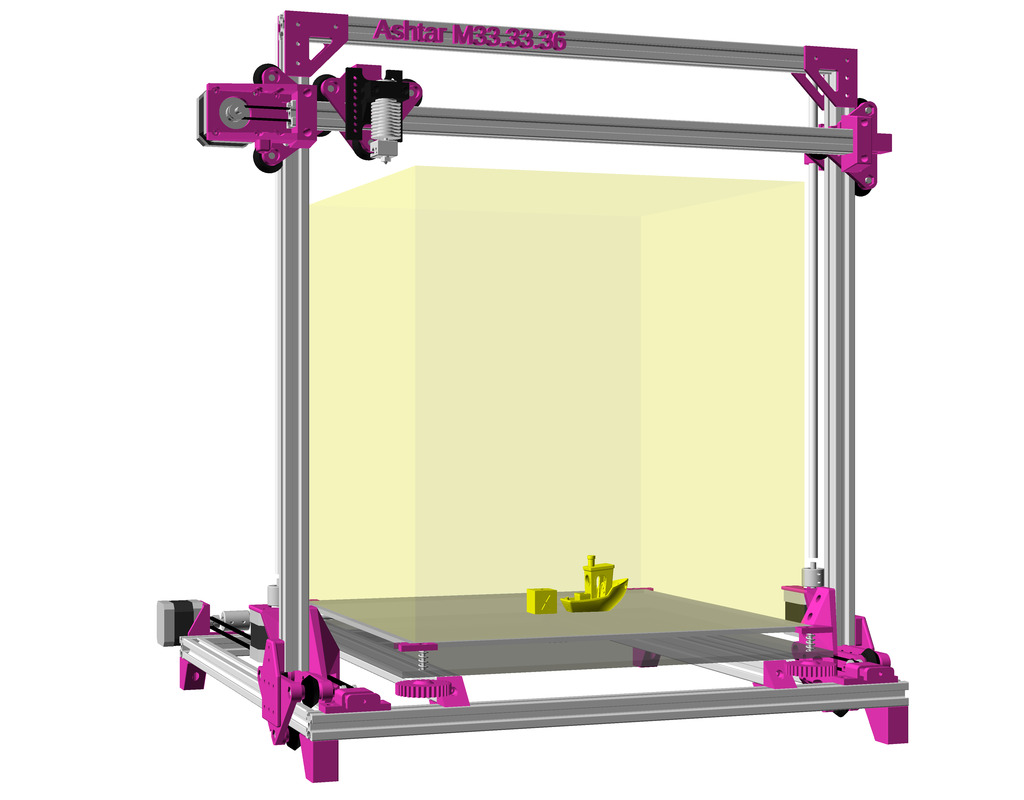
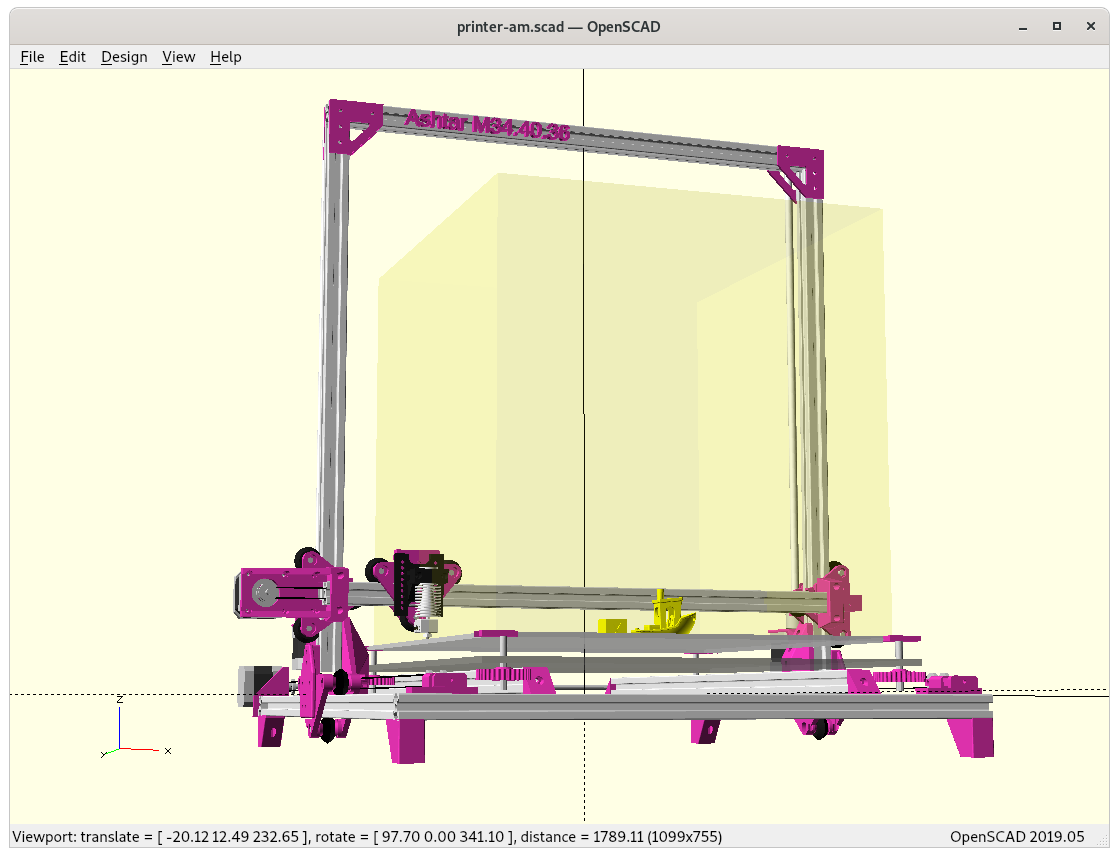
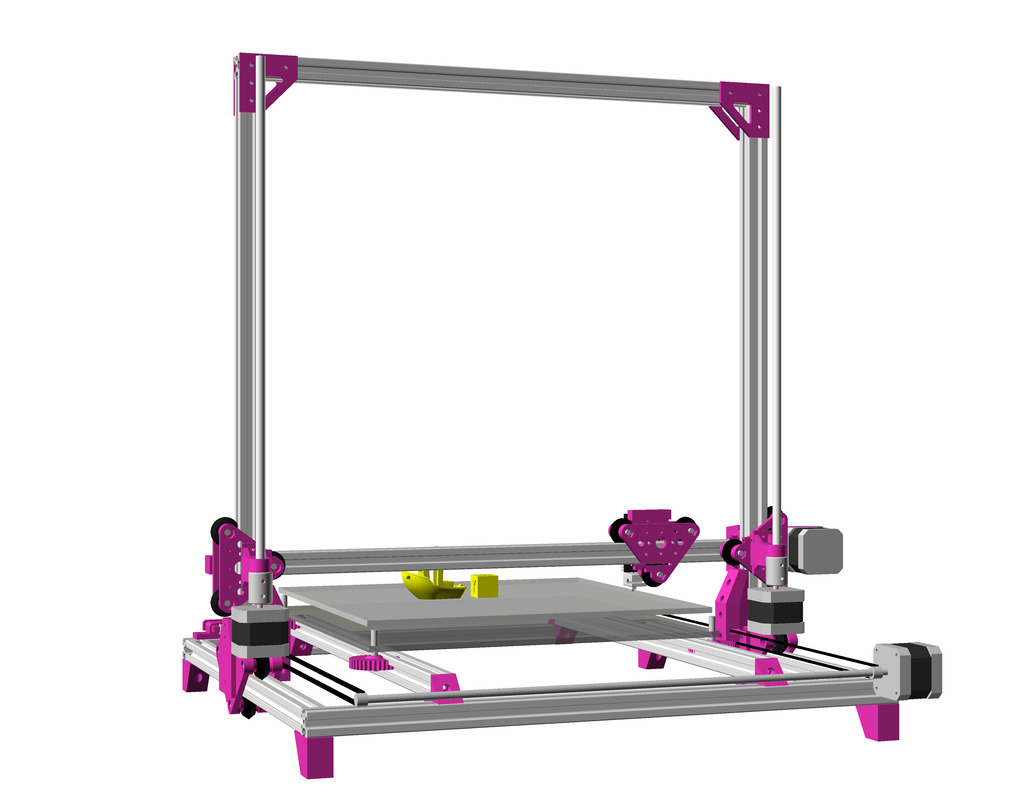
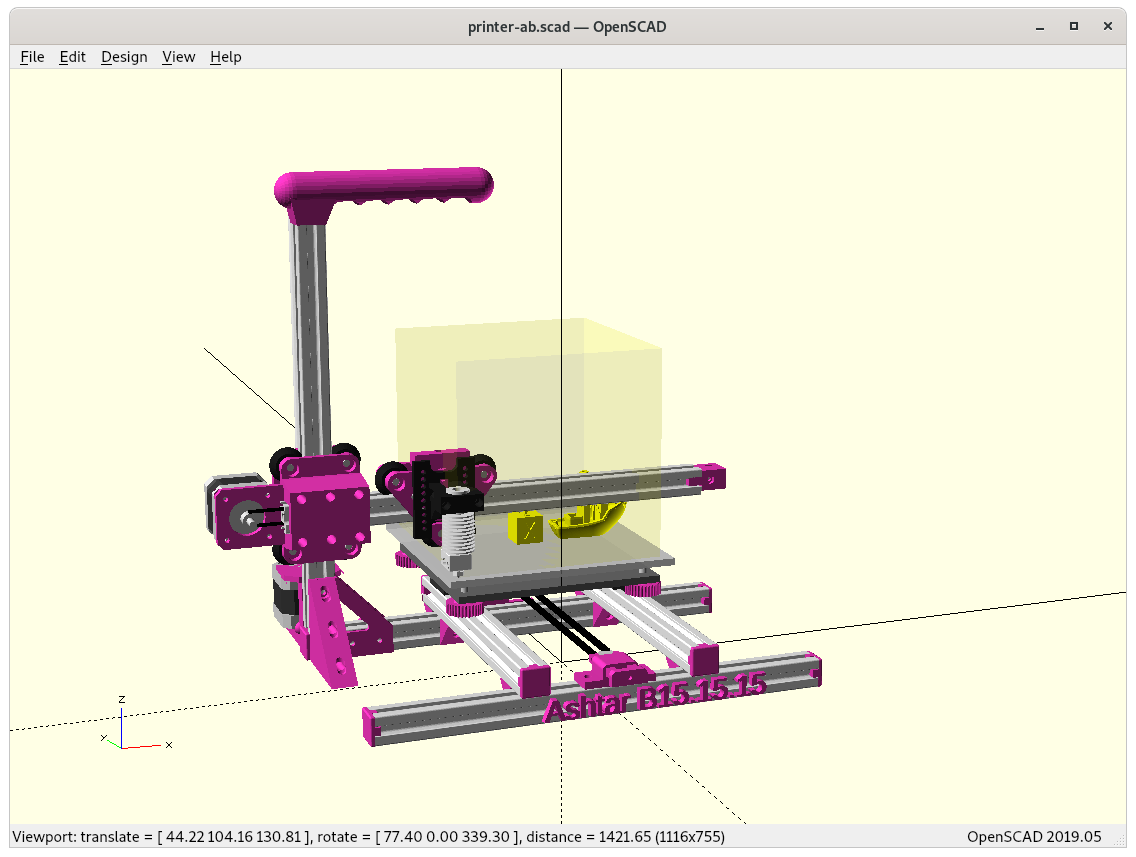
trying to achieve 400x400x400mm build volume as close as possible, alike Ashtar C 38.40.36
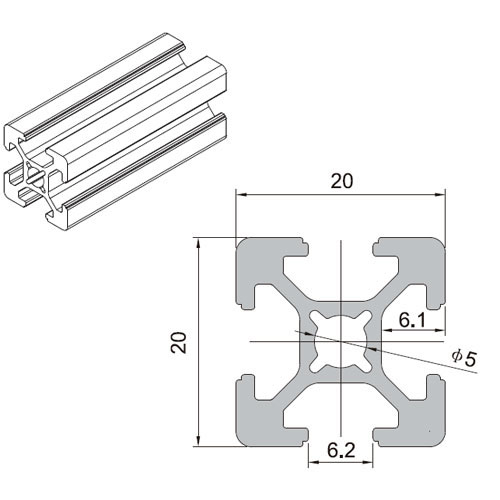
T-Slot 2020
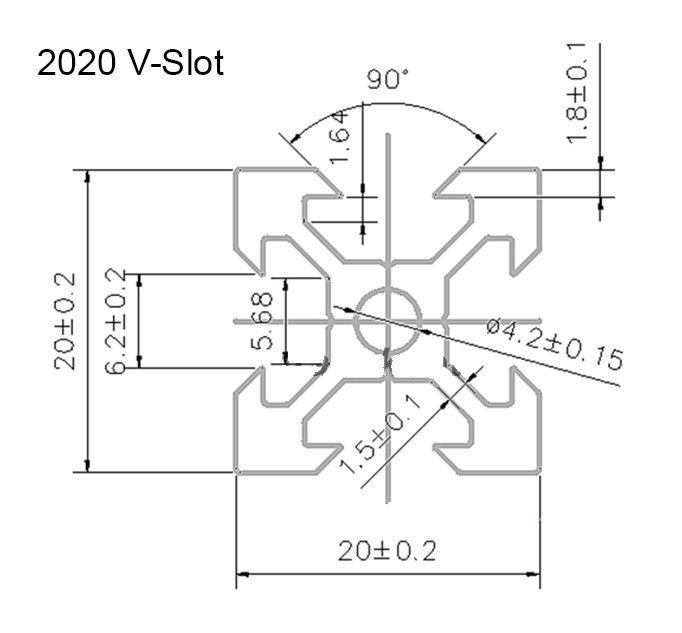
V-Slot 2020
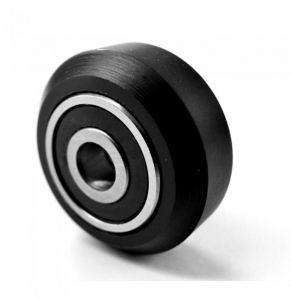
V wheel
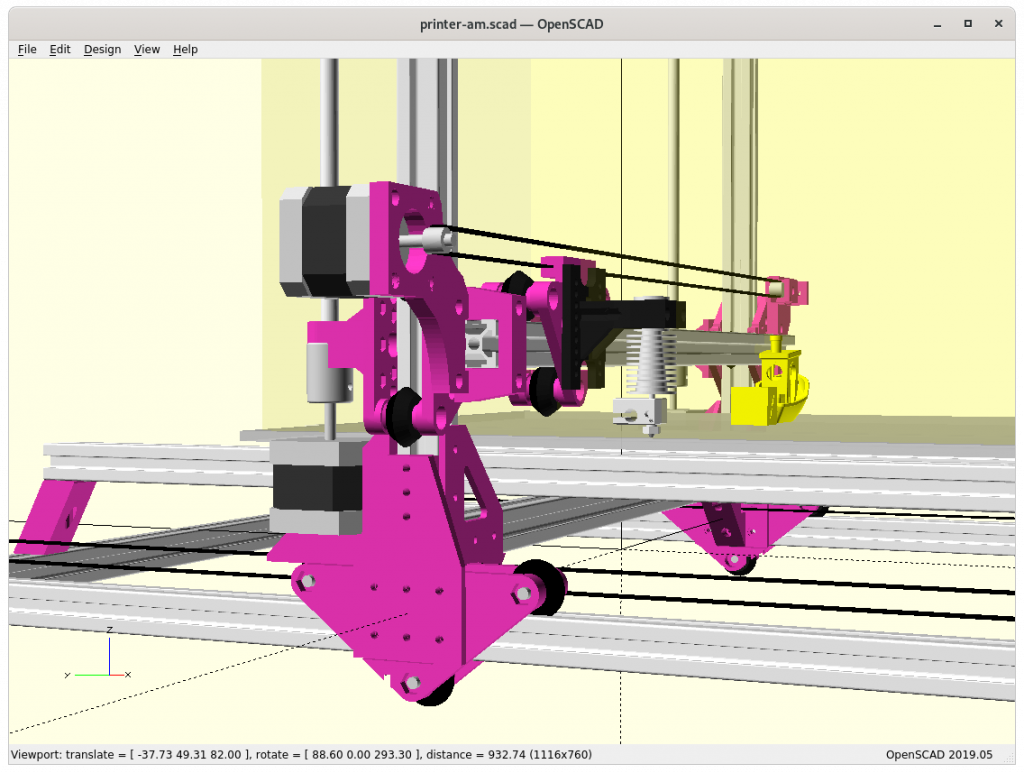
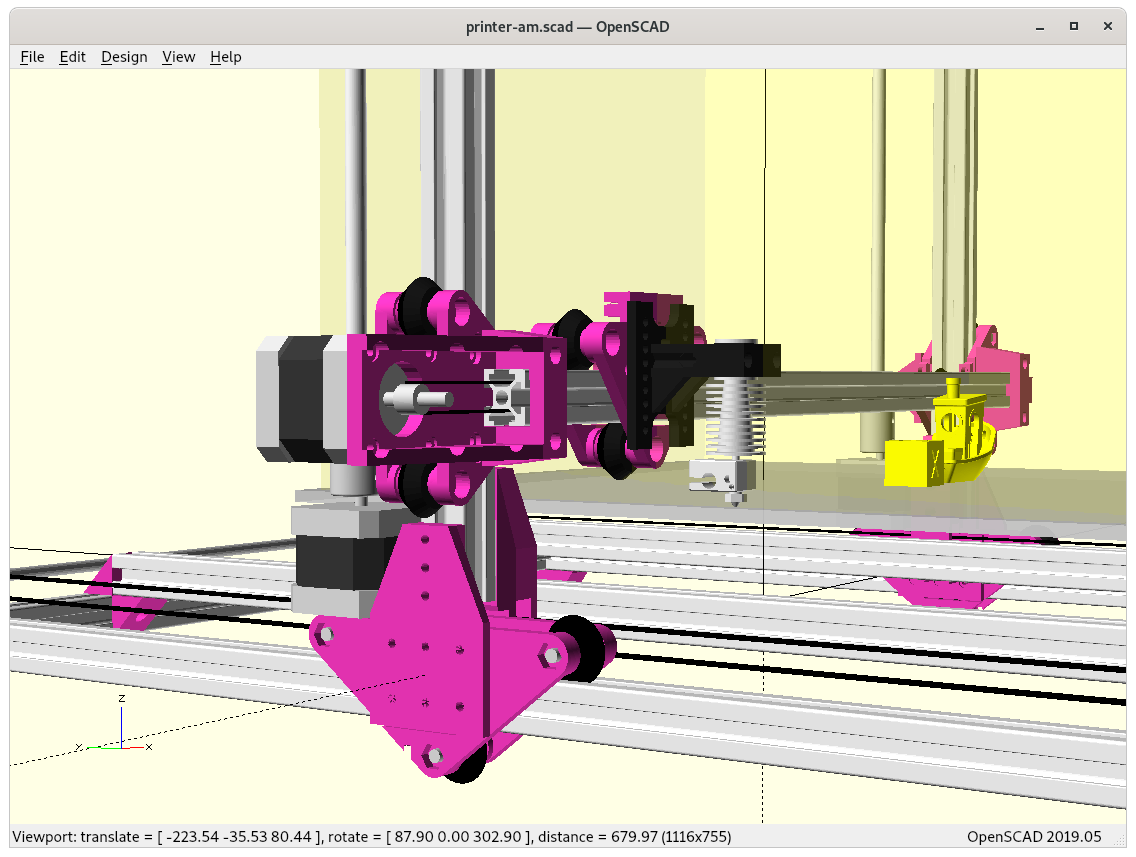
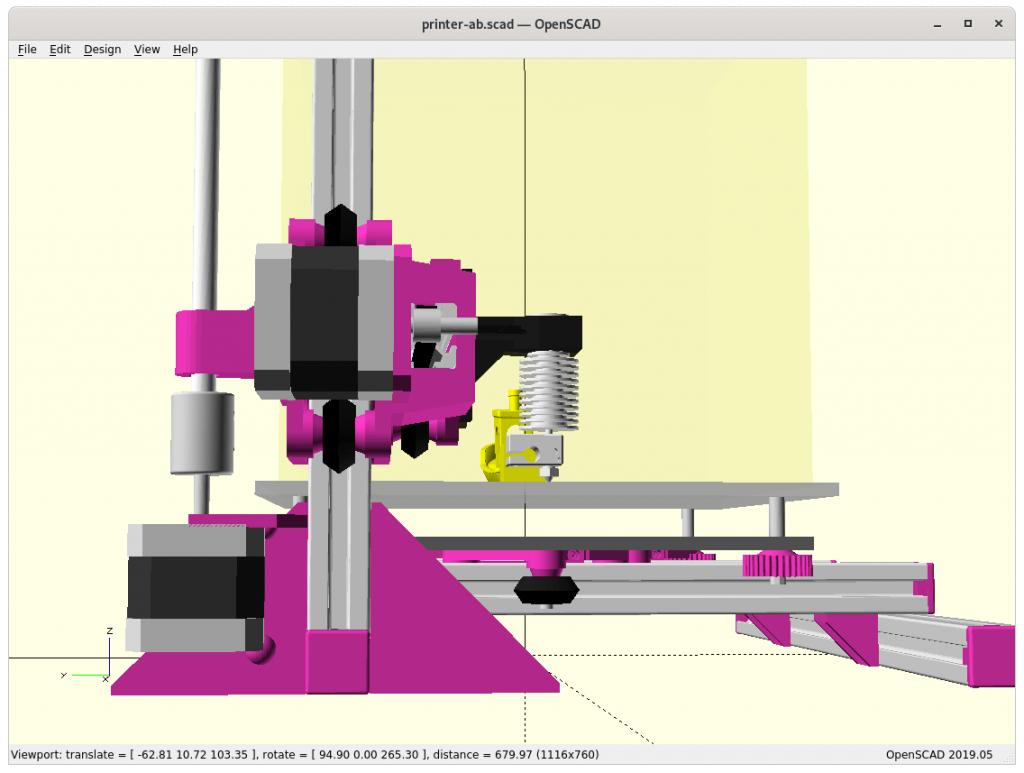
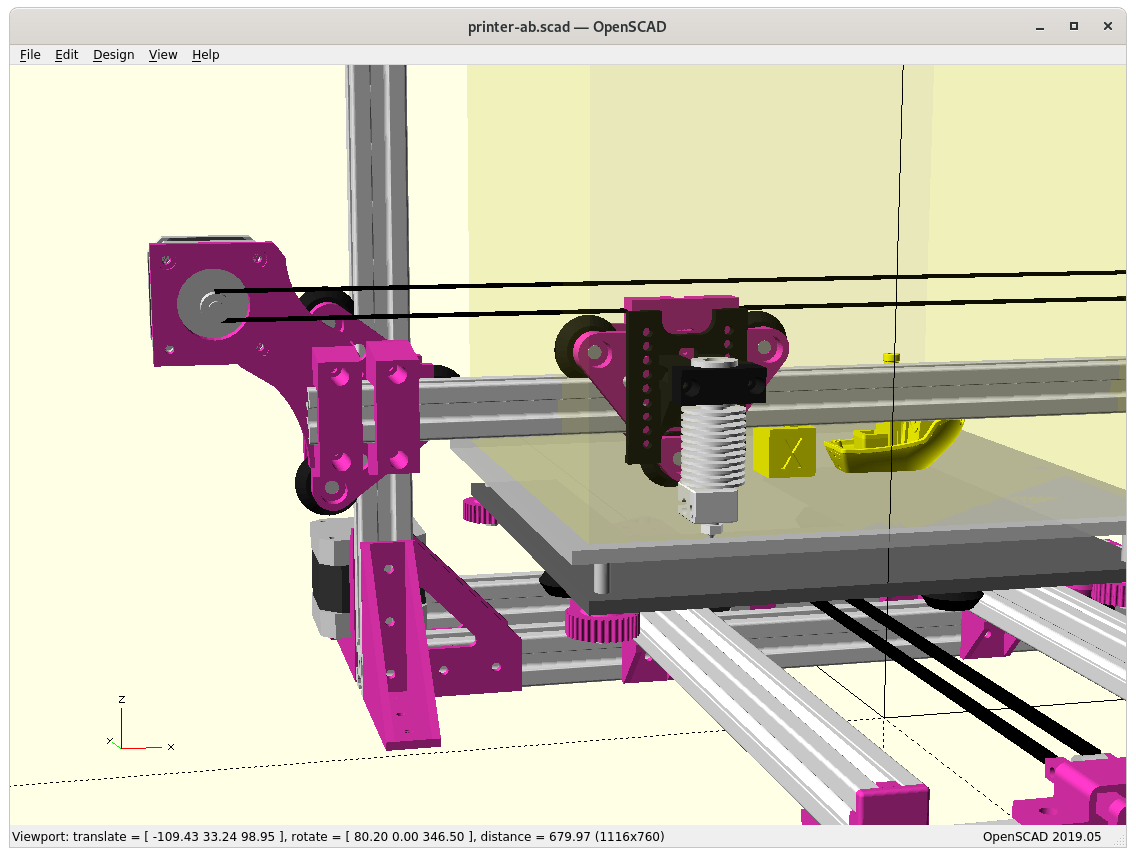
Using for Y carriages existing vcarriage2 module with vcarriage2(width=100) to have it wide enough:
Bare view on Y carriage with XZ frame
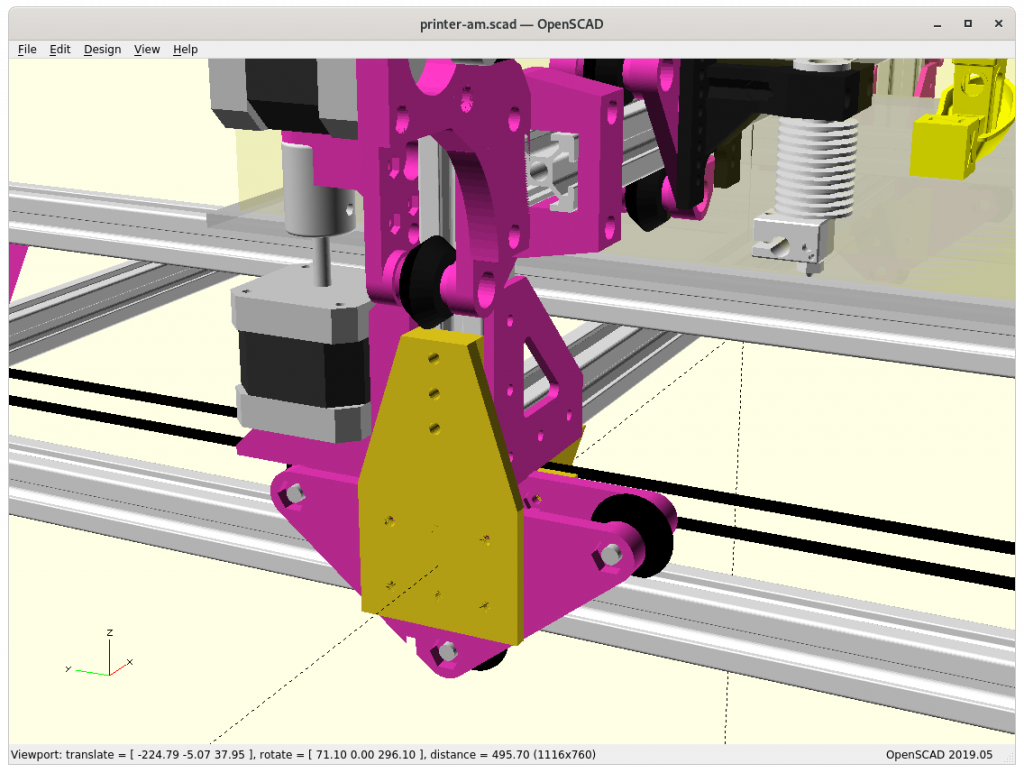
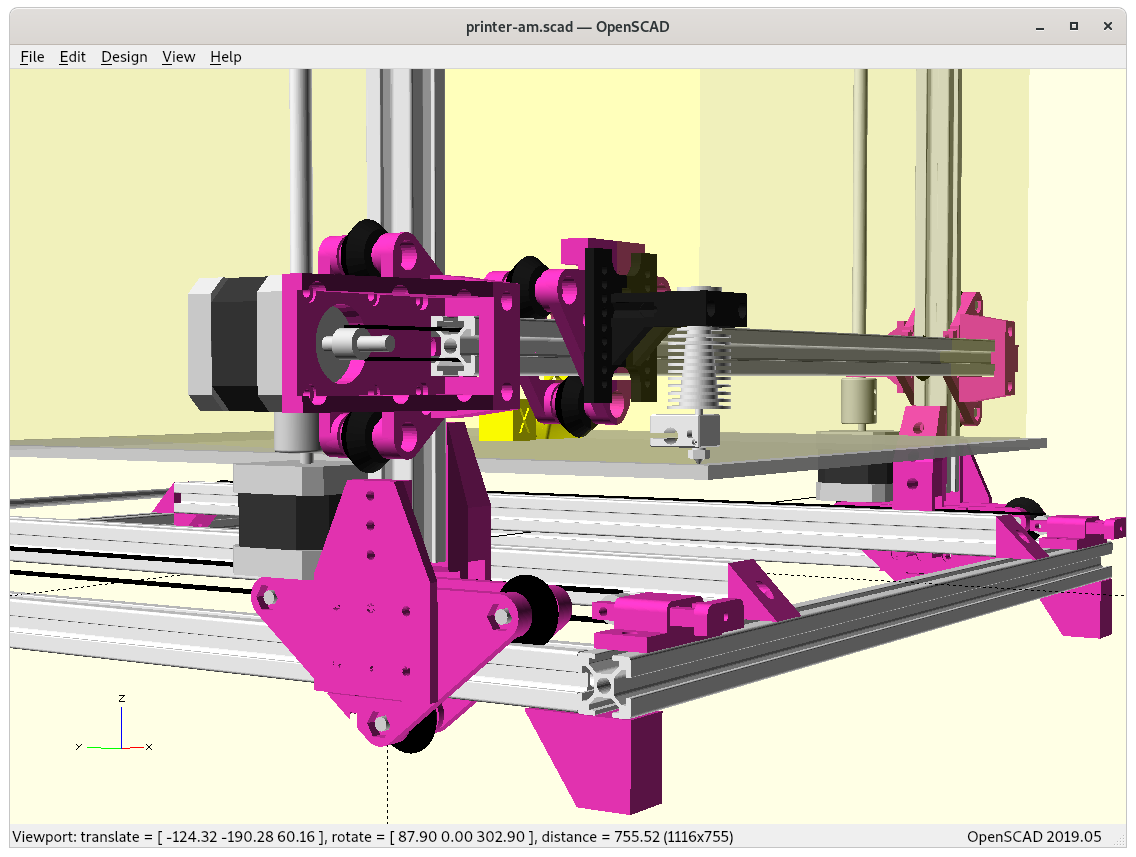
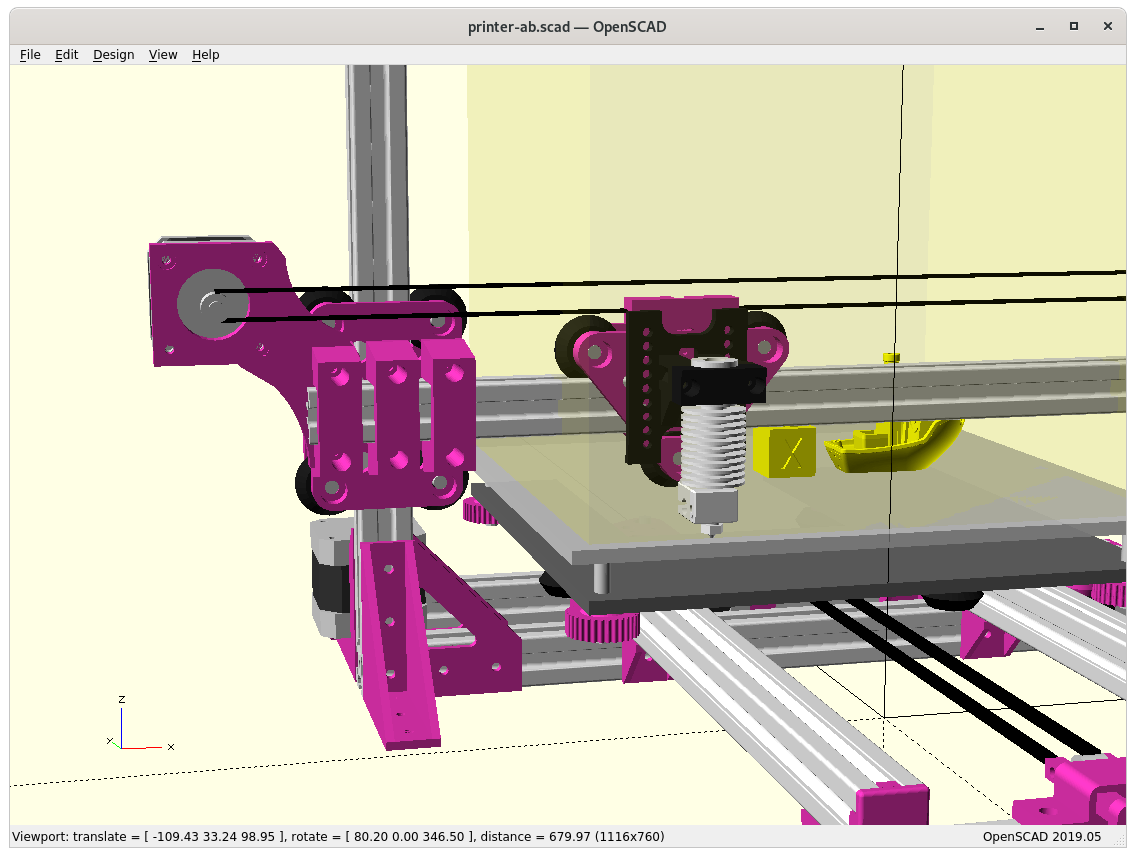
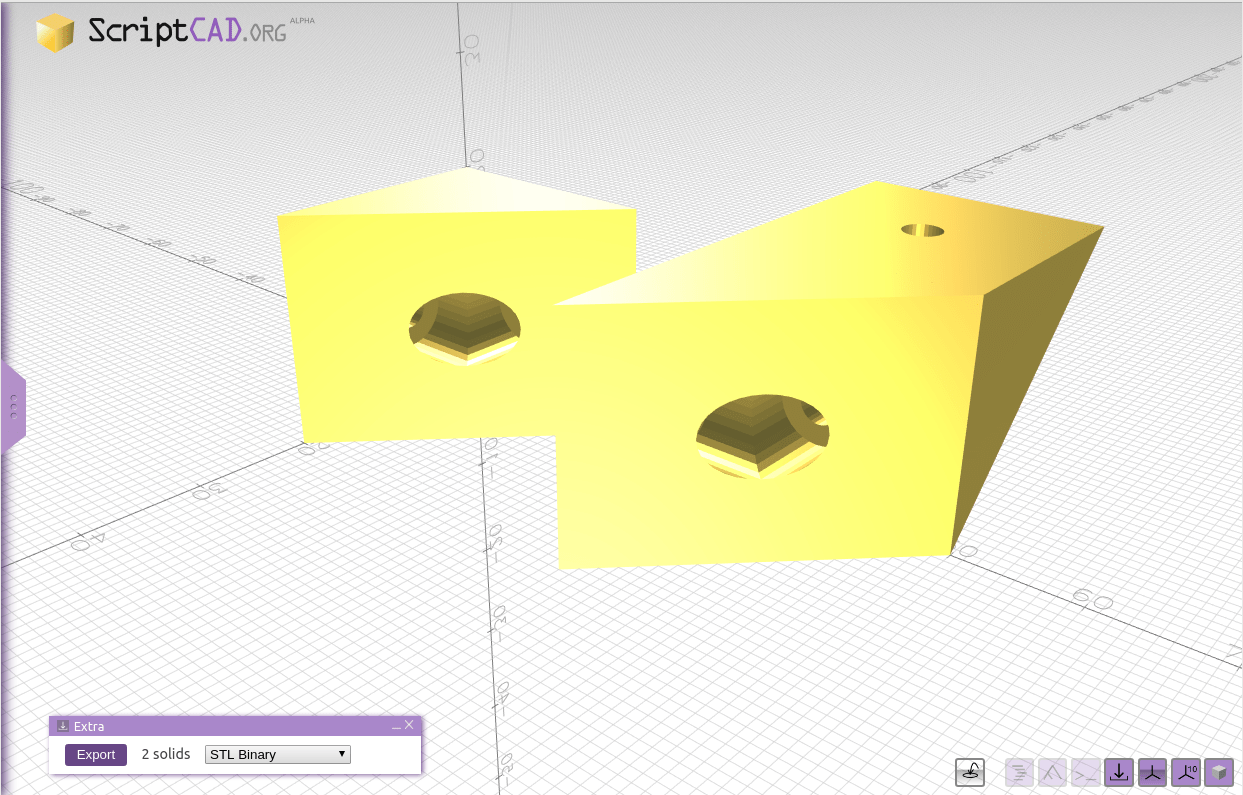
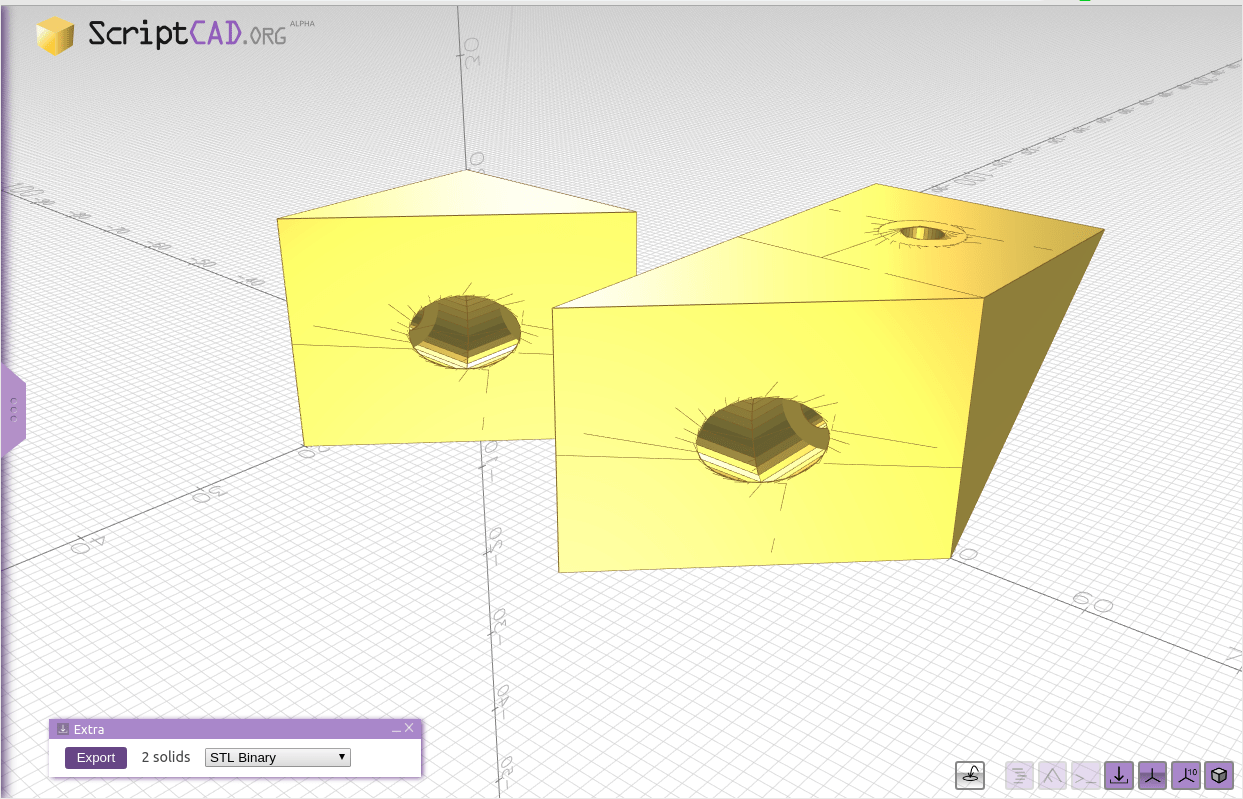
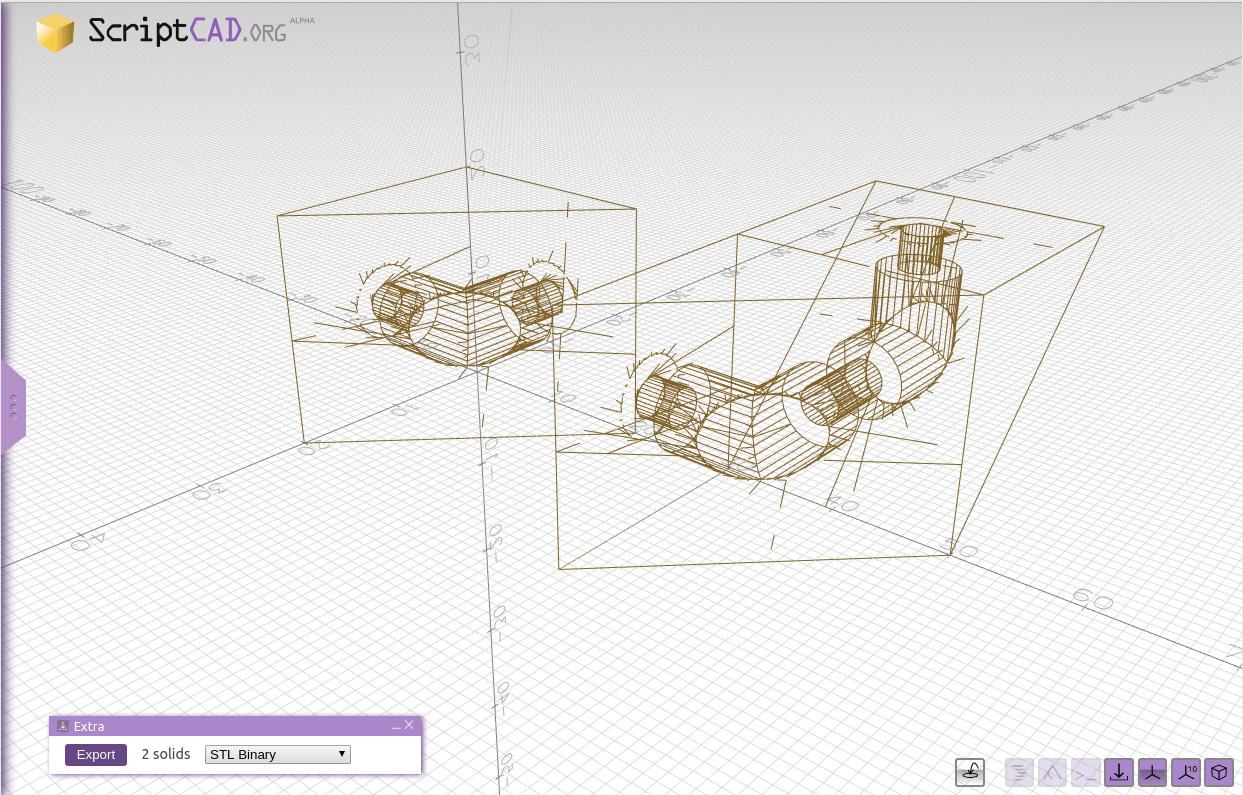
Adding side pieces “A” & “B”
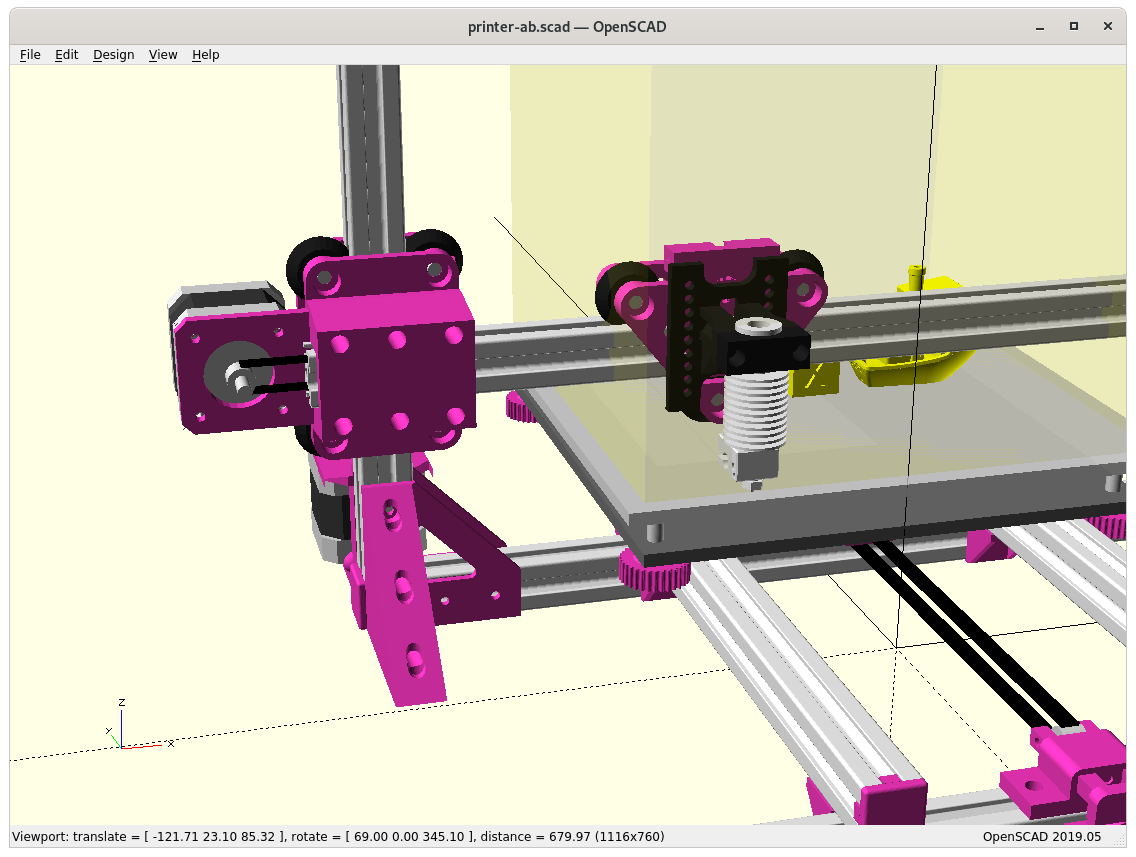
Piece “A” connecting Y carriage with XZ frame
Piece “B” connecting Y carriage with XZ frame
Piece “B” bottom view
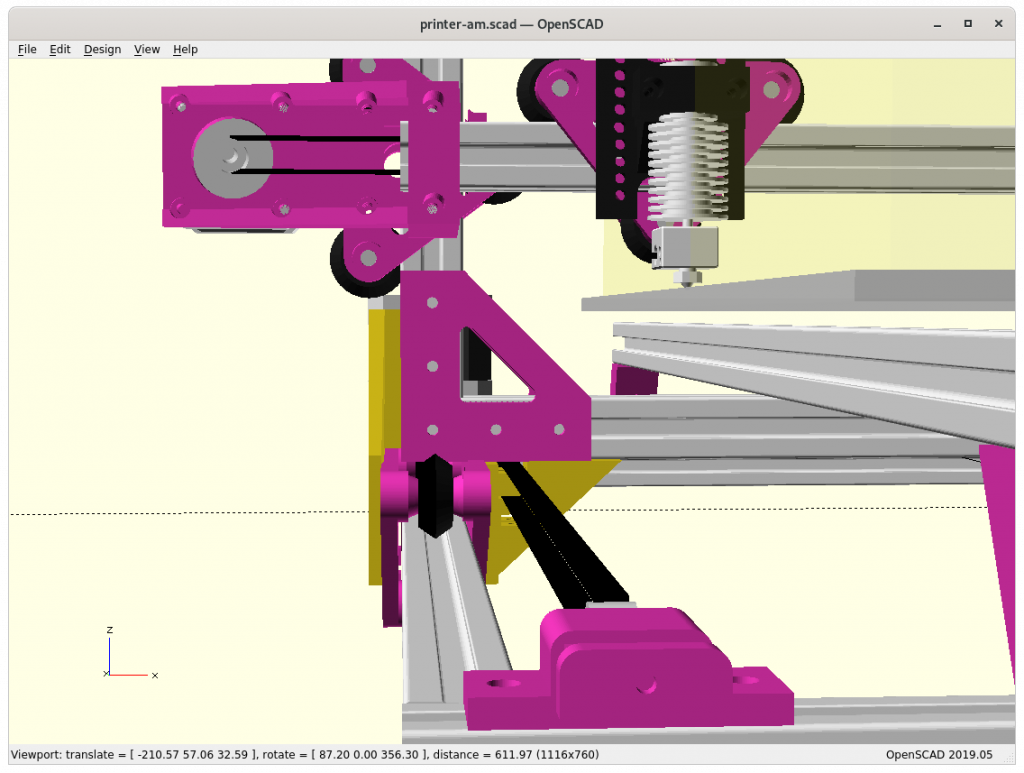
At position 0,0,0
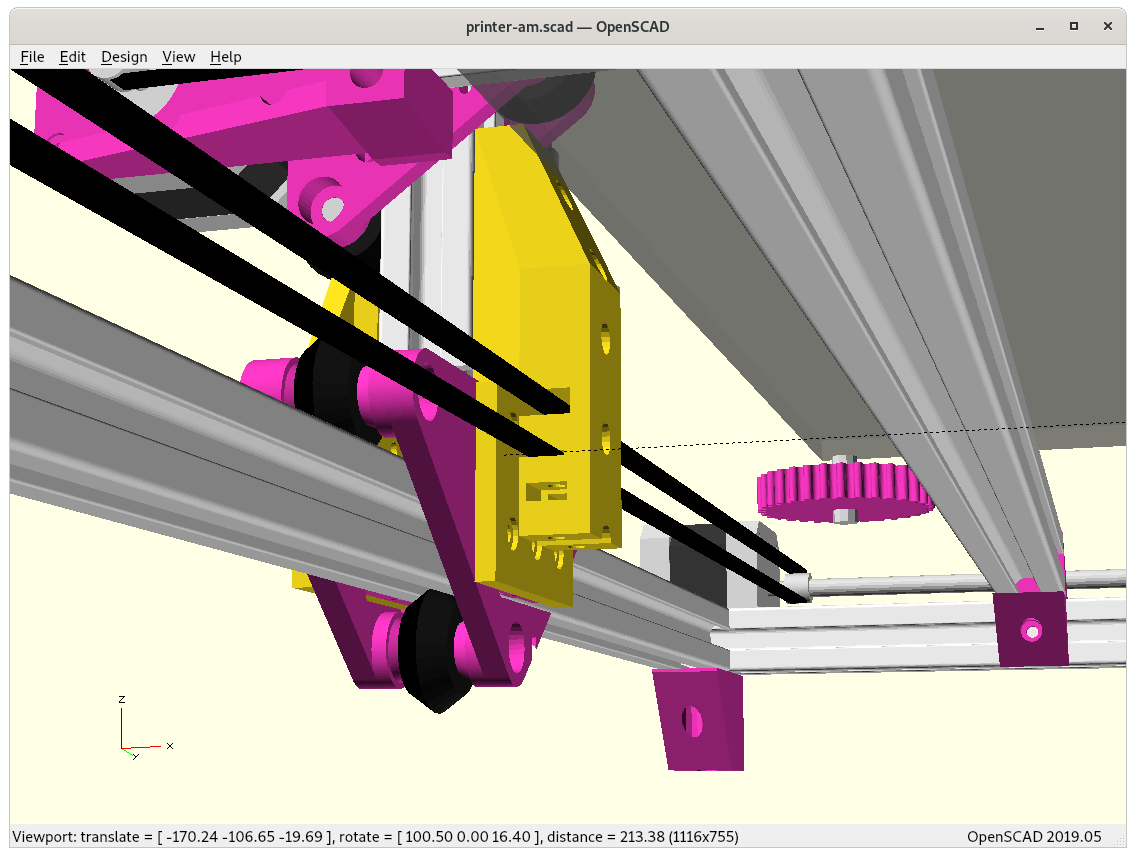
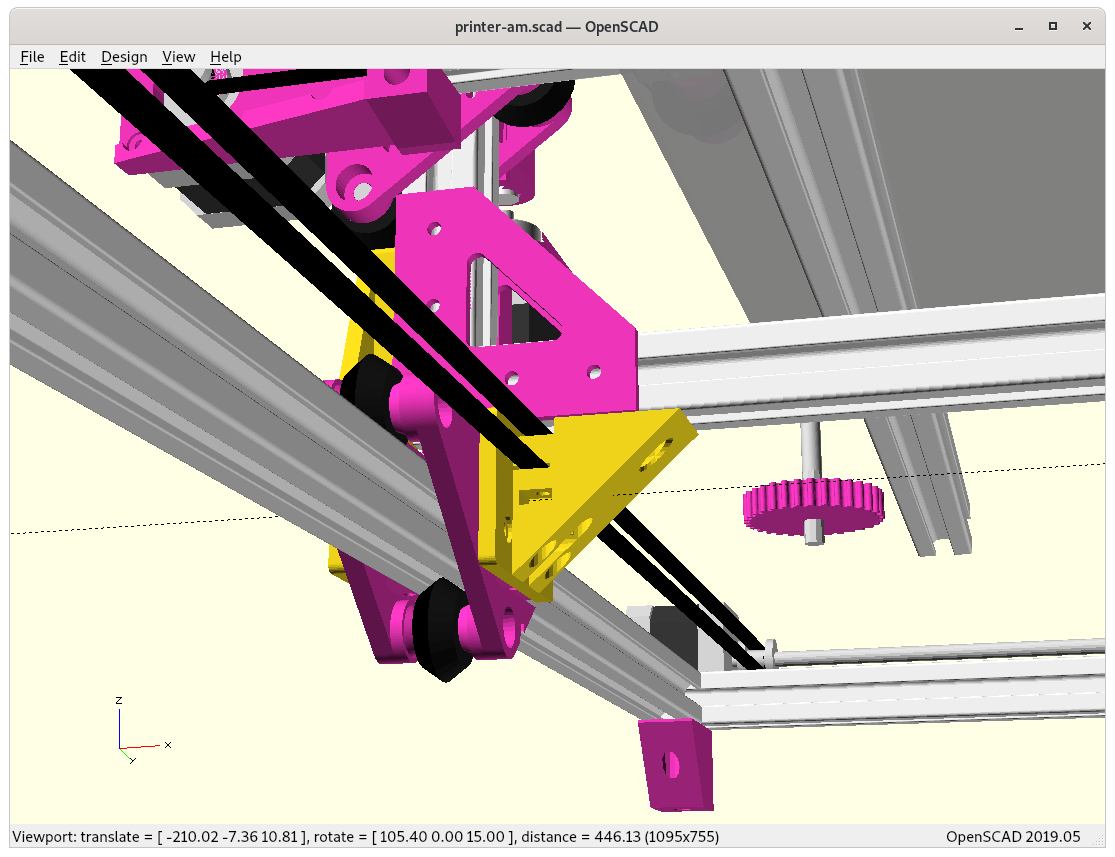
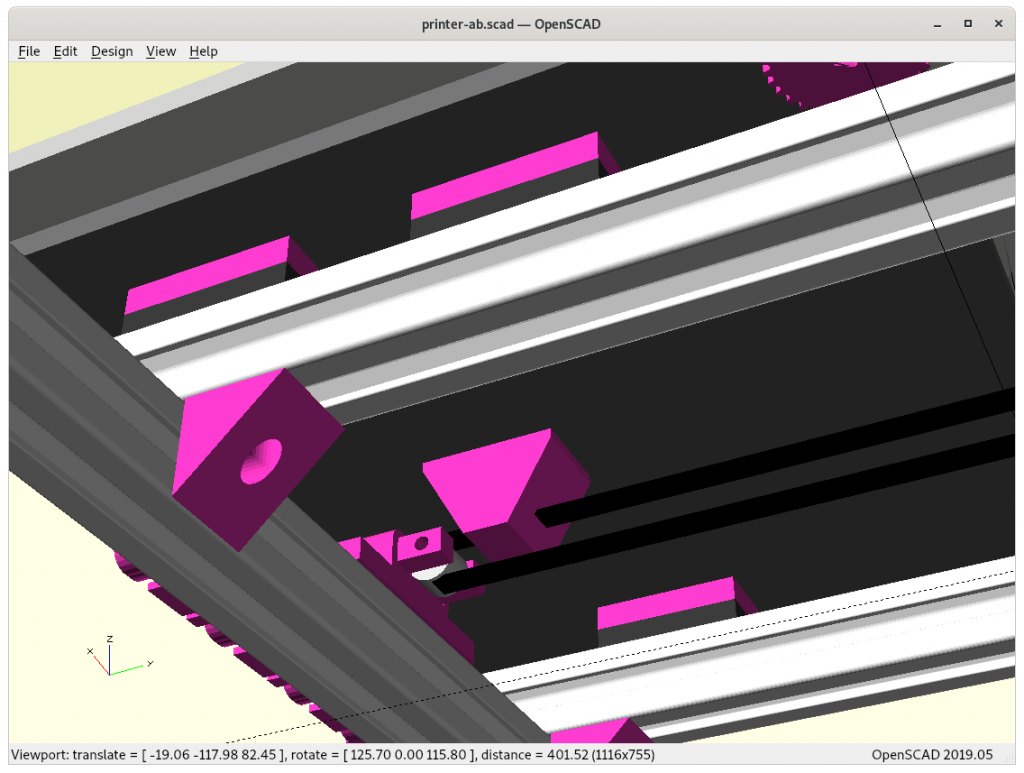
The two main new pieces required were connecting the Y carriage with the XZ frame:
Piece “A” outside ycarriage_xzframe_mount_a(): has to be printed with 0.1mm layer height in order to stay within the +/- 0.05mm tolerance, otherwise it will introduce tilt and stress on the Y carriage and cause long term damage – tricky part to print.
Adding side pieces “A” & “B”
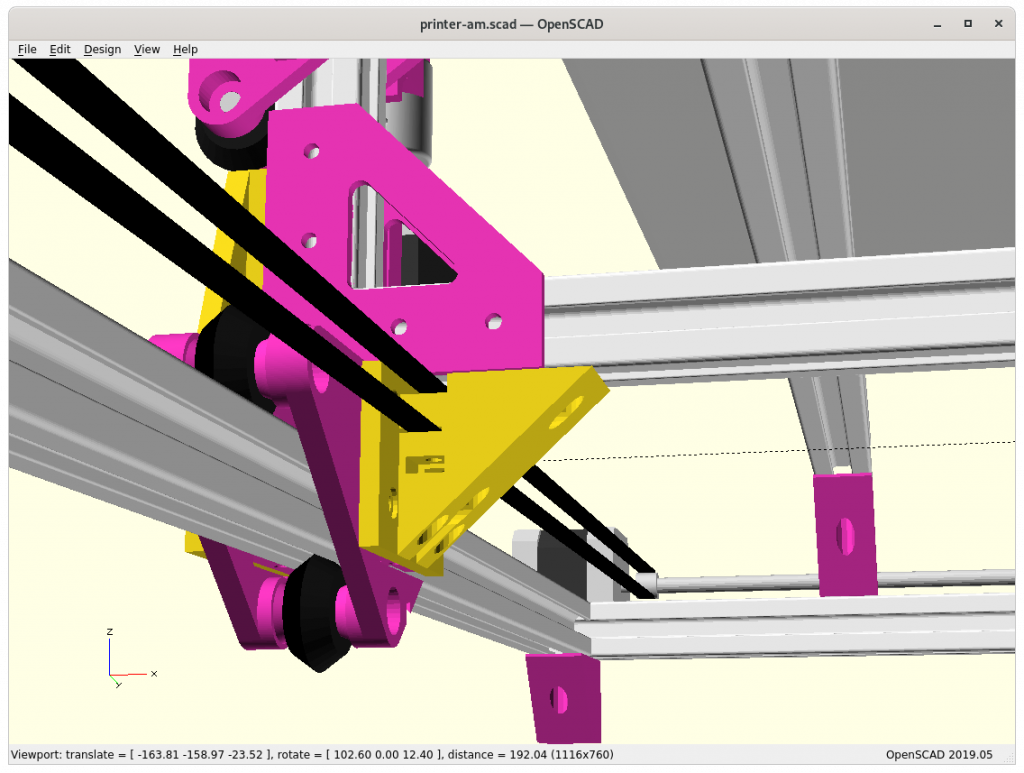
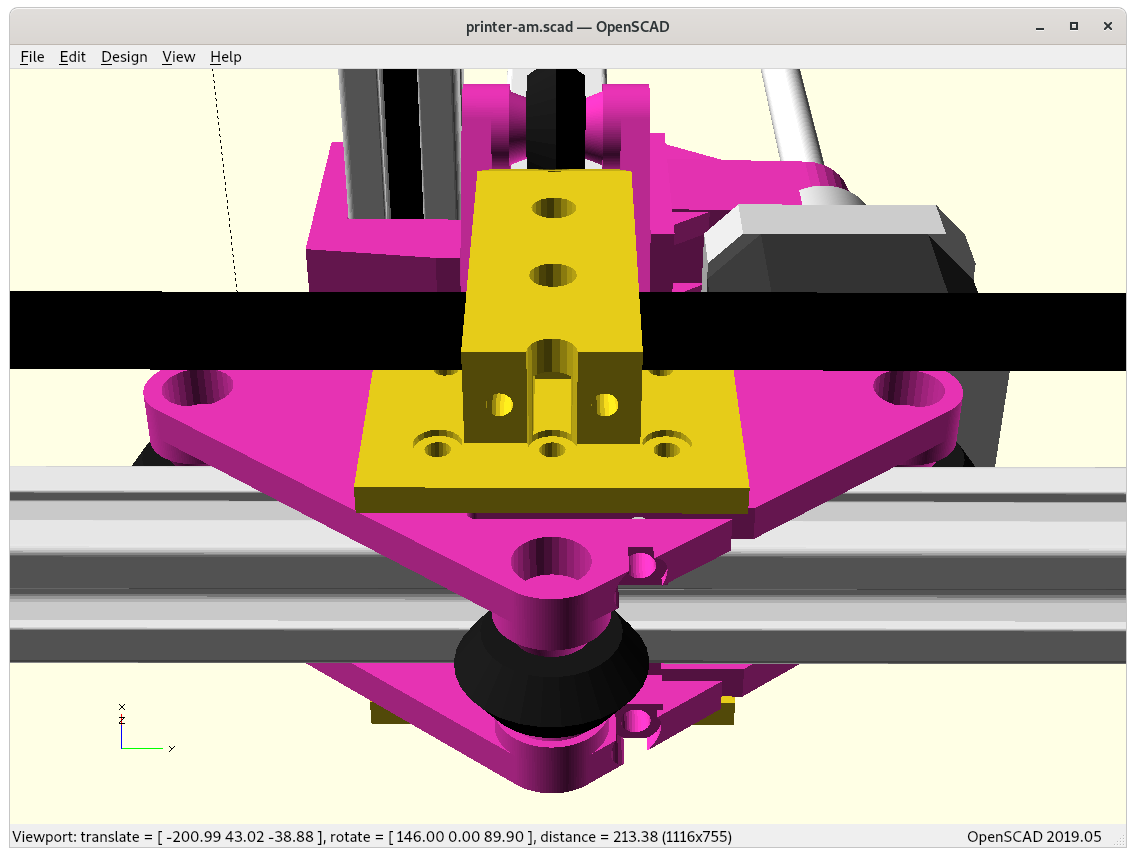
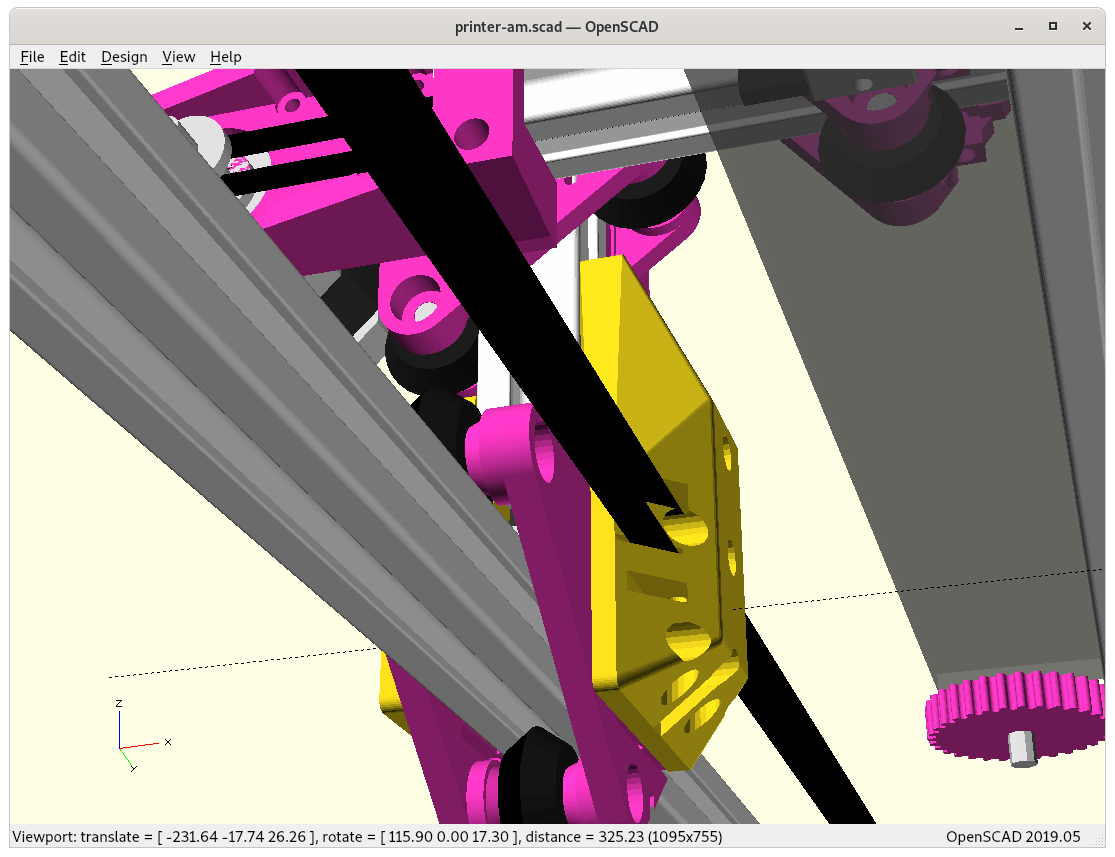
Piece “B” inside ycarriage_xzframe_mount_b(): is quite elaborate already and should be functional, with the Y belt ends fastening with M3 screws and M3 nuts inserts, the belt endings will come out downward:
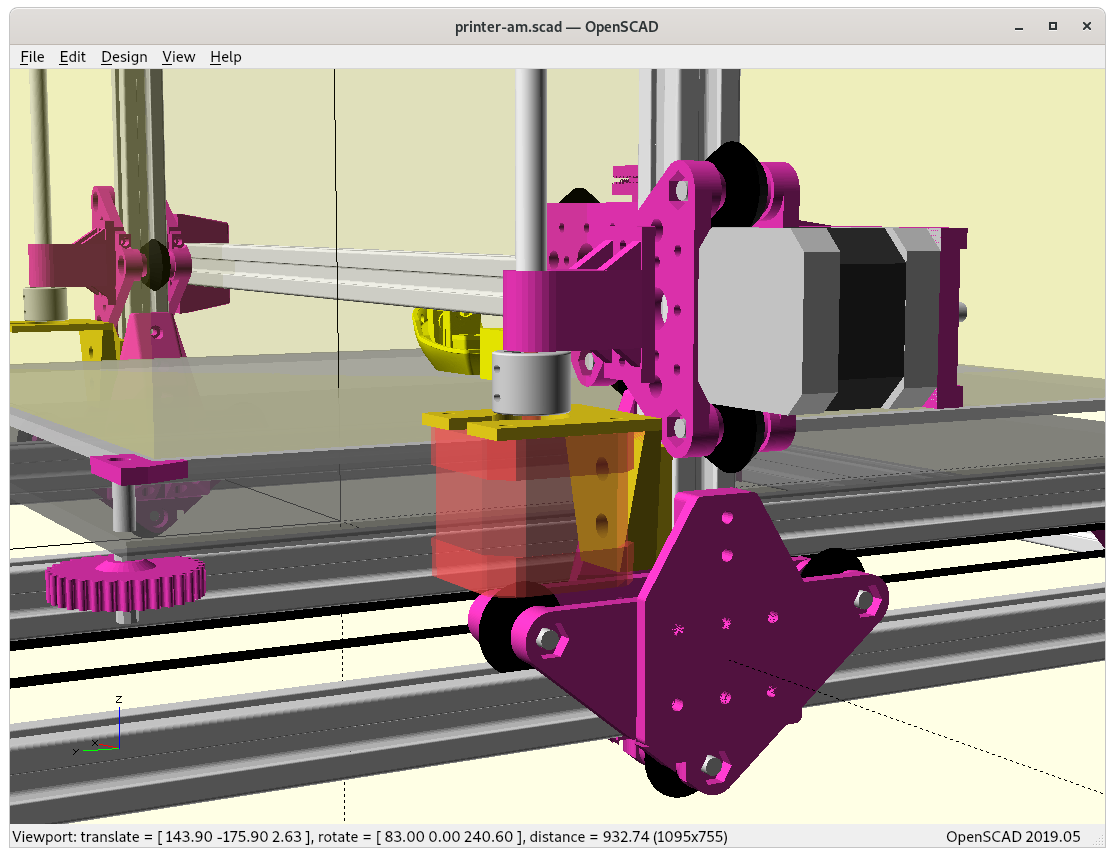
XZ Arch Option – Removing Lower X Beam
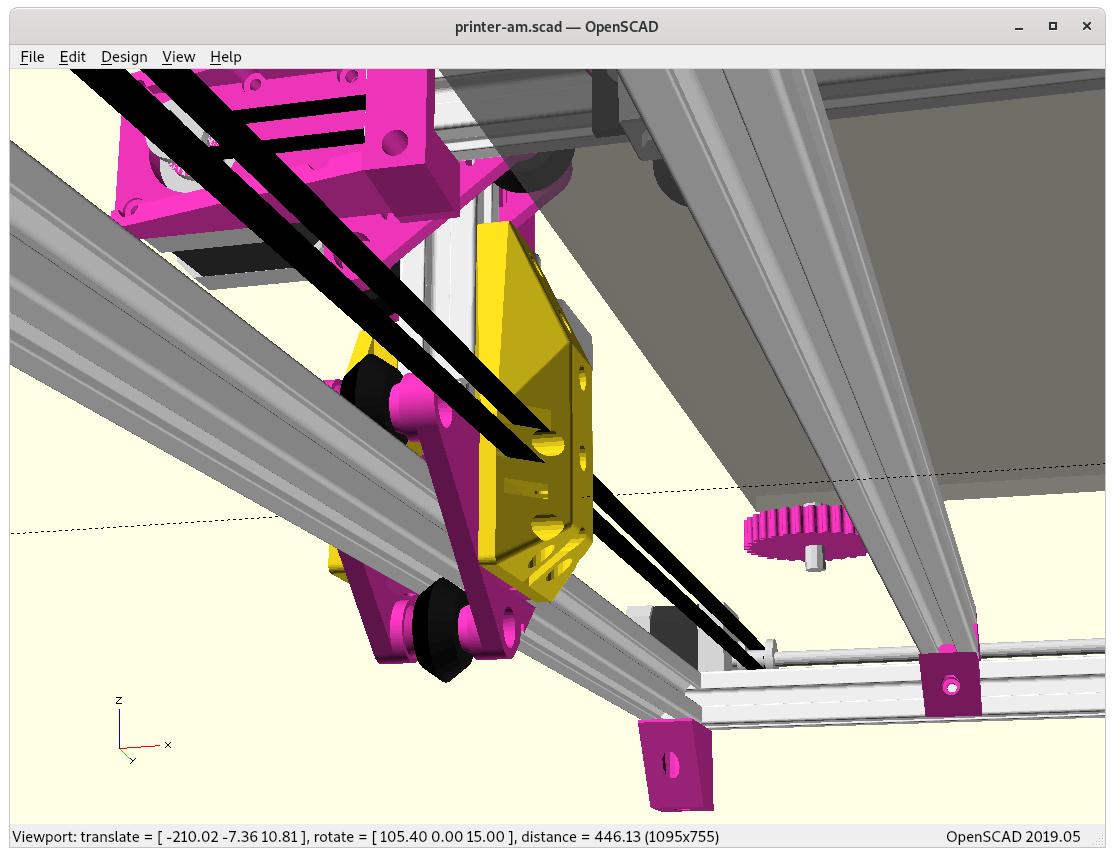
In order to gain some Z build space by lowering the print bed, I may reduce the XZ frame to an XZ arch:
Side pieces “A” & “B” with Arch (lower X-beam removed)
Side piece “B”
Actual physical tests may reveal if it’s suitable to maintain overall geometrical integrity. Removing the lower X beam also reduces moving mass of the XZ arch/frame/gantry.
Pros
gain Z build space
reduce XZ gantry weight / inertia
Cons
decrease XZ gantry stability
Further Development
As I develop Ashtar M further, I will post updates on the blog here, and also keep documenting the current state at Ashtar M page.
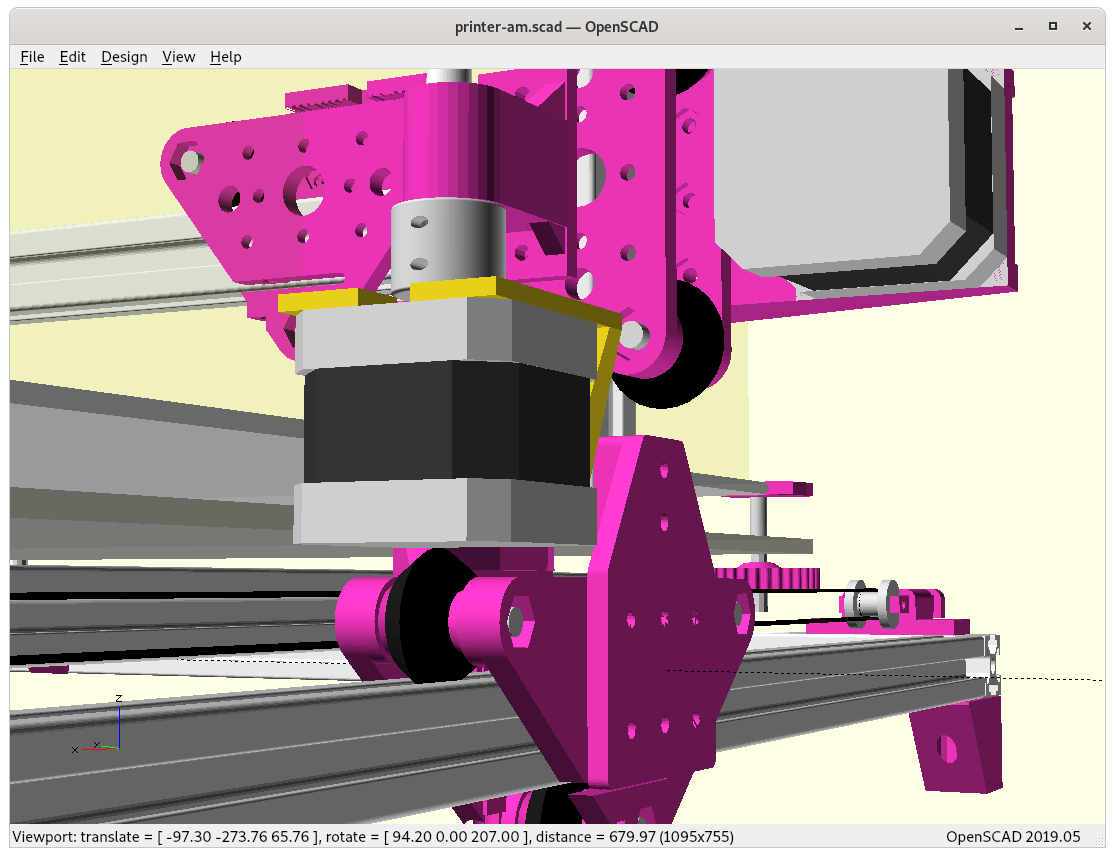
2021/01/07: Y motor and shaft extension with Y pulley holder added
2021/01/03: Z motor mounts added, Y carriage to XZ frame/arch pieces refined using rcube()
2020/12/19: new “XZ Arch” option (removing lower X beam from XZ frame)
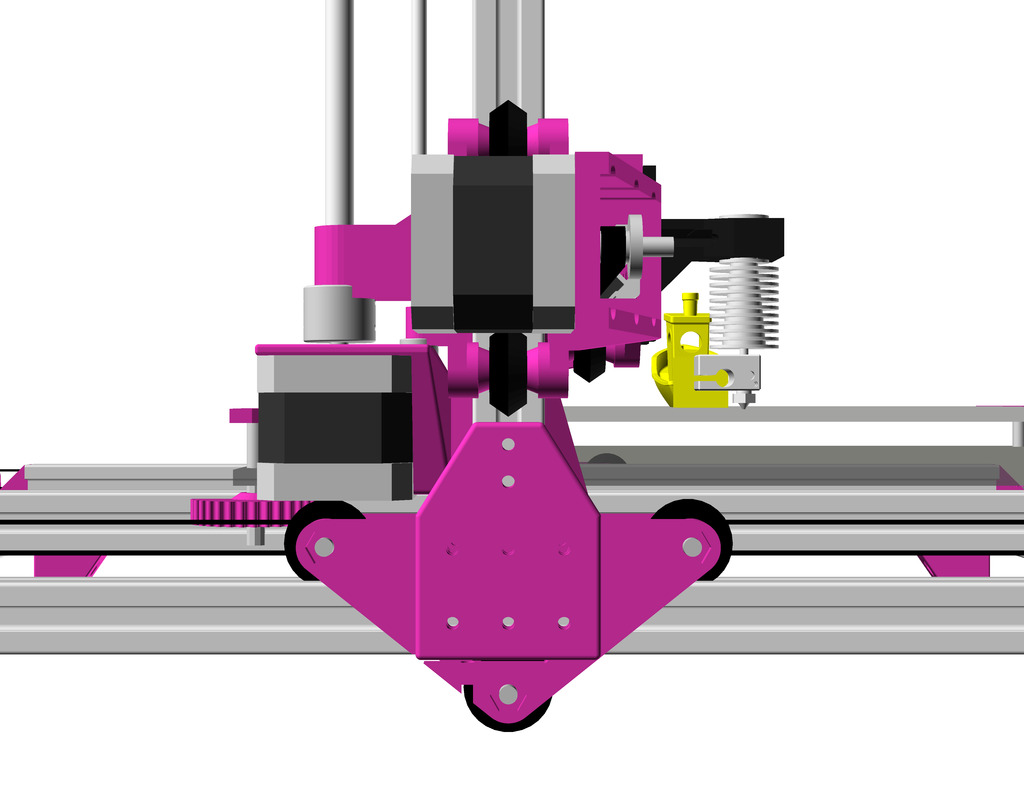
2020/12/17: change X carriage, routing X belt inside 2020 alu extrusion
2020/12/12: first drafts, just a skeleton, details still to be worked out
Introduction
Jon Schone (@properprinting) did a “Moving Portal” (MP) mod for his CR-10 in April 2020, and I thought to adapt his approach as “Ashtar M” as Moving Gantry (MG) using CNC terminology.
Instead to move the bed in Y axis to move the entire XZ frame or gantry – the rest of the Prusa i3 style printer remains the same.
Reducing Moving Weight
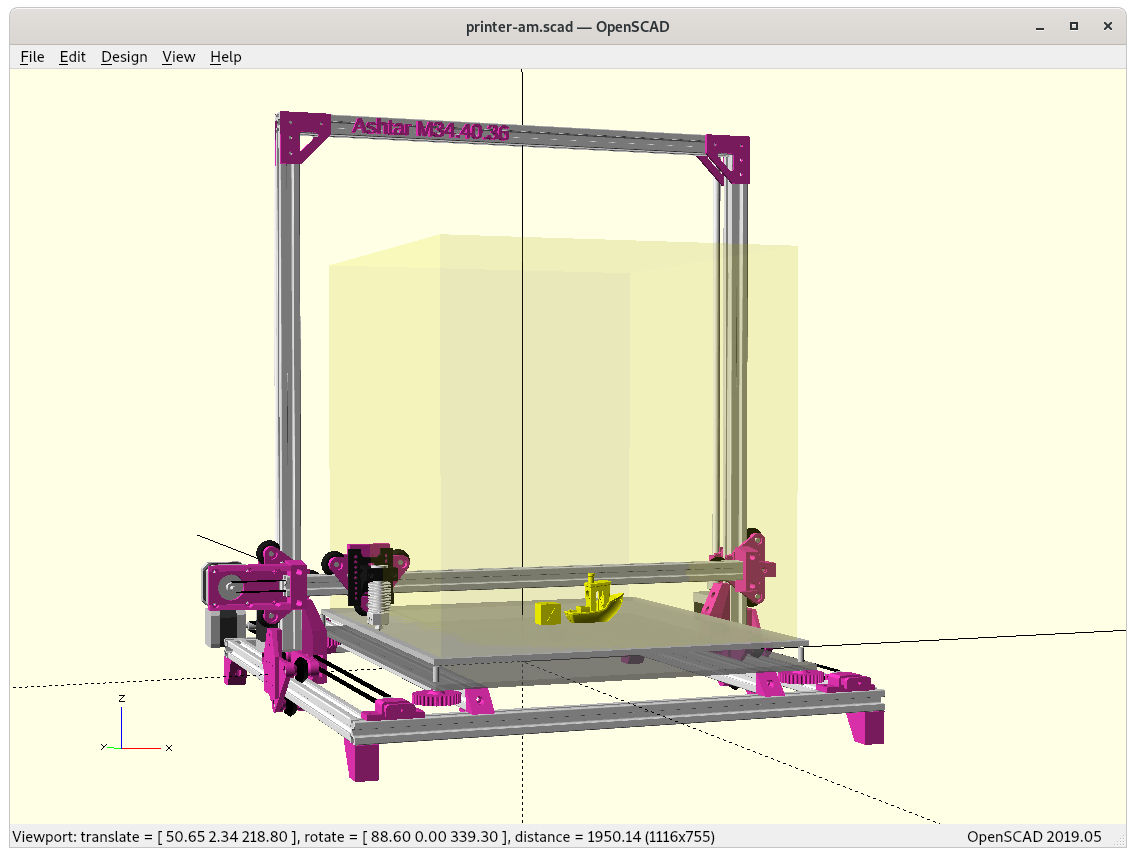
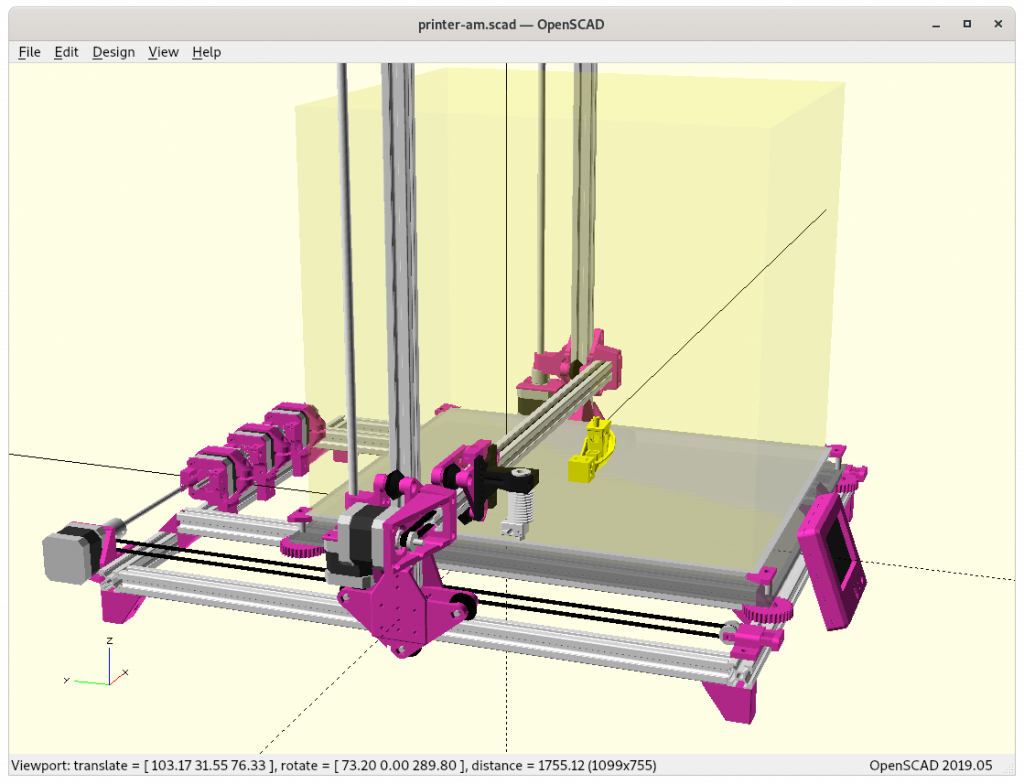
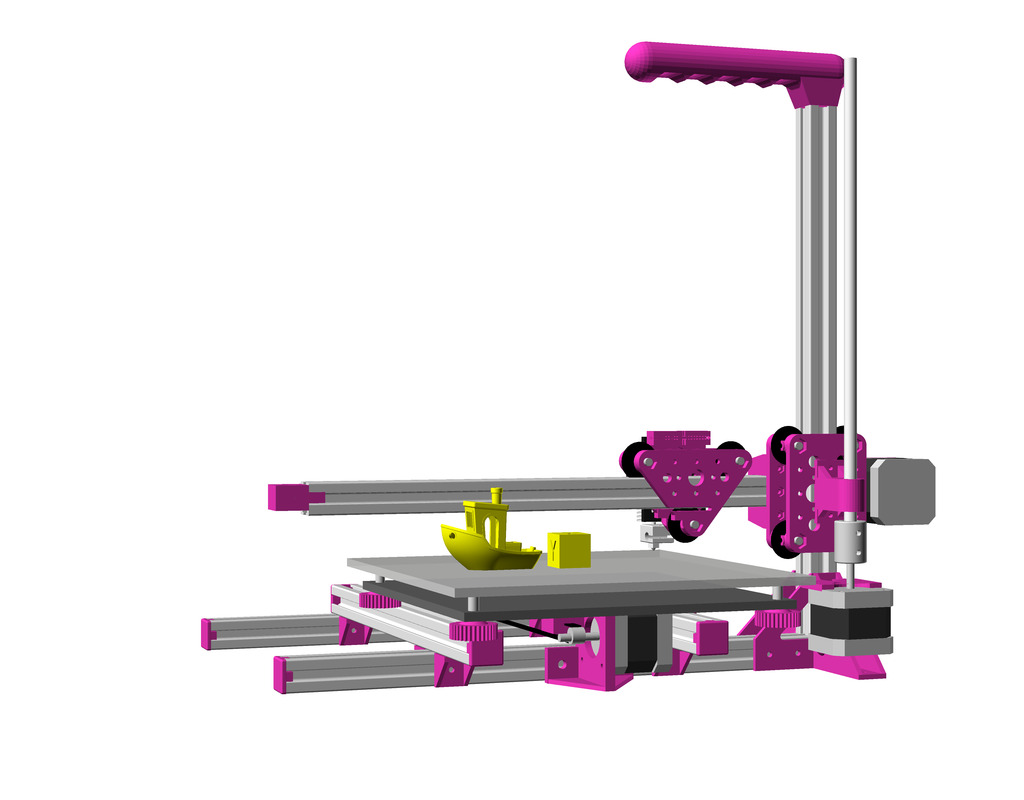
Ashtar M with Moving XZ frame using modular & parametric V-carriage
This variant only makes sense when the weight of the bed exceeds the weight of the XZ frame + X carriage, in order to reduce the moving weight as of inertia – so only for large(r) build volume this makes sense:
weight(XZ frame + X carriage) < weight(bed)
and as I compose my Ashtar 3D printer series with alu extrusions (beams) I can say:
weight(XZ frame) = beam X * 2 + beam Z * 2 + NEMA17 * 2 weight(bed) = X * Y
and it becomes here clear, the bed weight grows X * Y whereas XZ frame only (X + Z) * 2, but also 2* NEMA17 motors of the Z axis are part of the XZ frame.
XZ frame is static (can hold filament, extruders etc)
T-Slot 2020
V-Slot 2020
V wheel
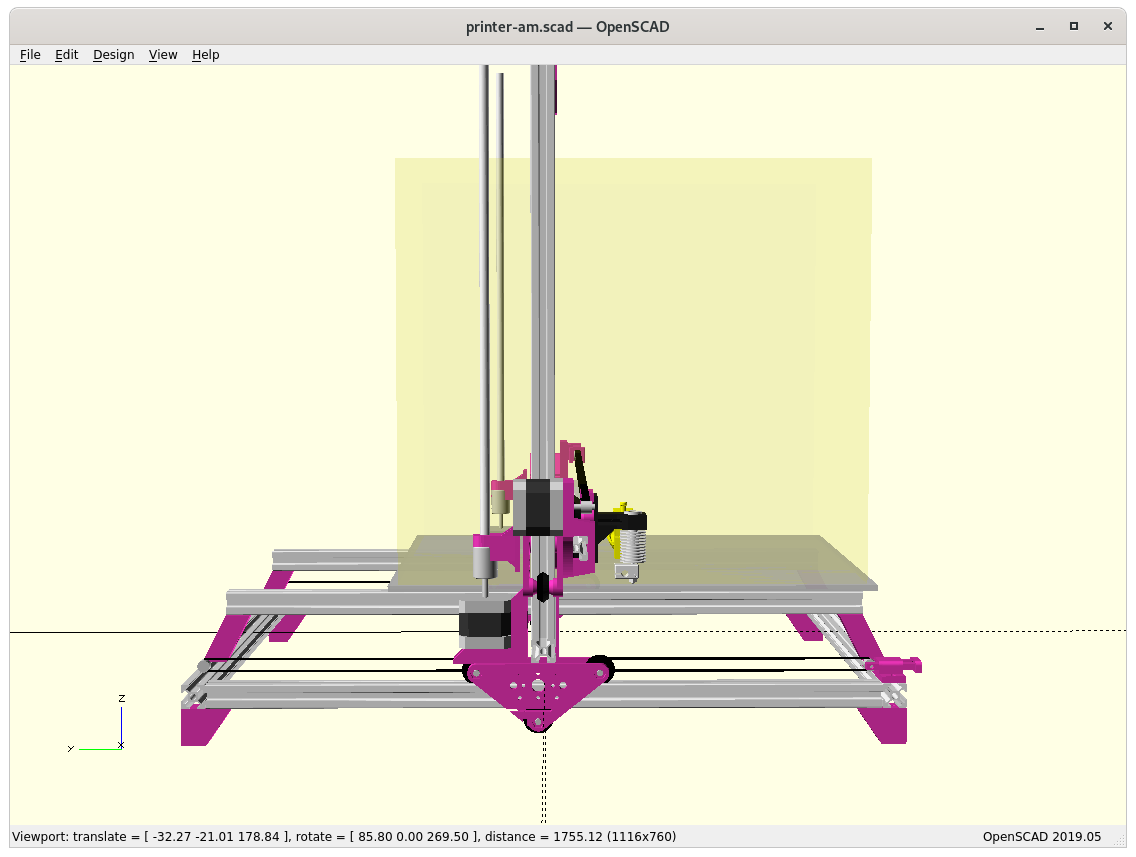
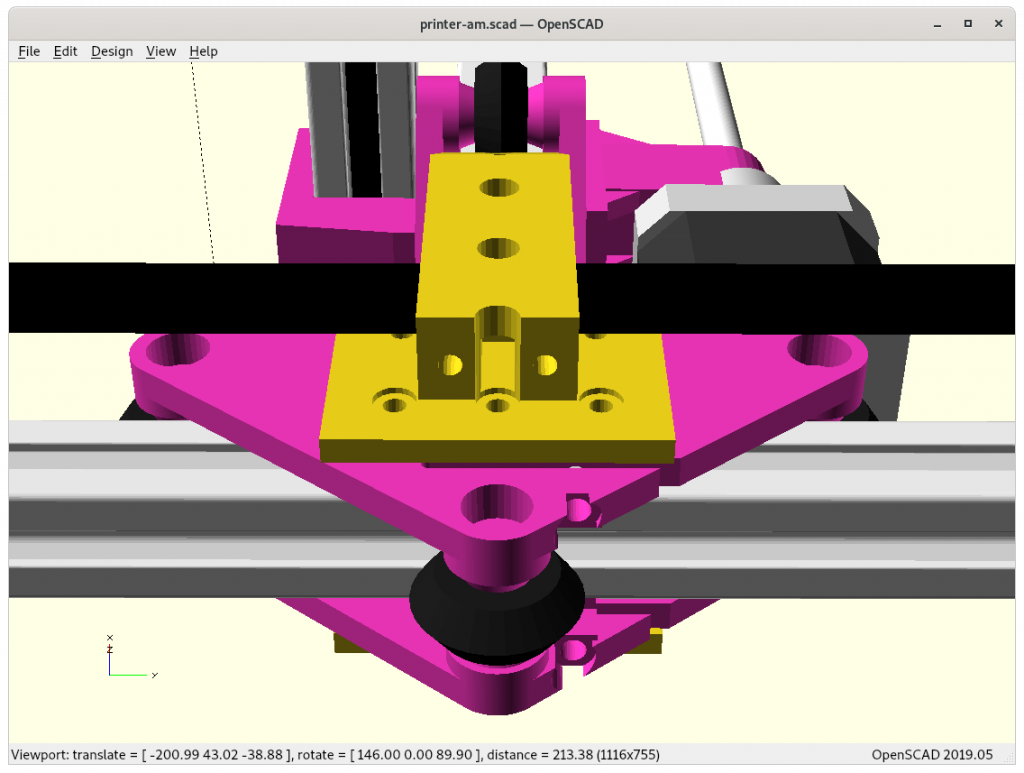
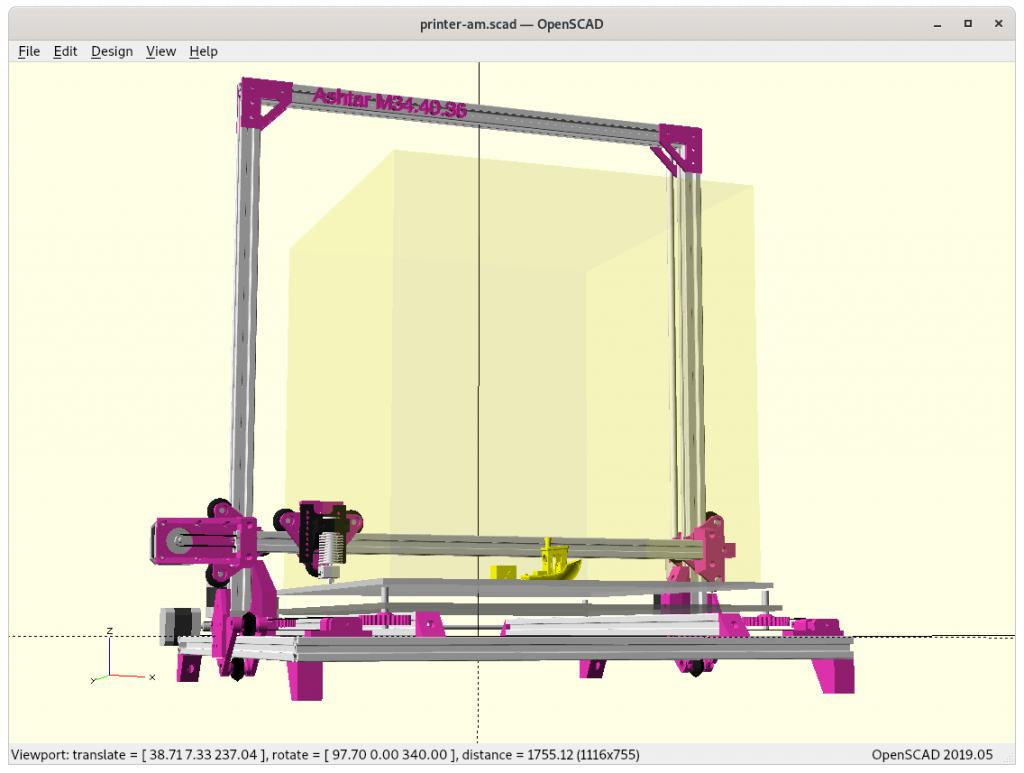
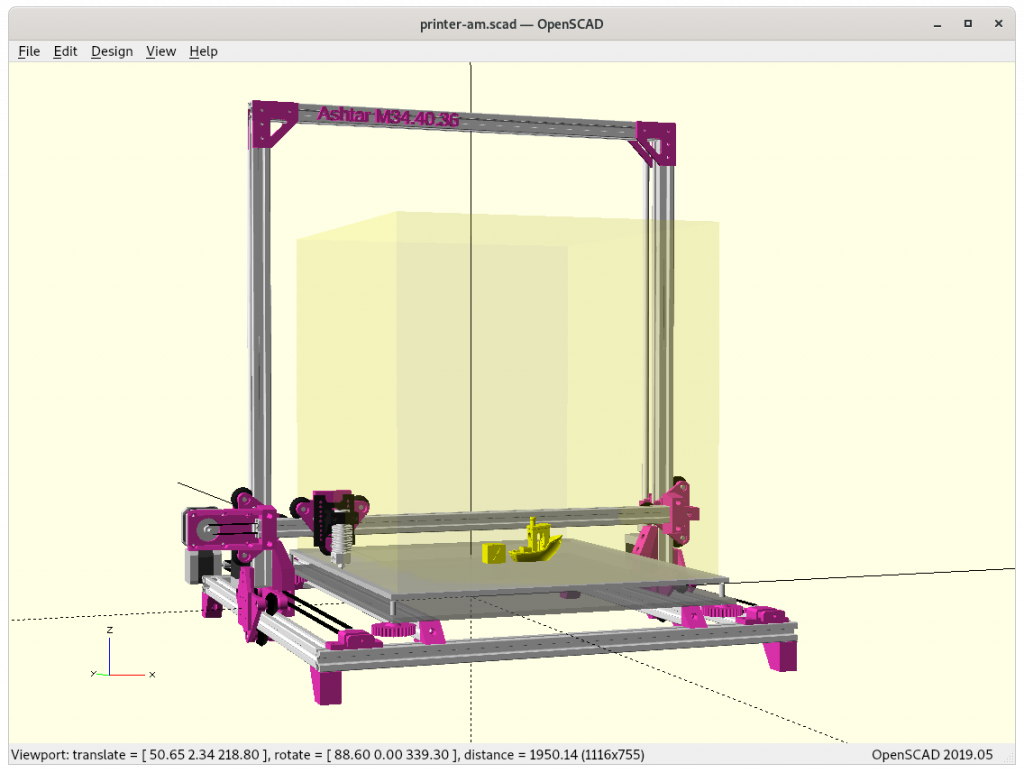
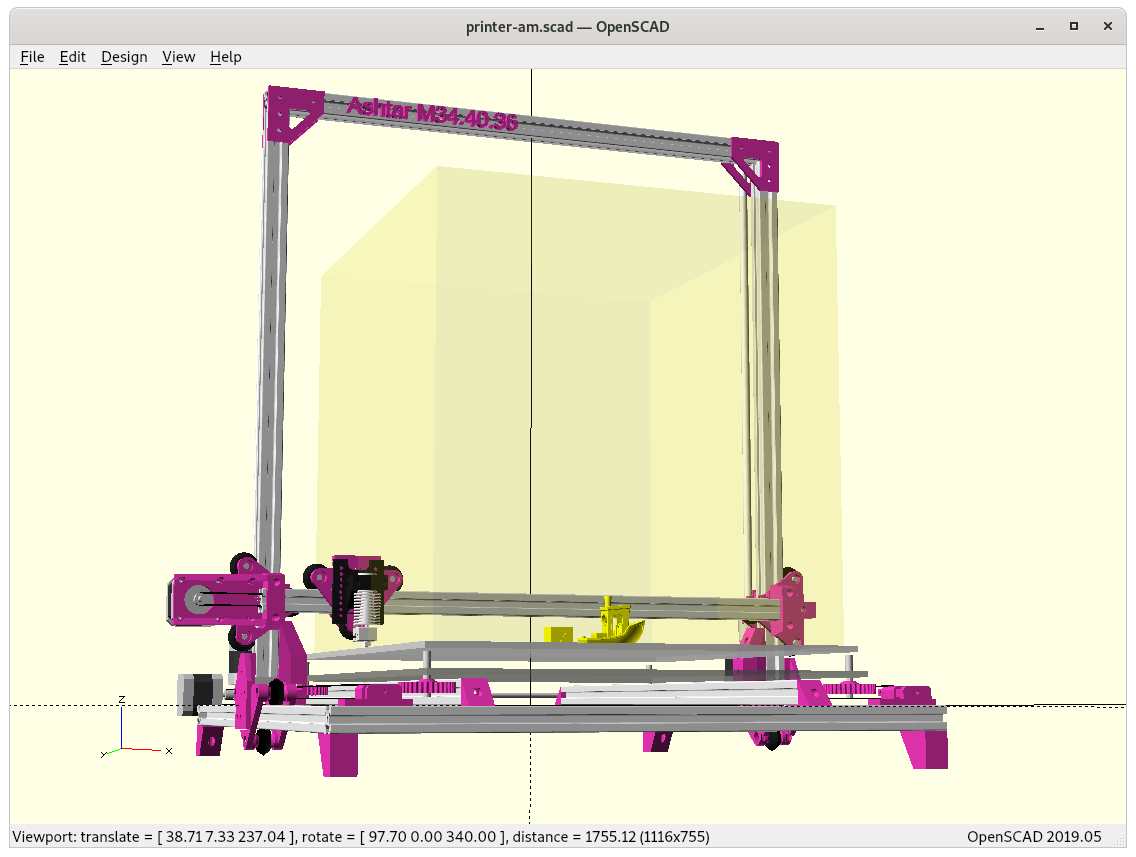
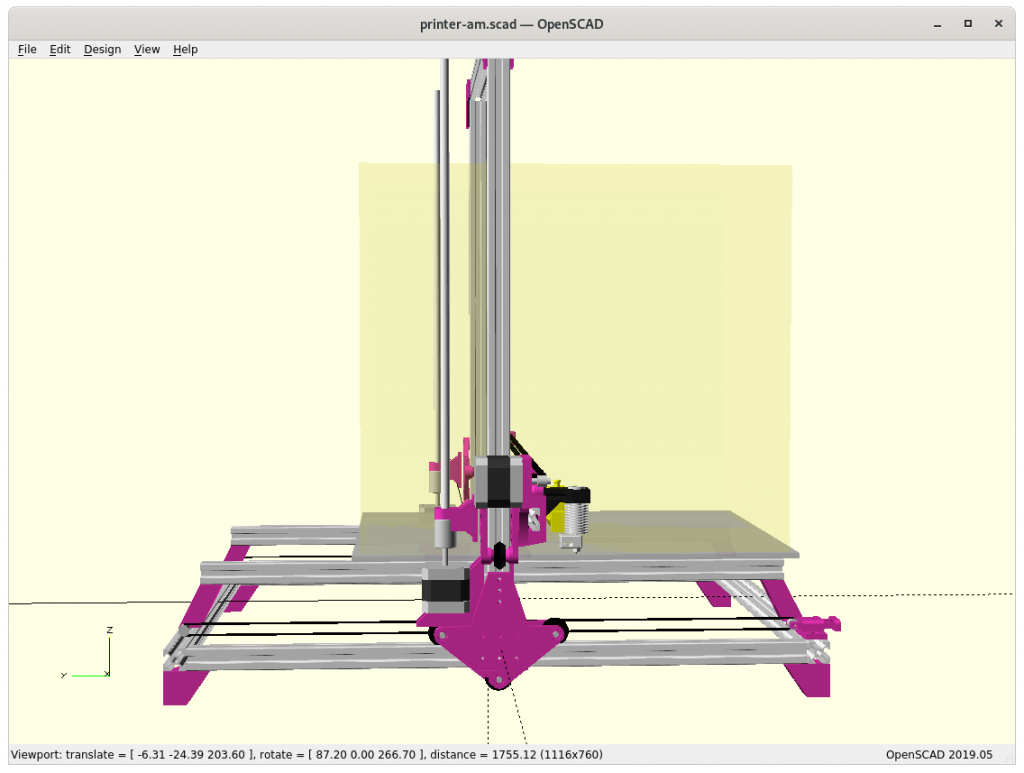
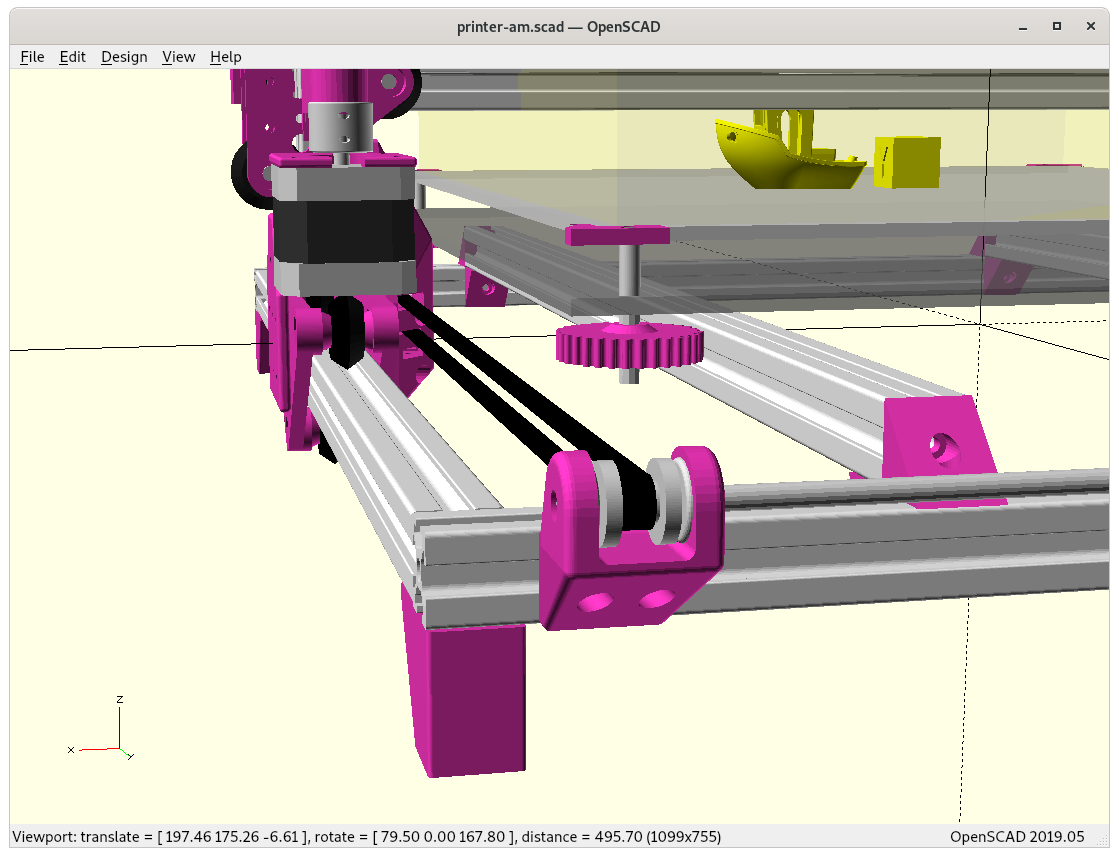
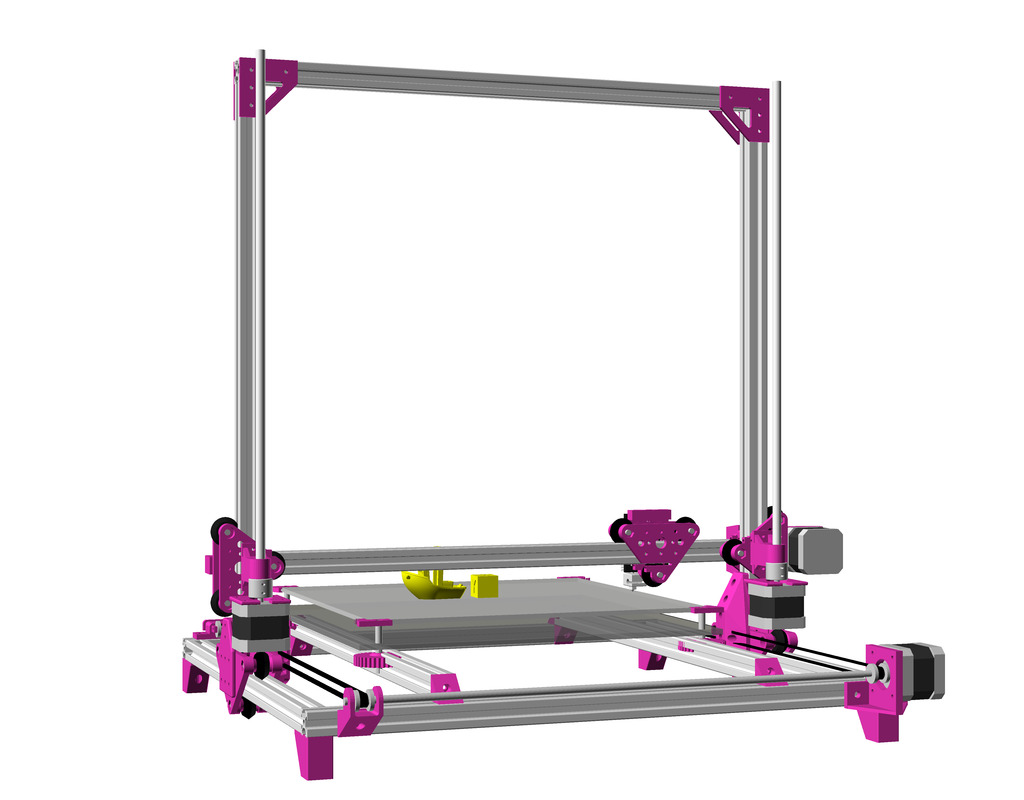
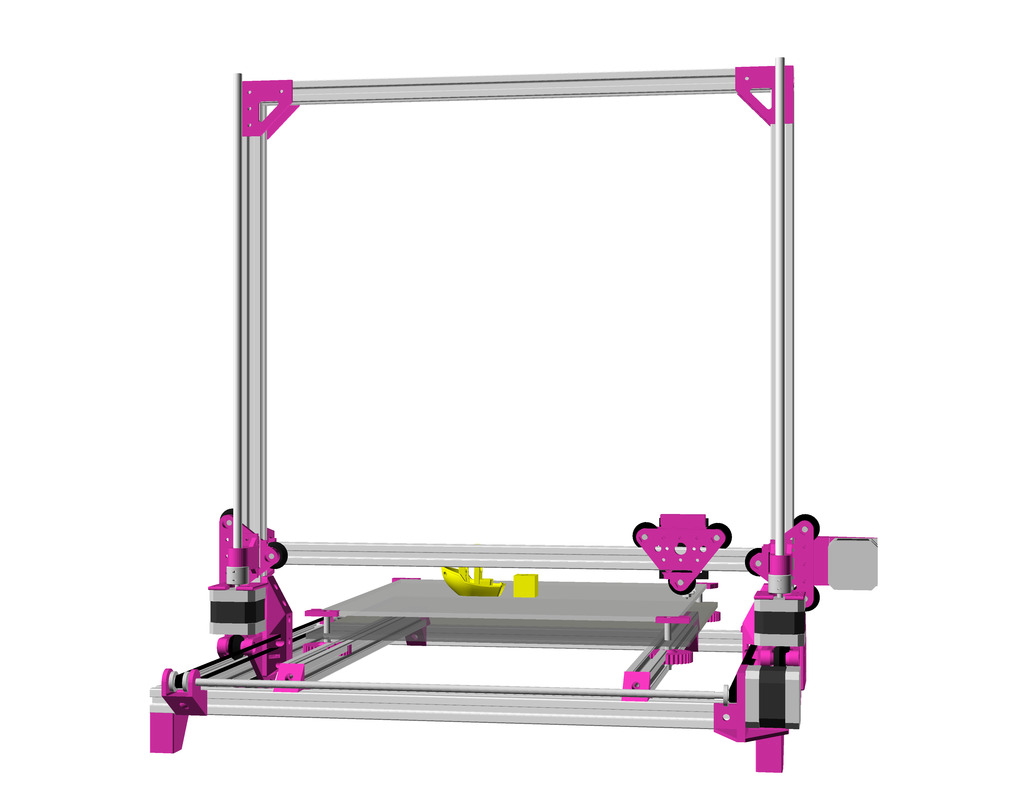
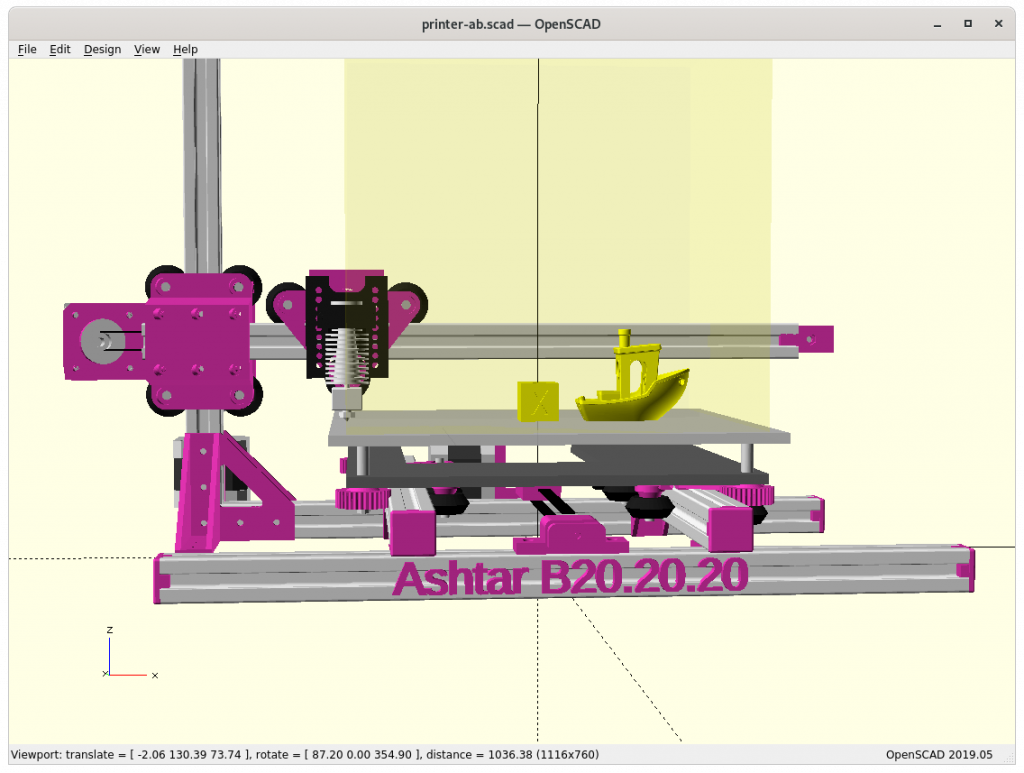
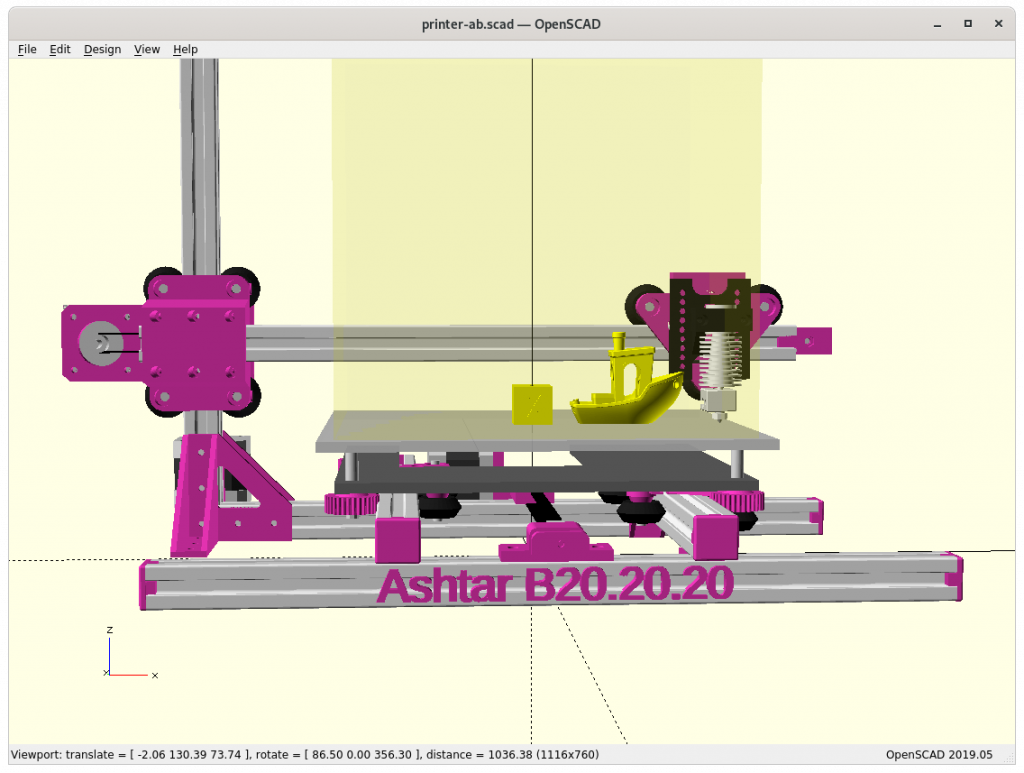
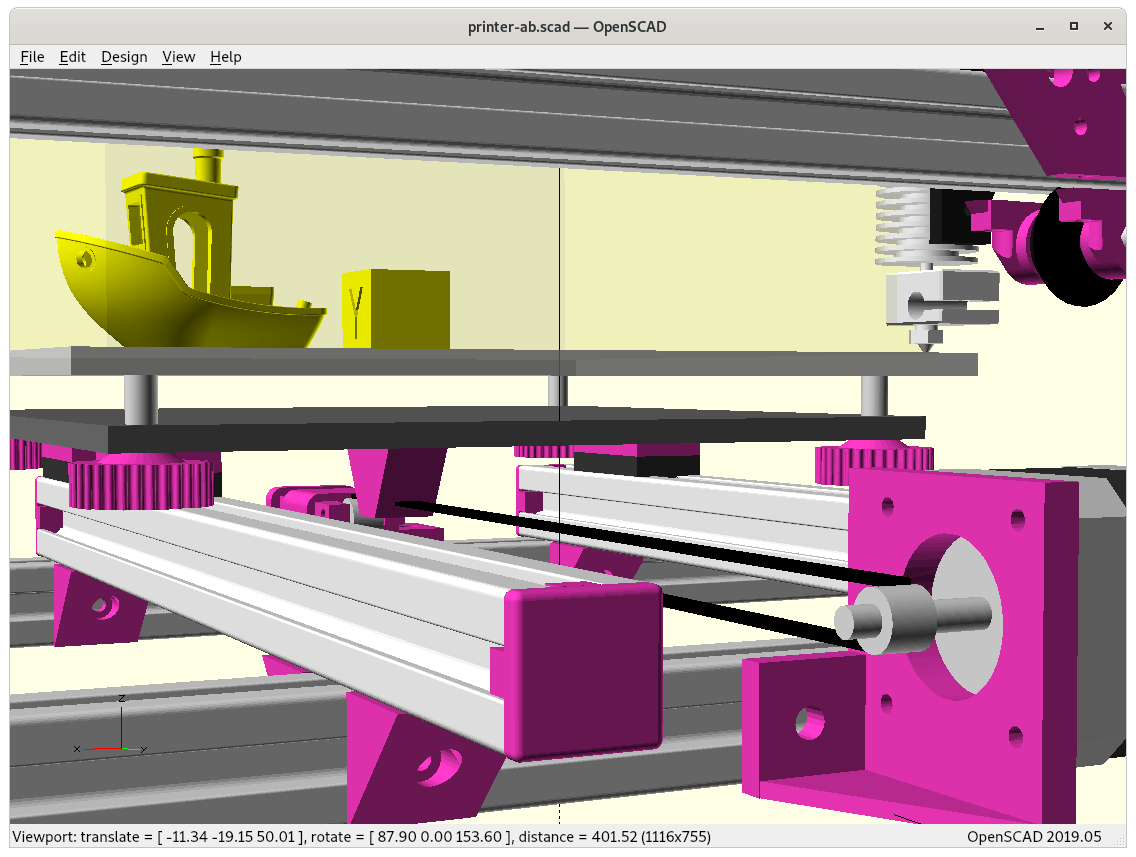
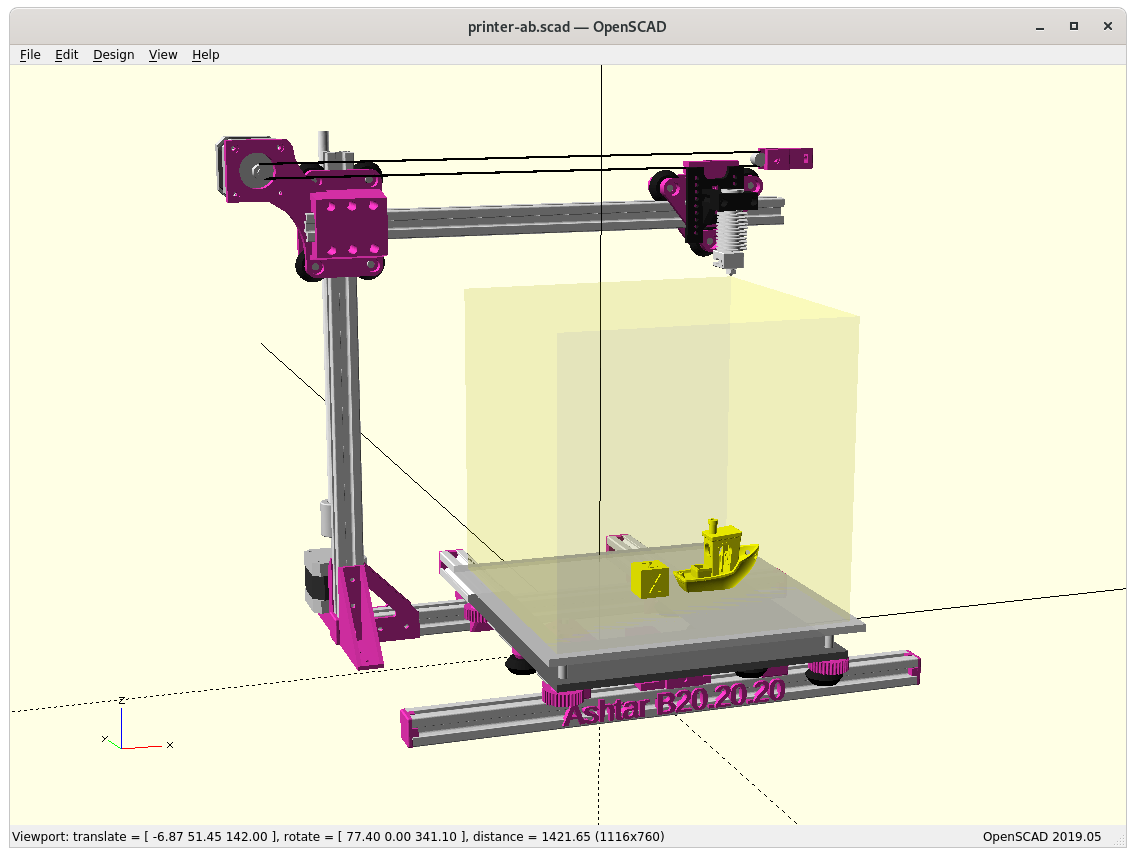
Draft
At position 0,0,0
Bare view of Y carriage to XZ frame
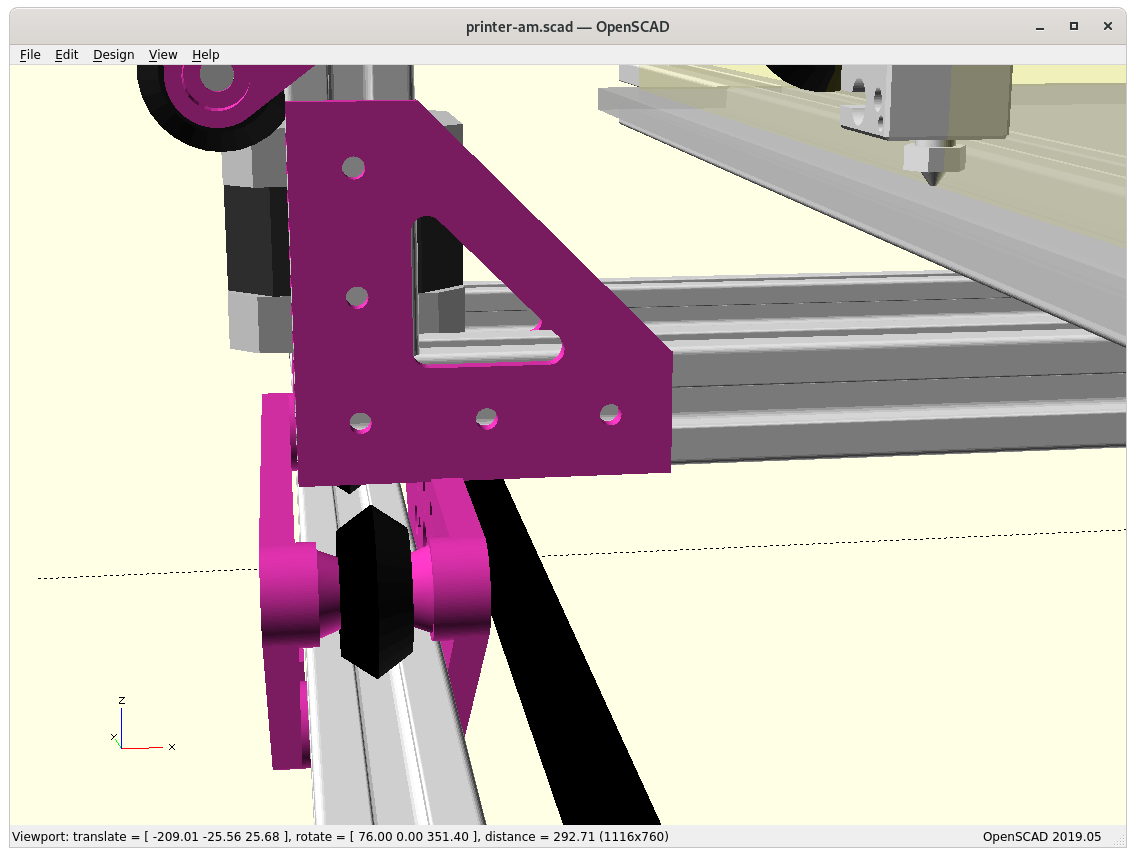
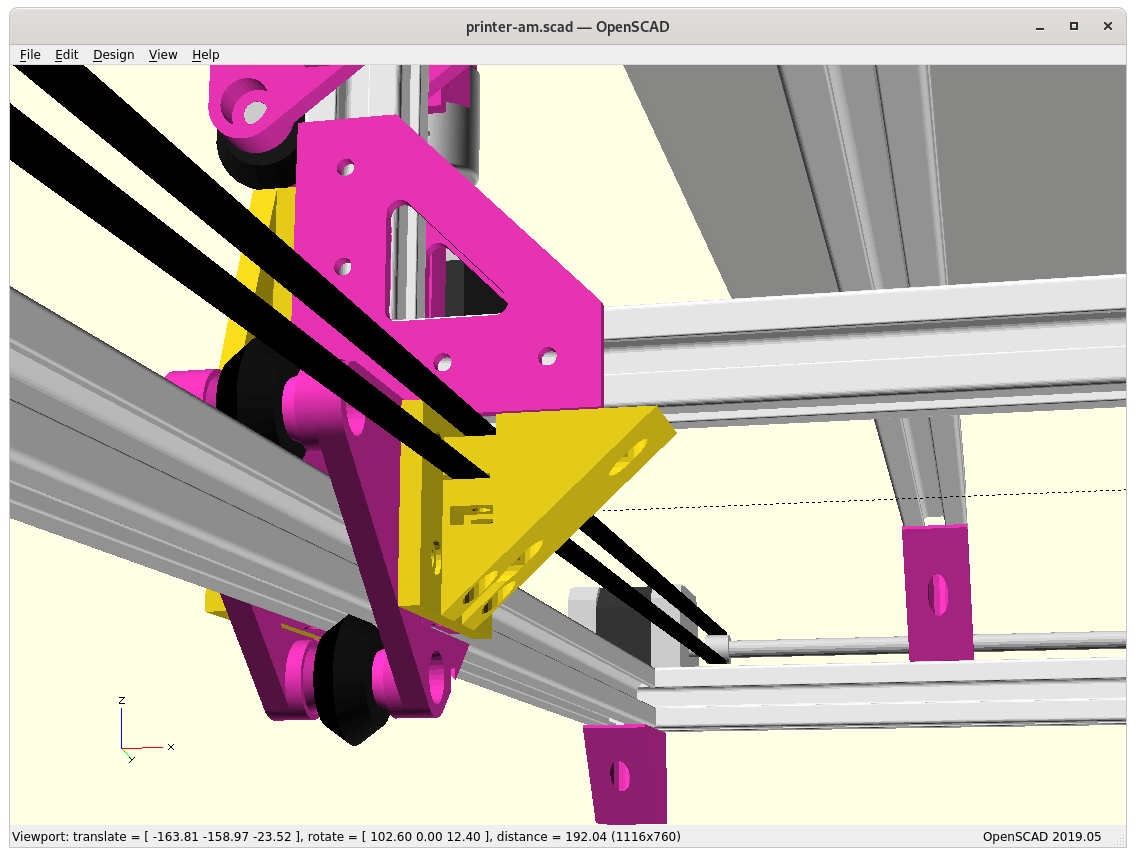
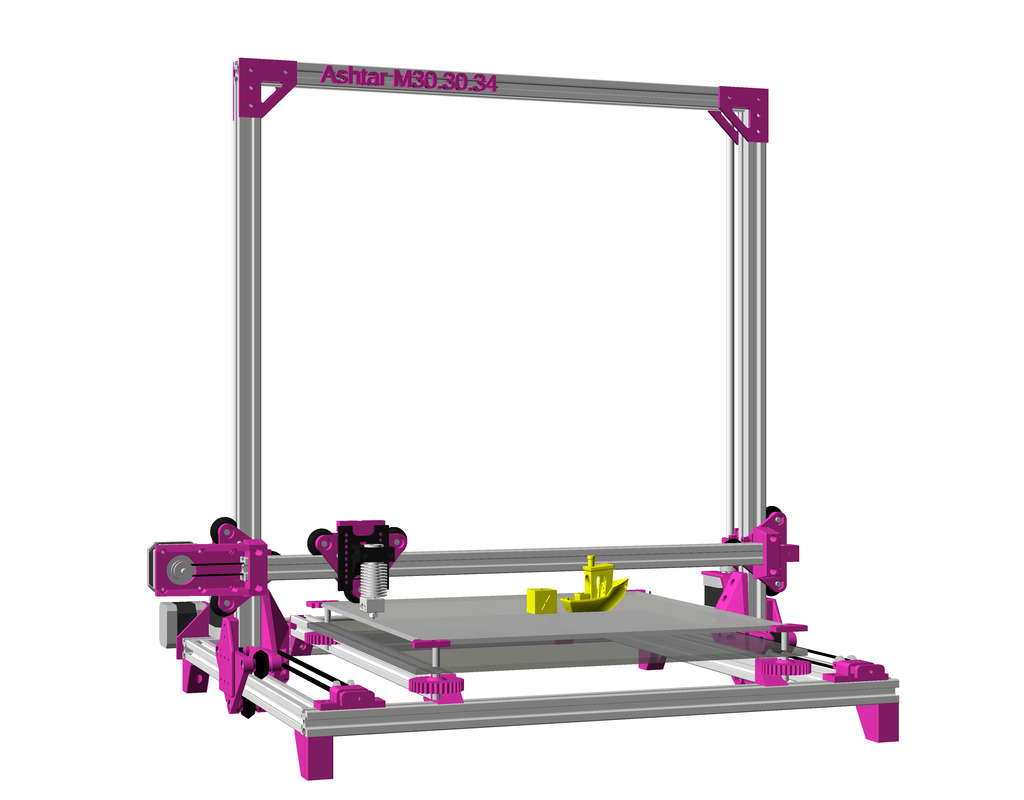
Adding side pieces “A” & “B”
Side piece “A” Y carriage to XZ frame
Side piece “B” Y carriage to XZ frame
Side piece “B” bottom view
At position 0,0,0
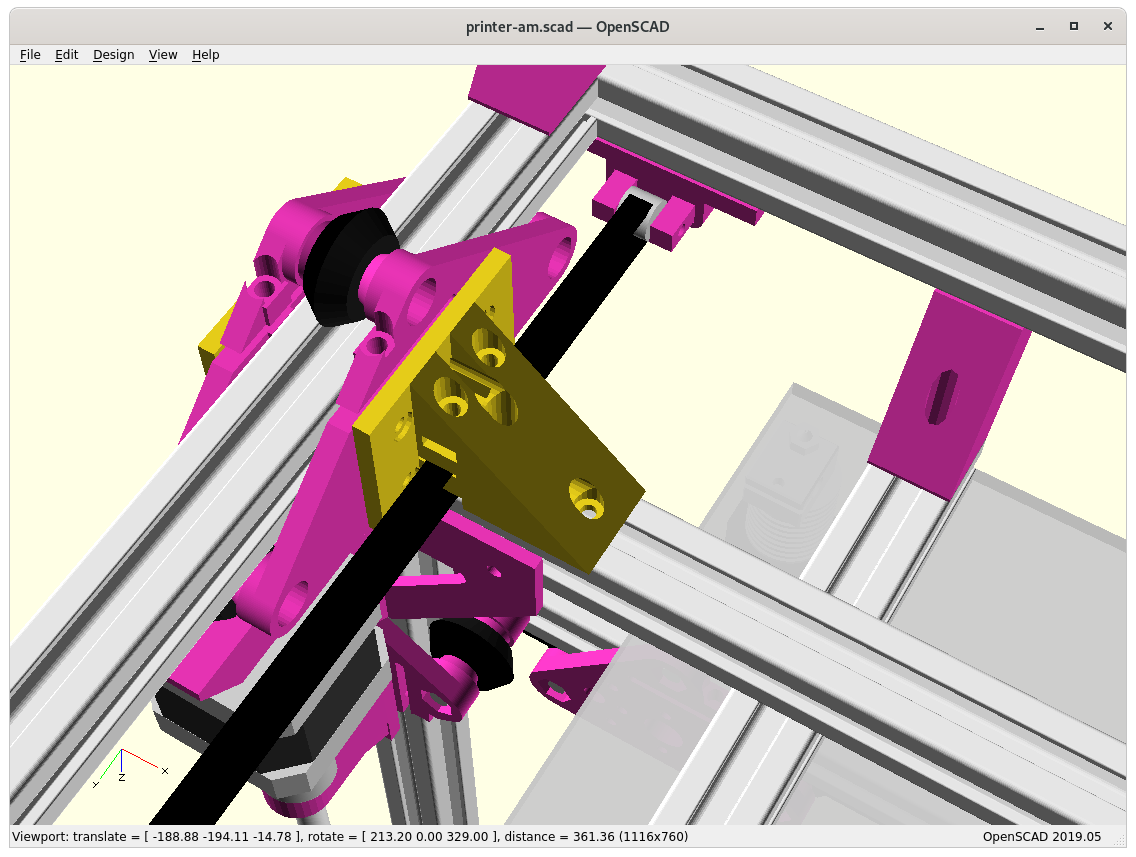
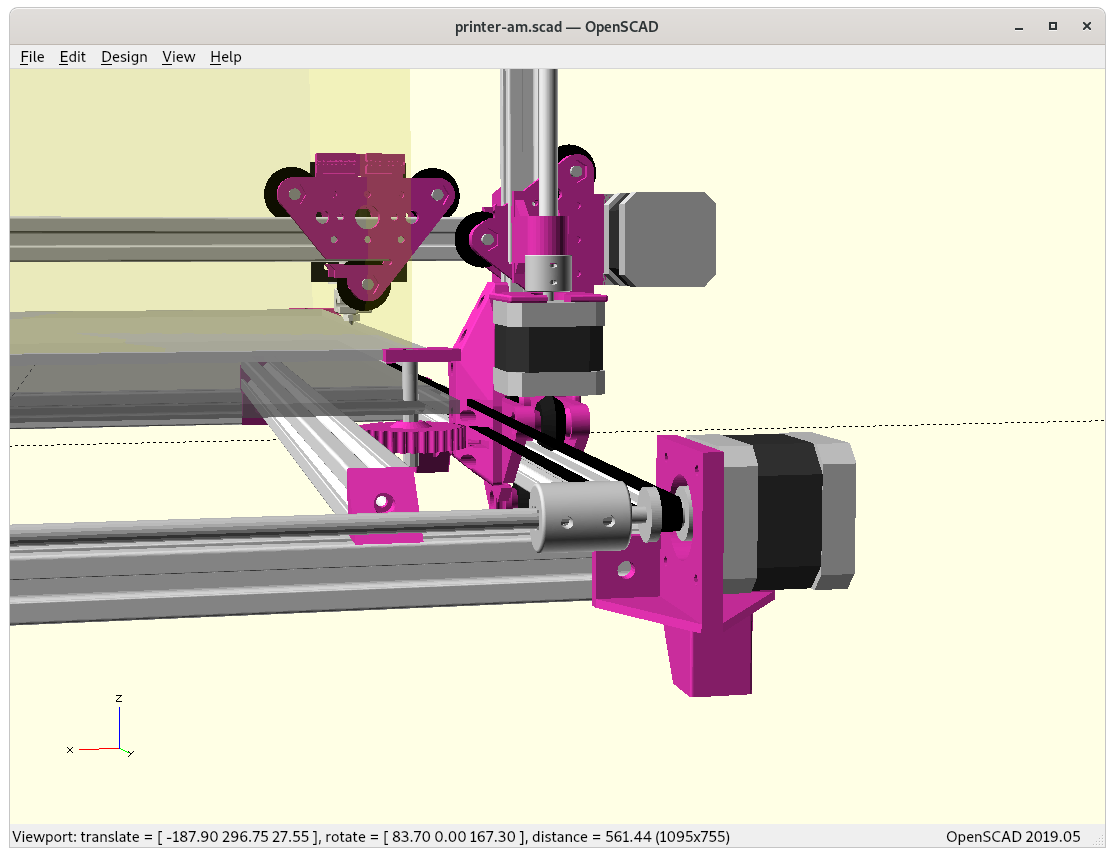
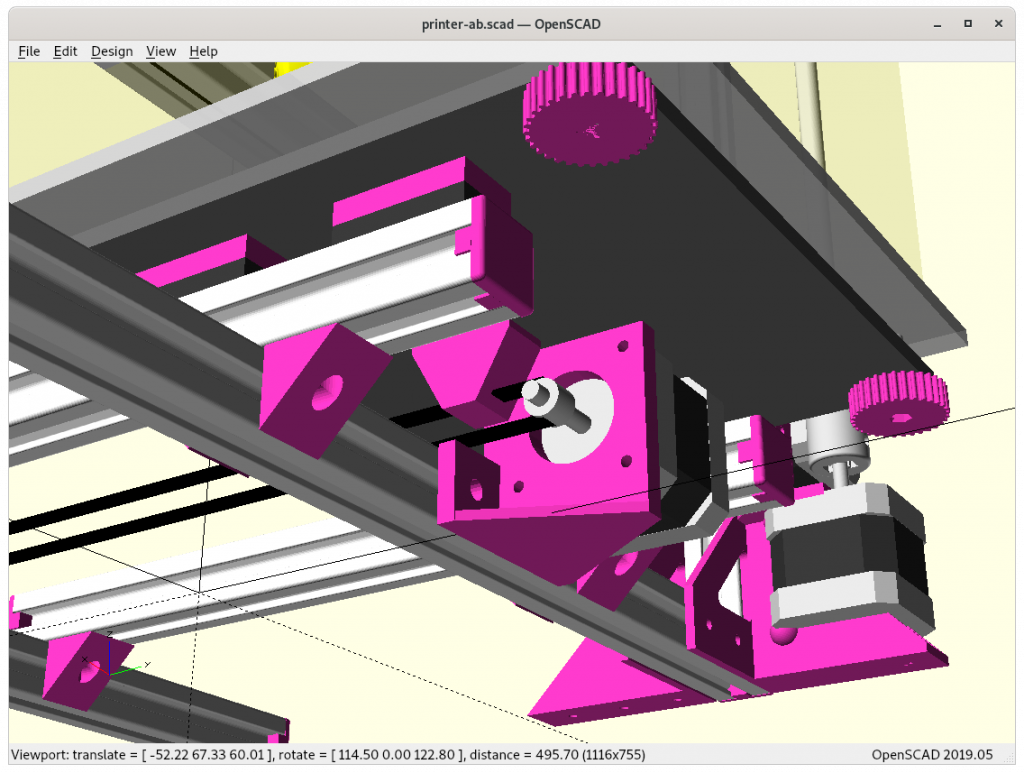
Z motor mount
Y belts & Y motor
Y pulley holder
Y motor mount
For now I decided to use my V modules as Y carriages with width of 100mm vcarriage2(width=100) but actual tests are required how stable the moving XZ frame will be.
As you can see on the draft, I lose some build volume because I stack on top of the Y carriage instead within, but if I put the gantry / XZ frame between the Y carriage I need extra long X beams for the outer frame, and make it impossible to achieve uni-length design (same beam length for all); it’s all about balancing a compromise.
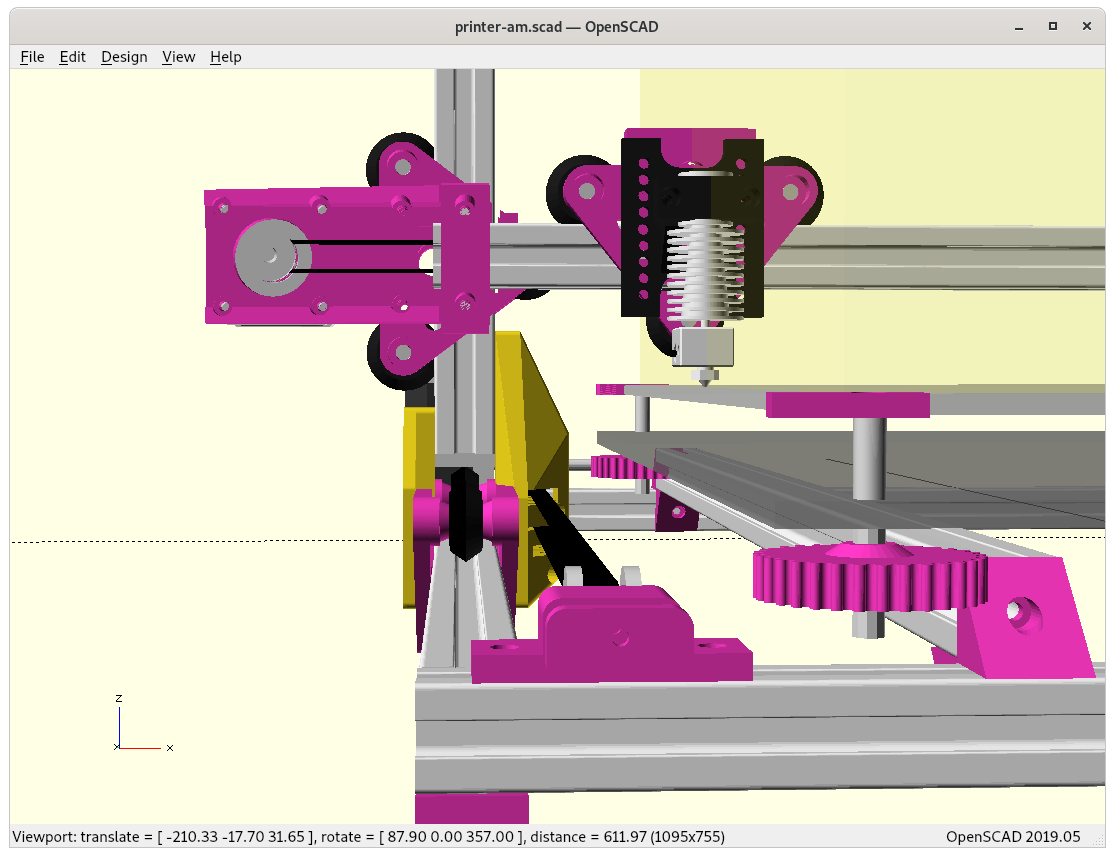
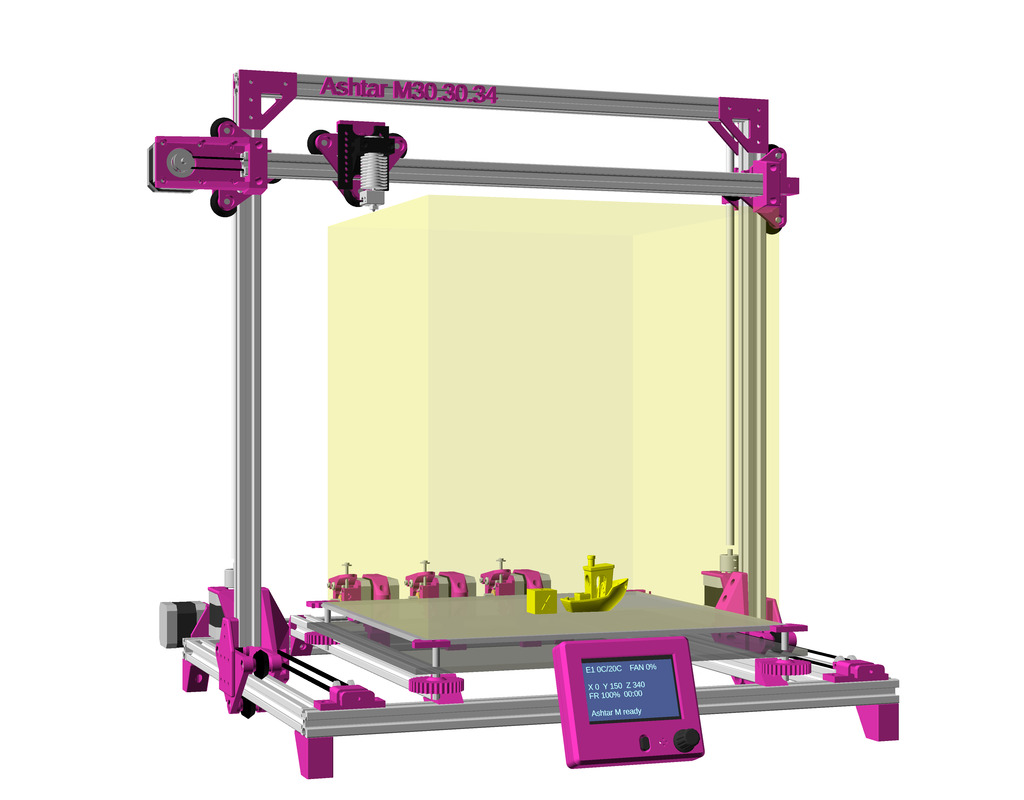
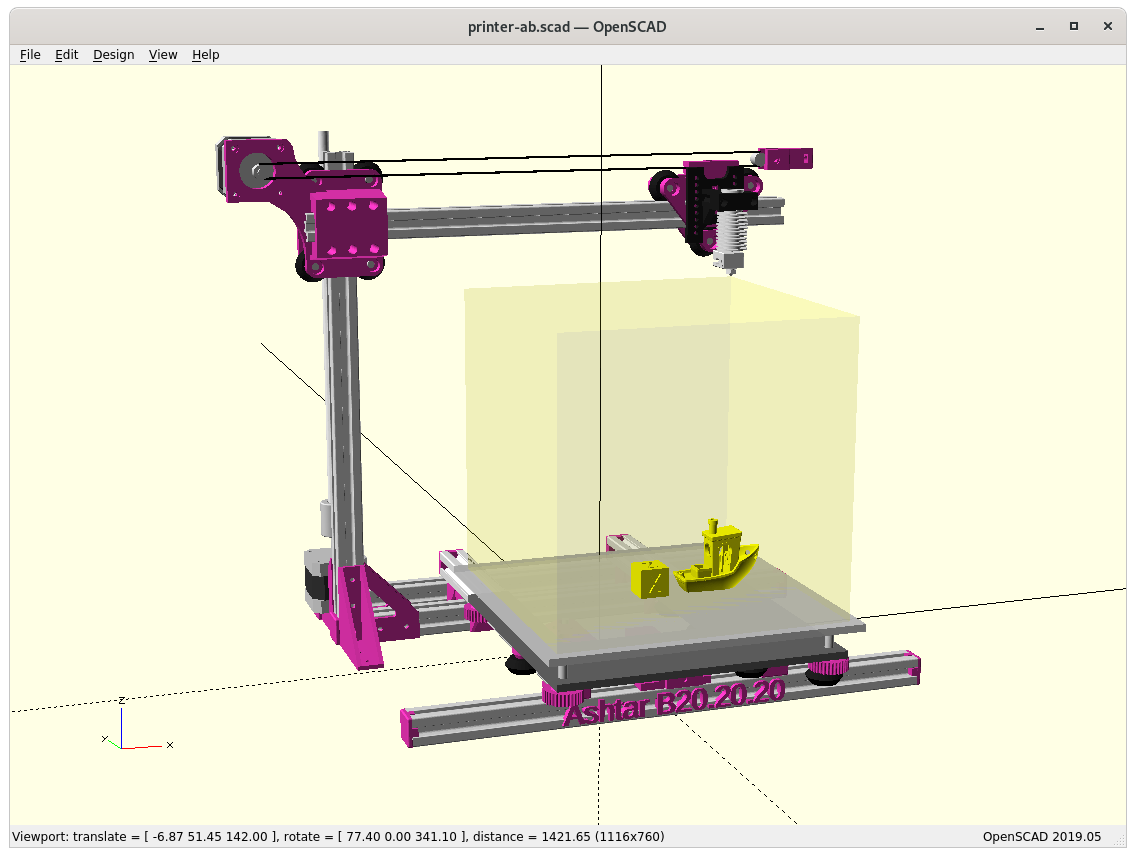
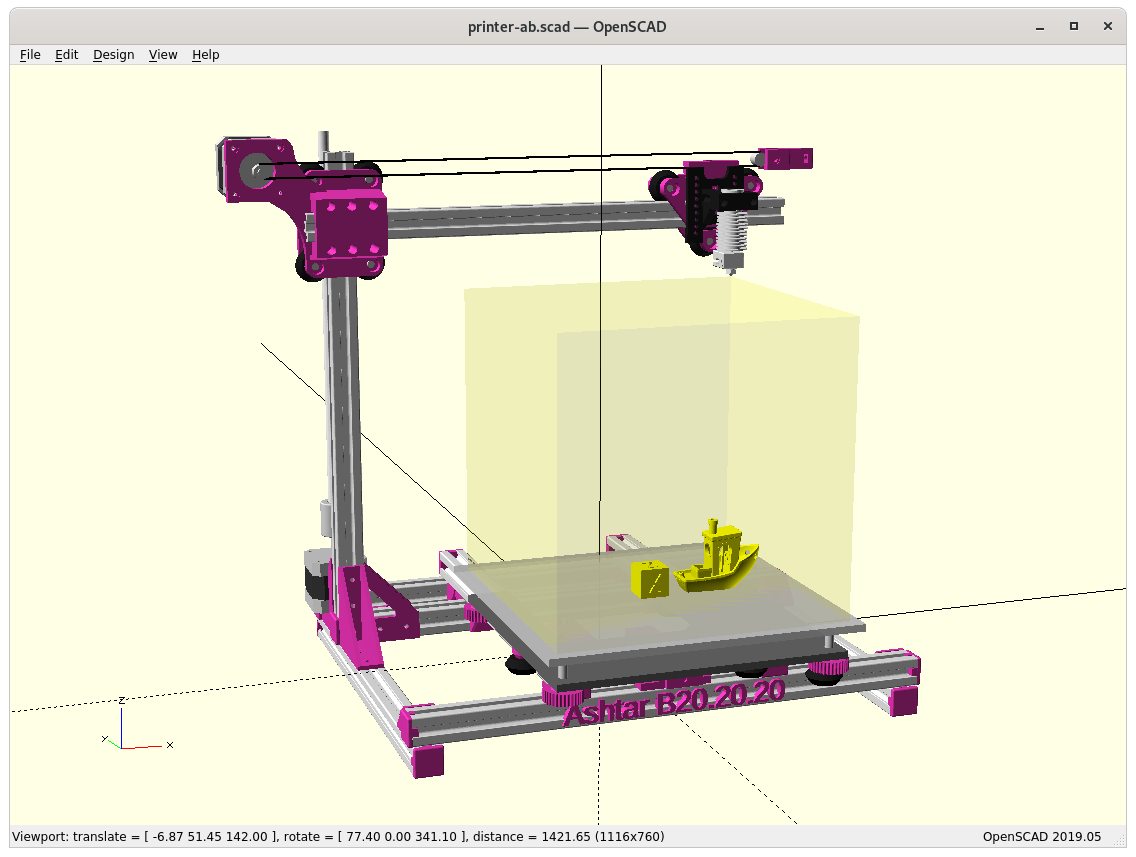
XZ Arch Option
The “XZ Arch” option is removing the lower X beam from the XZ frame, hence, extends Z build space as the print bed also goes lower – for now I moved the Y beams supporting the print bed on the lower framework, details how the print bed will be mounted not yet determined. The side piece “A” is a bit shorter, and side piece “B” is a bit more solid – the way the Y belt is fastened remains the same: Y belt ends come out downward, and are fastened with M3 screws & M3 nuts inserts.
Side pieces “A” & “B” with Arch (lower X-beam removed)
Side piece “A”
At position 0,0,0
Specifications
Build Volume: ~380x400x380mm
Frame: 10x 500mm 2020 alu profiles (XZ arch option)
3x or 5x V-Slot 2020 (X, Y and optional Z axis)
7x or 5x T-Slot 2020
Issues to Resolve
Y motor & Y pulley holder, likely using 6mm smooth or threaded rod as extender, resolved, details defined with 625ZZ bearings
print bed mounting with adjusting nobs to level bed
optional remove lower beam of the XZ frame and make it just a gantry, would allow to lower supporting bed beams (space for springs and nobs etc) – but might introduce weaker XZ gantry geometry
Y Carriage to XZ Frame mount: either combine the L shape of XZ frame, or have a separate piece to attach – that part likely is the most challenging to get right, using two pieces “A” and “B” to connect to XZ frame with Y carriage
resolved in theory, but in actual implementation it will be tricky, as the piece “A” aka ycarriage_xzframe_mount_a() will be printed flat, and quantized by layer height, but the thickness has to be very precise as +/- 0.05mm not to introduce any tilt on the Y carriage (it would damage the V module and/or V wheels and introduce wobble Y-wise), hence 0.1mm layer height required for piece ycarriage_xzframe_mount_a() mounted outside, and ycarriage_xzframe_mount_b() (◤-like piece) mounted inside:
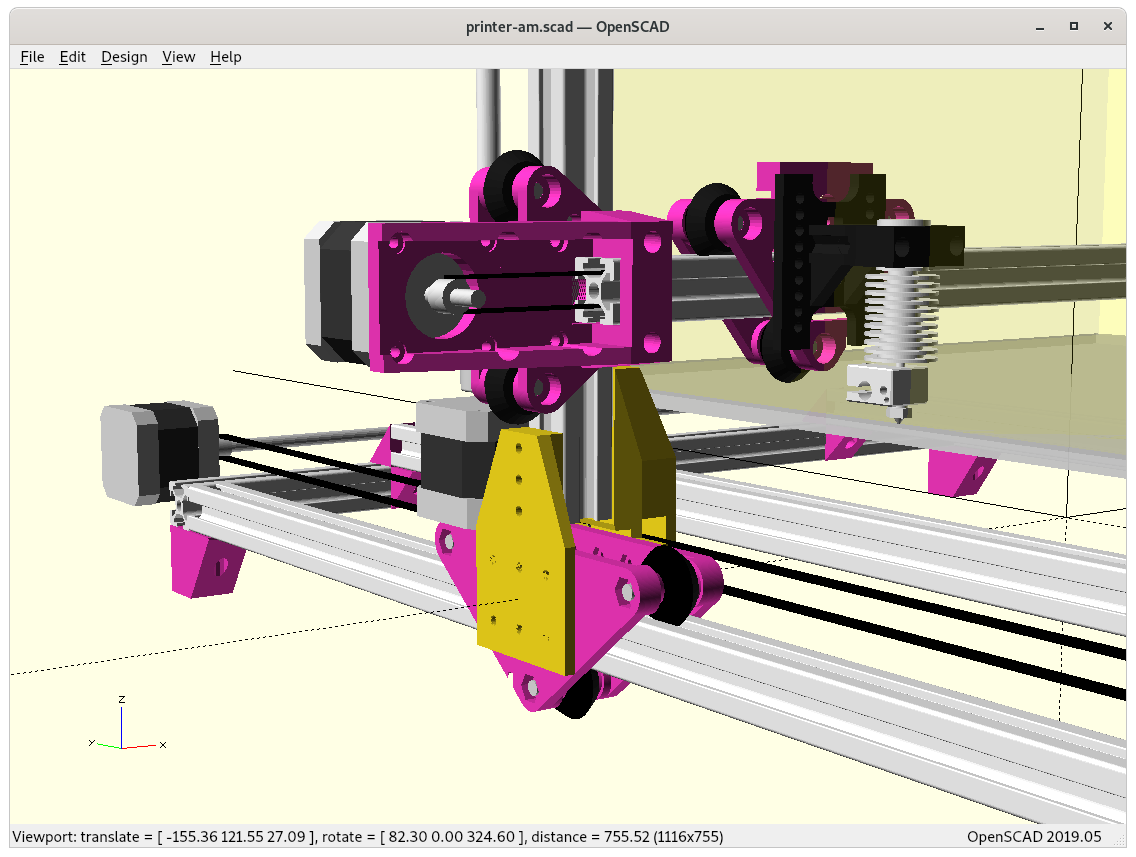
Side pieces “A” & “B” with full XZ Frame
Side pieces “A” & “B” with XZ Arch
Z motor mounts, resolved: how stable it is needs to be tested
cabels & bowden tube routing
XZ frame moves as well – lot of motion involved – likely not put bowden extruder motor on it and avoid to add additional weight again
cable chain to ensure it bends in a controlled manner
Preliminary position of multiple extruders: X back beam, hence, very long Bowden tubes
none of them can be put on the moving XZ frame anymore
tuning to common to build-volume with uni-length beams
likely 400x400mm build plate achievable, but perhaps 380×400 printable, losing 10-15mm on left- and right-hand side.
XZ frame vs XZ arch: to be determined if it’s essential with actual tests
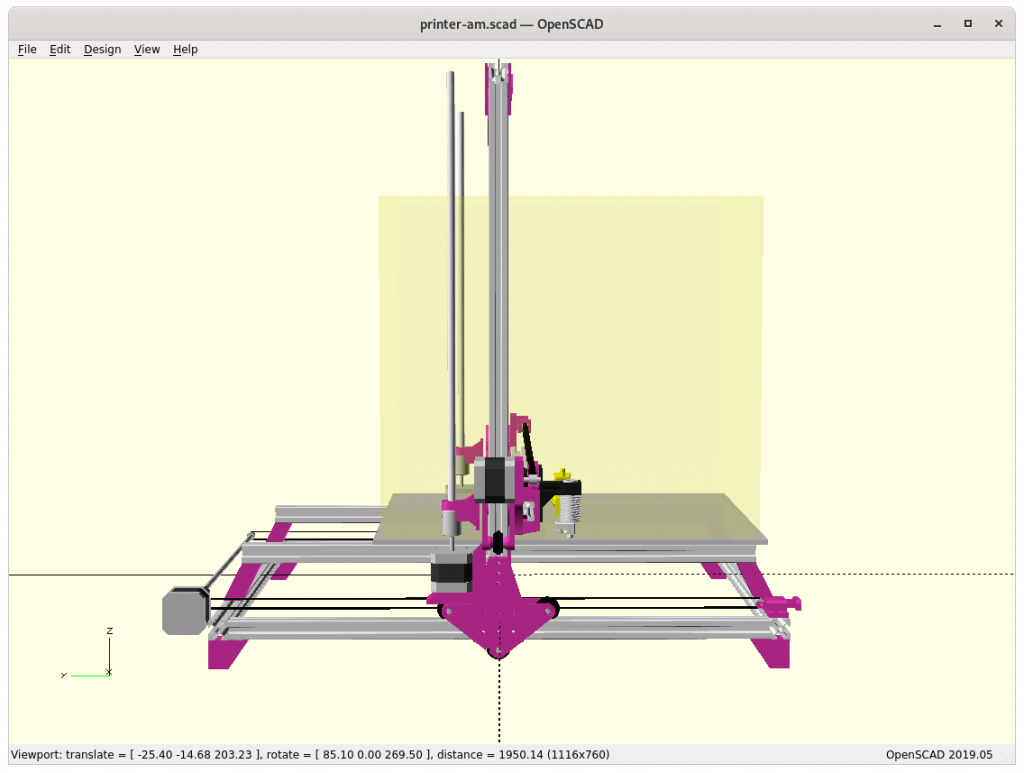
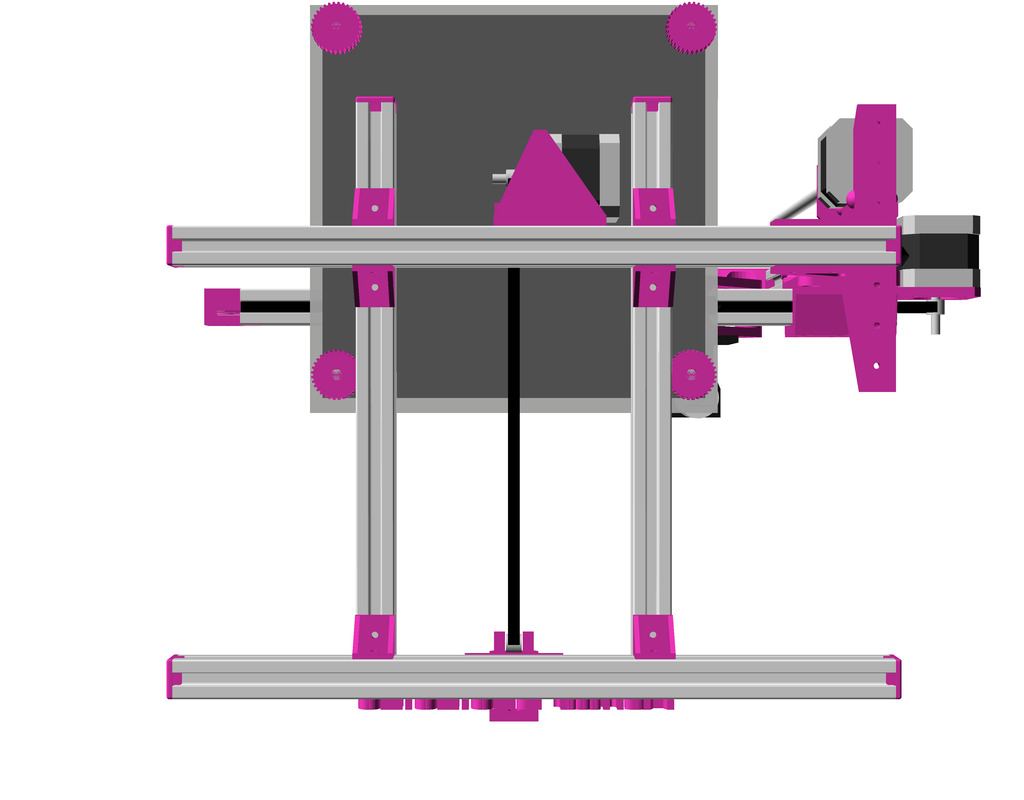
XZ frame (back view)
XZ arch (back view)
build printer
print tests
release parts
release code
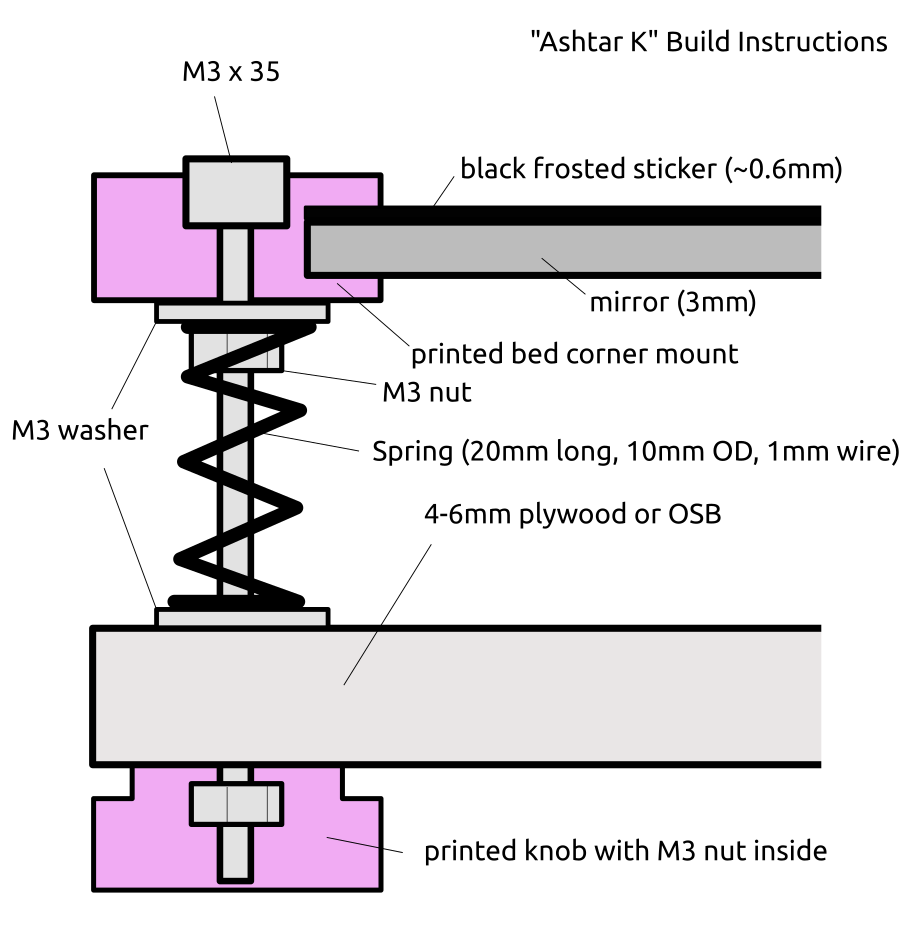
Bed
Ashtar K & M bed mounting
The bed is stationary, so it’s relatively simple, a bed carriage it still required so the fine level adjustment is possible with some knobs – using the same setup as for Ashtar K.
Gallery
Parts
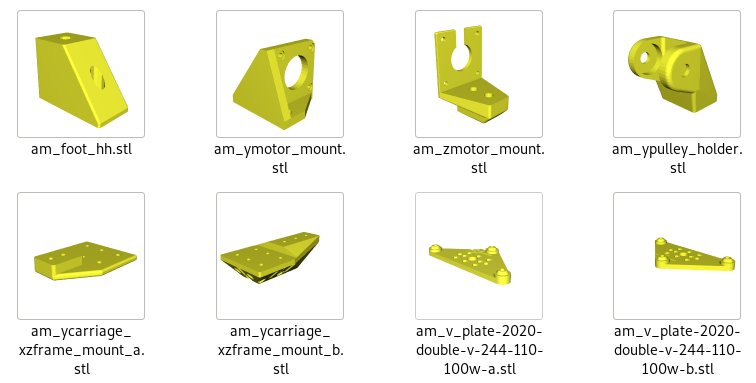
Printable Parts
Y carriage:
2x am_v_plate-2020-double-v-244-110-100w-a
2x am_v_plate-2020-double-v-244-110-100w-b
2x am_zmotor_mount
2x am_ycarriage_xzframe_mount_a
2x am_ycarriage_xzframe_mount_b
1x am_ypulley_holder
1x am_ymotor_mount or 2020_Y_motor_mount
4x am_foot_hh
Non-Printable Parts
2x 625ZZ bearings
2x for 1x am_pulley_holder
nx pulleys (dimension not yet determined)
2x (5mm hole) for 1x Y motor, 1x am_ypulley_holder
1x (5mm hole) for 1x X motor
nx idlers (with 3 or 5mm hole)
1x (3mm hole) for 1x X belt
2x (3mm hole) for 2x Y belts
~490-500 mm M5 smooth or threaded rod (Y shaft extension)
See the on-going blog-posts on Ashtar M development, with some more details than the overall page here.
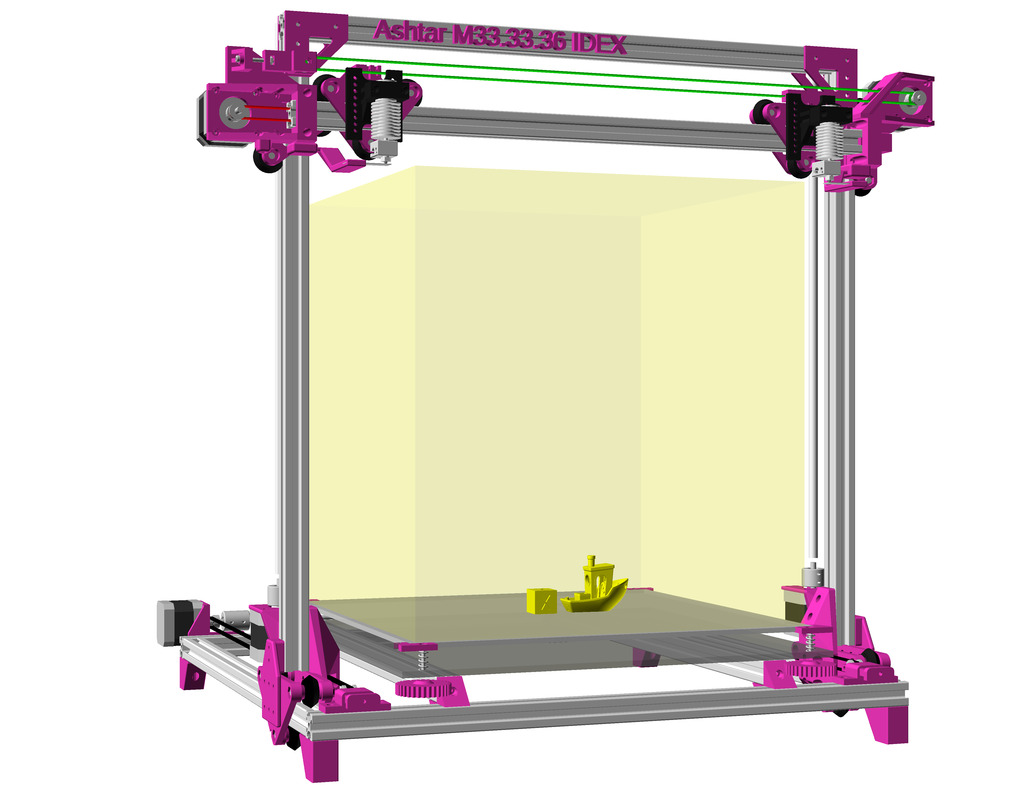
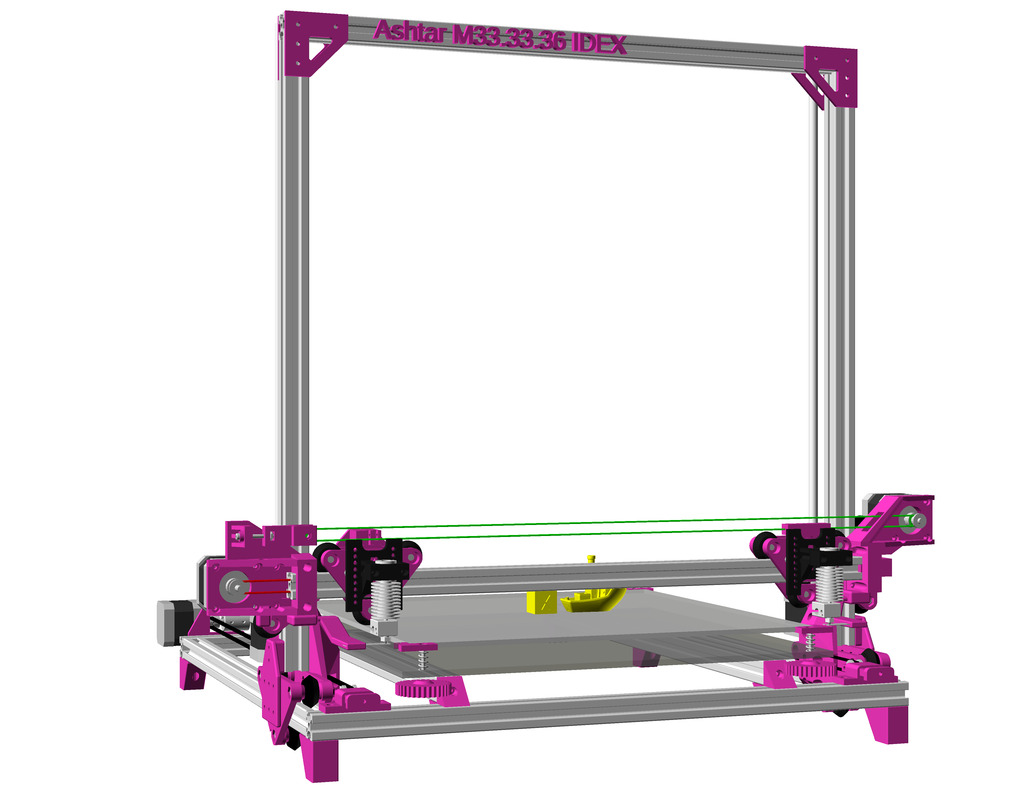
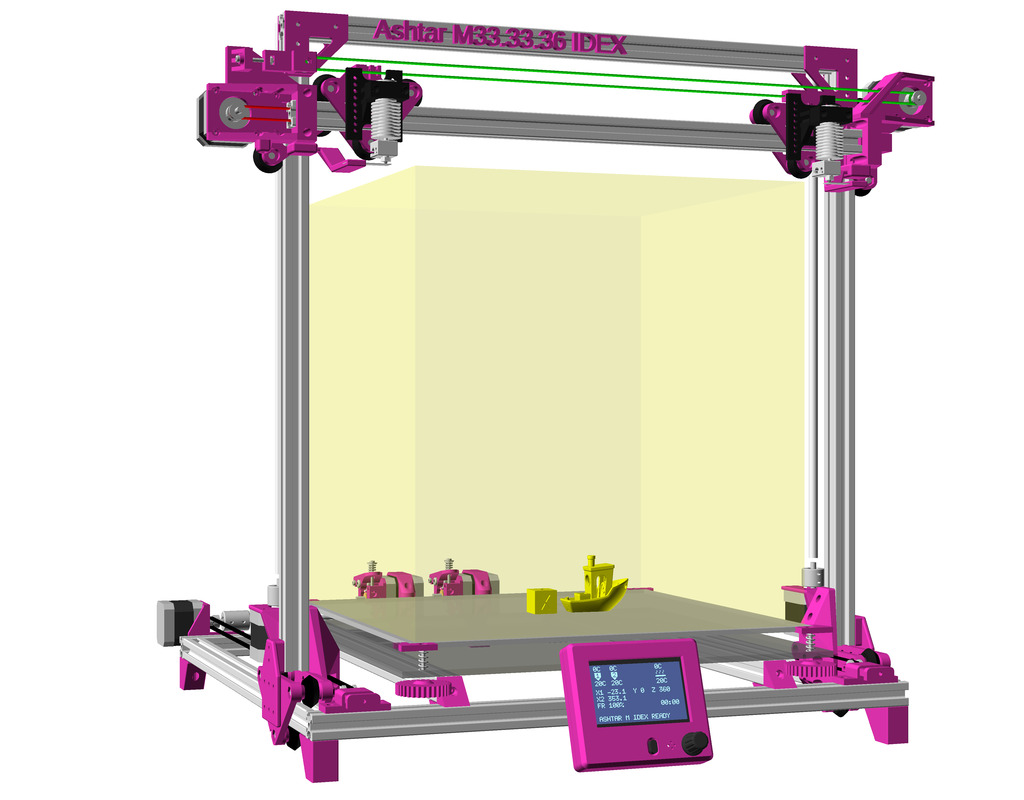
IDEX Option
As Ashtar M shares much of Ashtar K design, the IDEX option comes easily – yet, adding a 2nd motor on the moveable XZ frame/gantry definitely pushes the limits of Ashtar M, significant forces will be applied at high Z positions while moving Y axis.
In order to run two independent printheads (Independent Dual Extrusion) following changes are needed:
2020/12/23: added more details on Y bed, and size comparison, blog post published.
2020/12/17: X motor mount done, X belt pulley holder, XZ cantilever x-offset 10mm.
2020/12/12: just the basic idea, an early draft with a few options (extra foot, 3/4 wheels for Z carriage), 6 vs 7 vs 9 beams.
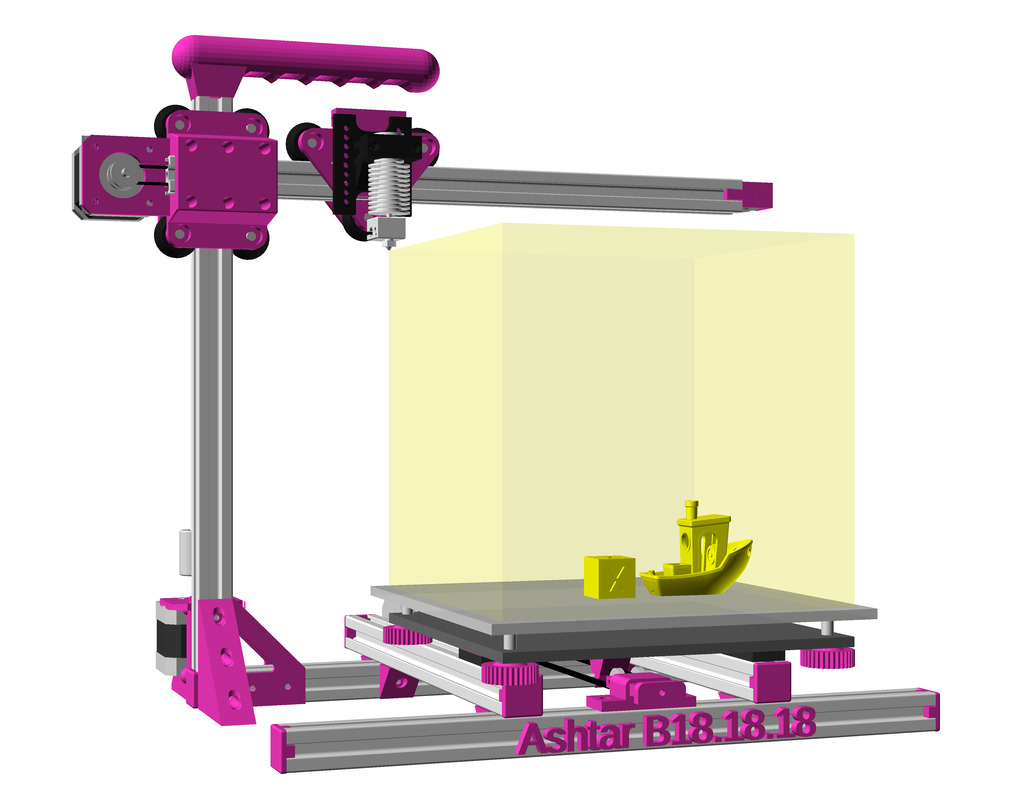
Introduction
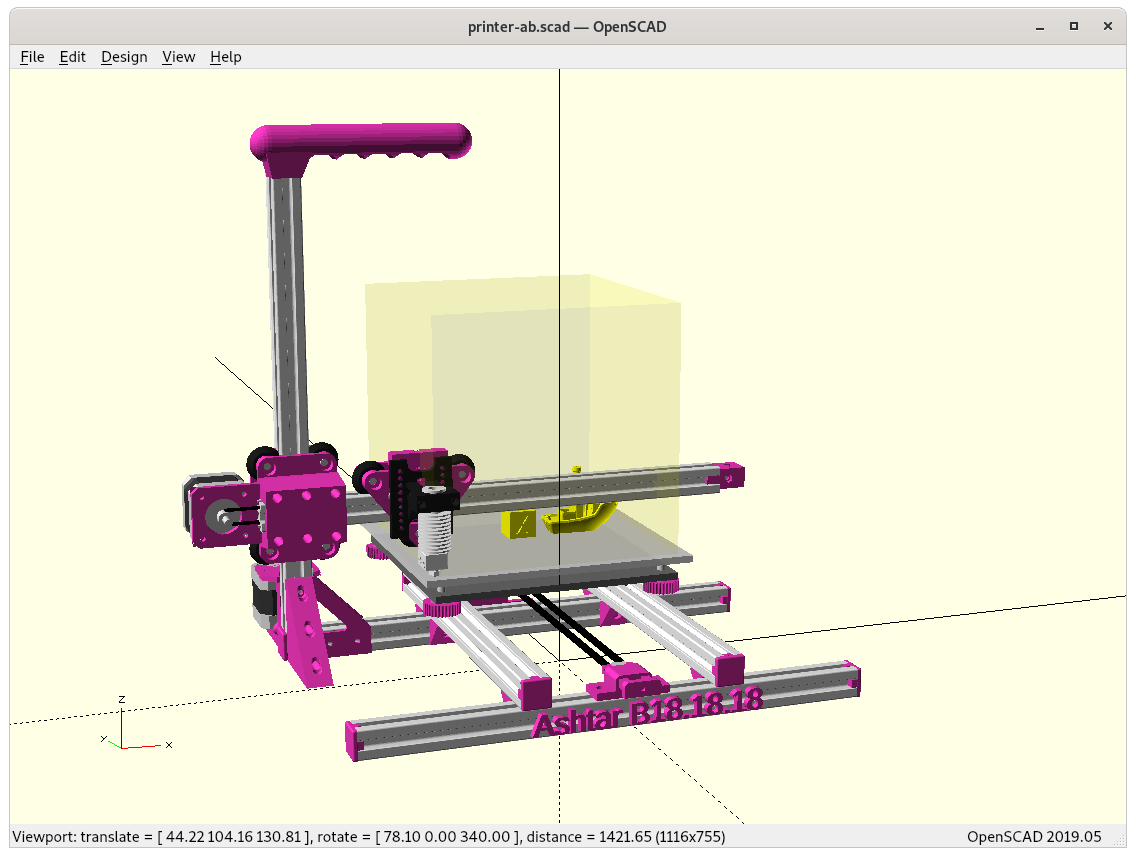
Ashtar K was the first design with 2020 T-slot alu extrusions, and I used 11 beams of 500mm length to make up the entire frame. In the back of my mind I thought also doing a Cantilever 3D printer with 2020 T- or V-slot, like the Prusa Mini or Printrbot Simple Metal, and as before I like to reuse the frame as rails directly and not use any smooth rods or alike, which means X beam as V-slot, and optionally Z beam as well as V-slot, Ashtar B:
T-Slot 2020
V-Slot 2020
V wheel
Draft
At position X = 0
At position X = max
At position Y = 0
At position Y = max
A build-volume of 140mm to 190mm each axis is targeted in order to keep the X axis short – also, likely using a Bowden extruder setup where just a hotend resides on the X carriage.
Specifications
Build Volume: ~180x180x180mm
Frame: 6x 340mm 2020 alu profiles
2x V-Slot (X and Z axis)
4x T-Slot (Y axis with simple sliders where T-Slot are sufficient)
Issues to Resolve
X belt routing: outside of 2020 extrusion or inside
X motor mount: rather simple, perhaps combine with xcarriage_short_hmount_2020(), done
Y motor mount position: will determine overall build volume
3 vs 4 wheels on Z carriage, 4 wheels (see below why)
positioning: extruder, controller, display, power supply, optional filament holder
positions of X, Y and Z endswitches
tune to a common build volume while having uni-length beams/extrusions
150mm, 200mm, 215mm for X & Y build axis length
Frame: 6 vs 7 vs 9 beams
6 beams
7 beams (+1 back)
9 beams (+2 left/right)
The 9 beams give an overall better sturdiness, but not sure how essential at small building volume (less than 220mm each axis). I might be able to remove beam, the last beam at the back at the bottom reducing to only 6 beams, in that case the Y motor is mounted on the remaining beam in the back.
Z Carriage: 3 vs 4 wheels module
3 Wheels / 2 Mounts
4 Wheels / 3 Mounts
4 Wheels / 3-wide Mount
4 Wheels / 3-wide Mount, Routing Inside
The 4 wheels looks better also because it allows to add another 2020 horizontal mount or wider mount, some X range is sacrificed (10-20mm).
Different Sizes
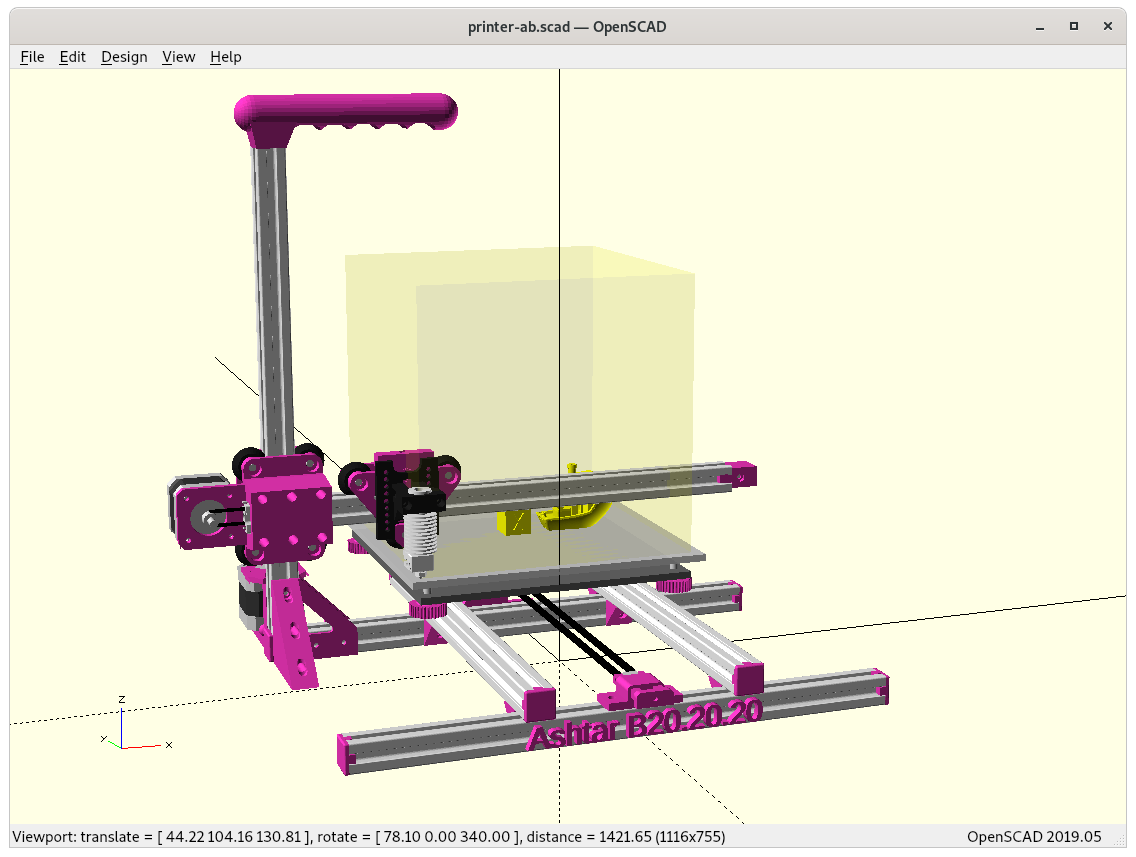
Ashtar B 150x150x150
Ashtar B 180x180x180
Ashtar B 200x200x200
The build volume from 150mm to 200mm for each axis, I like to have 200mm but not sure if the X axis can maintain linearity fully (e.g. half of a layer-height such as 0.1mm ⇒ 0.05mm linearity for head X = 0 .. max), I might to have to settle for 180mm or even 150mm. Actual tests and fine tuning of the Z axis (4 wheels V carriage) and X axis (3 wheels V carriage) will tell.
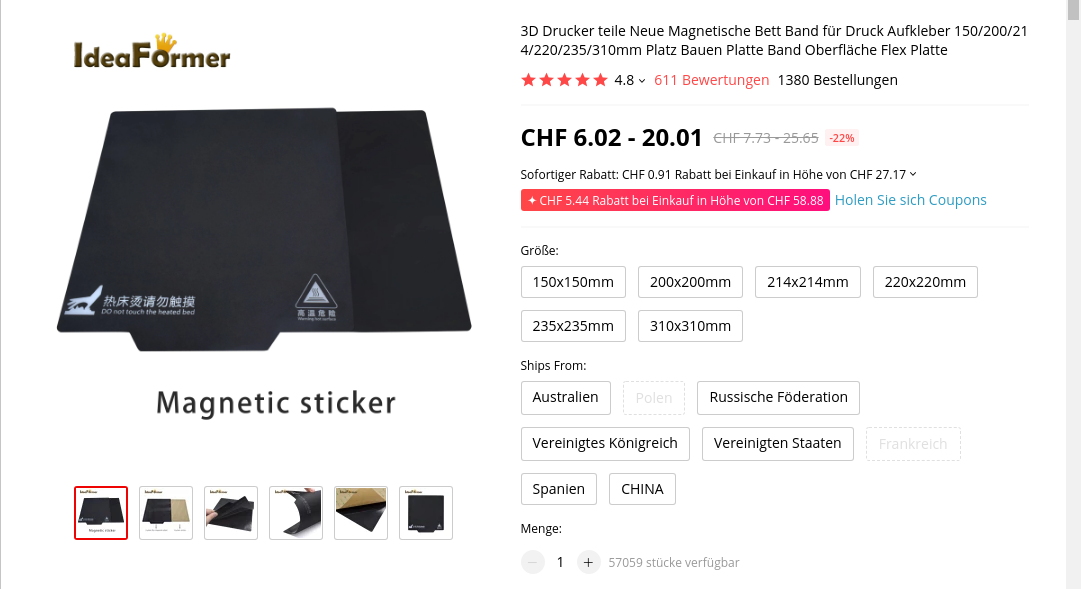
Common quadratic bed-sizes are 150mm, 200mm, 214mm, 220mm and 235mm e.g. for magnetic beds. A 200mm bed can be used but only 180mm be printed, as I have sufficient margin on the XZ cantilever side.
Y Bed
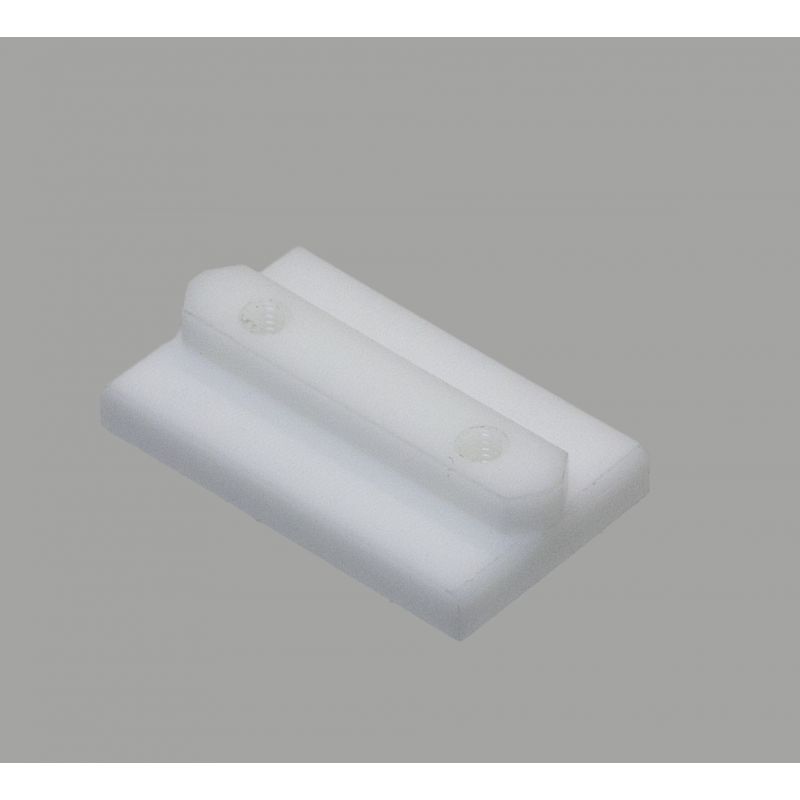
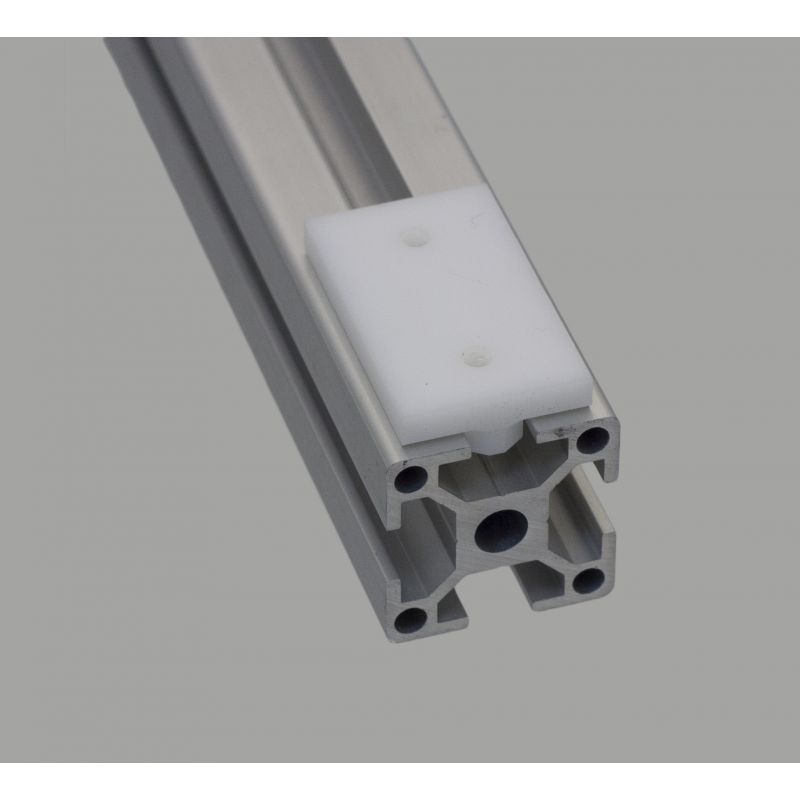
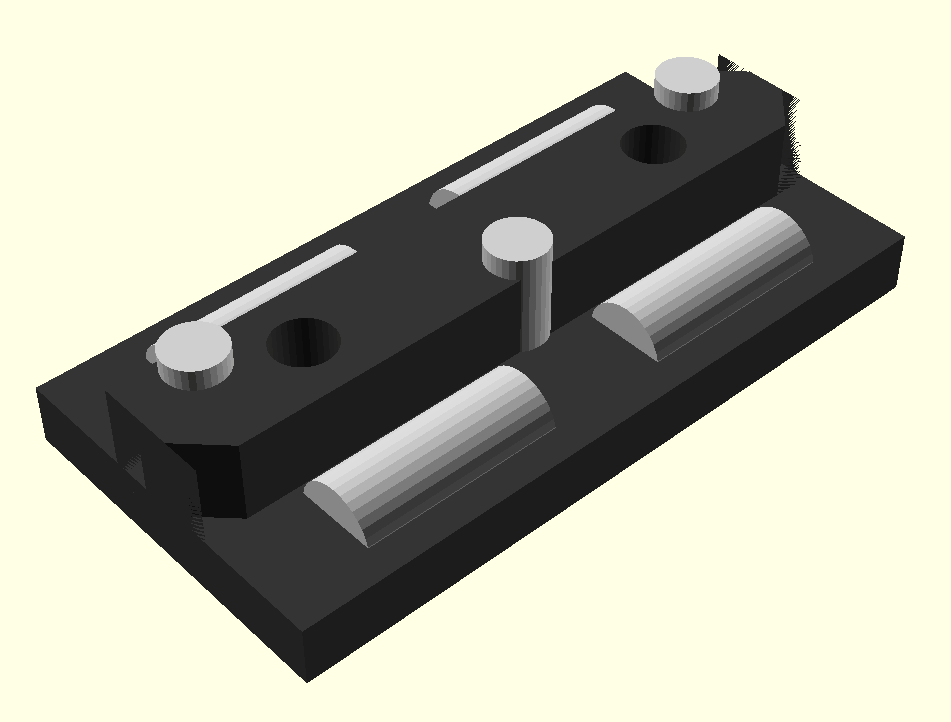
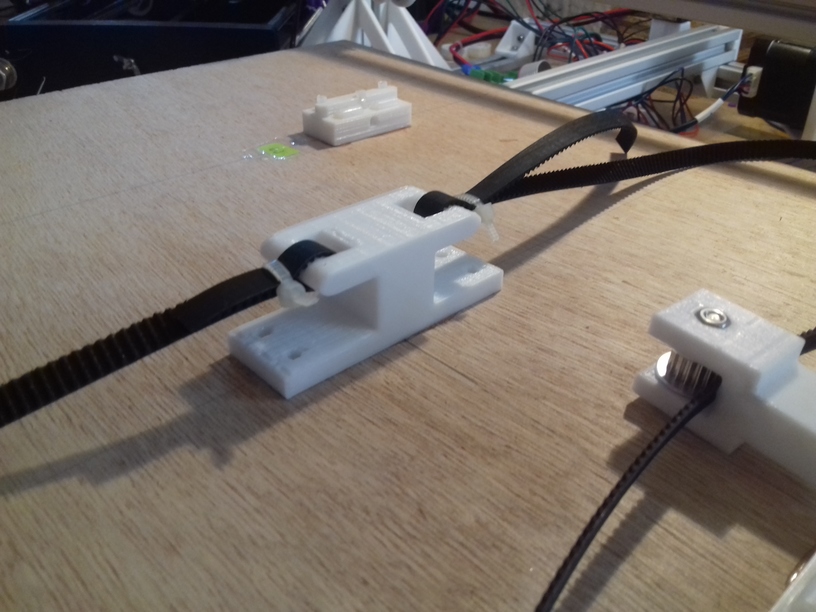
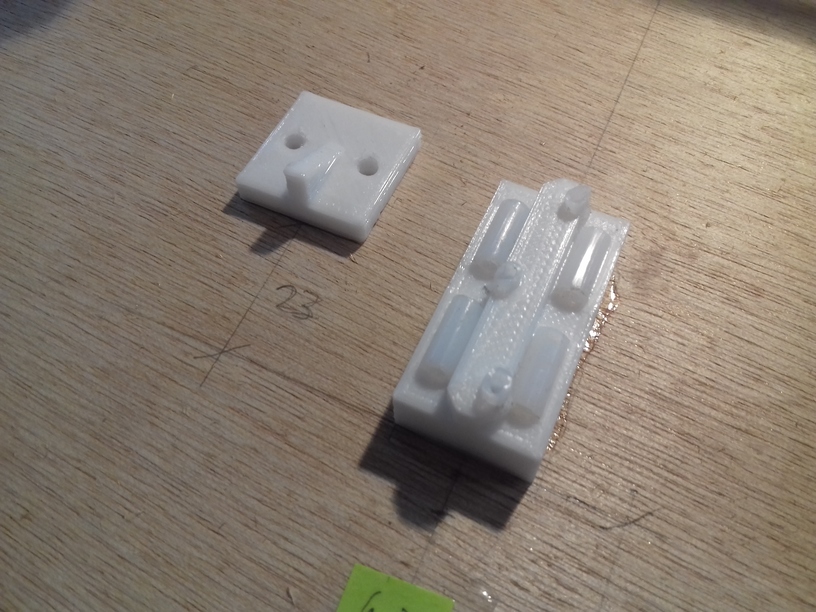
I gonna use the simple slider riding on T-slot (derived from an existing nylon slider) for the Y bed, 3 sliders in total:
Nylon Slider for T-Slot
Slider on T-Slot
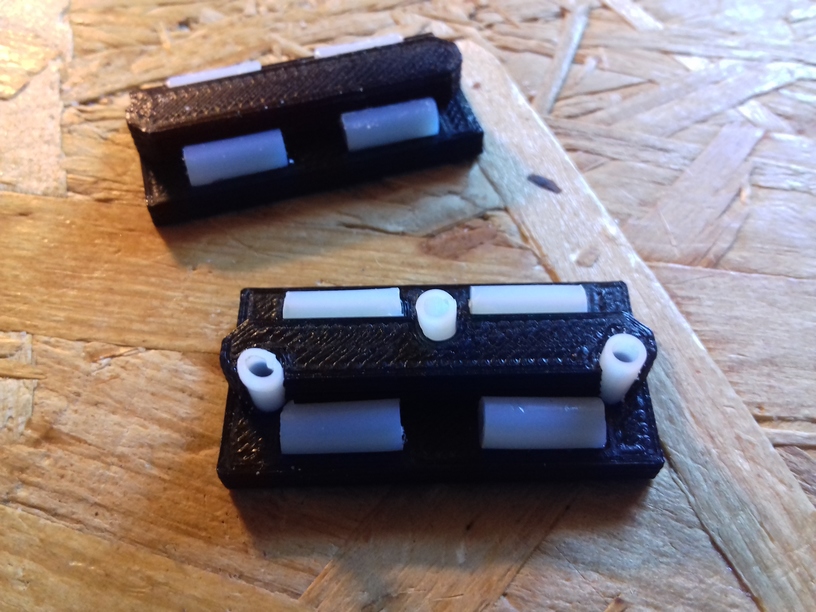
Slider model with PTFE tubes
3D printed slider with PTFE tubes
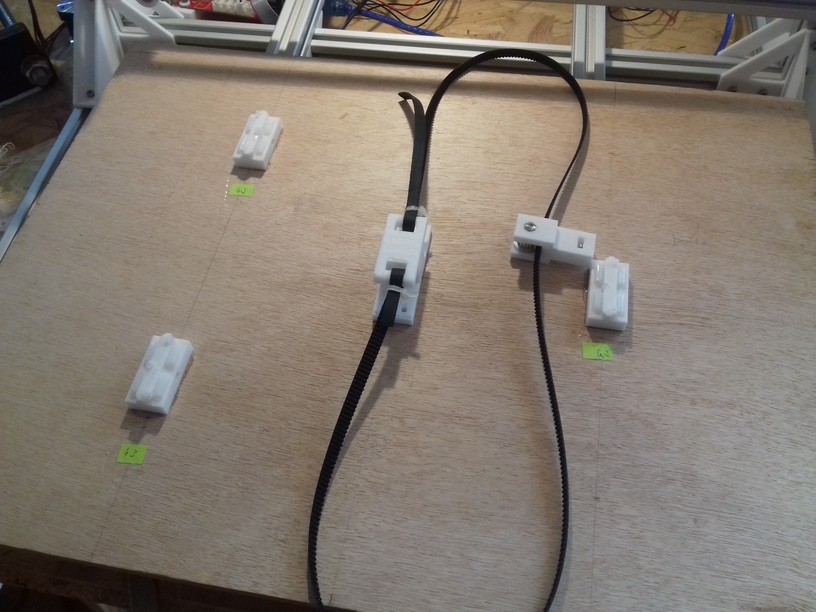
The sliders are glued beneath the Y carriage, then the Y bed snaps into the T-slots easily. I have printed on these sliders with two Ashtar K‘s (K1 = 380×400, K2 = 300×300) for about 1+ years successful. This simple approach requires gravity, and the bed needs its own weight to stay in place (cannot be up-side-down or in no-gravity environment like International Space Station ISS).
As of December 2020, something remarkable has happened: Creality, a big chinese 3D Printer company has openly acknowledged and worked with western developers to bring forth a belt-based 3D printer.
Usually chinese companies have copied without acknowledge or give credit to development done by others like Adrian Bowyer or Josef Prusa, yet with the influence of Naomi Wu, a maker from Shenzen, Creality seemed to have been swayed to give proper attribution and even actively work with Open Source Hardware inventors to mass produce a belt-based 3D Printer.
CR-30 aka 3DPrintMIll by Naomi Wu with Creality (2020)
The past decades “Western Innovation vs Chinese Manufacturing” combo has been operating very well and brought many consumer products at low cost, including 3D printers.
Now, in this particular case, we see Bill Steele and Karl Brown (White Knight Printer) properly attributed in the 3DPrintMill Kickstarter page:
CR-30 Kickstarter [Screenshot 2020/12/08]
Attributing Adrian Bowyer (RepRap), Bill Steele & Karl Brown (White Knight) [Screenshot 2020/12/08]
And even giving proper context of the overall lineage:
Lineage
All consumer 3D printers currently sold, build in some way on the work of Adrian Bowyer and his RepRap project- Open Source 3D printing. Some 3D printers iterate more than others, some are simply clones and claim innovations as their own that was in fact the community’s work. Others take only the broad strokes of an idea and build on it, improve it, and allow others to build on it further. For the 3DPrintMill (Creality CR-30) we have taken pains to involve and consult the talented individuals who brought the technology this far, and built on their work with their permission.
Bill Steele, who first demonstrated Infinite-Z FDM and DLP printers, and Karl Brown who created the first practical, Open Source kit so consumers could build their own Infinite-Z printer. Both Karl and Bill have given the project their blessing- and indeed, without them, it would never have been possible.
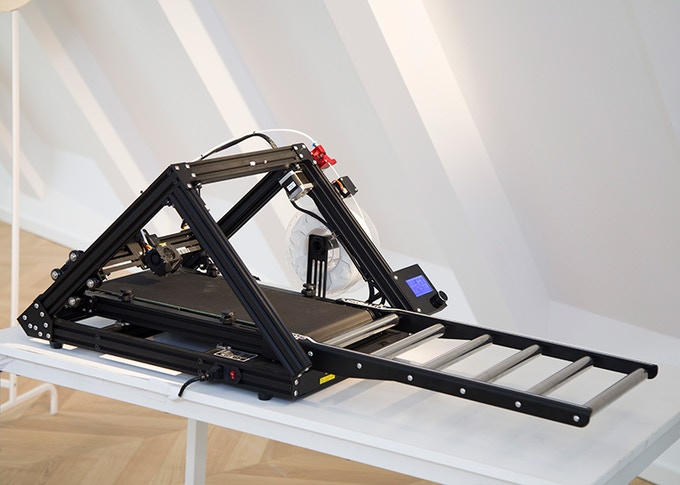
Bill Steele Belt Printer (2016)
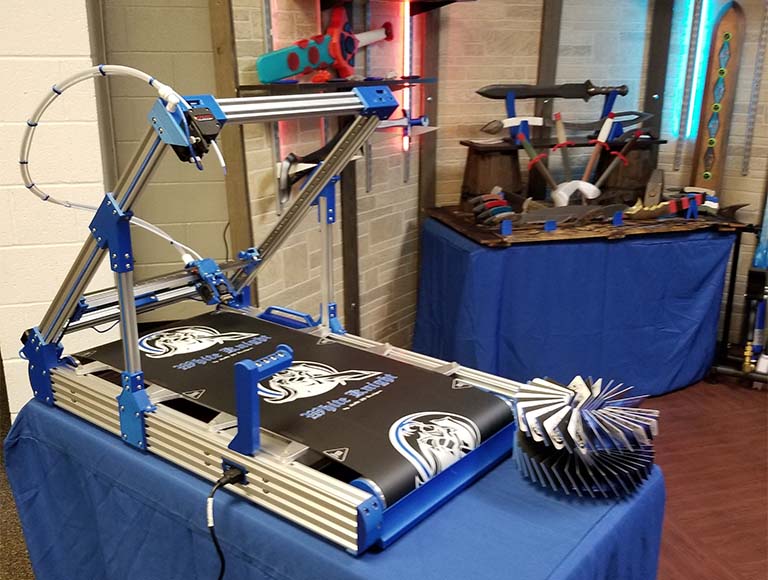
White Knight belt 3D printer at MRRF 2019
As said, this is remarkable and probably a new level of cooperation of Open Source Hardware movement and chinese manufacturers.
Back in 2010 I thought that the Open Source Hardware movement should actively seek cooperative alliance with chinese manufacturers instead just to complain – but this did not happen. Now in late 2020 it seems happening, thanks to Naomi Wu (Project Head for the CR-30/3DPrintMill), who made an effort to bridge the western innovation culture and chinese manufacturing culture – without a bridge, a canyon keeps villages apart.
Thanks also to Creality, namely Michael Tang (Co-founder of Creality), Steven Han (Brand Director), Zhou Yong (Product Manager), Lei Congjin (R & D Manager), Yu Xianhong (Project Manager) for the acknowledgment as expressed in the Kickstarter page.
Open Source Hardware Commitment
Additionally, and perhaps even more relevant is their on-going commitment to Open Source Hardware as expressed in this passage:
Bringing the 3DPrintMill (Creality CR-30) to life would need the resources of a full engineering team and a company with substantial 3D printer manufacturing experience. So a deal was struck, Creality would invest the R&D resources necessary to make the 3DPrintMill(Creality CR-30) real, and as soon as that expense was recouped, the entire product would be fully Open Sourced for the benefit of the community. When the 3DPrintMill (Creality CR-30) reaches 5 million USD in crowdfunding, the whole machine- CAD files, BOM, firmware, schematics, will be fully Open Sourced. Anyone in any country can make their own version, iterate and improve on it- leading to vastly accelerated development.
This is probably what many Open Source Hardware (OSHW) enthusiasts have been waiting for, one of the big player like Creality join the common OSHW efforts once more, after having released all plans of the Ender 3 in 2018 and giving an example for other companies.
Bigger Context
And I look at Apple, Microsoft, IBM, ARM, Intel, AMD and I wonder, with the Open Source ISA (Instruction Set Architecture) of RISC-Vonthe horizon, whether we are going to see the full stack of Open Source Hardware from the CPU design up to the PCB and final assembled computer (GPU, RAM, I/O); and if any of the big players take a moment, and look at what Creality did here?
Naomi Wu ranted away on Twitter with the following, which hits the nail about Open Source and Open Source Hardware is really about:
Software? Fusion360, Adobe Creative Cloud, John Deere tractors- a tradesperson can’t even own their own tools anymore. We’re all sharecroppers. Everything is rented.
…
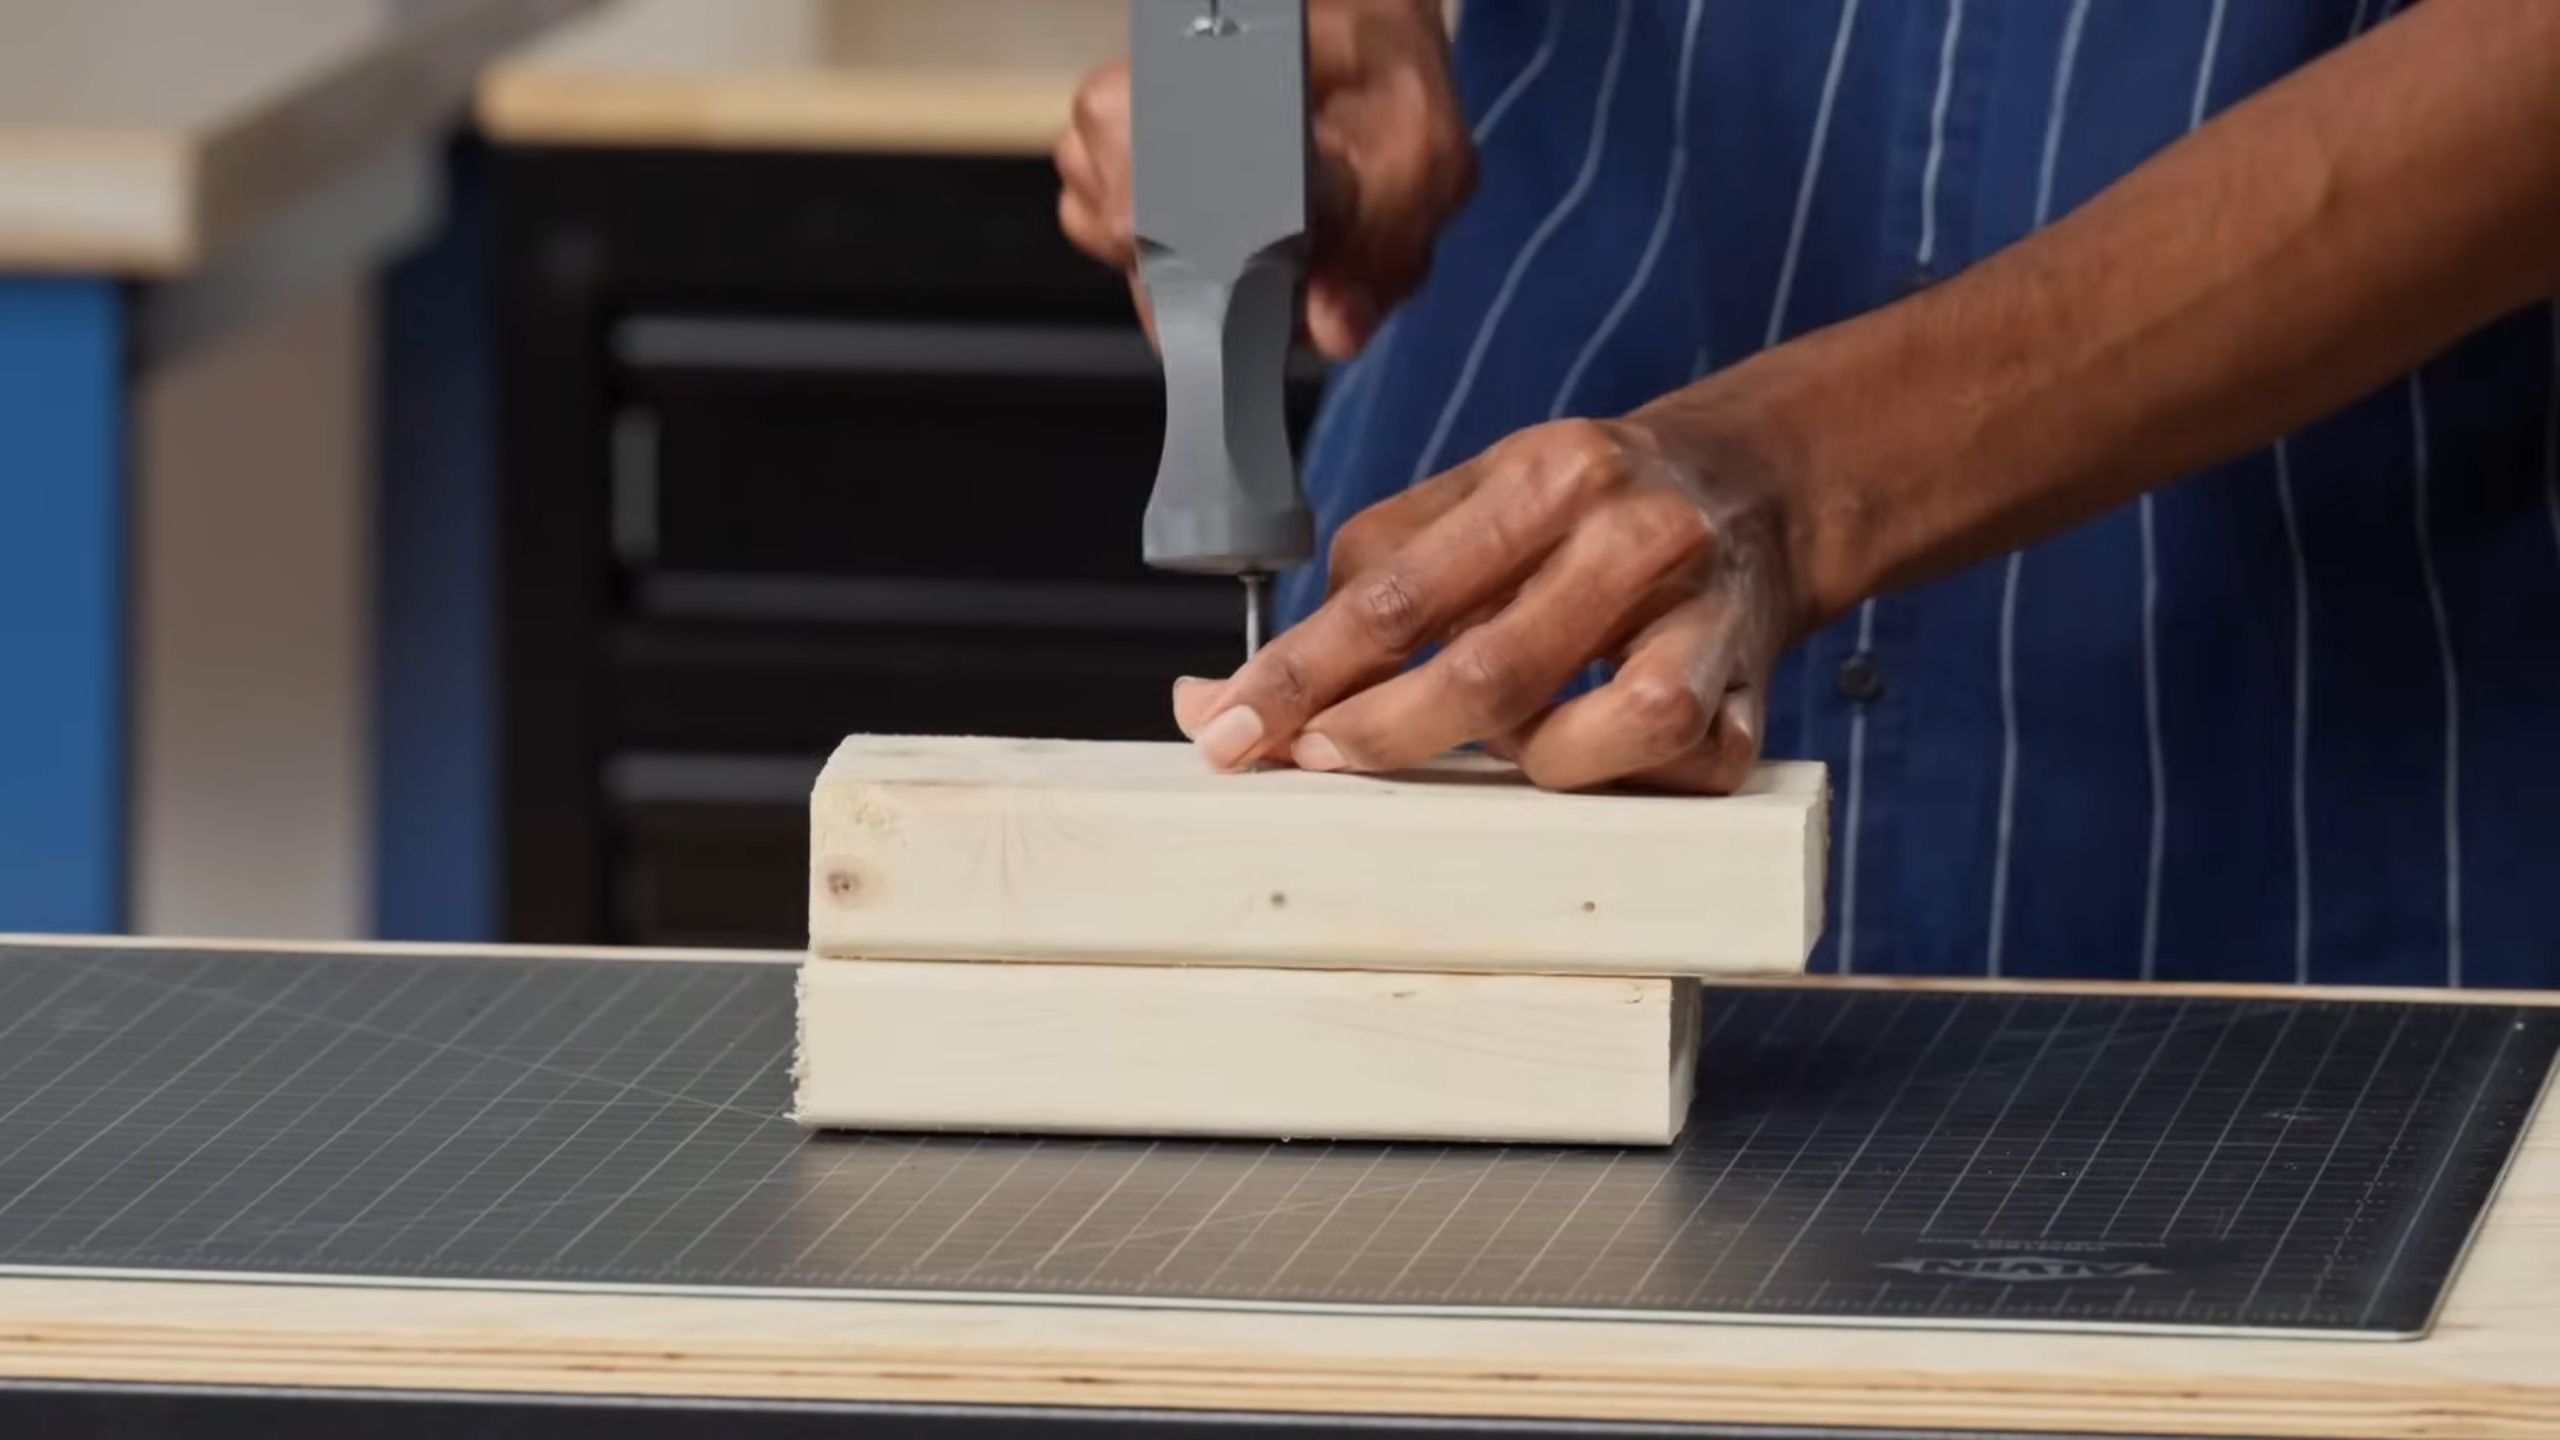
Every single thing we own is being taken, put in the cloud, and rented back to us. Willingly. Because no one wants to know how to do anything beyond a narrow scope. We’re a world of carpenters willing to rent sharp chisels and saws rather than learn to sharpen them ourselves.
…
Although the rant started as people seemingly complained on the non-existing or poor customer support of Creality, her main argument is, rather have Open Source Hardware and a community helping each other, than a Closed Source without any control but good customer support – the rant actually targets the Software- & Hardware Sovereignty, which is behind all of the Open Source movement, that is the core issue: you are allowed, you are given the opportunity to improve what you bought, what you own, you can resolve the needs and requirements of your own use cases – personal evolution – and you contribute and help others by being able to share it again – collective evolution. And the mentioned companies, like Apple, or Microsoft, who have been locking up their hardware and software further and further, to improve usability and simplicity – and believe me, I have been an open critic of poor GUIs in Linux not able to catch up – but the price is high, loss of “digital sovereignty” as of software and hardware.
So, because companies are profit driven, they have to balance their own needs and requirements with the collective interest – and this is done in these statements:
Creality would invest the R&D resources necessary to make the 3DPrintMill(Creality CR-30) real, and as soon as that expense was recouped, the entire product would be fully Open Sourced for the benefit of the community.
When the 3DPrintMill (Creality CR-30) reaches 5 million USD in crowdfunding, the whole machine- CAD files, BOM, firmware, schematics, will be fully Open Sourced.
This is why I consider this an important and significant move, because a profit-driven company has actively and willingly balancing its own needs and requirements with those of the collective of the Open Source Hardware movement, and acknowledged that very product they are about to produce has been possible because of individuals like Adrian Bowyer, Bill Steele and Karl Brown.
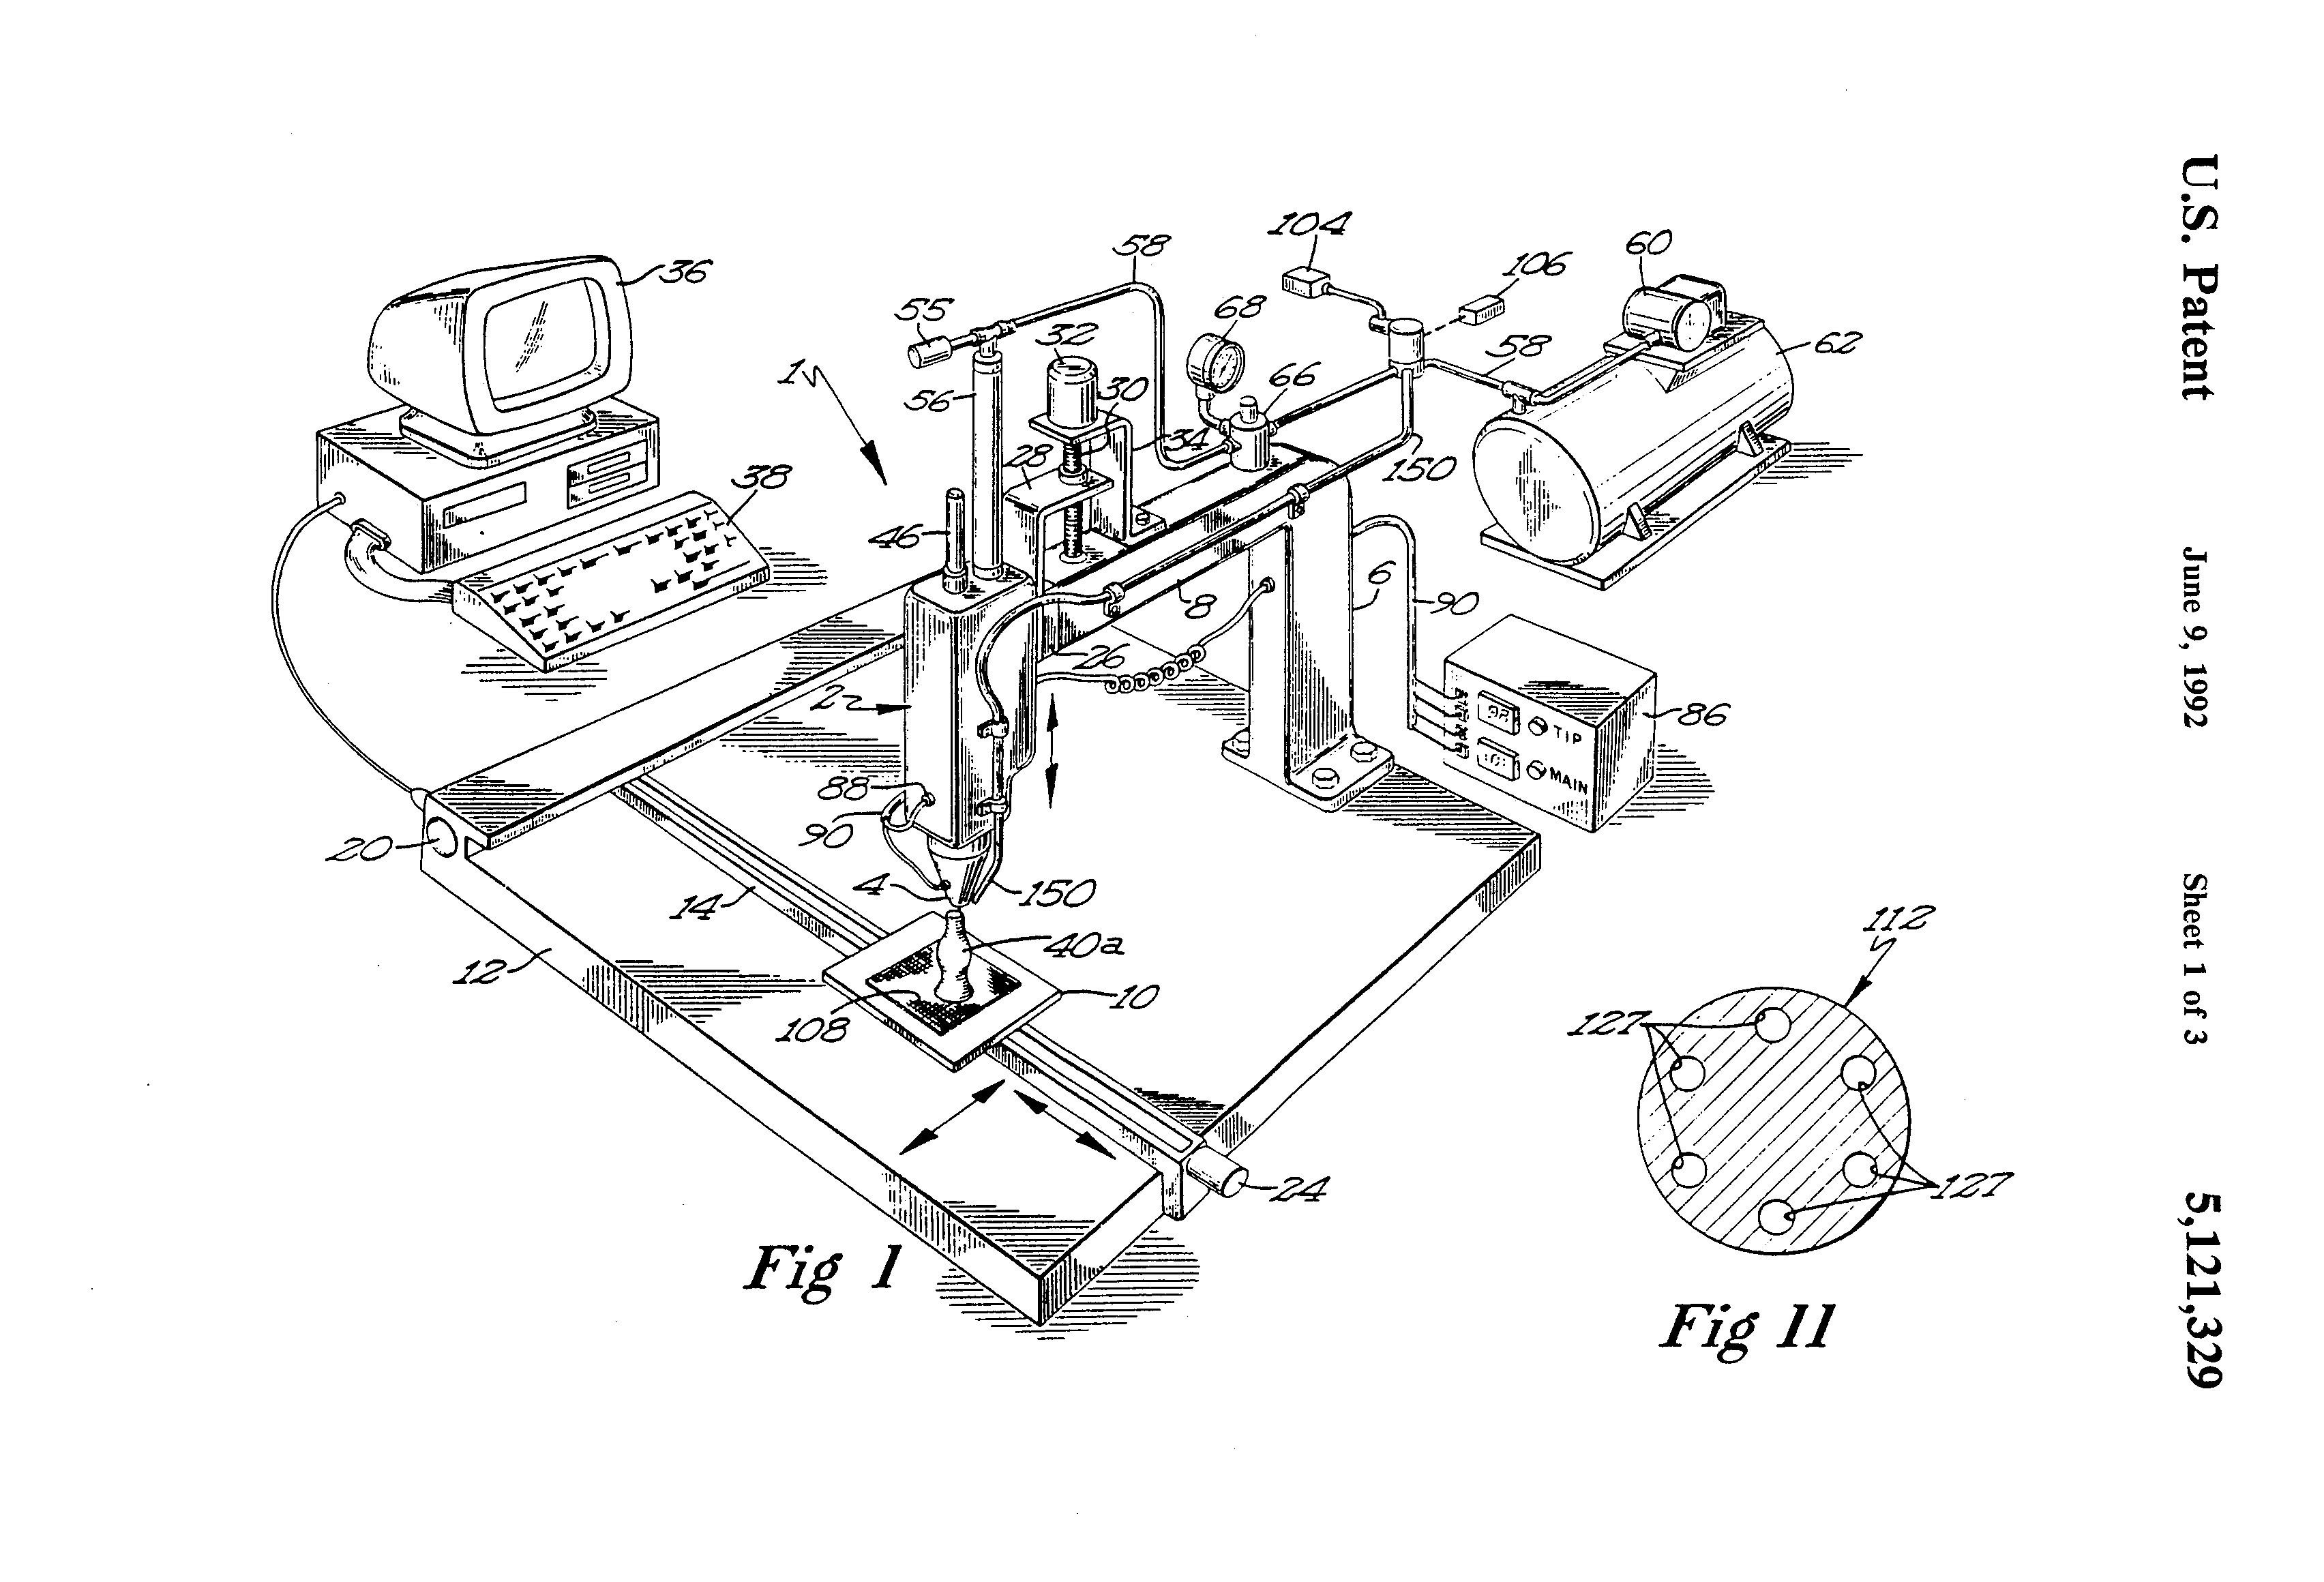
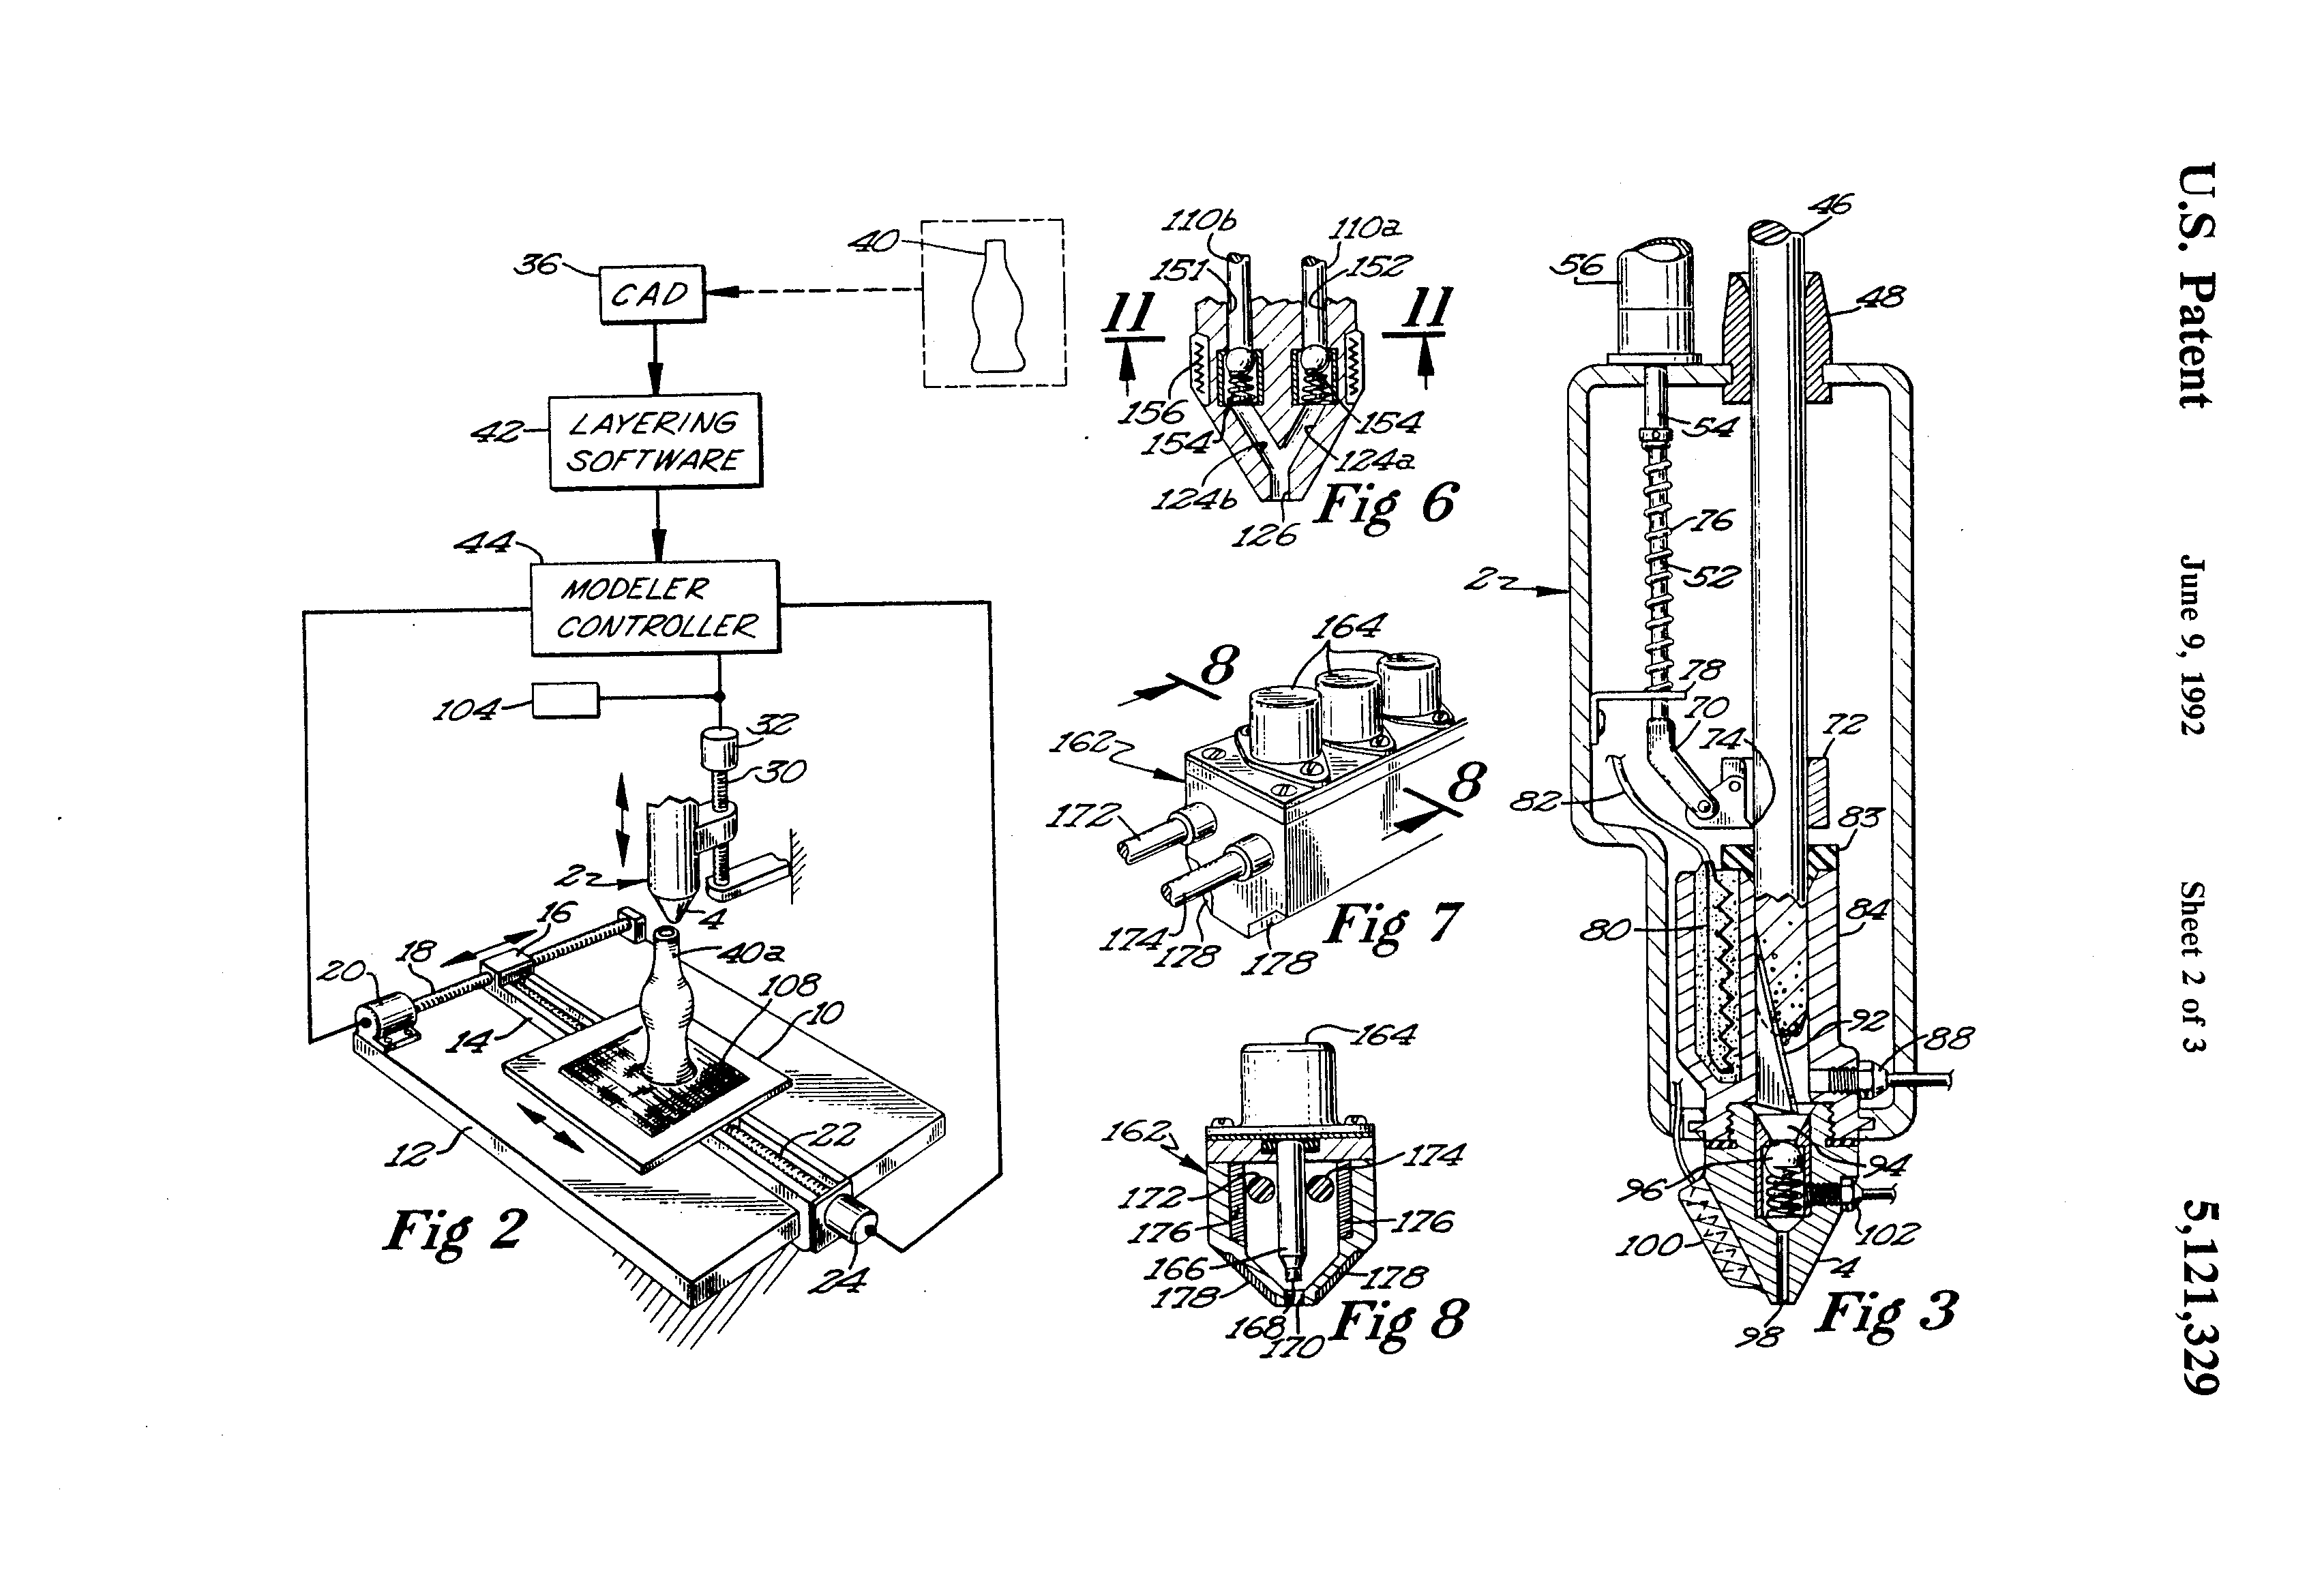
And so most approaches were secured with patents by companies like Stratasys, like the famous US #5,121,329: Apparatus and Method for Creating Three-Dimensional Objects (applied 1989, granted 1992) and others were thereby inaccessible for innovation outside of the patent holders and due the high pricing also inaccessible for users – a period of stagnation happened.
Scott Crump, US Patent #5,121,329Scott Crump, US Patent #5,121,329Scott Crump’s first Stratasys 3D Printer (1991)
Once the patents expired (~2009), and that’s truly a lesson against patents, a surge of innovation occured and the prices for 3D printers fell from 100K+ USD range below 3K USD for the same functionality and print quality.
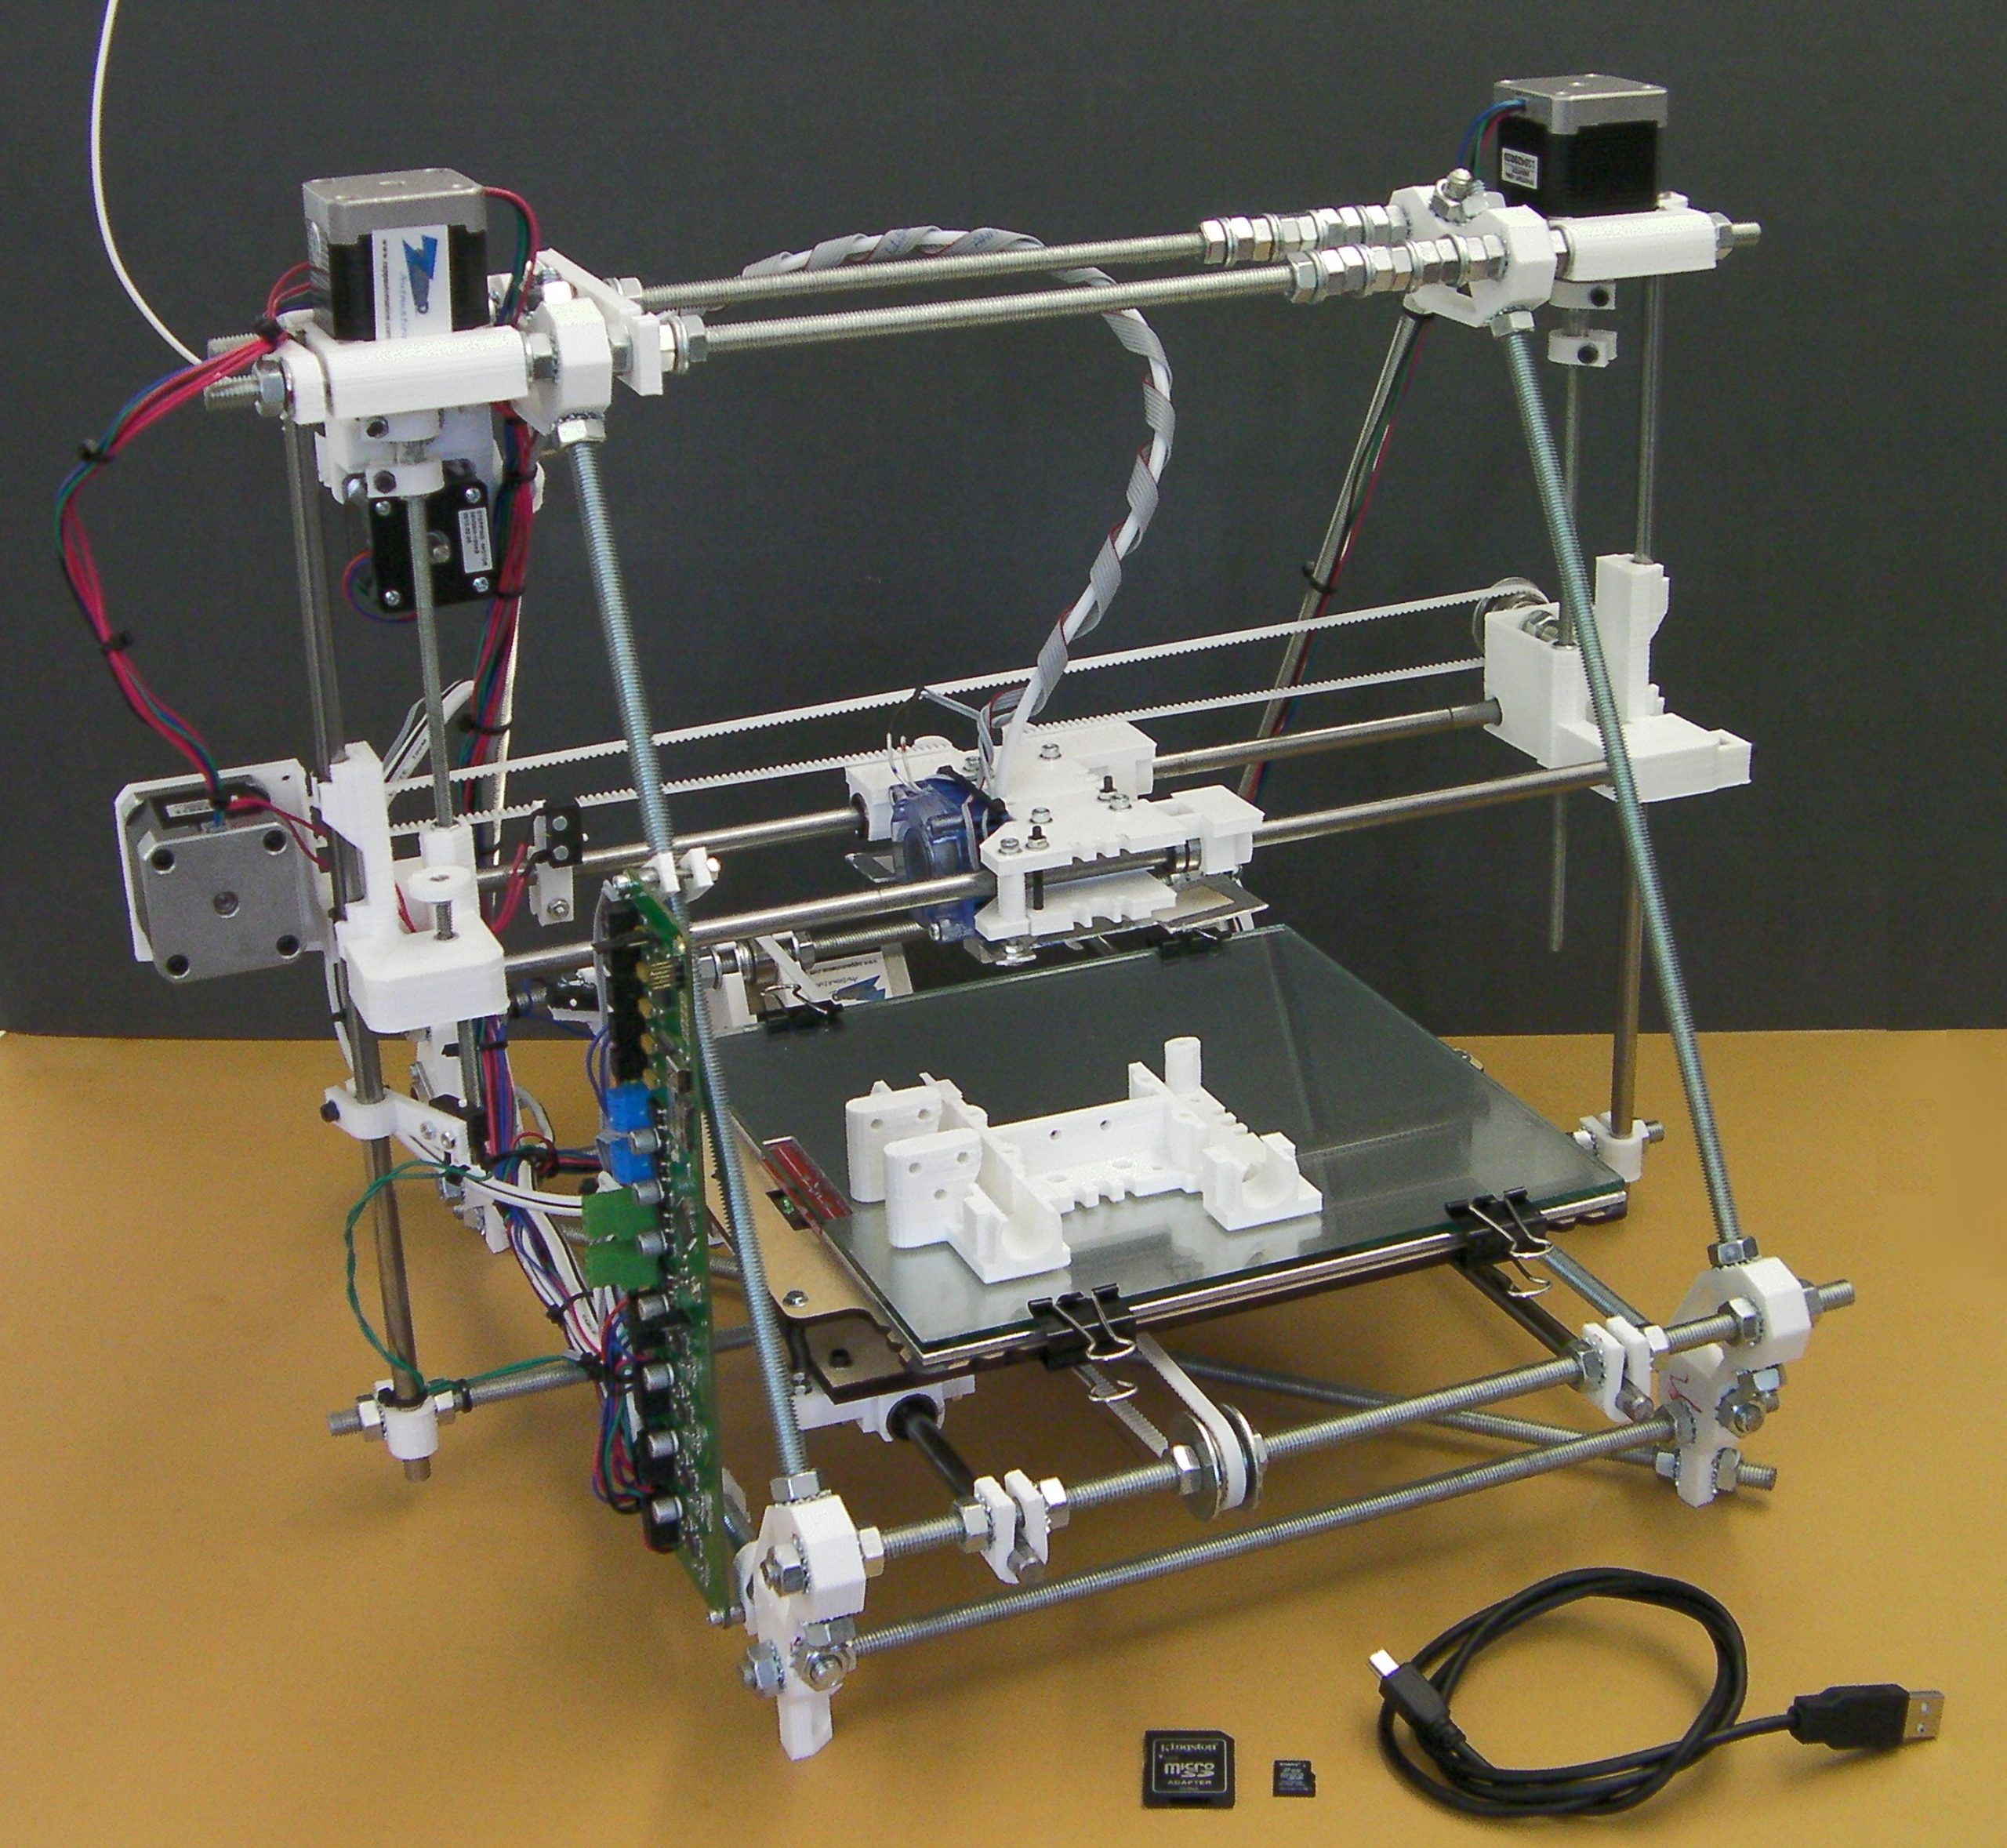
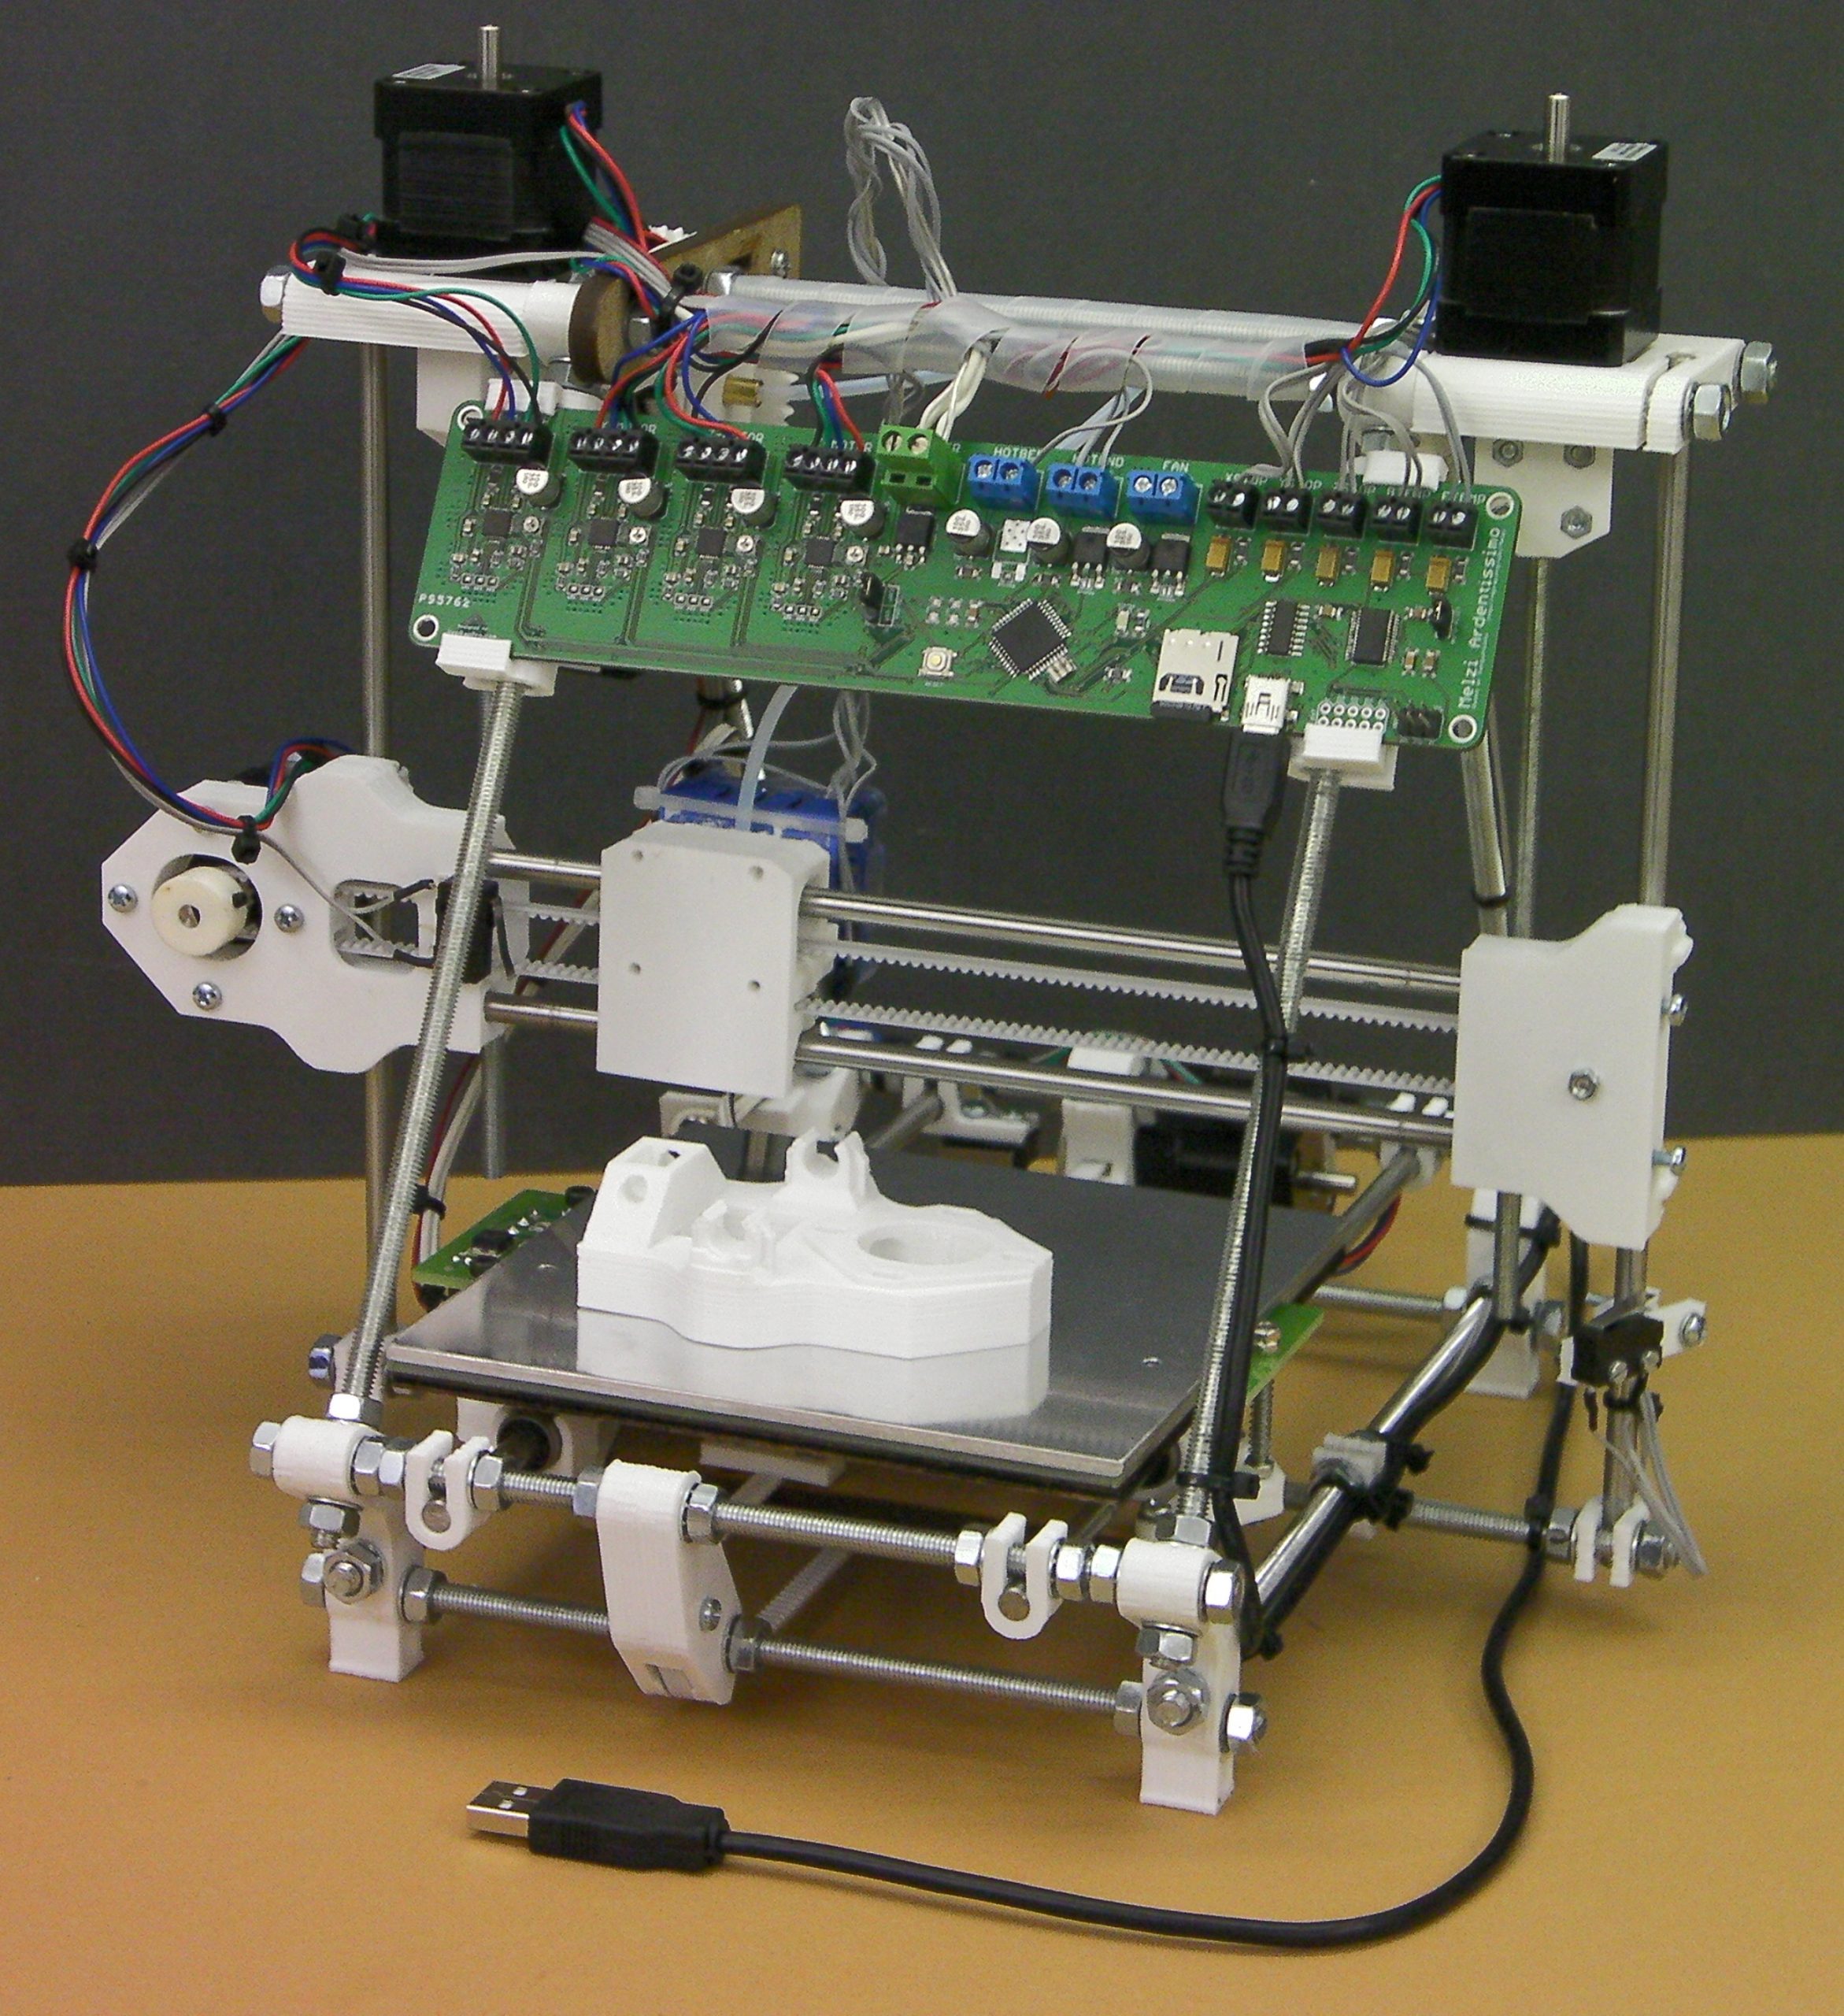
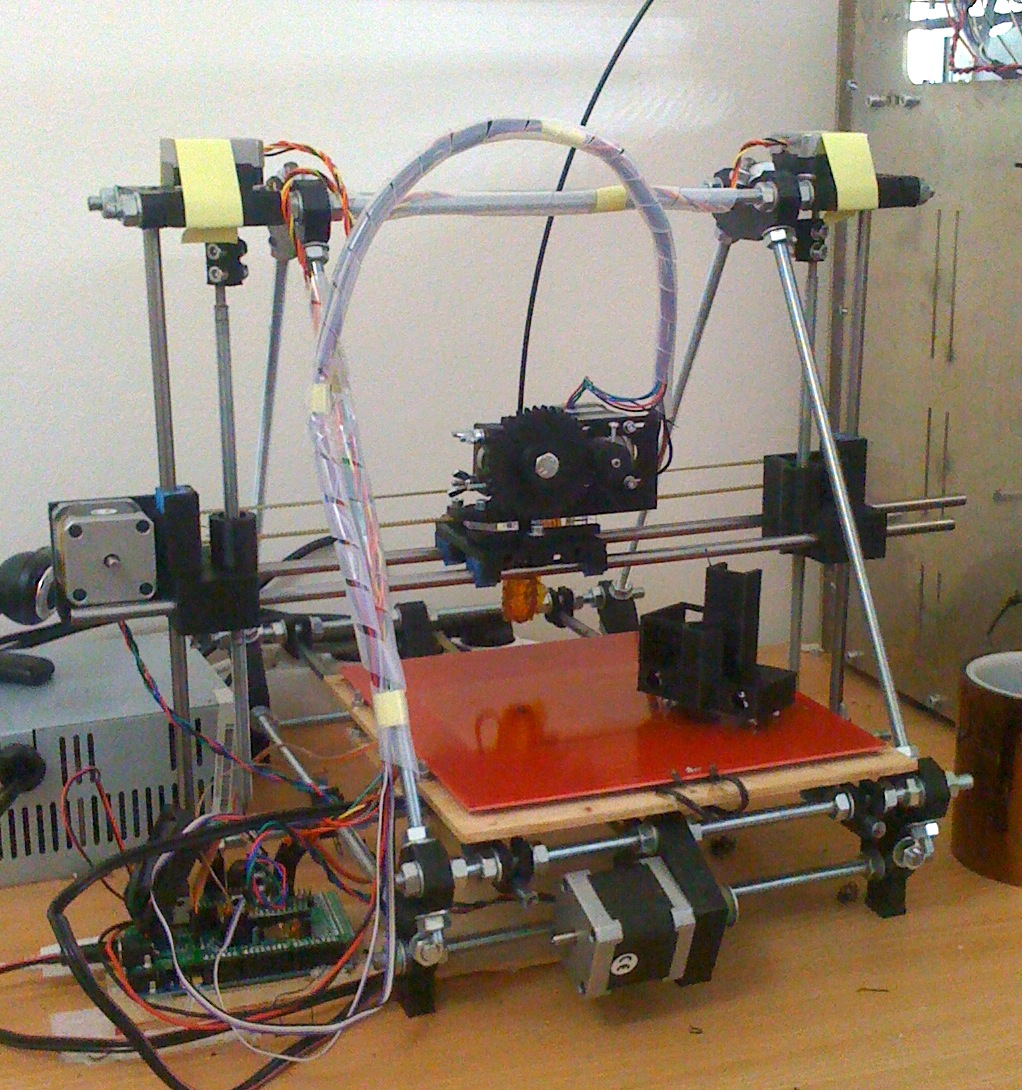
Adrian Bowyer, a british academic, coined the term of RepRap (2005), the replicating rapid prototyping and designing 3D printers which can print parts for itself: self-replication. Hobbyists started to adapt the design and push it further, since all plans were Open Source aka Open Source Hardware, it was easy to improve and iterate the designs. Eventually the Prusa Mendel as developed by Josef Prusa and reduced overall complexity and his next iteration was most significant: Prusa i3 (2012). This third iteration became quasi standard for low cost 3D printers for the next years and his Prusa Research company surged. See also RepRap Principle and RepRap.org Blog Archive.
RepRap Darwin by Adrian Bowyer (2007)RepRap Mendel by Adrian Bowyer (2009)RepRap Huxley by Adrian Bowyer (2010)Prusa Mendel by Josef Prusa (2010)Prusa i3 by Josef Prusa (2012)
RepRap Darwin: XY head and Z bed, threaded rods based
RepRap Mendel & Huxley: XZ head and Y bed, threaded rods based
Prusa Mendel: XZ head and Y bed, threaded rods based
Prusa i3: XZ head and Y bed, laser cut XZ frame
Josef Prusa summarizing his history 2010-2019, representing part of the spirit of the RepRap movement:
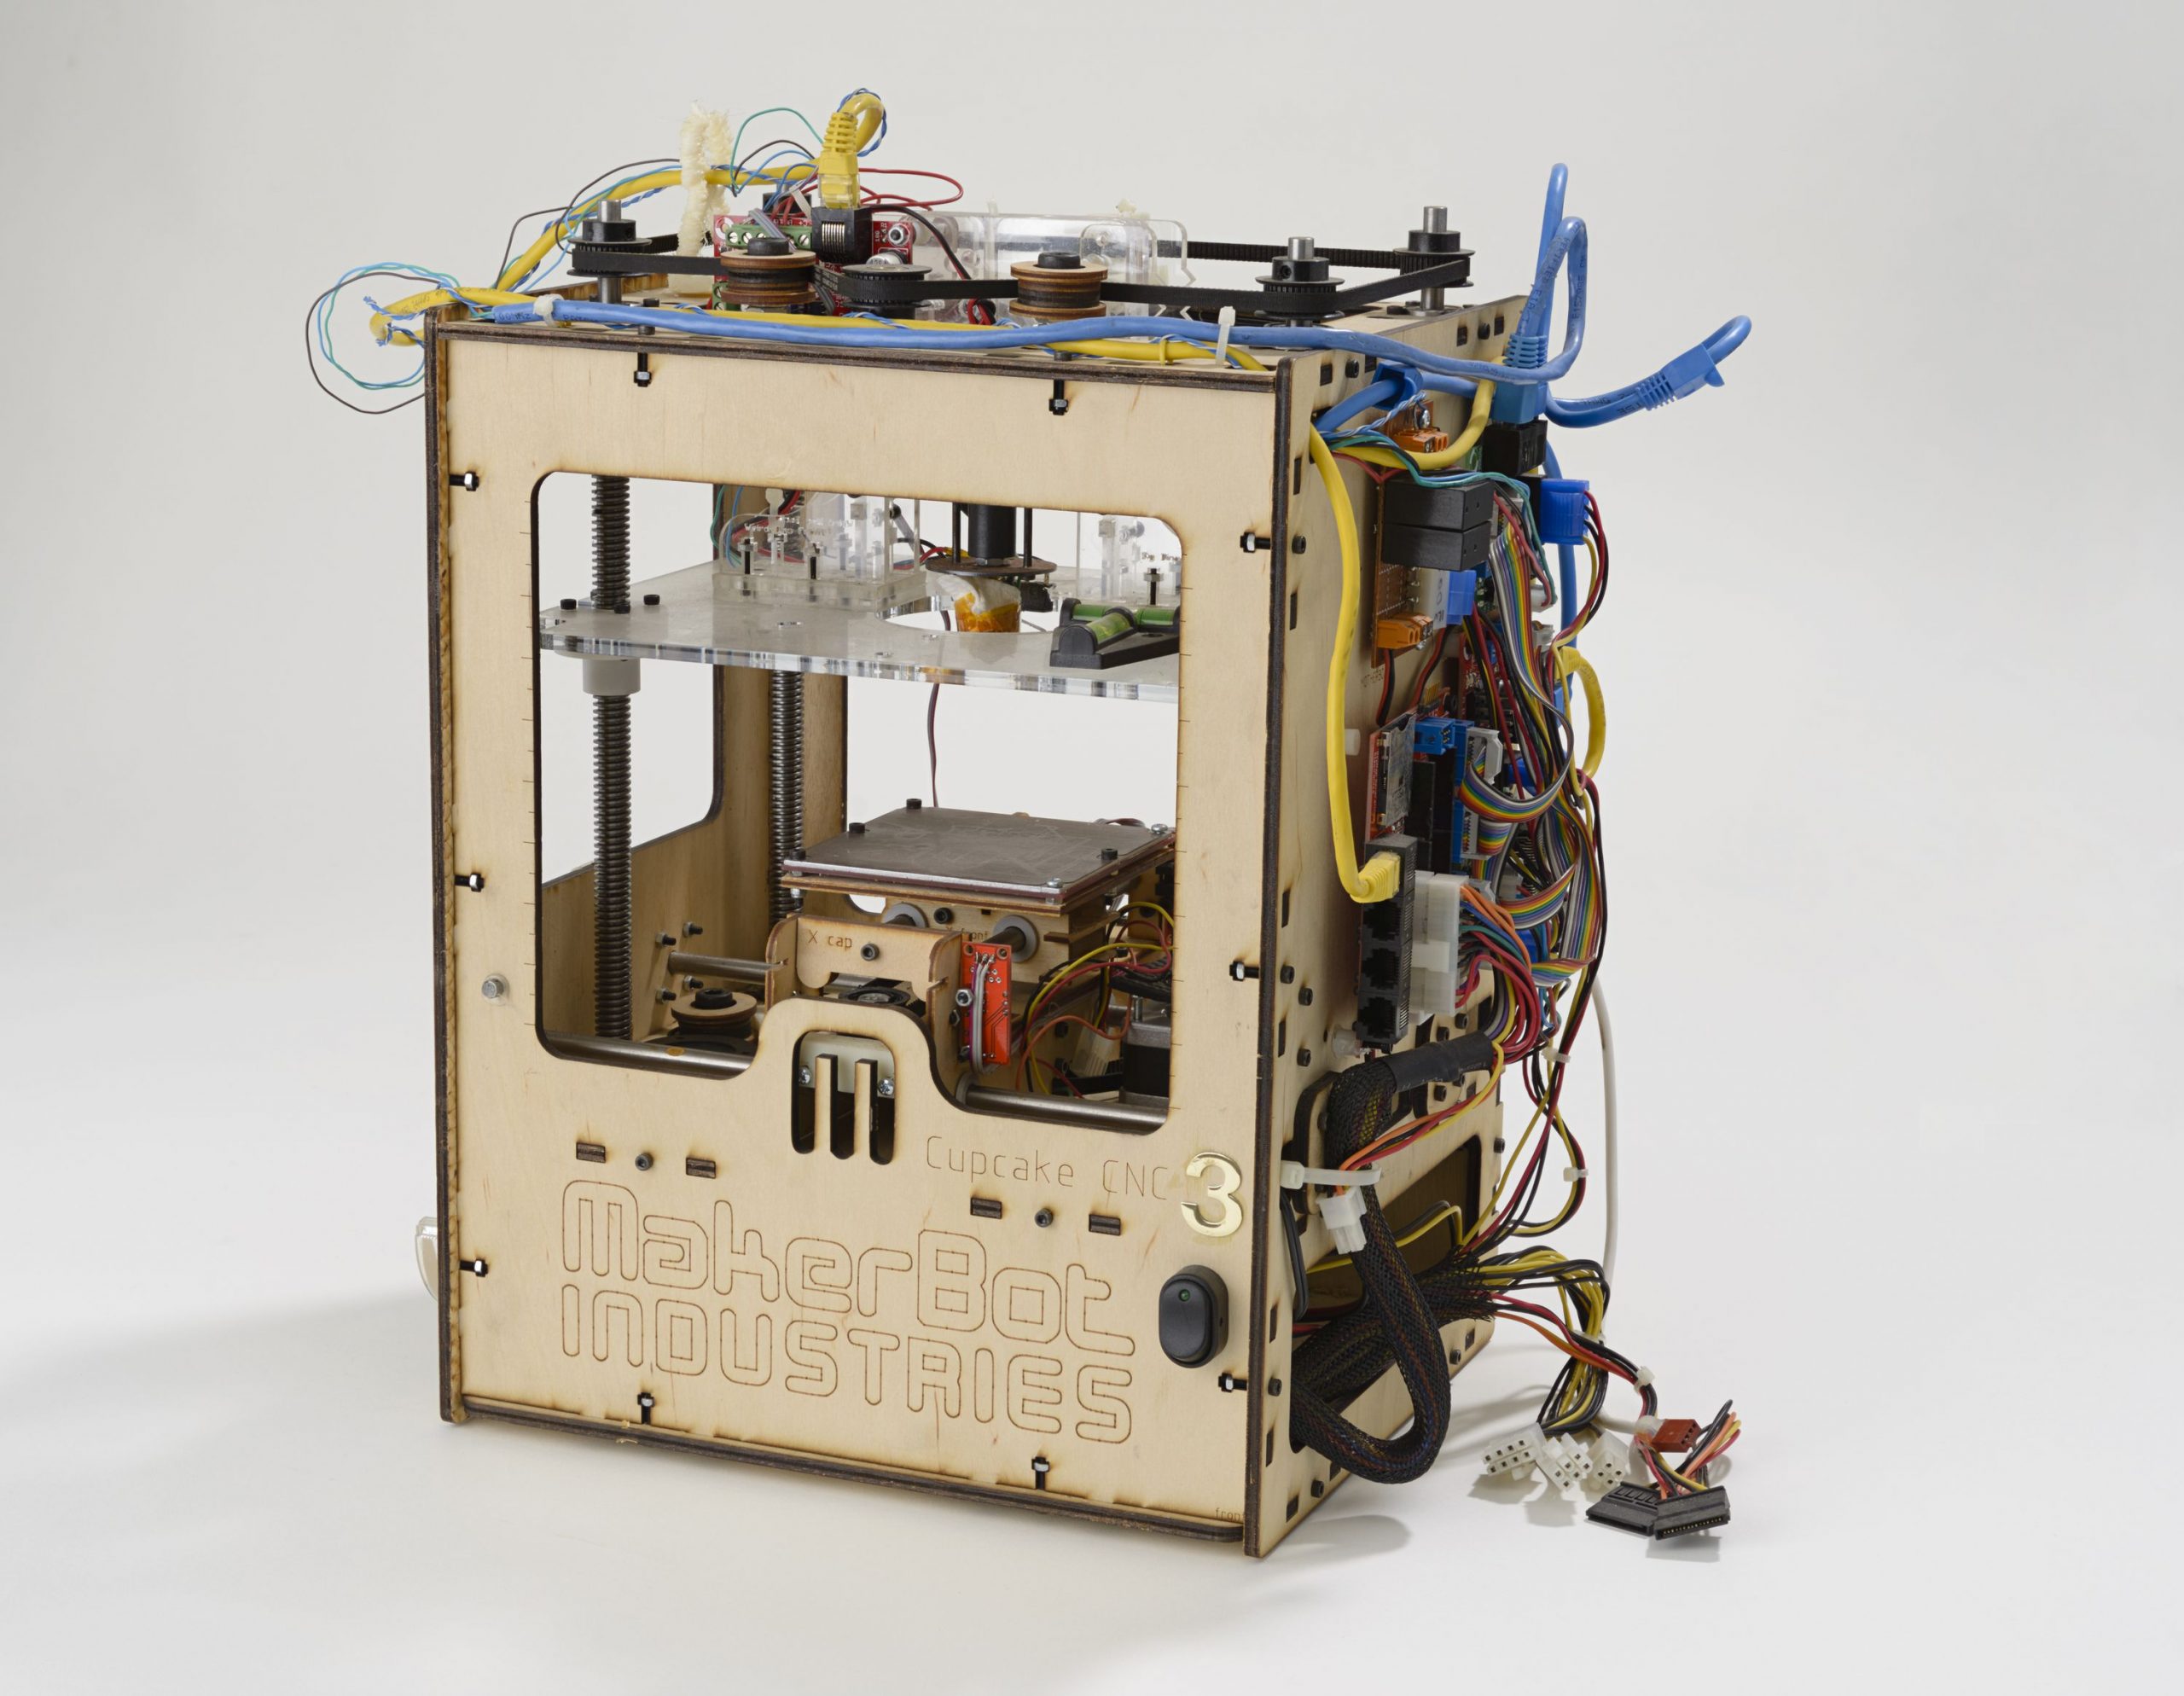
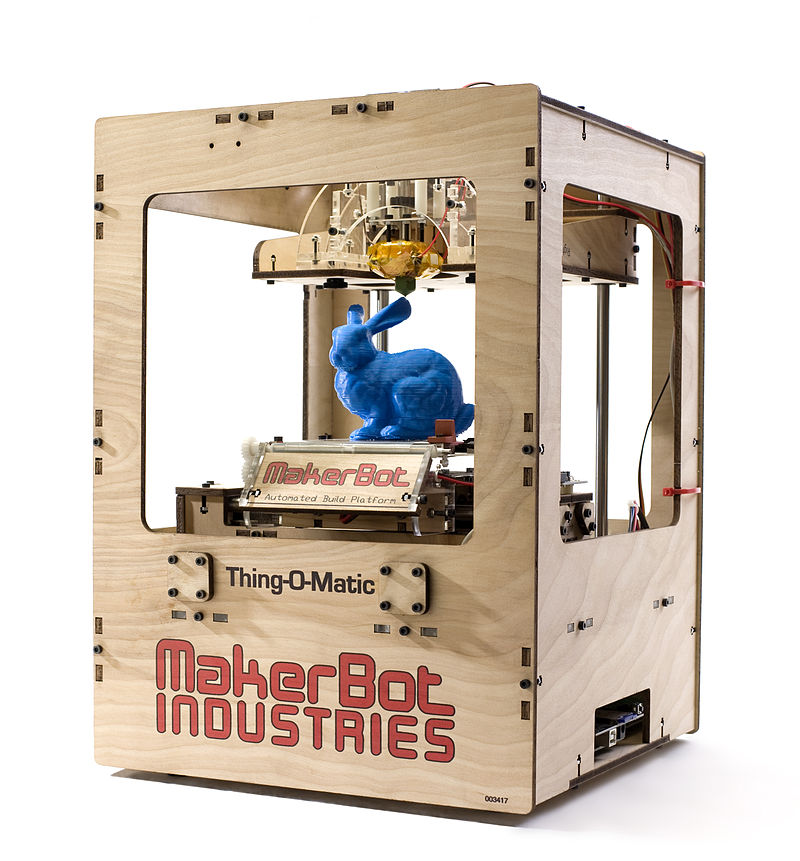
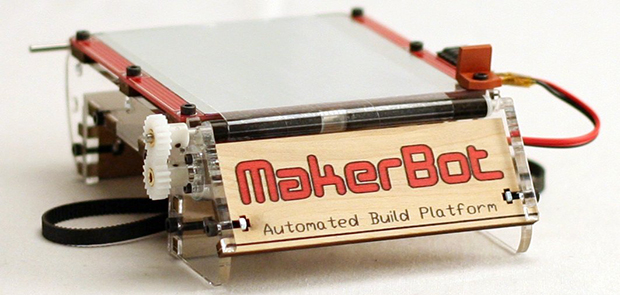
2009-2013: MakerBot & Thingiverse
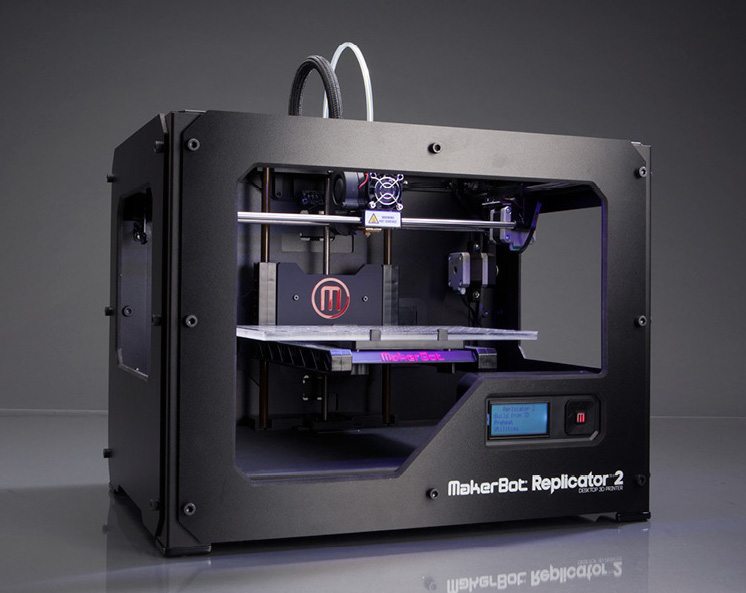
US-based MakerBot was at the beginning (2009) a major driving force to the Open Source 3D printing community as partially funded also by Adrian Bowyer and his wife. MakerBot also runs Thingiverse, the major repository of free 3D models and designs for 3D printing. As MakerBot struggled with sales, after receiving Venture Capital and later bought by Stratasys (2013) it left the Open Source principle at the same time Thingiverse struggled since to stay functional (2019). In 2020 Thingiverse was given some attention, it seems now taken care of better.
Thing-o-Matic: Z head, XY bed, laser cut wood frame
Replicator 2: XY head, Z bed, metal frame
2011-2016: Kickstarter Hype
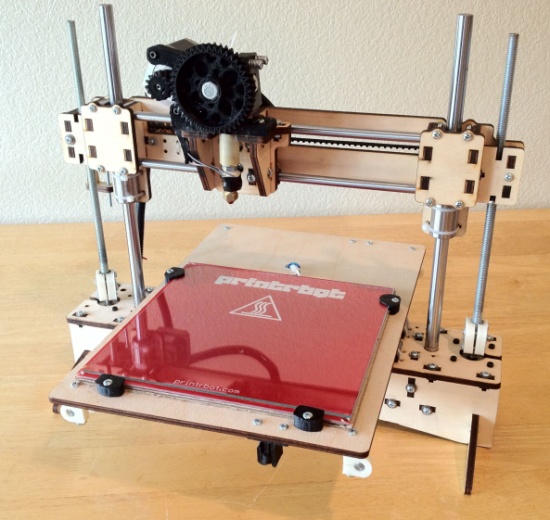
With the expiration of patents held by Stratasys and other companies (2009-), the surge for Kickstarter-based 3D printers began, sub 1000 USD printers became widely available, but also many failures and plain scams happened. Printrbot started as Kickstarter and thrived for a few years as US-based 3D printer company, also Snapmaker and FORM 1 by Formlabs made a successful debut, while sub 100 USD 3D printer like MakiBox, metal Eventorbot or slick Buccaneerfailed at different stages.
In 2016-2018 chinese manufacturers (Geeetech, Creality, Anycubic, FLSUN, TEVO, CTC etc.) started to develop Prusa i3-like machines and the companies started to copy each others parts and improvements at a rapid pace. As a result, many small US companies, like Printrbot, which contributed significantly to the Open Source movement, closed doors for good (2018).
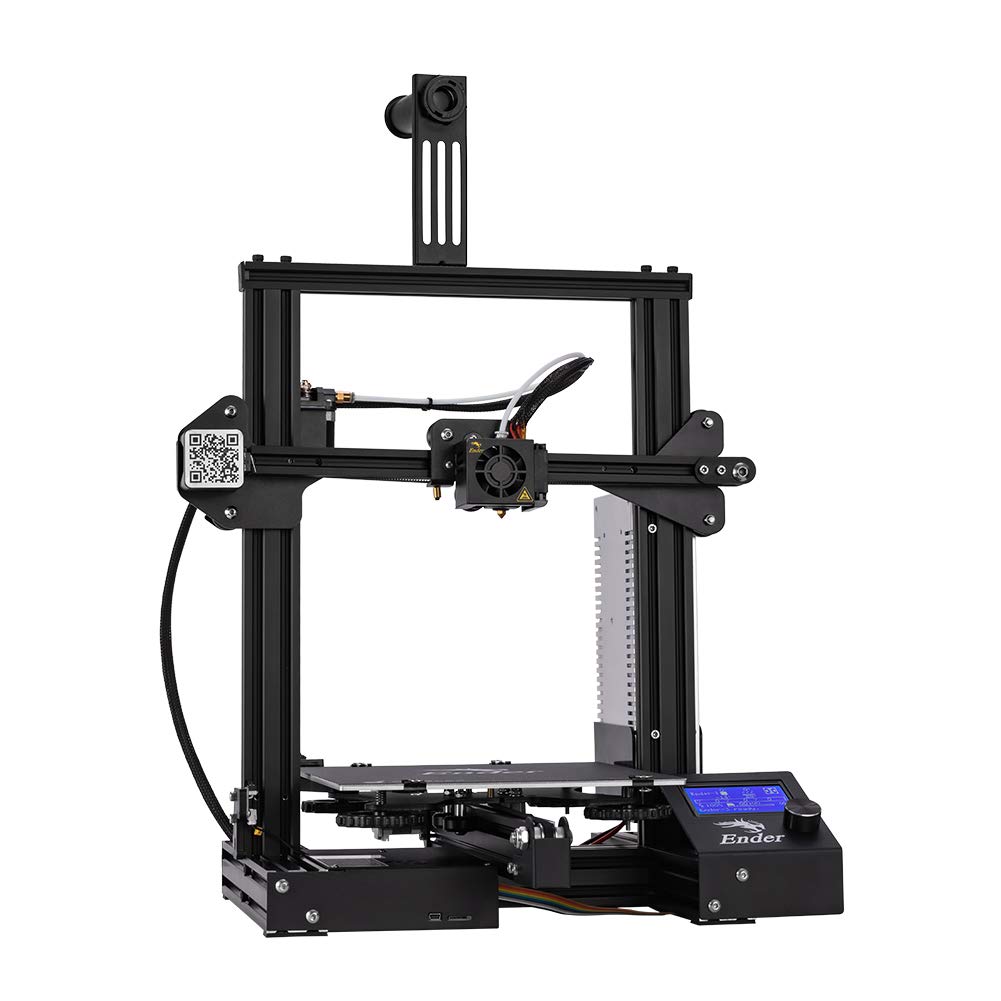
A big game changer was Ender 3 as manufactured by Creality, priced at USD 150-200 incl. shipment, providing excellent printing quality, at a price which was hard to compete by anyone else. Notable was, Creality open sourced Ender 3 entirely, as the Open Source community built up pressure to chinese manufacturers which spit out each month a new Prusa i3 derivative (e.g. different build volumes, slight improvements of extruders etc) back in 2018/2019.
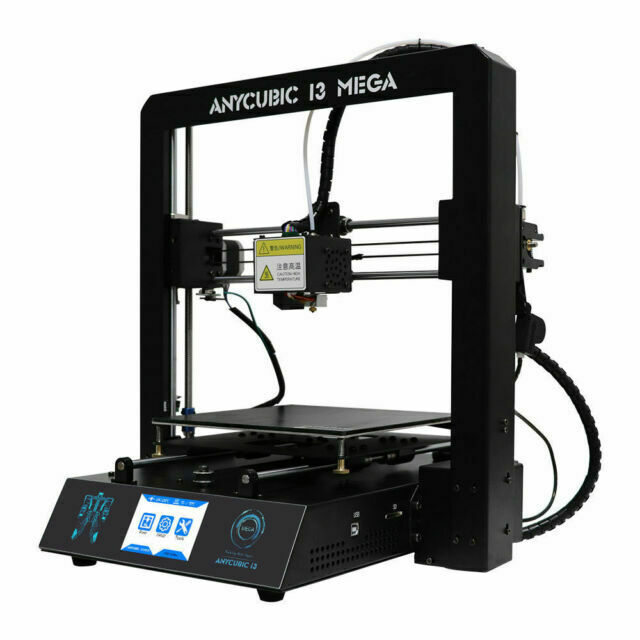
Anet A6 (2016)CR10 (2017)Anycubic i3 Mega (2017)Ender 3 (2018)
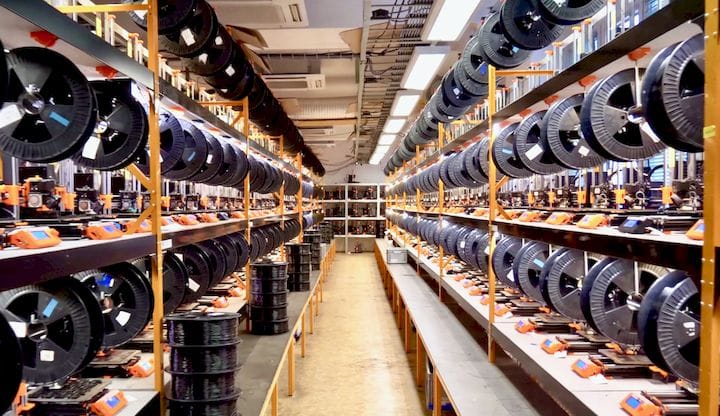
As a side note, the chinese manufactured 3D printer broke the RepRap principle and used other means to produce their parts, while Prusa Research has a 3D printer farm to manufacture their parts.
Prusa Research 3D printer farm (2018)
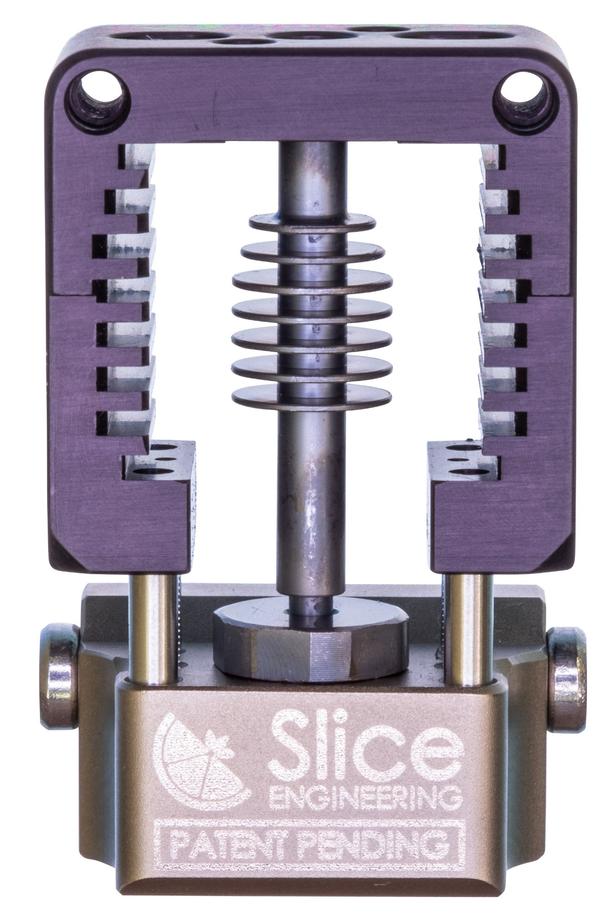
Western Innovation & Chinese Manufacturing
Mosquito hotend by Slice Engineering (2018) Closed Source, Patent Pending
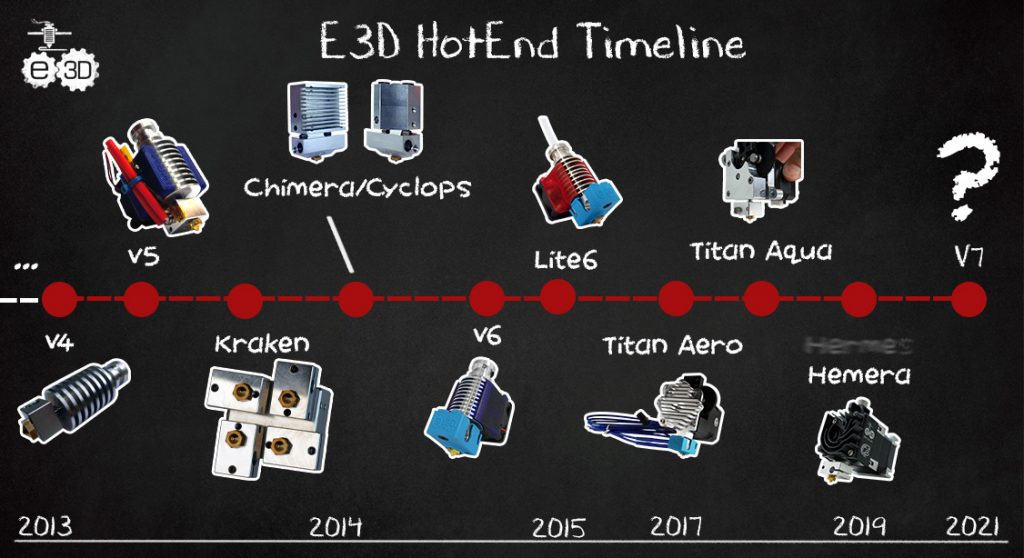
It became obvious the past years (2010-2019), that true innovation still remained in the west, Czech-based Prusa Research, Denmark-based RepRap.me with Diamond Hotend (3-in-1 and 5-in-1), or UK-based E3D or US-based Slice Engineering with their hotends and extruder technology, and the chinese manufacturer which cloned or copied the Closed- and Open-Source designs within weeks and sold at fraction of the price as by the original inventors. Often chinese manufactures tried to simplify hotend designs and compromised significant features – to copy a design didn’t mean the design was understood.
As pointed out, Creality, one of the big chinese 3D printer manufacturer, started to adapt and join the Open Source Hardware movement, with the release of the Ender 3 source files and get properly certified – time will tell – as of end of 2019 – if they stay true to their commitment, and whether other chinese 3D printer manufacturer follow and become also actual innovators.
In late 2020 Creality announced a belt-based printer named CR-30 aka 3DPrintMill as a result of collaboration with Naomi Wu and acknowledging all the previous research of developers like Bill Steele and Karl Brown (White Knight Belt) the printer is based on – and renewed their commitment to Open Source the CR-30 – a nice development.
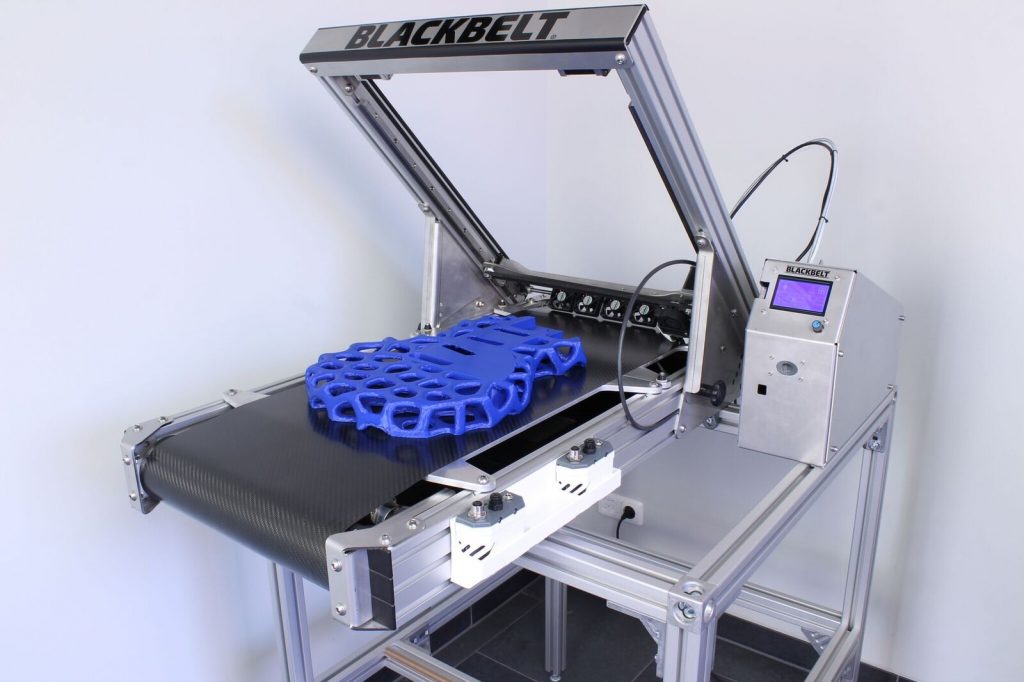
Makerbot Automated Build Plate (ABP) (2010)Bill Steele Tilted Belt Printer (2016)Blackbelt (2017)White Knight Belt 3D printer at MRRF 2019CR-30 aka 3DPrintMill by Naomi Wu (2020)
2021: Voron, Prusa XL, E3D Revo
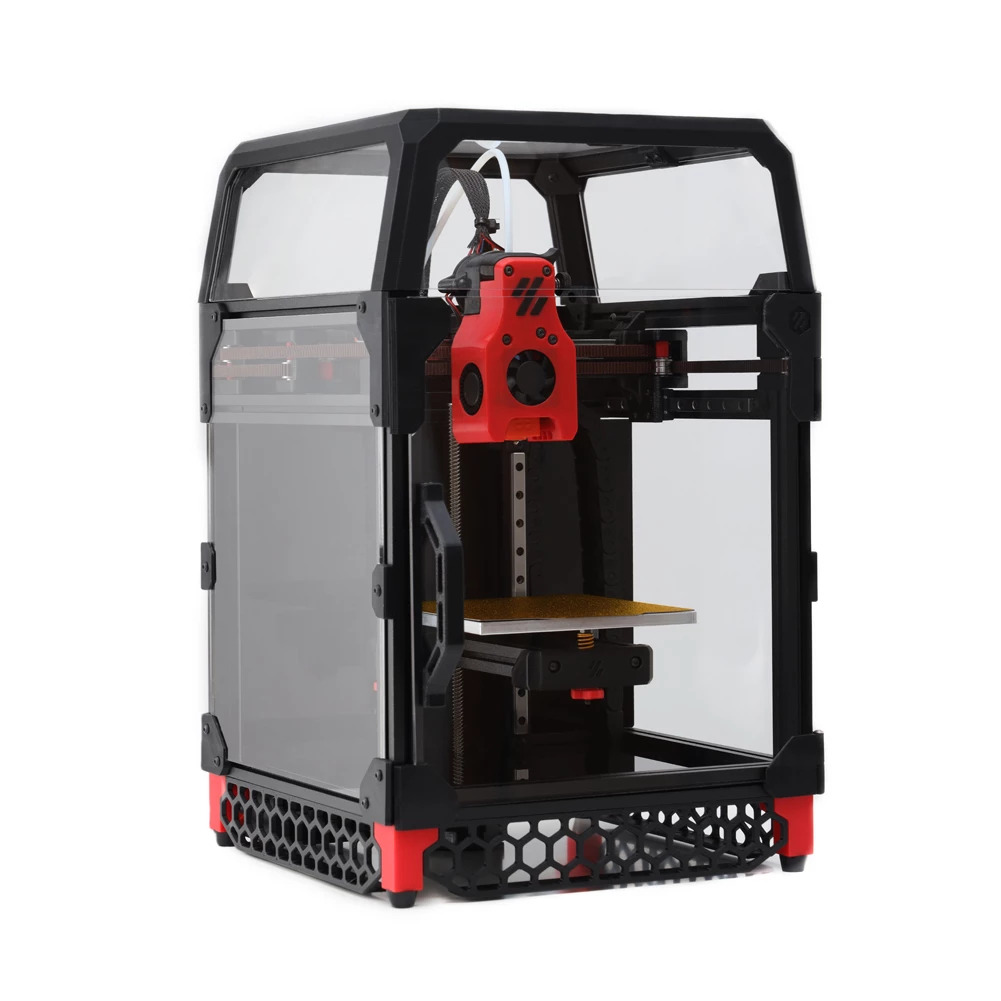
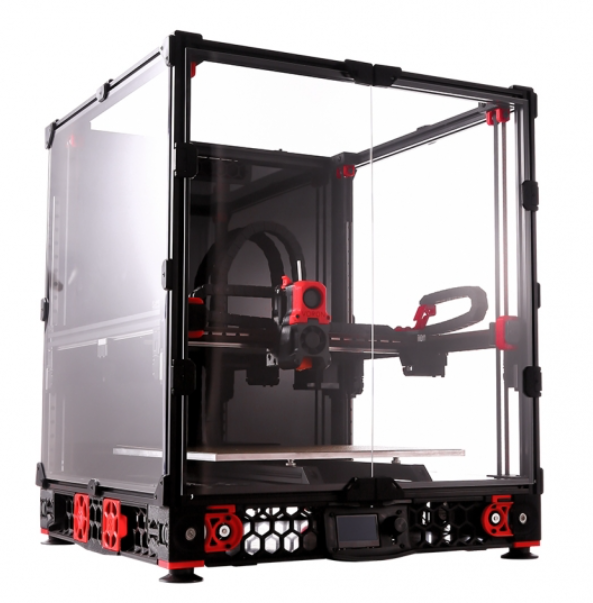
A loosely organized Maker group developed various 3D printers under the brand Voron Design which gained momentum in the Maker community:
CoreXY (Voron 0.x, 2.x, Trident) or CoreXZ (Voron Switchwire)
sturdy well engineered frame design
tuned toward reliable and fast printing
properly documented (CAD models, bill of materials)
fully open source
no commercial frontend (no single store to buy assembled Vorons, only kits)
Voron printers became well-known in 2021 and widely adapted among people who wanted to build their own printers.
Voron 0.1Voron 2.4
Various skillful Makers tuned the printer design toward very fast printing, high motion speeds and acceleration, to achieve 3D Benchy prints below 10mins at acceptable quality aka “Speed Benchy”.
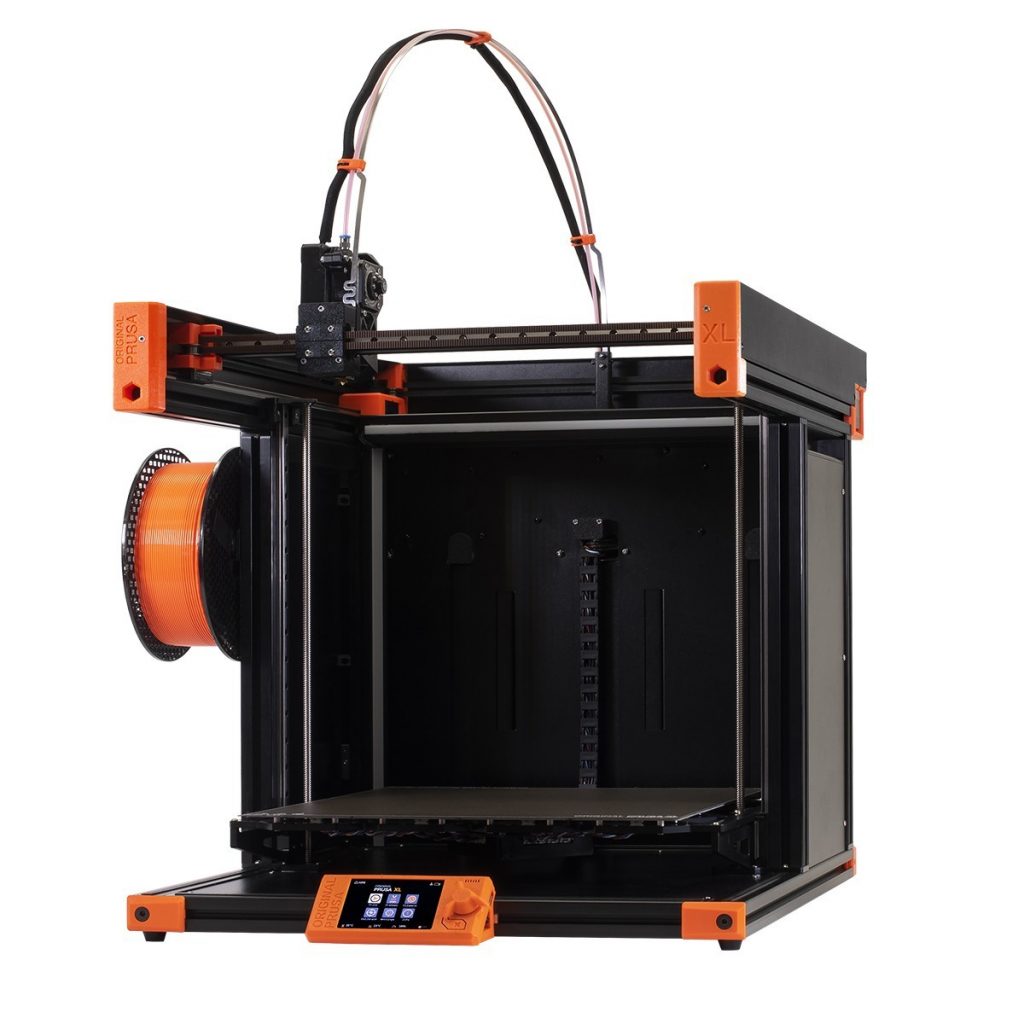
Prusa XL (CoreXY)
At Formnext 2021 (November 2021) Prusa Research announced the Prusa XL, a CoreXY cubic frame 3D printer, with interesting features:
ability to sense blocked nozzle, indirectly by measuring bending of print head with a load cell
autoleveling done mechanically via same load cell
multiple heating zones in the build plate (only heat where part resides)
multi-material with optional tool changer
foldable curtain to maintain more regulated air temperature within the printer
build-volume 360x360x360mm
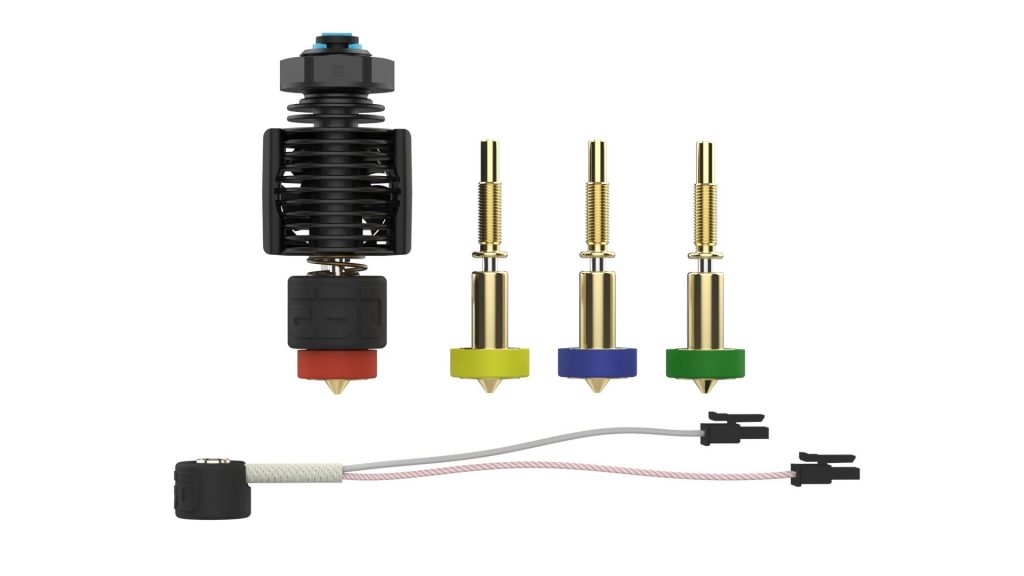
E3D Revo: different nozzle sizes (color coded) manually interchangable
Also in fall of 2021 E3D announced its new generation of print heads, Revo:
manual (un)mounting of print head without tools
nozzle and heatbreak combined
spring loaded tension of heat cartridge with nozzle
partially patented
2022: MakerBot & Ultimaker Merge, Bambu Lab’s X1
In May 2022 MakerBot, owner of Thingiverse and part of Stratasys, announced together with Ultimaker they would merge the coming months, and in September announced to become UltiMaker. MakerBot, who plays no significant role in regards of hardware development anymore, and software development being neglected as well, incl. Thingiverse lumping since many years.
Ultimaker became monetary successful the past years is also showing inertia in hardware innovation, resting on existing hardware designs, at the same time committed to push software development with Cura slicer with fine-tuning details of the slicer, and still doing most of it under Open Source, admirably.
Bamboo Lab X1
Another significant announcement happened in May 2022: Bambu Lab, founded by former DJI (drones) employees, worked the past two years on a new printer called “X1“, which has features hardly even seen in industrial 3D printers:
printing fast at 400mm/s with 10,000 to 20,000m/s2 accelleration
auto leveling (no manual calibration)
auto tuning pressure advance with LiDAR sensor
first layer analysis with LiDAR sensor, measure height and width of extrusions
video analysis of failed prints using built-in camera and AI
multiple materials (up to 16 spools/materials)
dedicated slicer (being open sourced later)
competitive price with USD 900-1500
The only downside is the rather moderate build-volume with 256x256x256mm, but they control that tightly unlike anyone before.
2023 & 2024: Incremental Upgrades
Formlabs resin printer series 4 switched from laser based SLA to UV-light & LCD based MSLA procedure (EUR 5,000-10,000), like the rest of prosumer and consumer resin printers. In June 2024 Micronics LLC launched a Kickstarter compaign for their SLS printer priced at USD 2,500, and after the finish of the compaign, the company was acquired by Formlabs.
Resin printing with more specialized resin types entering SLS and FDM domain (from Formlabs Keynote 2024):
Prusa Research introduced SL1S resin printer in 2021 with a tilting vat, and Elegoo followed then with Mars 5 Ultra & Saturn 4 Ultra in 2024, priced at EUR 300 & 400, also having a tilting vat / tilt release mechanism, which decreases layer printing time by ~50% from ~10s to ~5.5s, and therefore overall printing time as well, e.g. increase from 18mm/hr in Z height to 32mm/hr at 50μm or 64mm/hr at 100μm layer height.
Elegoo also introduced a massive FDM OrangeStorm Giga with a build volume of 800x800x1000mm, priced at EUR 2,500. Sovol SV08 (Voron 2.4 / CoreXY) becomes available at USD 750, with a build volume of 350x350x330mm.
It seems Bambu Lab has reached of market share where they are relevant for Stratasys, e.g. also protect their UltiMaker branded prosumer FDM series which have shown no relevant innovation since 5+ years.
2025: Price of Closed Source, Tool Changers
Bambu Labdecided (2025/01/17) to change the way their printers are accessed, introducing “security” locking 3rd party software and hardware out, and breaking thereby workflows and trust into the company and their printers. Smaller 3D printing companies seem to like Bambu Lab for its reliability and integrated eco-system – two sides of different demands.
Multi Material with Tool Changer
Tool changer is the way to go to print multiple materials with different temperatures or different colors with minimal purging/cleaning, as one only have to purge the “cooked” (remained) filament is waiting and become reused again.
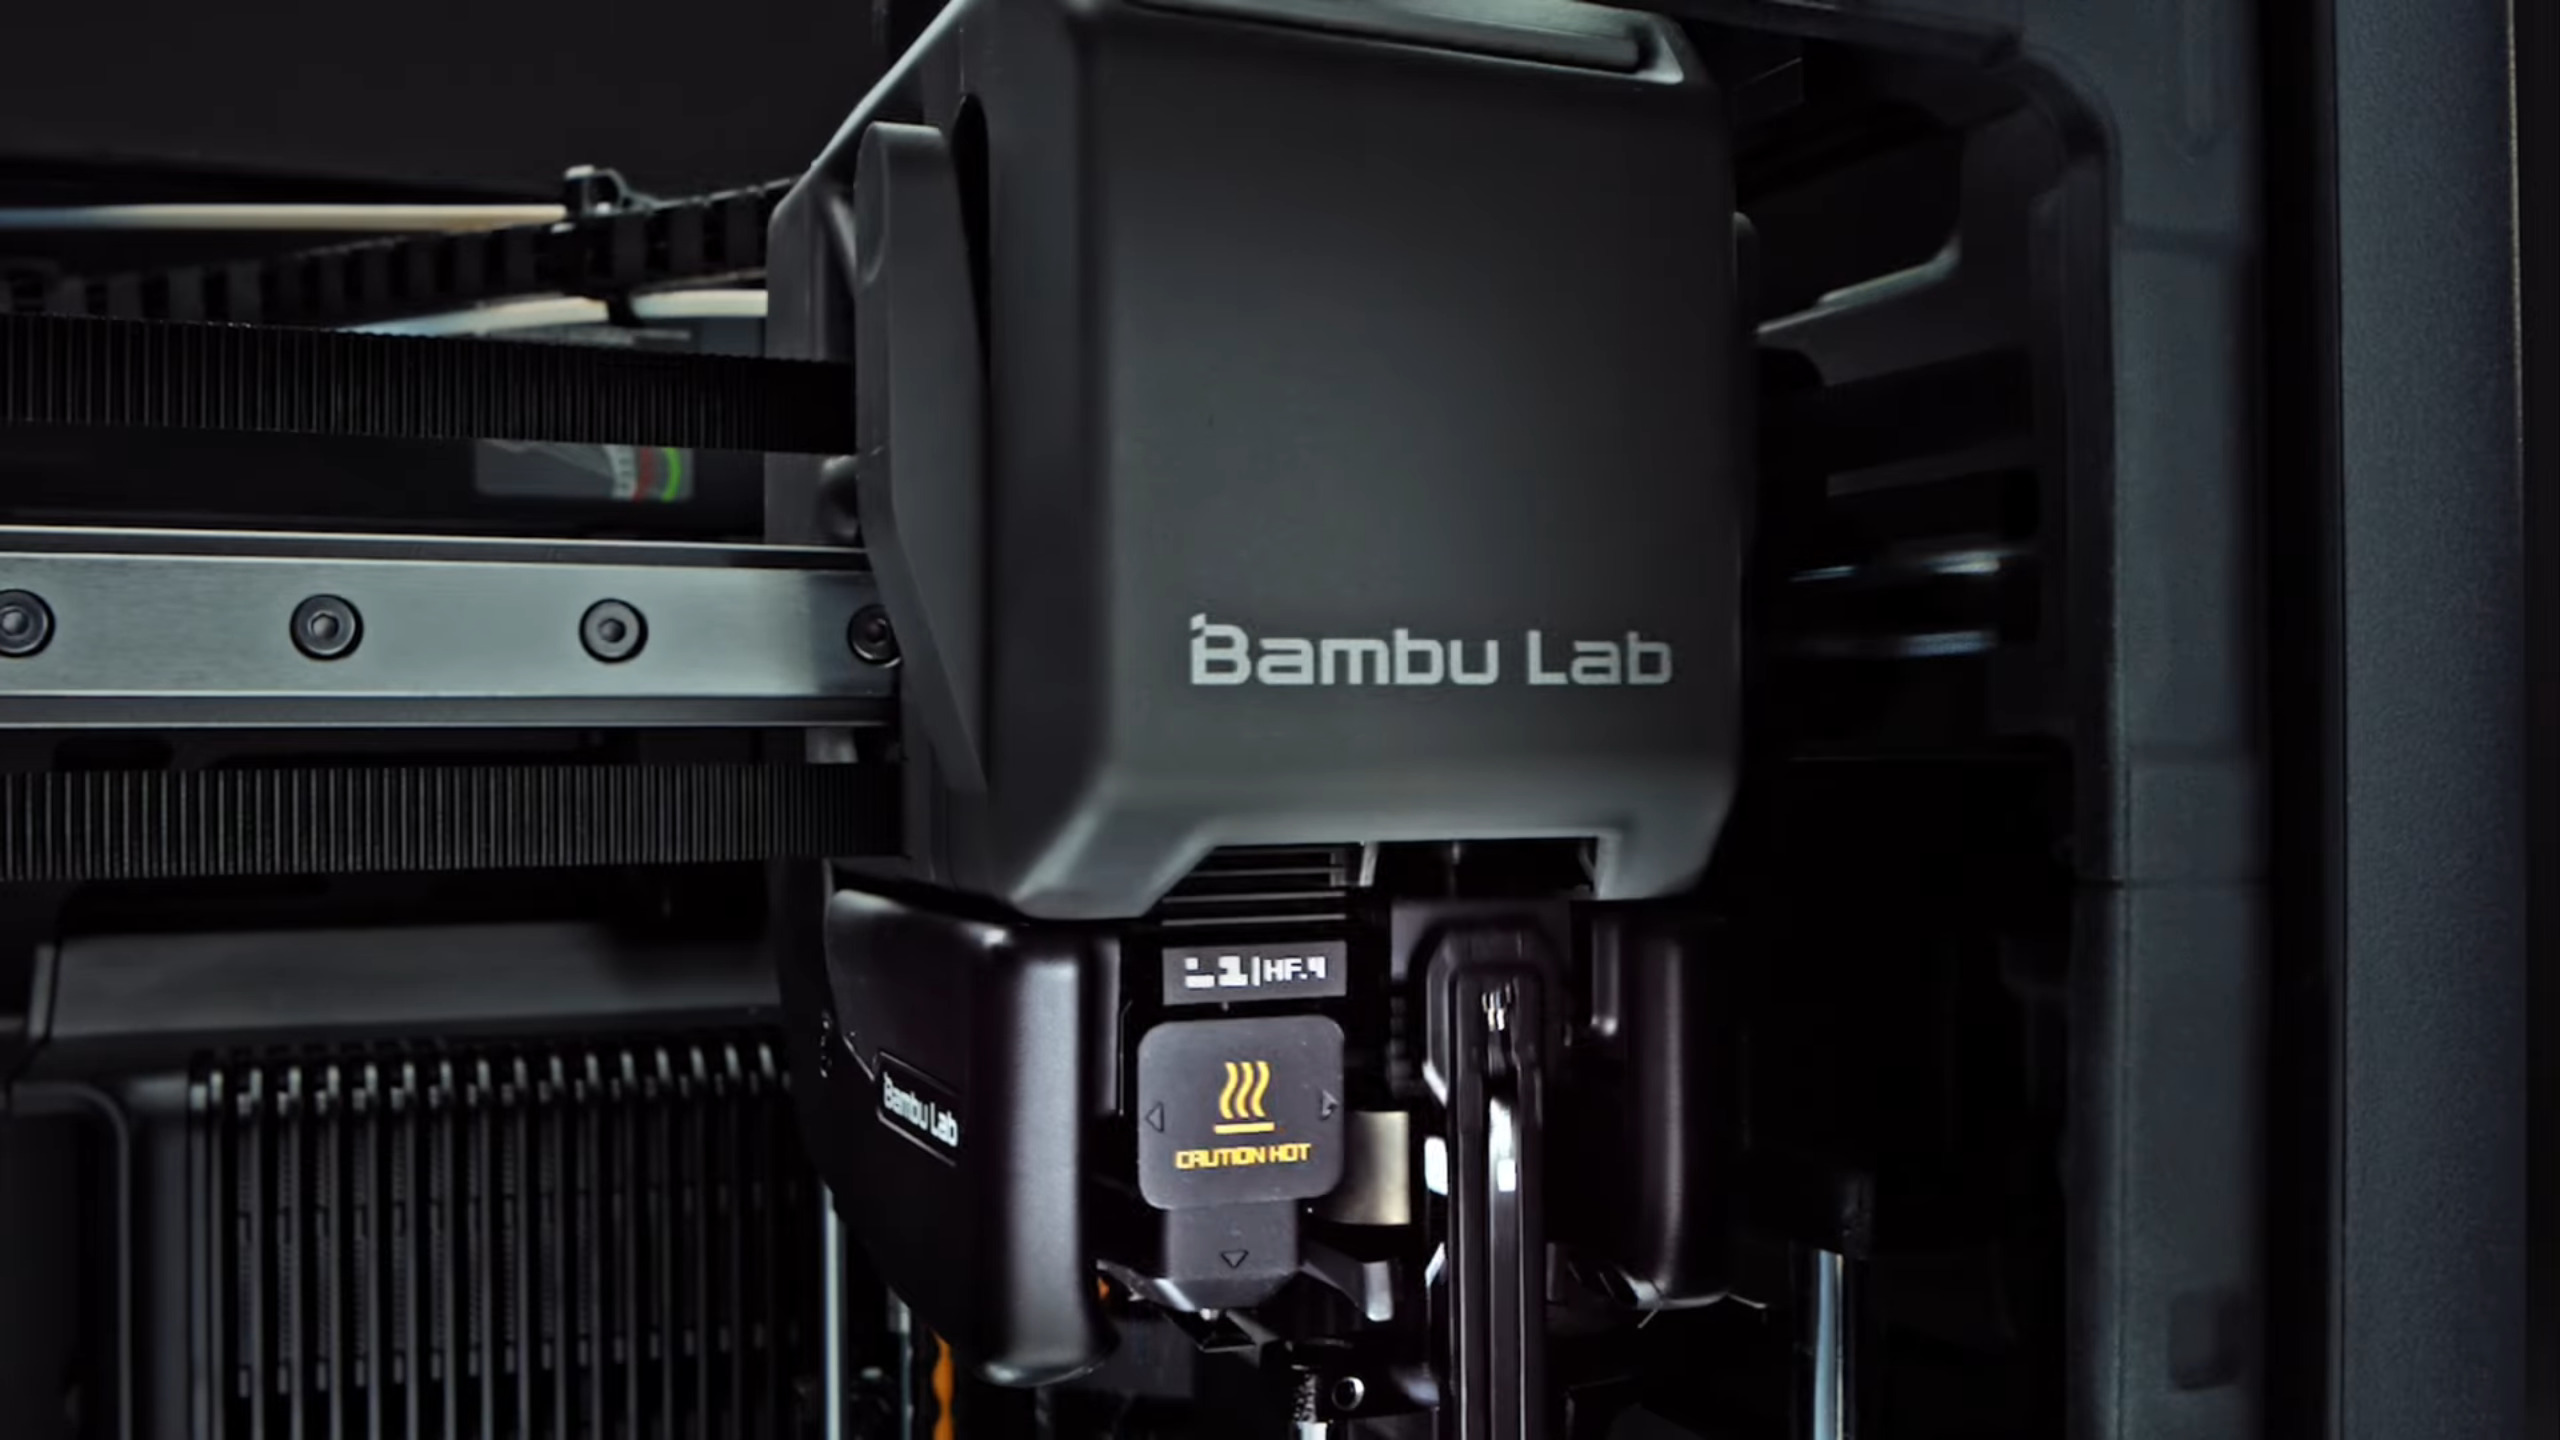
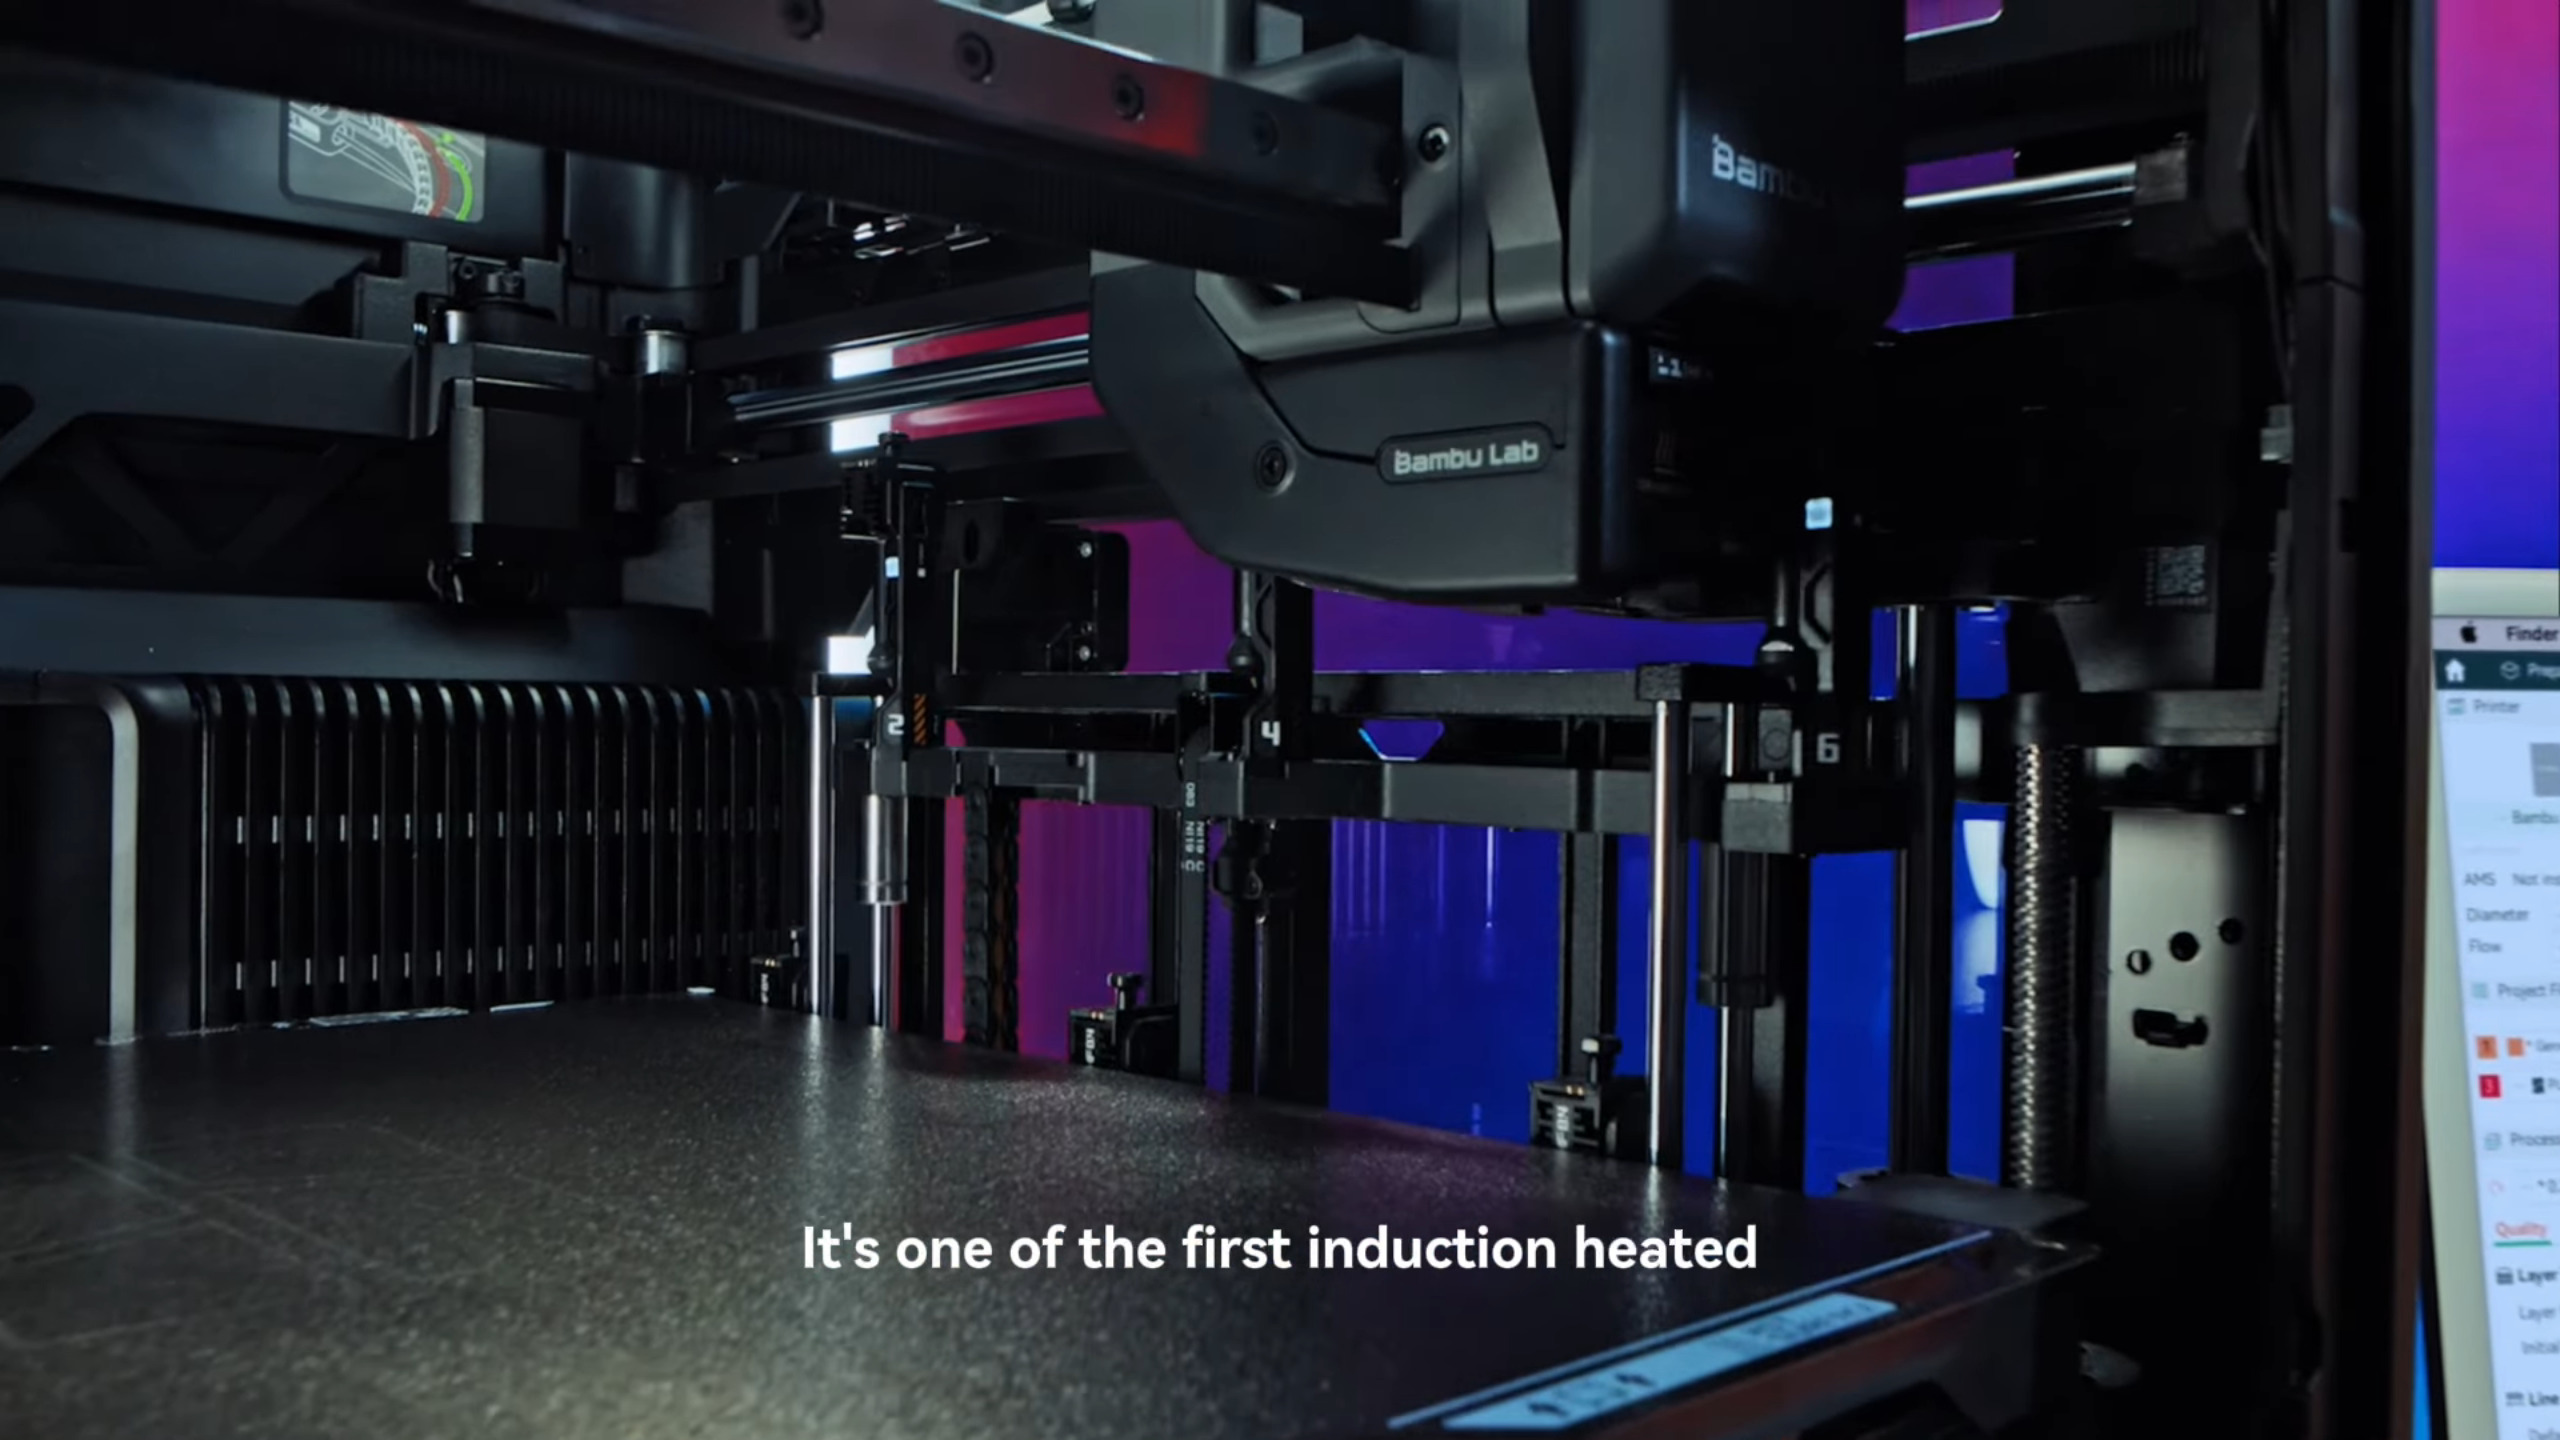
Bambu Lab announced their complex Vortek tool changer: a hotend with active electronics (power & data) to measure temperature and tool information – the main heating is done via induction, hence also wireless; apprx. 12s tool change time (without purging).
BambuLab VortekBambuLab Vortek: wireless power & dataBambuLab Vortek: tool rack
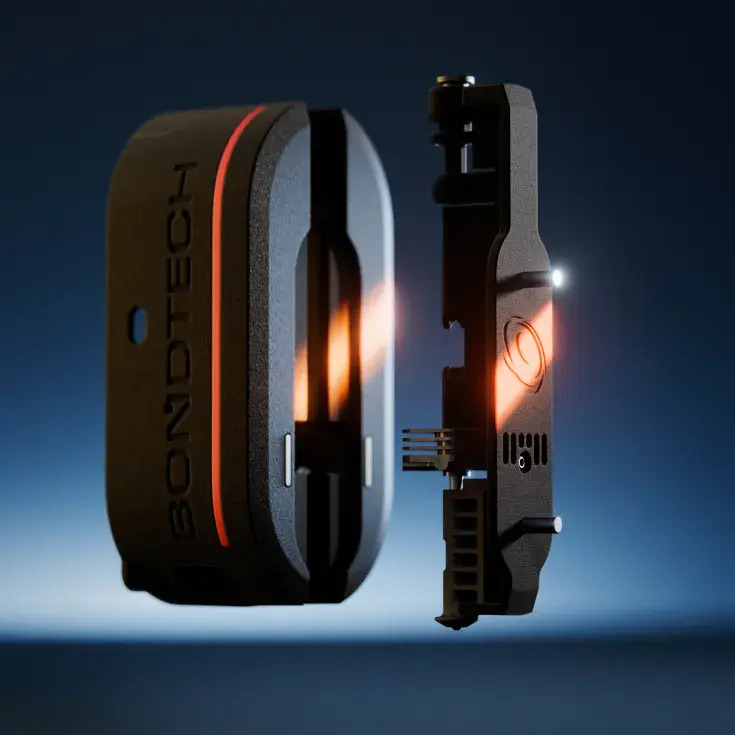
Bondtech announced their INDX tool changer: a solely passive hotend which is heated also with induction, and the temperature measured from outside via IR sensor – you take and put back a hotend with the filament still inside, apprx. 14s tool change time (without purging).
Bondtech INDXBondtech INDX: many hotendsBondtech INDX: hotend closeup
Adrian Bowyer – father of RepRap – gave an interview (2025/12) to Prusa giving some update where he is at:
printing material research ABS, PLA and other materials
slicing algorithms
deciding to use Arduino as motor controller
Notable Excerpts
RepRap Family Growth
Adrian Bowyer summarizes RepRap history April 18, 2011, in brackets the amount of RepRaps:
Spring 2007 – The first RepRap Darwin was finished. Its RP parts were made in a Stratasys Dimension. [1]
During that summer we made four or five sets of parts for the machine in the Stratasys and sent them to RepRap team members round the world.
September 30, 2007 – Vik Olliver in New Zealand finished the second Darwin. [3]
Around Christmas 2007 – A number of people start to make wooden and lasercut copies of Darwin. The Bath RepRap Lab also supplied a Stratasys-printed set of Darwin parts to Ian Adkins of Bits from Bytes, who created silicone moulds from them and started selling Darwin copies made by PU moulding. [8]
February 21, 2008 – Zach Smith (now also of MakerBot) gets his Darwin working. [20]
February 22, 2008 – Ponoko have a lasercut version of Darwin. Spring 2008 – Lots of the wooden and moulded Darwin-type Repstraps are working, and people start using them to print RepRaps.
April 2008 – Nophead starts printing Darwin parts on his Repstrap Hydraraptor. [60]
May 29, 2008 – Vik Olliver’s Darwin has made a full set of parts for another Darwin; these are assembled in New Zealand and finally tested when he visits at Bath University in the UK. This is the first true RepRap replication. [100]
Summer 2009 – RepRap Mendel introduced. [400] Around this time Nophead, I, and many others went into serious production selling reprapped sets of parts for RepRaps made in RepRap machines on Ebay etc. Summer 2010 [1500]
Spring 2011 – Nophead alone has made over 100 RepRaps for other people. I have made over 50. [4000]
RepRap Darwin (2007)
RepRap Mendel (2009)
RepRap Huxley (2010)
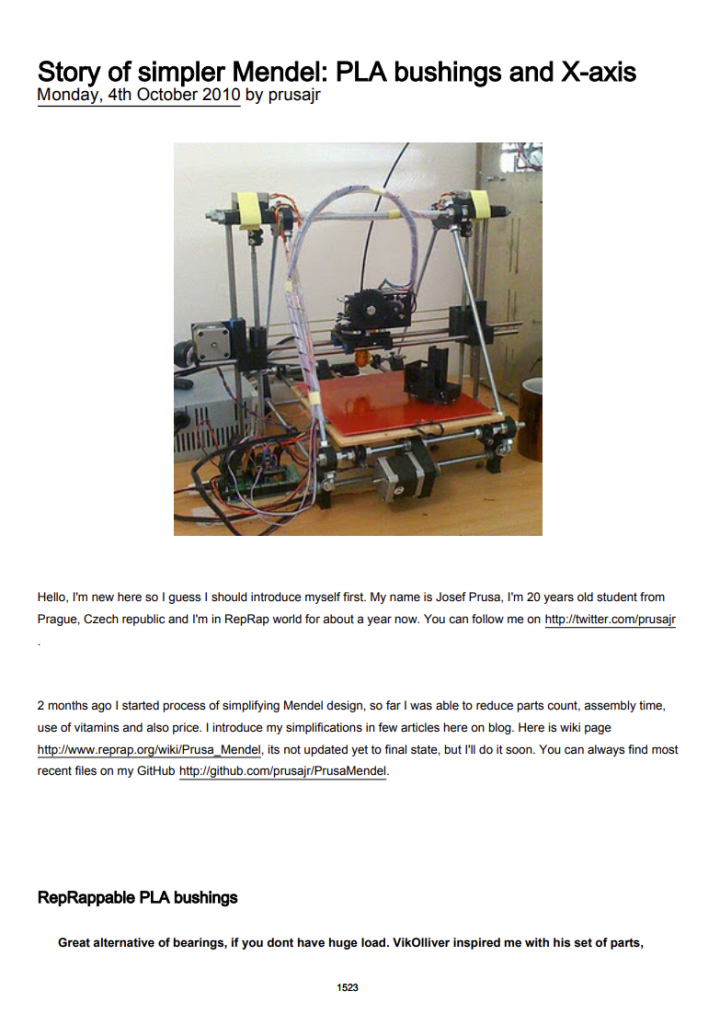
Prusa Mendel Announcement
October 4, 2010 Josef Prusa announced his “Prusa Mendel“ version with this post:
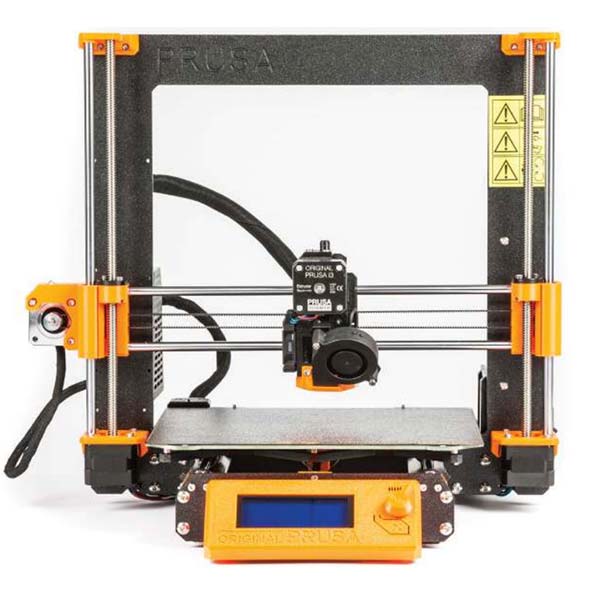
He eventually iterated to “Prusa i3“ May 2012, which became quasi standard for low-cost FDM 3D printers.
gcode command allows to send Gcode in the command line directly:
% print3r gcode 'G28 X Y'
% print3r gcode 'G28 Z'
Gcode Console (gconsole)
gconsole command launches an interactive console to send Gcode and custom commands to USB connected printer:
== Print3r: Gcode Console (gconsole) - use CTRL-C or 'exit' or 'quit' to exit
   for valid Gcode see https://reprap.org/wiki/G-code
conf: device /dev/ttyUSB0, connected
>
Commands
any valid Gcode line
in gconsole/commands reside a few gcode script which simplify handling:
home, homex, homey, homez, hx, hy, hz: homing all or individual axis
left <n>, right <n> move left or right (X-axis) relatively
up <n>, down <n> move up or down (Z-axis) relatively
forward <n>, back <n> move forward or back (Y-axis) relatively
x <n>, y <n>, z <n> move each axis absolutely
nozzle <temp> set nozzle temperature
bed <temp> set bed temperature
off turn everything off (motors, nozzle, bed)
> homex
send <G28 X>
-----
X:0.00 Y:0.00 Z:5.00 E:0.00 Count X:0 Y:0 Z:16000
ok
.
> right 10
send <G91>
-----
X:0.00 Y:0.00 Z:5.00 E:0.00 Count X:0 Y:0 Z:16000
ok
.
send <G1 X10>
-----
ok
.
> _
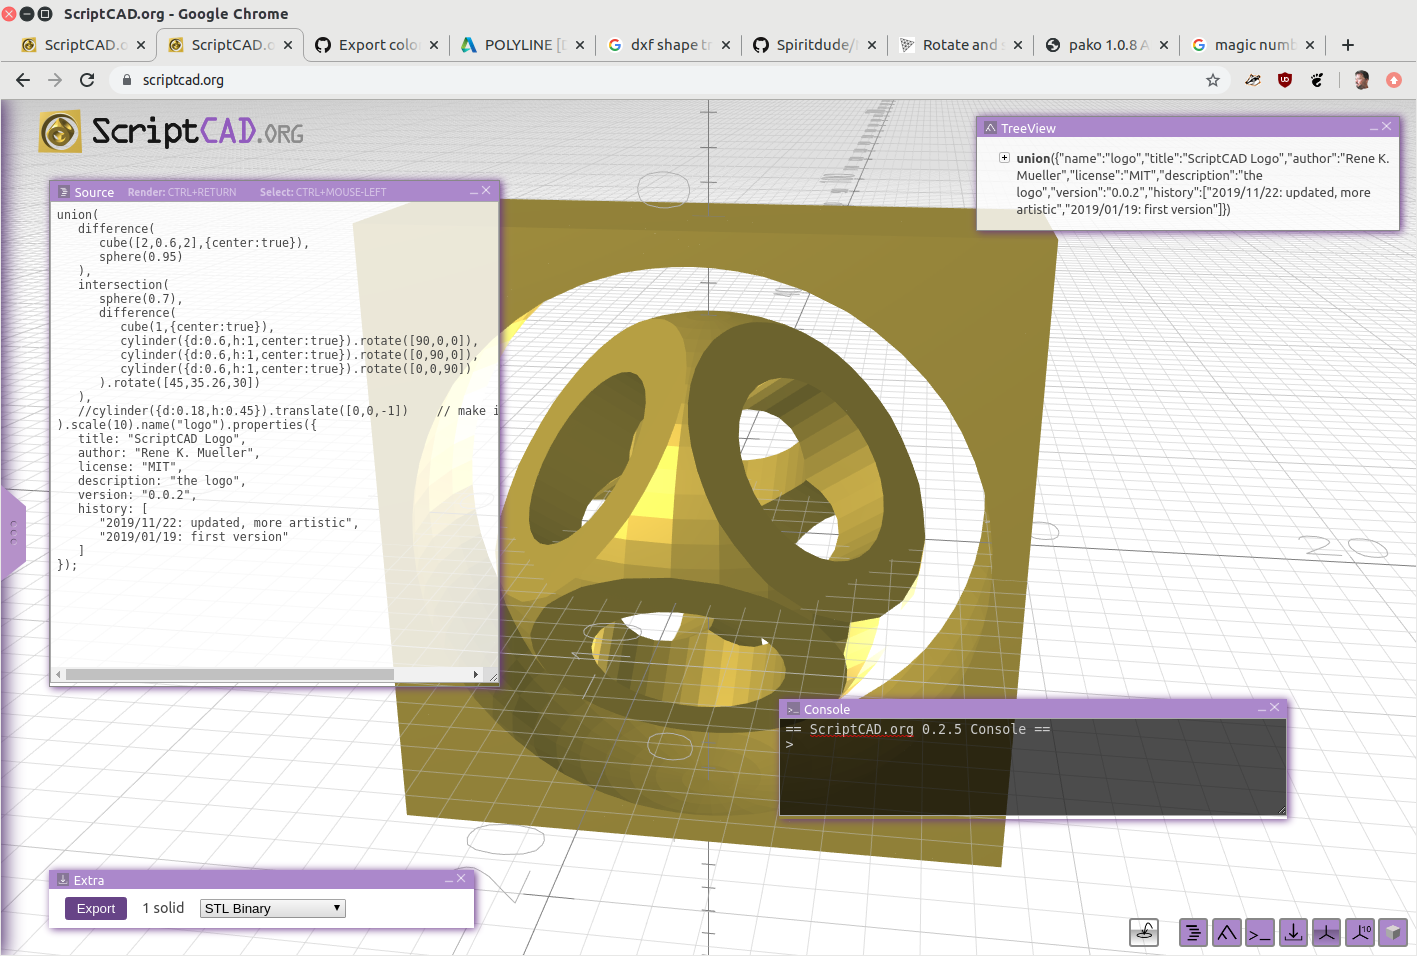
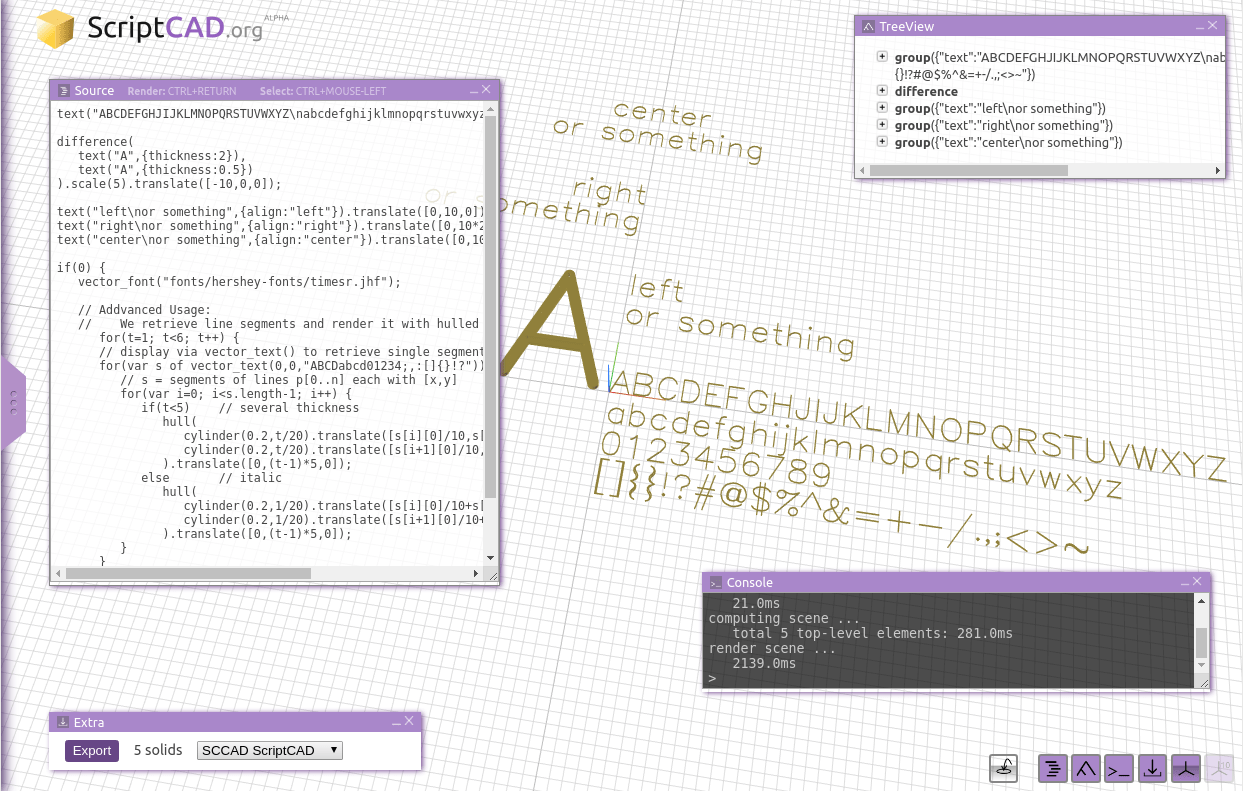
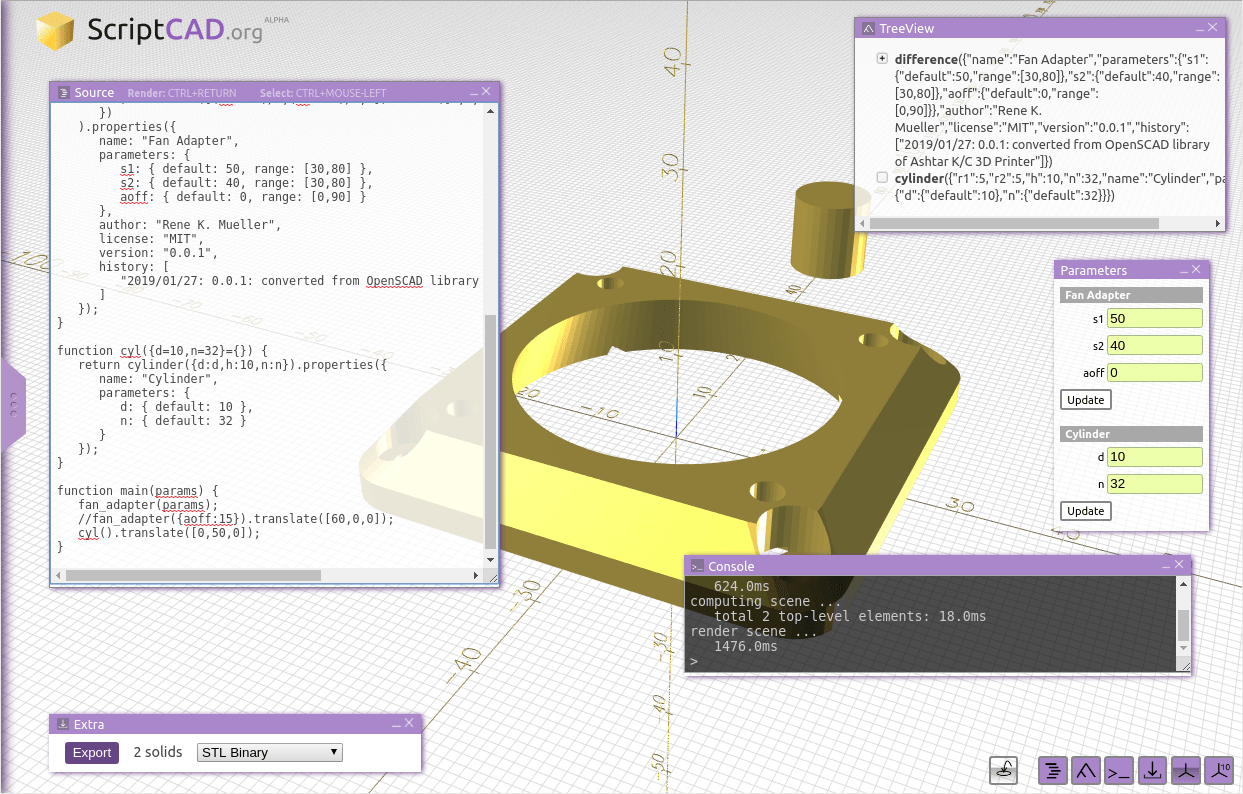
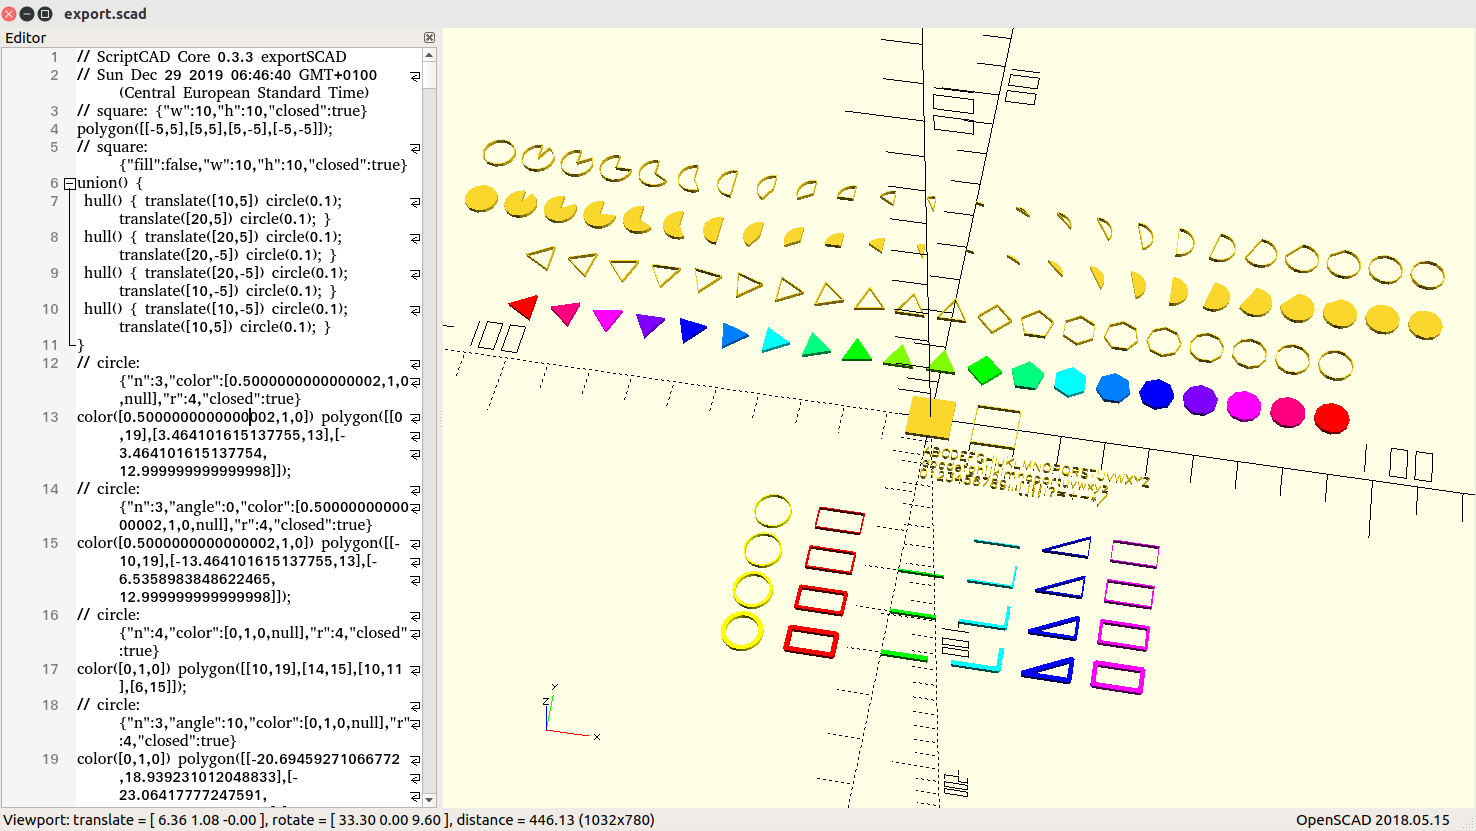
Around February 2019 I bootstrapped a scripted CAD environment named “ScriptCAD”, and resembles closely to OpenSCAD.org and OpenJSCAD.org (which I co-developed for a couple of years) with a new take, developed from scratch:
ScriptCAD.org: ScriptCAD Logo 2019/11
Scripting capability using JavaScript
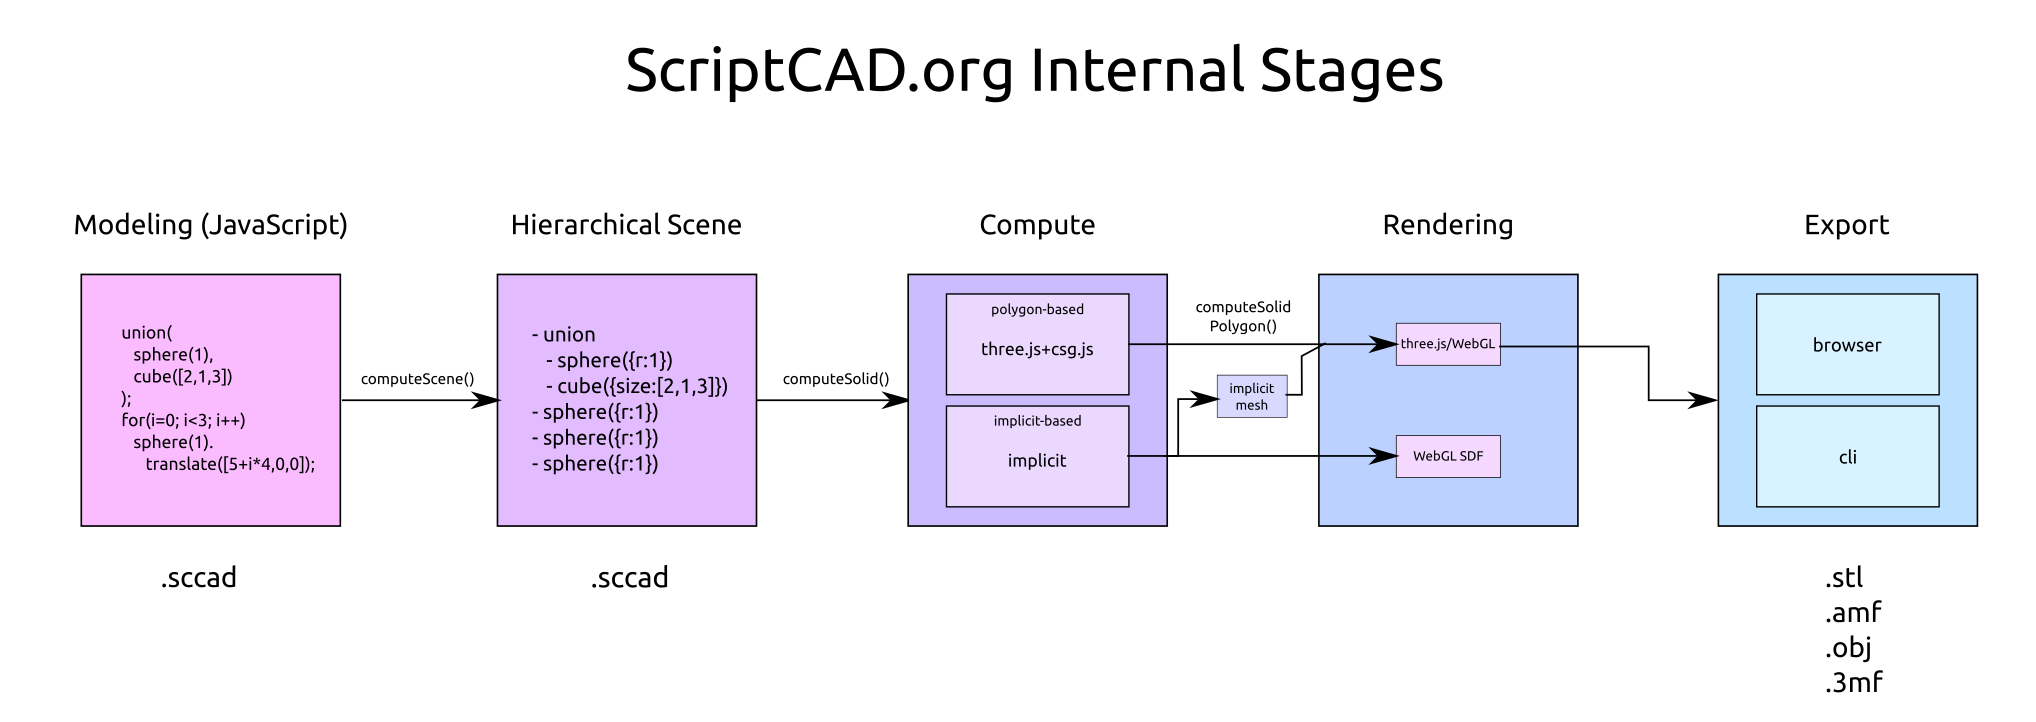
Separate internal representation from display representation
Triangulation or Implicit representation
only triangulate at late stage at display or export
ScriptCAD.org Internal Stages
Intuitive Graphical User Interface (GUI)
Simple export various formats
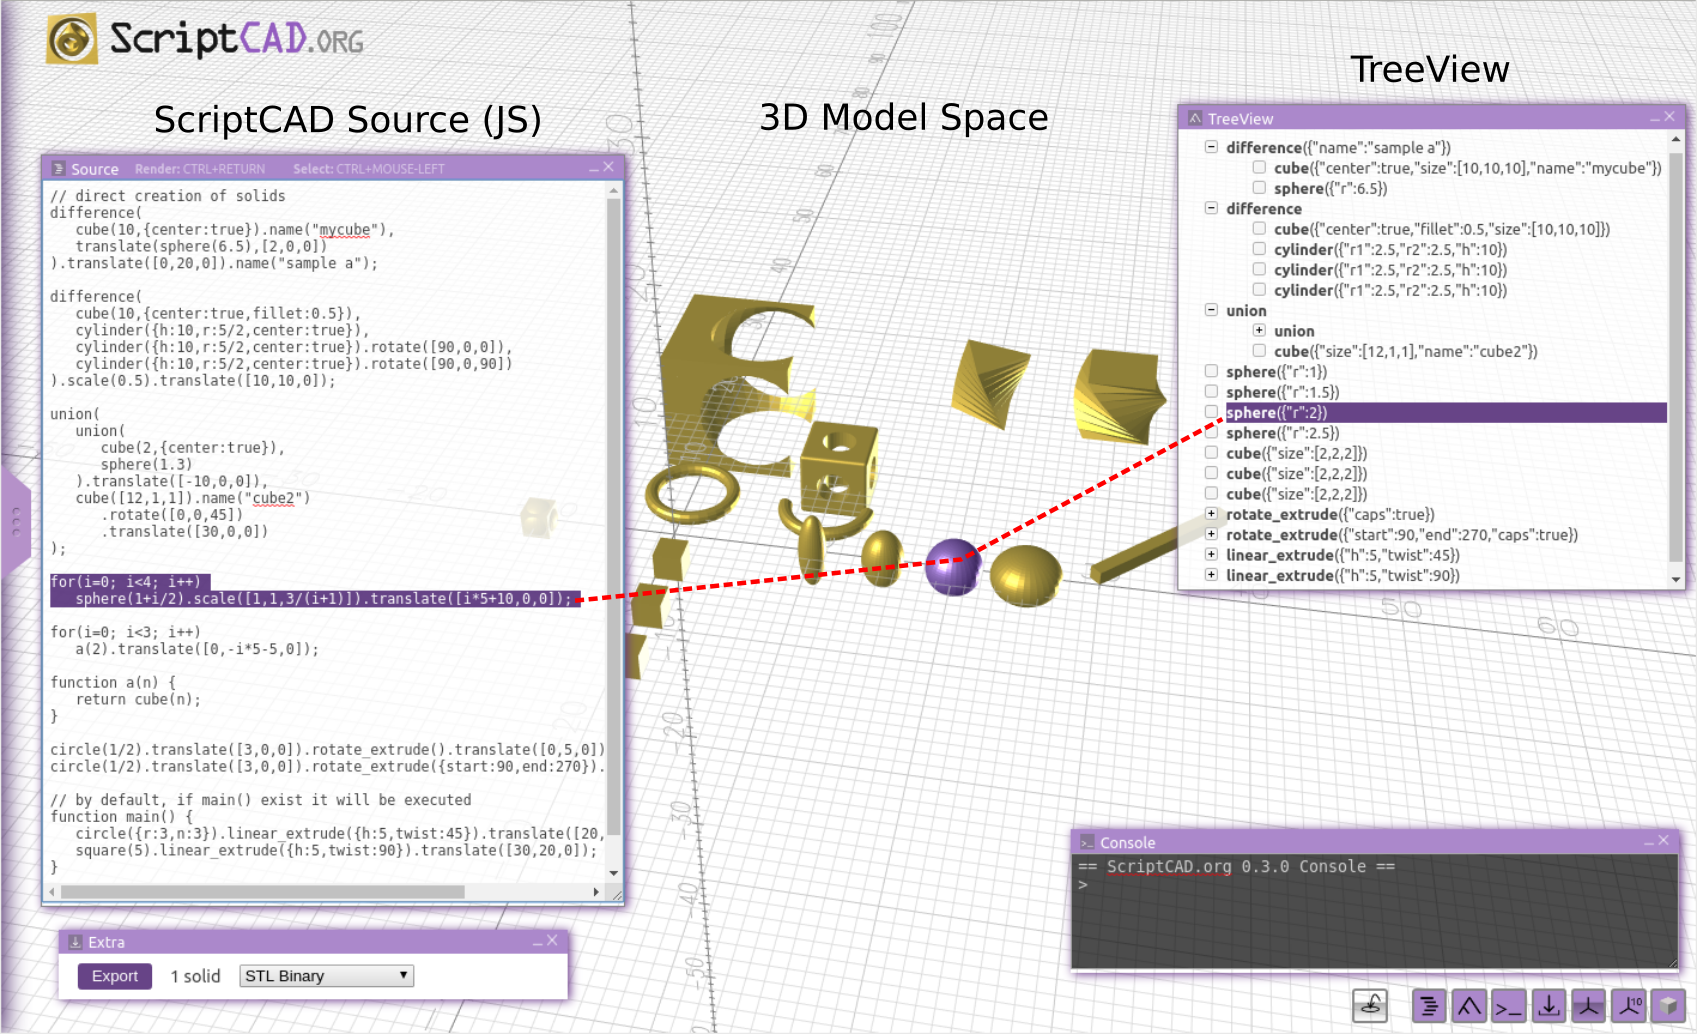
Select top-level solids
Source <-> TreeView <-> 3D Model selection
Select Source <-> TreeView Item <-> 3D Model
The transparent Source vs Object Tree vs 3D Space has been in the back of my mind for a long time as I keep the connection of each stage intact and transparent.
Ease of use
hiding JS module complexity and notions
Browser use (either use built-in editor or drag-n-drop source with autoreload)
Command Line Interface (CLI) use
Screenshots & Examples
Faces
Faces + Edges
Edges
3D Text with Hershey Font
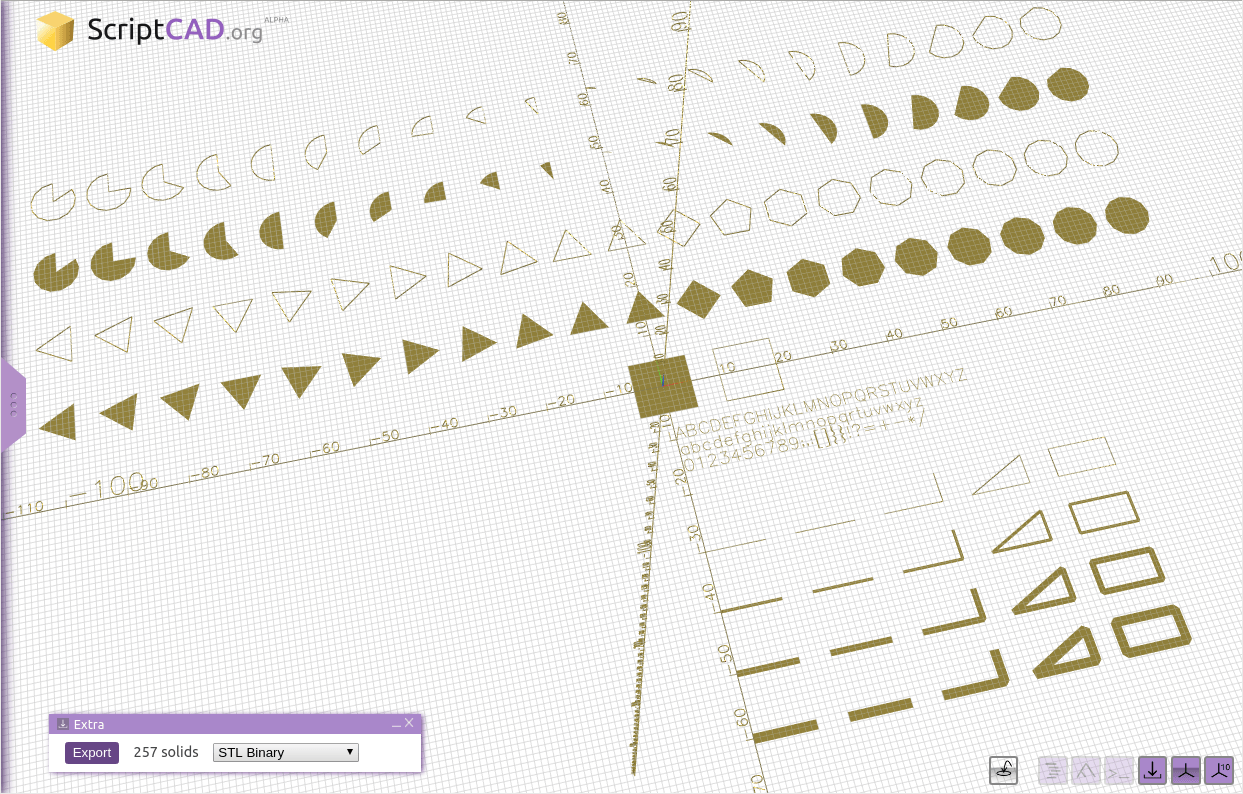
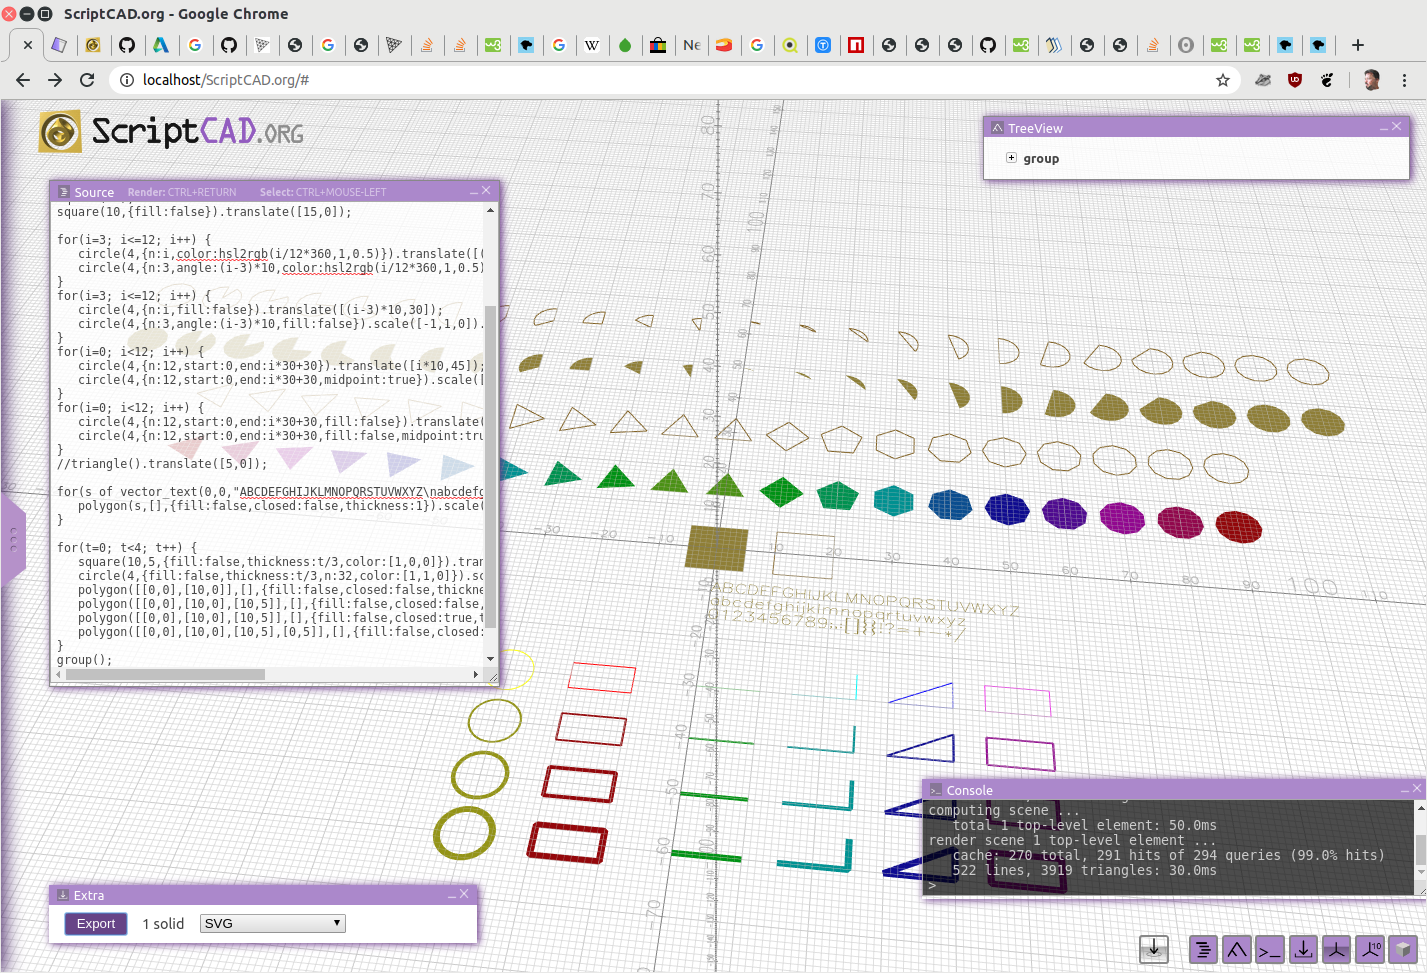
2D Examples
Parametric Designs
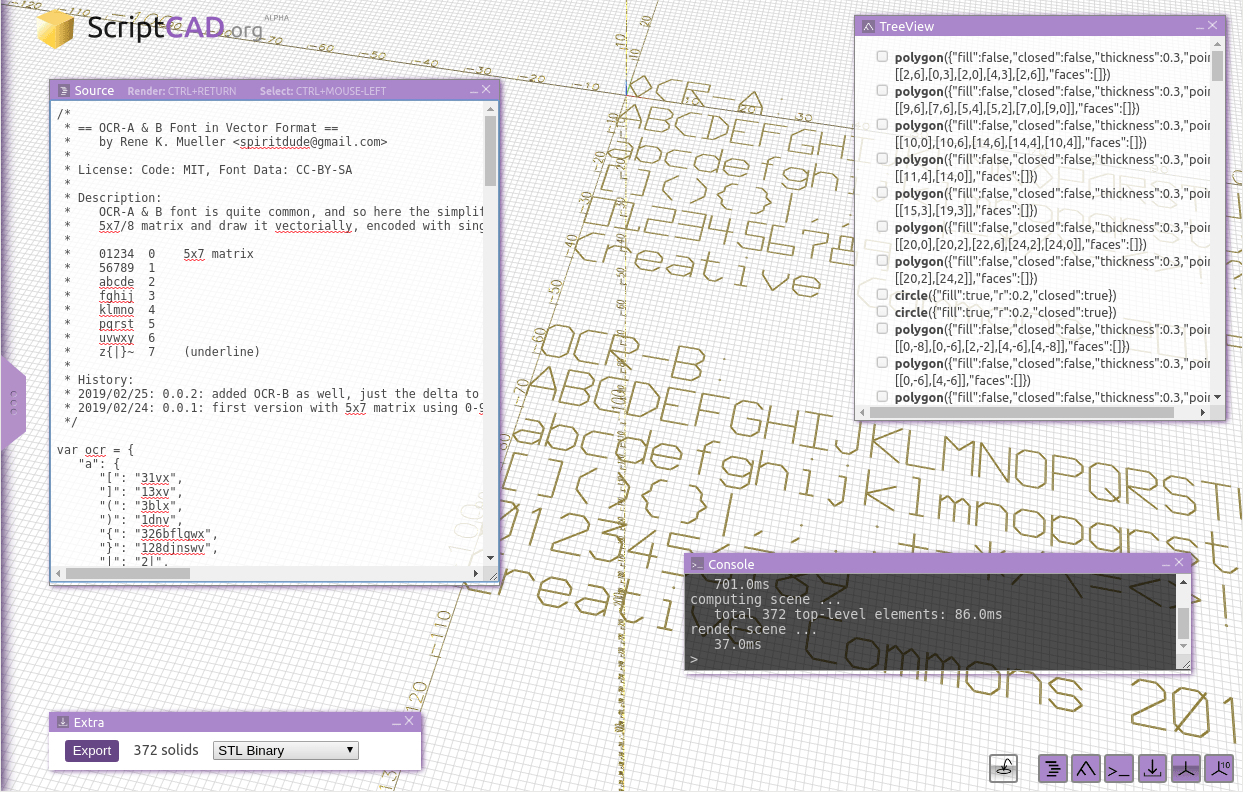
2D OCR A + B Font
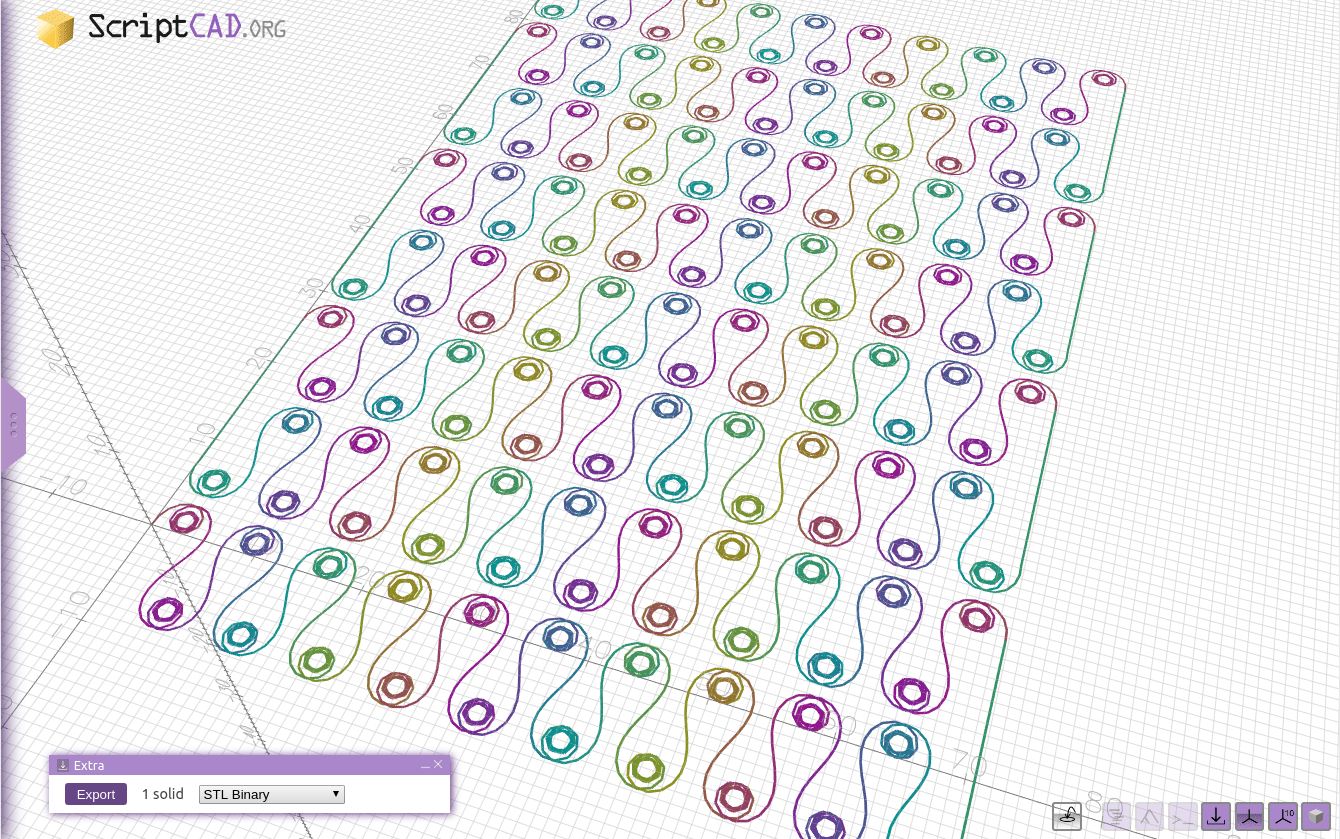
LissaJou 1
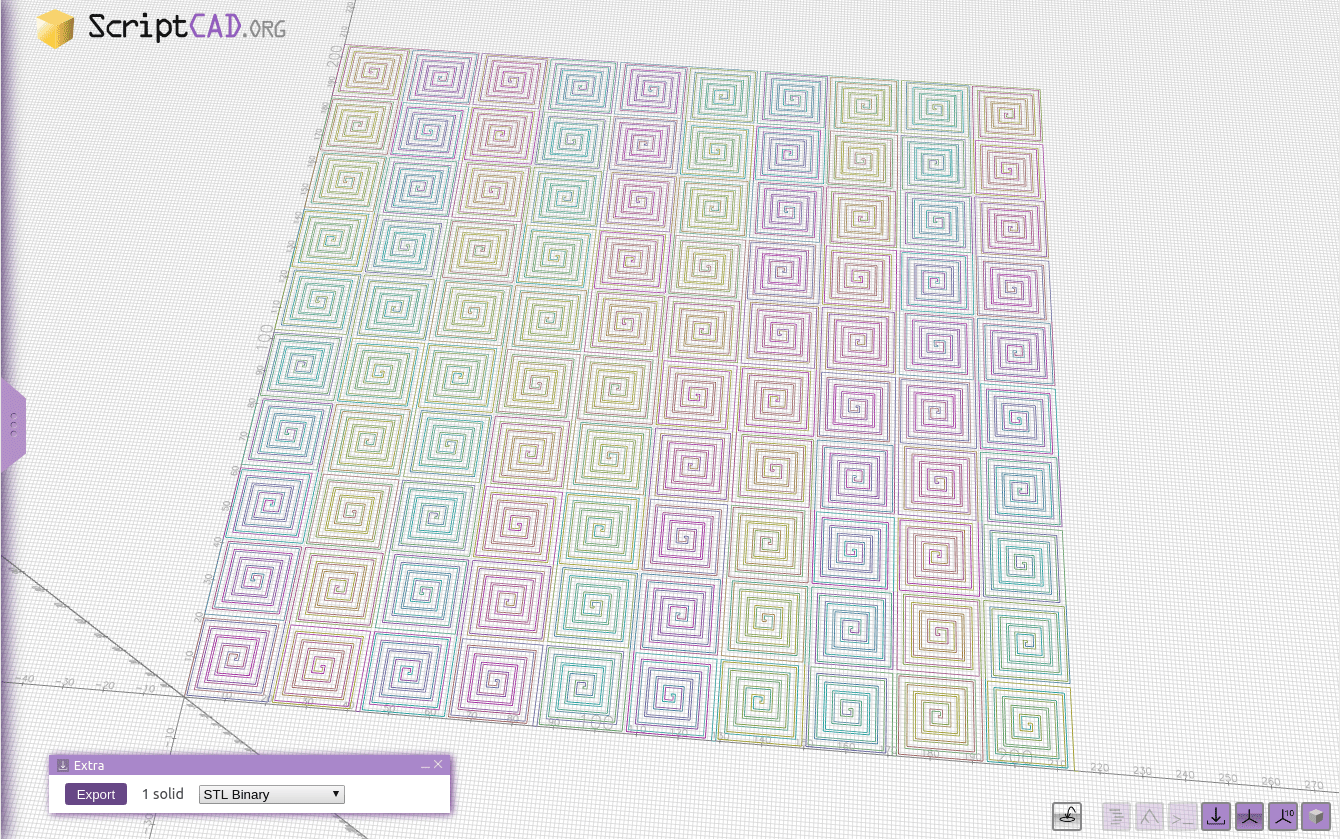
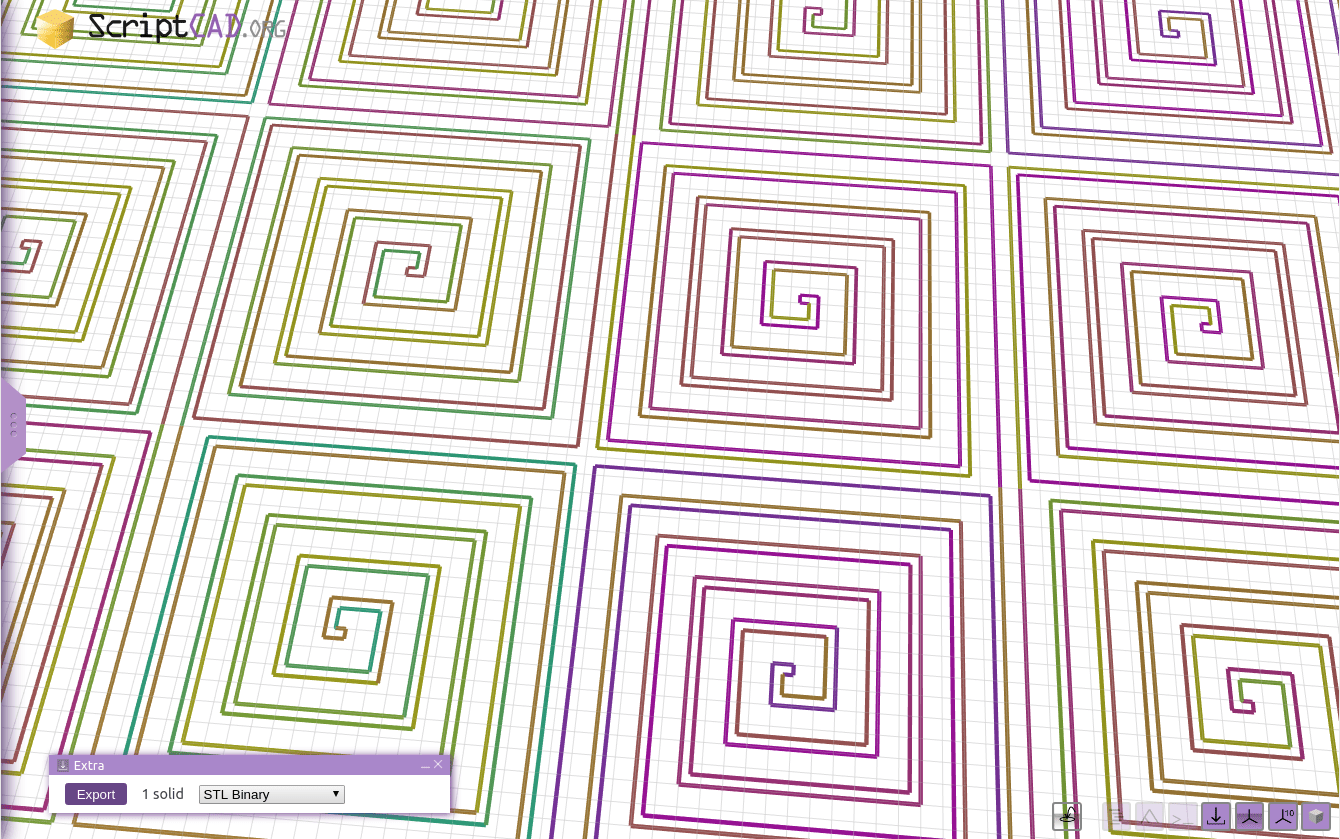
House (Circular Squares)
House (Circular Square) Closeup
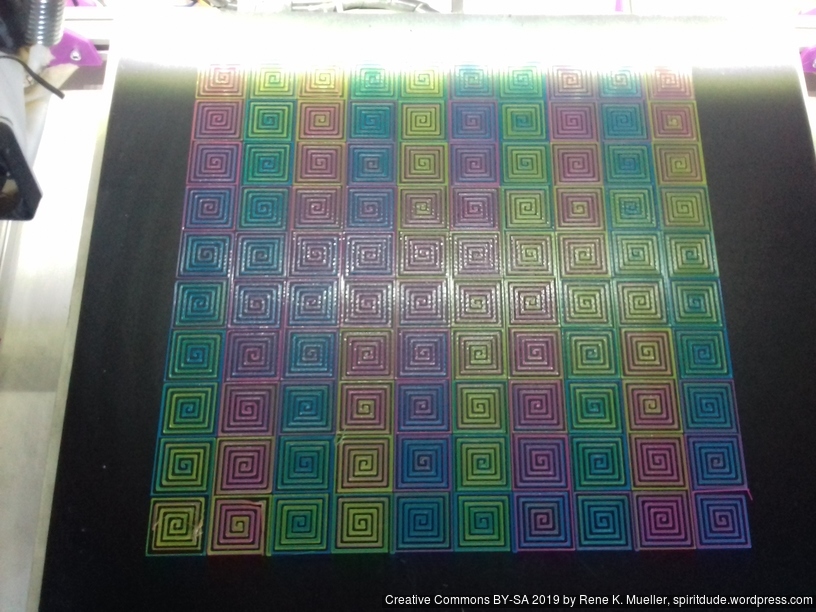
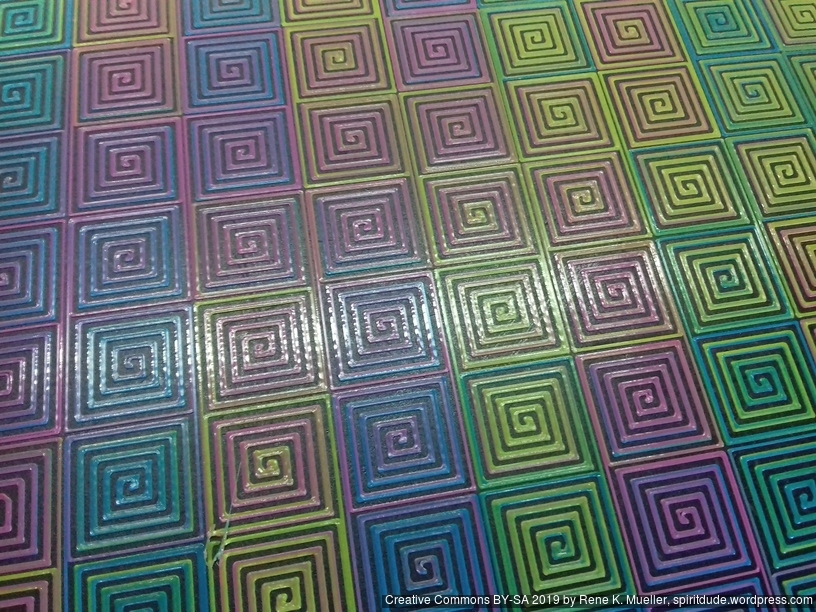
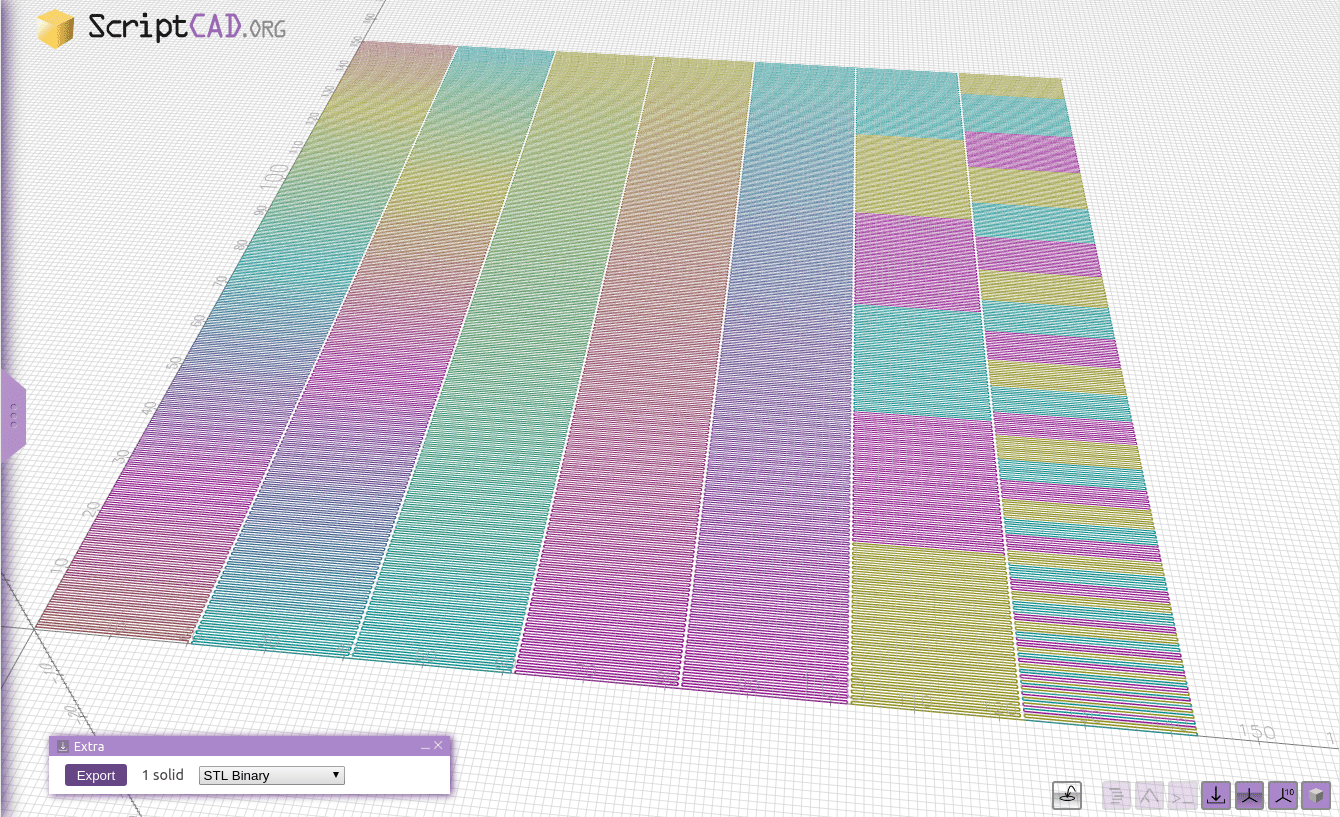
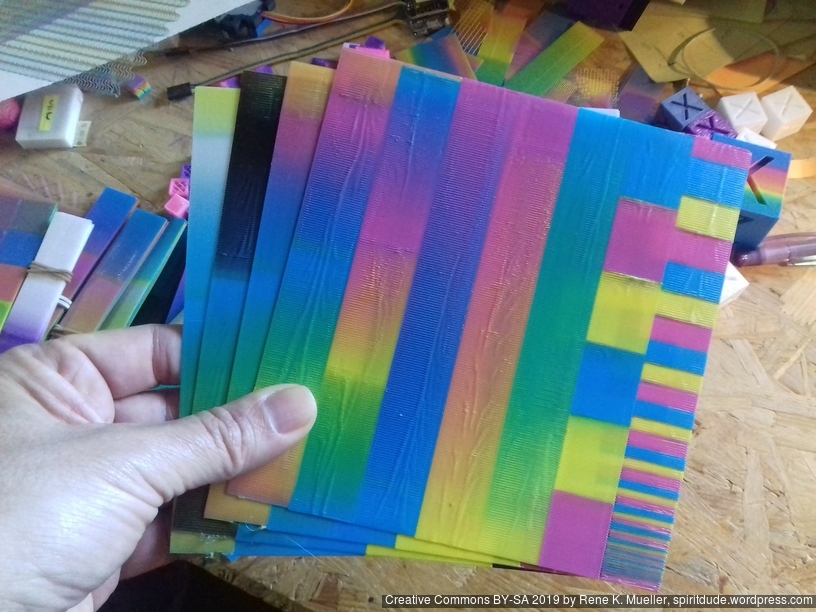
7 strips (20x150mm) testing CMY color transitions
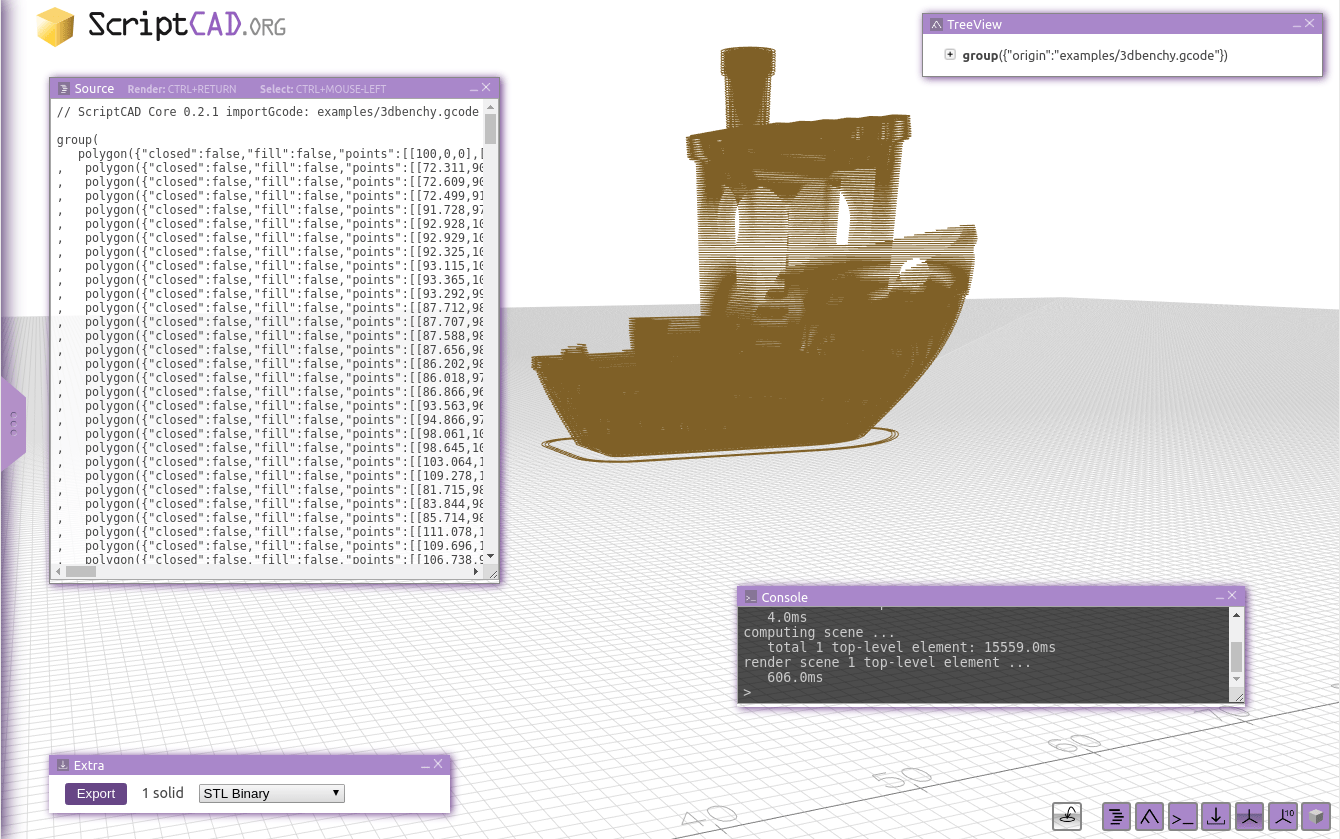
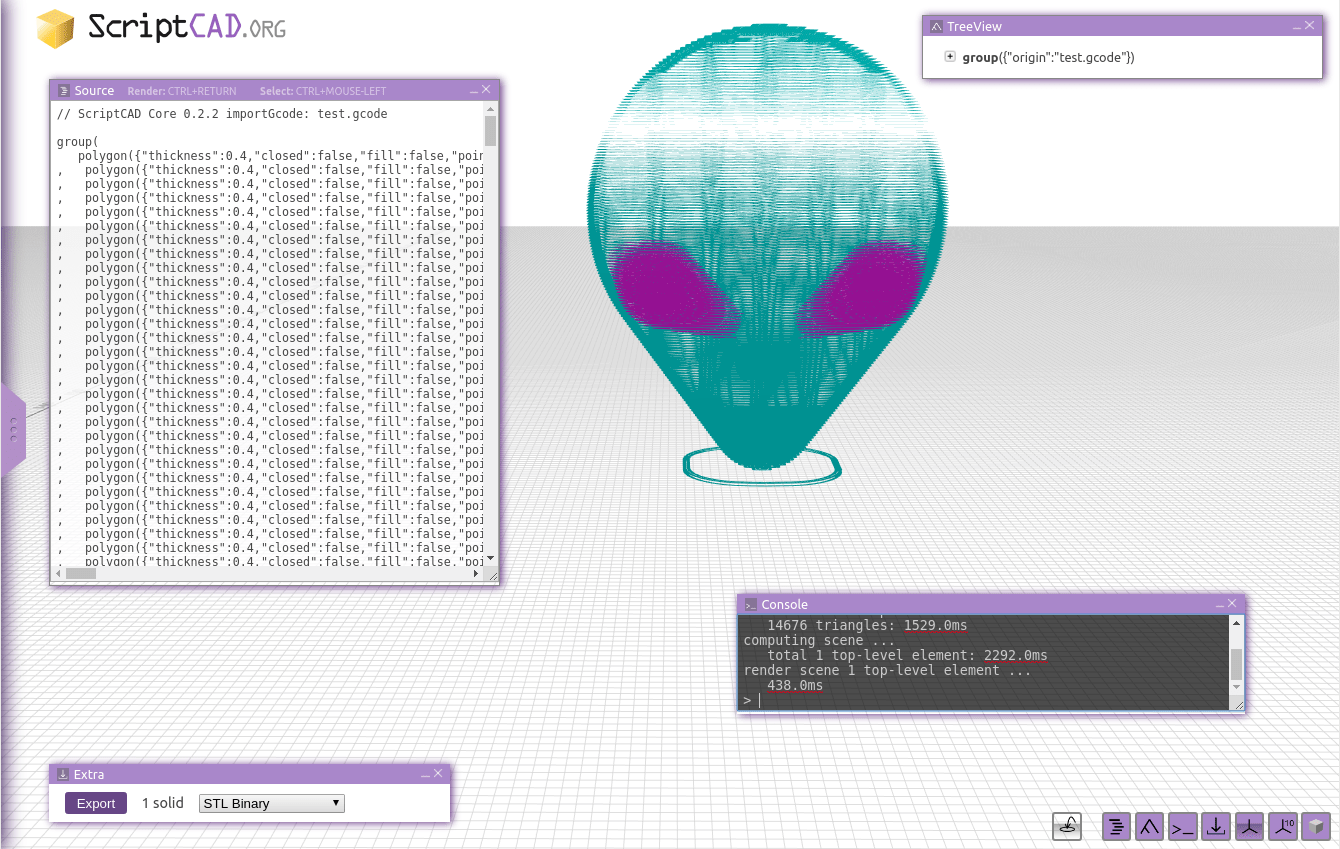
Importing Gcode
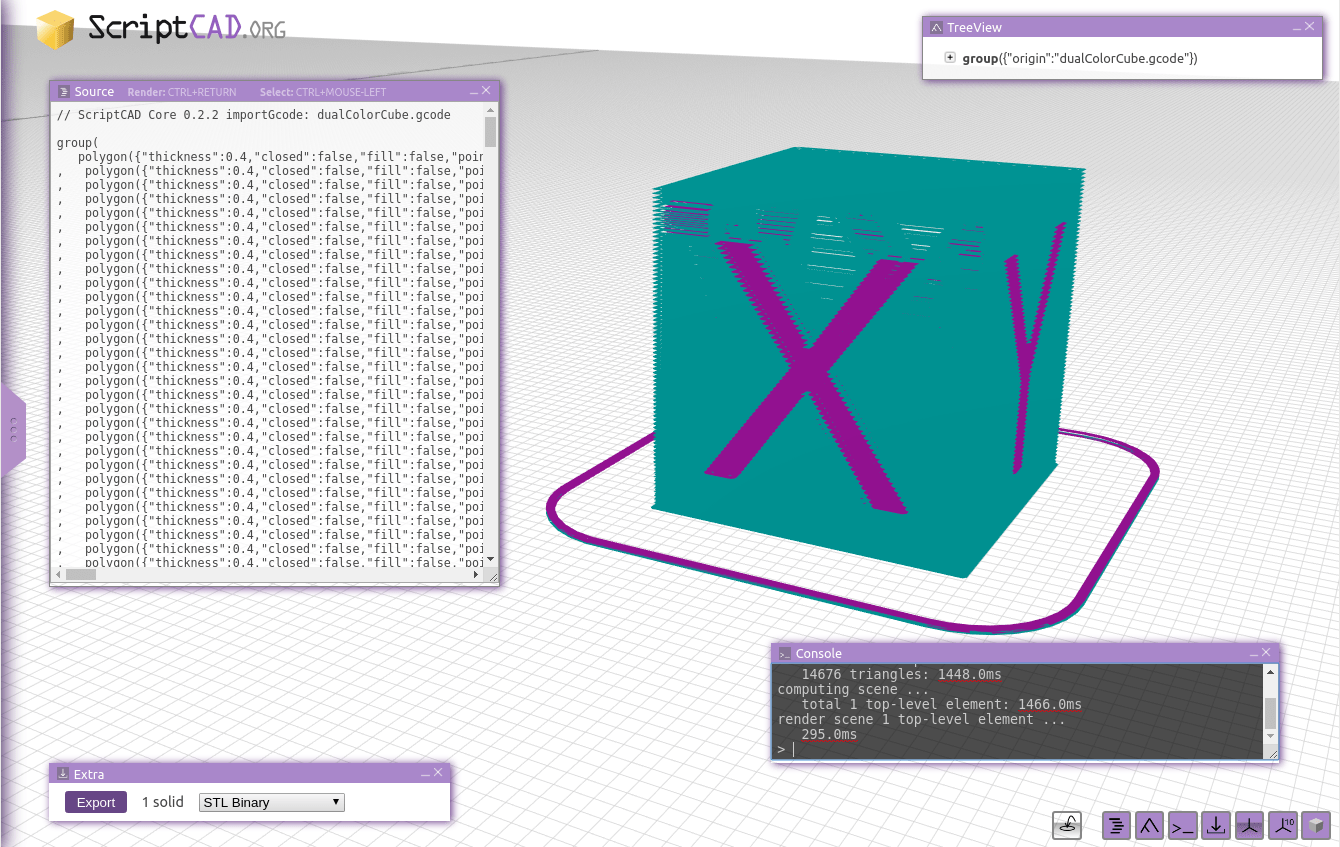
Importing Gcode with M163/M164/M165 multi-color Gcode
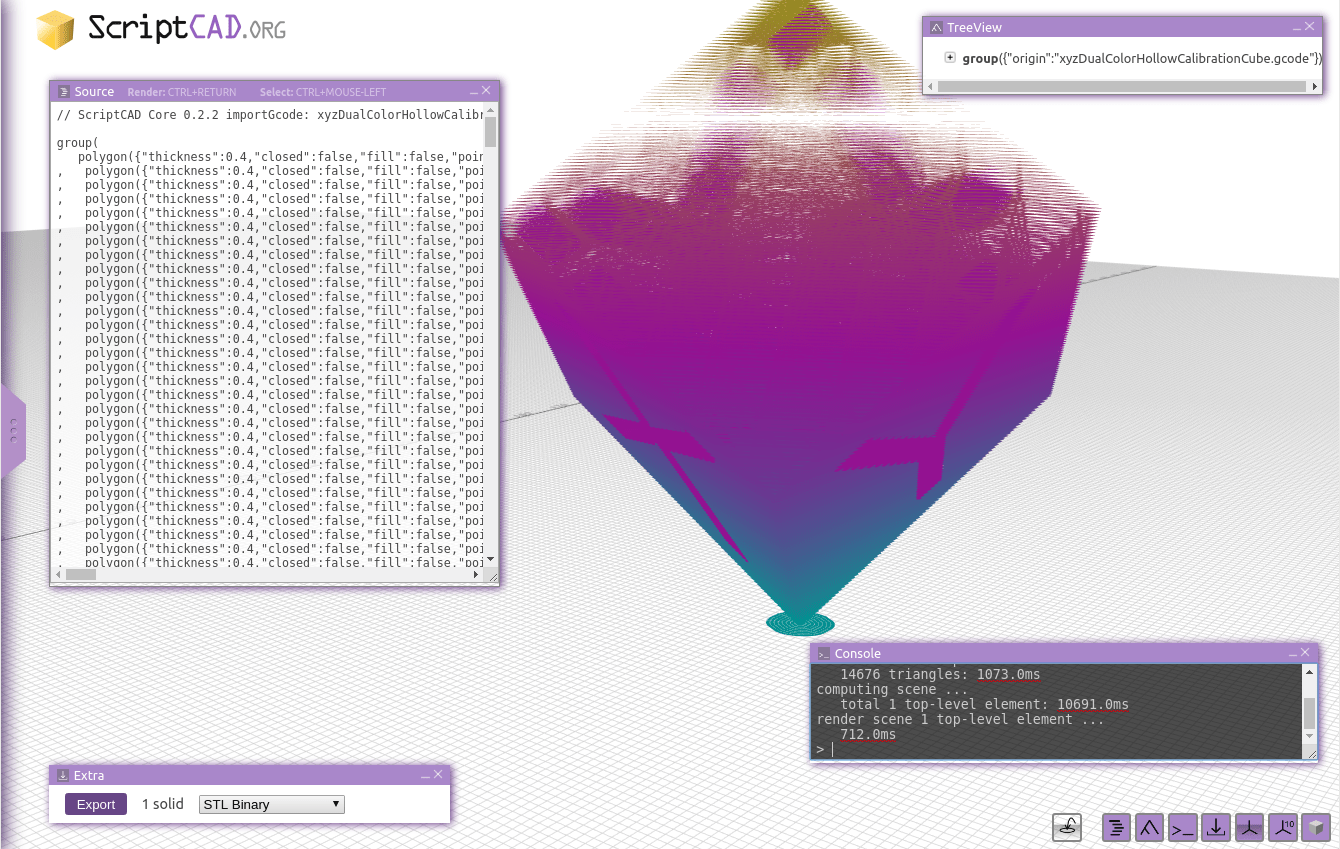
Dual Color Gcode (T0/T1)
Dual Color “XYZ” Cube sliced with Slic3r PE, and applying Z transition of 3 color range
Basic Shapes
Basic Shapes in OpenSCAD
2D Examples
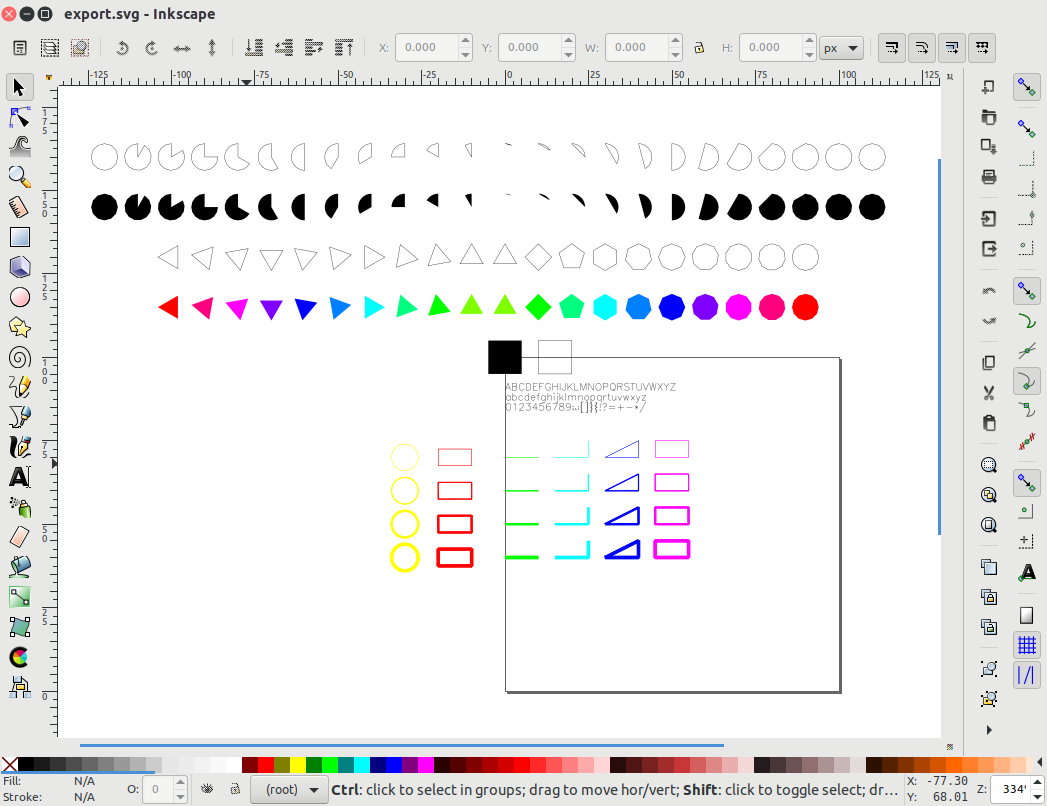
2D Examples: SVG in Inkscape
2D Examples in OpenSCAD
SpiritCAD.org Online as Preview
As of November 2019, ScriptCAD.org is reachable as an early preview (alpha stage), most examples work, some do not yet or display wrong output.
Note: there is only limited documentation yet (2019/11), and the API is subject of changes.
I still tune it to my use-cases and therefore API and overall design of the API might change, even drastically; once the API becomes more stable I will release the source code as well.
Some of use-cases (as seen in the gallery above):
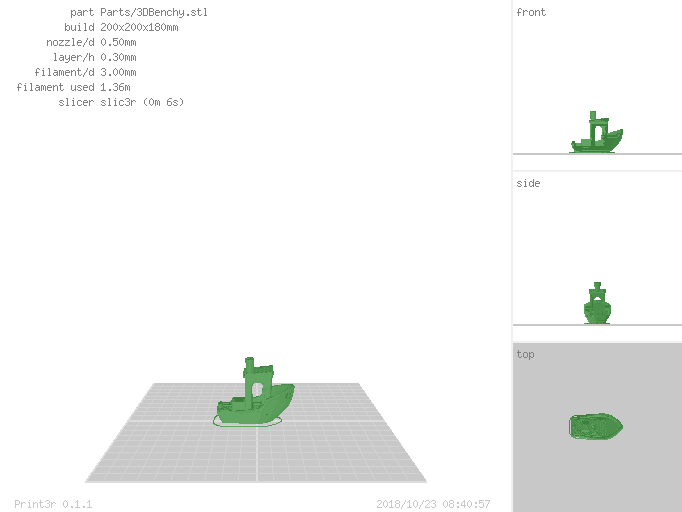
coding low-level Gcode and use ScriptCAD to preview (render) Gcode including colors, scriptcad (CLI) outputs .gcode to actually print
testing single layer color mixed 3D Printing: forms, color mixing
ScriptCAD uses ThreeCSG/csg.js at its core to perform CSG operations, which can be very slow – hence, designing complex pieces can be slow as every change recomputes all again (I like to avoid this in future developments) yet as of 0.3.2 basic caching is implemented so only deltas are recomputed.
A few worthwhile videos done by 3DMN (3D Maker Noob), Vector 3D (Adam) and others at Formnext 2019. I will update this post as more interesting videos become available.
2019/12/11: added 3DMN Trilab DeltiQ 2 video
2019/12/02: added Joel’s (3D Printing Nerd) Formnext 2019 video
bowden style, optionally direct drive style setup (Trilab FlexPrint)
price: 2600 EUR (minimal configuration)
Vector 3D: Continuous Carbon Fibre by Anisoprint
Anisoprint mixes Nylon, PC, PLA, TPU and PETG with carbon fibres (CCF) in their continueous 3D printing procedure.
Vector 3D: Dyze Design & Craftbot
Dyze Design: High volume printing from pellets with 1-5mm large nozzles. Craftbot: Briefly discusses “Craftbot Flow Generation” 3D printer series, not very informative (sales talk).
igus: more infomercial, yet informative: wear resistant filament / prints (e.g. gears) with their own polymer mixture called “iglidur”, optionally also food save.